by Kendra Hughson | Nov 21, 2019
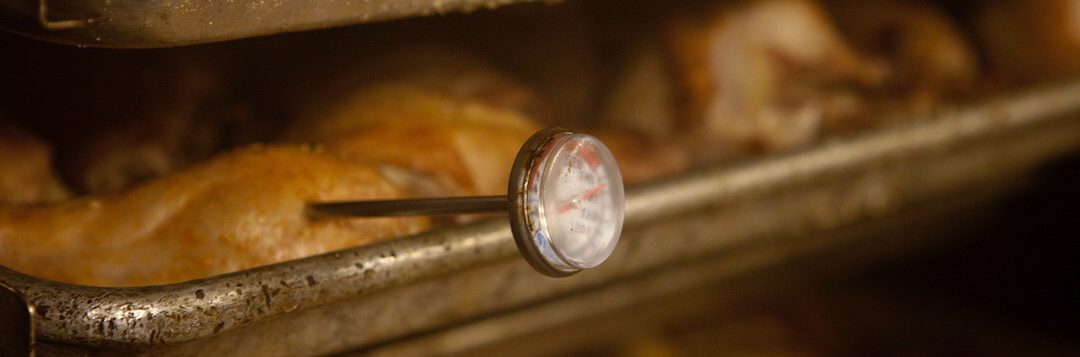
You can’t tell by looking if your food is done cooking. Using a food thermometer not only ensures your food is properly cooked to reduce the risk of harmful bacteria, but it also prevents overcooking. Check out this video for more information:
Sources:
IsItDoneYet.gov
Is It Done Yet – Brochure
Proper Thermometer Placement – USDA placement
by Kendra Hughson | Nov 8, 2019
You have your frozen turkey. Now what? Plan ahead to be sure your bird is safe and ready to cook. Do not thaw your frozen turkey on the counter. All parts of the turkey must be kept at a safe temperature during the thawing process and cooked immediately after thawing. Use one or a combination of the following recommended methods:
Refrigerator Thawing
Thaw your turkey safely. Photo Credit: Kendra Zamojski
Keep the turkey in the original wrapper, placing on a tray to catch any leaking juices. Allow approximately 24 hours for every 4 to 5 pounds. For example, a 12-16-pound turkey may take 3 to 4 days to thaw. A properly thawed turkey will keep in the refrigerator for 1 to 2 days before cooking.
Thawing In Cold Water
Keep the turkey in the original wrapper and place in a larger sealed, leak-proof plastic bag. Submerge in cold water, changing the water every 30 minutes, until thawed. Allow 30 minutes per pound, so a 12- to 16-pound turkey would take 6-8 hours to thaw. A properly thawed turkey can be stored in the refrigerator.
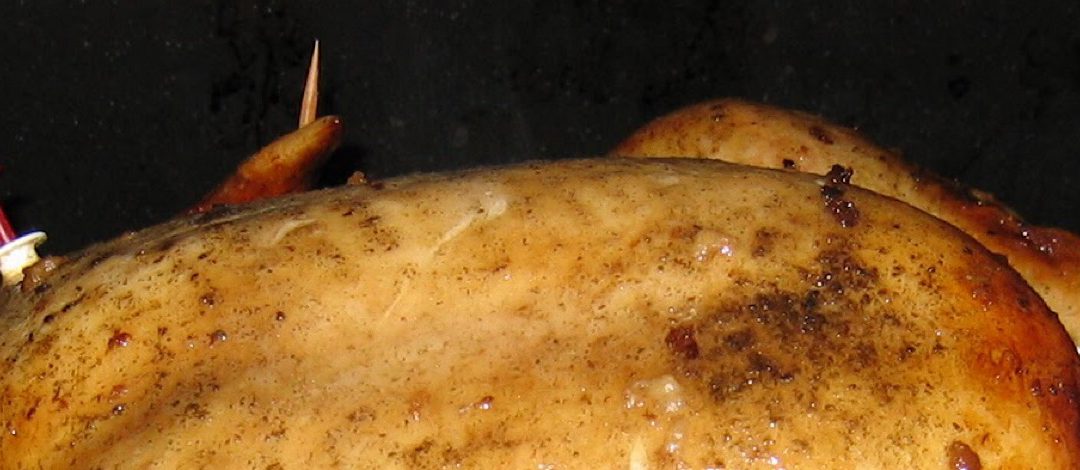
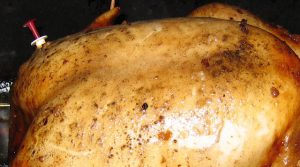
When it’s Ready to Cook
When the turkey is ready to cook, don’t rinse it. You could splash salmonella and other bacteria around your kitchen. Cook your turkey to the proper temperature. Use a food thermometer to be sure the inner thigh, the inner wing, and the thickest part of the turkey breast are all cooked to at least 165°F.
For more information, contact your local UF/IFAS Extension office.
Sources:
UF/IFAS: Food Safety Tips for the Holiday Season
USDA: Let’s Talk Turkey
USDA: Tips and Resources for a Bacteria-Free Thanksgiving
by Samantha Kennedy | Nov 7, 2019
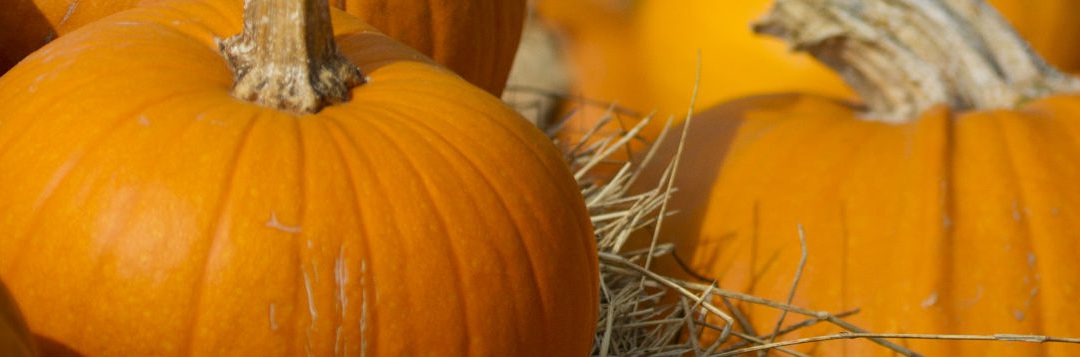
Now that it is finally starting to feel like autumn here in north Florida, I have begun to see more and more fall-themed decorations. While the leaves may not change color as much as they do farther north, we do have easy access to another autumn staple: pumpkins.
Pumpkins can be grown in Florida. They are part of the cucurbit family of vegetables that includes other winter and summer squashes such as acorn, butternut, lemon, and zucchini. The four species of pumpkins include pepo, moschata, mixta, and maxima. They have a coarse, strongly flavored flesh and rinds whose hardness falls between that of winter (hard) and summer (soft) squashes.

Pumpkins are an autumn staple, providing not just festive decorations, but also nutritious additions to meals and desserts. (Photo source: Amy Stuart, UF/IFAS)
The three major categories of pumpkins are carving pumpkins, pie pumpkins, and ornamental pumpkins. Each type has its own unique characteristics. Carving pumpkins are large and have smooth, orange, and slightly ribbed skin. Pie pumpkins are smaller, have a sweeter taste, and bright, firm flesh. Ornamental pumpkins are tiny, about 3-4 inches in diameter, and can be orange, white, or variegated.
Pumpkins, like tomatoes, are botanically fruits, but are commercially considered vegetables. While their rinds are generally not edible, both their flesh and seeds can be eaten. Pumpkin can be canned, pureed, roasted, and made into soups, stews, and, of course, pies. Pumpkin seeds are most commonly roasted and eaten on their own as a snack or added to salads and other dishes for a bit of delicious crunch.
As a food source, pumpkins are very nutritious. They are low in fat, calories, sugar, and sodium. A single serving of pumpkin contains 10% of the daily value of potassium and 3 grams of fiber, both of which are vital to good health. Pumpkin also contains a variety of other beneficial nutrients such as vitamin C, calcium, and iron. However, pumpkin is a vitamin A powerhouse. One serving contains 250% of the daily value of this vitamin, which helps promote healthy eyes, skin, and bones. In fact, the beta carotene in pumpkins, which our bodies convert to vitamin A, is what gives pumpkins their vibrant orange color.
According to the University of Florida IFAS, most pumpkin varieties need around four months to reach maturity. To be ready for Halloween, pumpkins should be planted no later than early July. Spring pumpkins planted in March or April can be stored for use in October and November if stored properly in a cool, dry place.
When carving pumpkins, be sure to use the proper tools. Remove the seeds and pulp, and save the seeds for roasting and/or planting. When preparing pumpkins for canning, use smaller sugar or pie pumpkins. Cut them into cubes and do not mash or puree them. When making pumpkin pie, choose the smaller, sweeter pumpkins for the best flavor. Commercially canned pumpkin also can be used to make pumpkin pie.
One final note: do not confuse gourds and pumpkins. While, technically, all pumpkins can be considered gourds, not all gourds are edible. What we think of as gourds are usually the hard, bumpy things with the hollow center that are commonly found in fall decorations. While they are part of the same cucurbit family, they are primarily grown for ornamentation, utensils, and general interest.
Nothing says autumn like a few festive pumpkins. Whether used for a scary Halloween jack-o’-lantern, as a centerpiece for fall decorations, or as an ingredient in a delicious fall dessert, pumpkins are definitely the stars of autumn.
For more information about pumpkins, please call Samantha Kennedy, Family and Consumer Sciences agent, at 850.926.3931.
Additional Resources:
Florida Pumpkins – UF/IFAS Extension
Perfectly Pumpkin Recipe Collection – University of Nebraska – Lincoln Extension
Pumpkin carving: The history of the jack-o’-lantern – Michigan State University Extension
Extension classes are open to everyone regardless of race, creed, color, religion, age, disability, sex, sexual orientation, marital status, national origin, political opinions or affiliations.
by Dorothy C. Lee | Oct 23, 2019
Pumpkins have been grown in the Americas for thousands of years. They are indigenous to the western hemisphere and were unknown in Europe before the time of Columbus. There was probably some kind of pumpkin served at the first Thanksgiving Feast.
Pumpkins, gourds, and other varieties of squash are members of the family Cucurbitaceae.
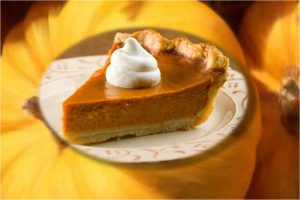
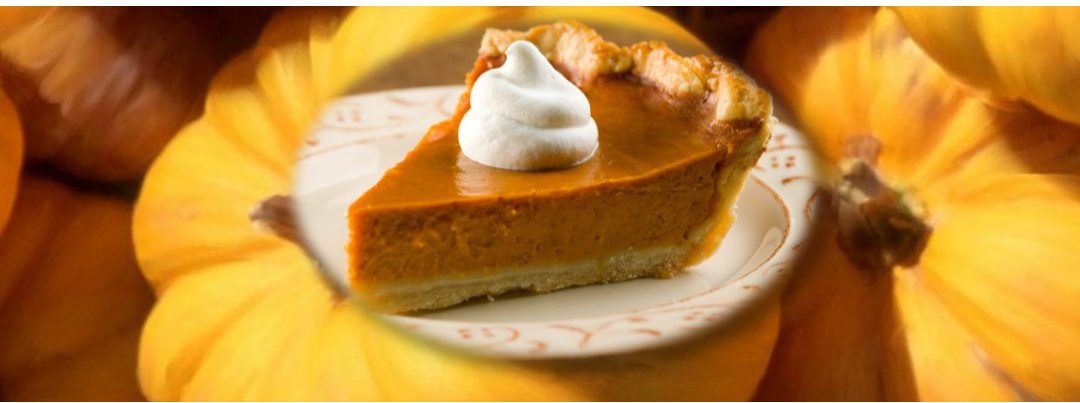
Pumpkin King of Pies
Photo Source: Esther Mudge
Baking with pumpkins during the holiday season has become a popular tradition. Pumpkin pie is king of the holiday pies.
Freshly baked pumpkin dishes are a delicious delight. It may surprise you that pumpkin is classified as a fruit, not a vegetable. Pumpkin is an excellent source of many nutrients. Pumpkin is rich in minerals like phosphorus, calcium, and iron. The pumpkin is also rich in carbohydrates. It contains vitamin A as well.
Small to medium size pumpkins are best for baking and cooking because they have a finer textured flesh than large pumpkins. Look for heavy pumpkins, and ones that do not have a hollow sound when you thump on them.
To use fresh pumpkin rather than canned pumpkin, scoop out the seeds and cut into small even pieces. The pumpkin can be peeled before or after cooking. Boil the pumpkin until tender and then mash it and use to prepare a variety of pumpkin dishes.
I like to cut the pumpkin in half, place the cut side down on a glass plate, and microwave on high for 20-25 minutes, depending on the pumpkin’s size, until tender. Then I remove the skin and beat the pumpkin in a mixer until smooth (strings will remain on the mixer blades). It’s now ready to use in any recipe.
One cup of raw pumpkin yields about ¾ to one cup of cooked, pureed pumpkin. It takes about 1 ½ to 2 cups of cooked pumpkin for a well-filled 9-inch pie.
When you carve that jack-o-lantern, don’t throw away the seeds. Roasted pumpkin seeds make a delicious, nutritious snack anytime and can be easily prepared in the microwave. See recipe below.
Pumpkin pie usually comes to mind first when the fall pie season arrives. However, pumpkin lends itself to a variety of bread, cookies, pancakes, muffins, butters, and a variety of other sweet treats. Happy Fall!!
ROASTED PUMPKIN SEEDS (in the microwave)
- 1 cup pumpkin seeds
- 1 tablespoon butter
- ¼ teaspoon seasoned salt
- Remove any fiber clinging to pumpkin seeds.
- Wash and drain well.
- Spread seeds in a single layer to dry, stirring occasionally.
- Line a 9-inch pie plate with two layers of paper towels. Sprinkle seeds on the towels.
- Microwave on HIGH 13 -14 minutes or until seeds are dry but still white, stirring every 5 minutes. Let stand 5 minutes.
- Place butter in a 2-cup measure and microwave until melted. Add seeds and salt; stir and coat.
- Serve as a snack.
FRESH PUMPKIN PIE
INGREDIENTS
FILLING:
- ¾ cup packed brown sugar
- 1 ¾ teaspoons pumpkin pie spice
- ¼ teaspoon salt
- 1 (12-ounce) can evaporated low-fat milk
- 2 eggs
- 1 ½ cup of fresh pumpkin (cooked and drained)
CRUST:
- Frozen 9-inch-deep pie crust
TOPPING:
- ¼ cup whipping cream
- 2 teaspoons powdered sugar
PREPARATION:
Place the oven rack to its lowest position. Preheat oven to 425ºF. Prepare fresh pumpkin as directed above. Be sure to drain the pumpkin after cooking. Now you are ready to use the pumpkin in recipes. To prepare filling, combine first 6 ingredients in a large bowl, stirring with a whisk. Add pumpkin and stir with a whisk until smooth. Pour pumpkin mixture into the crust. Place pie plate on a baking sheet. Place baking sheet on lowest oven rack. Bake at 425ºF for 10 minutes. Reduce oven temperature to 350ºF (do not remove pie from oven); bake an additional 50 minutes or until almost set. Cool completely on wire rack. To prepare topping, beat cream with a mixer at high speed until stiff peaks form. Add the powdered sugar and beat until blended. Serve with pie. Yield 1 Pie, about 6 -8 pieces.
by Angela Hinkle | Oct 22, 2019
Delicious, nutritious, and super helpful for today’s needs, peanut butter is a great addition to your shopping cart. But it’s more than just a tasty and healthy food that also helps those in need (more on that below). Pound for pound, peanut butter saves.
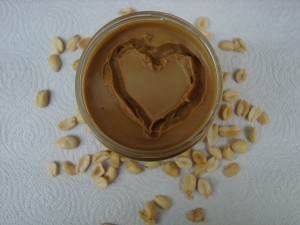
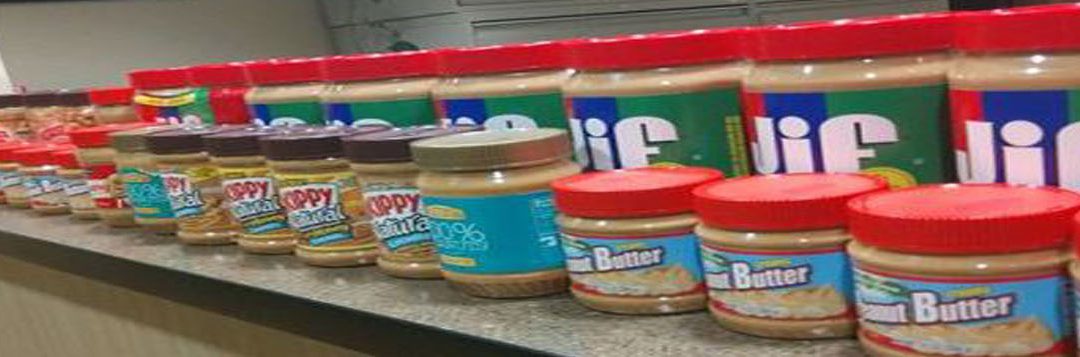
Nutty for Peanut Butter
Photo Source: Angela Hinkle
Compared to a pound of ground beef, a pound of peanut butter saves:
- Money at the grocery store. A pound of peanut butter currently comes in at around $2.50. A pound of ground beef will run you around $3.82.
- Time. It takes about 2-3 minutes to make a peanut butter and jelly sandwich. A burger at home will take you anywhere from about 8-15 minutes to prepare.
- Environmental costs. If you make a peanut butter and jelly sandwich for lunch instead of a hamburger, you can save 2.5 pounds of carbon dioxide, 133 gallons of water, and 24 square feet of crop land.
- Saturated fat. That’s the kind that tends to clog up arteries and cause health problems. Eating the PB&J gives you about 3 grams. You consume about 10 grams of saturated fat in a 90% lean quarter pound hamburger.
- Utilities. No gas, coals, or electricity is required to cook or safely store peanut butter.
- Hunger. Families in hardship situations often need help from food pantries. The most requested item from these pantries is – yes, you guessed it – peanut butter. It is shelf stable so you don’t have to worry about keeping it cold or heating it up. People like it. And it is a healthy plant-based food with fiber and oleic acid – a healthier monounsaturated fat.
Maybe you’re like me – you like a really good, juicy all-beef burger. Every once in a while, sure. But pound for pound, peanut butter really can save the day.
Here’s how you can help with the local hunger part:
- Buy peanut butter. Look for BOGOS (Buy One Get One Free Sales). Keep one for yourself. Then…
- Now through November 27, donate unopened jars of peanut butter for the Peanut Butter Challenge. Check with your Florida Panhandle UF/IFAS Extension Office for collection sites.
- All collected peanut butter will be given to local food pantries to assist hungry families in need.
So save, save, save with peanut butter. And help save a family from hunger.
Check out 2019 Peanut Butter Challenge for additional information.
Resources: https://foodtank.com/news/2013/12/why-meat-eats-resources/ and https://www.farmprogress.com/peanut/peanut-s-environmental-footprint-stretches-beyond-farm
by Kendra Hughson | Oct 21, 2019
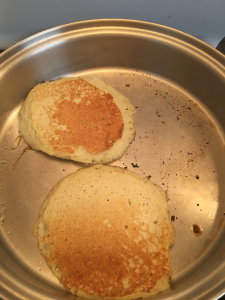
Most foods freeze well. Pancakes are easy to make ahead and freeze for later use. Photo Credit: Kendra Zamojski
You get home after a busy day and now it’s time to figure out what to make for dinner. You open the pantry and the refrigerator in a search for something to make for dinner. Maybe you can’t find the right ingredients or you don’t feel like cooking, so you pick up the phone to order delivery. A little planning ahead, could help you save money and make healthier choices.
Meals that you can make ahead and freeze are great to have on hand for use on busy days. According to the USDA, most foods can be frozen. Canned foods and shell eggs should not be frozen. This is because liquid expands when frozen and can cause shelled eggs and metal cans or glass jars to crack or break. Instead, remove canned foods from metal cans before freezing. To freeze eggs, beat together yolk and whites for better quality; egg whites can be frozen separately. Some foods don’t freeze well like mayonnaise, cream sauces, and lettuce. These exceptions aside, make ahead meals are easy to freeze and convenient to have on hand.
Cooking ahead doesn’t need to be complicated. Start freezing leftovers for later use or try doubling recipes when you are already cooking. Soups, stews, chili, casseroles, sloppy joes, and taco filling are easy recipes to experiment with batch cooking. Freeze in airtight plastic or glass containers or freezer safe bags or packaging. If you freeze foods in glass or plastic containers, leave 1-2 inches of head space between the food and the lid to allow room for expansion. Use labels to identify the frozen products, including the date and any cooking instructions. Store food in the quantities that you want to use for later. For example, whole casseroles can be reheated for family meals or soups and stews can be stored in single-serving quantities for quick and easy lunches. Freeze quickly for the best quality and to reduce freezer burn.
When it’s time to thaw, plan ahead. Do not thaw foods on the counter. Cook frozen foods immediately after thawing. Use one of the following recommended methods:
- Refrigerator: Small quantities can thaw in the refrigerator overnight. Larger quantities may take a day or two.
- Water method: Place in a sealed, leak-proof plastic bag and submerge in cold water. Change the water every 30 minutes, until thawed.
- Microwave defrosting: Defrosting in the microwave can cause some parts of the food to start cooking. Be sure to cook foods immediately after thawing.
- Cooking from a frozen state: Casseroles and other prepared foods can be cooked from a frozen state. Plan for extra cooking time by adding 15 to 30 minutes to the cooking time. Use a food thermometer to be sure it reaches an internal temperature of 165 degrees. Never place a frozen dish in a hot, pre-heated oven.This could cause the dish to crack or break.
If you enjoy experimenting with batch cooking, there are a lot of great resources for make ahead recipes and weekly meal plans. For more information, contact your local UF/IFAS Extension office: http://sfyl.ifas.ufl.edu/find-your-local-office/
Sources:
Freezing and Food Safety: https://www.fsis.usda.gov/wps/wcm/connect/cce745c9-0fc9-4ce6-a50c-84363e5b5a48/Freezing_and_Food_Safety.pdf?MOD=AJPERES
Make Ahead Freezer Meals to the Rescue: https://extension.psu.edu/make-ahead-freezer-meals-to-the-rescue
Freezing Food for Multiple Meals: https://www.ksre.k-state.edu/humannutrition/nutrition-topics/eatingwell-budget/makeaheadmeals.html


