
by Angela Hinkle | Aug 10, 2020
You may be spending more time creating and experimenting in your kitchen these days. But are you taking the time to clean and enjoy the beauty of the kitchen when you’re not making those new culinary masterpieces? Here are 11 super simple kitchen cleanups that can take away the stresses caused by kitchen grime, stink, and clutter.
That’s Dirty!
- Dust and Cover
For space between upper cabinets and the ceiling, begin by using a duster (and soapy sponge if needed) to get rid of all those dust bunnies. Then lay down wax paper (which holds the dust) or newspaper, paper grocery bags, or parchment paper. Then you can just lift the old paper and put down new a few times of year without having to clean years of dust and grime by hand. You may want to start with this because dust may fall from the top. Then work your way down to the rest of the kitchen.
- Clean the Microwave
Add about one cup of water to a large microwave-safe bowl. Cut a lemon in half. Squeeze the lemon juice into the bowl then add the lemon halves too. Microwave on high for about 2 minutes until the liquid boils and the window steams up. Don’t open the door yet; let the bowl sit for about 5-10 minutes. The steam loosens the gunk. Then it’s just an easy wipe down with a sponge inside and out.
- Wipe Down Surfaces
Wipe cabinet shelves and doors, counter tops, and trashcans with warm soapy water. Use the rough side of a double-sided non-scratch sponge for stuck-on areas and the softer side for crumbs and easier messes. You can also disinfect these surfaces with a spray bottle filled with a solution of one tablespoon bleach to one quart water, using paper towels to wipe dry.

Ever Cleaned?
Photo: A. Hinkle
- Scrub a Stove-top

Clean/ready to cook.
Photo: A. Hinkle
First, wipe down with warm soapy water. Put half a cup of baking soda in a bowl. Then slowly pour in hydrogen peroxide, mixing until it becomes a thin paste. Pour a little paste on the stubborn spots and rub with a heavy-duty paper towel or rag. The stains should come right off. For stubborn stains, pour a bit more of the paste onto the stuck-on stain and let it soak for about 10 minutes. Then scrub, scrub, scrub some more until the stove-top is completely clean.
(Check manufacturer’s directions for smooth top stoves.)
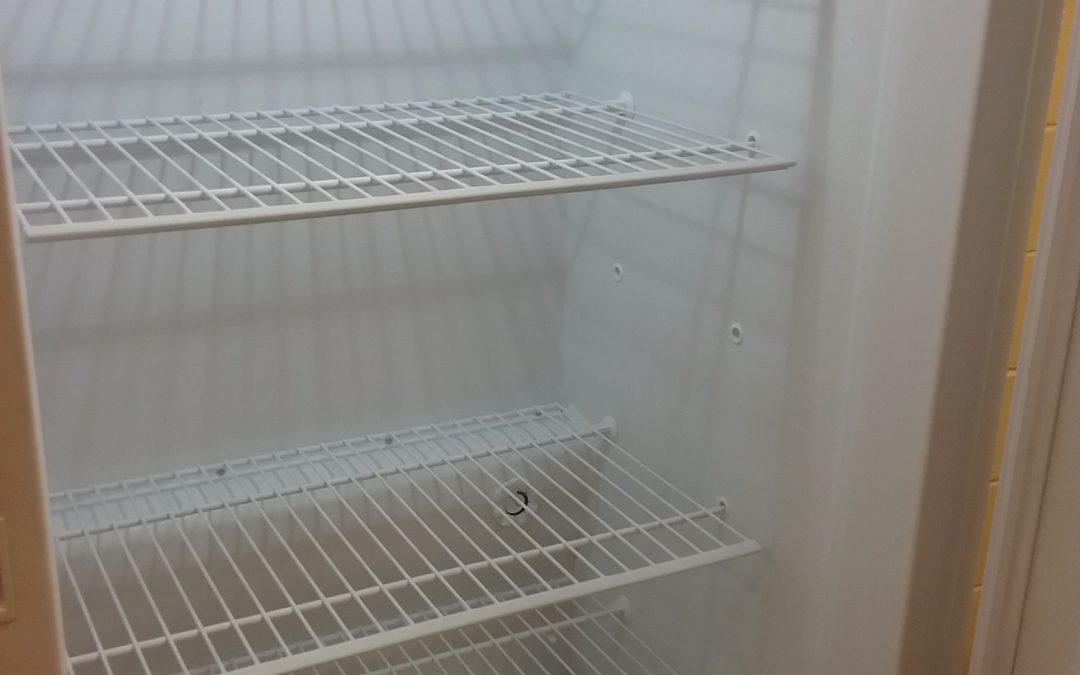
- Wash the Refrigerator
Take out shelves, drawers, and other removable parts of your refrigerator and freezer and wash with hot water and dish soap – just as if they were dishes. Wash the inside walls and door compartments of the refrigerator and freezer with a solution of 2 tablespoons baking soda and 4 cups warm water to clean and reduce any strong odors. Rinse with clear warm water and dry with a soft cloth. Wipe off all jars and dishes as you replace them in the refrigerator.
Wash the outside of the refrigerator and freezer with hot soapy water, rinse, and dry. Don’t forget the door gaskets – sticky gaskets can cause air leaks, using more energy over time.
That Stinks!
- The Garbage Can
Sprinkle baking soda into the bottom of the trash bag to help keep the shudder-inducing smellies away and/or add a cotton ball soaked in essential oils to add a nice scent.
- The Stinky Sink
First, run hot water down the drain. Follow that with a cup of baking soda. Finish off with a cup of lemon juice. This fizzy reaction is fun to do with the kids.
- That Refrigerator Smell
Placing an open box of baking soda on a shelf in the refrigerator gets rid of most smells. If your unit has a pan or plastic tray on the very bottom to collect the condensation or defrost water, remove and clean it once or twice a year. Dust and moisture in this pan can lead to mold growth and cause health problems for persons with allergies. It also can develop an unpleasant odor. Check your care manual for the location of the pan.
That’s Got to Go!
- Food – Organize, Keep, Toss
Go through your refrigerator, freezer, and pantry and throw away anything that is expired, moldy, or you have no idea what it is. (To learn more about Use-By, Sell-By, and Best-By dates on food packages, check out Understanding Date Labels.) FIFO (First In First Out) your pantry foods by placing the older foods at the front and newer foods in the back. This way, you use up the foods that will expire first. Throw away any foods with freezer burn.
- Herbalicious…or Not
Toss out any herb or spice containers that are past their best-if-used-by date. Herbs and spices begin to quickly lose their wonderful tastes and aromas after this date. If it has no date and you have no idea how long you’ve had it, best bet is to throw it away.
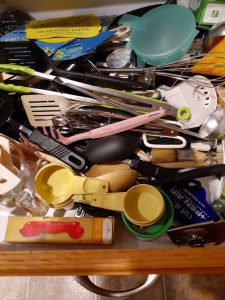
That Kitchen Drawer
Photo Source: A. Hinkle
- That Drawer
Where is that ladle? I know I put it in this drawer. Why is the kitchen tool I want to use always at the bottom of the utensil (or junk) drawer? And why do I have five corkscrews when I don’t even drink wine? Help beat these frustrating dilemmas. De-clutter and organize this drawer. Start by taking everything out – yes, everything. Pick out things you never use. If you’ve had a melon baller for 10 years and used it once nine years ago, put it in a giveaway pile. Put four of the five corkscrews in that pile too. Throw away anything that’s broken or unusable. Wipe out the drawer using a sponge and warm soapy water or disinfectant wipes. Refill the drawer starting in the bottom/back with those tools you don’t use as often. Work your way forward and up with the tools you use most often. Ah, so much better now, and from now on.
Try tackling two or three of these tips a week. You can complete the whole list in one month. Your kitchen will be cleaner and more comfortable, and you can be less stressed and happier.
by Angela Hinkle | Sep 3, 2019
Hurricane season is June 1 to November 30, with peak season in September and October. And hurricanes are not the only disasters we have to contend with. Living Well in the Panhandle provides the trusted Disaster Resources you need so you know what to do to keep your family and you living well.
Disaster Resources
Below are helpful resources for preparing for and handling the aftermath of a disaster. For more information, please contact your local UF/IFAS Extension Office.
Food Safety
Is My Food Safe to Eat?
Keeping Your Food Safe During Emergencies: Power Outages, Floods, and Fires
USDA – A Consumer’s Guide to Food Safety-Severe Storms and Hurricanes Guide
Well Water Safety
Well Water Testing
Housing
Search for an open emergency shelter near you by texting SHELTER and your zip code to 4FEMA (43362) Example: SHELTER 01234

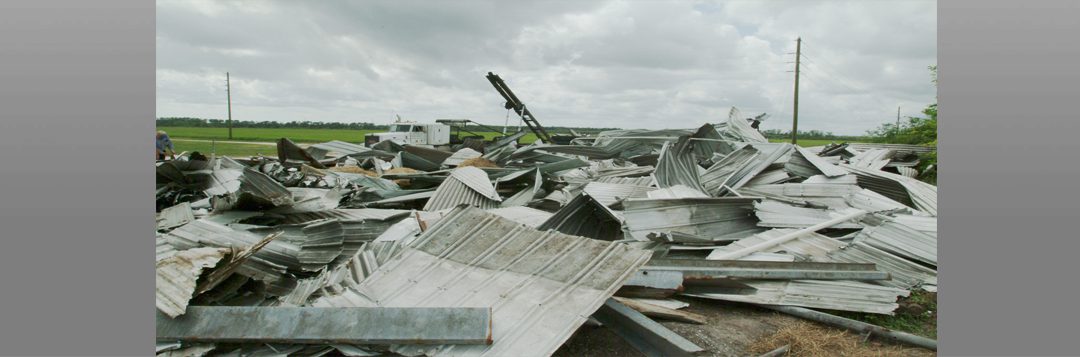
Lightning storm. Photo Source: UF/IFAS
Cleaning Up After a Hurricane
Safety Comes First!
Get the Right Tree Care Professional
Hiring an Arborist – Spanish
Cleaning Mold After a Flood
Hurricanes and Mosquitoes
Mosquito Control Tips for Homeowners
Money Management/Consumer Issues
Avoiding Fraud and Deception
Six Steps in Making an Insurance Claim
Replacing Lost or Damaged Documents
FEMA – Individual Disaster Assistance
FEMA – Interim Housing Resources
USDA Farm Service Agency Disaster Assistance
Disaster Recovery Loans
Tax Relief After a Disaster
Complaints – If you have a complaint about disaster relief assistance, contact the Department of Homeland Security’s Inspector General’s Office at 1-800-323-8603.
Family Health and Wellness
Call the Disaster Distress Helpline 24/7 for free counseling – 1-800-985-5990 (TTY) 1-800-846-8517
OR text TalkWithUs to 66746
Mental Health for Adults
Mental Health for Kids
Mental Health for Adolescents
Agriculture and Natural Resources
Practices to Minimize Flooding Damage to Commercial Vegetable Production
Florida Panhandle Agriculture
Florida Panhandle Agriculture Facebook
by Kendra Hughson | Mar 15, 2019
I love spring cleaning. Well, I love spring. I wish someone else would do the cleaning. It does feel nice to have everything clean and sparkling for those sunny spring days. According to a 2018 survey by the American Cleaning Institute, nearly 76% of households engage in spring cleaning each year. These spring cleaners report deep cleaning and clearing clutter as the top two reasons for this annual springtime spruce up.
If you want to join the springtime cleaning craze but aren’t sure how to start, here are a few ideas:
Clear the Clutter
Get ready for the springtime spruce up. Photo credit: Kendra Zamojski
Personal belongings hold a host of memories and other emotional attachments. This means stuff can accumulate in closets, drawers, cabinets, and other places. In my own life, I try to get rid of items I haven’t used in the last year. Others may use different criteria. Pick a closet, cabinet, or other area to de-clutter and start by sorting. Separate items into boxes or baskets labeled: Keep, Donate/Sell, Recycle, Trash. This is also a great way to help children make decisions about their stuff. It always makes me feel better to clear the clutter and organize a messy cabinet or closet.
Deep Cleaning
Deep cleaning involves going through each room and cleaning it to a higher standard or reaching dirt that might get missed in a regular cleaning routine. On deep cleaning days, wash window and shower curtains, wash windows and mirrors, scrub floors, wash or wipe down walls, baseboards, and doors. Dust or wipe down light fixtures, ceiling fans, furniture, and shelves. Other tasks might include vacuuming under furniture, cleaning the carpets and rugs, and cleaning under and behind appliances.
Spring cleaning takes a little extra elbow grease compared to the regular cleaning routine. If you find this overwhelming, start small by choosing a room or even smaller by choosing a closet or cabinet. Once you see the difference, it will motivate you to tackle the next job.
References:
Healthy Homes: Dealing with Household Clutter. 2015.
Available at: https://secure.caes.uga.edu/extension/publications/files/pdf/C%201067_1.PDF
Spring Cleaning Tips
Available at: https://lancaster.unl.edu/home/articles/2005/springcleaning.shtml

by Judy Corbus | Dec 3, 2018

Photo source: UF/IFAS Northwest District
The holiday season is here and, with it, many colorful decorations, delicious treats, and fun events. There also are hidden dangers that can mar this special time of year if we aren’t careful. Follow these twelve tips for a safe holiday celebration:
- To reduce fire risk, do not connect more than three strings of incandescent lights. Follow label guidelines for stringing together LED lights. Check lights for frayed or exposed wires, loose connections, and broken sockets and replace as needed.
- Place candles on stable surfaces away from trees, curtains, and other flammable items and out of reach of children. Never leave burning candles unattended or sleep in a room with a lit candle. Consider using battery-operated candles.
- Use caution when decorating with “angel hair” and artificial snow. Angel hair is made from spun glass and can irritate eyes and skin; always wear gloves when handling or use non-flammable cotton instead. Artificial snow can irritate your lungs if inhaled; follow package directions carefully.
- Keep kids and pets in mind when decorating the tree. Place breakable ornaments or ones with metal hooks near the top out of reach of little hands, playful paws, and wagging tails.
- Use a sturdy step ladder, not chairs or other furniture, to reach high places. Get someone to “spot” you and assist with handing or taking items.
- If you use a fireplace, have your chimney checked and cleaned at least once a year by a certified chimney sweep. Cleaning removes soot and other by-products that can lead to chimney fires and carbon monoxide intrusion into your living space.
- Use special care when giving toys that use coin lithium batteries to children. Older children’s devices with these batteries can be enticing to young children. Ingestion of button batteries can cause serious injury or death. Lock away spare batteries and closely supervise young children around products with button batteries. In case of ingestion, contact the 24-hour National Battery Ingestion Hotline, (800) 498-8666.
- If you want to fry a turkey, consider using an oil-less turkey fryer or purchase a fried turkey from a professional establishment. The Consumer Product Safety Commission reports that since 2002, there have been 168 turkey-related fires, burns, explosions, or carbon monoxide poisoning incidents, 672 injuries, and $8 million in property damage. Don’t add to the statistic count!
- Use a food thermometer to ensure meat reaches a safe internal temperature. Click here for a convenient temperature chart.
- Refrigerate food within two hours. Cut leftover meat in small pieces and store foods in shallow containers so they will chill quickly. Use leftovers within four days or freeze or discard.
- Reheat sauces, soups, and gravies to a rolling boil before serving.
- Wash your hands frequently with soap and warm water to reduce your risk of illness.
Have a happy, healthy holiday season!
Sources:
National Safety Council
Chimney Safety Institute of America
Electrical Safety Foundation International
by Judy Corbus | Nov 15, 2018
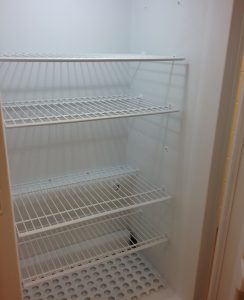
Photo source: UF/IFAS Northwest District
After an extended power outage, your refrigerator and freezer may develop unpleasant odors from spoiled food. To get rid of these odors, remove all food items and clean the inside, including drawers and bins, with a mild cleaning solution of dish soap and water. You also can use a solution of 2 tablespoons baking soda and 4 cups warm water. Strong cleansers may affect the taste of food or ice cubes or damage the interior finish. Rinse with a bleach solution of one tablespoon unscented chlorine bleach per gallon of water to sanitize. Lemon juice and water solutions are not strong enough to sanitize effectively. Leave the unit unplugged with the door open for 1-2 days to air out. Spray disinfectant around hinges, locks, and into any openings.
If odors persist, try one of these methods:
- Spread activated charcoal, clean cat litter, or baking soda on trays and place on refrigerator or freezer shelves. Activated charcoal is extra dry and absorbs odors more quickly than cooking-type charcoal. It is available at drug or pet supply stores. Run the appliance empty for 2-3 days. If the odor remains, replace with new charcoal and repeat.
- Place trays of freshly ground coffee on appliance shelves and close the door. Run the appliance empty for 2-3 days. If a slight coffee aroma remains, wash and rinse shelves and the aroma should dissipate.
- Pack each shelf with crumpled newspaper. Set a cup of water on the top shelf or sprinkle the newspaper with water. Allow appliance to run for approximately 5-6 days. While this method is time-consuming, it is effective in removing strong odors.
- Use a commercial product designed for refrigerator and freezer odor removal. These products are available at hardware, grocery, discount, and variety stores.
Once the odor is gone, rinse and dry the appliance. Don’t forget to clean gaskets with a mild cleaning solution and warm water; rinse and dry. Dirt and spills can prevent the gasket from sealing well, resulting in a loss of cold air and higher utility bills. Also, clean the coils and front grill with a brush or vacuum cleaner to remove dirt that can hinder air flow to the condenser.
Use an appliance thermometer to check the temperature of your refrigerator and freezer. The refrigerator should be between 33˚F and 40˚F and the freezer at 0 degrees or below.
If there is still an odor after trying these steps, it is possible meat or fish drippings have seeped into the insulation. An appliance service technician may need to remove the liner and replace the insulation or the appliance may need to be replaced.
Sources:
My Florida Home Book – University of Florida/IFAS Extension
Solving Odor Problems in Your Refrigerator or Freezer – University of Nebraska-Lincoln Cooperative Extension
When the Power Goes Off – Clemson Cooperative Extension
Cleaning the Fridge – North Carolina State University Cooperative Extension
by Judy Corbus | Jul 10, 2018

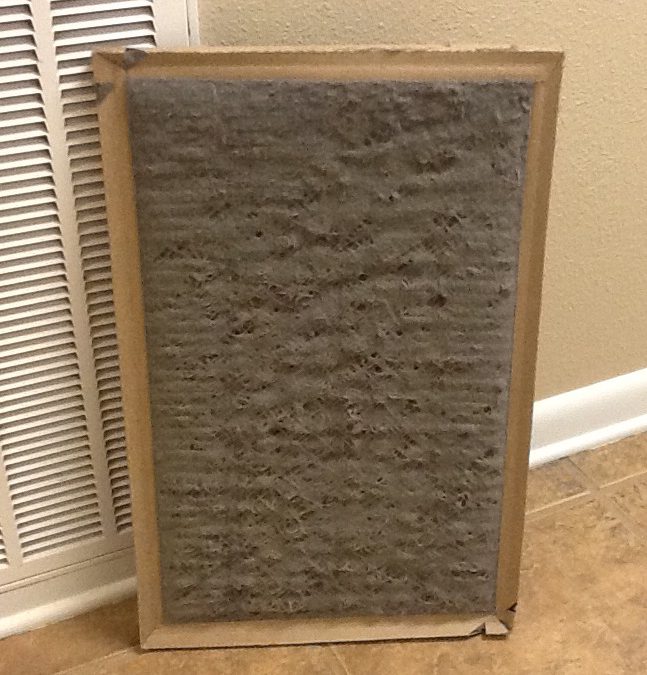
Check your air conditioner filter monthly and replace when dirty.
Photo Source: UF/IFAS Northwest District
When the temperature is in the 90s and the heat index in the triple digits, you certainly don’t want your air conditioner to conk out! Follow these simple steps to keep your AC running efficiently and to save money on your electric bill:
Check the filter monthly. Your air conditioner’s filter catches dust, dirt, and allergens to keep your home cleaner. During periods of high use, like summer, a lot of air passes through the filter so it can become dirty more quickly. If you live in a dusty area or have pets, these, too, can “fill” your filter so be sure to check your filter monthly and clean or change it as needed. Some filters are washable and reusable, such as in window unit air conditioners. To clean, turn off the unit and remove the filter. Wash in warm, soapy water and allow to air dry; reinstall in unit. Replace the filter if it is worn or torn. Inspect and replace window seals to prevent cool air leaks.
Central air conditioning systems typically use disposable filters. Turn off the system to prevent dust and dirt from entering the unit while you are cleaning it. Open the intake grate and remove the filter. Hold the filter up to a light; if you see very little light through the filter, replace it. Make sure to install the new filter so the air flows in the direction indicated by the arrow on the filter frame. Also, dust the grate with a soft cloth. Use the filter type recommended by the manufacturer for best performance; keep a supply on hand so you can change them regularly. Pick a day of the month, such as the 1st or when you receive your electric bill, to check the filter. This also is a good time to dust your ceiling fan blades.
Does a clean filter make a difference? A clogged filter makes your air conditioner work harder to pull air through the filter. Many of the newer air conditioning units now have a safety feature that shuts down the unit if air cannot pass through the filter to prevent the compressor from overheating. When this happens, a service technician must inspect and reset the unit, resulting in a service call charge. Getting in the habit of checking and changing your filters regularly will keep your unit operating efficiently and extend its usable life. You can reduce your air conditioner’s energy consumption by 5 to 15 percent by maintaining clean air filters (www.energy.gov).
Clean leaves and other debris from the fan, compressor, and condenser. Trim shrubbery so it is at least two feet away from the outside unit to allow for proper air flow.
Check and clean the evaporator coil every year.
Use a “fin comb” (available at hardware stores) to straighten bent coil fins.
Twice a year, insert a stiff wire through the drain channels to clear and prevent clogs, which can lead to backups and flooding.
Have your air conditioner serviced at least once a year. Spring is an ideal time to have a qualified service technician inspect and service your unit so it can handle the demand of the hot summer months.
Keep your “cool” this summer with these maintenance tips!
For more information, visit:
Energy Saver 101: Everything You Need to Know About Home Cooling
Florida Energy Systems Consortium