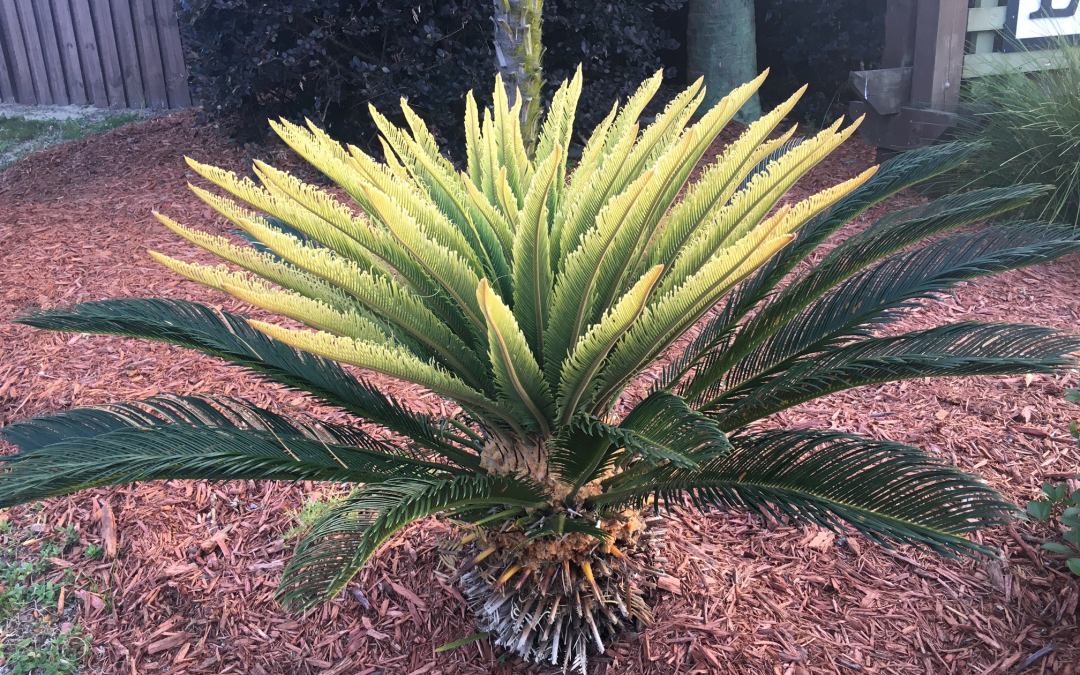
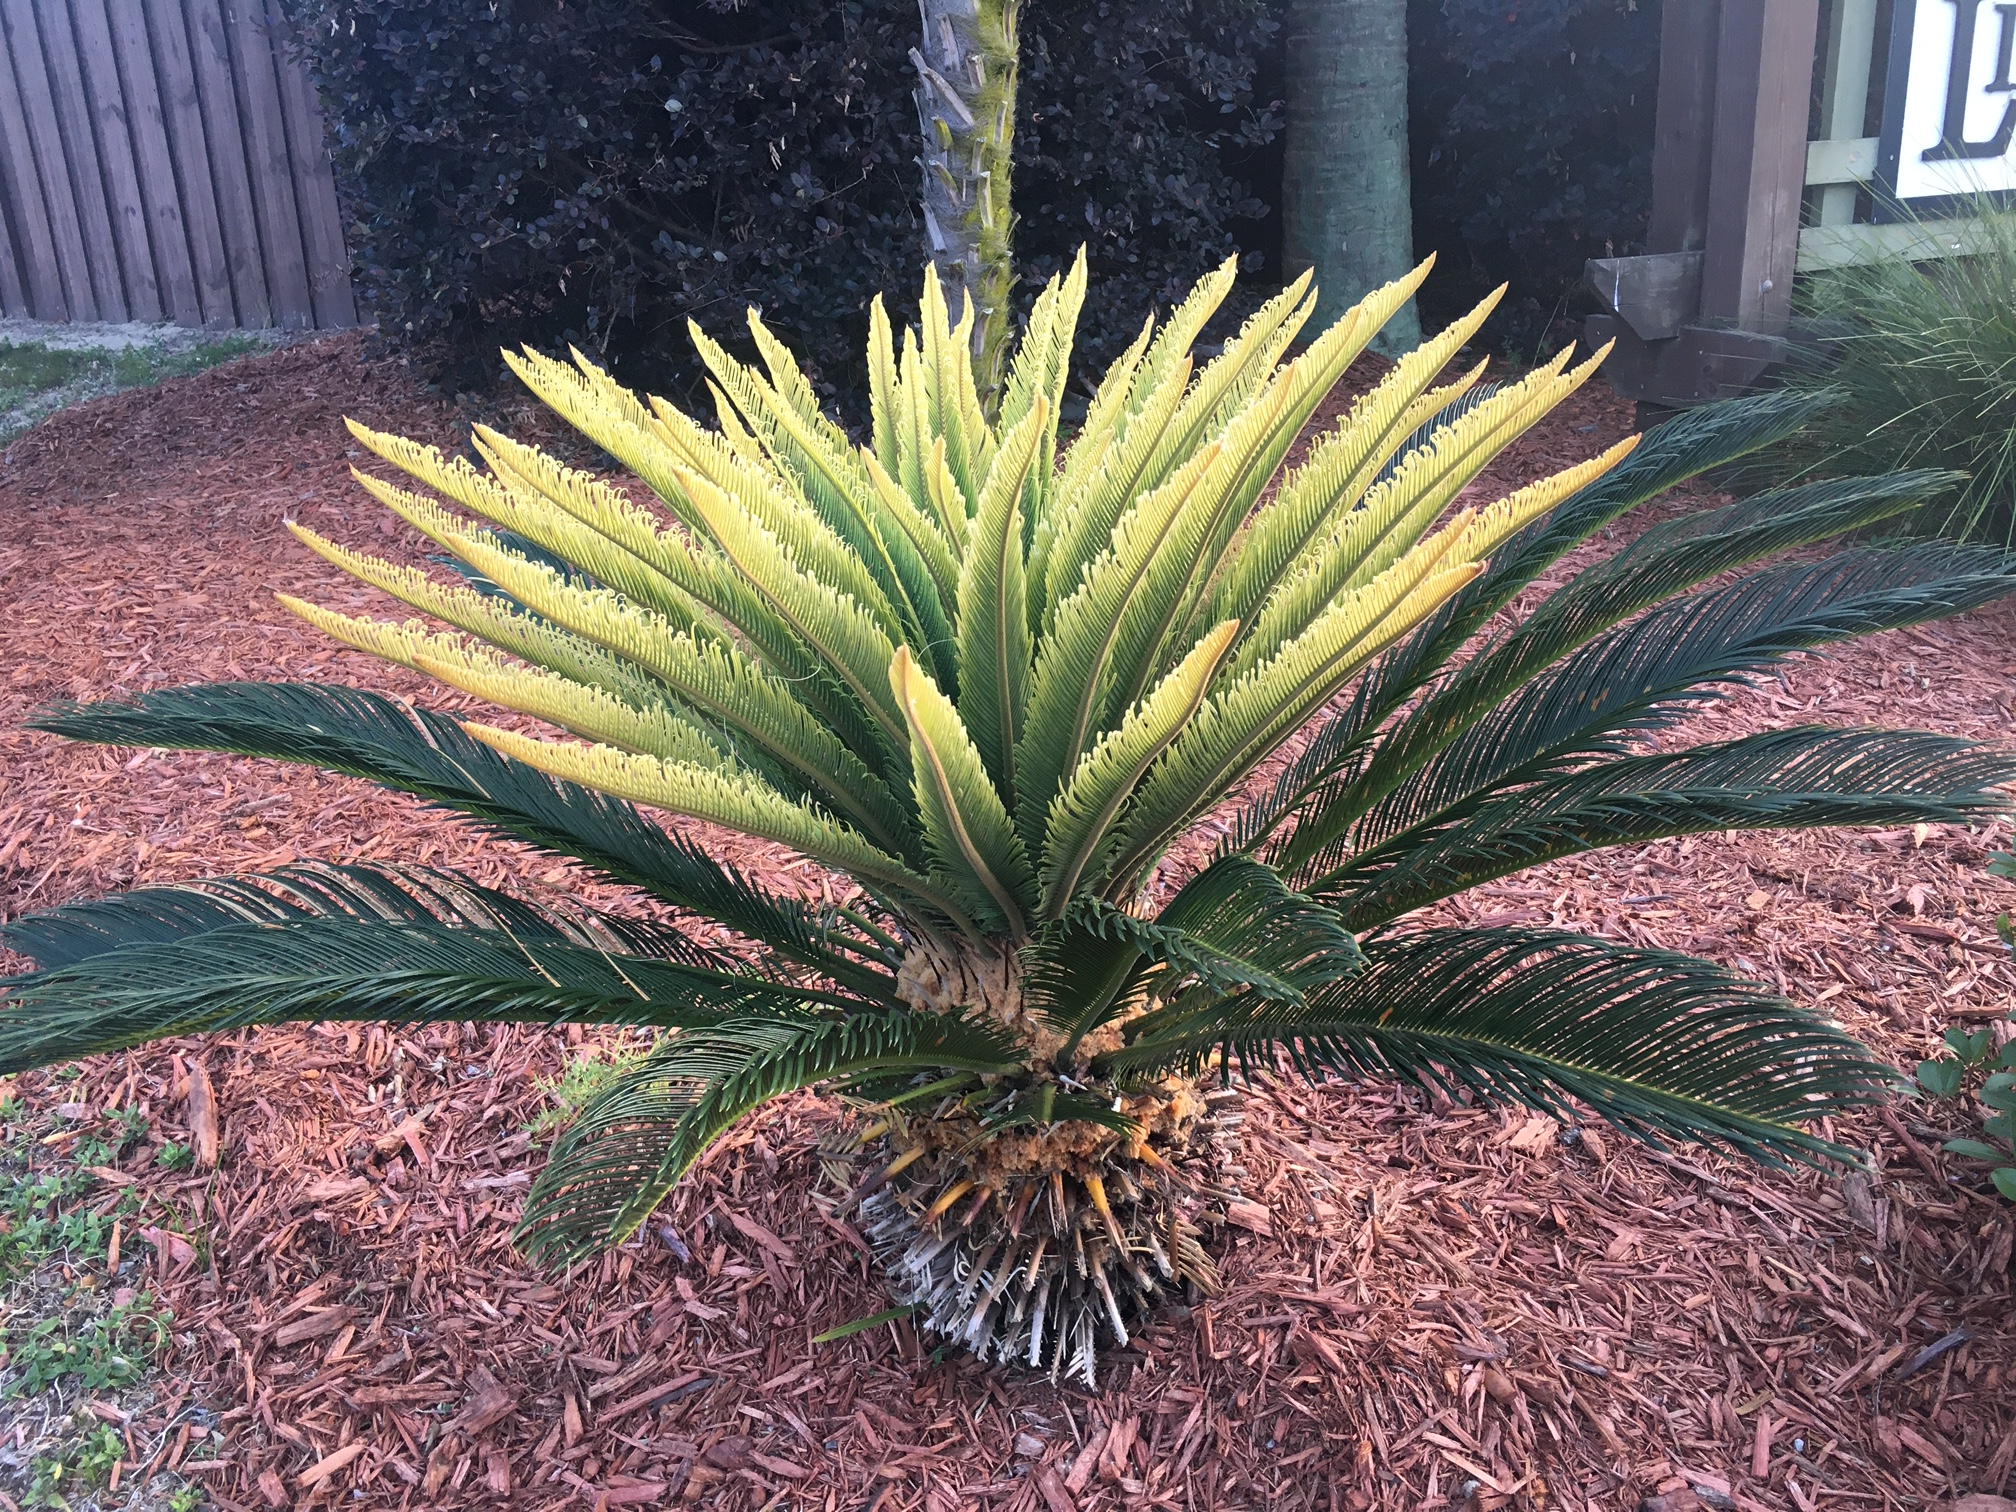
The first sign that something is going wrong in a plant is often a loss of the color green. When a sago is forming all new yellow leaves it is a matter of concern. Typically, this a common nutritional deficiency – manganese. Sandy soils of the Panhandle have a hard time retaining nutrients. Manganese and other micronutrient availability is highly influenced by soil pH. Being an essential plant nutrient, manganese is critical to growth. More specifically, it is the base of the metalloenzyme cluster of the oxygen evolving complex (OEC) in photosystem II (PSII). I hope that means more to you than it does me. Basically, manganese is part of the photosynthetic activity and since it isn’t very mobile in the plant, the new growth of sagos turns yellow.
If the nutrient deficiency isn’t corrected, the newly-formed leaves will become deformed and turn brown. In a sago this is referred to as “frizzle-top”. Many people believe the plant has a disease when they see the symptoms and may apply fungicides to no avail. Keep in mind the discoloration of the affected leaves cannot be reversed. However, manganese replacement in the soil will enable the sago to form normal leaves with the next growth phase. Damaged fronds can be removed later to improve the appearance of the sago over time.
Begin this process by determining the soil pH through a soil test. Your local Extension office can help you obtain lab submission forms and explain the collection procedure. Manganese is most available for uptake by sagos when the soil pH is between 5.5 and 6.5. If the pH is above 6.5, larger amounts of manganese will have to be present before the plant can utilize it. When the soil pH is below 5.5 the nutrient is quickly leached out of the soil during rain events.
To correct a manganese deficiency the sago plant will need to receive manganese sulfate. The product is readily available at local nurseries, garden centers and building supply stores. The amount needed for each plant will vary with the size of the sago and the existing soil pH. Sagos growing in sandy, acidic soil will require less manganese sulfate than those in high pH soils. Refer to the package label for application rates.
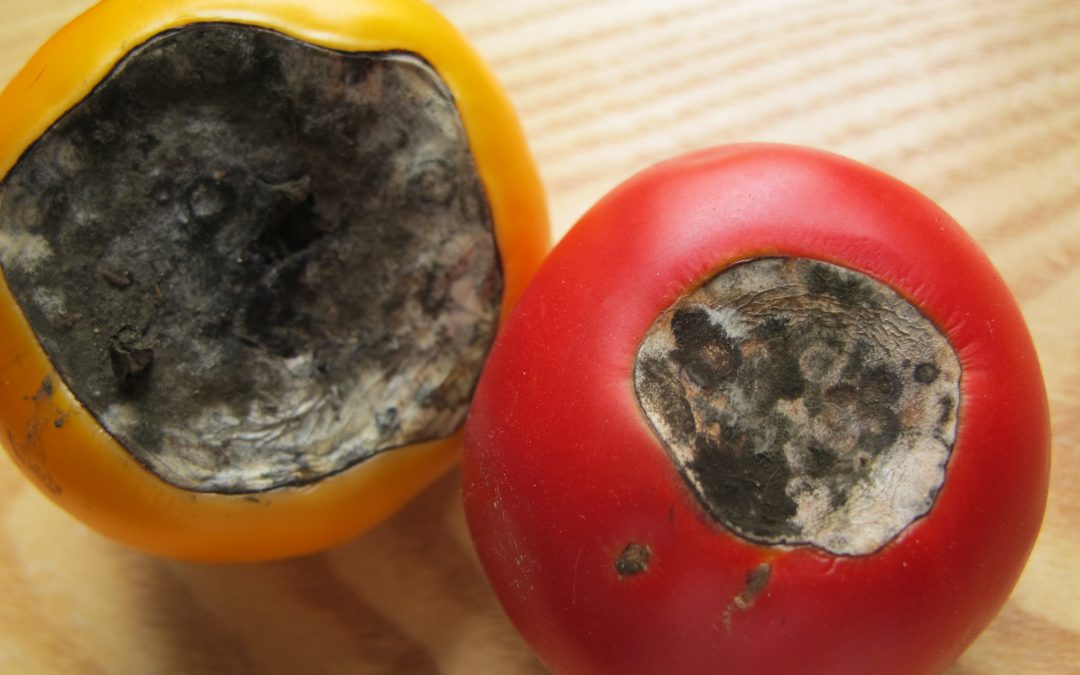
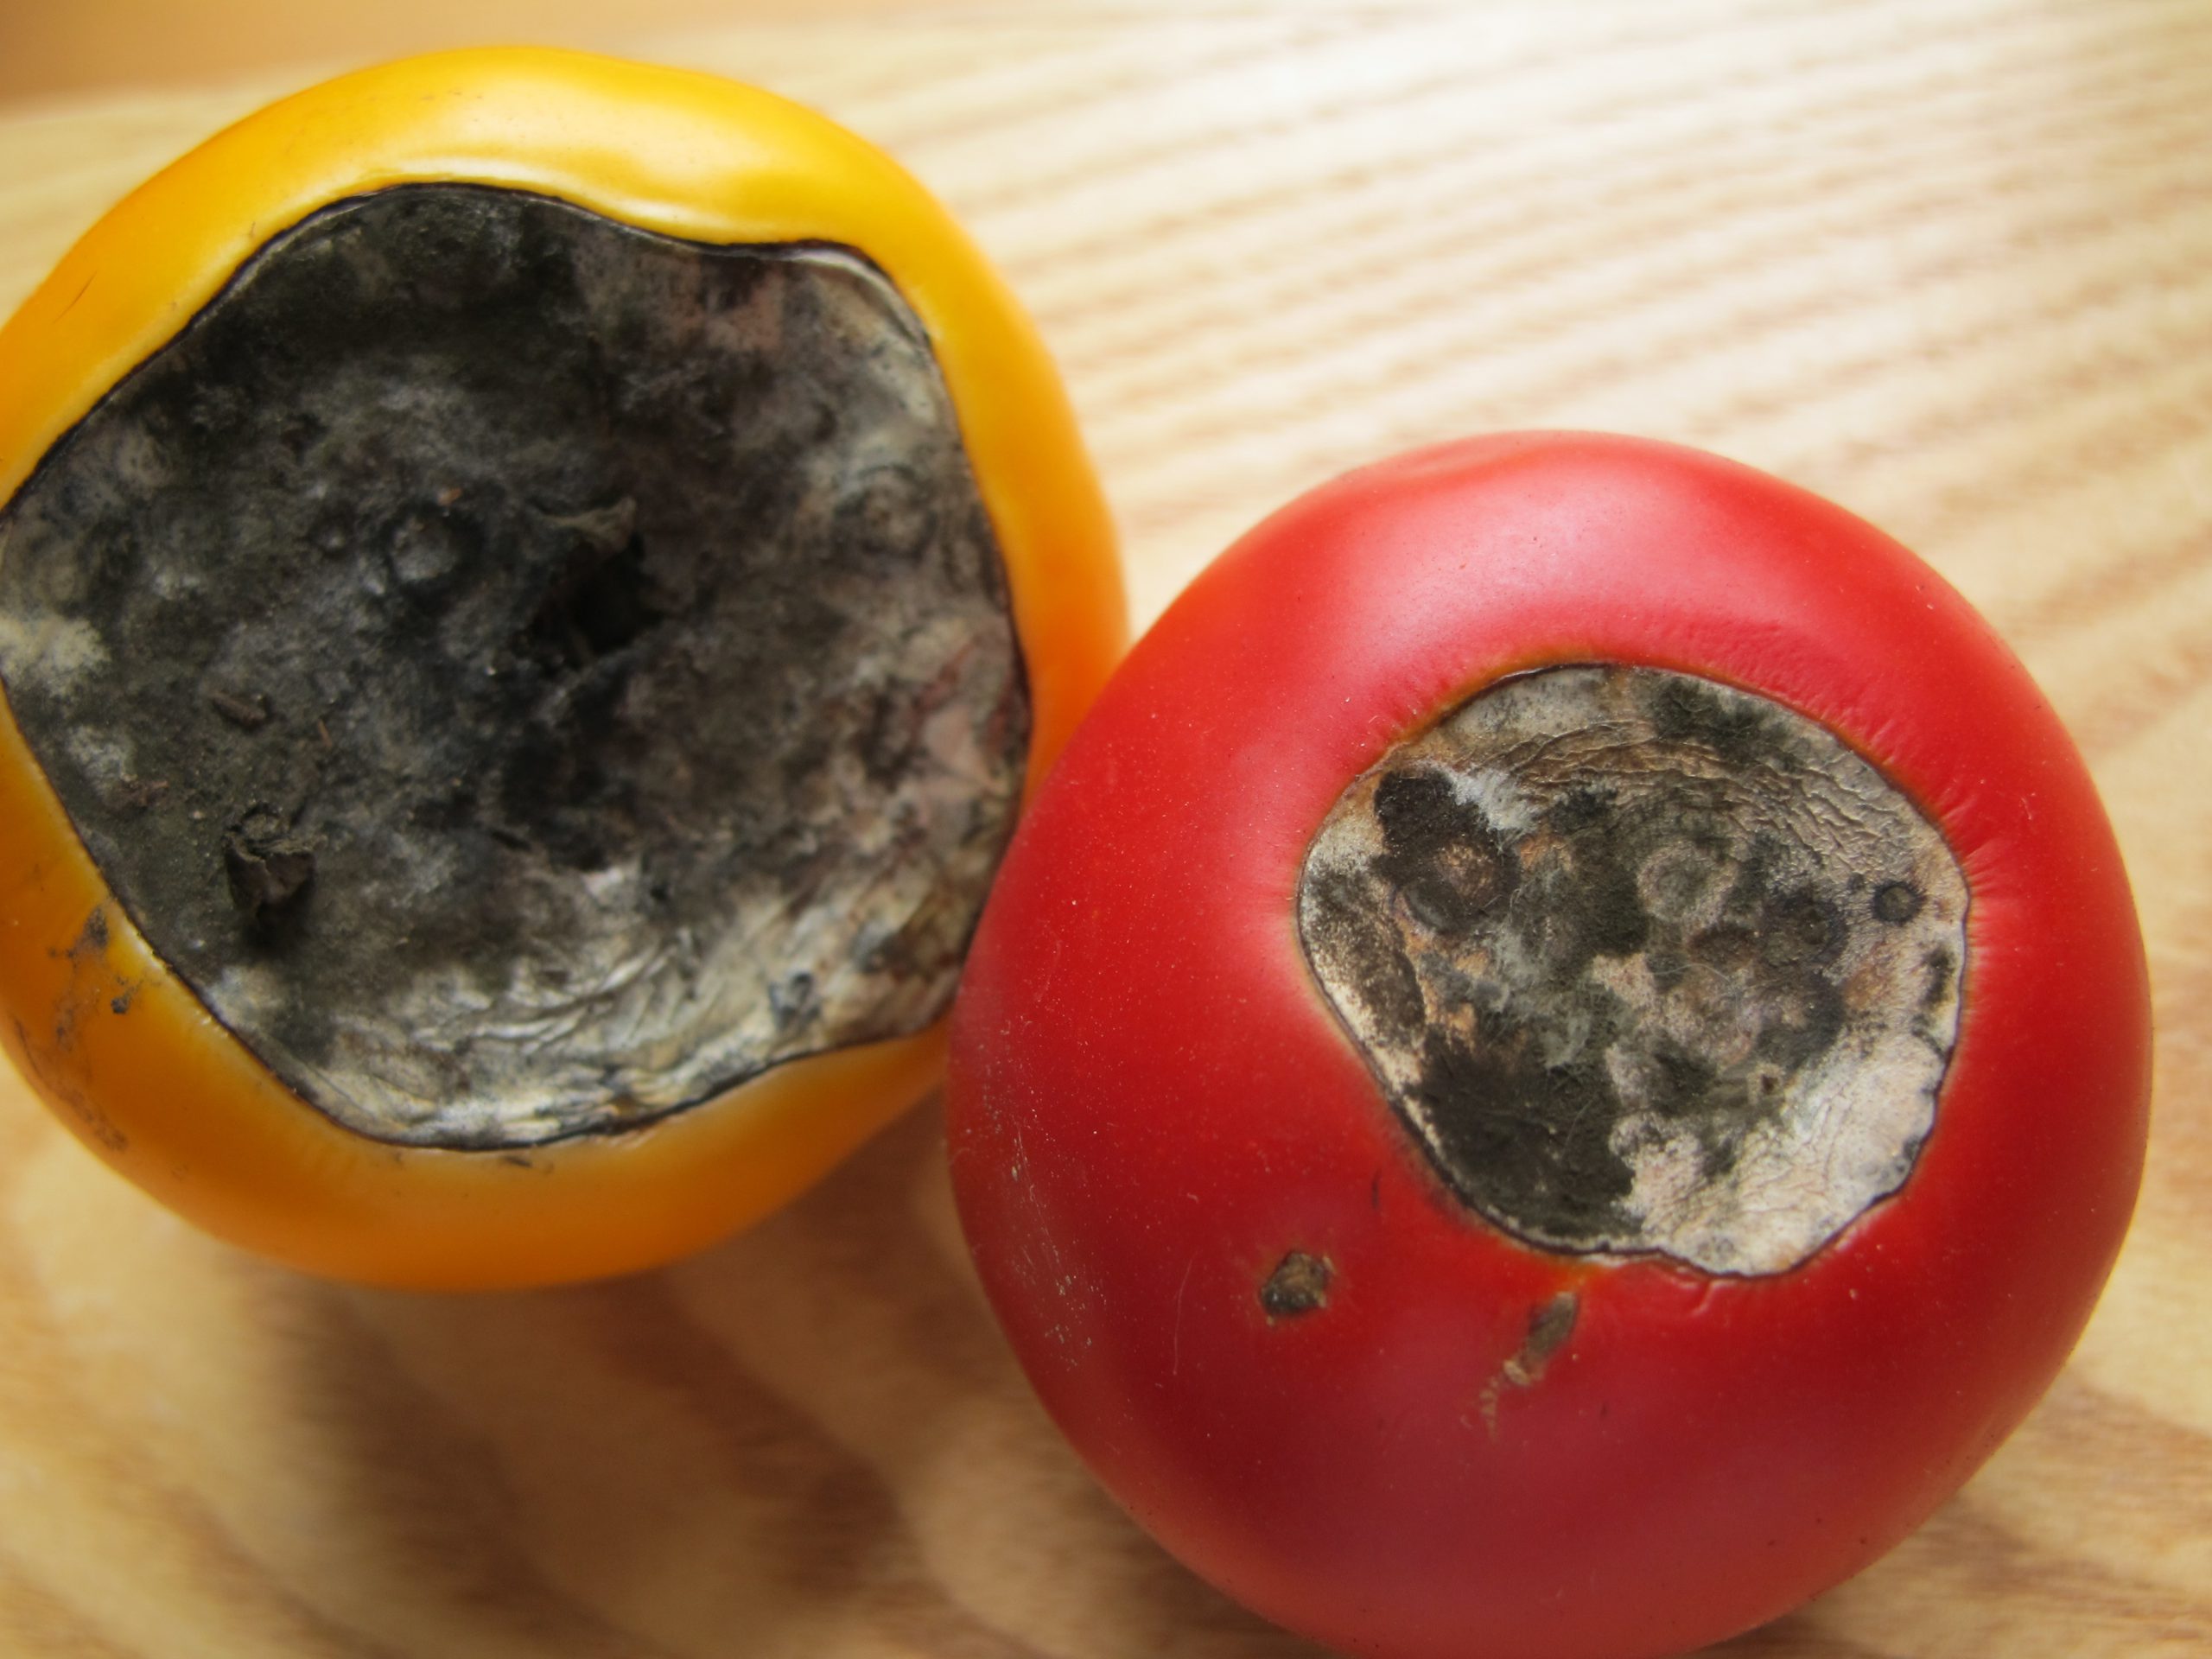
There aren’t many more frustrating things than growing seemingly healthy tomatoes, those plants setting an abundance of flower and fruit, and then, once your tomatoes get about the size of a golf ball, having the fruit rot away from the base. This very common condition, called Blossom End Rot (BER), is caused one of two ways: by either a soil calcium deficiency or disruption of soil calcium uptake by the plant. Fortunately, preventing BER from occurring and then realizing an awesome crop of tasty tomato fruit is relatively simple and home gardeners have a couple of possible preventative solution!
Blossom End Rot damage. Photo Courtesy Larry Williams, Okaloosa County Extension.
Soil Test & Lime if Needed. The only way to really know if your soil calcium level is sufficient is through a soil test. A complete soil test through the UF Soil Lab or other lab measures both raw nutrient levels and pH. Testing for pH is especially critical. For calcium, either already in the soil or in a supplement you apply, to be available to tomato plants, soil pH needs to be between 6.0-7. In more “acidic” soil pH below 6, nutrients like iron and aluminum become more available to your tomato plants, outcompeting calcium for uptake into the roots. We don’t want that. If your soil test indicates a pH below 6, it will give a lime recommendation somewhere between 3-5 lbs/100 ft sq of garden area to raise the pH to the sweet spot between 6.0-7.0 where your tomatoes will thrive.
Use a Non-Lime Calcium Supplement. If you’ve had your soil tested and your pH is fine, adding more lime as a calcium supplement isn’t helpful. Using lime as an additional calcium source can actually lift pH above that 6.0-7.0 zone and cause other problems. At this point, once pH is where we want it, I like to add a non-lime calcium supplement. There are lots of options here. Traditional fertilizers labeled for tomatoes and veggies tend to have a good calcium content in the 6-10% range and work great. However, if you’re into organic gardening or just don’t need the extra nutrient value of a complete fertilizer, Gypsum is a good calcium supplement and is widely available. Regardless of which non-lime source you choose, apply at planting or shortly after and follow label rates for best results.
Water Properly. Consistent watering is key in helping ward off BER. Though we know BER is generally
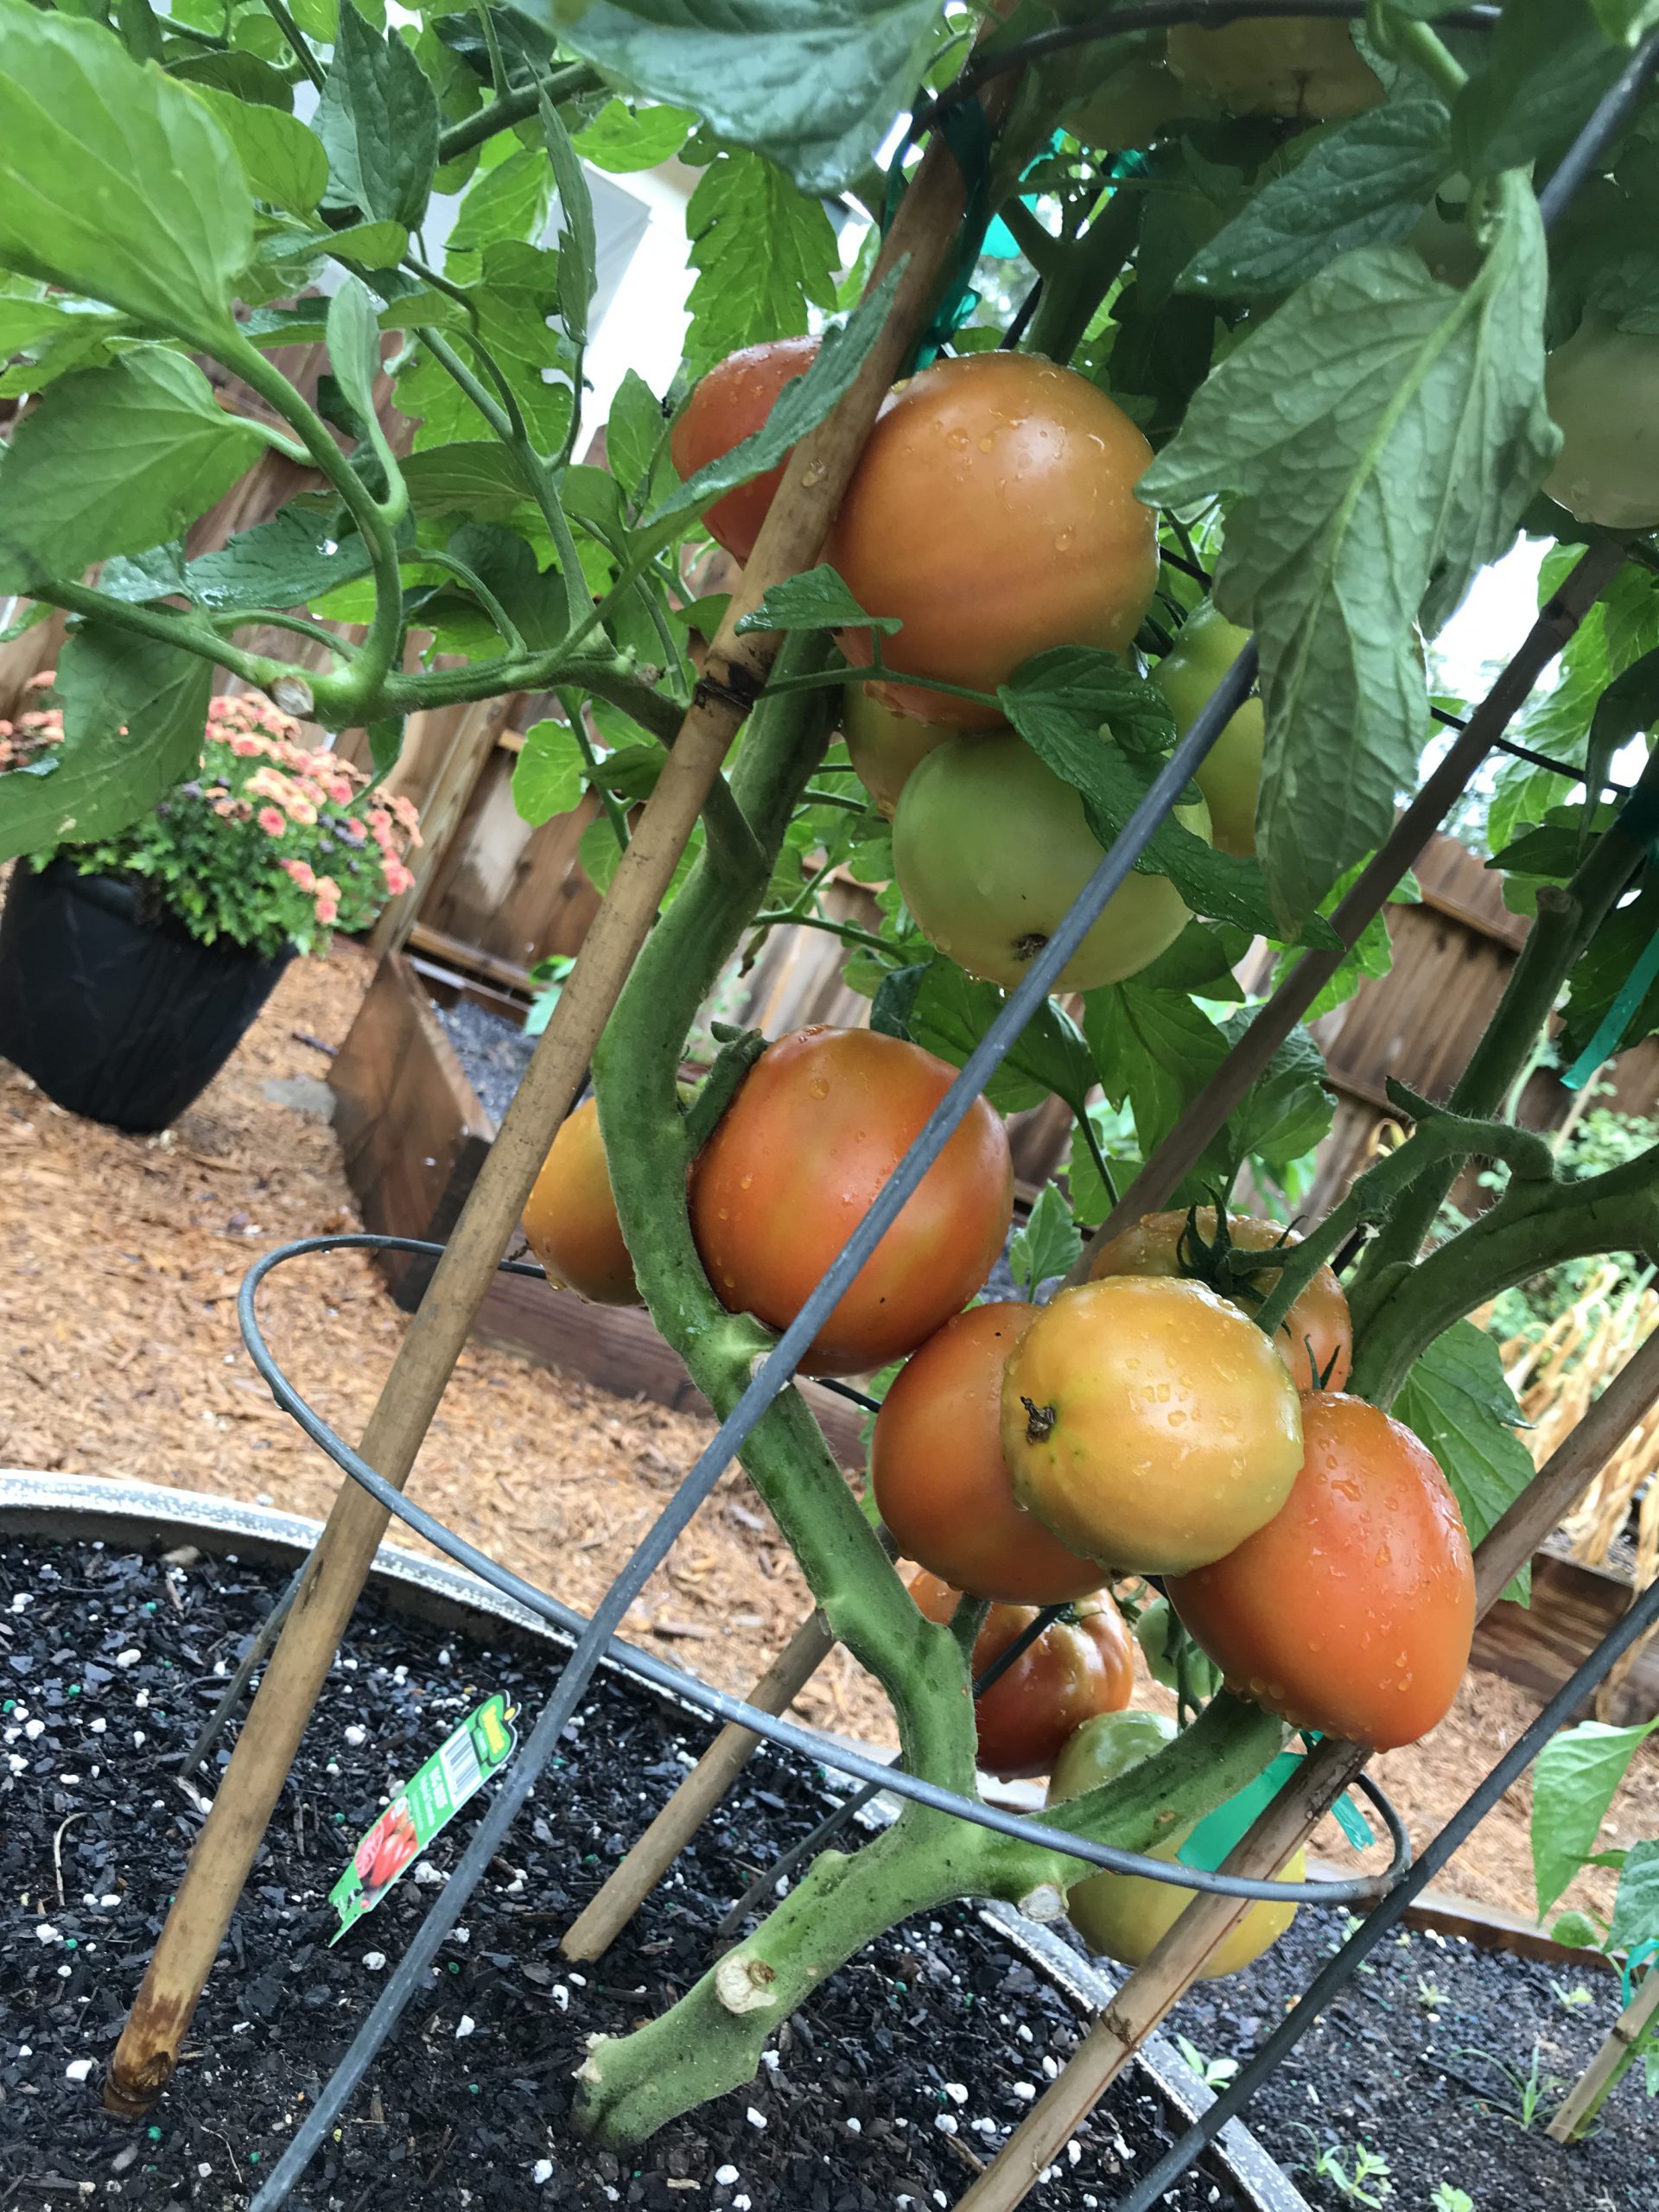
Healthy ‘Big Beef’ tomatoes grown in 2019 with a pH of 6.5, amended with Gypsum at planting, and watered regularly each day! Notice no BER. Photo courtesy the author.
caused by calcium deficiency, it can be induced by creation of distinct wet and dry periods from non-regular watering, interfering with calcium uptake and availability to the plant. So, while you may have adequate soil calcium, if you don’t water correctly, the condition will happen anyway! It’s also good to keep in mind that mature tomato plants use large quantities of water daily, so during the heat of summer, plants in containers may need to be watered multiple times daily to maintain consistently moist soil. Think about it, you don’t drink 8 glasses of water when you wake up and then never drink again throughout a hot day. A tomato is no different. Allowing your plants to wilt down before providing additional water ruins productivity and can induce BER.
Blossom End Rot, while one of the more destructive fates of tomatoes, is totally preventable by a little legwork early in the growing game from you! Soil test and change pH with lime if needed, add a shot of calcium through a tomato blend fertilizer or non-lime supplement like gypsum, and water regularly! Do these three things and you’ll be well on your way to a great crop of early summer tomatoes. If you have any questions about tomato blossom end rot or any other horticulture or agricultural topic, please don’t hesitate to reach out to us at the UF/IFAS Calhoun County Extension Office. Take advantage of this beautiful spring weather and get in the garden today! Happy gardening.
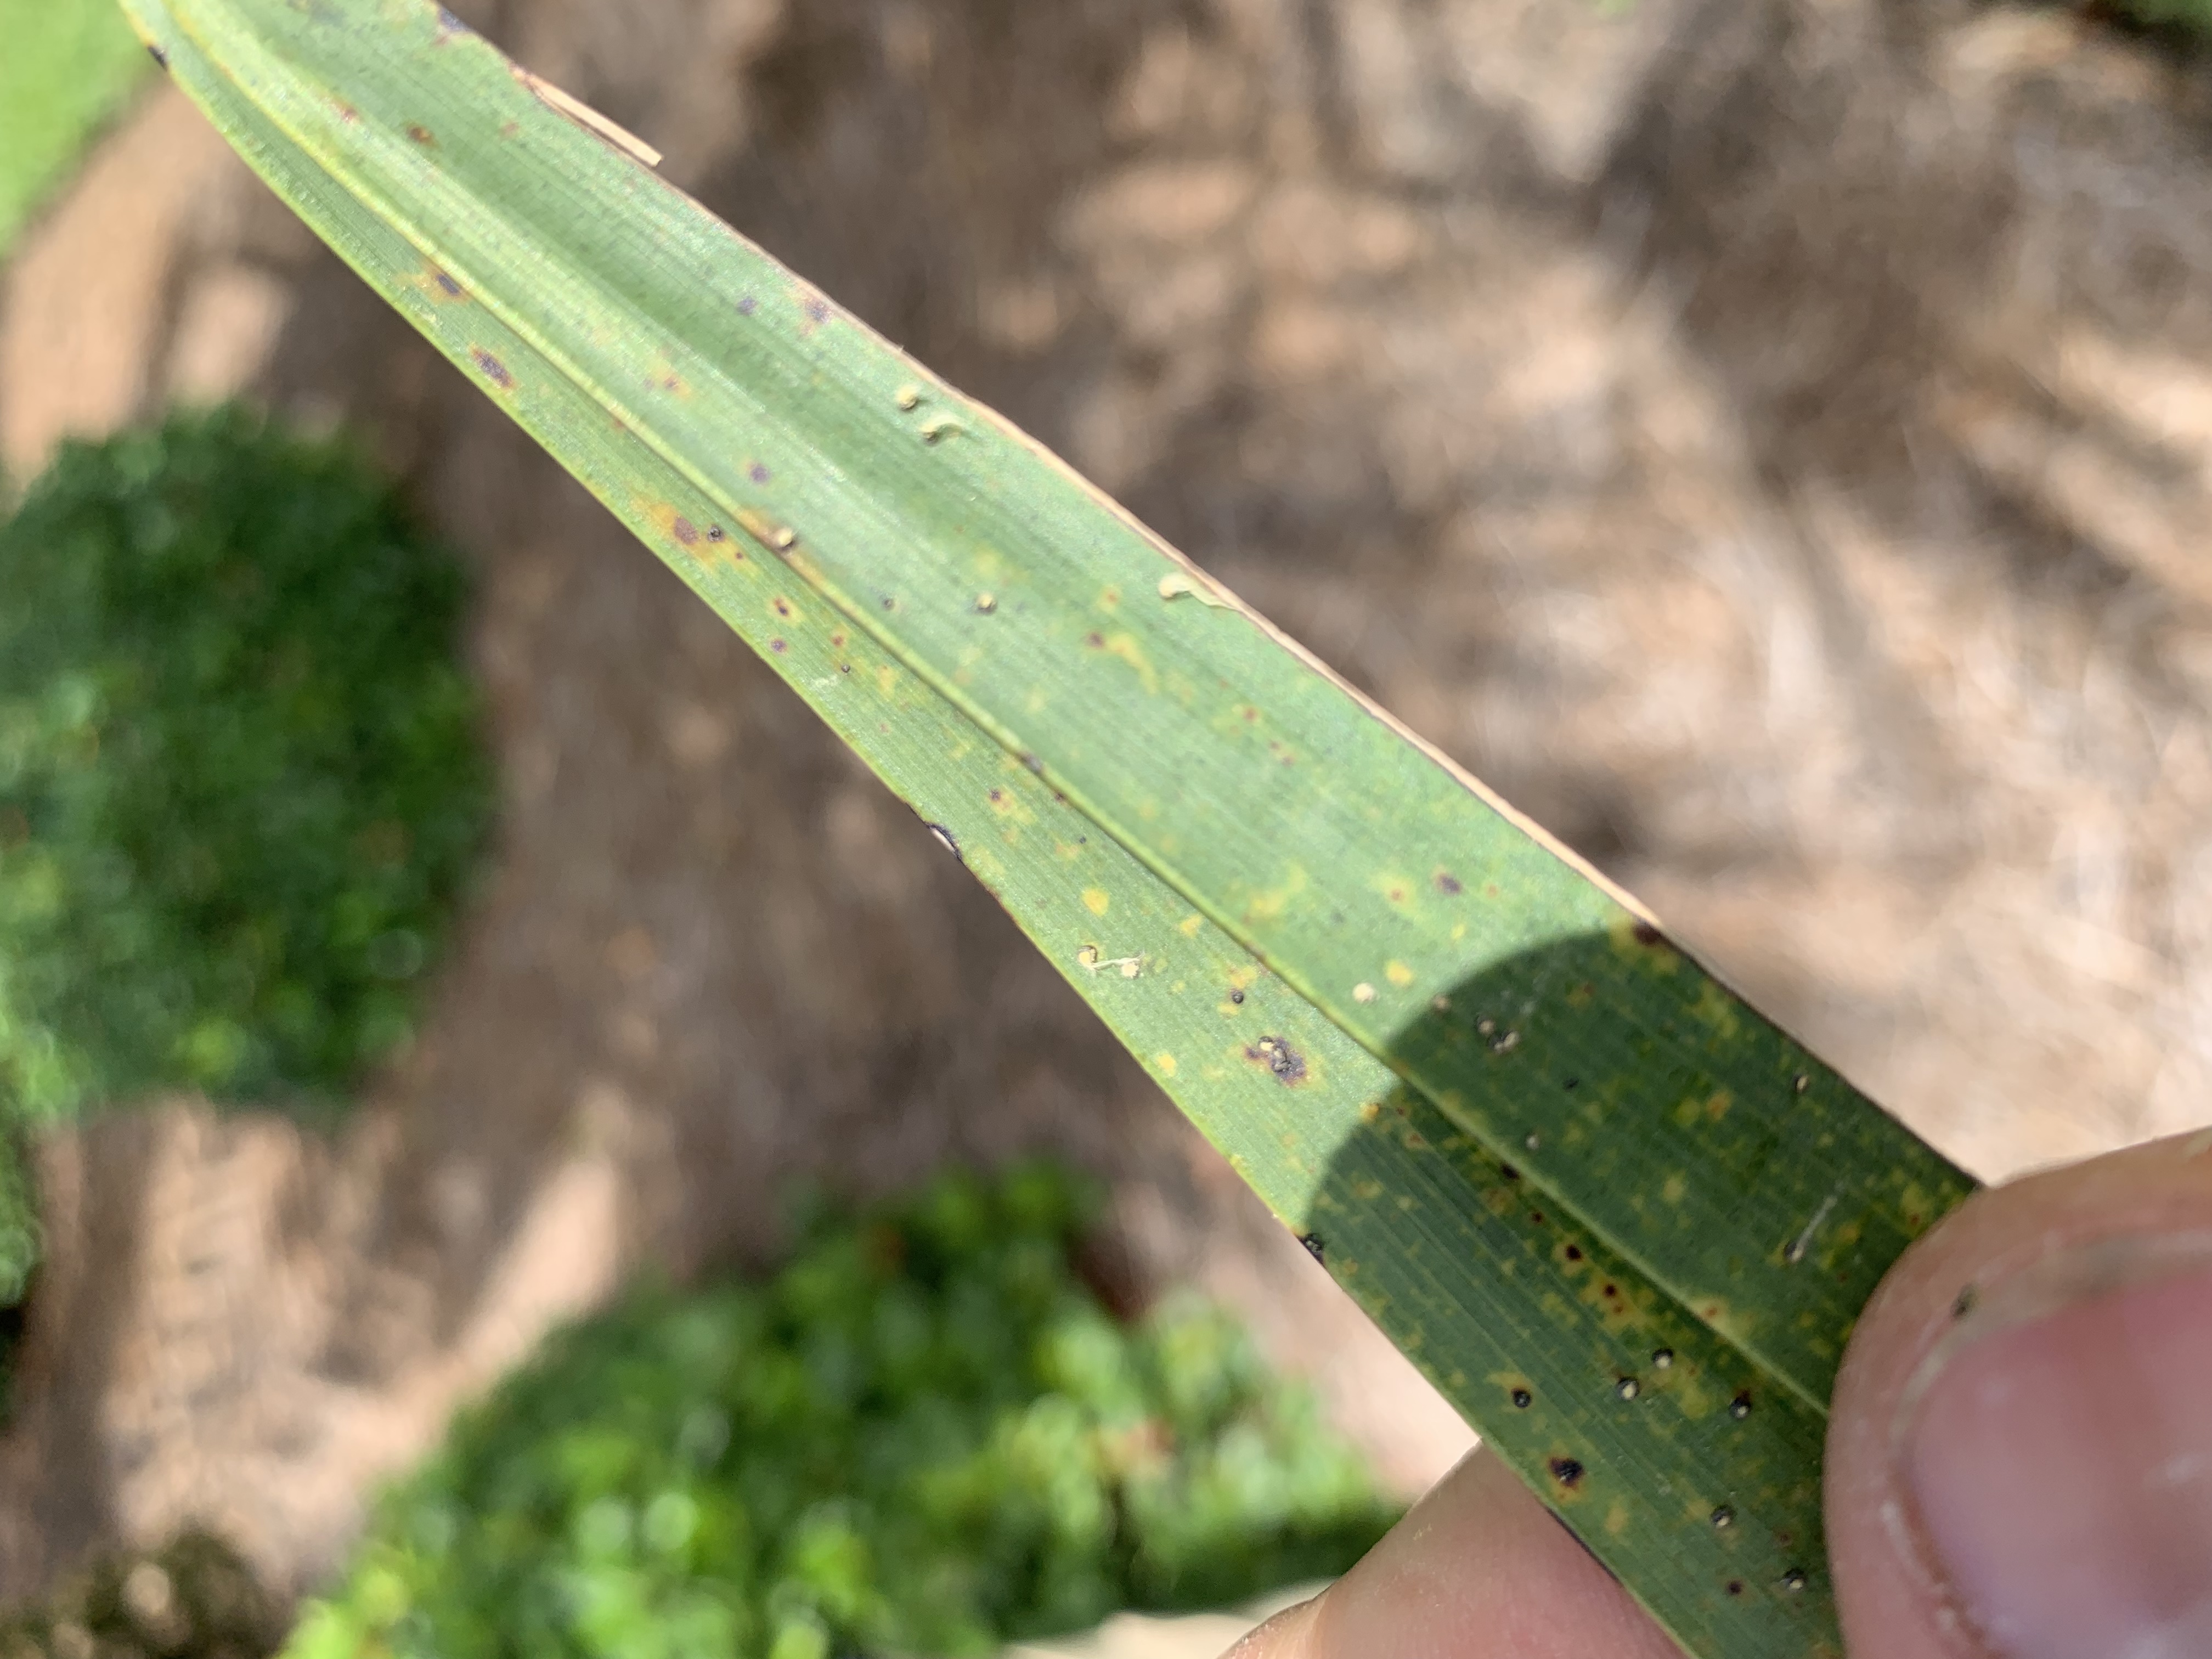
A couple weeks ago, I was on a site visit to check out some issues on Canary Island Date Palms. The account manager on the property requested a site visit because he thought the palms were infested with scale insects. He noticed the issue on a number of the properties he manages and he was concerned it was an epidemic. From a distance, lower fronds were yellowing from the outside in and the tips were necrotic. These are signs of potassium deficiency with possible magnesium deficiency mixed in.
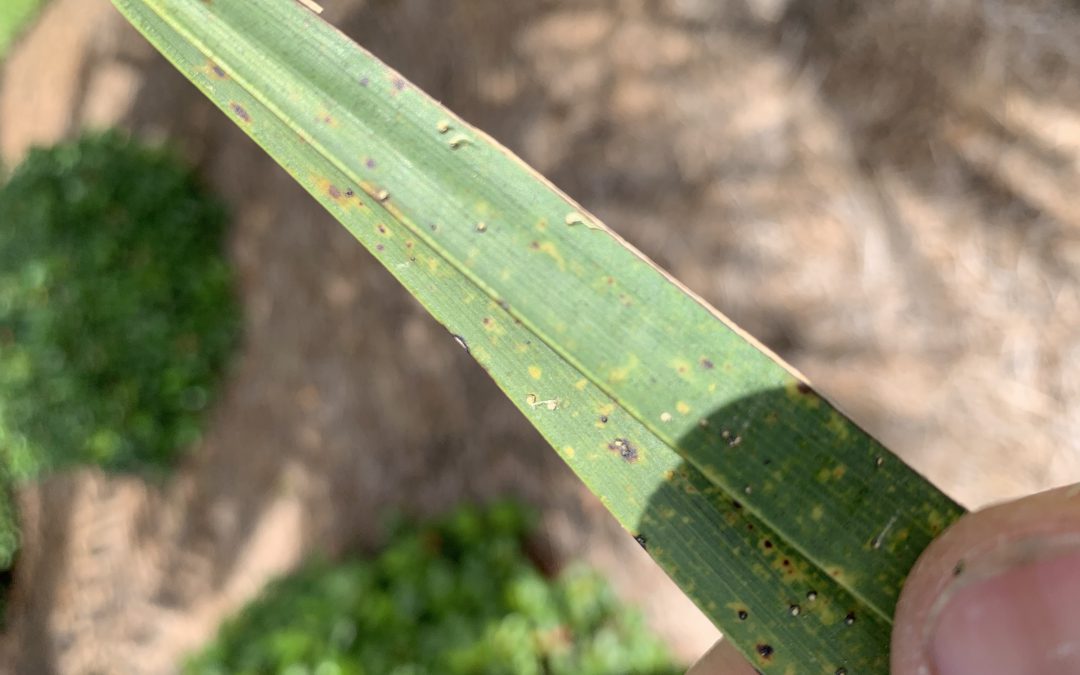
Transitional leaf showing potassium deficiency (tip) and magnesium deficiency (base) symptoms. Photo Credit: T.K. Broschat, University of Florida/IFAS Extension
Nutrient deficiencies are slow to correct in palm trees. It’s much easier to prevent deficiencies from occurring by using a palm fertilizer that has the analysis 8N-2P2O5-12K2O+4Mg with micronutrients. Even if the palms are part of a landscape which includes turf and other plants that require additional nitrogen, it is best to use a palm fertilizer with the analysis previously listed over a radius at least 25 feet out from the palms. However, poor nutrition wasn’t the only problem with these palms.
Upon closer look, the leaflets were speckled with little bumps. Each bump had a little white tail. These are the fruiting structures of graphiola leaf spot also known as false smut.
Graphiola leaf spot (false smut) on a Canary Island Date Palm. Photo Credit: Matt Lollar, University of Florida/IFAS Extension – Santa Rosa County
Graphiola leaf spot is a fungal leaf disease caused by Graphiola phoenicis. Canary Island Date Palms are especially susceptible to this disease. Graphiola leaf spot is primarily an aesthetic issue and doesn’t cause much harm to the palms infected. In fact, the nutrient deficiencies observed in these palms are much more detrimental to their health.
Graphiola leaf spot affects the lower fronds first. If the diseased, lower fronds are not showing signs of nutrient deficiencies then they can be pruned off and removed from the site. All naturally fallen fronds should be removed from the site to reduce the likelihood of fungal spores being splashed onto the healthy, living fronds. A fungicide containing copper can be applied to help prevent the spread of the disease, but it will not cure the infected fronds. Palms can be a beautiful addition to the landscape and most diseases and abiotic disorders can be managed and prevented with proper pruning, correct fertilizer rates, and precise irrigation.
It is common in Northwest Florida for palms to show signs of nutrient deficiencies. In general our sandy soil is often nutrient poor and available nutrients can easily move out of soils with frequent rainfall. In landscapes where fertilization is occurring, often the wrong types of fertilizer are applied. Fertilizer miss-application actually increases nutrient problems for the palm.
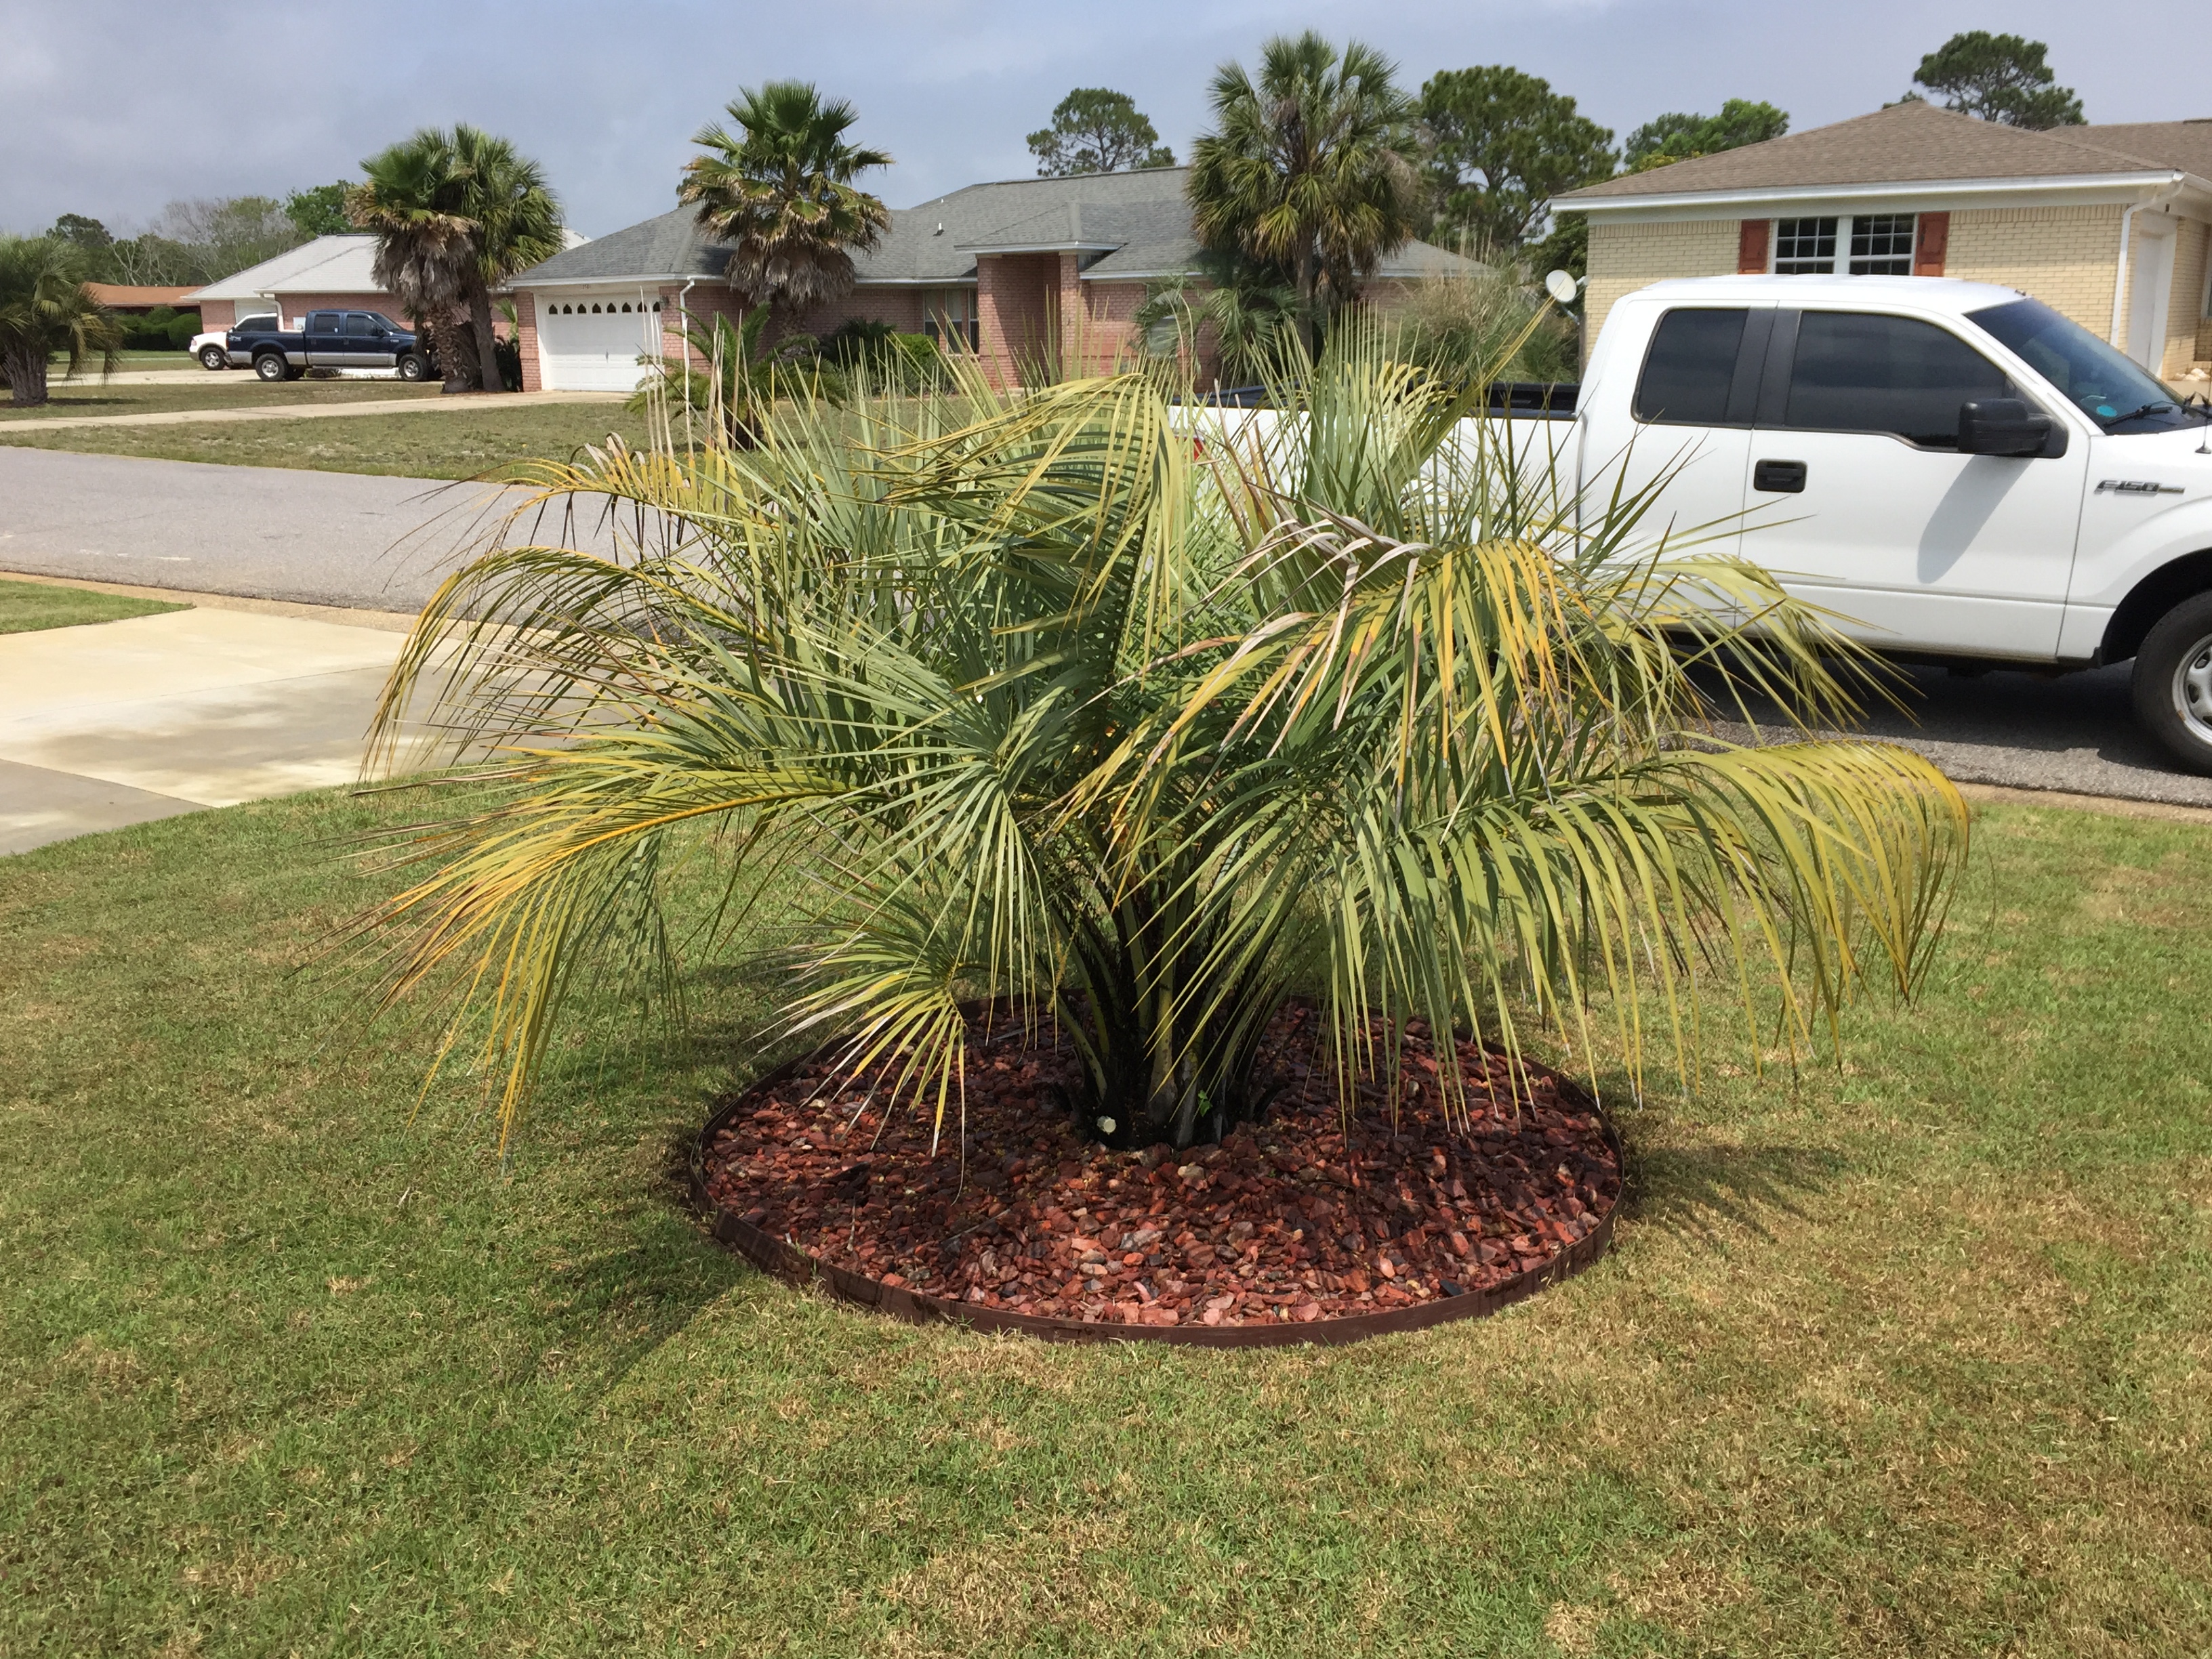
Palms can be deficient in many nutrients but the most common deficiencies we see in landscapes are from inadequate amounts potassium and magnesium. The simple solution would be to purchase a fertilizer labeled for palms to correct the problem. The difficulty is that most easily available fertilizers for palms do not have the correct form of nutrients that are required for the problems. With the exception of nitrogen, all other nutrients are in a quick release form so while the slow release nitrogen lasts for 2-3 months, all other nutrients have been used up. In response, the palm is encouraged to grow by the nitrogen but does not have enough of the other critical nutrients to carry out vital plant functions. What we see is often older leaves that are yellowing, browning, and die off before they should because the plant is pulling any available potassium and magnesium from old fronds to support new growth. Without the application of proper nutrients to the soil, the deficiency can continue until even new fronds are affected or the palm dies.
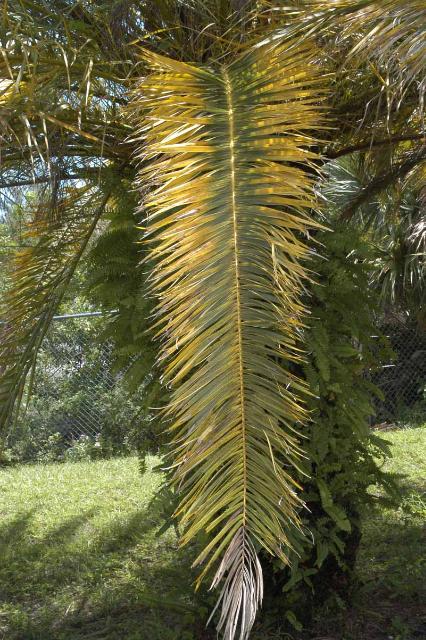
The fertilizer used for lawns does not have all the slow release and correct forms of nutrients for the palms. Older leaves turn yellow and brown indicating potassium deficiency. Photo by Beth Bolles, UF IFAS Extension Escambia County.
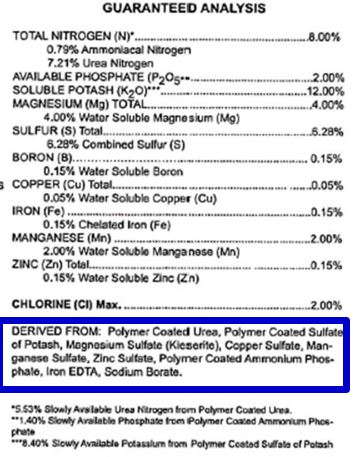
There is a solution that will help keep your palms healthy and attractive. Make sure you choose a specially designed fertilizer that has all nutrients in slow release form. Look for an analysis such as 8-2-12-4 (Nitrogen-Phosphorus-Potassium-Magnesium). Also read further on the label for Polymer Coated Sulfate of Potash, Magnesium Sulfate (Kieserite), and Chelate (Iron EDTA). These are the forms of nutrients that will be beneficial to your palms.
Look in the area ‘Derived From’ (outlined in blue) on your fertilizer label to find the forms of nutrients. Photo by Dr. Monica Elliott, US/IFAS Extension.
If you have a mixed landscape where the palms are planted in the lawn, be sure to keep all lawn fertilizers out of the root zone of the palms. Lawn fertilizers do not have the correct forms of nutrients for palms. Remember also that palms roots extend many feet beyond the palm canopy so your ‘no lawn fertilizer zone’ may be past the mulch ring.
The recommendation from the University of Florida is 1.5 pounds of fertilizer over a 100 square foot area. Broadcast this on top of the ground and lightly water after application. In North Florida, you will likely apply the correct palm fertilizer about at least two times in May and end of August or 1st of September. If you are not able to use a palm fertilizer with the correct form of slow release nutrients, it is best not to fertilize palms at all.
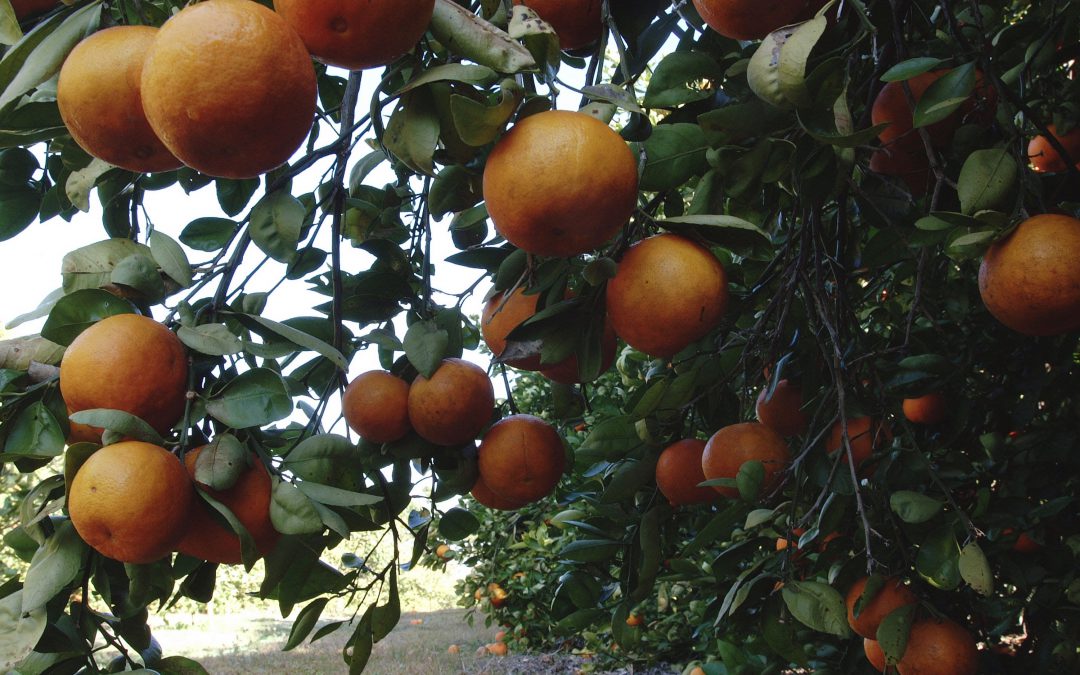
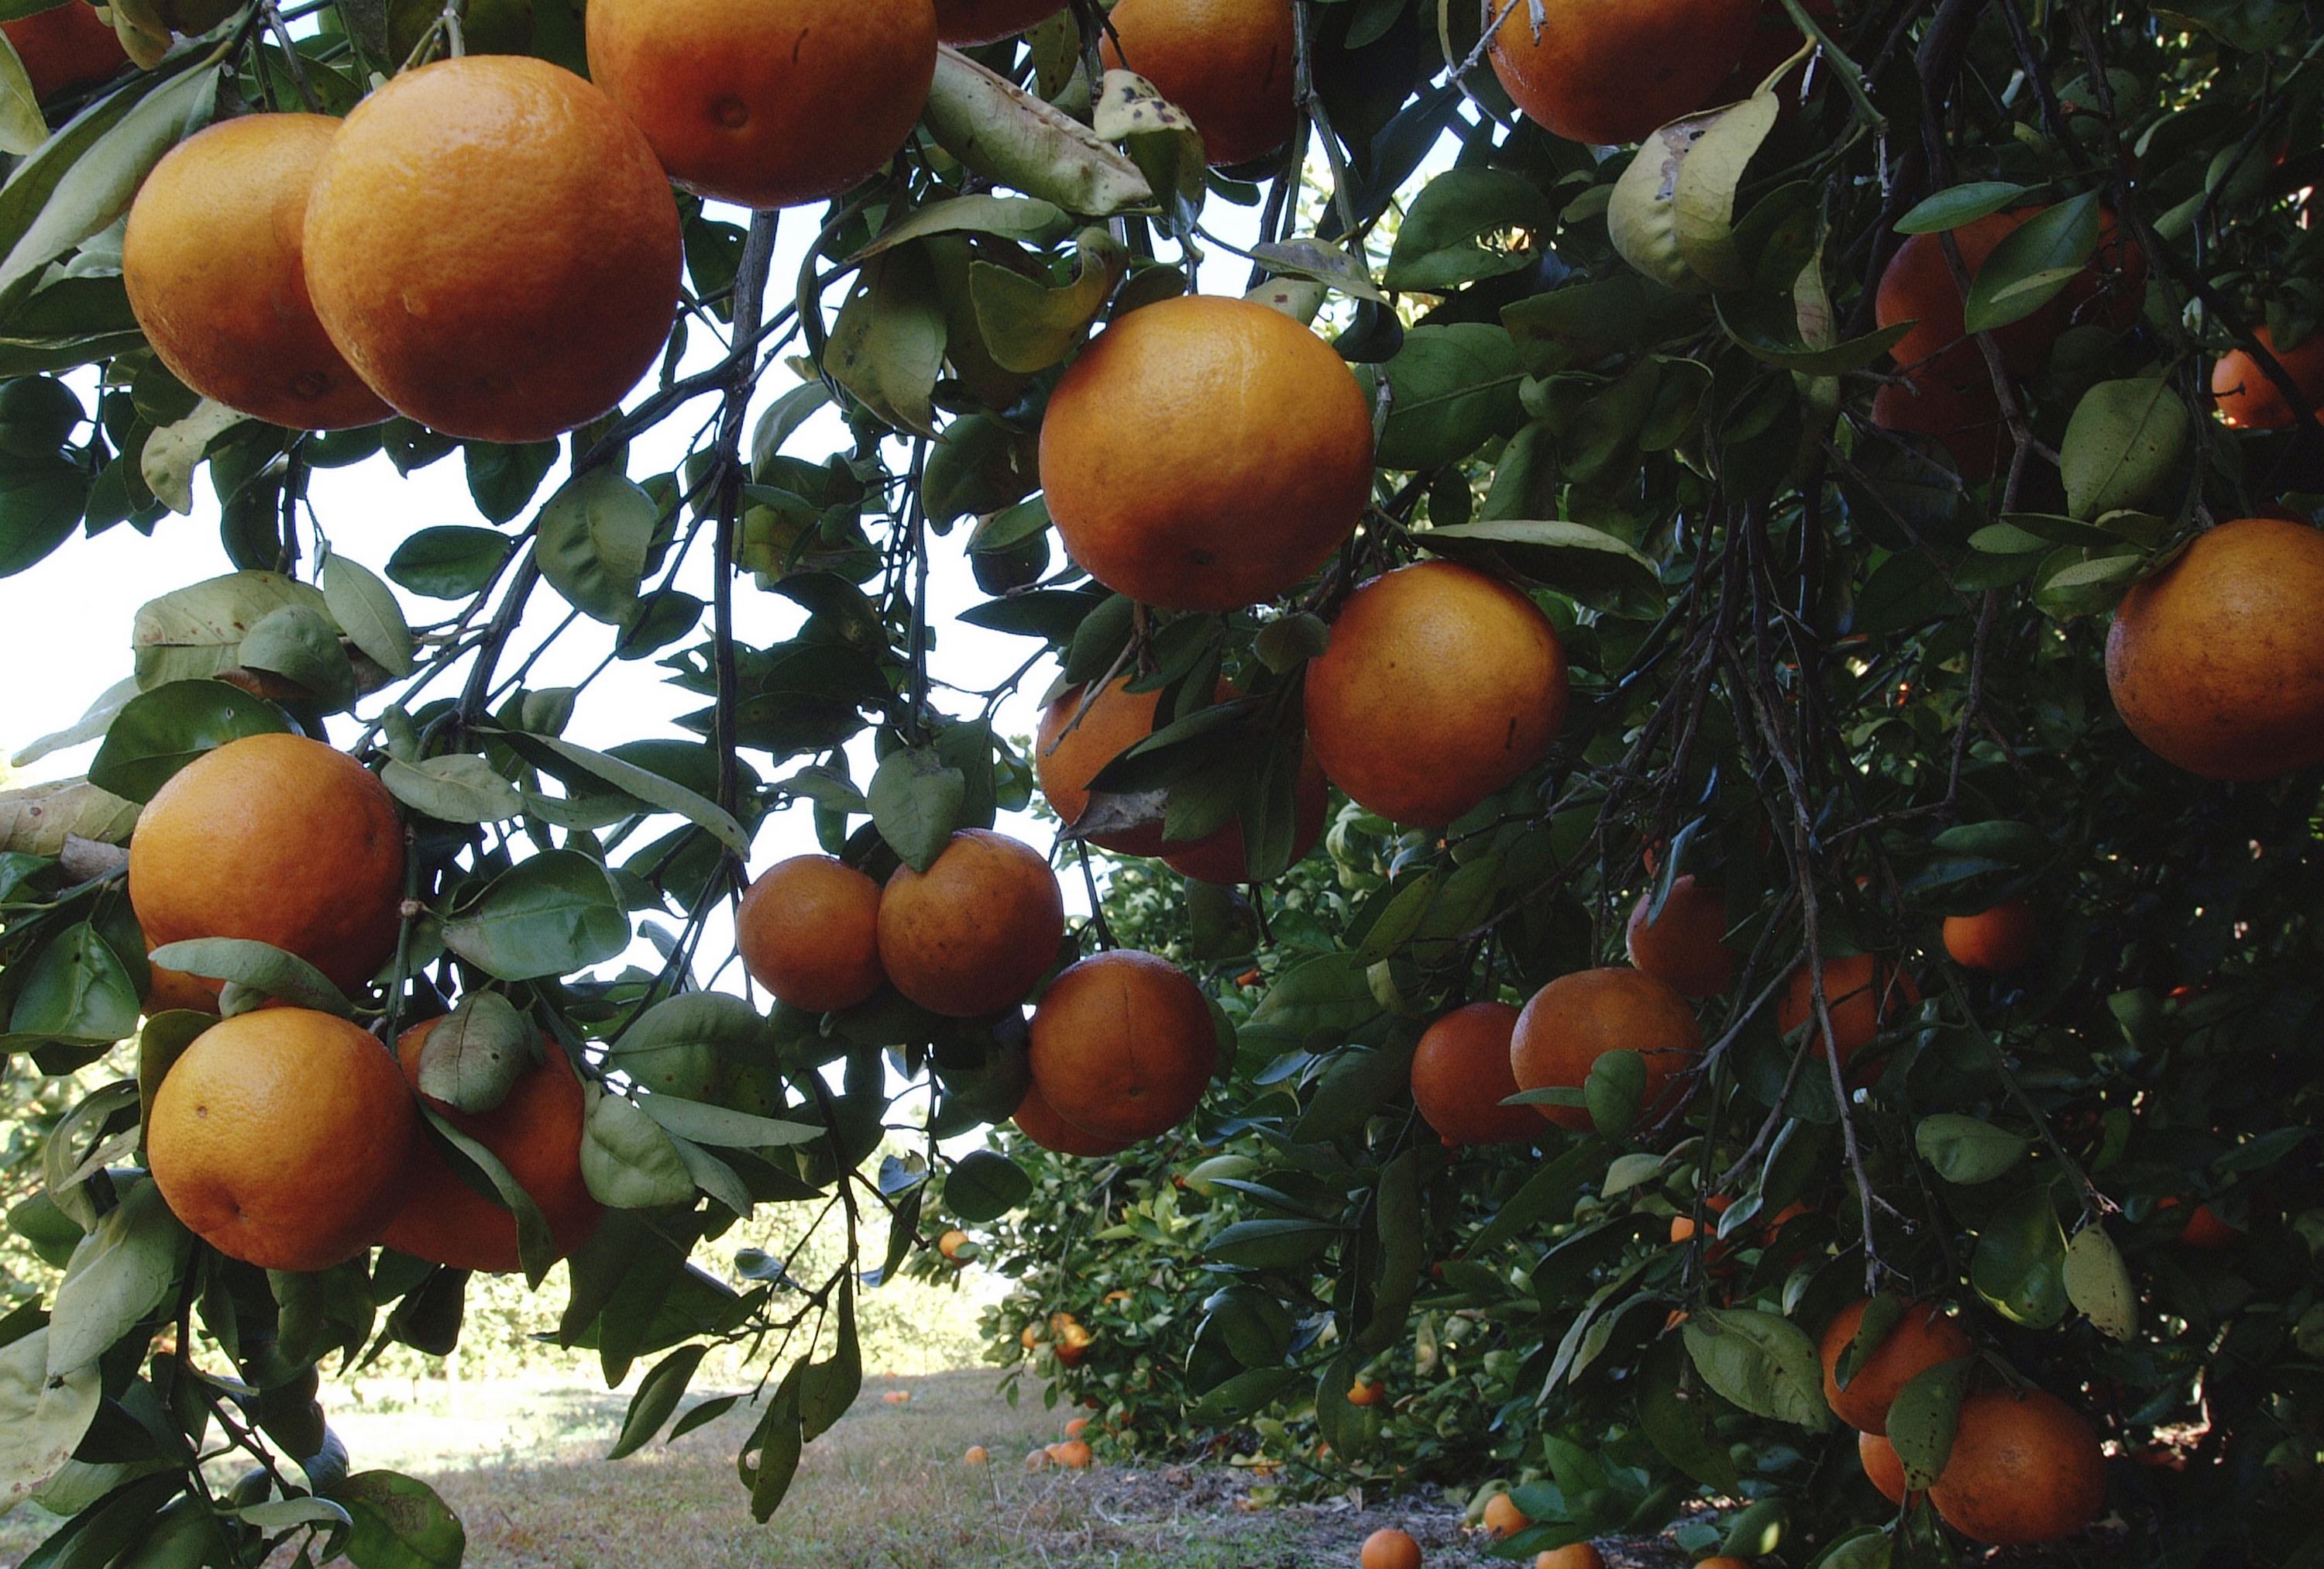
As you have read in other articles in this blog, it is too early to fertilize your lawn; however, this is a good time to start fertilizing your citrus to ensure a healthy fruit crop later in the year.
Orange grove at the University of Florida. UF/IFAS photo by Tara Piasio.
Citrus benefits from regular fertilization with a good quality balanced citrus fertilizer that also contains micronutrients. A balanced fertilizer has equal amounts of nitrogen, phosphorus and potassium such as a 6-6-6, 8-8-8 or a 10-10-10. The amount of fertilizer to be applied will vary on the formulation; for example you will need less of a 10-10-10 than a 6-6-6 as the product is more concentrated. Always consult the product label for the correct amount to use for your particular trees. Fertilizer spikes are not recommended as the nutrients are concentrated in small areas and not able to be widely available to all plant roots.
The number of fertilizations per year will vary depending on the age of the tree. Trees planted the first year need 6 light fertilizations that year starting in February with the last application in October. In following years, decrease the number of fertilizations by one per year until the fifth year when it is down to 3 fertilizations per year. From then on, keep fertilizing 3 times per year for the life of the tree. Good quality citrus fertilizer will have accurate and specific instructions on the label for the amount and timing of fertilizer application.
Fertilizer should be spread evenly under the tree but not in contact with the trunk of the tree. Ideally, the area under the drip line of the tree should be free of grass, weeds and mulch in order for rain, irrigation and fertilizer to reach the roots of the tree and provide air movement around the base of the trunk.
If you have not in recent years, obtain a soil test from your local extension office. This can detect nutrient deficiencies, which may be corrected with additional targeted nutrient applications.