by Daniel J. Leonard | Feb 2, 2021
There is an old saying that rings true in pretty much any situation – “You get what you pay for.” Gardening tools, especially pruners, are no exception. We’ve all been there, fumbling around with a pair of rusty, dull, cheap garden pruners that just barely get the job done. Unfortunately, they can also do considerable harm to the plants you’re trying to improve, as anything short of a nice, sharp, clean cut introduces the potential for insect/disease infestation and will produce a wound that takes much longer to heal, if it ever heals properly at all. You wouldn’t want your doctor to start hacking away at you with a dirty, second-rate scalpel. Don’t subject your plants to the same treatment! While I’m not advocating blowing hundreds or thousands of dollars outfitting your garden tool shed with top of the line everything, investing in a pair of quality bypass hand pruners will pay dividends many years into the future and make your gardening experience much more enjoyable!

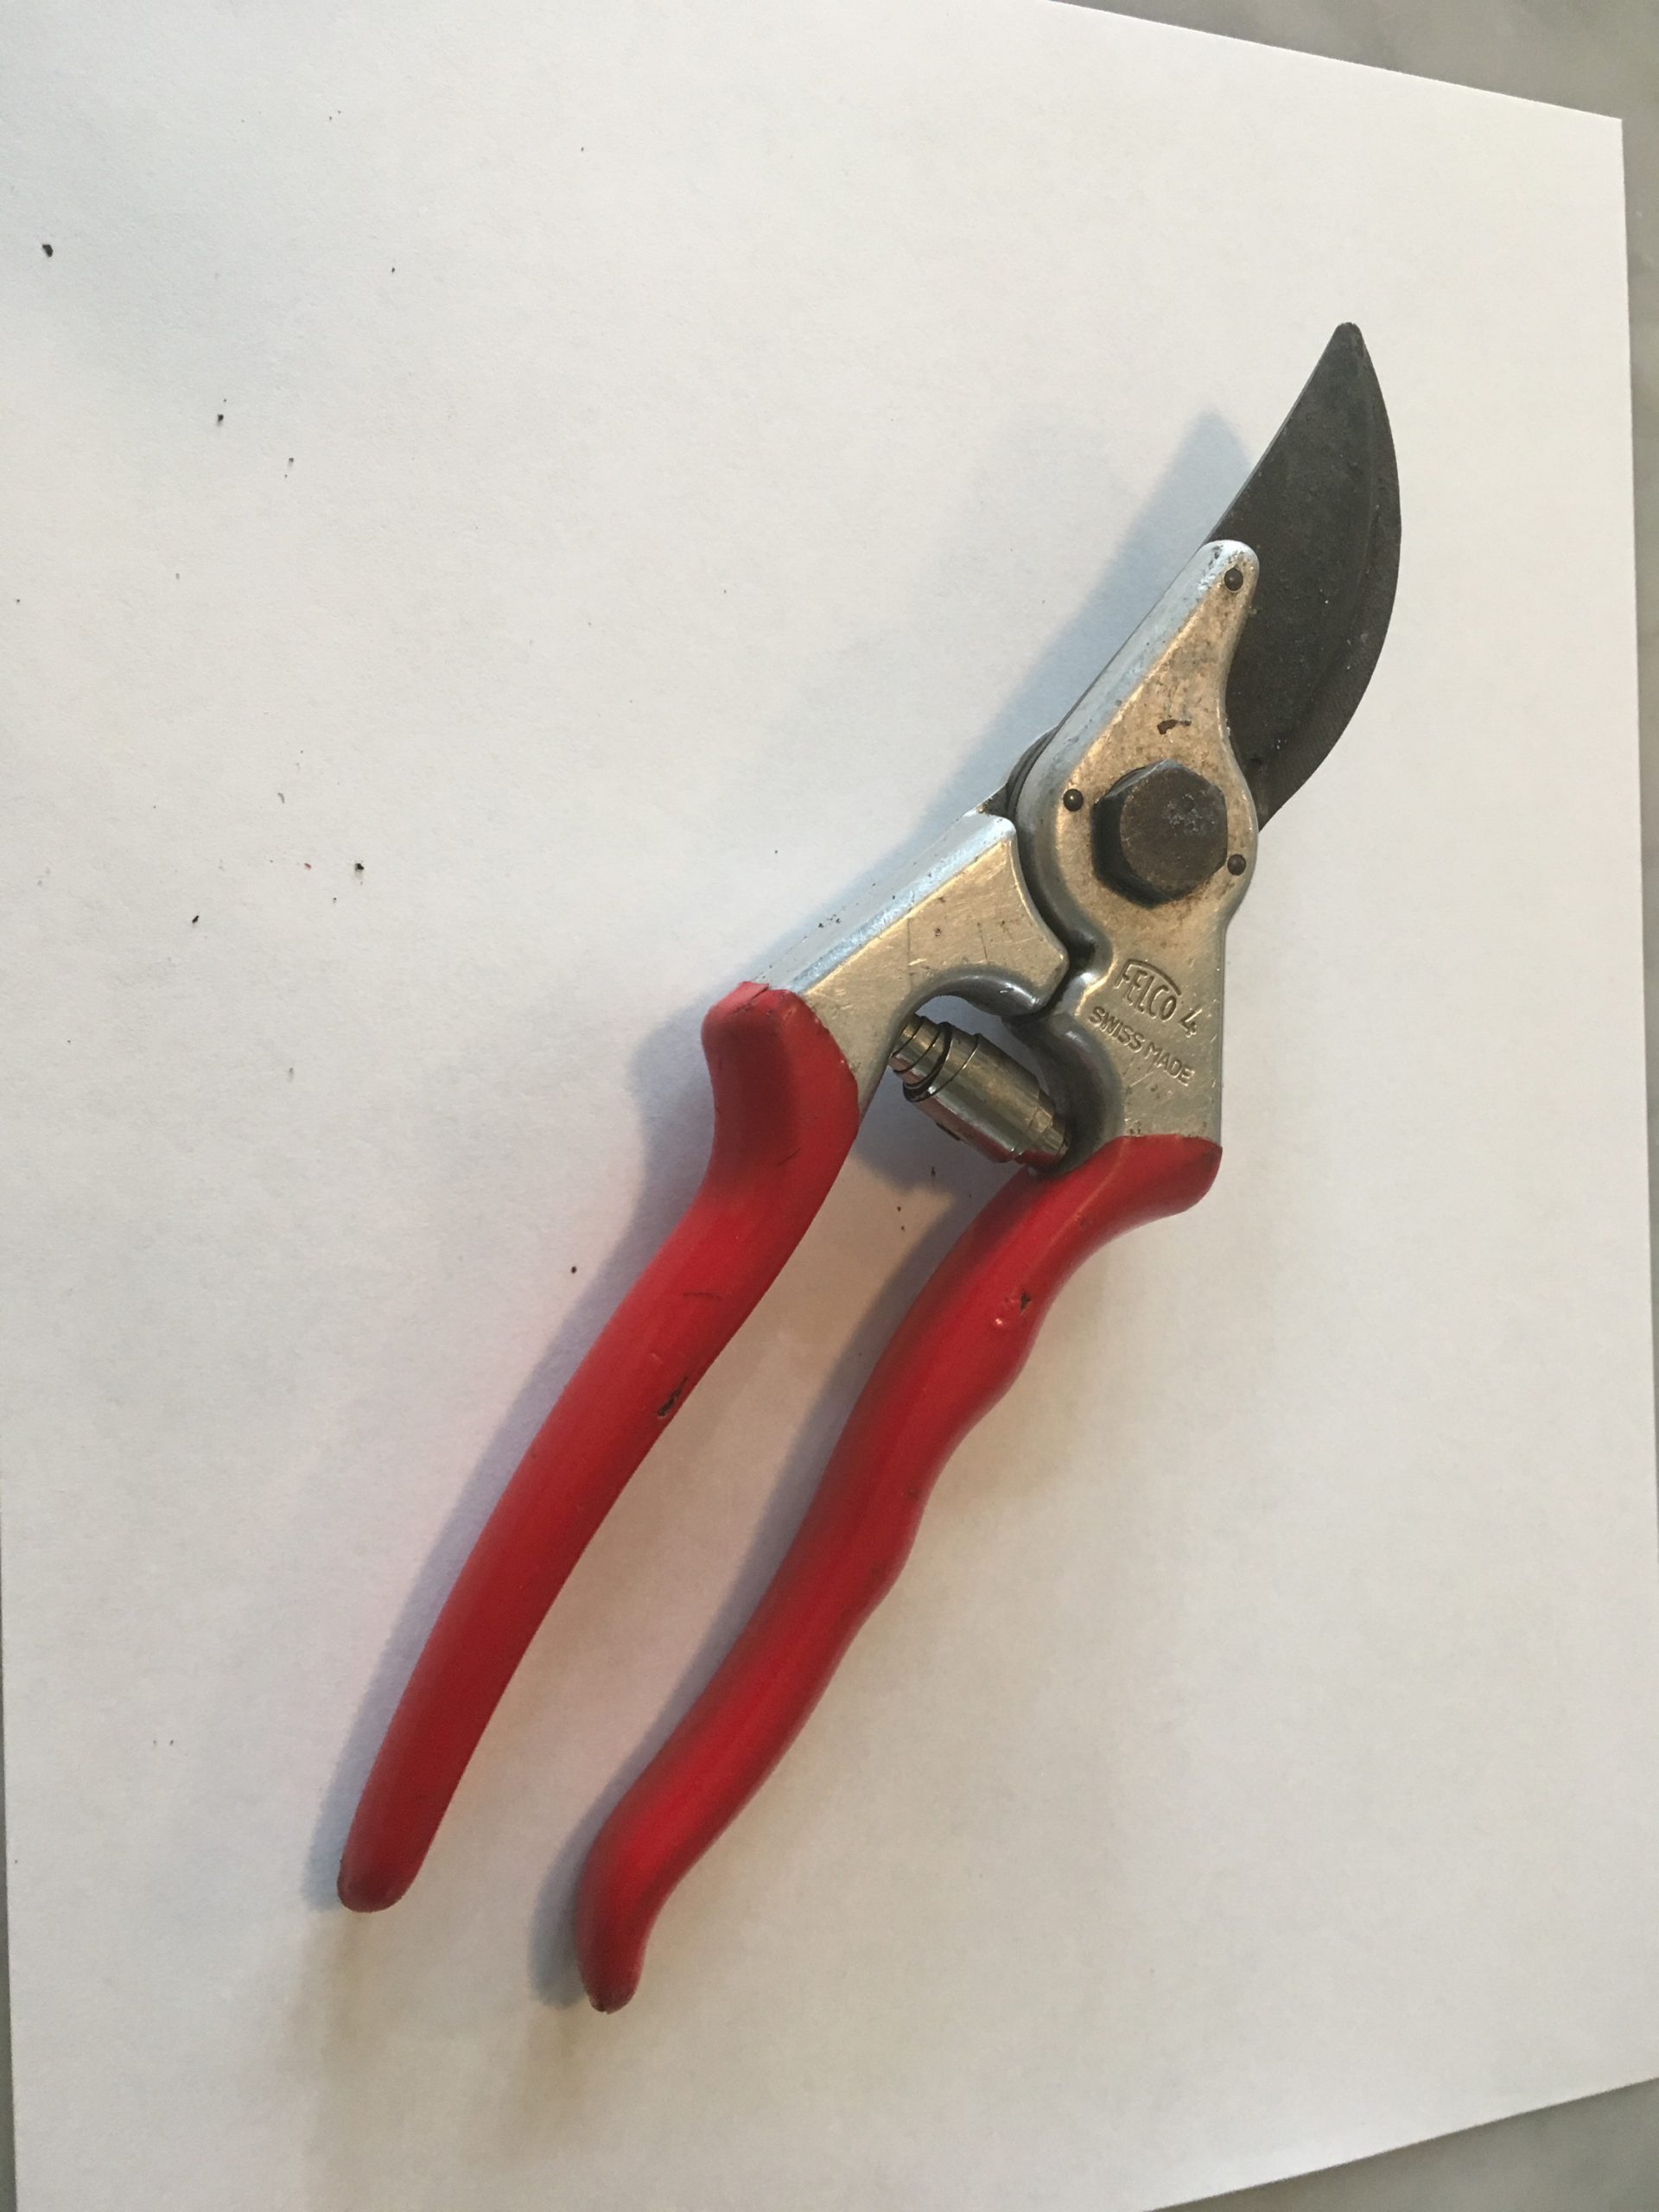
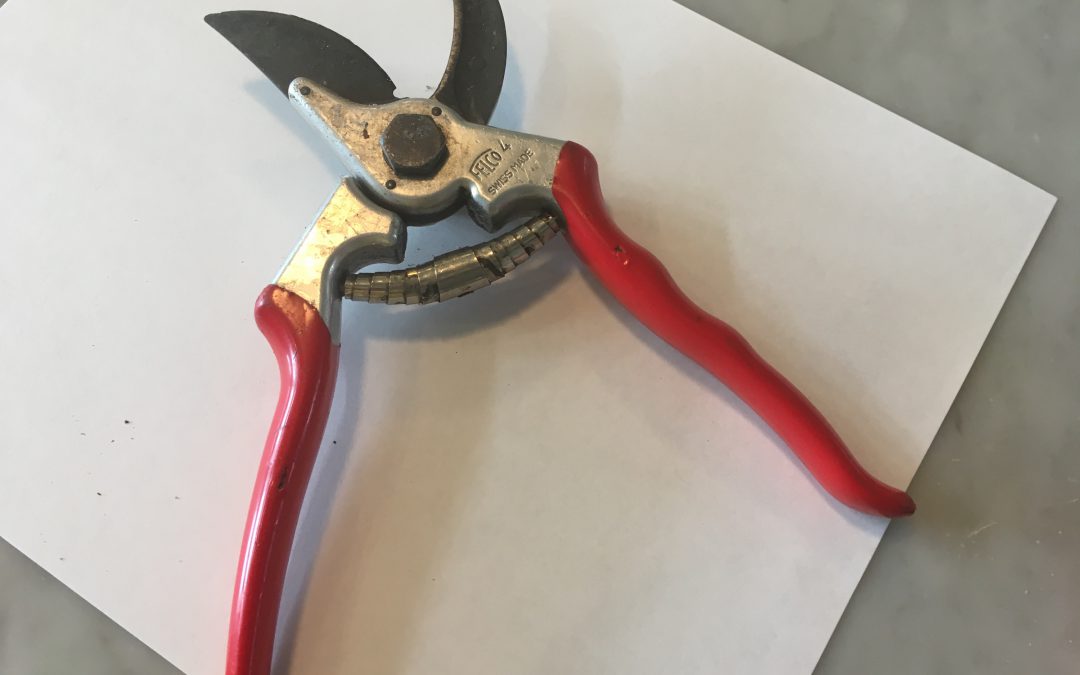
The classic Felco #4 bypass hand pruners. Photo courtesy of Walton County Master Gardener Andrea Schnapp.
Found in three designs, from old-fashioned anvil pruners that smush and smash their way to a cut, to ratcheting pruners that make short work of larger branches but tend to be cumbersome and complicated, to bypass pruners that produce clean cuts in a scissor-like manner, hand pruners accomplish many tasks in the landscape. From cutting small limbs, to harvesting vegetables, to deadheading annual flowers and everything in between, there isn’t a more frequently used, versatile tool. Therefore, it makes sense to buy a quality pair that will perform excellently, still be snipping long after your pruning days are over (if you take care of them), and that are comfortable enough you will enjoy using them. When shopping for your pair of “forever” pruners, there are a few things to look for.
- Only use bypass style pruners. Your plants will appreciate it.
- Look for heavy duty pruners with frames made from quality aluminum or stainless steel; they won’t rust and won’t easily bend or break.
- Buy pruners with replaceable parts. This is especially key because springs eventually rust and gum up and blades break and will eventually lose their ability to hold an edge over time (though you can and should resharpen them).
There are two commonly found brands that fit all three above criteria, albeit at different price points. For a high quality “budget” blade, various models from Corona do an excellent job for the money ($20-30) and won’t hurt your feelings too badly if you happen to lose a pair. Should you decide to splurge a little, Felco makes sharp, indestructible pruners, in multiple models around $50 to fit all size hands. Felco has become the horticulture industry standard and you’d be hard pressed to find a nursery owner or landscaper that didn’t own a pair (or two).

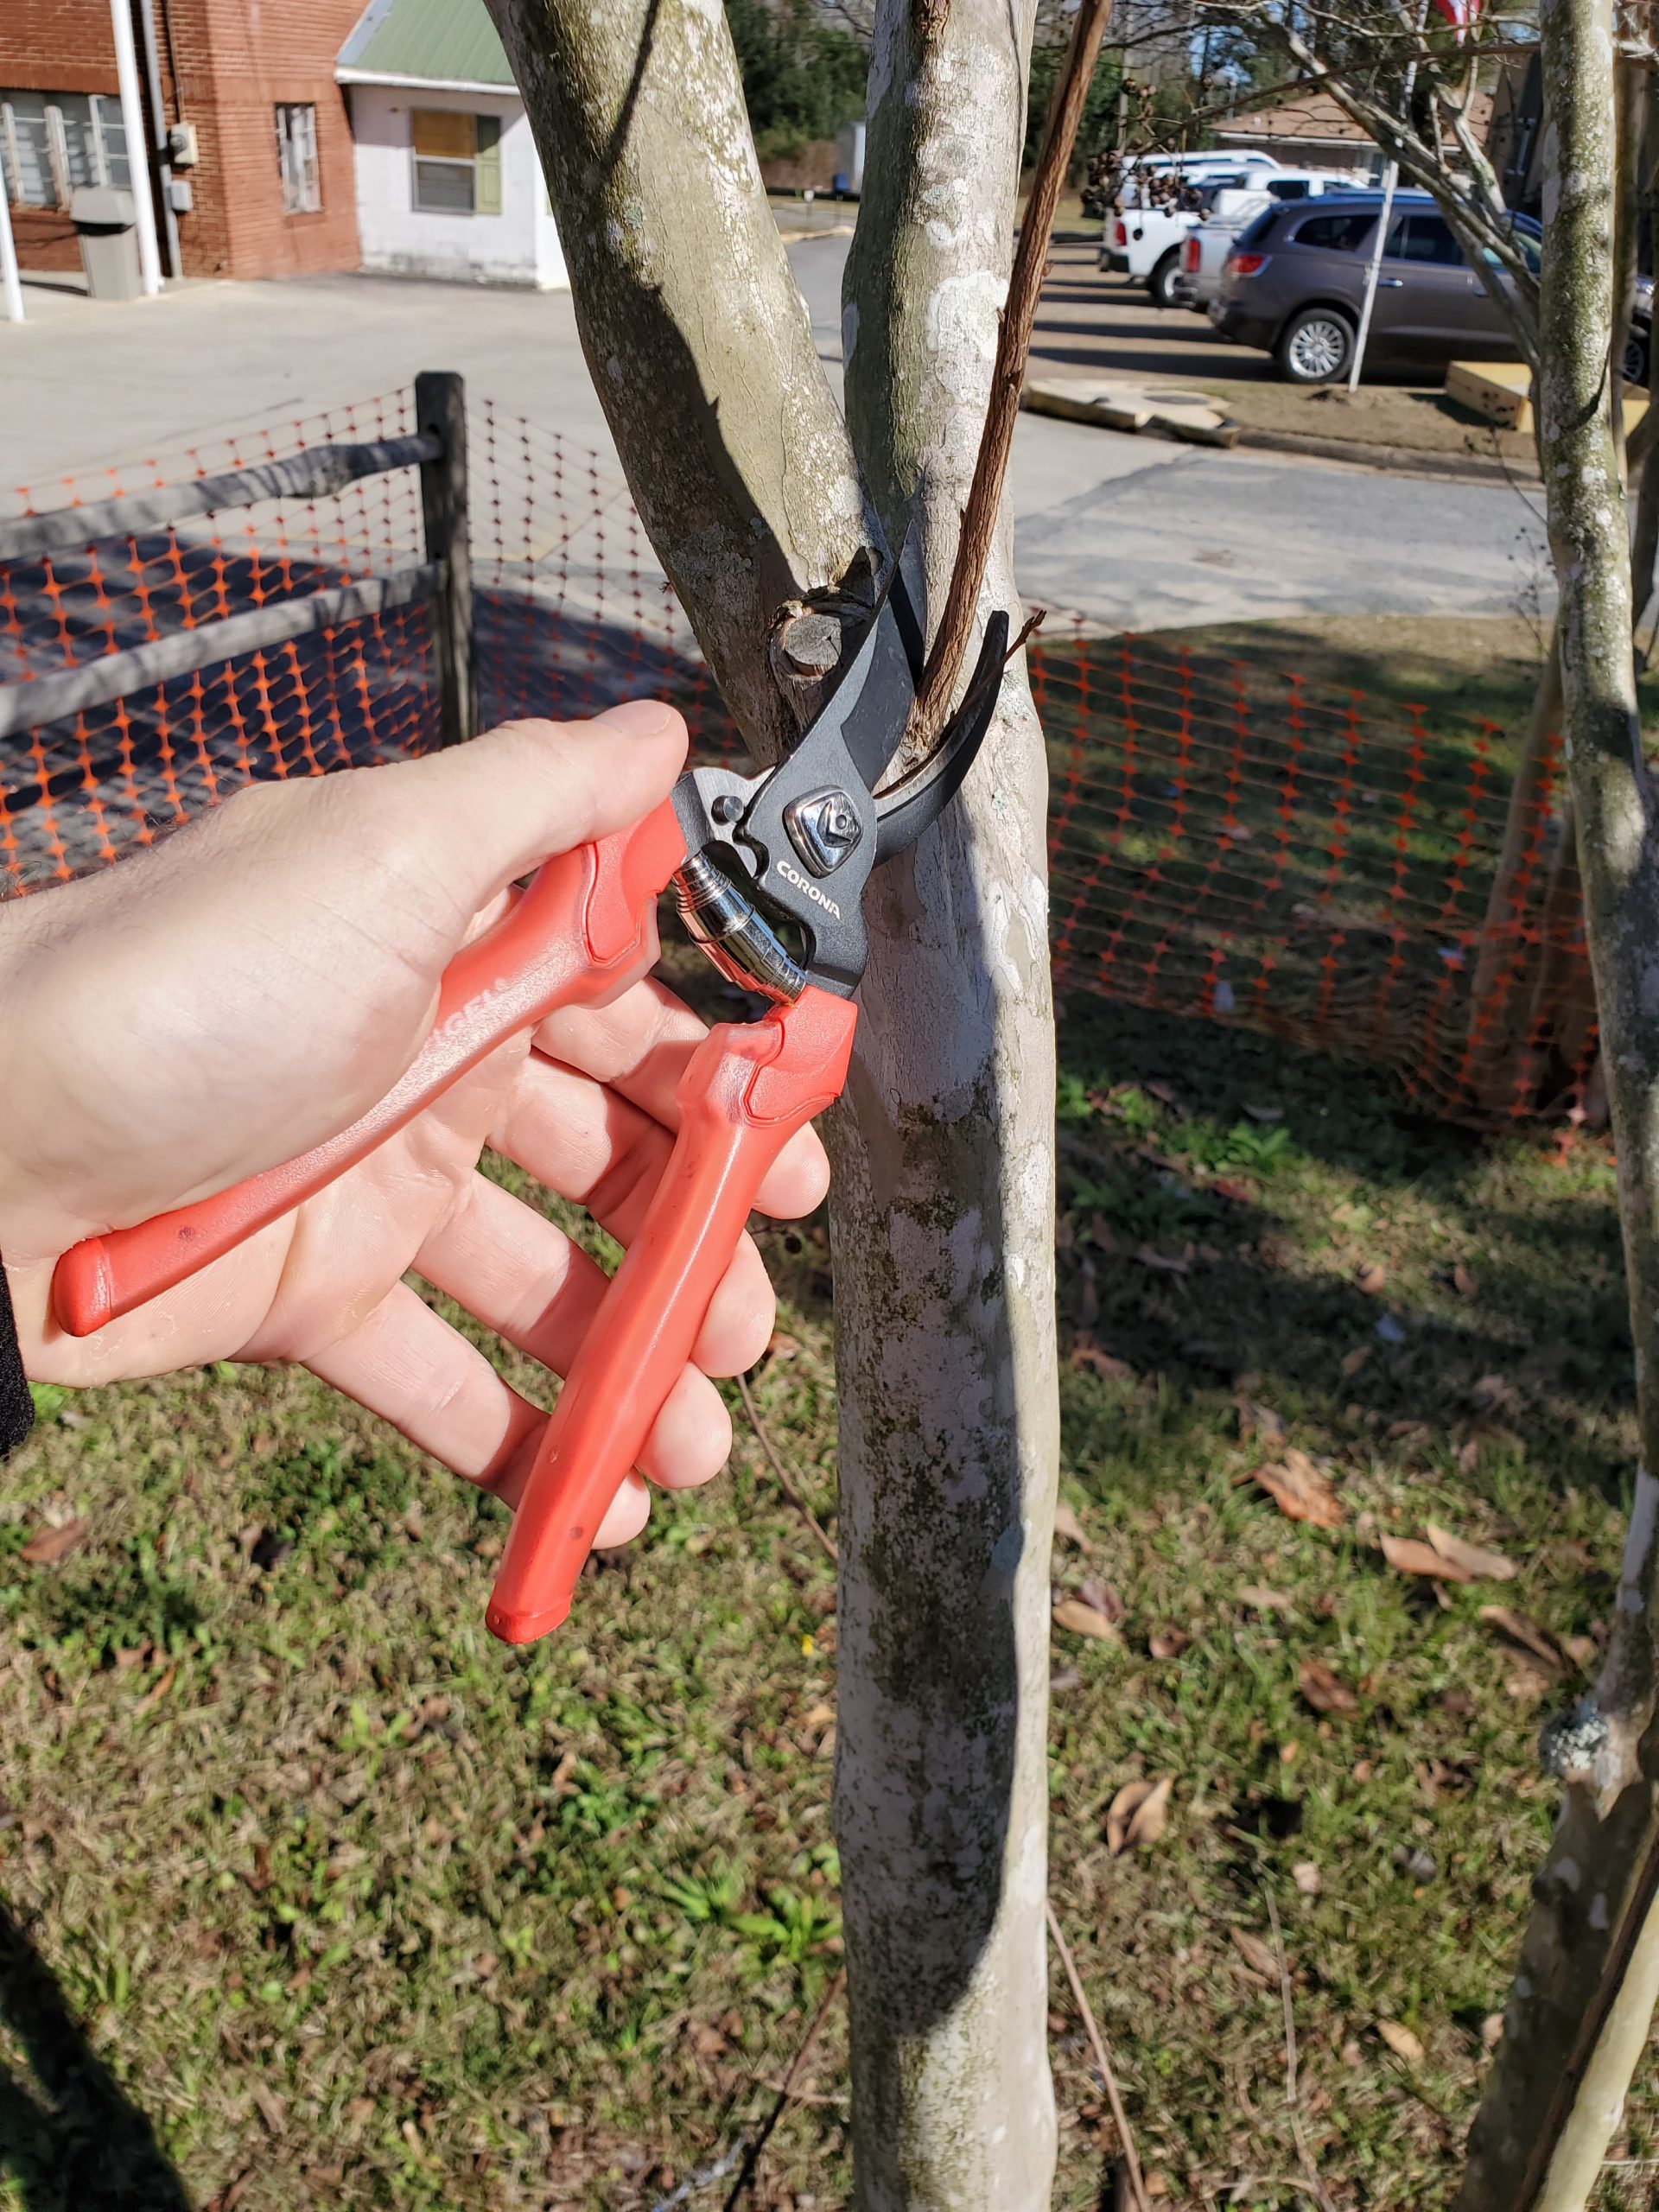
Corona ComfortGel bypass hand pruner. Photo courtesy of Daniel Leonard.
Regardless of which brand you buy (and there are many more than the two above listed) a pair of well-made pruners, if taken care of, should last a lifetime and make your gardening experience much more enjoyable for you and your plants! If you have any questions about gardening tools or equipment or any other horticulture or agronomic topic, feel free to contact your local UF/IFAS Extension Office. Happy Gardening!
by Sheila Dunning | May 27, 2020
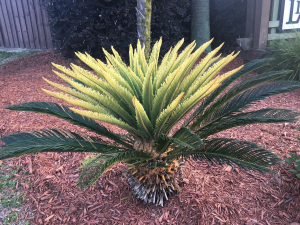
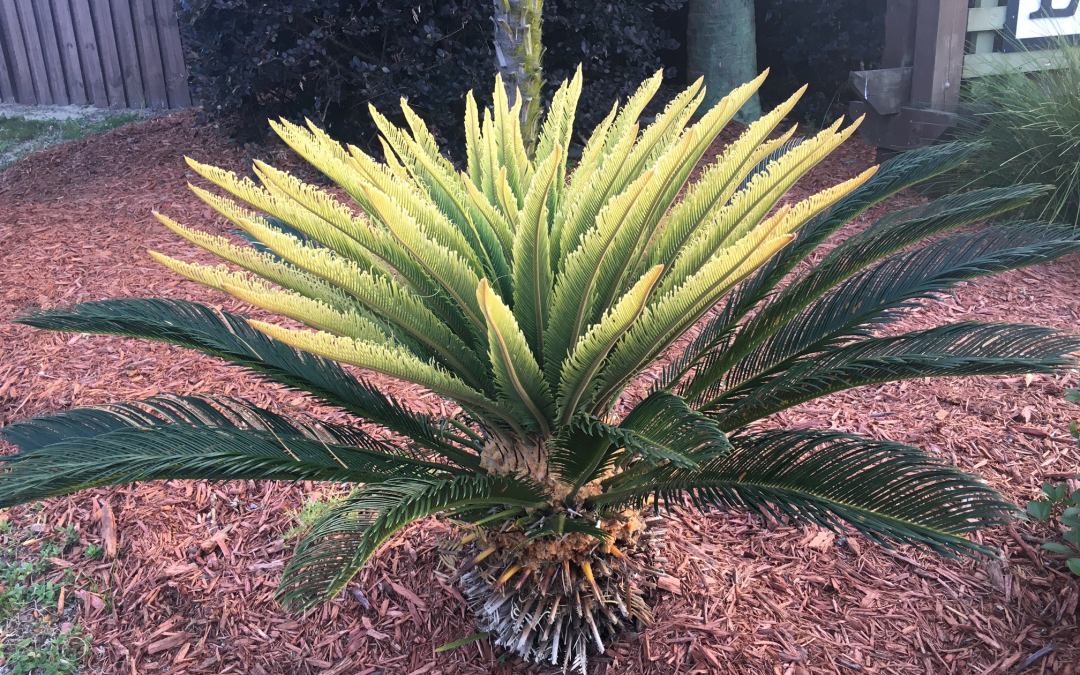
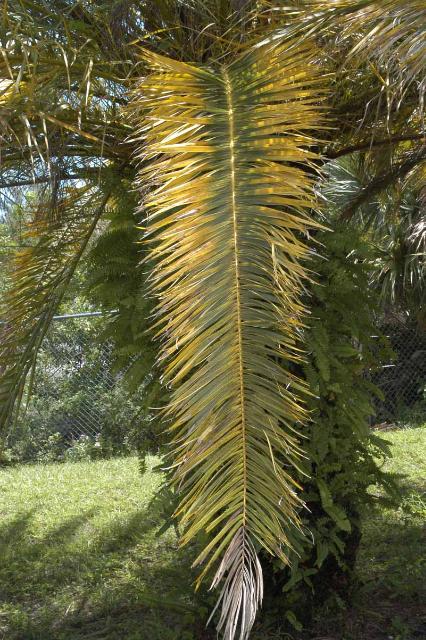
Photo by: Sheila Dunning
The first sign that something is going wrong in a plant is often a loss of the color green. When a sago is forming all new yellow leaves it is a matter of concern. Typically, this a common nutritional deficiency – manganese. Sandy soils of the Panhandle have a hard time retaining nutrients. Manganese and other micronutrient availability is highly influenced by soil pH. Being an essential plant nutrient, manganese is critical to growth. More specifically, it is the base of the metalloenzyme cluster of the oxygen evolving complex (OEC) in photosystem II (PSII). I hope that means more to you than it does me. Basically, manganese is part of the photosynthetic activity and since it isn’t very mobile in the plant, the new growth of sagos turns yellow.
If the nutrient deficiency isn’t corrected, the newly-formed leaves will become deformed and turn brown. In a sago this is referred to as “frizzle-top”. Many people believe the plant has a disease when they see the symptoms and may apply fungicides to no avail. Keep in mind the discoloration of the affected leaves cannot be reversed. However, manganese replacement in the soil will enable the sago to form normal leaves with the next growth phase. Damaged fronds can be removed later to improve the appearance of the sago over time.
Begin this process by determining the soil pH through a soil test. Your local Extension office can help you obtain lab submission forms and explain the collection procedure. Manganese is most available for uptake by sagos when the soil pH is between 5.5 and 6.5. If the pH is above 6.5, larger amounts of manganese will have to be present before the plant can utilize it. When the soil pH is below 5.5 the nutrient is quickly leached out of the soil during rain events.
To correct a manganese deficiency the sago plant will need to receive manganese sulfate. The product is readily available at local nurseries, garden centers and building supply stores. The amount needed for each plant will vary with the size of the sago and the existing soil pH. Sagos growing in sandy, acidic soil will require less manganese sulfate than those in high pH soils. Refer to the package label for application rates.
by Matt Lollar | Jan 13, 2020
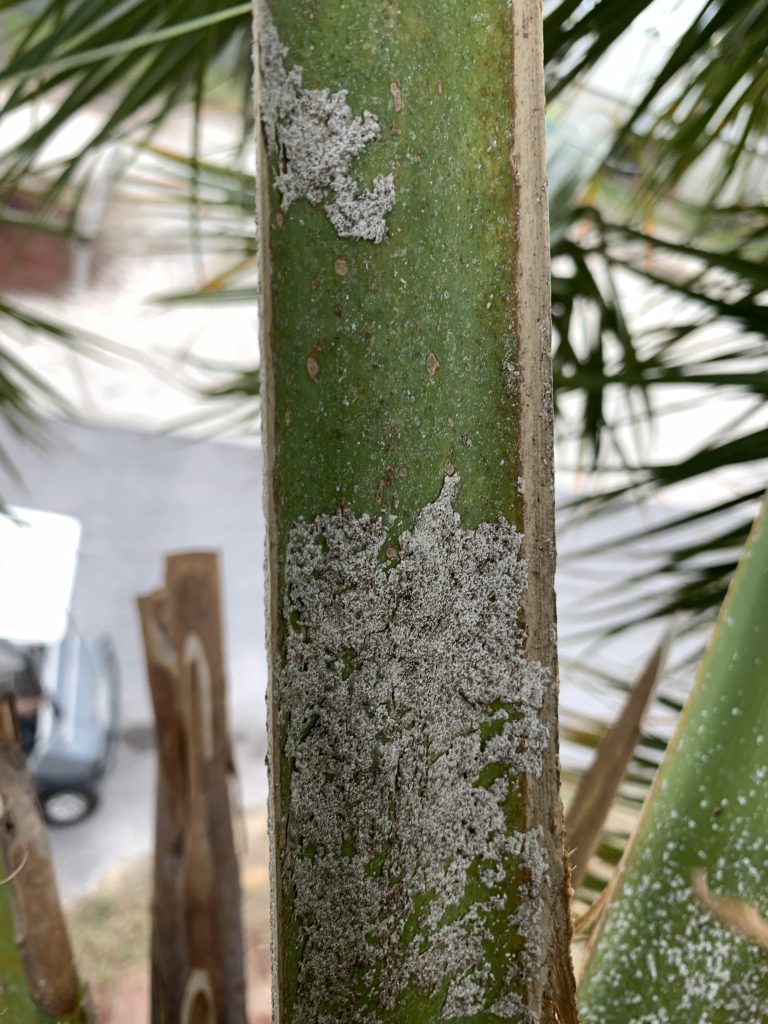
Scale insects on a cabbage palm (Sabal palmetto). Photo Credit: Matt Lollar, University of Florida/IFAS Extension – Santa Rosa County
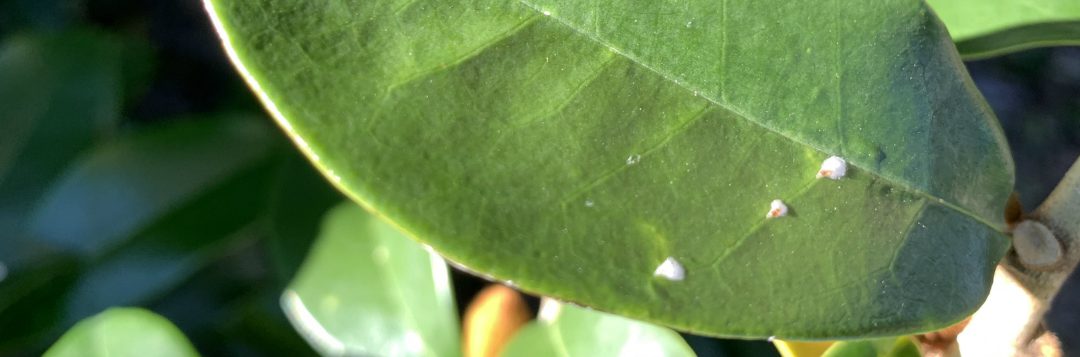
This week I was on a couple site visits to look on some cabbage palms (Sabal palmetto) and some banana shrubs (Michelia figo). The palms had a white, waxy substance on their frond petioles and the banana shrubs had white specs on the tops of their leaves. Upon further investigation, I realized the waxy substance and specs were both different species of scales. Scale insects are serious pests of a number of ornamental plants. Here in Florida there are 13 different families of scales with the most common being armored scales, soft scales, and mealybugs. Scales have piercing-sucking mouthparts which they use to siphon fluids from the leaves, stems, and sometimes roots of many ornamental plants. Heavy infestations cause extensive leaf yellowing, premature leaf drop, branch dieback, and eventually plant death.
Scale Biology
The life cycle of a scale begins with eggs being laid beneath wax coverings or beneath the adult female. Eggs typically hatch in 1 to 3 weeks. The newly hatched nymphs, called crawlers, move around a plant until they find a spot to feed. Once a feeding site is located, their piercing sucking mouthparts are inserted into the plant and the crawlers begin to feed and grow. The males of many scale species develop wings as adults and fly to other plants to reproduce.
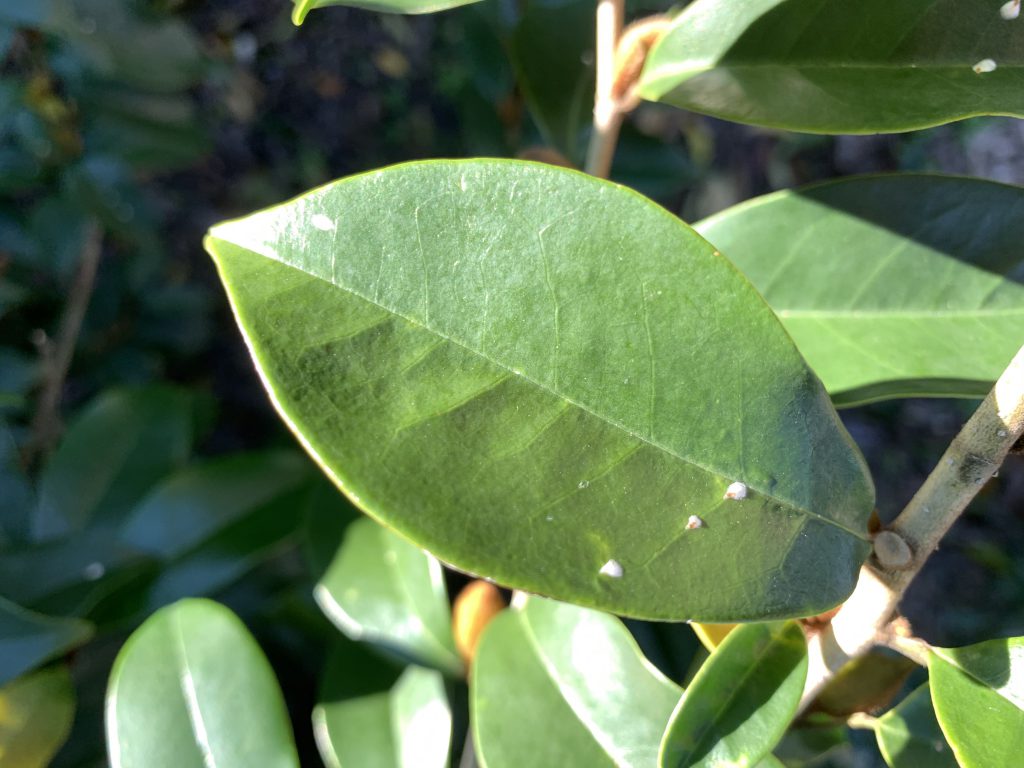
Magnolia white scales on a banana shrub (Michelia figo). Photo Credit: Matt Lollar, University of Florida/IFAS Extension – Santa Rosa County
Armored Scales
Armored scales get their armor by secreting a waxy covering over their bodies that is not attached. The scale lives under this covering and uses it as a protection to feed under. Armored scales can be almost any color or shape and range anywhere from 1/16 to 1/8 inch in diameter. For females, these shapes range from circular to oval to long and slender. The males typically have coverings that are more elongate and smaller than the females. As adults, the males are tiny, winged, gnat-like insects and are rarely seen.
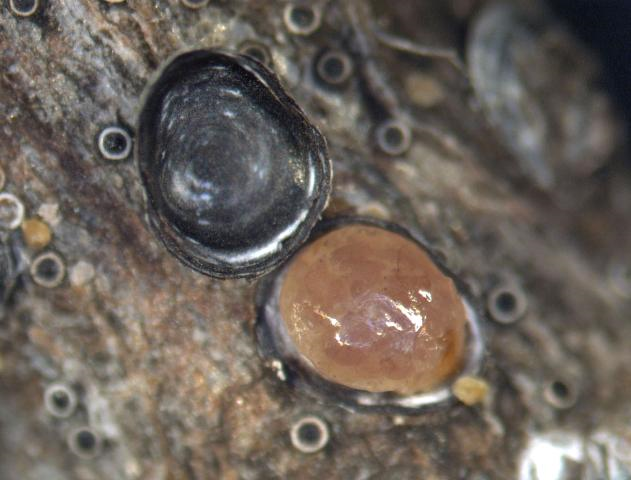
Gloomy scale (Melanaspis tenebricosa) with armored covering removed. Photo Credit: A. G. Dale, University of Florida/IFAS
Soft Scales
Similar to armored scales, soft scales secrete a waxy covering, but it is attached to their bodies. Soft scales can be a number of colors, shapes, and sizes and range anywhere from 1/8 to 1/2 inch in diameter. Their shapes vary from spherical to nearly flat.

Population of adult and immature tuttle mealybugs (Brevennia rehi) on a blade of zoysiagrass. Photo Credit: Lyle J. Buss, University of Florida/IFAS
Mealybugs
Mealybugs are soft-bodied insects that possess a covering of flocculent, white, waxy filaments. They are about 1/8 inch in length and usually pinkish or yellowish in color. Mealybugs have piercing-sucking mouthparts which they use to siphon fluids from the leaves, stems, and sometimes roots of many ornamental plants. Mealybug damage produces discolored, wilted, and deformed leaves.
Scale and Mealybug Management
- Cultural Control – Plant inspection prior to purchase or installation is the first line of defense against a scale or mealybug population. Make sure to inspect the undersides of leaves and plant stems. Infested sections of plants can be pruned and plant material should be cleaned from the planting area and discarded. Also, you can increase air flow and decrease humidity by proper installation and pruning. Over-fertilizing can also increase pest populations.
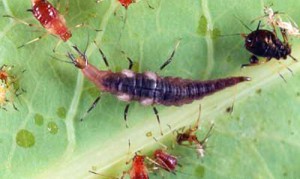
Larva of a brown lacewing. Credits: Lyle Buss, University of Florida.
- Biological Control – Predators, such as ladybugs and green lacewings, are usually present in large enough numbers to suppress scales and mealybugs to a desirable threshold. However, broad-spectrum insecticides and bad weather can reduce predator numbers. Look for signs of predation by inspecting dead scales for jagged holes in their waxy coatings. If predation signs are present, use more selective chemical controls and oils as opposed to broad-spectrum products.
- Chemical Control – Timing is everything when it comes to managing scale and mealybug insects. Crawler activity is more pronounced with the flush of new plant growth in the spring. Before application, prune infested plant parts off first to promote greater penetration of insecticides into the foliage. Dormant Oils are often used in the winter to smother scale insects. These are good choices to implement because they don’t harm non-target or beneficial insects. Care must be taken to read the label and use them at the correct temperature, since use in hot weather may burn foliage. Contact products (acephate, bifenthrin, carbaryl, etc.) must be applied to inhibit the crawler stages of these insects and systemic products (acetamiprid, imidacloprid, thiamethoxam, etc.) can be used on the sessile growth stage. Plants should be sprayed thoroughly to the point of drip or “run off” from leaves, twigs, and stems. Repeated applications may still be necessary even if the timing is right, as crawler populations are often large and crawlers like to hide under old waxy scales. Systemic drenches are also a viable option. With good spray coverage, horticultural oils can kill scales at all stages of growth. Refer to the product label for phytotoxicity and temperature guidelines. Even after successful treatment, the outer coatings of the scales may remain on the plant material for weeks, which can be unsightly. The best way to determine if scales are dead is to squeeze them. They will be dry when squeezed if they are dead and they will ooze liquids if they are living (they were at least alive to the point of being squashed).
For insect identification and additional information on scale control, please see:
A Guide to Scale Insect Identification
UF/IFAS Featured Creatures
Your County Extension Office
by Matt Lollar | Sep 7, 2019
A couple weeks ago, I was on a site visit to check out some issues on Canary Island Date Palms. The account manager on the property requested a site visit because he thought the palms were infested with scale insects. He noticed the issue on a number of the properties he manages and he was concerned it was an epidemic. From a distance, lower fronds were yellowing from the outside in and the tips were necrotic. These are signs of potassium deficiency with possible magnesium deficiency mixed in.
Transitional leaf showing potassium deficiency (tip) and magnesium deficiency (base) symptoms. Photo Credit: T.K. Broschat, University of Florida/IFAS Extension
Nutrient deficiencies are slow to correct in palm trees. It’s much easier to prevent deficiencies from occurring by using a palm fertilizer that has the analysis 8N-2P2O5-12K2O+4Mg with micronutrients. Even if the palms are part of a landscape which includes turf and other plants that require additional nitrogen, it is best to use a palm fertilizer with the analysis previously listed over a radius at least 25 feet out from the palms. However, poor nutrition wasn’t the only problem with these palms.
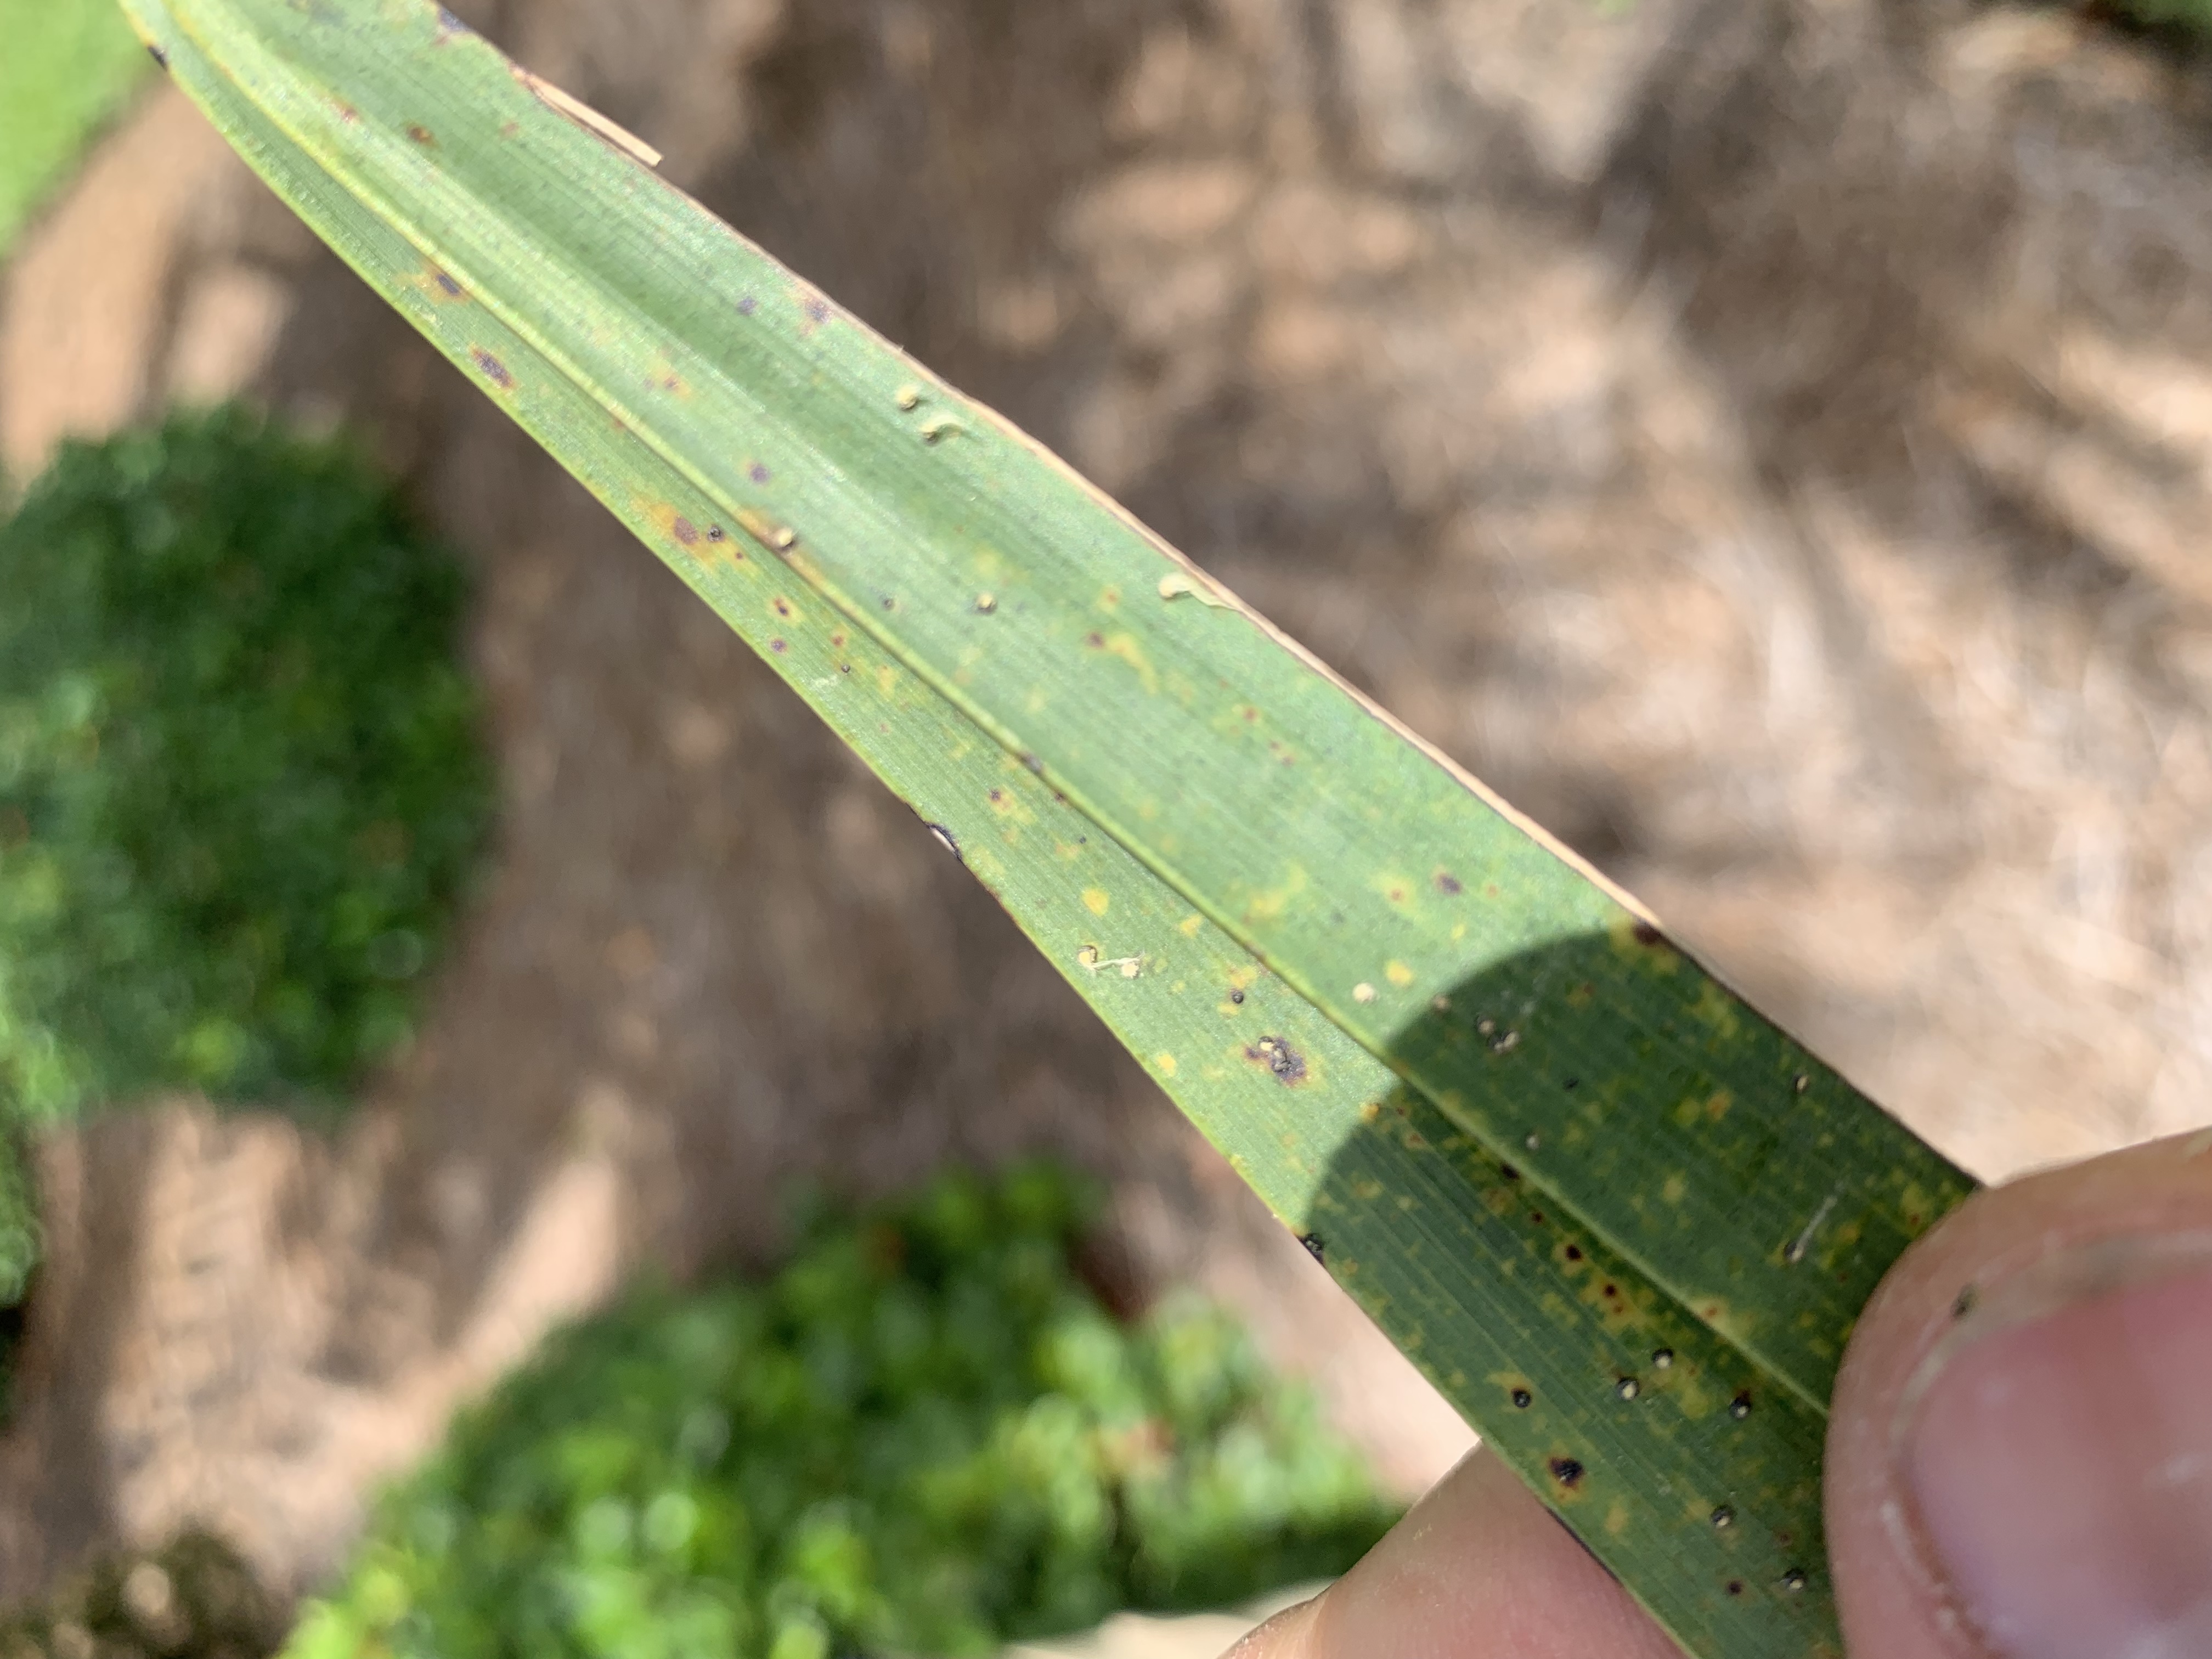
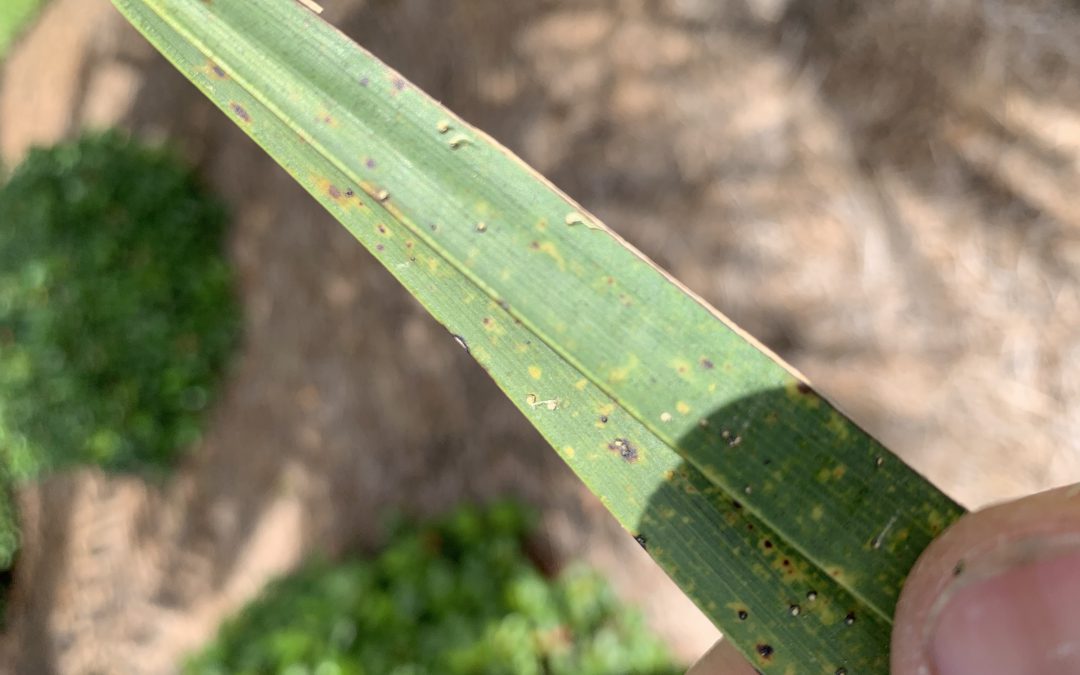
Upon closer look, the leaflets were speckled with little bumps. Each bump had a little white tail. These are the fruiting structures of graphiola leaf spot also known as false smut.

Graphiola leaf spot (false smut) on a Canary Island Date Palm. Photo Credit: Matt Lollar, University of Florida/IFAS Extension – Santa Rosa County
Graphiola leaf spot is a fungal leaf disease caused by Graphiola phoenicis. Canary Island Date Palms are especially susceptible to this disease. Graphiola leaf spot is primarily an aesthetic issue and doesn’t cause much harm to the palms infected. In fact, the nutrient deficiencies observed in these palms are much more detrimental to their health.
Graphiola leaf spot affects the lower fronds first. If the diseased, lower fronds are not showing signs of nutrient deficiencies then they can be pruned off and removed from the site. All naturally fallen fronds should be removed from the site to reduce the likelihood of fungal spores being splashed onto the healthy, living fronds. A fungicide containing copper can be applied to help prevent the spread of the disease, but it will not cure the infected fronds. Palms can be a beautiful addition to the landscape and most diseases and abiotic disorders can be managed and prevented with proper pruning, correct fertilizer rates, and precise irrigation.
by Beth Bolles | Jun 10, 2017
It is common in Northwest Florida for palms to show signs of nutrient deficiencies. In general our sandy soil is often nutrient poor and available nutrients can easily move out of soils with frequent rainfall. In landscapes where fertilization is occurring, often the wrong types of fertilizer are applied. Fertilizer miss-application actually increases nutrient problems for the palm.
Palms can be deficient in many nutrients but the most common deficiencies we see in landscapes are from inadequate amounts potassium and magnesium. The simple solution would be to purchase a fertilizer labeled for palms to correct the problem. The difficulty is that most easily available fertilizers for palms do not have the correct form of nutrients that are required for the problems. With the exception of nitrogen, all other nutrients are in a quick release form so while the slow release nitrogen lasts for 2-3 months, all other nutrients have been used up. In response, the palm is encouraged to grow by the nitrogen but does not have enough of the other critical nutrients to carry out vital plant functions. What we see is often older leaves that are yellowing, browning, and die off before they should because the plant is pulling any available potassium and magnesium from old fronds to support new growth. Without the application of proper nutrients to the soil, the deficiency can continue until even new fronds are affected or the palm dies.
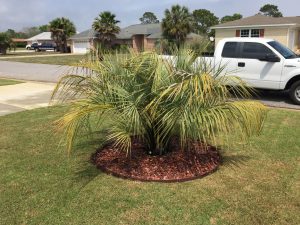
The fertilizer used for lawns does not have all the slow release and correct forms of nutrients for the palms. Older leaves turn yellow and brown indicating potassium deficiency. Photo by Beth Bolles, UF IFAS Extension Escambia County.
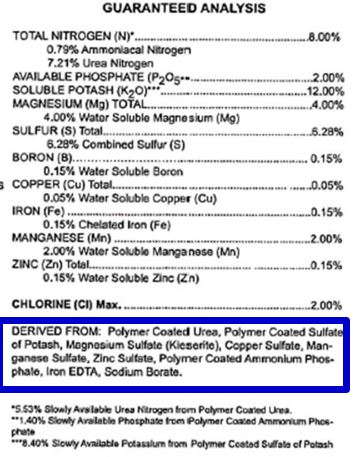
There is a solution that will help keep your palms healthy and attractive. Make sure you choose a specially designed fertilizer that has all nutrients in slow release form. Look for an analysis such as 8-2-12-4 (Nitrogen-Phosphorus-Potassium-Magnesium). Also read further on the label for Polymer Coated Sulfate of Potash, Magnesium Sulfate (Kieserite), and Chelate (Iron EDTA). These are the forms of nutrients that will be beneficial to your palms.

Look in the area ‘Derived From’ (outlined in blue) on your fertilizer label to find the forms of nutrients. Photo by Dr. Monica Elliott, US/IFAS Extension.
If you have a mixed landscape where the palms are planted in the lawn, be sure to keep all lawn fertilizers out of the root zone of the palms. Lawn fertilizers do not have the correct forms of nutrients for palms. Remember also that palms roots extend many feet beyond the palm canopy so your ‘no lawn fertilizer zone’ may be past the mulch ring.
The recommendation from the University of Florida is 1.5 pounds of fertilizer over a 100 square foot area. Broadcast this on top of the ground and lightly water after application. In North Florida, you will likely apply the correct palm fertilizer about at least two times in May and end of August or 1st of September. If you are not able to use a palm fertilizer with the correct form of slow release nutrients, it is best not to fertilize palms at all.
by Ray Bodrey | Oct 12, 2016
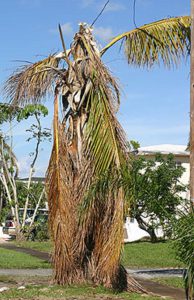
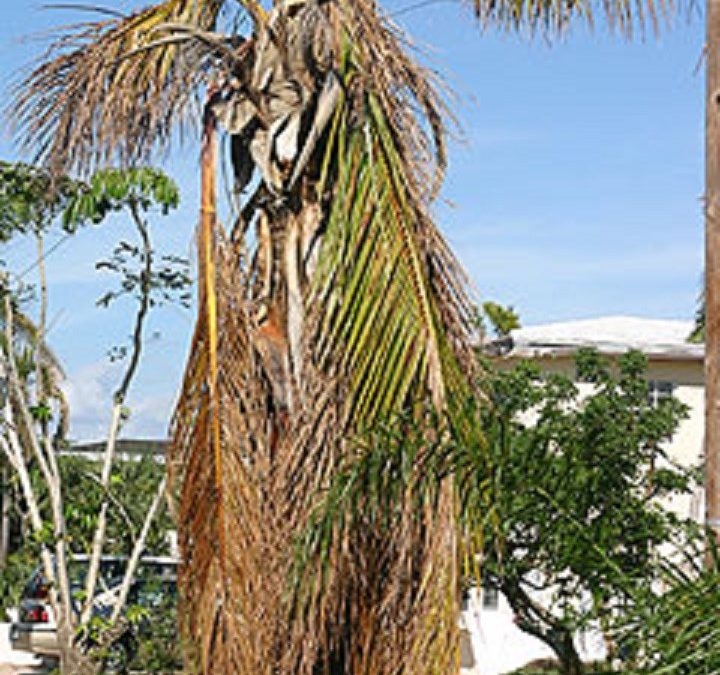
Figure 1: Palm damage after storm event.
Credit: Edward F. Gilman, UF/IFAS.
A common question after a tropical storm or hurricane event is will my palm tree recover? Palms grow different from other trees, so there’s definitely a different way to care for them post-storm.
The growing point of a palm tree is the bud, located in the top of the tree. This is where the palm fronds emerge. If this bud area becomes damaged, no new leaves will develop and unfortunately the tree will die. If by chance the palm tree has multiple-stemmed trunks, the undamaged trunk(s) should survive. Often times palm trees are so tall that it is very difficult to visibly determine if the bud has been damaged. Time will tell.
It’s important to wait at least 6 months to see if palms develop new growth. Palms usually rebound slowly after a storm. It may take a couple of years before the palm tree produces a full canopy of fronds. If a damaged palm tree is determined to be in peril and current rainfall is not sufficient, it’s important to irrigate three times a week for at least six weeks to assist in recovery.
After the storm strikes, it may be beneficial to perform pruning of the canopy. Start by removing any hanging broken or dead fronds that could be hazardous to people or property. It’s a good idea to remove any fronds that are covering the bud, as well. This will allow new fronds to form. Leave any bent green fronts attached. These fronds still have vital nutrients that the tree is utilizing. Once the frond turns brown, then it is safe for removal.
Storm damage cleanup is extremely dangerous, even for professionals. During cleanup after the storm, remember that safety comes first. Some general safety tips are essential, as in, do not work alone. It’s important to keep a well-stocked first aid kit too. Avoid overexertion at all costs. This is the most common cause leading to injury. Be sure to survey the area, identify the hazards and have a plan for the cleanup. Above all, create a safe area to work within.
Palm tree recovery from storms is a slow process, so please be patient and safe. Contact your local county extension office for more information.
Supporting information for this article can be found in the following the UF/IFAS publications:
“Assessing Damage and Restoring Trees After a Hurricane” by Edward F. Gilman, Mary L. Duryea, Eliana Kampf, Traci Jo Partin, Astrid Delgado & Carol J. Lehtola: http://monroe.ifas.ufl.edu/pdf/Hort/Assessing_Trees_After_Hurricane.pdf
An Equal Opportunity Institution.