The subject of plant propagation by leaf and cane is a continuation from my article on propagating plants by layering, written in late October. Plants can be generated in multiple ways with leaf and cane techniques emerging as a possible indoor winter and early spring project. Not all plants can be propagated with a leaf or parts of leaves. Fortunately, some of the plants that can are ones we all enjoy growing indoors or in protected areas outdoors, like a covered porch and other similar locations. Do an assessment of indoors windows with bright light and a few hours of sunlight for the best success. If you are fortunate to have a backyard greenhouse that is heated, you may want to try it there.
One of the simplest ways to grow a new plant is by clipping a leaf and petiole section off an existing plant that has certain characteristics you like (bloom color or the growth of the plant). African violets and sedum are plants that can be easily propagated in this manner. The length of petiole connected to the leaf should be around 1 ¼ – 1 ½ inches in length, this portion of the leaf will be planted in potting mix. I would suggest planting two in a small to medium sized container to increase the chance of a successful rooting and the new plant establishing. When the new plant leaves have emerged, usually in 6 – 10 weeks, they are clipped away from the original leaf and petiole. Some will reuse the original and replant, but I tend to discard and begin with a new one.
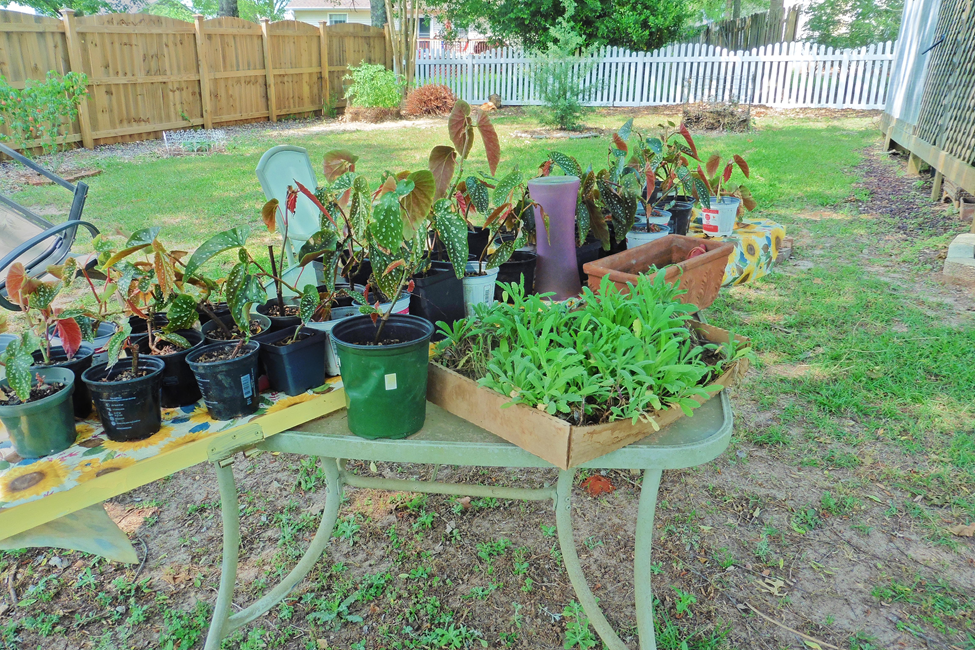
Plants being propagated by leaf cuttings. Photo Credit: University of Florida/IFAS
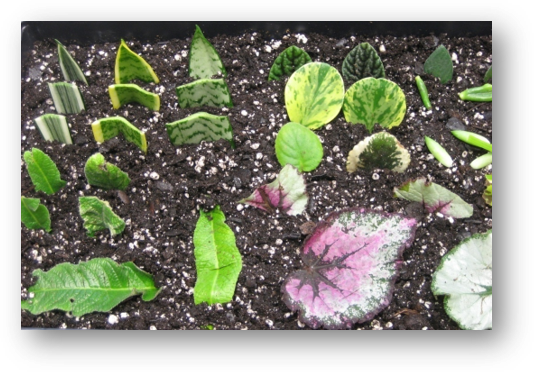
Next up is trying to propagate using a leaf without the petiole. This form of propagation can occur with plant that possess fleshy leaves that are thicker, with more energy to produce a new plant. The jade plant, snake plant and African violet are examples of plants that root and form new plants successfully in this way. Place a leaf or a piece of leaf vertically into a container filled with slightly damp plant media. Be sure the leaf midvein is placed into the soil as this will likely be the site of the new plant’s emergence.
Cane cuttings are yet another process for propagating a new plant. If you have ever grown a Dieffenbachia, better known as dumb cane or corn plant, they can become leggy and require staking to keep limbs from bending away from the center of the plant. If you look closely, you may see dormant adventitious buds (nodes). These buds will be the future leaf emergence area for the new plant. With a sharp clean knife cut remove a 6 – 10-inch section of the stem. The top leaf areas and smaller stem section can be removed and discarded.
Next, cut so that two stem sections are together with at least 2 nodes. Place the sections horizontally or vertically with the bottom third of the section indented into the potting media for go plant to soil contain. Make sure the node is facing upward. Once rooted with new leaves emerging, you may transplant them into a selected pot for future growth and establishment.
As mid to late spring arrives and the danger of frost passes, you can move the plants to a covered porch or under tall shade trees with filter sunlight for the summer and early fall. Enjoy creating new plants and maybe share a few with family and friends!
It’s always fun to add new plant to the landscape. And it’s even more fun to propagate your own plant material. The question is, what plant propagation method is best? The answer depends on a number of factors such as:
How much time and money is available?
Is a uniform crop desired or is trait variation preferred?
What is the plant species being propagated?
Plants can be propagated either by seed (sexual propagation) or by segments of vegetative material (asexual propagation). Sexual propagation takes far less time and effort because new plants are being started from the seeds (offspring) of parent plants. This type of propagation promotes genetic diversity because offspring may not have the exact characteristics of the parent plants. Sexual propagation increases the possibility of hybrid vigor, which is the improved quality of plant material to that of parent plants. Asexual propagation usually takes more time, but generally ensures that propagated plants will maintain the same characteristics as the parent plant. For some species it may be the only way to pass on desired traits to subsequent generations and it may be the only way to propagate certain species. A plant produced vegetatively can become larger than a plant produced by see in the same amount of time.
Tips for Successful Sexual Propagation
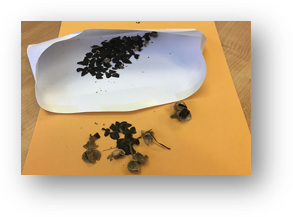
Seed Collection – Seeds should be collected when fruit is ripe, just before they fall to the ground. In general, seeds should be cleaned, dried, and stored at 40 degrees Fahrenheit (in a refrigerator). However, palm seeds should be planted immediately after harvesting and cleaning.
Seed Dormancy – Some seeds have thick seed coats the inhibit germination. Some seeds need to be scarified (breaking of the seed coat) and/or stratified (stored in a specific environment) in order to germinate.
Seed Sowing – Seeds can be germinated in flats or other suitable containers in a seed starting media. Seeds should be planted at a depth of two to three times their diameter, but no deeper than 3 inches. Cycad seeds should be planted just below the medium surface.
Seeds stored in an envelope. Photo Credit: University of Florida/IFAS
Tips for Successful Asexual Propagation – In general, asexual propagation is the propagation of plant material from cuttings of stems, leaves, and/or roots.
Rooting Hormones – Increase rooting percentage, hasten root initiation, increase the number of roots per cutting, and increase root uniformity. Auxin based rooting hormones (Indolebutyric acid (IBA) and Naphthalenacetic acid (NAA)) are available in dry or liquid forms. It is important to use the correct concentration for the particular plant species because over application can cause damage to cutting base.
Sticking Cuttings – Cuttings should be stuck in the medium only deep enough to support the cuttings and hold them upright (1/2″ to 1″ deep).
Post-Rooting Care – Fertilization should be applied as soon as roots emerge from the cuttings. However, overfetilization can increase soluble salts and burn roots.
Examples of Asexual Propagation
Softwood Cuttings – Taken from woody plants usually three to four weeks after a new flush of growth. Commonly propagated species using this method include: crape myrtle; magnolia; oleander; azalea; jasmine; and boxwood.
Semihardwood Cuttings – Similar to softwood cuttings, but the lower portion of the cutting has become lignified (woody). Usually taken from new shoots six to nine weeks after a flush of growth. Commonly propagated species using this method include: camellia; pittosporum; junipers; and some hollies.
Hardwood Cuttings – Taken from the previous season’s growth, just before or during the dormant period. Commonly propagated species using this method include narrow-leaved evergreens and deciduous species during the dormant season after leaves have dropped.
Leaf Cuttings – Comprised of only the leaf blade or the leaf blade and petiole (leaf stalk). Cuttings are stuck upright in the propagation medium with the basal end (petiole end) of the leaf inserted into the propagation medium. Commonly propagated species using this method include begonias and peperomias.
Root Cuttings – Taken in late winter or early spring from two to three-year-old plant material. Plants propagated by root cuttings may not reproduce true to type if they are budded or grafted. Commonly propagated species using this method include: plumbago; bayberry; oakleaf hydrangea; and yucca.
Plants being propagated by leaf cuttings. Photo Credit: University of Florida/IFAS
This article provides only a brief overview of propagation methods and techniques. For more information on plant propagation please visit University of Florida Plant Propagation Glossary or Plant Propagation Techniques for the Florida Gardener. Please be advised that some plant material is patented and it is illegal to propagate patented material without written authorization or licensing of the patent holder. If it is patented, a notation of patent number will be on the tag.
My obsession with plants started with the purchase of my first house in Waverly, Alabama in the late 90s. I bought a house with seven acres and of that about 1.5 acres was a fenced yard. The landscape was not very appealing, so I was on a mission to make it beautiful yet functional for my dogs. The only problem was, as a new homeowner, I had very little expendable income for my burgeoning plant habit. This dilemma forced me to be a resourceful gardener.
Shop the discount rack at garden centers
Many retail garden centers (especially mixed use stores with limited plant space) will discount plants simply because they are no longer flowering. Plants look perfectly healthy but are just not considered “retail ready” anymore, so rather than hold them over until they bloom again and appeal to most shoppers the stores tend to mark them down.
Plants are either growing or they are dead, so it is common to find some outgrowing their container and are getting “potbound” which means the root system is outgrowing the pot. Potbound plants are hard to keep watered without wilting and the solutions are to transition to a larger pot or plant in the ground. Most garden centers are not equipped to pot up overgrown plants to larger containers, so the easier solution is to sell them quickly. If you purchase a plant with circling roots be sure to trim the bottom and score (slice) the root ball to encourage roots to spread laterally.
Avoid plants that appear diseased (leaf spots, brown stems, mushy parts, rotting odor) or have active feeding insect activity.
Compliment other gardeners’ plants
When you get gardeners together, they inevitably start swapping plants. I really don’t have an explanation for this other that good old southern hospitality, but I’ve noticed over the years that when you express appreciation of plants to other people they tend to end up in your own yard. Ask if you can take a pinch (for cuttings) or offer to divide a clump of crowded perennials and you are on your way to a trunk full of plant babies.
I can’t recommend this for multiple safety reasons, but I have been known to photographs plants in my travels then strike up a conversation with a homeowner who insisted I take one home.
Experiment with basic propagation techniques
Grow flowers from seed. Either purchase seeds (usually under $2/pack) or collect seed heads from spent flowers in your own garden. After flowers fade, allow them to set seed then either crush and distribute in other parts of your garden or store in a cool, dry place until you can swap with friends.
Division – clumping perennials such as daylilies, cast iron plant, iris or liriope can be dug up and cut into smaller pieces with a shovel or machete. You only need to be sure to have buds on top and roots on the bottom to make a new plant. Other plants create offshoots that can be removed from the parent plant. Examples of these are agave, cycads, and yucca.
Cuttings – the list of plants that can be propagated from stem cuttings is endless but a few that are very easy are crape myrtle, hydrangea, and coleus.
There are a number of plants in my landscape that bring back fond memories – plants that I propagated.
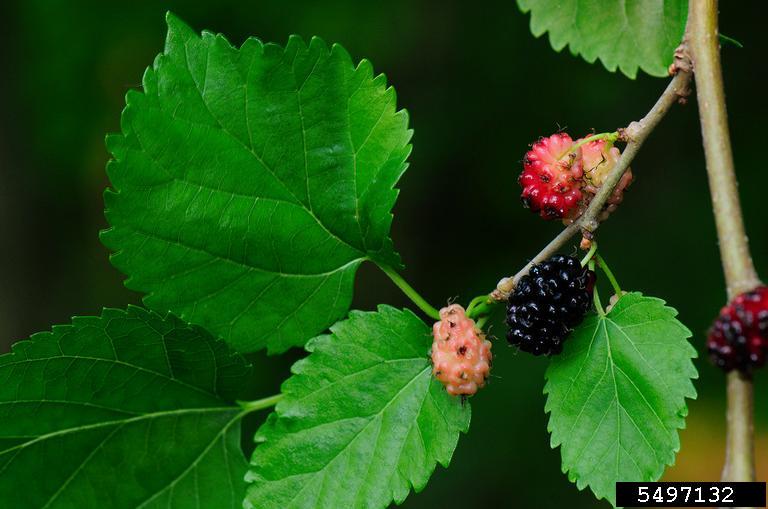
Red Mulberry. Photo credit: Vern Williams, Indiana University, bugwood.org.
There’s a mulberry tree in my backyard that I rooted years ago. I took the cuttings from an old mulberry tree in my hometown. As a boy, I climbed the tree, got in trouble once for coming home with mulberry stains on my clothes. I liked the berries and still do. I have good childhood memories about the tree.
About twenty years ago I visited the property adjacent to my childhood home. The tree was still there. It was during mulberry season. I enjoyed a few mulberries. I took about eight or ten cuttings from the tree. About a year after my visit, the property sold. The new owner bulldozed the tree.
But because of the cuttings that I rooted, the tree still lives and not just in my memory. The trees produced by those cuttings are genetically the same as the parent tree. Essentially, they are clones. The one in my backyard produces mulberries each year.
You too can propagate memories. Not all plants can be propagated from cuttings but many can be. Sometimes trial and error is necessary to learn proper timing in taking cuttings. But most reliable references will provide the time of year to take cuttings based on the plant species.
Stem cuttings should be removed from the parent plant with a clean, sharp knife or pruner. Ideally your cutting should be 4-6 inches in length and not much thicker than a pencil in diameter.
Take the bottom two-thirds of leaves off on each cutting. The cuttings should be stuck upright in a propagation medium. I usually use a good quality potting mix and mix in a little course sand or perlite for better drainage. The cuttings should be inserted deep enough to hold them upright, usually ½ to 1 inch.
To help promote rooting of moderate to difficult to root plants, wound the cuttings by scraping the lower ½ to 1 inch of the stem with a clean, sharp knife. The scrape should remove the bark or “skin.” Then dip the cutting in a rooting hormone covering the scrape with the rooting powder prior to inserting the cutting into the rooting medium.
I usually use a four inch pot, gallon size pot or bedding plant flat with drainage holes as a rooting container. I may stick as many as ten stem cuttings in a gallon size pot. I place the container of cuttings in a shady location outdoors and keep it moist. The cuttings should produce roots in two to sixteen weeks, depending upon plant species and the environment.
After the cuttings have rooted, carefully remove them and individually plant each rooted cutting in its own four inch to one gallon size pot. Keep the potting medium moist but not soggy. After the roots adequately fill the pot, the plant should be strong enough to be planted in the ground.
As your rooted cuttings grow, hopefully they will provide fond memories.