by Ray Bodrey | Aug 24, 2020
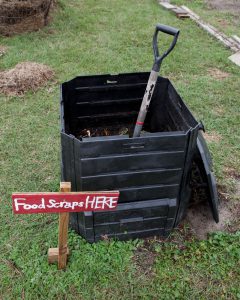
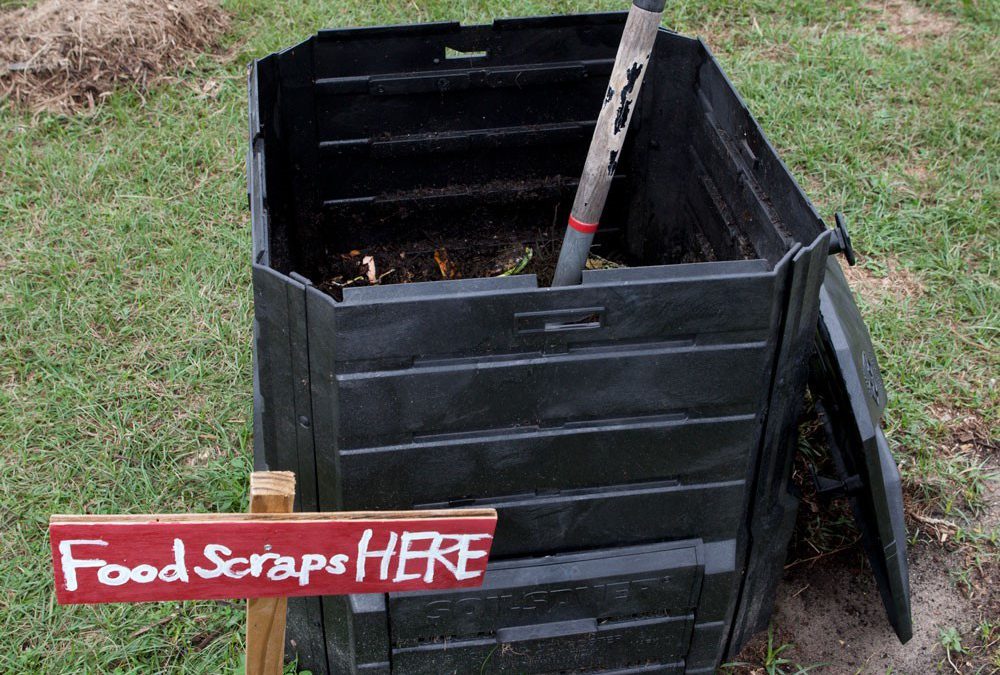
Figure: Increase water holding capacity through home composting.
Credit: Tyler Jones, UF/IFAS Communications.
Water is a precious resource for Floridians, even if the last couple of months of rainfall may make you think otherwise. As home gardeners, we should keep water conservation in mind.
Wasting water now may cause restrictions in the future, as basic water needs of a growing population outpace capacity. Of course, we all hope that’ll never happen, but it is possible.
As we start planning for our fall vegetable garden, let’s think about conserving water usage. We can start by putting our “plant biology” cap on. A great way to save water is to plant fast growing, early-maturing vegetables. The strategy, of course, is the sooner a plant matures the less water it will need.
Gardening periods in Florida vary, too. Thus, there are broad choices of planting dates for many vegetables. For Panhandle gardeners, the current trend has shown dry periods in the spring, but adequate rainfall in summer months. Usually with the seasonal change to fall, soil moisture holding capacity is not a great struggle in Panhandle. However, much of our soils consist of coarse sandy particles, which are not ideal for water holding capacity. Amending garden soils with organic materials such as compost, manures, and cover crops, will help the soil hold water better.
Selecting the right irrigation method is also a great way to conserve water. Overhead sprinkling is not ideal for most gardening applications. This method wastefully projects water into areas between rows, outside of root zones and allows for much evaporation loss. Drip irrigation can help solve these issues, by concentrating water directly to the root system. IFAS research has estimated an 80% reduction in water usage when utilizing a drip system.
If drip irrigation isn’t a method you’re interested in, overhead watering the garden thoroughly twice weekly is an acceptable alternative. Remember, there’s a limit to how much water plants can use. Excess water can cause runoff and consistent heavily saturated soils may promote root rot. Mulching also ranks highly among water conservation practices, by allowing the soil to hold more moisture. Examples of mulch types include hay, straw, leaves or plastic.
Supporting information for this article can be found at the UF/IFAS gardening solutions website.
For planting information, please see the Florida Vegetable Gardening Guide.

by Daniel J. Leonard | May 20, 2020
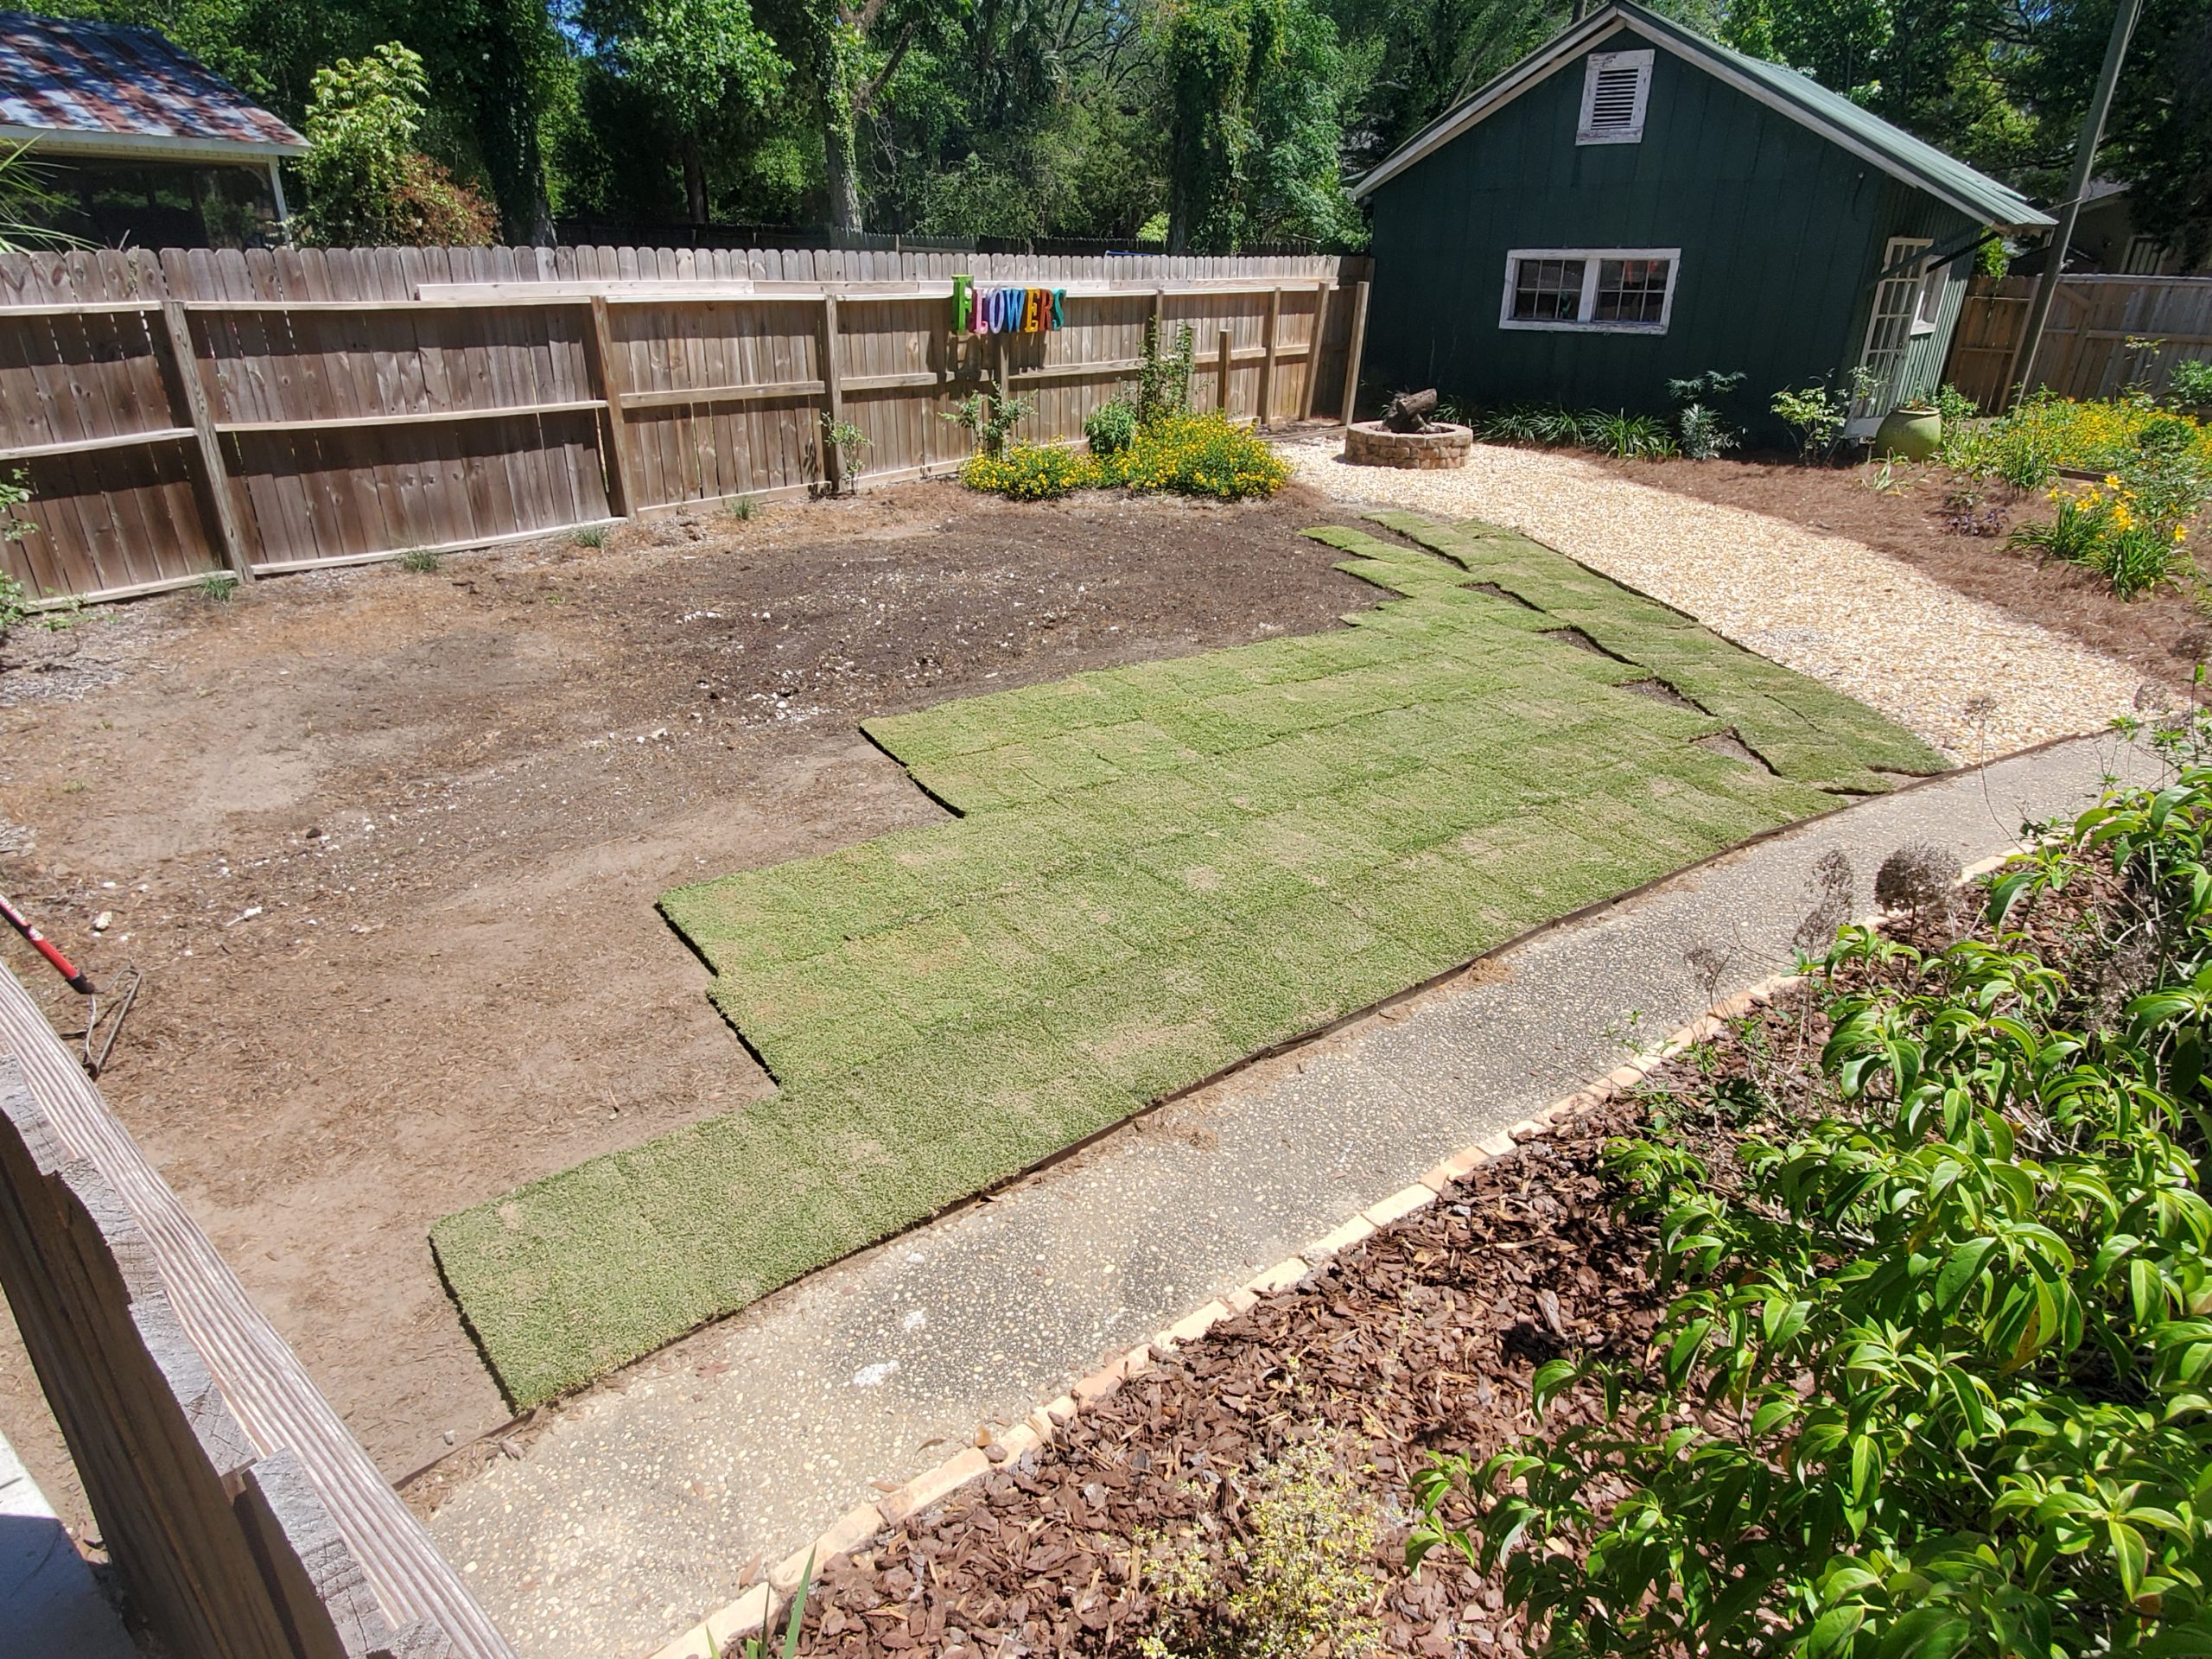
Nearly everyone dreams of having a perfectly lush, green turfgrass lawn in the backyard. Indeed, lawns provide many benefits to homeowners! A well-managed lawn is an excellent filter of chemical and nutrient runoff, builds soil through the breakdown of clippings, thatch and organisms that exist in turf systems, is aesthetically pleasing and increases property values, reduces ambient air temperatures and provides a durable surface for pets and play! However, none of these turf benefits can be realized if you don’t install and establish sod correctly. Remember these ten tips when planning, installing, and establishing sod to realize your perfect lawn dream!
Choose the Correct Species for Your Site. Not every site is equal. Is irrigation present, or will the turf be on its own? Are you willing and able to provide a higher level of care or will you sacrifice some aesthetic appeal for a lower maintenance turf? These and other questions need to be answered before you buy! Do some homework before settling on a particular grass species and cultivar; they all have merits and drawbacks.
Prepare the Site. Ensure the area you’ll be installing your new sod is weed-free, not compacted, and smooth. Several weeks before installation, apply a non-selective herbicide to “clean” the site of weeds. After existing weeds die, it’s a good idea to till the area or at least “rough it up” with a heavy rake. This helps alleviate site soil compaction which allows easier root initiation from sod to soil. Finally, smooth the site to ensure good root to soil contact and prevent a bumpy surface later.
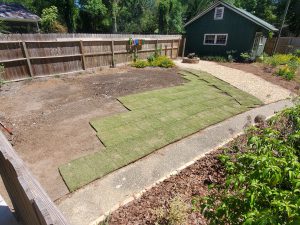
Time for some water! ‘Tiftuf’ Bermuda sod ready for a mid-lay watering. Hot and dry conditions demand sod be kept moist. Photo courtesy of the author.
Buy Quality Sod. Research where the dealer you purchase sod from sources their grass. Ensure you’re buying turf from a respected operation that follows Sod Production Best Management Practices. Not all farms are equal.
Lay it Quickly. If buying from a retail dealer, make sure their sod is fresh. Sod quality declines rapidly after 48 hours from cutting. Ideally, sod is installed the same day it’s cut on the farm, but not later than the next day.
Water periodically during installation. If installing a large area of turf, periodically wet sod you’ve already laid. Think about the day the sod you’ve laid has had. It was ripped from its home soil, windblown on a trailer en route to your site, laid onto a warm, bare soil surface and is currently baking in the sun waiting on you to finish laying the rest. That’s stressful and a good way to have a crispy brown patch in the new lawn! Ease the sod’s stress by periodically wetting as you lay it. It’s also not a bad idea to lightly moisten the site prior to laying the new sod. Avoid making it muddy.
Mound Soil Around Edges. This prevents the edges of freshly laid turf from drying quicker than the rest of the grass and browning out. It doesn’t have to be a lot, just take a heavy rake and fill in the gap between the soil surface and the leaf blades. Think of it as hiding exposed roots from the sun and wind. Trust me, this step keeps you from having a nice brown ring circumventing your new green lawn!
Pack it Down. You can be fancy with a drum roller partially filled with water or simply use a rake or tamping tool to lightly tamp the grass down. This helps ensure good root contact with the soil, prevents dry patches in the establishing sod, and quickens rooting time.
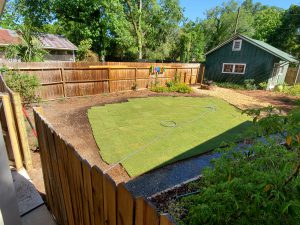
Almost finished! Remember to tamp down and mound soil around the roots of the edge pieces. Photo courtesy of the author.
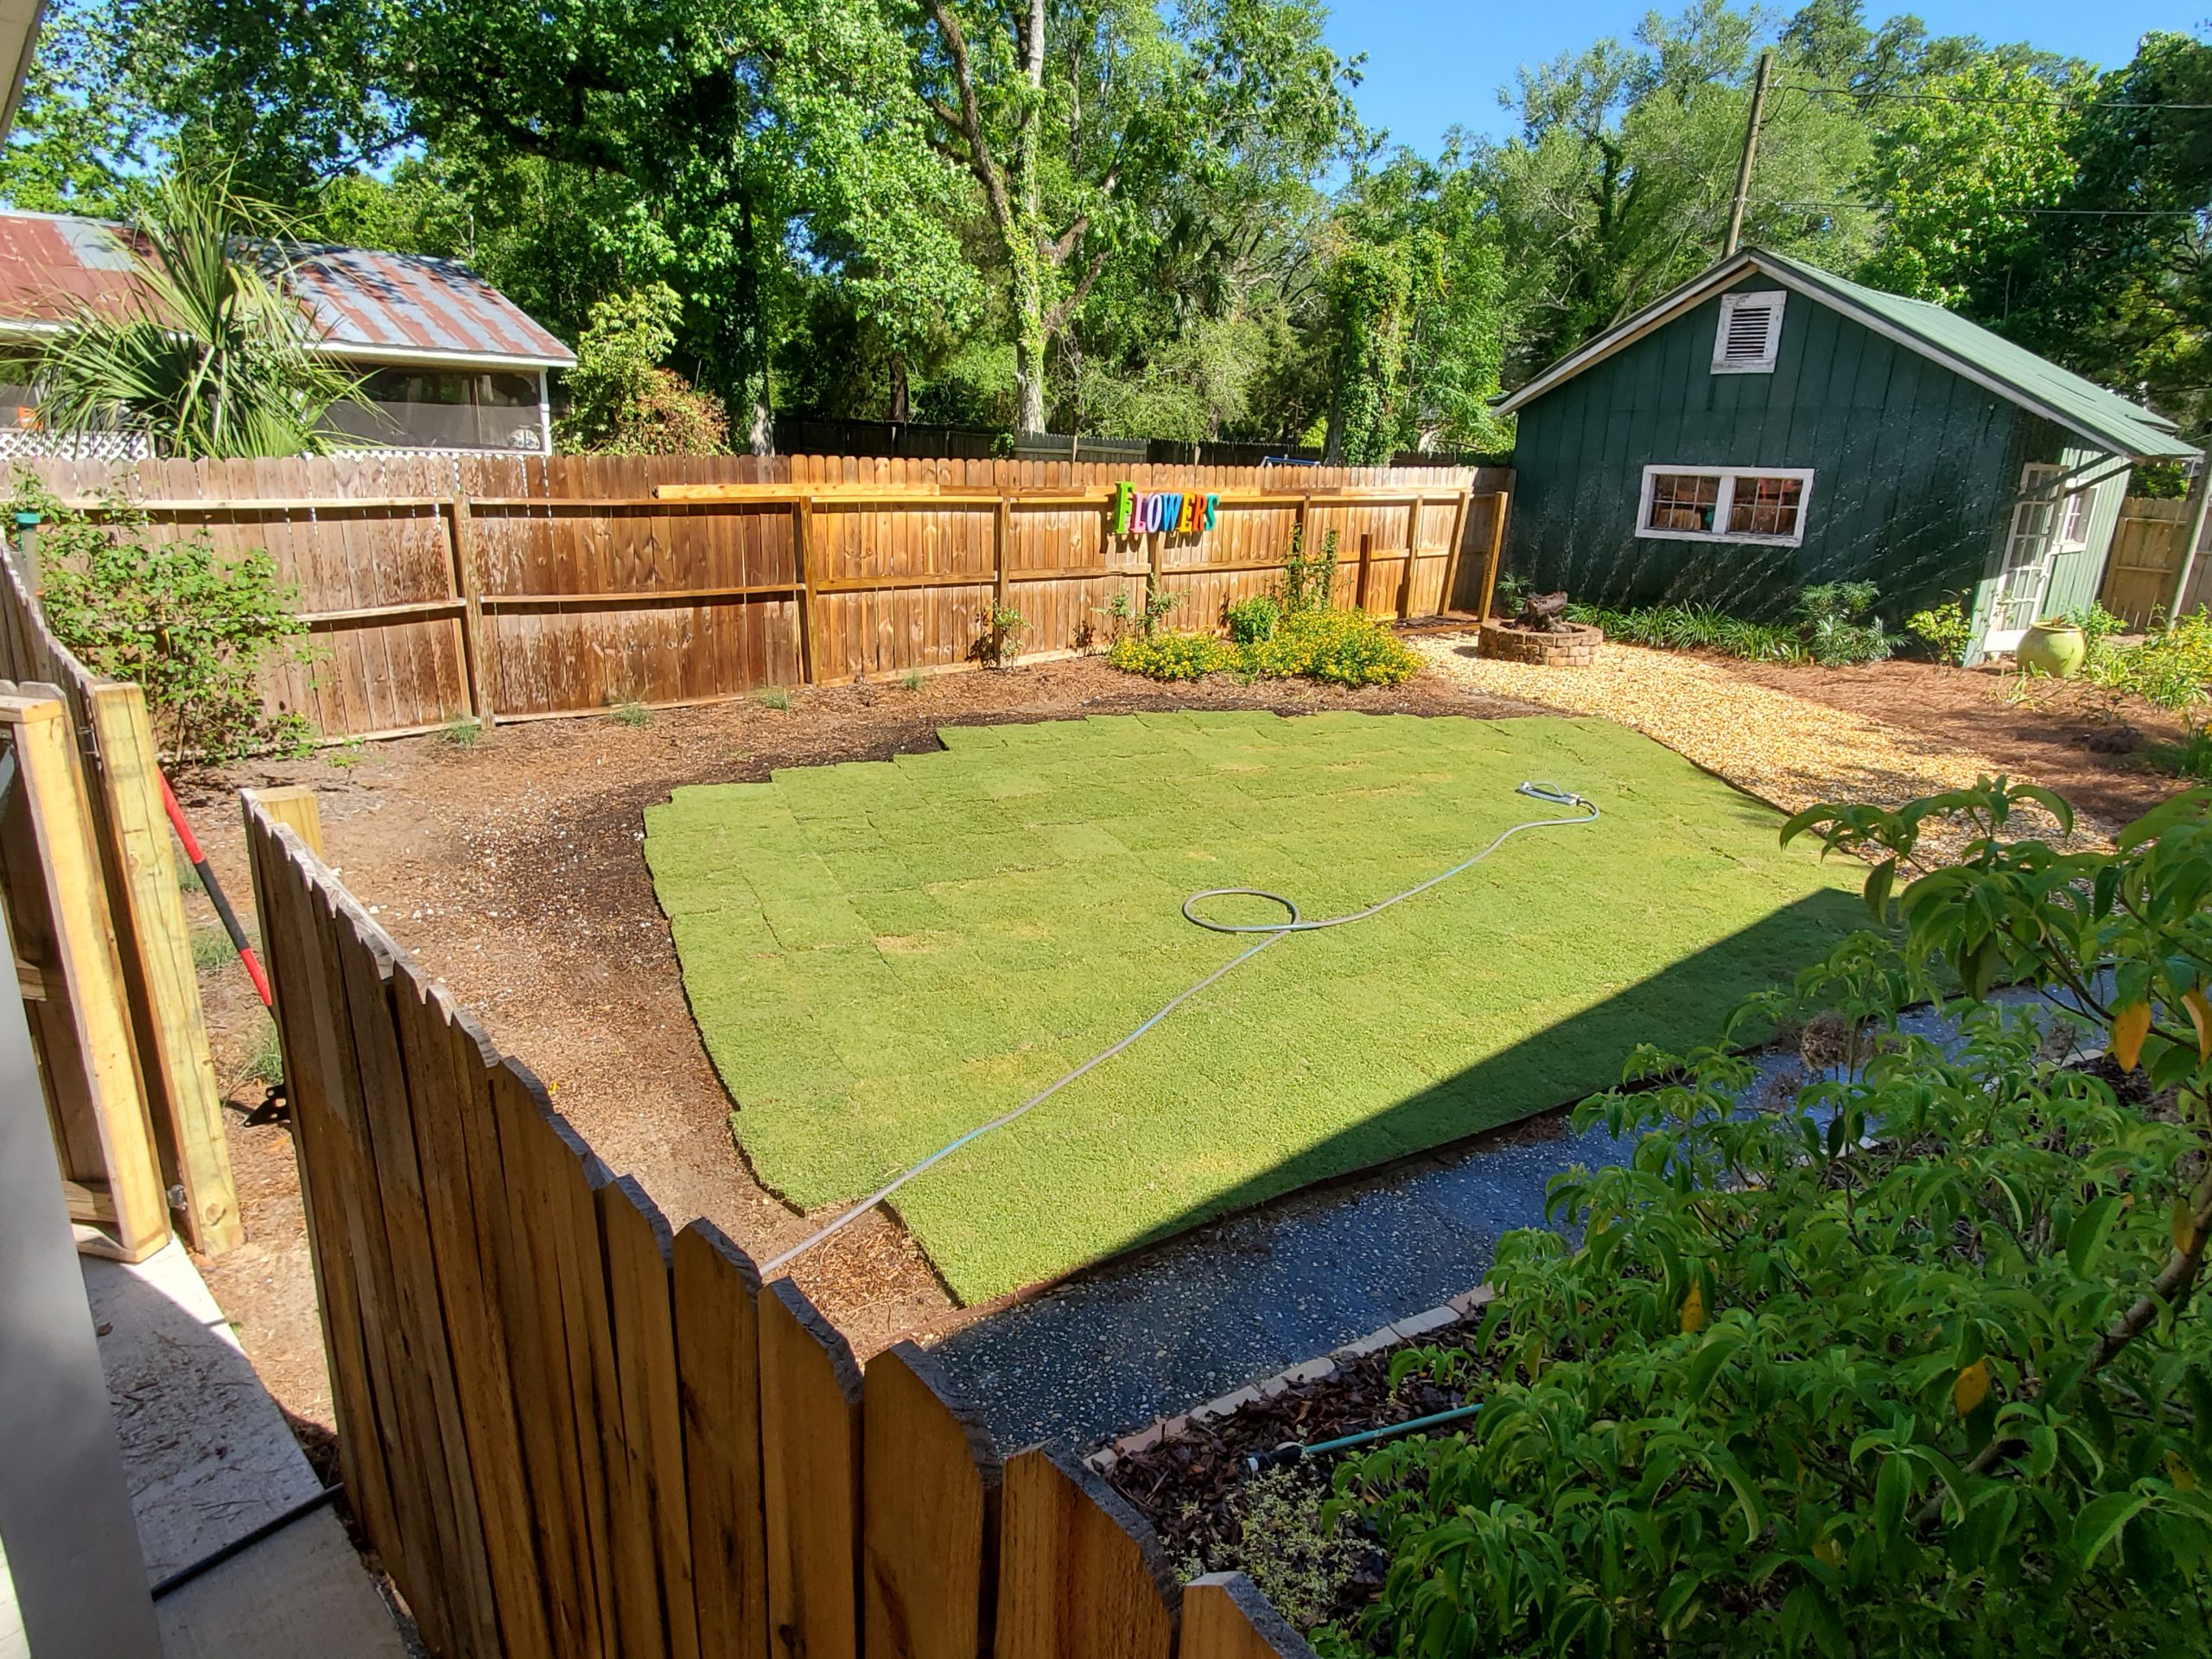
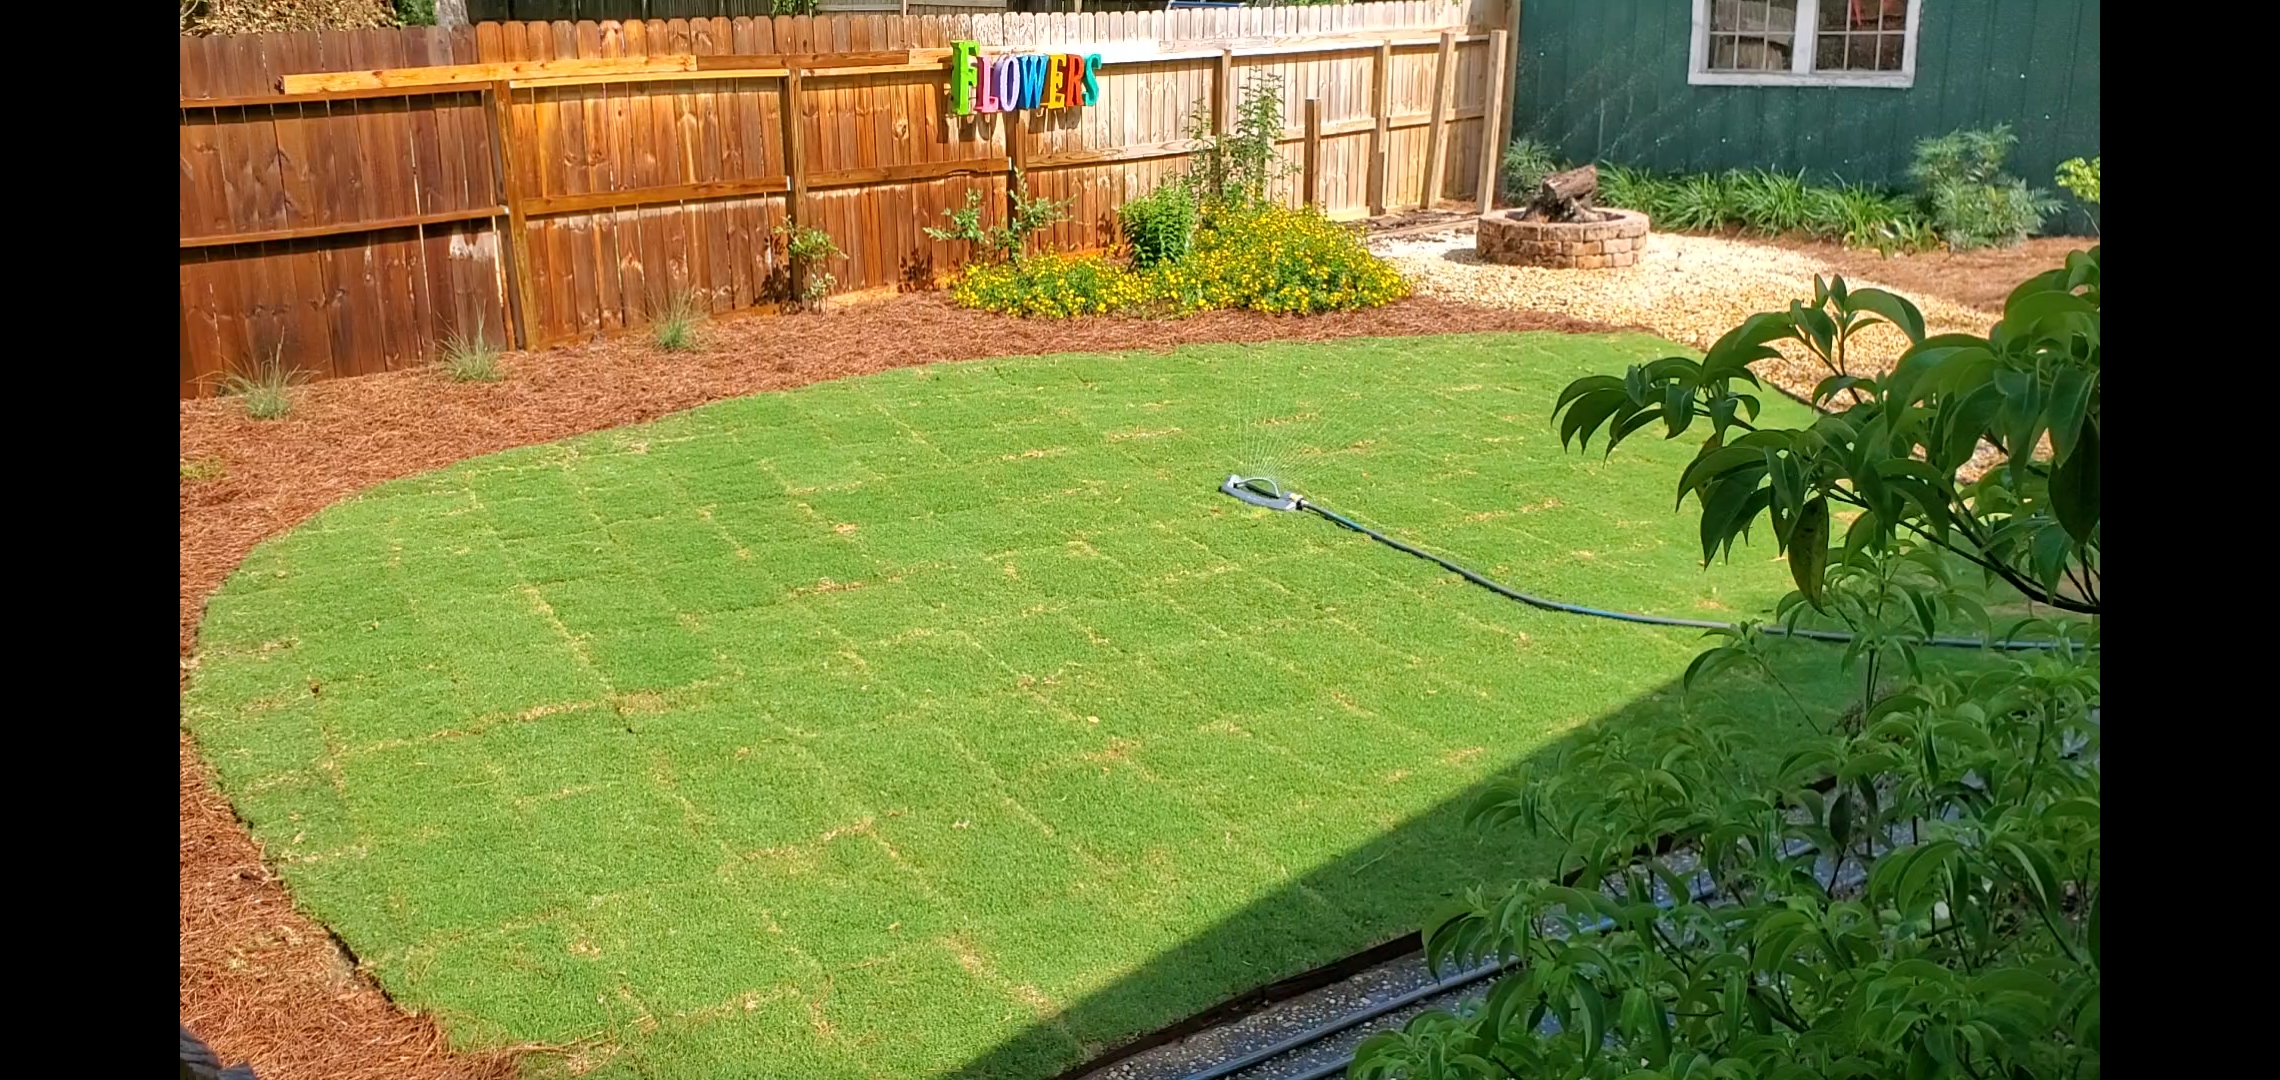
Water Correctly. Your new sod needs to be thoroughly watered daily for the first 10-14 days after installation. Remember how stressful the sod laying process is to turf. It takes a little while for sod to recover and initiate rooting into its new home. Don’t miss a day! Following this initial 10-14 day period, back off to once every couple of days for another two weeks or so. After that, the sod should be rooted in nicely and be able to rely on regular, as needed, lawn irrigation intervals.
Stay Off It! Minimize traffic on new sod for several weeks after installation. Roots are establishing during this time and are extremely vulnerable to disturbance until anchored. I know you’re ready to enjoy your new lawn, but you’ve come too far now to mess it up!
No Fertilizer for 30-60 days! Plants without roots have a hard time taking up nutrients. Therefore, it makes sense that until sod has firmly anchored into place and established a new root system, fertilizer application should be withheld. Fertilizer applied during the initial establishment period will likely be wasted and leach through the soon-to-be rootzone and could even burn fragile new roots. Also, avoid using a starter fertilizer for the same reason – there aren’t any roots to take up the nutrients.
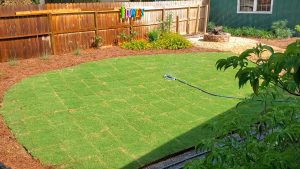
‘Tiftuf’ Bermudagrass sod being watered after installation is finished. Do this daily for 10-14 days following installation. Photo courtesy of the author.
By following these ten tips, you’ll be well on your way to a perfect lawn! For more information on these and other lawn care topics, contact your local UF/IFAS Extension Agent and consult The Florida Lawn Handbook, a research-based publication written by UF/IFAS Extension specialists.
by Larry Williams | May 14, 2020
When we go through dry periods in North Florida some residents become interested in drought-tolerant plants to include in their landscapes. The need for irrigation can be reduced when drought-tolerant plants are used. But don’t overuse these plants. Remember we have periods of rainy weather, too.
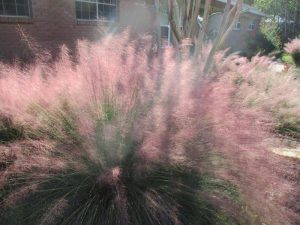
Gulf Muhly Grass in Flower. Photo credit: Larry Williams
Some drought-tolerant plants have poor tolerance to the other extreme – too much water. There are a few plants that can tolerate both extremes but they are the exception. Avoid using drought-tolerant plants on naturally wet or poorly drained sites. But if you have the typical deep sandy well drained soil Florida is famous for, you’d do well to include some drought-tolerant plants on your site.
Drought-tolerant plants are especially well suited for areas that receive little to no irrigation.
Some plants are genetically better able to withstand drought. They have a built-in tolerance of drought. Many of our Florida native plants are designed to grow in our poor water holding sandy soils. Many of the plants native to arid areas of the world possess high drought-tolerance. These plants have characteristics that allow them to better survive dry weather. These features include thicker or waxier leaves, large surface root areas or deep roots and the ability to drop leaves in drought and regain them when moisture is adequate.
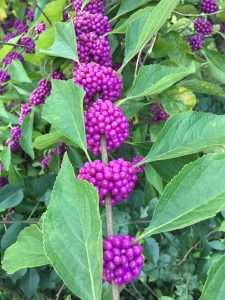
Beautyberry with fruit. Photo credit: Larry Williams
It’s important to realize that these plants must first establish a root system before they can cope with severe dry weather. Plan to irrigate during dry periods for the first season to allow them to become established.
Some outstanding trees to consider include crape myrtle, redbud, Chinese pistache, cedar (Cedrus species), hawthorn (Crataegus species), American holly, yaupon holly, Southern red cedar (Juniperus species), Live oak, Sand live oak, winged elm, pond cypress and bald cypress. Some people are surprised to learn that pond cypress and bald cypress have high drought-tolerance because these trees are associated with swamps, many times growing in standing water. But once established on a dry site, they exhibit very good drought-tolerance.
Some outstanding shrubs with drought-tolerance include glossy abelia, dwarf yaupon holly, Indian hawthorn (Rhaphiolepis species), beauty berry (Callicarpa americana), pineapple guava, junipers, oleander, spiraea, blueberry or sparkleberry (Vaccinium species), viburnum, Chaste tree (Vitex agnus-castus) and coontie (Zamia pumila).
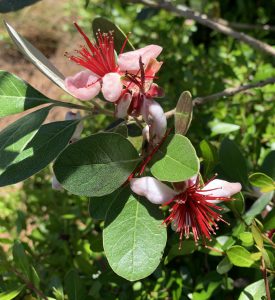
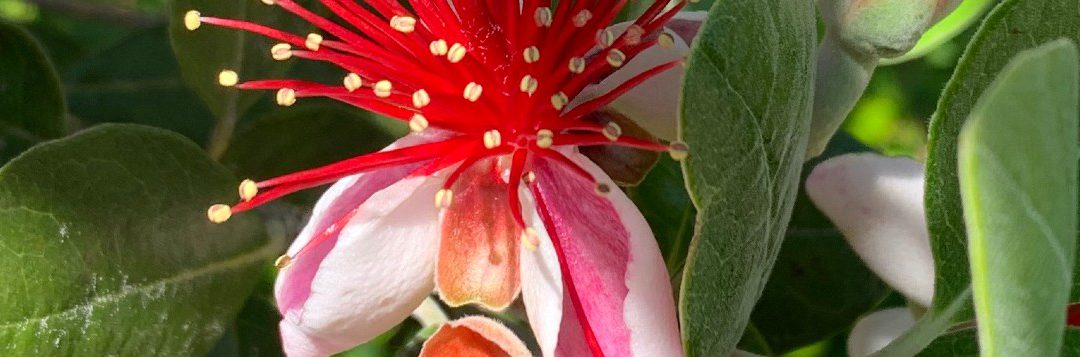
Pineapple guava in bloom. Photo credit: Larry Williams
Some outstanding drought-tolerant groundcovers to consider include beach sunflower (Helianthus debilis), daylily, juniper, lantana, liriope, rosemary (Ceratiola ericoides), Asiatic jasmine and society garlic. Many of the ornamental grasses such as Gulf muhly are good choices as well.
For more ideas on developing a Florida-friendly, water wise landscape, contact the UF/IFAS Extension Office in your County or visit the below website. https://ffl.ifas.ufl.edu/index.html
by Ray Bodrey | May 13, 2020
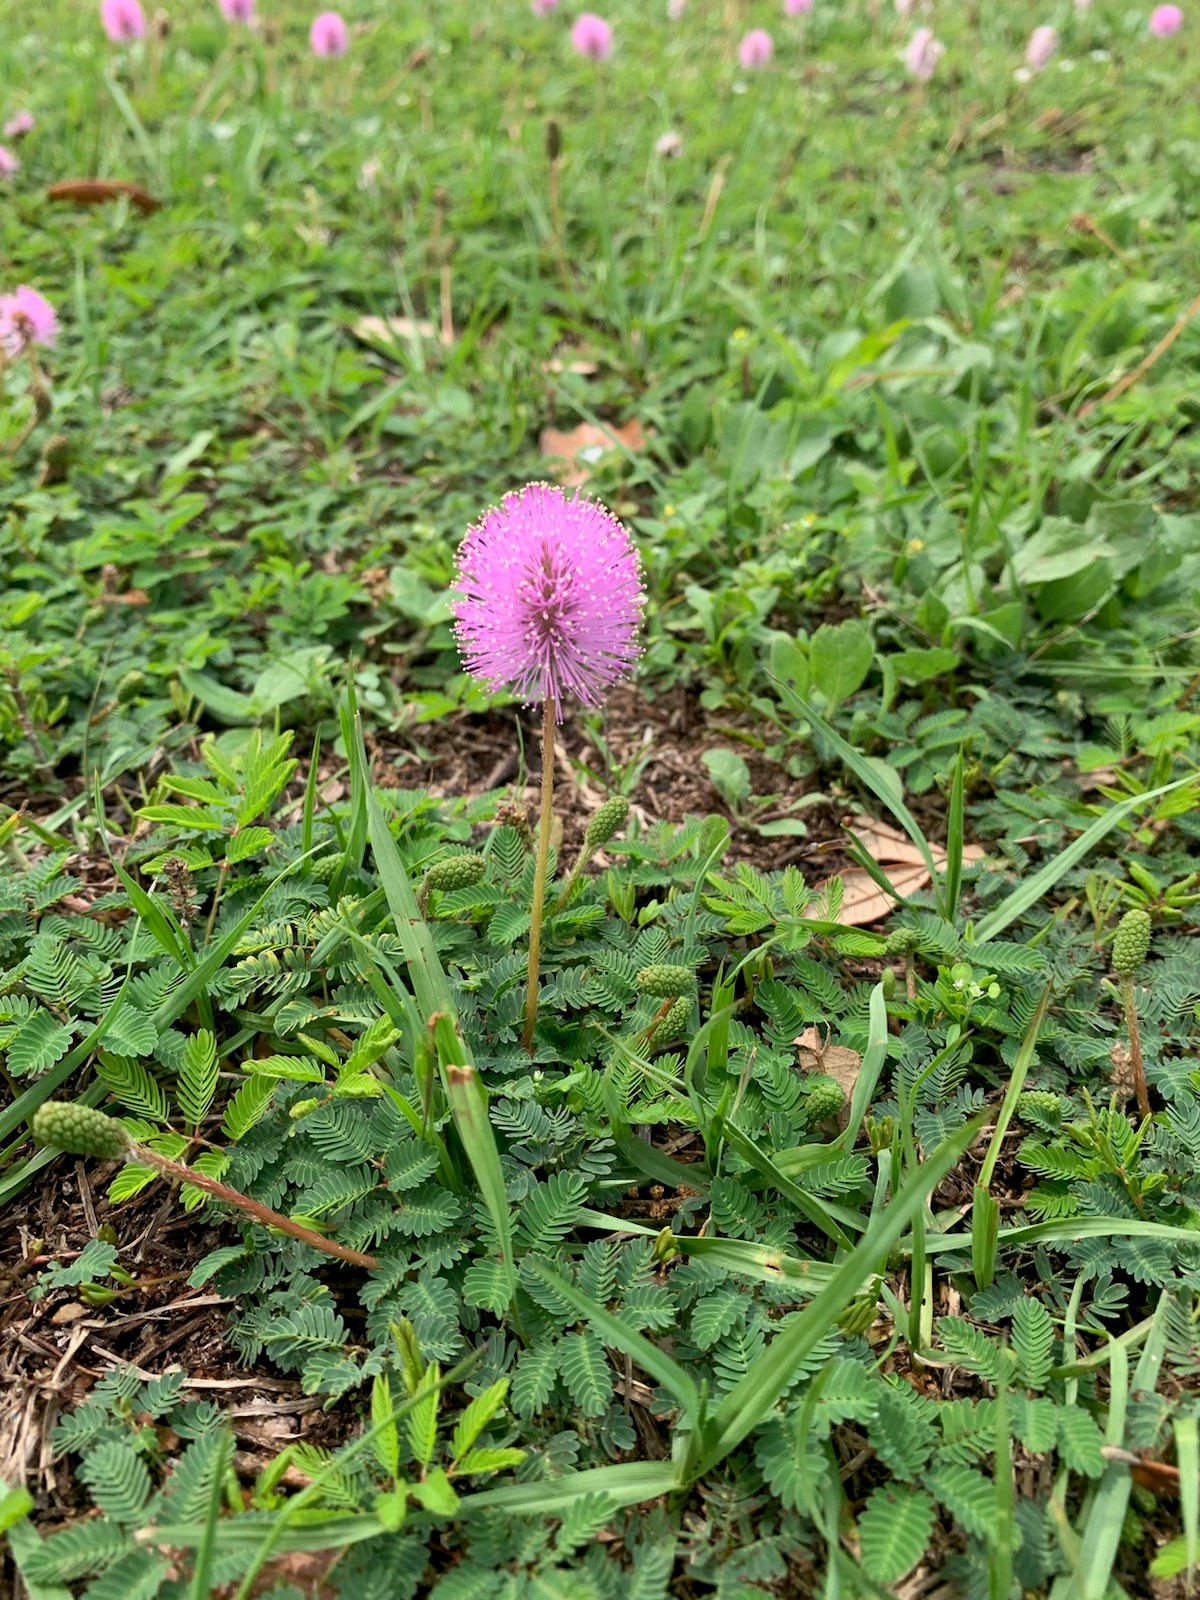
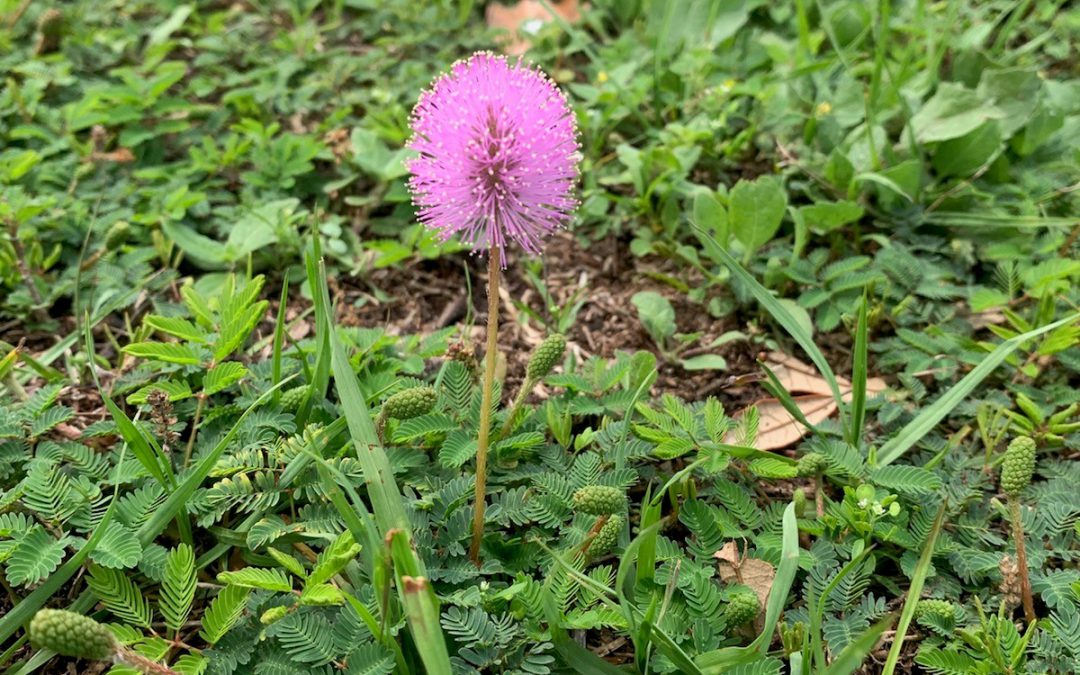
Powderpuff mimosa (Mimosa strigillosa), also called Sunshine Mimosa or Sensitive Plant, is an increasingly popular native plant for home and commercial landscape applications that offers a very show display of puffy pink flowers this time of year!
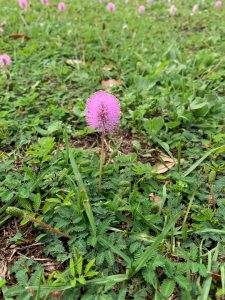
Powderpuff Mimosa, (Mimosa strigillosa). Photo courtesy of Ray Bodrey.
This Florida native, low-growing groundcover grows no more than eight inches in height, and that would be classified as an extremely vigorous stand. Powderpuff Mimosa is technically a perennial legume, meaning it doesn’t need any nitrogen fertilizer from gardeners.
The groundcover is appealing to the eye with its dark green fern-like leaves. Not an evergreen, the plants fall into a semi-dormant to dormant state during the fall and winter seasons. Powderpuff Mimosa is a very resilient groundcover as well, needing little irrigation, spreading quickly, and co-existing well with turfgrass. Just a few pots of this species transplanted should cover up to 300 square feet in a season. Although it spreads quickly, it can easily be pruned or mowed if it moves into unwanted areas.
Powderpuff mimosa is a great plant for erosion control due to its deep roots. These deep roots also allow for good levels of drought tolerance. There are very few insect or disease problems with this plant, other than the occasional caterpillar. It is a very wildlife and pollinator friendly plant, with honeybees, butterflies, deer, and more all finding it appealing. It’s even considered a livestock forage, as cattle find it palatable.
Looking to plant powderpuff mimosa in your landscape? Any area that gets mostly full sun is just fine. This plant is adapted to a wide range of soils, but particularly flourishes in well-drained, sandy loam soils. Be sure to water regularly, especially to ensure successful establishment in your landscape. Find this wonderful little plant at Florida native plant nurseries!
For more information contact the Gulf County Extension Office at 639-3200 or email at rbodrey@ufl.edu.
Supporting information for this article can be found in the UF/IFAS Extension website: https://gardeningsolutions.ifas.ufl.edu/plants/ornamentals/powderpuff-mimosa.html & USDA website: https://plants.usda.gov/plantguide/pdf/pg_mist2.pdf
UF/IFAS Extension is an Equal Opportunity Institution.
by Evan Anderson | May 13, 2020
As temperatures lean more toward summertime highs, conditions can sometimes leave a landscape looking sad. Water issues can be a major source of headaches for homeowners when they cause plants to decline. The cause is not always readily apparent.
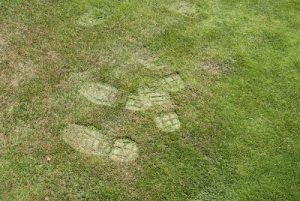
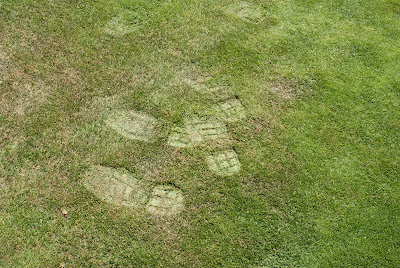
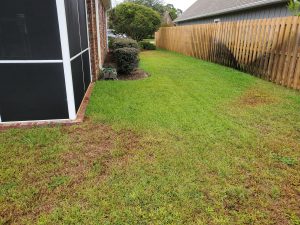
Footprints remain in droughty grass. Photo courtesy of Taylor Vandiver.
Water is something not even the meanest cactus in the driest desert can do without. Too little, and plants start to develop symptoms of drought stress. These symptoms include more than just wilting; stunted growth, curling or rolling leaves, fruit or leaves dropping, and yellowing or browning especially at leaf edges are all clues that a plant is thirsty. In lawns, underwatered grass may not spring back when stepped upon, leaving visible footprints in the turf. Long periods of drought stress can cause grass to thin. Plants exhibiting symptoms such as these may require extra water. A layer of mulch around landscaping can also help to retain moisture if soil dries out too quickly. Newly installed plants are particularly susceptible to drying out, and hot weather dries out all plants more quickly.
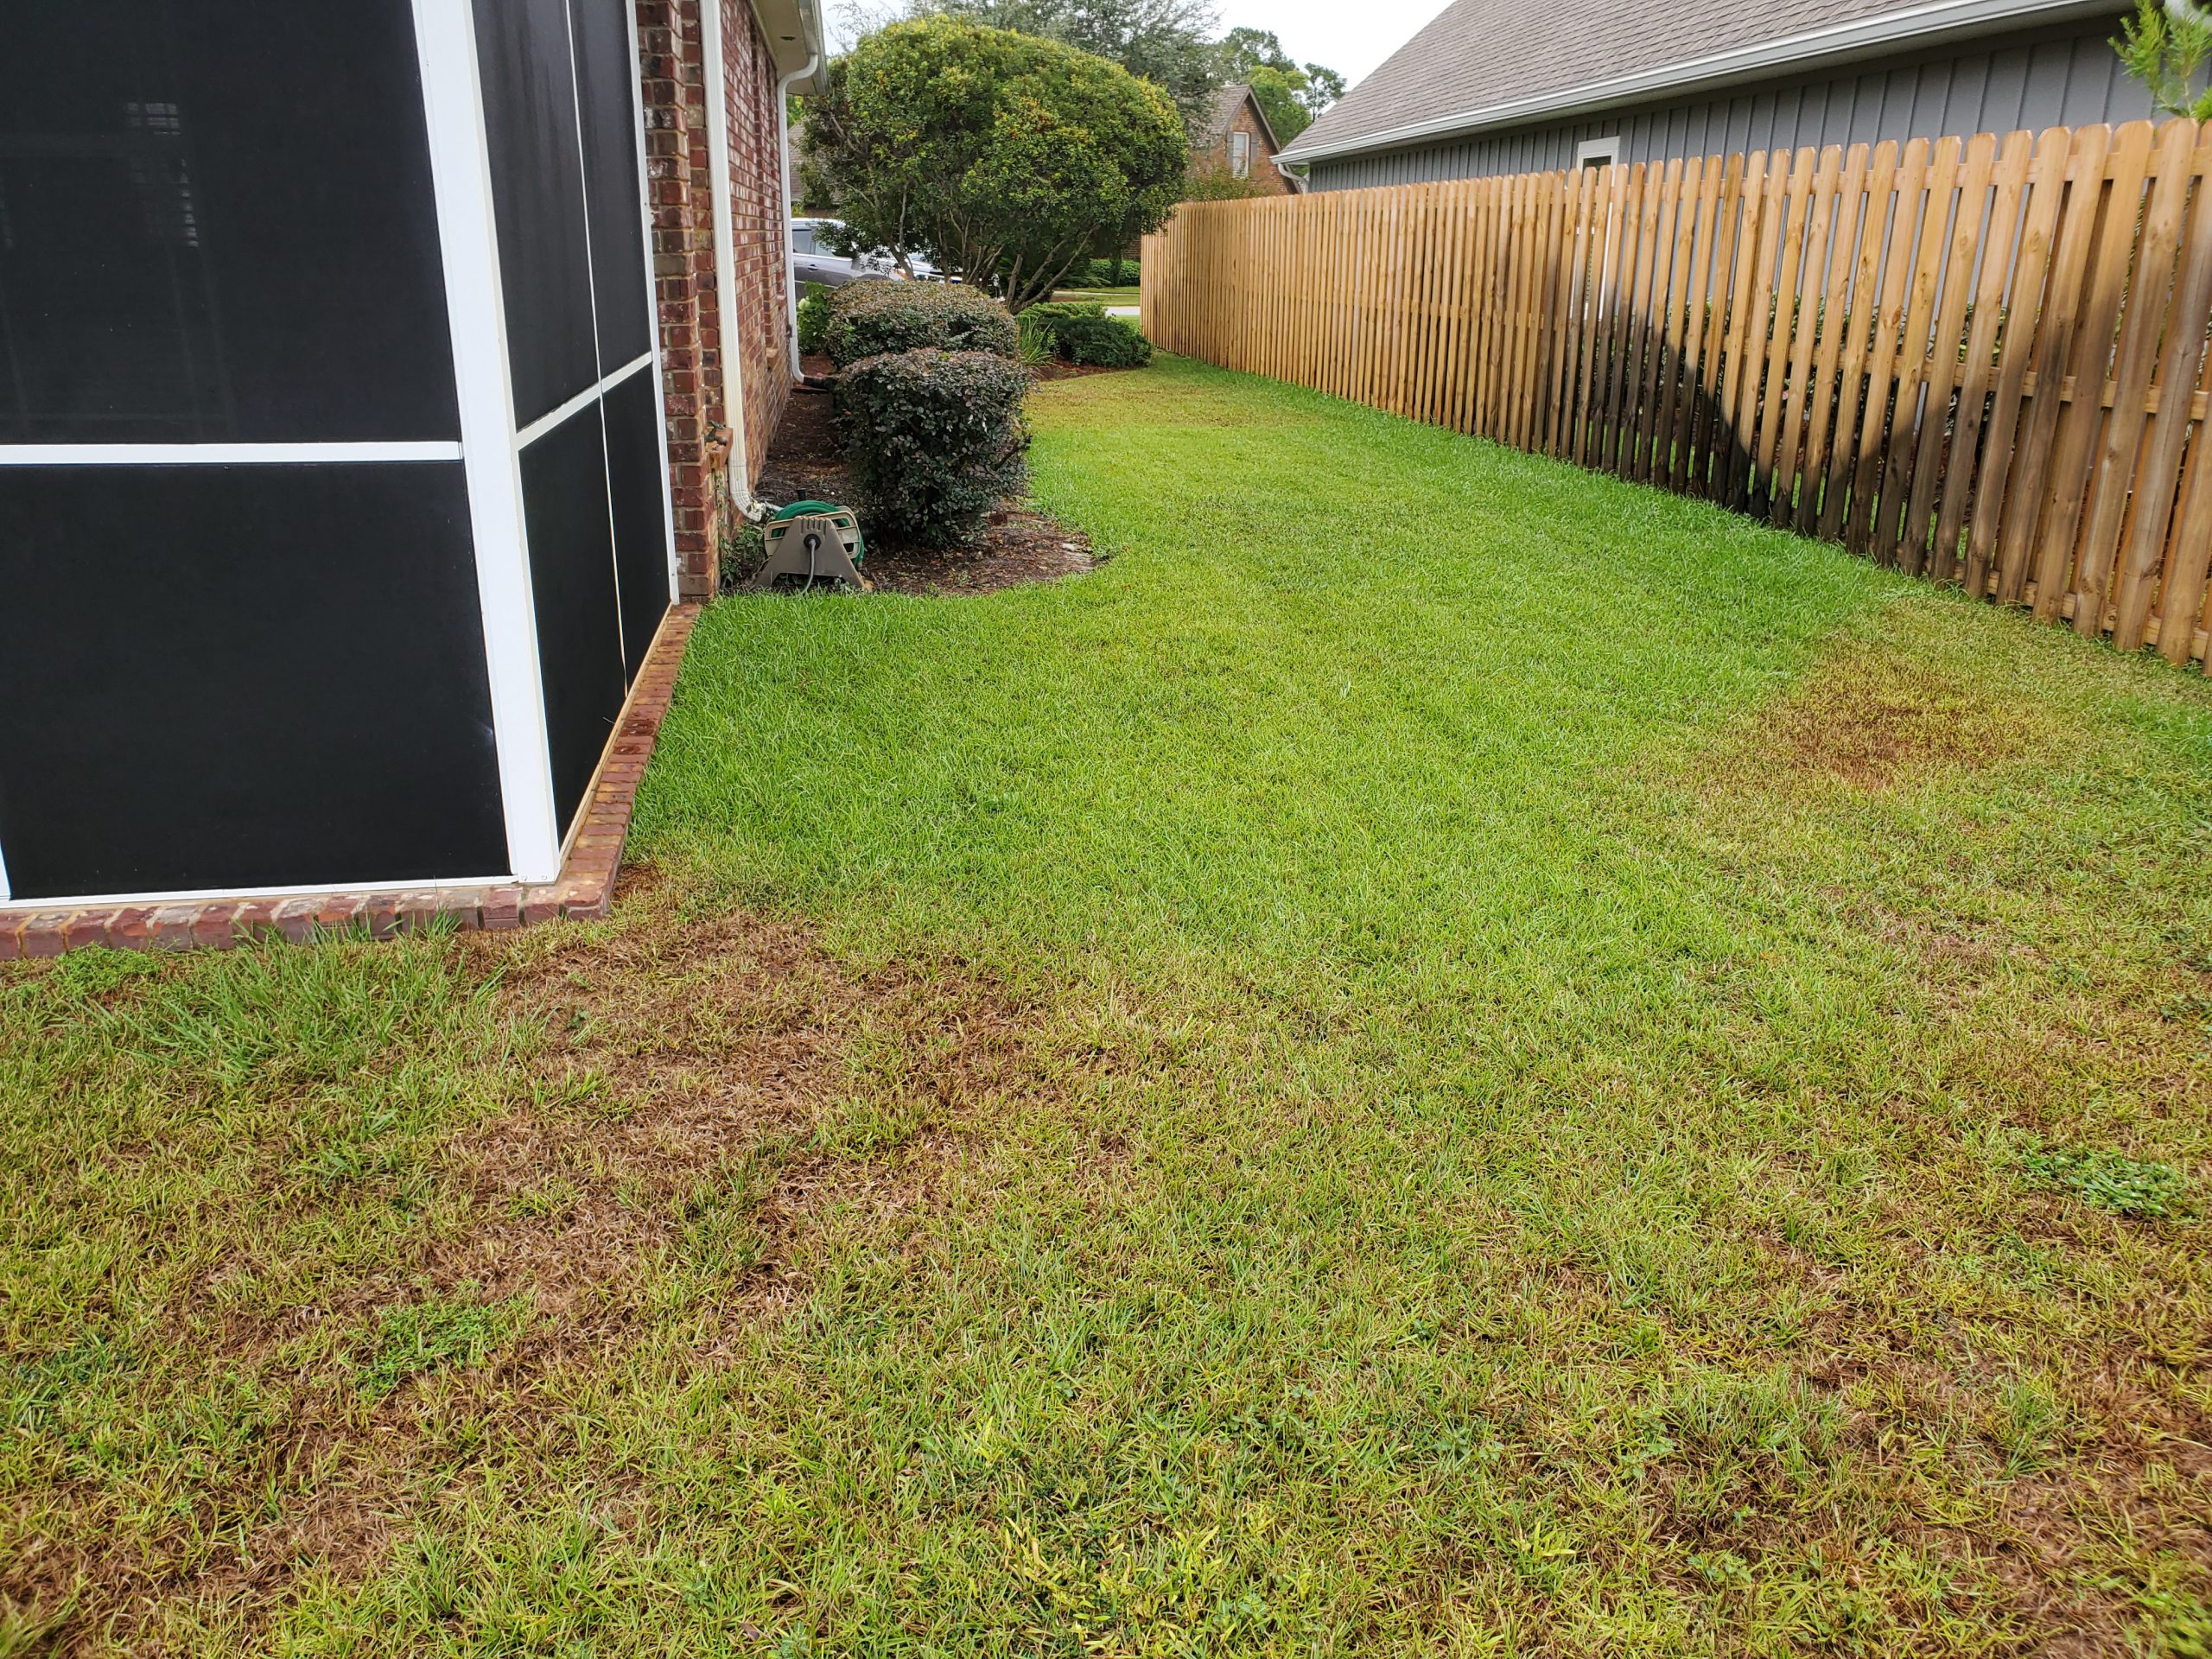
Plants can also be overwatered, however. Even with the well-drained, sandy soils that are present in much of the Florida Panhandle, it is possible to put too much water on a lawn or landscape. This can lead to problems that may be similar to those caused by underwatering – stunted growth, curled leaves, wilting, limbs or leaves dying, and increases in fungal disease can all occur. Lawns may become patchy and weeds, especially those that enjoy damp conditions such as sedges or dollarweed may establish themselves.
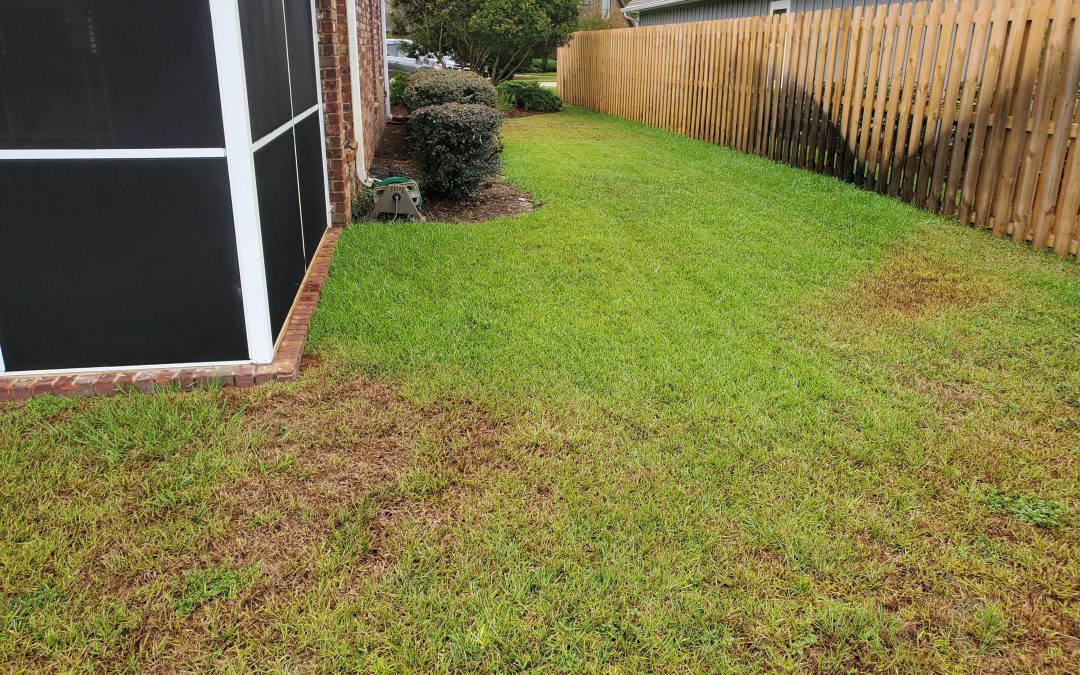
Improperly calibrated sprinklers. Photo courtesy of Evan Anderson.
Stress of any sort can also leave plants more susceptible to pest and disease issues. A healthy plant is better able to compete with weeds and fight off infestation or infection. If you notice problems with fungal disease, increased insect populations, or weed issues, it could be made worse by over- or underwatering!
To help avoid watering issues, make sure plants with similar water requirements are planted near one another. If you have irrigation for your lawn or landscape, it is important to calibrate it regularly. Make sure the system has a rainfall shutoff device and check systems for damaged or malfunctioning emitters. And remember, if you are having trouble with your lawn or landscape, contact your local Extension office for help!
You can find further information on watering in our EDIS publications located at https://edis.ifas.ufl.edu/topic_landscape_irrigation_and_fertilization, and at our Gardening Solutions website at https://gardeningsolutions.ifas.ufl.edu/care/irrigation/.
by Daniel J. Leonard | May 7, 2020

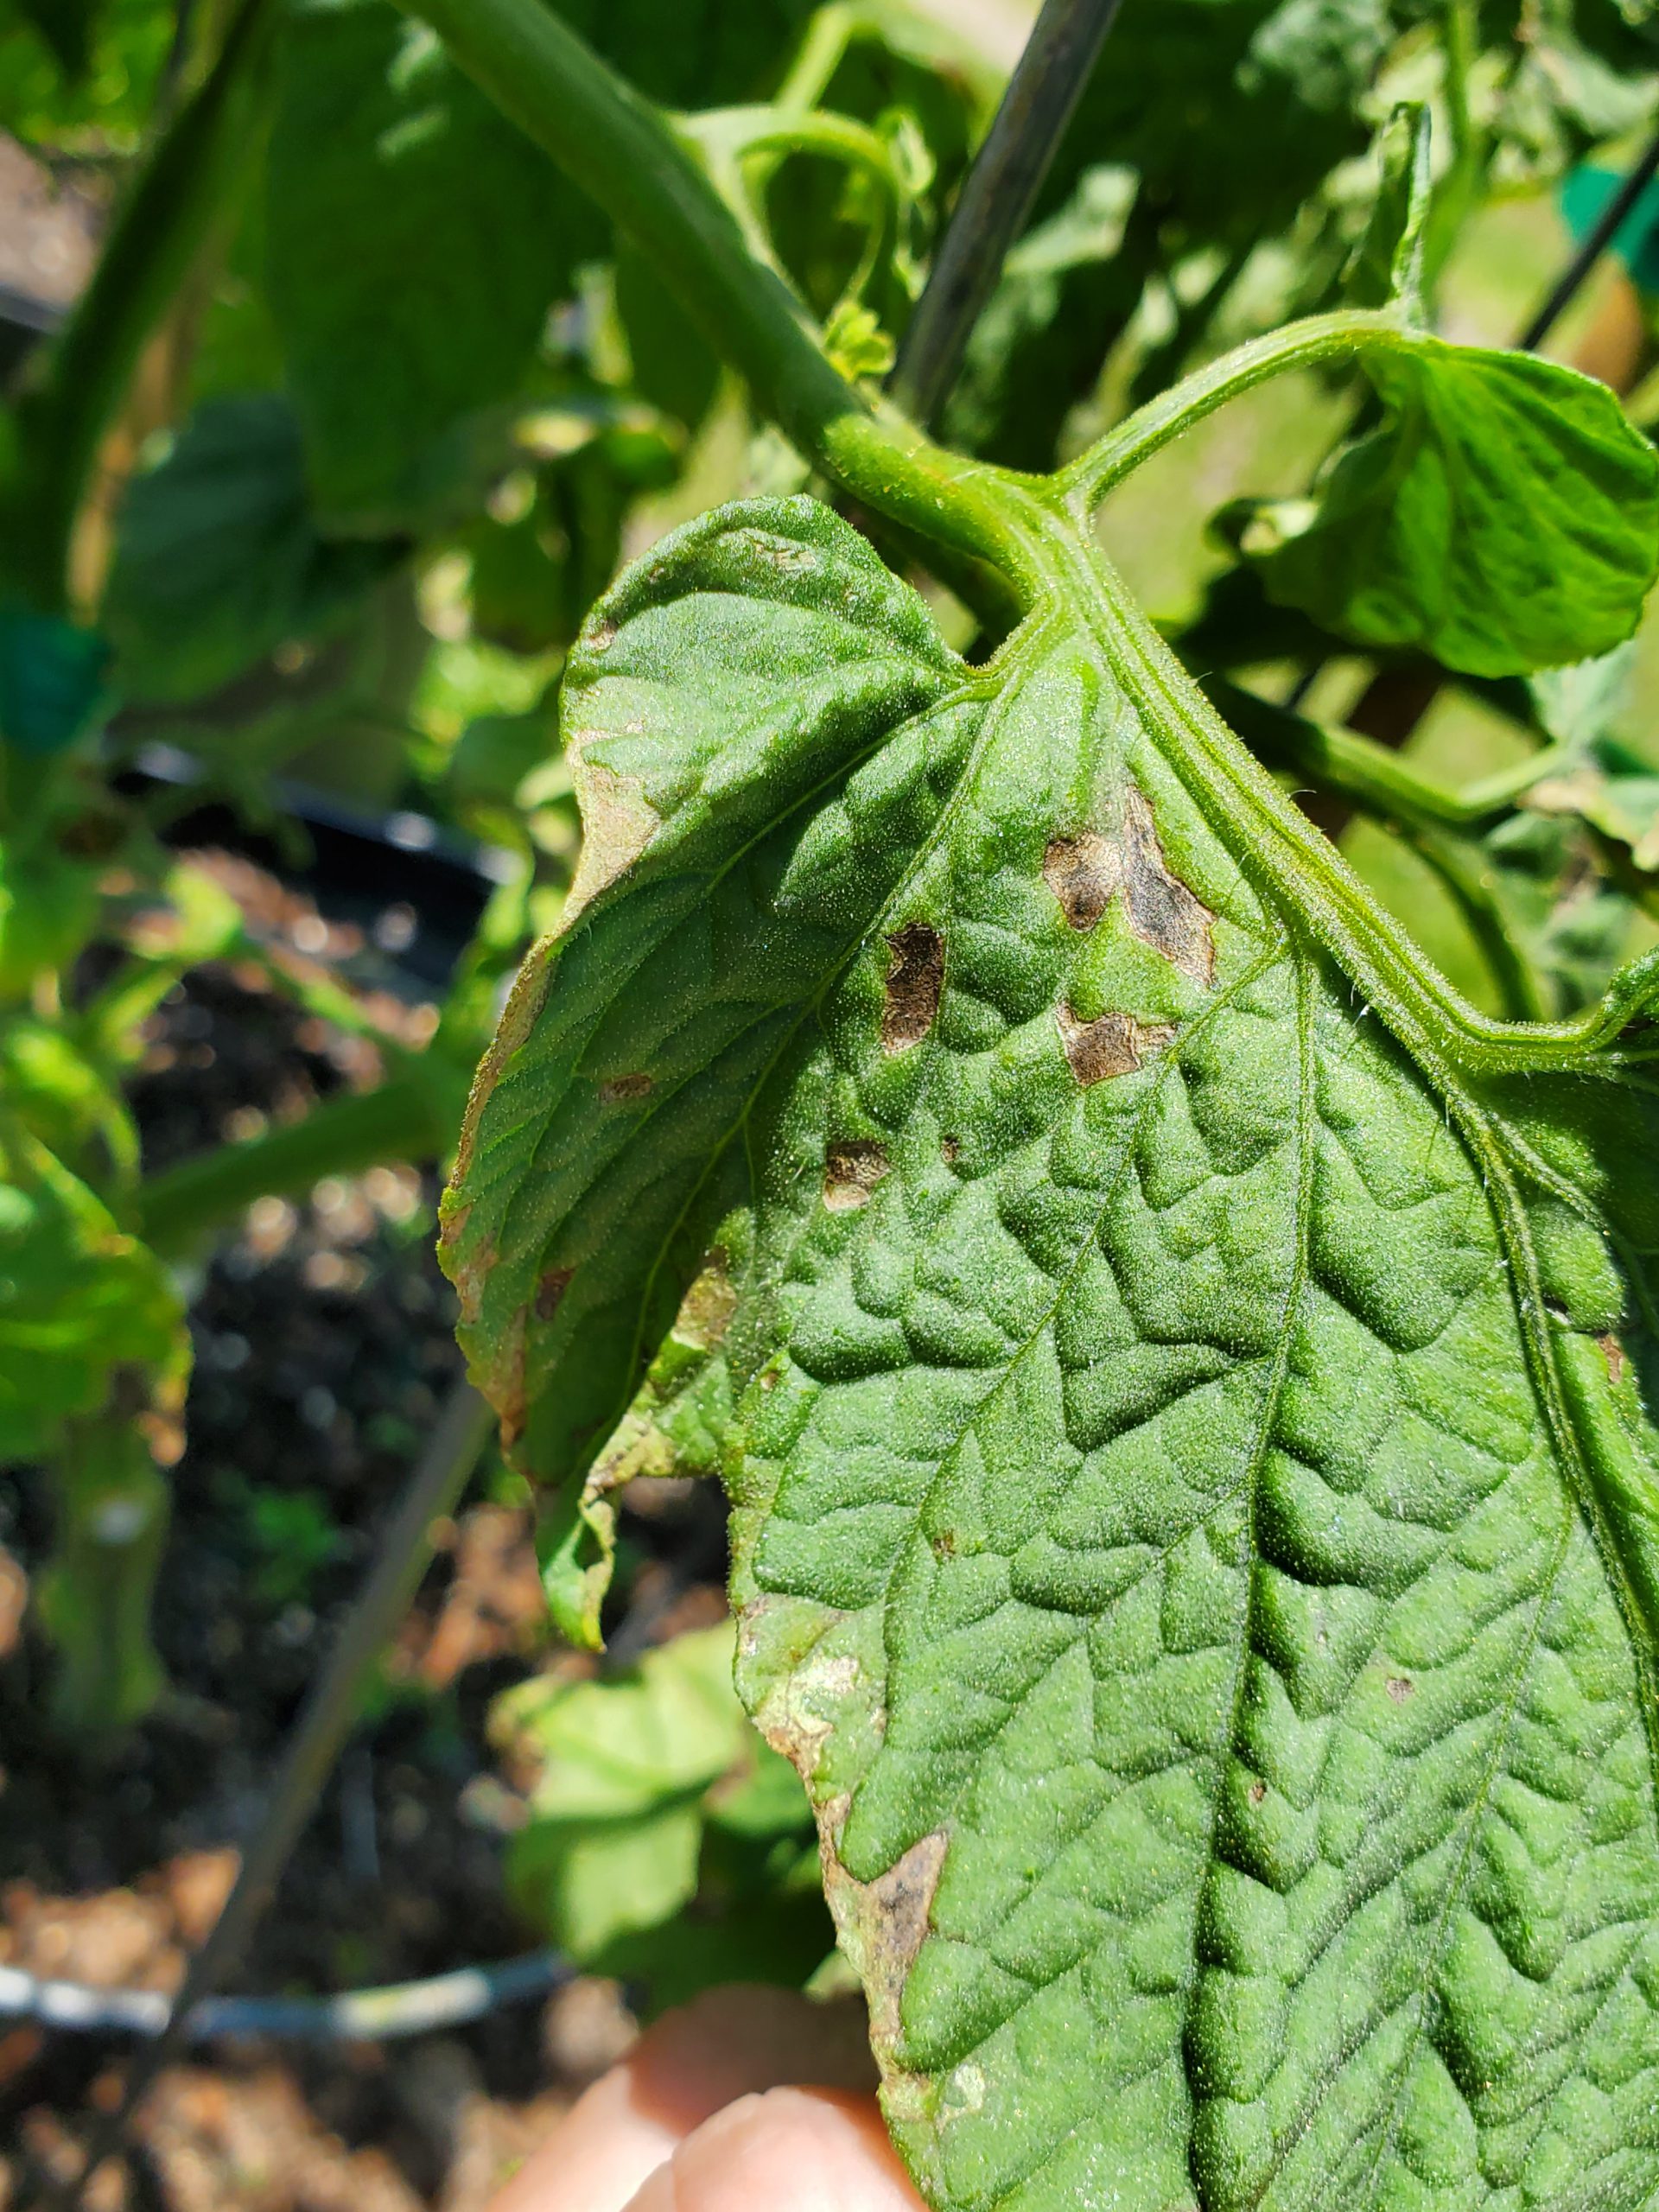
Early BLS symptoms appear on lower leaves. Photo courtesy of the author.
Tomatoes are among the most notoriously difficult vegetable species to grow in Florida. Even when you do everything right (choose disease resistant varieties, buy clean seed/healthy transplants, plant early, rotate crops, scout for insects, prune and support vines, etc), things can go wrong in a hurry. Bacterial Leaf Spot (BLS) caused by the pathogen Xanthomomas perforans, is one of those things. BLS often hitches a ride into gardens undetected on seed and transplants and presents itself as warm and humid weather arrives in late April/early May. Outbreaks typically happen in concurrence with the frequent heavy rainstorms that accompany these months and quickly wreak havoc on tomato plants.
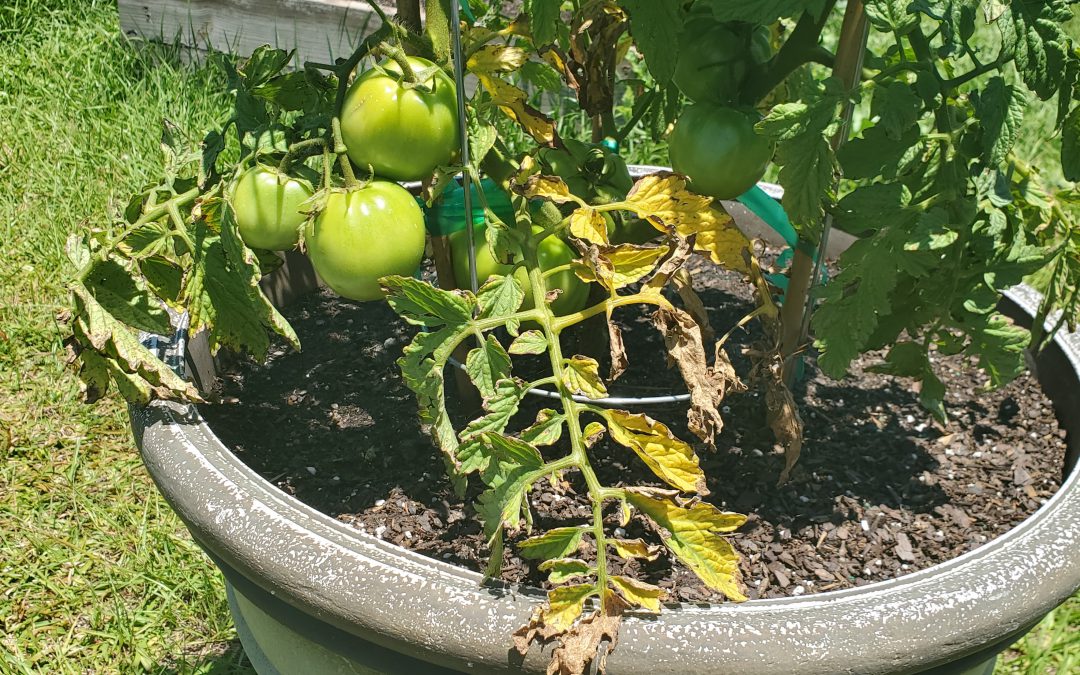
BLS occurrence, much worse in some springs than others, has exploded this year in home gardens. First noticed on the plant’s lower leaves, BLS pathogens enter through natural openings in leaves called stomata, manifest as small, “water-soaked” leaf lesions and then develop within days into dark circular spots, sometimes surrounded by a yellow halo. As conditions worsen, all these individual infections cause a general yellowing or “blighting” of entire leaves. Though the issue begins on tomato leaves, BLS can affect all parts of the plant, including stems, flowers and fruit too! It’s at this point, when blighted leaves become obvious and lesion developing on flower stalks cause both flowers and small fruit to drop, that most home gardeners notice that something is up.

Advancing progression of BLS with “blighted” leaves. Photo courtesy of the author.
Unlike with many other pathogens, gardeners don’t have an abundance of options to control BLS. However, taking the following preventative measures can reduce the pathogen’s impact and stave off disease progression until ripe fruit can be harvested.
- Don’t irrigate overhead. Utilize drip/microirrigation or hand water beds and containers at soil level. This prevents the leaves from becoming wet; wet leaves become a perfect host for BLS.
- Never work tomato plants when leaves are wet. No staking, pruning, tying, or anything else until plant tissue is dry. Working wet tomato plants is an excellent way to spread bacteria!
- Sanitize pruning tools often and wash hands after working infected plants.
- Maintain airflow in plants by planting at correct spacing and thinning interior leaves as necessary to facilitate quicker drying of the plant.
- Prune lower leaves to at least 12” from the soil’s surface to prevent disease transmission from soil to leaves through splashing water.
- Remove infected leaves (when plants are dry!) to slow disease progression.
- Rotate crops and destroy infected plants to prevent buildup of BLS organisms in soil.
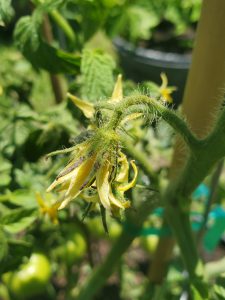
BLS lesions on tomato flowers. Photo courtesy of the author.
- Preventative measures are best, but if your garden has a history of BLS and local weather forecasts call for warm/wet/humid weather, it is best to spray fungicides proactively to protect your crop. A weekly spray with a tank mixture of copper and mancozeb is effective at keeping BLS at bay. This is the only chemical spray combination proven to be effective in controlling BLS.
- Unlike many common tomato pathogens that can be reliably avoided through planting resistant cultivars like ‘Big Beef’, ‘Celebrity’ and others, no varieties are resistant to BLS.
While BLS is an extremely destructive pathogen of both home and commercially grown tomatoes, growers can lessen the disease’s effects by following the preventative measures outlined above and spraying with a copper/mancozeb mix if necessary. Growing tomatoes this year hasn’t been easy, but it’s worth it to fight back and realize a harvest despite difficulties like BLS!
If bacteria have given you the blues or other garden issues are bringing you down, give your local UF/IFAS County Extension Agent a call! We’re here to help you be successful in all your horticultural endeavors. Happy gardening!