by Terri Keith | Feb 21, 2021

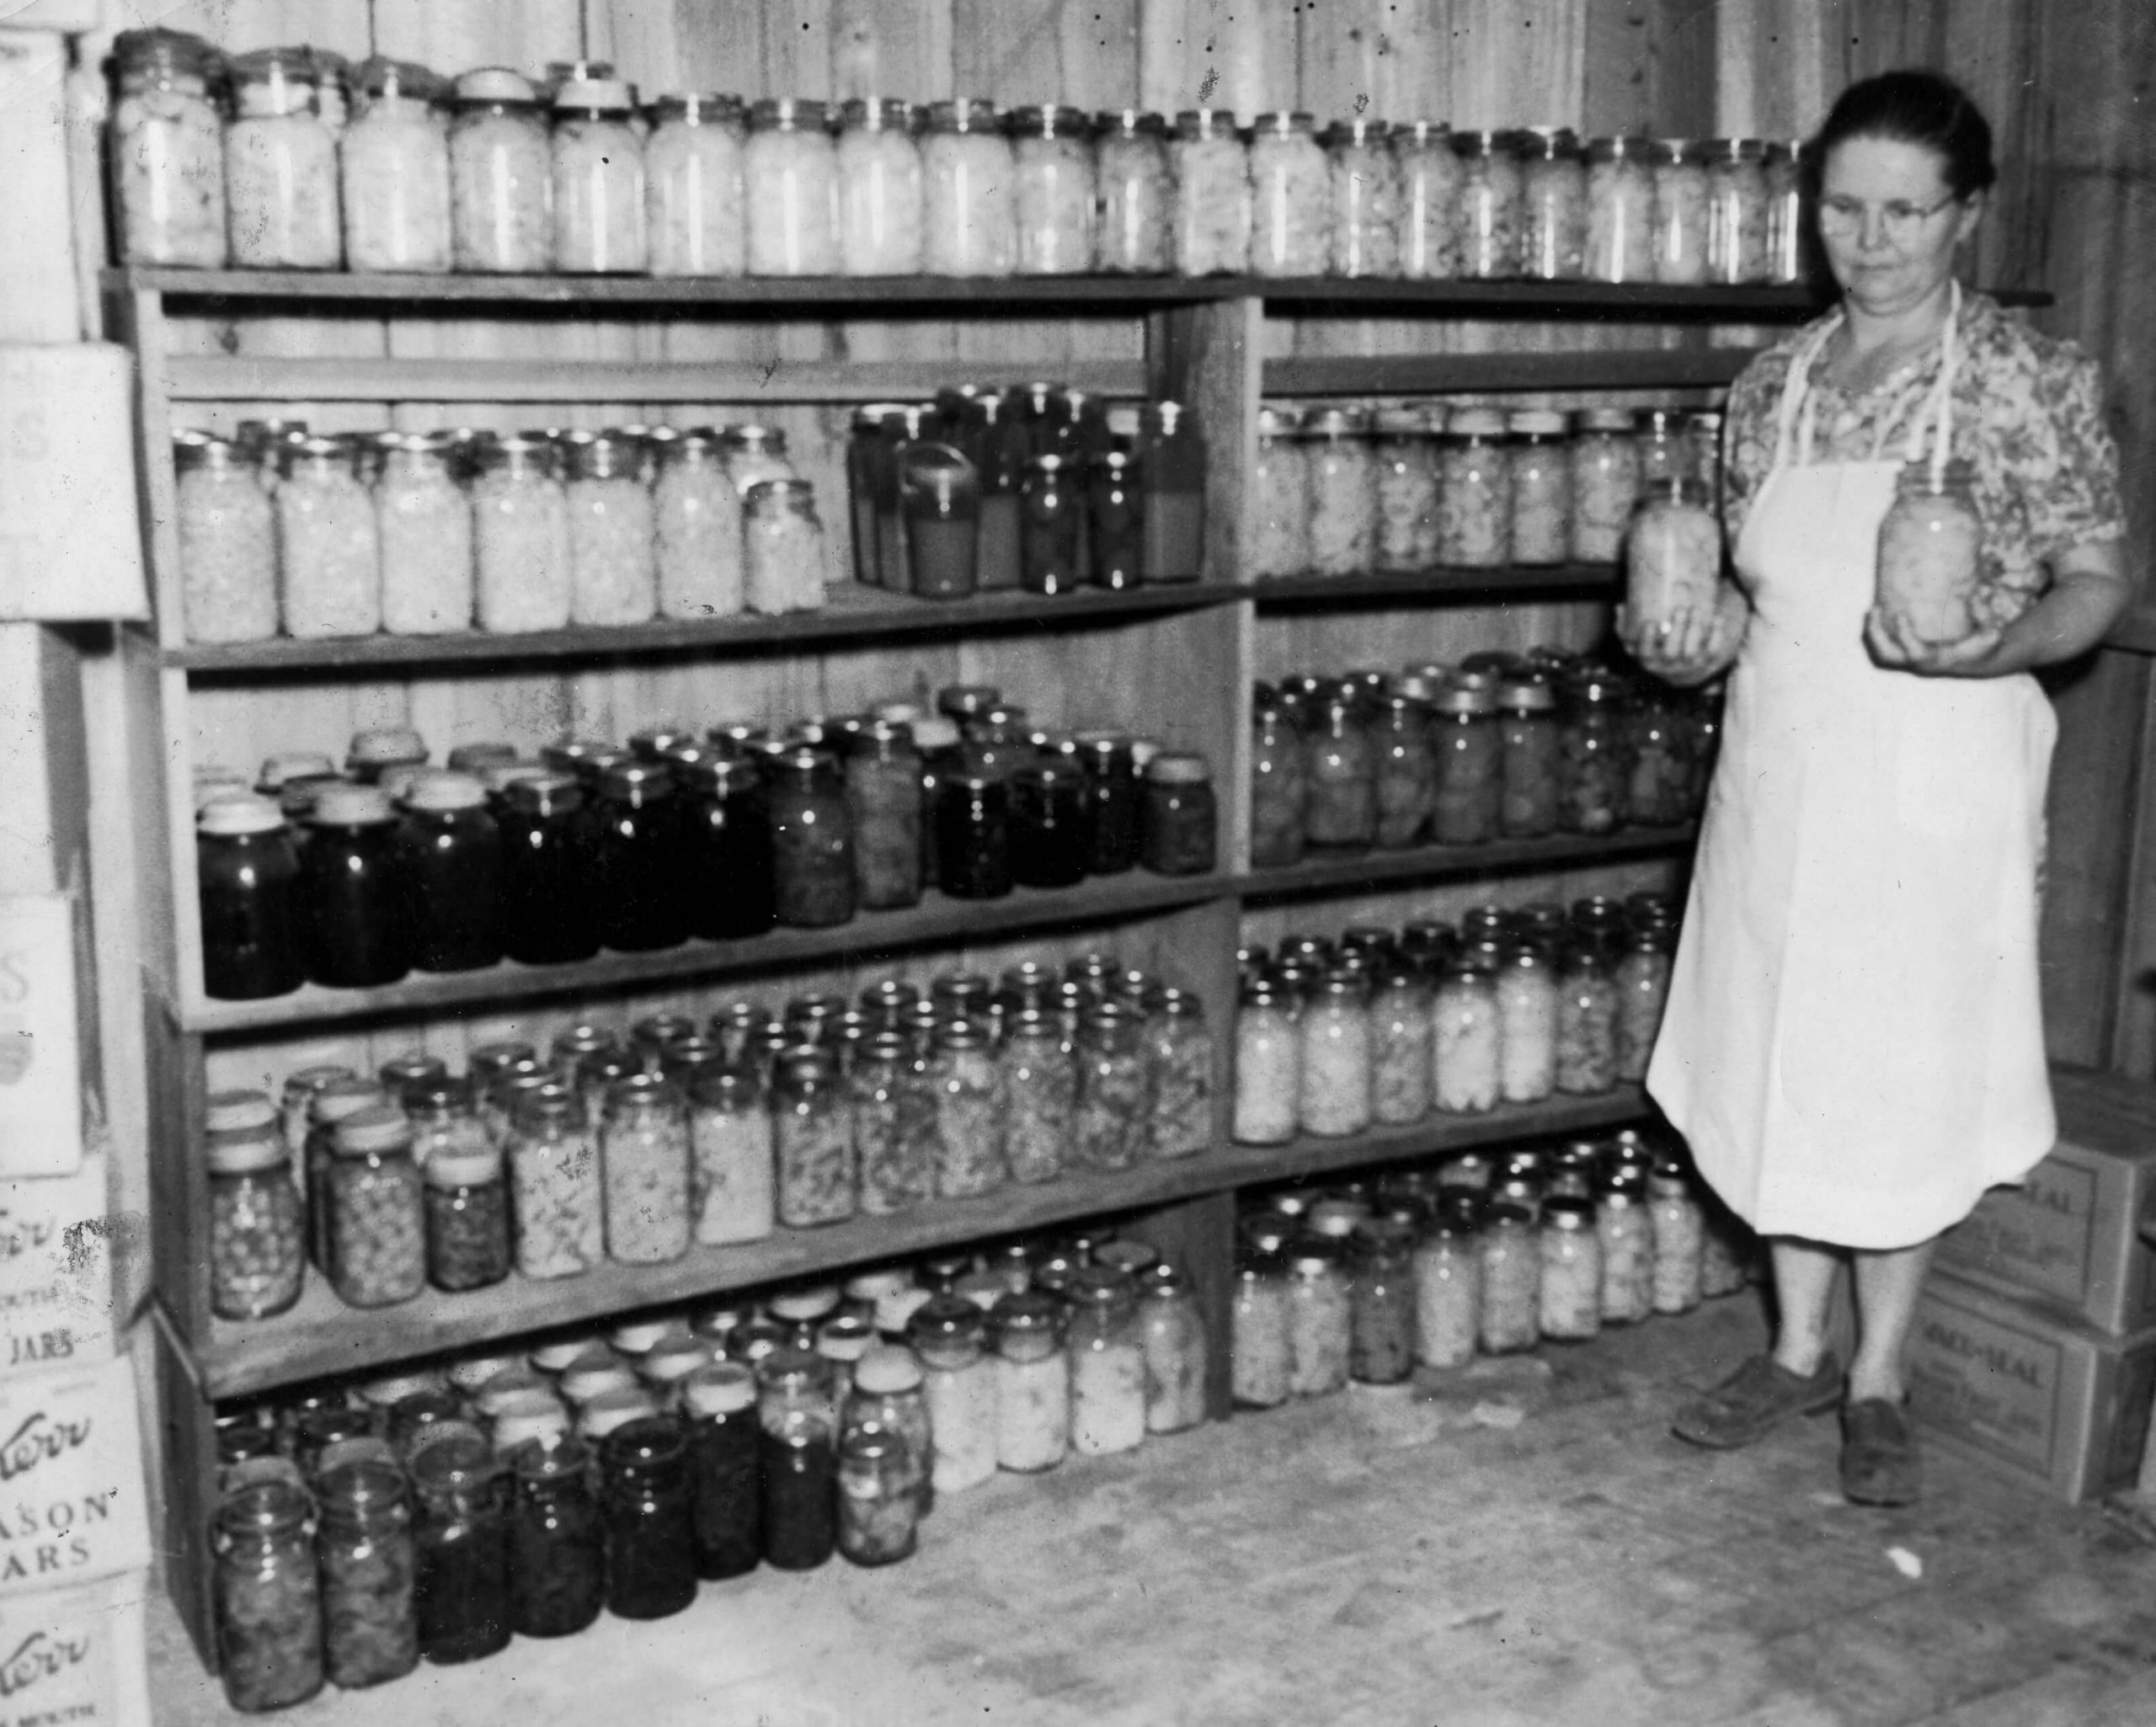
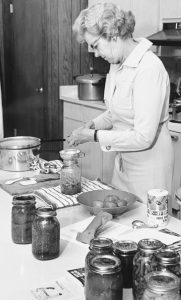
Homemade canned preserves 1942.
Photo Credits: UF/IFAS File Photo
In 1795, Napoleon needed a better way to preserve large quantities of food for his troops during the Napoleonic Wars, so his government offered a reward of 12,000 francs for the invention of a new food preservation method. In 1809, Nicolas Appert won that award with his canning technique that used glass containers that were sealed then heated to a set temperature. Peter Durand created the tin canister a year later. These inventions led to the canning materials and processes that are used today to preserve food for people all over the world.
Canned food provides a convenient and often less expensive way to include fruits and vegetables in the diet of many individuals and families. Canned foods are also considered a staple in many pantries because of their shelf life. Commercially canned products may keep the food packed inside at its best quality for 1 to 5 years depending on the type of food. Most home canned foods are able to be stored for up to a year, though there are some exceptions.
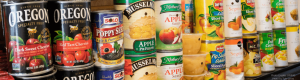
Photo Credit: UF/IFAS Photo by Tyler Jones
To make the most of canned foods, keep these tips in mind.
Best by or use by dates on commercial products do not indicate safety. They are estimated dates provided by the manufacturer on how long they believe their product would be at its best quality. The exception to this is for infant formula products that are required to have a “Use-By” date and should not be used after that date.
Avoid cans or jars that are not in good condition. Look for dents, swelling or bulging, leaking, rust, cracks in jars or loose lids. If the food has a foul odor or spurts liquid when it’s opened, do not use it. Any of these could indicate the food may have been contaminated or could contain Clostridium botulinum toxins.
A woman canning in the kitchen.
Photo Credits: UF/IFAS File Photo
Store canned foods in a cool, dark and dry space. This will help them to last longer and keep the food inside at its best quality. Keep canned foods in an area that is between 50-70°F.
Use canned foods to fill nutrition gaps. Add a can of vegetables to your dinner menu—a side of green beans or carrots can help balance your plate. Try using a can of fruit as a basis for a dessert. Pineapple and cottage cheese, anyone? If you’re concerned about sodium or sugar in canned foods, look for products marked as low sodium or lite for less sugar. Compare ingredient and nutrition labels of different brands or varieties of a product to find what works best for you.
If you can foods at home, make sure you’re following recipes that have been tested for safety. Follow the guidelines in the USDA Complete Guide to Home Canning, 2015 Revision or find more information at the National Center for Home Food Preservation. You can also contact your local extension office; in Florida, you can find your local office here.
Resources:
U.S. Department of Agriculture, National Agricultural Library, How Did We Can?: https://www.nal.usda.gov/exhibits/ipd/canning/timeline-table
U.S. Department of Agriculture, AskUSDA, How long can you keep canned goods?: https://ask.usda.gov/s/article/How-long-can-you-keep-canned-goods
U.S. Department of Agriculture, Food Safety and Inspection Service, Food Product Dating: https://www.fsis.usda.gov/wps/portal/fsis/topics/food-safety-education/get-answers/food-safety-fact-sheets/food-labeling/food-product-dating/food-product-dating
by Samantha Kennedy | Aug 24, 2019
If you are anything like me, you pride yourself on keeping your kitchen safe and clean. Everything is tidy and in its place, there is no expired food in the pantry or refrigerator, and all the appliances are clean and free of debris.
But really. How clean is your kitchen? Out of curiosity, I recently graded the cleanliness of my kitchen using this handy checklist from Rutgers University. And while I received a pretty good grade, there were a few things I discovered I was not doing correctly. As a food safety instructor, I was ashamed of myself!
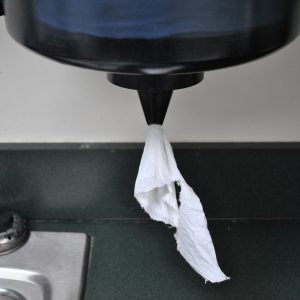
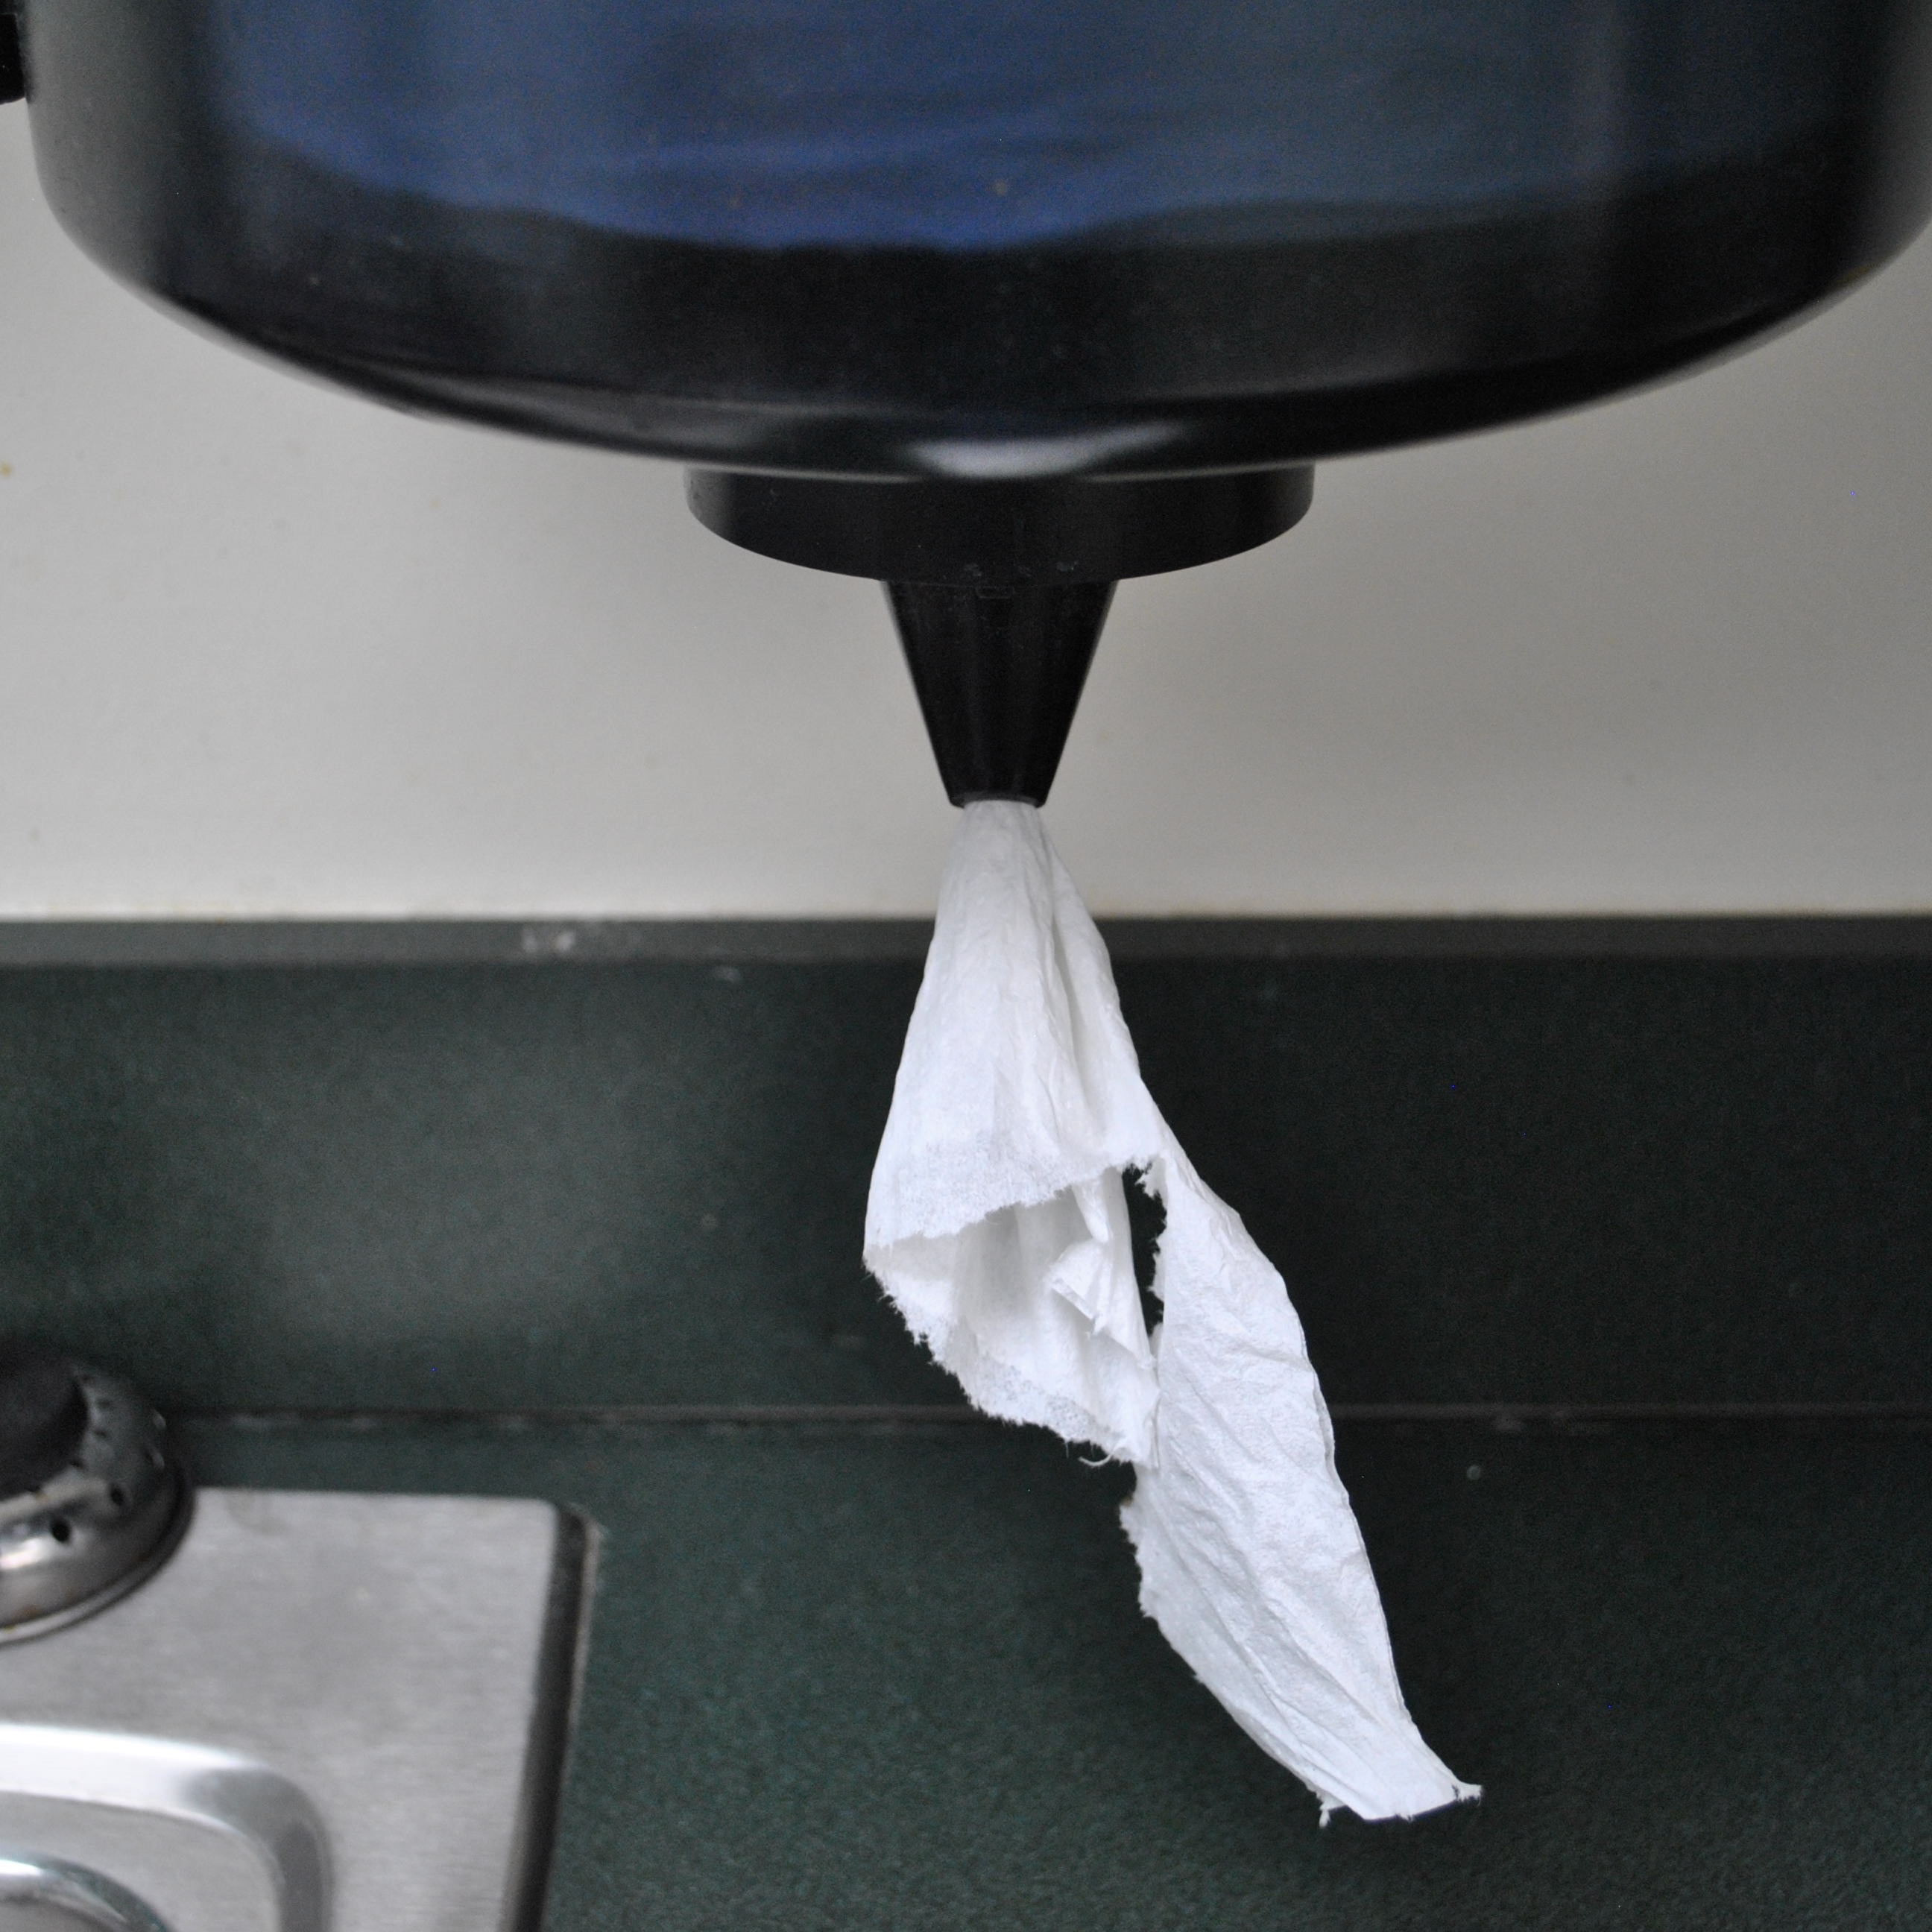
The safest and most sanitary way to dry your hands is with disposable paper towels. Never use a dishtowel for anything other than drying dishes. (Photo source: Samantha Kennedy)
The top five things I overlooked are:
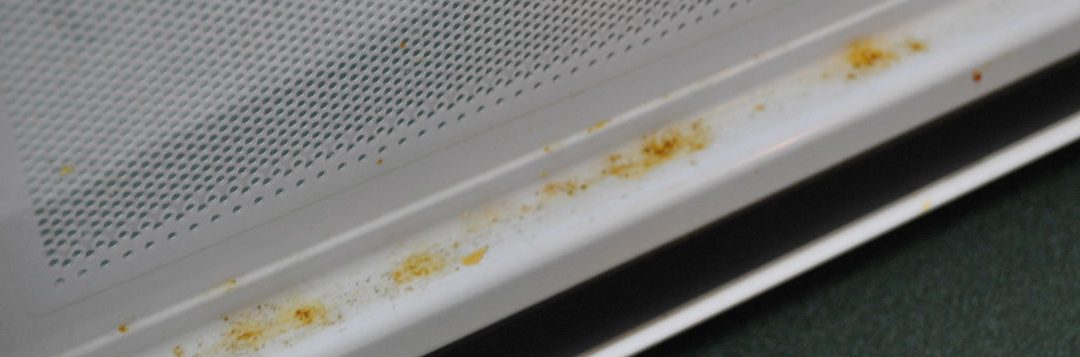
- While the inside of my microwave oven was clean and free of debris, I failed to pay enough attention to the door. It was a little grubby. While it may not seem important to keep it clean since it does not come in contact with food, gunky buildup from food and other sources can harbor bacteria. Be sure to always keep the door clean!
- I have a bad habit of using the same dishtowel to dry my hands that I use for other functions in the kitchen. The best food safety practice is to either use paper towels to dry your hands or have a designated towel for hand drying. In fact, dishtowels should only be used to dry dishes, not to wipe down countertops or clean up spills.
- While I hate to admit it, I have sometimes resorted to thawing foods on the counter when I have realized that one of the ingredients for that night’s dinner is still in the freezer. THIS IS A VERY UNSAFE PRACTICE! Thawing foods at room temperature (i.e. on the counter) exposes foods to the Temperature Danger Zone, which can encourage the growth of pathogens. The Temperature Danger Zone is the range of temperatures between 41 and 135 degrees F. Keep cold foods below 41 degrees and hot foods above 135 degrees to reduce the risk of foodborne illness. There are only 4 acceptable methods to safely thaw foods:
- In the refrigerator.
- Under running water. (NOTE: The water temperature must always be less than 70 degrees F.)
- In the microwave. (NOTE: The food must be cooked immediately after thawing.)
- During the cooking process.
- I do not actually store a lot of leftovers. As a single person, I generally prepare small meals that can be eaten in one sitting. However, on those occasions when I do have leftovers, I do not always label them with the date. Leftovers stored in the freezer should be labeled with what it is and when it was put into the freezer. Refrigerated leftovers should not be kept longer than 7 days. Frozen leftovers should not be kept longer than 6 months.
- My cats are allowed in the kitchen and even on the countertops. While I always sanitize the surfaces before I prepare food, the best food safety practice is to prevent pets from coming into contact with countertops and other food contact surfaces.
How do you think your kitchen would fare? I encourage you to take a few minutes to grade your own kitchen to make sure you are doing everything you can to keep your kitchen as clean and sanitary as possible.
For more information about food and kitchen safety, please visit https://www.foodsafety.gov/.
by Samantha Kennedy | Jul 2, 2019
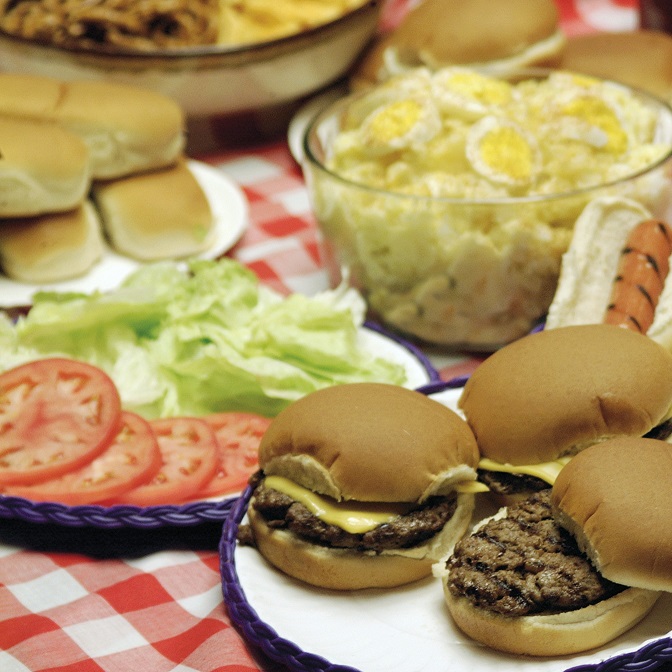
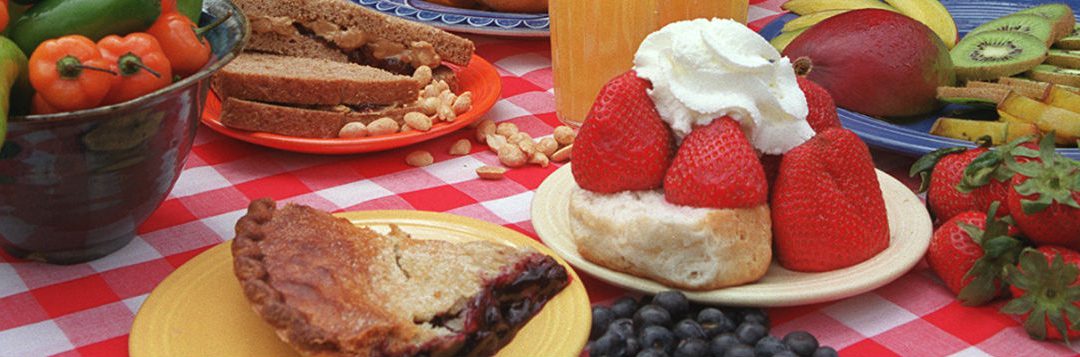
Picnics are a great way to share food and fun with friends and family. By following a few simple food safety tips, you can make sure foodborne illness doesn’t crash your party. (Photo source: UF/IFAS file photo)
There are few things more iconic during summer than a picnic. There’s just something fresh and fun about sharing a meal in the park or at the beach with family and friends. But just because you’re enjoying the warm, gentle breeze doesn’t mean you should throw caution to the wind. By following a few simple food safety tips, you can ensure that your perfectly planned picnic doesn’t make you sick.
Plan appropriately. Not all foods are picnic-appropriate. Anything that requires a lot of perishable ingredients and/or a lot of preparation should be avoided. Stick with foods that require little or no cooking and that contain just a few ingredients. Foods such as fruits and vegetables (especially whole ones), hard cheeses, peanut butter and jelly, cereal, bread, and crackers are ideal picnic items. Anything made with commercially processed custard or mayonnaise will stay safe as long as it is kept cold.
Pack it safely. Use a cooler, if possible, and store cold foods together so they can help each other stay colder longer. Use ice or frozen gel packs to help keep foods cold. Pack foods directly from the refrigerator into the cooler; don’t leave them sitting out before packing. Store ready-to-eat foods separately from raw meats. If packing up hot foods, be sure to keep them in a thermos or other insulated dish. DO NOT store them in the same container as the cold foods. Paper towels, disposable utensils, and a food thermometer are ideal picnic accessories. Remember, keep cold foods below 41 degrees F and hot foods above 135 degrees F. Do your best to keep the cooler away from direct sunlight by storing it in the shade and be sure to replenish the ice and/or frozen gel packs when they melt. If possible, store drinks in a separate cooler so cold foods are not exposed to warm air with frequent openings of the lid to retrieve drinks. This also reduces the risk of cross-contamination, with fewer hands reaching into the food cooler.
Prepare it carefully. All food items should be kept at the proper temperature at all times. When cooking raw meats, use separate plates for the raw and cooked products and clean and sanitize utensils between uses. Cook meat to the proper recommended internal temperature to ensure doneness and safety. Click here for a list of recommended internal cooking temperatures.
Clean up quickly. Discard any perishable foods that have been left out for longer than two hours. In really hot weather (generally above 90 degrees F), foods should not be left out longer than one hour. Keep food protected in storage containers such as coolers and lidded dishes to minimize contamination from flies and other pests. Serve small portions of food at a time and keep the rest in the cooler.
Picnics are an important part of summer and with just a little bit of planning and a few useful tips and tools, they can be safe and delicious for everyone!
Related links:
Food Safety at Tailgating (University of Florida/IFAS)
Picnic Safety (Iowa State University)
Checklist for the Perfect Summer Picnic (foodsafety.gov)
Extension classes are open to everyone regardless of race, creed, color, religion, age, disability, sex, sexual orientation, marital status, national origin, political opinions or affiliations.
by sbouie | Aug 28, 2016
 September is National Food Safety Month. However, food safety should be practiced every day of the year and for every meal and/or snack. We live in a busy society. We are always in a rush to do and to go to whatever we have planned.
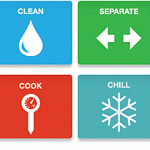
When it comes to our food, we need to make the time to observe steps to food safety. Food safety will decrease the opportunity for food borne illness. The steps are as follows:
- Clean – everything that touches the food. This includes hands, utensils, surfaces, and foods – fruits, vegetables, but not meats or eggs. Wash hands in hot water and soap for at least 20 seconds. Bacteria can get on cutting boards and utensils. Rinse fresh fruits and vegetables under running tap water, including those with skins and rinds that are not eaten. Rub firm-skin fruits and vegetables under running tap water or scrub with a clean vegetable brush while rinsing with running tap water.
- Separate – surfaces used for raw meats and eggs from other foods or surfaces when shopping, storing, preparing, and cooking. This will prevent cross-contamination.
- Cook – food at the correct temperature by using a food thermometer (see the chart below). The danger temperature zone is 400 to 1400 Fahrenheit. This is when bacteria rapidly grows.
- Chill – Refrigerate perishable foods within two hours. Never thaw or marinate foods on the kitchen counter.
After you remove meat from a grill, oven, or other heat source, allow it to rest for the specified amount of time. During the rest time, its temperature remains constant or continues to rise, which destroys harmful germs.
| Category |
Food |
Temperature (°F) |
Rest Time |
| Ground Meat & Meat Mixtures |
Beef, Pork, Veal, Lamb |
160 |
None |
| Turkey, Chicken |
165 |
None |
| Fresh Beef, Veal, Lamb |
Steaks, roasts, chops |
145 |
3 minutes |
| Poultry |
Chicken & Turkey, whole |
165 |
None |
| Poultry breasts, roasts |
165 |
None |
| Poultry thighs, legs, wings |
165 |
None |
| Duck & Goose |
165 |
None |
| Stuffing (cooked alone or in bird) |
165 |
None |
| Pork and Ham |
Fresh pork |
145 |
3 minutes |
| Fresh ham (raw) |
145 |
3 minutes |
| Precooked ham (to reheat) |
140 |
None |
| Eggs & Egg Dishes |
Eggs |
Cook until yolk and white are firm |
None |
| Egg dishes |
160 |
None |
| Leftovers & Casseroles |
Leftovers |
165 |
None |
| Casseroles |
165 |
None |
| Seafood |
Fin Fish |
145 or cook until flesh is opaque and separates easily with a fork. |
None |
| Shrimp, lobster, and crabs |
Cook until flesh is pearly and opaque. |
None |
| Clams, oysters, and mussels |
Cook until shells open during cooking. |
None |
| Scallops |
Cook until flesh is milky white or opaque and firm. |
None |
Food is for the nourishment of our body, not to make us sick. Take the time to clean, separate, cook, and chill foods to avoid food borne illness. For more detailed information and videos, visit www.foodsafety.gov and www.fightbac.org.
Sources: www.foodsafety.gov; www.fightbac.org

by jbreslawski | Mar 11, 2016
 It seems that everywhere you look, an egg hunt is being advertised, egg dye kits are on every corner in the store, and the Internet is a-buzz with cool decorating ideas. Keep in mind this season that this fun family activity could turn rotten if you forget food safety.
Outbreaks of foodborne illness, especially salmonella, have been associated with the improper preparation and storage of eggs. Salmonella is not something you want to remember when you think back to memories of decorating and hunting eggs in the spring.
Common symptoms of salmonella include nausea, vomiting, abdominal cramps, diarrhea, fever, and headache. Children are one population most susceptible to foodborne illness.
There is no reason to worry about potential food safety hazards associated with your holiday eggs as long as you remember to follow these guidelines:
- Clean and sanitize your hands, preparation area, and utensils before, during, and after the cooking process.
- Use eggs that are clean and free of cracks and leaks.
- Cook eggs completely – no rushing or short cuts. If you don’t have the time, pick another day to do it.
- Use only food-grade dyes; these include food coloring and dye sold in egg dye kits. Use beet juice, blueberry juice, etc. as alternatives to artificial dye.
- Refrigerate eggs as soon as you are finished decorating or, if decorating later, after cooking and drying.
- The refrigerator door is the warmest spot in your fridge; store eggs in the carton in the main compartment, not in the door.
- Toss eggs that have been out of the refrigerator for more than 2 hours. If eggs are not “found” or eaten, within this time, make the sacrifice and throw them away (of course, do this while the kids aren’t looking.)
- When hiding eggs for a hunt, keep them in areas that are clean, free of dirt, and away from pets or pests. Consider decorating one set for hunting and another for eating.
- Hard-boiled eggs are safe for up to one week with proper cooking, storing, and handling procedures.
Keep these guidelines in mind for an “egg”cellent holiday with family, friends, and fun!