by Judy Corbus | Jul 3, 2025

Check the terms of your homeowners or renters policy to make sure you have adequate coverage.
Photo credit: Judy Corbus, NW Extension District
Do you know what your home insurance covers? How about levels of coverage or exclusions? If you’re not sure, now is a good time to take a look at your homeowner’s or renter’s policy. Hurricane season potentially increases the likelihood of filing a claim and it’s wise to know your level of coverage, perils included (or excluded), and deductibles before the need arises.
How Much Insurance Should I Buy?
To be adequately covered, your home must be insured for the amount necessary to rebuild it at the current cost factoring in building material prices and labor costs. Also, depending on the age of your home, it may need to be repaired or rebuilt to meet current building codes. Law and Ordinance coverage will cover these additional costs so discuss your policy with your insurance agent. If your home is underinsured at the time of loss, there may be a penalty or reduction in the amount the insurance company will pay for the loss. Discuss both the limits and adequacy of types of coverage with your agent.
What Perils are Covered by My Policy?
Damage from rising water (flood) is not covered by most homeowners’ policies. You may purchase flood insurance through the National Flood Insurance Program (NFIP) or through private insurers. Flood insurance is available to cover your home and personal property. Usually, there is a 30-day waiting period before a flood insurance policy goes into effect with the NFIP, unless you purchase the policy at the same time you purchase or refinance your home. You may obtain flood insurance through your local agent.
You also should check for windstorm coverage, sinkholes and catastrophic ground cover collapse, and mold coverage.
Replacement Cost or Actual Cash Value?
These two settlement options are available when purchasing home insurance. Replacement Cost is the amount needed to repair or replace damaged property with materials of similar kind and quality without deducting for depreciation, which is the decrease in the value of your home or personal property due to normal wear and tear. Actual cash value is the amount needed to repair or replace an item, less depreciation. To receive replacement cost coverage, most homeowners’ insurance policies require the policyholder to insure the home for at least 80% of its replacement value.
What About the Hurricane Deductible?
The Hurricane Deductible is the deductible applied to loss caused by a hurricane. The deductible is the dollar amount paid by the policyholder before an insurance company pays anything. Typically, the hurricane deductible is $500 or two, five, or ten percent of the amount of insurance covering the dwelling at the time of loss. In Florida, you pay one hurricane deductible per calendar year as long as you are insured by the same insurer for the second or subsequent hurricanes for the same calendar year. The hurricane deductible applies from the time a hurricane watch or warning is issued for any part of Florida until 72 hours after the last hurricane watch or warning is terminated for any part of Florida.
Take a few moments to review your policy while the sun is shining and the waters are calm so you are prepared for hurricane season.
For more information on homeowners’ insurance, check out Homeowners Insurance A Toolkit for Consumers and Florida’s Hurricane Deductible.
Sources:
Homeowners Insurance A Toolkit for Consumers
Florida’s Hurricane Deductible

by Judy Corbus | Apr 28, 2025
Spring has sprung and you may feel the urge to give your home a deep cleaning. The American Cleaning Institute finds that 80% of us are doing some type of deep cleaning this spring so you are not alone. Deep cleaning your home after winter gives a fresh restart and boosts your spirits.
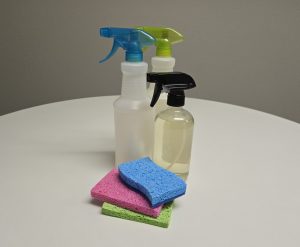
Make your own household cleaners to save money and reduce container clutter. Photo credit: Judy Corbus
When choosing cleaning products, keep in mind that you can make your own from ingredients you already may have on hand. You will save money and reduce container clutter with products that can clean multiple surfaces. Here is a list of basic cleaning ingredients:
- Vinegar
- Rubbing alcohol
- Washing soda (can be found near the laundry detergent in most stores)
- Borax (also near the laundry section)
- Mild dish detergent
- Liquid bleach
- Baking soda
- Ammonia
- Water
Here are a few recipes to get you started:
Everyday Household Cleaner
- 2 tablespoons of liquid detergent/soap
- 2 tablespoons of ammonia
- 1 quart of water
Use for all general cleaning jobs.
Window Cleaner
- 1/4 cup rubbing alcohol
- 1/4 cup white vinegar
- 1 tablespoon cornstarch
- 2 cups warm water
Combine all ingredients together in an empty spray bottle and shake well. You will need to shake it a little with each use if you see cornstarch accumulating at the bottom of the bottle. Use crumpled-up newspaper to shine the windows.
Ceramic Tile Floor Cleaner
- 1/4 cup of white vinegar (or more depending on how dirty)
- 1 gallon of water
Typically requires little-to-no scrubbing to remove most dirt and doesn’t leave a film like soap sometimes does when using hard water.
With all cleaning products, remember:
- It is best to mix just what you need and use it all.
- Be sure the container has a label. If you make your own cleaner, always label it.
- Never put cleaners in food containers.
- Store cleaning solutions out of children’s reach.
Note: Use caution when making homemade cleaners! Mixing bleach with ammonia or vinegar will create toxic fumes that are very dangerous to your lungs and breathing!
For additional cleaner recipes, check out:
Reference: Homemade Household Cleaners
An Equal Opportunity Institution.
by Judy Corbus | Aug 28, 2024
With summer in full swing, you’ve probably noticed an uptick in your electricity bill. The hot temperatures and high humidity have been giving your air conditioner a real workout! Since your heating, ventilation, and cooling (HVAC) system uses the most electricity of any item in your home, taking steps to improve its efficiency will save energy and money. Try these five easy ways to stay cool for less:
Adjust the thermostat. Set the air conditioner thermostat to 78o F. For every degree setting below 78o F, you spend up to 4% more in cooling costs.
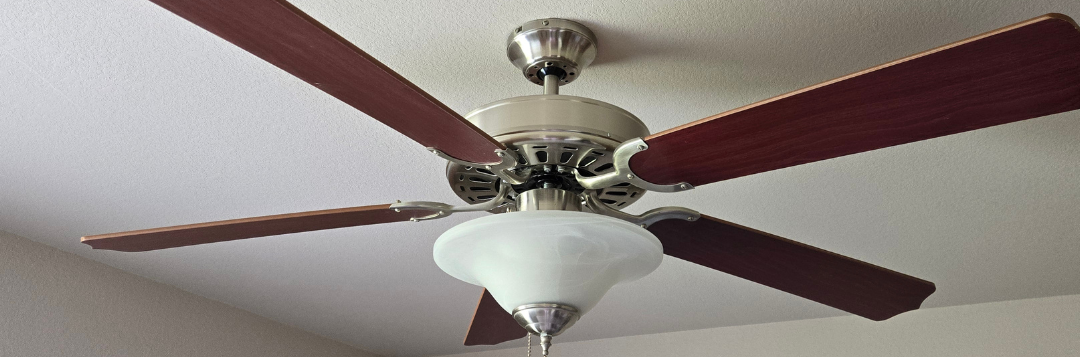
Use fans. Ceiling and floor fans move air to create a breeze, which can make a room feel up to four degrees cooler than the actual temperature. This allows you to set the thermostat higher and still be comfortable. Ceiling fan blades should move in a counterclockwise direction to create a downdraft – you can adjust the direction by moving the switch located on the side of the motor casing. Tip: Fans cool people, not rooms, so turn off the fan when you leave the room to save more money on your power bill.
Use window coverings to control sunlight. East- and west-facing windows catch the brunt of the sun’s heat, adding extra warmth to those sides of your home. Keep blinds and drapes closed to block out morning or afternoon sunlight so your air conditioner doesn’t have to work harder to cool those rooms.

A dirty filter forces your HVAC system to work harder, raising your power bill and shortening the lifespan of the unit.
(Photo source: Judy Corbus)
Change the air filter. Dirty air filters restrict airflow and may cause the HVAC system to run longer, increasing your energy bill and potentially shortening the life of the unit. Many newer HVAC systems shut down if the filter becomes too clogged for air to pass through the filter; this prevents the compressor motor from overheating. When this occurs, a service technician must inspect and reset the unit, resulting in a service charge. During periods of high use or if you live in a dusty area or have pets, check and change your filter monthly, even if the filter is labeled to last three months. Pick a day that’s easy to remember, like the first of the month or when you receive your power bill in the mail. Make sure you use the filter type and size recommended by the manufacturer for optimal efficiency. While you’re at it, dust your ceiling fan blades, too!
Have your HVAC system serviced at least annually. Schedule a maintenance check on your unit at least once a year. A trained technician will check the coolant level, drain line, and overall system to make sure everything is operating at peak efficiency. If you live in a manufactured home, it’s especially important to check the ductwork to ensure it has not separated at the seams, resulting in a loss of cool air inside and higher electricity bills. Routine maintenance will head off potential problems, extending the life of your unit and promoting efficient operation for reduced power bills. Tip: Prune back shrubs that may block airflow to your air conditioner compressor.
These simple tips will help to cool down your power bill while you stay cool!
For more energy-saving tips, visit the Florida Energy Systems Consortium.
An Equal Opportunity Institution.

by Judy Corbus | Jun 24, 2024
Do you reach for the can of bug spray at the first sight of a pest? Many people do, but did you know there are other less toxic methods for controlling ants, cockroaches, and other vermin in and around your home? Integrated Pest Management, or IPM, is an approach that uses a variety of strategies to discourage the development of pest populations and to reduce pesticide use. These strategies are not difficult or expensive and promote a cleaner, healthier environment.
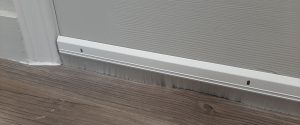
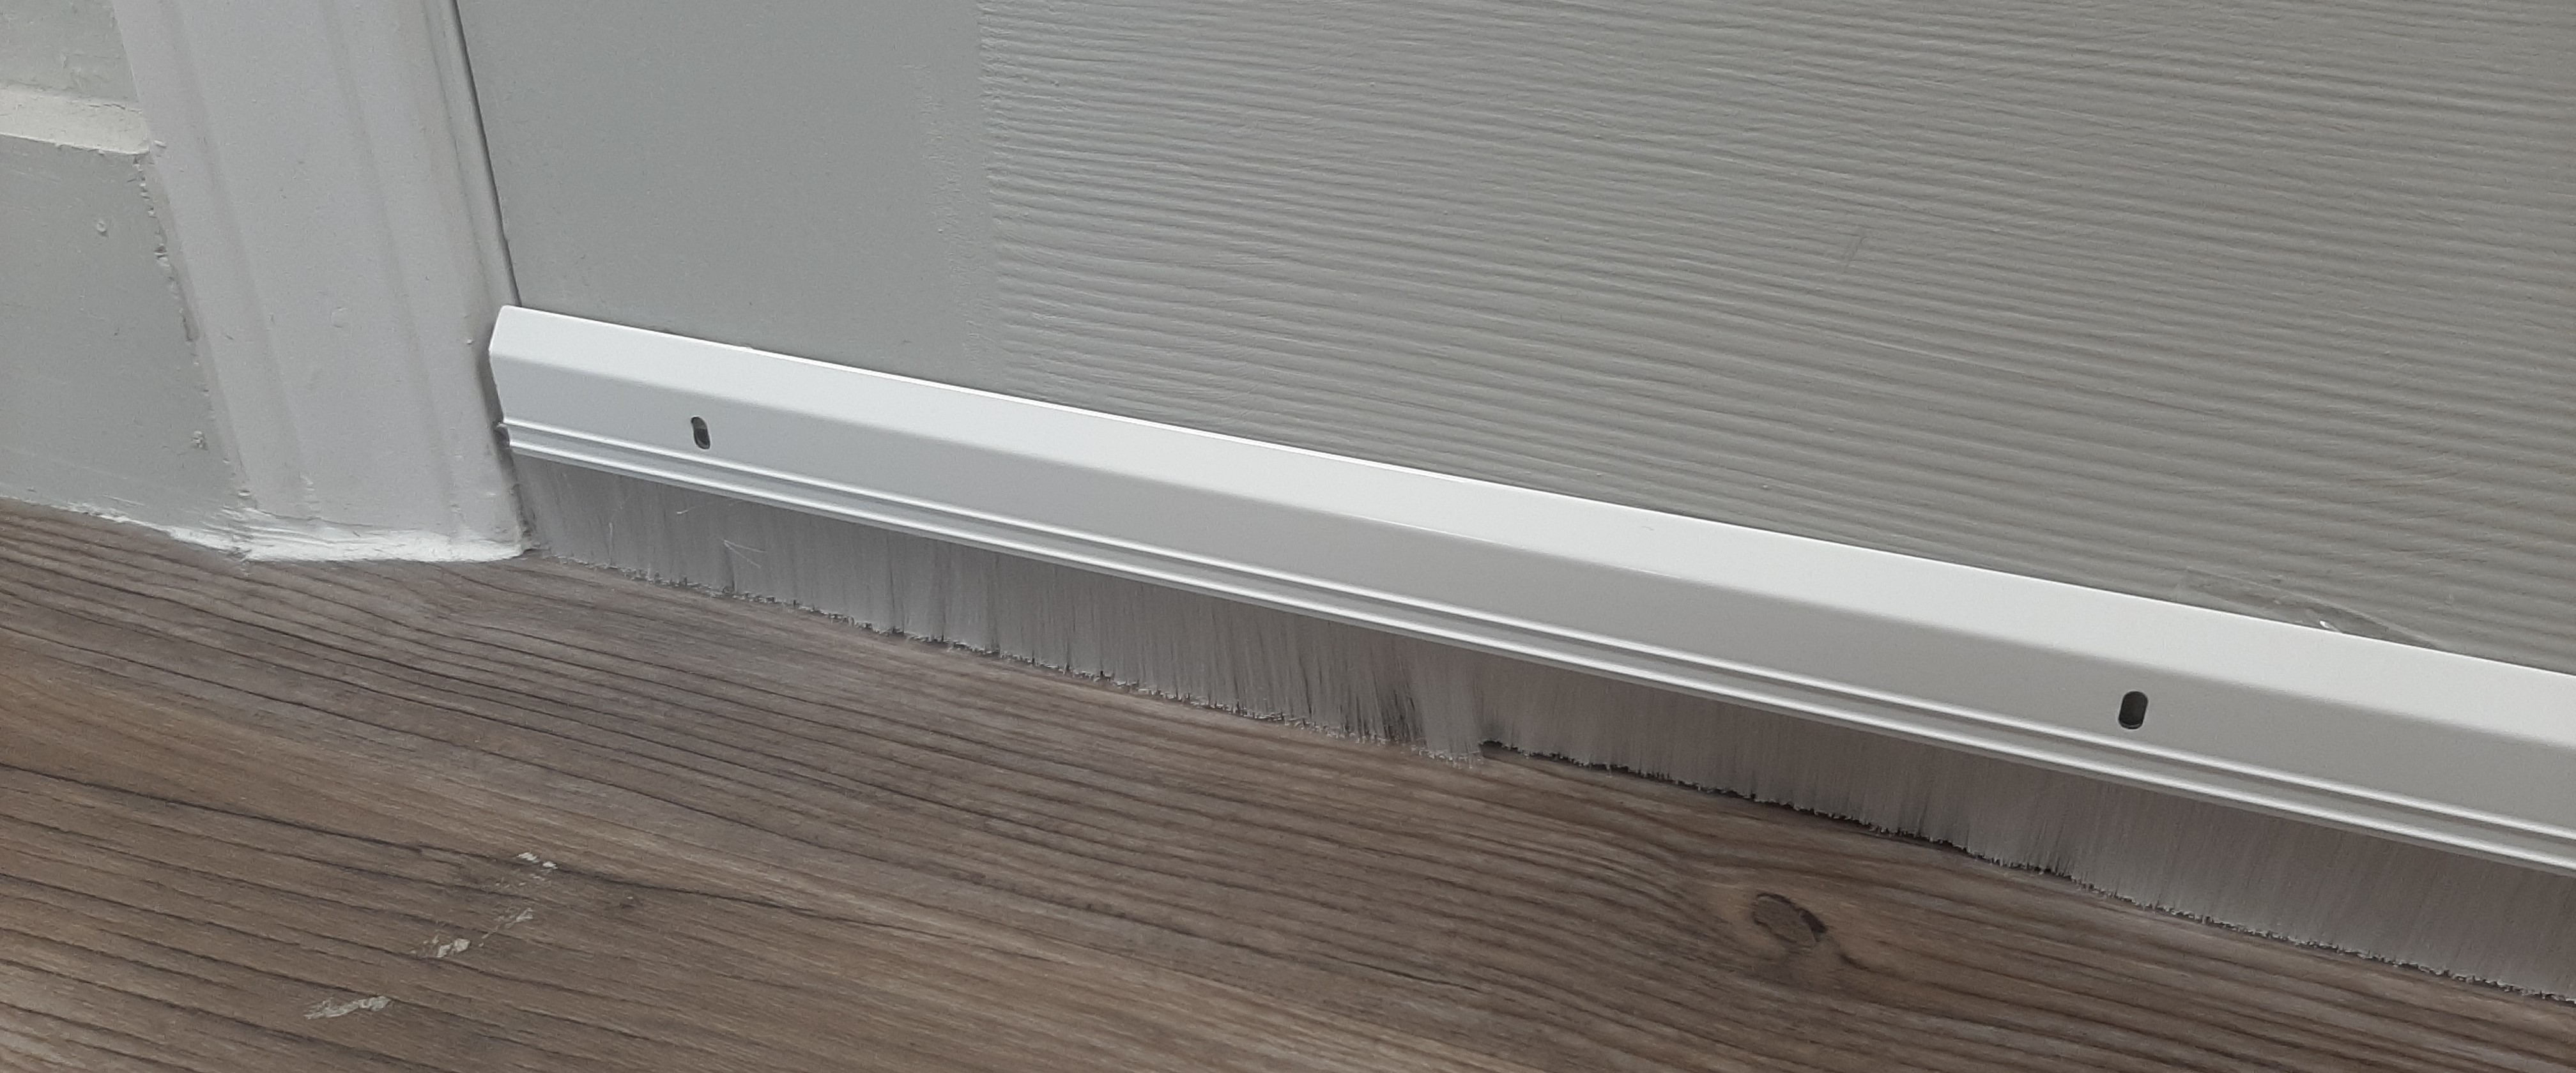
Install door sweeps on the inside of exterior doors to keep insects out.
Photo Credit: Judy Corbus
PREVENTION
- Check grocery bags, book bags, and lunch containers for cockroaches before bringing them in your home.
- Cockroaches LOVE cardboard boxes and paper bags. Dispose of unnecessary boxes and bags immediately to eliminate breeding areas. Transfer items for storage to plastic totes with snap-on lids.
- Repair or replace torn window and door screens to keep ants, cockroaches, and mosquitoes from entering your home.
- Apply weather stripping around exterior door frames. Cockroaches can enter through an opening the thickness of a dime so small gaps around your doors are all they need to come in. If your door frame peeks light, your home is not tight!
- Install door sweeps on exterior doors to make it harder for ants and cockroaches to enter. Make sure the sweep brushes the floor to keep insects out.
- Ants and cockroaches often enter a home looking for water, especially during dry spells. Seal gaps and openings around pipes with expanding spray foam to eliminate these entry points.
- Regularly empty standing water in flowerpots, tires, outside toys, and other containers to cut down on mosquito larvae.
Sanitation
- Wash dishes immediately after use.
- Wipe counter tops regularly, especially after food preparation.
- Keep small and large appliances clean and free of crumbs and other debris. Don’t forget to clean around them, too.
- Store food in sealed packages or containers or in the refrigerator.
- Close garbage container lids, empty garbage regularly, and keep the container and area clean.
Chemical control
Baits are most highly recommended because of their effectiveness and targeted application, while decreasing unnecessary pesticide exposure. They come in granular forms, in plastic stations, or in large syringes for gel application and in formulas targeted specifically for ants or cockroaches.
- Apply granular formulations outside in plants and mulched areas.
- Use bait stations around corners where you suspect cockroaches or ants are hiding or entering your home.
- Apply gel baits in cracks and crevices around windows, doors, behind the range, and any other suspected harborage areas.
- Pest control operators have other baits in different forms that also provide long-lasting control.
Simple, everyday habits can go a long way toward eliminating an inviting environment for pests.
For more information about pest management, check out these resources or contact your local UF/IFAS Extension Office:
Cockroaches and Their Management
Ants
Pantry and Stored Food Pests
Rat and Mouse Control
Urban Pests and Pest Management
Using Pesticides Safely In and Around the Southern Home
Source: Cockroaches and Their Management
An Equal Opportunity Institution.

by Judy Corbus | Oct 22, 2021

Consider setting up a flexible spending account during your employer’s open enrollment period. Photo credit: Judy Corbus
Fall is open enrollment for health insurance and other employee benefits with many employers. One benefit available through many employers is a flexible spending account, or FSA. A flexible spending account is a special account into which you put money to pay for certain out-of-pocket health care expenses. You select the total amount you wish to contribute for the following year, and your contributions are divided out evenly over your paycheck schedule beginning January 1st.
A real perk to this account is you don’t pay taxes on your contributions – the money is deducted before taxes are calculated so you will save an amount equal to the taxes you would have paid on the money you have set aside.
The FSA funds can be used to pay for certain medical and dental expenses for you, your spouse if you’re married, and your dependents. Typical allowable expenses include:
- Deductibles and co-payments
- Prescription medications and over-the-counter medications with a doctor’s prescription
- Medical supplies and equipment such as crutches, bandages, contact lenses and solution, hearing aid batteries, and blood sugar test kits.
Access to your funds varies by employer – some provide employees with a special debit card linked to their FSA to use to pay for expenses, while others require employees to submit a claim to the FSA for reimbursement.
You may contribute a maximum of $2,750 per year per employer. Your spouse also may contribute up to $2,750 in an FSA with their employer. Bear in mind that FSAs are “use it or lose it.” Funds generally must be used within the plan year; however, employers may offer a couple of options:
- They may provide a “grace period” of up to 2 ½ extra months to use the funds.
- They may allow you to carry over up to $550 per year to use in the following year.
Employers are not required to offer these options so it’s important to know your employer’s policy. If you have not used your money by the end of the plan year or grace period, you lose it so plan carefully.
To calculate how much to contribute, review this year’s medical expenses for routine doctor and dentist visit co-pays and charges, deductibles, prescription and OTC “maintenance” medications, and other medical expenses. If you anticipate an additional expense for the coming year, such as new eyeglasses, factor that in as well. It’s better to underestimate next year’s medical expenses and contribute a smaller amount than to overestimate and risk losing unused funds.
Some employers also offer dependent care flexible spending accounts to cover childcare expenses. They, too, offer tax savings and operate similarly to healthcare FSAs; check with your employer to see if they are available.
Use open enrollment to review your available options and premiums and compare with your current plan(s) to make sure you and your family are enrolled in the plan(s) that will best meet your needs at the most affordable price. Consider enrolling in a flexible spending account to save money on taxes – don’t leave money on the table!
For more information, visit IRS Publication 969 Health Savings Accounts and Other Tax-Favored Health Plans.
Source: HealthCare.gov