by Samantha Kennedy | Aug 24, 2017
 With today’s continued focus on healthy eating and the dangers of high blood pressure, seasoning and cooking with salt has decreased. Alternative seasonings such as herbs and spices are excellent additions to any dish without the dreaded sodium. Herbs and spices are easy to use and can add a variety of delicious flavor combinations to any family favorite.
The difference between an herb and a spice is the part of the plant used. Herbs come from the leaves and soft stems of the plant. Spices are taken from the roots, seeds, bark, fruit, or flowers of the plant. Spices tend to have a stronger flavor than herbs, and are usually used in smaller quantities.
Besides being a healthy substitute for salt, herbs and spices can also replace added fat and sugar without contributing extra calories. Instead of adding extra sugar to oatmeal, for example, try using cinnamon or allspice.
Add cumin or ground black pepper to more savory dishes instead of reaching for the salt shaker or butter. Try seasoning meats with herbs and spices instead of coating them in breading or gravy.
Not all herbs and spices pair well with all types of foods. Herbs and spices should be used to enhance and complement the flavor of food without taking it over completely.
A strong herb such as rosemary would completely overwhelm a mild-tasting food like peas or other vegetable. Conversely, a mild herb such as parsley would be completely overwhelmed by a strong-tasting food such as lamb or beef.
Dried herbs can be used instead of fresh herbs in recipes, and vice versa. Keep in mind the flavor of dried herbs is much more concentrated than that of fresh, so reduce the amount accordingly.
Use only a quarter to half as much dried as fresh. Start with a smaller amount, and then add as needed to achieve the desired taste.
Look for herbs with a bright green color and little or no wilting when choosing fresh ones. Avoid bunches showing signs of mold, slime, or pests.
Wash fresh herbs in clean, cool water to get rid of any sand. Fresh herbs need to be stored in the refrigerator, in an unsealed plastic bag, to maintain optimal freshness. They can last up to three weeks, though should be used within a week for the best flavor.
Dried herbs and spices, if stored correctly, do not spoil. However, they will lose their flavor and aroma over time.
Ideally, flaked or ground herbs and spices should be replaced every six months for maximum flavor, but can remain viable for up to three years. Whole spices such as cinnamon sticks and peppercorns can remain effective for up to five years.
Not all herbs and spices are created equal. When using them in cooking, it is important to remember the more delicate herbs such as basil and chives should be added right before serving to preserve their flavor.
Less delicate herbs such as thyme and oregano can be added earlier in the cooking process since they retain their flavor better. When creating herb blends, mix, match, and be creative. Add them to a cheese shaker for easy access during meals.
To learn more, sign up for the Extension Cooking Class series which starts September 7, 2017 at the UF/IFAS Wakulla County Extension Office at 84 Cedar Avenue in Crawfordville. Start time is 6:00 p.m. and the cost is $10.
For additional tips about cooking with herbs and spices, call Samantha at the UF/IFAS Wakulla County Extension office at (850) 926-3931.
by Ginny Hinton | Aug 18, 2017

With kids back in school, moms face a set of challenges that somehow seem new every year. One of those challenges is what to feed kiddos who race in the door hungry after a long day in the classroom. As a savvy mom, you know that snacks can help your kids meet their nutritional needs – as long as you pick the right ones. That’s where it can get a bit tricky because in addition to being healthful, the snacks need to be loaded with kid appeal plus be quick and easy to grab. Try some of the following ideas from the different food groups to create a snack that will give your kids calories (energy), meet their nutritional needs, and taste great as well!
• Banana Tortilla Treat – Grab a whole wheat tortilla, spread with peanut butter and sprinkle with low-fat granola. Put a peeled banana on top and roll the tortilla.
• Combo-licious – Top a scoop of cottage cheese with canned fruit. Choose peaches, pears, mango, pineapple or fruit cocktail.
• Wrap It – Spread fresh hummus on a whole wheat tortilla. Add thinly sliced carrots, zucchini, cucumber, or whatever veggie your kids prefer. Roll it up and go!
Feeling rushed in the afternoons? Plan ahead and create a healthy snack shelf at eye level in your pantry and in your refrigerator for kids to grab and go. You might try the following:
• String cheese and a small can of fruit.
• Fat free or 1% flavored milk (chocolate or strawberry)
• Pre-cut raw veggies (celery sticks, baby carrots, cucumber slices) in zipped baggies beside low-fat yogurt dip, cottage cheese or hummus.
• Snack-sized applesauce
• Trail mix with nuts and dried fruit
• Flavored rice cakes with peanut butter to spread
• Microwave popcorn
• Whole-grain crackers on the shelf and sliced cheese in the ‘fridge
With just a little planning, you can avoid snack-time stress and help your kids learn healthy eating habits at the same time.
For more ideas, check out these snack tips for parents. 10 Choose My Plate Snack Tips
by Kendra Hughson | Aug 16, 2017

Jazz up traditional peanut butter sandwiches with raisins or carrot straws.
Now that school is back in session, are your struggling to find healthy and safe lunches to pack? Do you cringe with every peanut butter and jelly sandwich you make? If you are like me, finding healthy lunch time meals that are packed with nutrition, offer some variety, and won’t end up in the trash requires planning, creativity, and lots of energy!
- Get children involved! Even young school-age children can help make their own lunch. Give children healthy choices and let them decide lunch menus. Children may be more willing to eat the food you pack if they have been involved in the process.
- Dunk it and dip it. Children love finger foods they can dip. Serve raw vegetables with hummus or fresh fruit with yogurt.
- Offer some “fun foods.” Let children choose some low-calorie fun foods. Healthy or low-calorie options for the sweet or crunchy tooth include pretzels, plain popcorn, mini rice cakes, low-fat pudding, a miniature chocolate bar, or a rice crispy treat.
- Jazz up boring favorites. Peanut butter and jelly sandwiches are a nutritious favorite. Liven them up with carrot straws or raisins. Add color and nutrition to sandwiches with lettuce, tomato, or sliced vegetables.
- Keep lunches safe. Make sandwiches the night before and freeze them. Freeze juice boxes or water bottles to keep foods cool and for a cool lunchtime beverage. Experiment to be sure there is enough time before lunch for the items to thaw.
- Re-think leftovers. Even if children don’t have access to a microwave to reheat food from last night’s dinner, some leftovers work for lunch, too. Try cold pizza, meat sliced for a sandwich, or pasta salad.
- Skip the fuss and sign up for the National School Lunch Program. While some schools may offer free and reduced-price lunches to eligible families, the school lunch program is for everyone. School lunches provide low cost, balanced meals that follow USDA dietary guidelines. Take a break from packing lunch and check out your school’s lunch menu.
Turkey Rolls:
2 flour tortillas
2 tsp mayonnaise
2 slices thinly sliced deli turkey
½ cup shredded lettuce
2 Tbsp shredded cheese, any type
Lay out tortillas. Spread with mayonnaise. Layer turkey slice, lettuce and cheese onto tortillas. Roll up and wrap. Makes 2 servings.
One serving provides 218 calories, 9 g total fat, 20 g carbohydrate and 14 g protein.
Exchanges – 1 bread, 2 meats, 2 fats.
Recipe source: Janis G. Hunter, HGIC Nutrition Specialist, and Katherine L. Cason, Professor, Department of Food, Nutrition, and Packaging Sciences, Clemson University, New 08/08. Revised 09/11. Image added 8/15. HGIC 4114

by Heidi Copeland | Aug 9, 2017
 Will you be ready if disaster strikes? Disasters, or devastating events-natural or human-generated, certainly can disrupt daily life. National Preparedness Month, held annually in September and sponsored by the Federal Emergency Management Agency (FEMA), is a good reminder that we need to be ready to respond to emergencies. Adversity can strike at any time. There is no time like the present to prepare for emergencies.
How? Focus on making a standing plan for family readiness! A standing plan is one that you and your family have developed in the event of disasters. For most people, the prime goal is knowing that all family members are safe and as secure as possible against harm.
Need some help? Ready.gov has information to help you with that critical “what do we do in case of an emergency” conversation with children as well as seniors or any family member with special needs. The Ready.gov website contains a wealth of information to get you started including downloadable checklists and other publications as well as printable posters. Anyone can download the materials for free!
For instance, some disasters strike without warning. Have you thought about supplies you would need the most? Ready.gov supports the use of checklists as a good way to help you make it through an immediate disaster period.
Are you a pet owner? Ready.Gov has a unique brochure containing information for pet owners and suggestions for proactive pet emergency preparedness. Have you ever considered evacuating in the car with your animals?
Additionally, inadequate insurance coverage on a family home or properties can lead to major financial losses. NOW is the time to plan, document, and insure your property as well as prepare digital copies of your important financial information. One thing to keep in mind: FLOOD INSURANCE is a pre-disaster insurance protection program. Flood damage is not usually covered by typical homeowners insurance. Check your policy. Do not make assumptions.
Be smart; take part in preparing before an emergency happens!
- Implement a standing plan
- Prepare in ADVANCE
- Stay informed
You can plan ahead for an emergency. Take action now.
by Heidi Copeland | Aug 7, 2017
 Can you believe it is that time of year already to sneak some zucchini on your neighbor’s porch! Honestly, it is a day to celebrate. And celebrate we should! It is the lucky neighbor who profits from the gardeners abundant harvest. Nonetheless, what can one do with all that zucchini?
The late, Julia Child bestows the virtue of ratatouille in many of her books yet it seemed to take an animated rat in the award winning Pixar film to suggest ratatouille might be something to try. Really! Ratatouille, a traditional French Provençal stewed vegetable dish, originating in Nice is a mostly Mediterranean fare, however, we too have all the local produce to adapt this delicious dish.
How? What do you need? Ratatouille can be made just the way you like it but start with the basics: onions, eggplant, zucchini, garlic, tomatoes, red, green or yellow peppers, mushrooms, and fresh or dried herbs and a pinch of salt and pepper.
Ratatouille is typically served as a side dish, but may also be served as a vegetable soup, or a meal on its own accompanied by pasta, rice or bread. Ratatouille is good as a topping for your favorite grilled meat or fish, or as a filling in a simple omelet. Did I mention it can be added to quiche? Or stuffed into a pita pocket?
There is as much deliberation on how to make a traditional ratatouille as there is about how you eat it. Do you layer it and bake it? Is it sautéed? Is it simmered? Is it eaten as a side dish, a main dish or a sandwich filling? I’ve tried them all and even found success using a slow-cooker.
Try your hand at this simple yet elegantly adaptable vegetable dish.
The provided very basic recipe can be adapted to suit your personal/regional taste. Don’t like eggplant? Leave it out! Have a lot of okra or yellow squash? Add it! Like olives, nuts or raisins? Add them to your portion. Rather not use vegetable oil? Don’t! Want to cover it in your favorite spicy olive oil? Do you have some extra zucchini? I think you get the picture.
Ratatouille does not have to look like the vibrant Pixar version yet, it is still going to garner up gracious comments and acknowledgements from those you love and cook for. Whip up your version to savor today!
Ratatouille
Ingredients:
2 Tablespoons any kind of oil
4 medium onions, chopped – any color, any kind
2 medium eggplant, cut into 3/4-inch cubes
4 garlic cloves, minced
6 medium zucchini, cut into 1-inch cubes
2 large green, red or yellow bell pepper seeded and cut in 1” cubes
8 to 10 ripe tomatoes, peeled, seeded coarsely chopped (or use a can of fire roasted diced tomatoes)
3 fresh thyme sprigs (or to taste)
1 fresh rosemary sprig (or to taste)
1 dried or two fresh bay leaves
1/2 tsp. salt
1/2 tsp. freshly ground pepper
Directions:
In a BIG pot over medium heat, warm the oil. When it is hot, reduce the heat to medium, add the onions and sauté until translucent, about 2 minutes. Add the eggplant and garlic and sauté, stirring often, until the eggplant cubes are slightly softened, 3 to 4 minutes.
Add the zucchini and bell pepper and sauté, stirring and turning, until softened, 4 to 5 minutes more. Add the tomatoes, thyme, rosemary, bay leaf, salt and pepper, and stir and turn for 2 to 3 minutes more.
Cover, reduce the heat to low and cook, stirring occasionally, until the vegetables are soft and have somewhat blended together, about 60 minutes. (slow cooker at least 4 hours on high)
Remove from heat. Garnish with minced fresh basil. Transfer to a serving bowl and serve hot, at room temperature or cold. Serves at least 10.
by Pam Allen | Aug 5, 2017
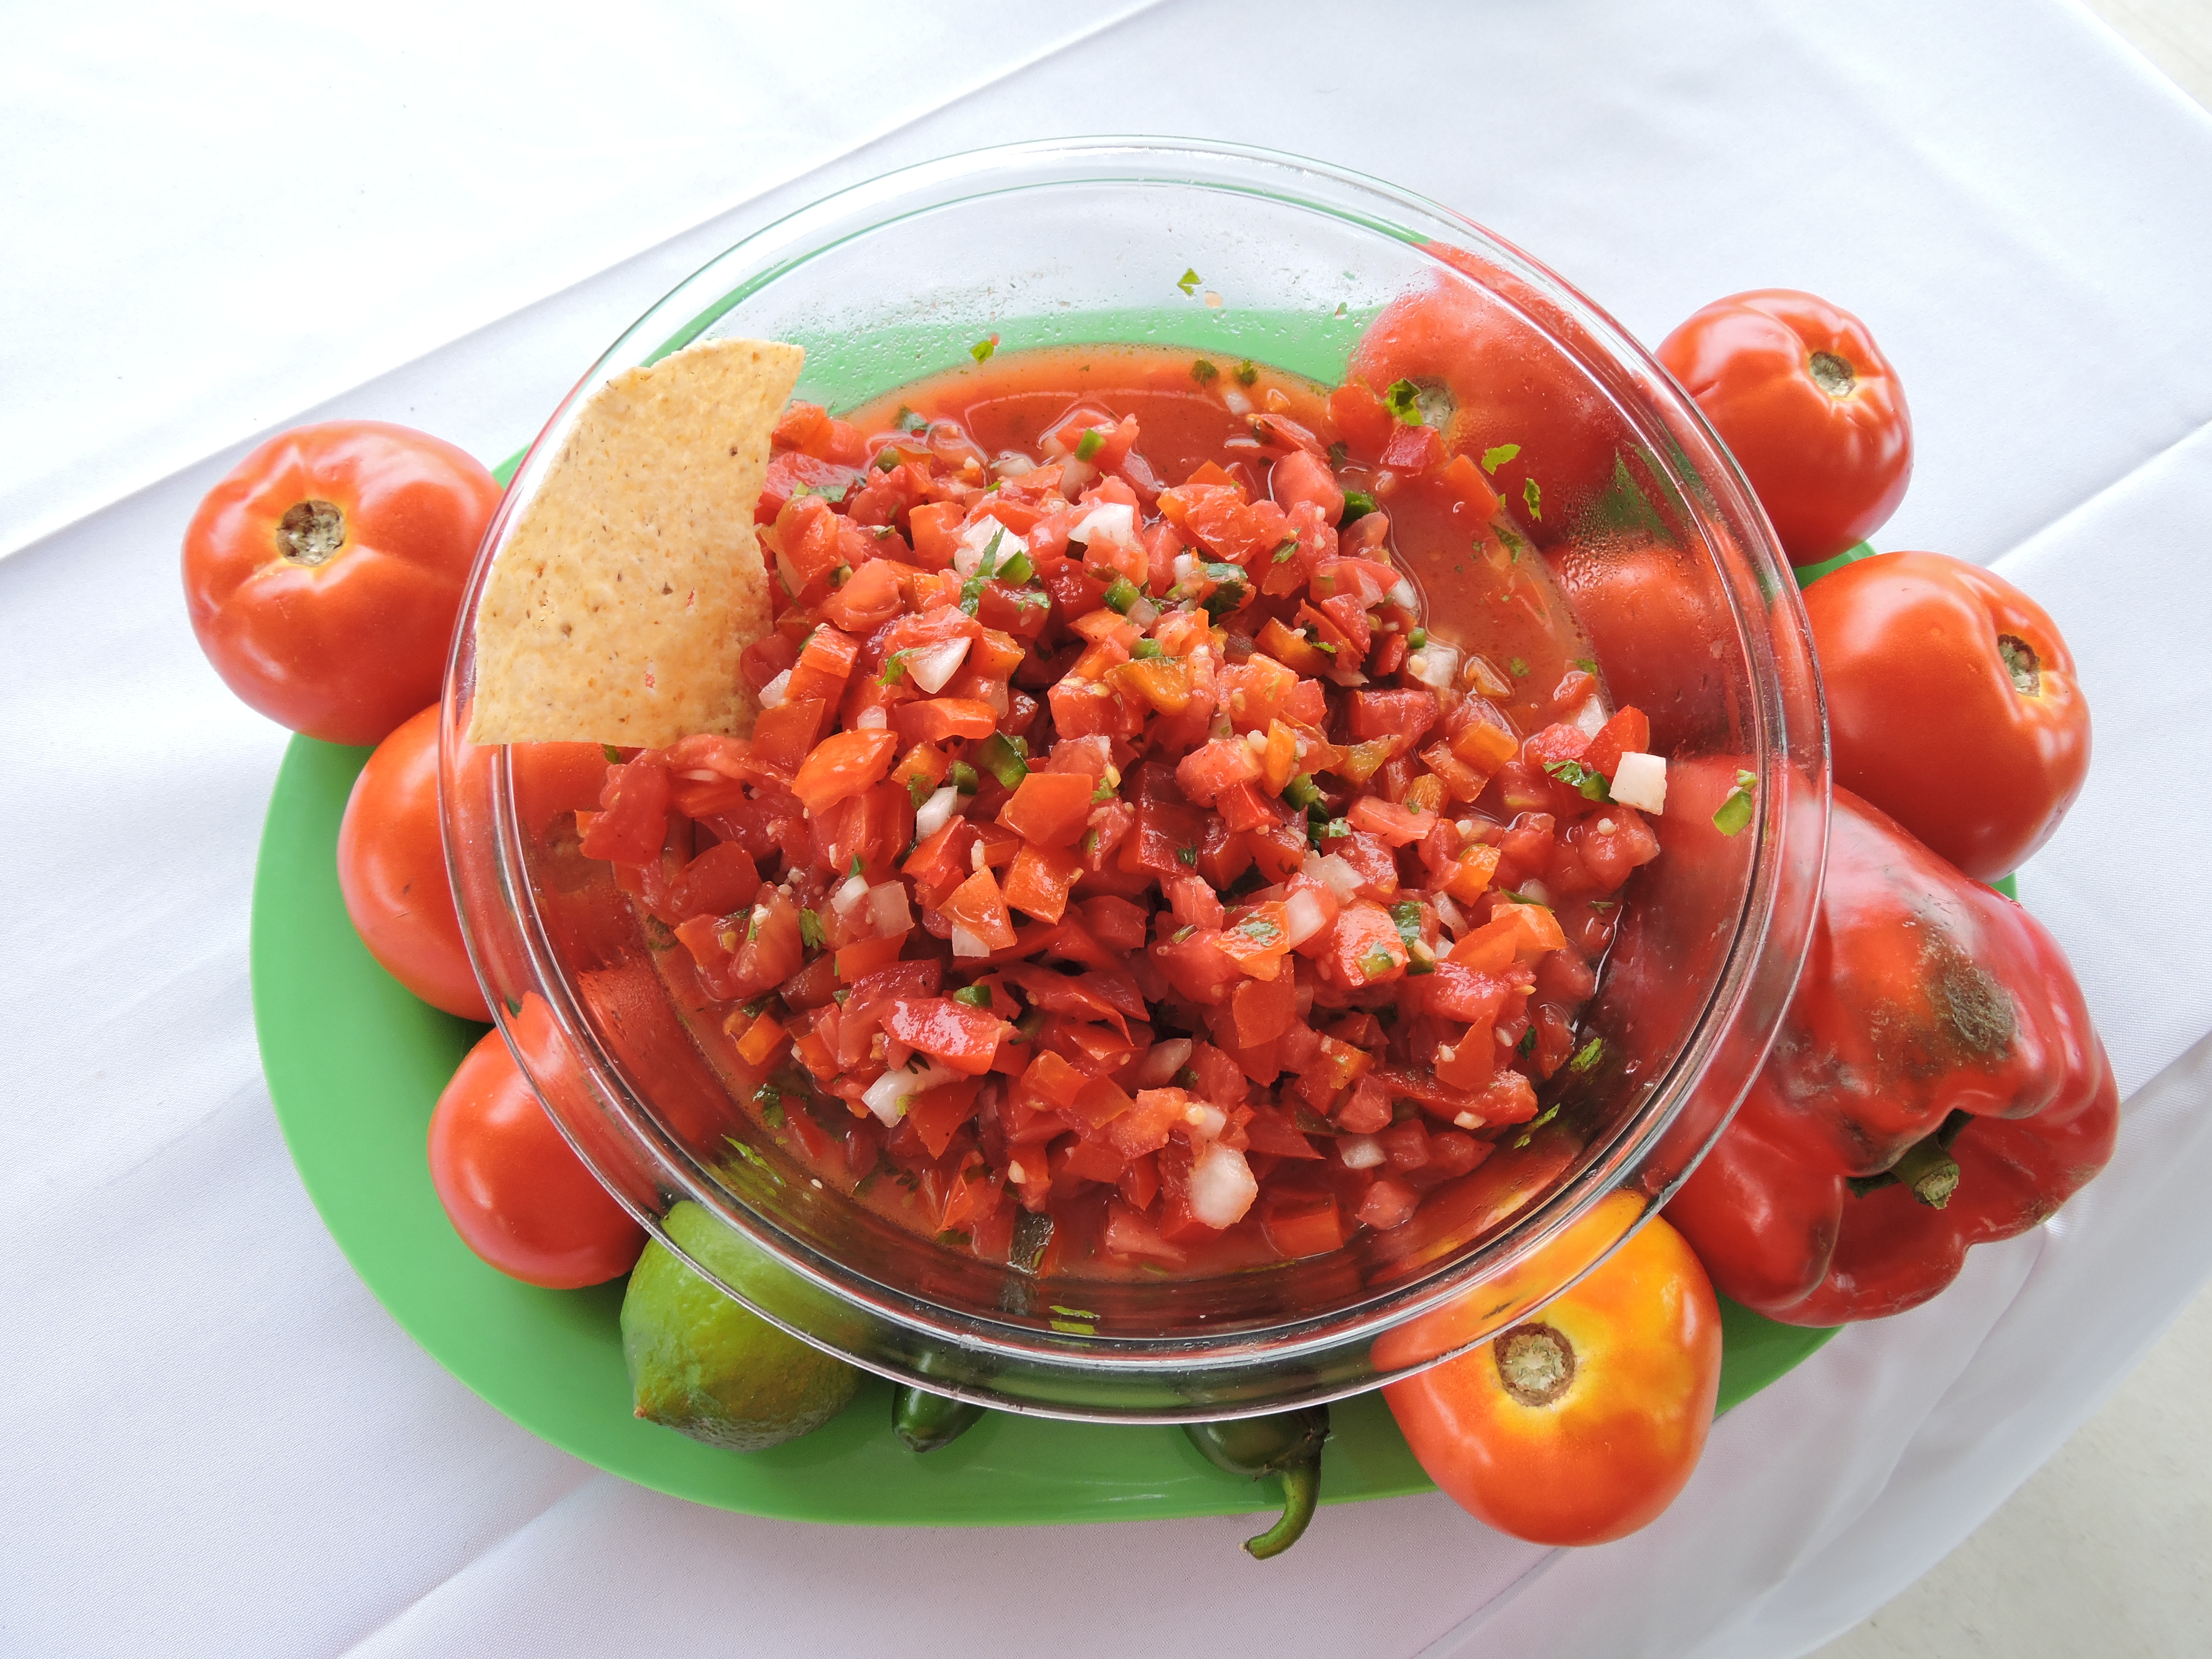
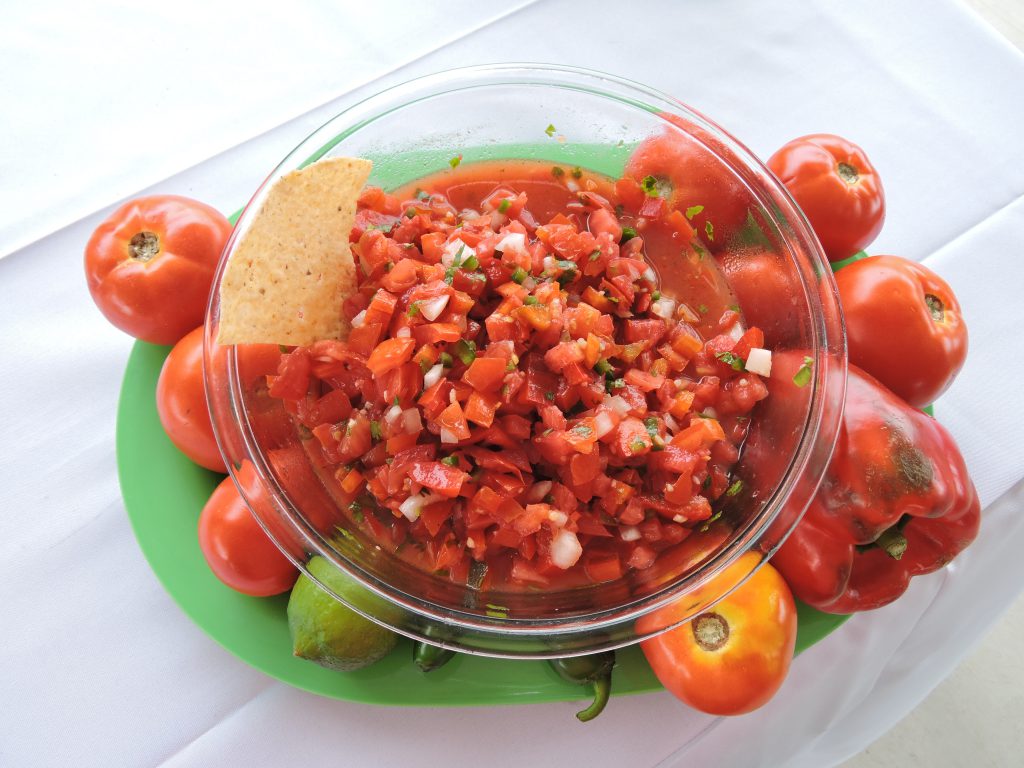 Tomatoes are abundant this time of year and you have many options to buy local and fresh. Tomatoes are one of the most popular home garden vegetable to grow and should now be providing the home gardener with fresh ripe bounty from now until summers end. Our local farmer’s markets are also selling tomatoes home grown and in many colors like deep red, bright yellow and green. Our climate is great for growing tomatoes. In fact, Florida is the nation’s largest producer of fresh tomatoes.
Nutritionally, tomatoes are packed with vitamin C and A. Low in calories and high in flavor, this succulent vegetable is a favorite all year long. Tomatoes are great served sliced and also in cooked dishes. Tomatoes should be stored at room temperature away from direct sunlight. Ripe tomatoes should be used within 3 to 4 days. For best flavor, do not refrigerate. Ripe tomatoes will give slightly to gentle pressure
If you want to preserve the summer’s tomato bounty, try your hand at canning. Remember to use USDA recommended practices for safety and long term quality. For a complete listing of how to safely can tomato products you will find the USDA guide here: http://nchfp.uga.edu/publications/usda/GUIDE03_HomeCan_rev0715.pdf
Farm Fresh Salsa
Fresh salsa is a low-fat, low sodium, treat that is packed with flavor and essential nutrients. Adjust the salt and oil to your taste and diet.
Ingredients:
6 medium ripe tomatoes, chopped
4 garlic cloves, minced
1 ½ seeded and minced jalapenos
1 red bell pepper, finely dices
½ red onion, finely chopped
1 Tablespoon olive oil
1 lime, juiced
Chili Powder, salt and pepper, to taste
Fresh scallions, cilantro or parsley, to taste
Directions:
In a bowl, combine all ingredients. Place in refrigerator for up to 12 hours for flavor infusion. Serve with your own baked chips.
Baked Tortilla chips
1 package medium or large tortillas
Cooking Spray
Salt to taste
Directions
Preheat oven to 375˚ F
On a cutting board cut tortillas into 8 – 12 pieces using a pizza cutter.
Place aluminum foil on 2 or 3 baking sheets.
Place tortillas pieces in a single layer on a cookie sheet.
Lightly coat tortillas with cooking spray on both sides.
Sprinkle tortilla pieces with salt to taste – or with salt-free alternative for dietary needs.
Place in oven and cook 10-15 minutes until crisp.

 With today’s continued focus on healthy eating and the dangers of high blood pressure, seasoning and cooking with salt has decreased. Alternative seasonings such as herbs and spices are excellent additions to any dish without the dreaded sodium. Herbs and spices are easy to use and can add a variety of delicious flavor combinations to any family favorite.