by Judy Corbus | Aug 27, 2021
Next to ensuring your family’s safety and well-being during a hurricane, having a game plan to protect your largest investment – your home and property – is essential in preparing for a major storm or other disaster. Many of these tasks can be done as part of routine home maintenance well before a storm is on the horizon.

Mow your yard before a storm to make clean-up easier. Photo credit: UF/IFAS Photo by Camila Guillen
Let’s start with the outside:
- Trim back limbs and branches hanging over the roof and any dead limbs elsewhere in the yard. These can break off in high winds, causing roof and siding damage.
- Clean valleys, gutters, and downspouts of leaves and debris. This will improve water flow off the roof, reducing the risk of leaks.
- If a storm is approaching, move trash cans, lawn furniture, grills, decorative items, potted plants, and toys to the garage, shed, or other secure storage area. These items can become flying missiles in high winds!
- Protect windows with plywood or roll-down shutters. These protective barriers can:
- keep wind pressure from building up inside, leading to roof loss
- reduce the chance of glass breakage
- reduce the risk of wind-driven rain damaging your home’s interior
- Be sure to install plywood before wind speeds increase!
- Do NOT apply tape to windows. Tape will not protect against breakage from flying debris and wastes time and resources. Plus, the adhesive can be very difficult to remove from the glass.
- Protect the garage door with vertical bracing. You can install wooden columns or purchase a kit. For more information, check out Protecting and Securing Garage Doors.
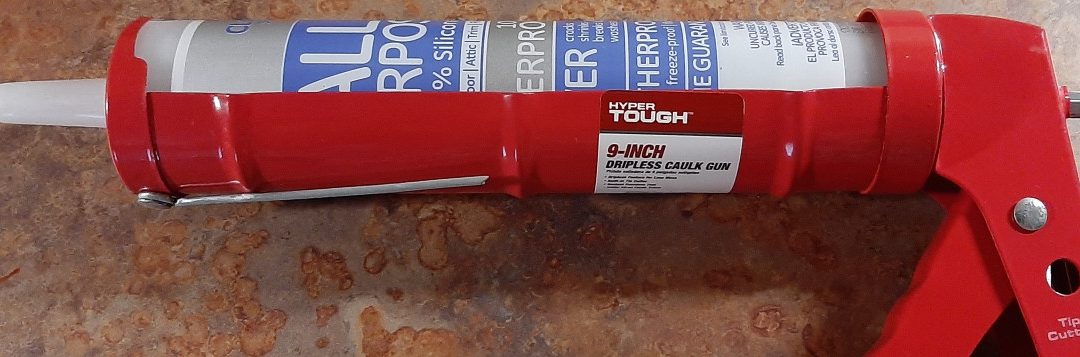
- Check doors, windows, and walls for openings where water can enter. Use silicone caulk to seal any gaps, cracks, or holes – pay special attention to cable and pipe openings into the house.
- Test and service your back-up generator to make sure it’s working properly and check your fuel supply. To prevent carbon monoxide poisoning, use your generator only outside and at least 20 feet away from doors, windows, and vents.
- Mow the yard. This makes post-storm clean-up much easier.
Now, we’ll move inside:
- Check your flashlights and stock up on batteries as needed. Plan on a flashlight for every person in the house plus additional lighting for bedrooms, bathrooms, and common areas.
- Check your weather radio to ensure it’s working properly.
- Check smoke detector and carbon monoxide alarm batteries and replace as needed. Hard-wired alarm systems will operate on the battery backup during a power outage.
- Keep your cell phone and other devices charged when a storm is forecast. Purchase backup charging devices for your electronics.
- Gather disinfectant supplies, trash bags, toilet paper, paper towels, paper plates, cups, and plastic utensils. Put these items in a waterproof/water resistant container to keep them clean and (hopefully) dry in case of flooding.
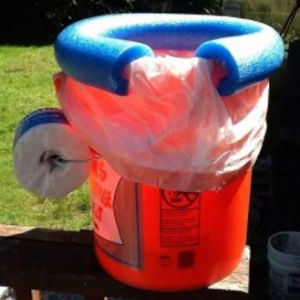
A 5-gallon bucket with a liner can serve as a toilet. Photo credit: Annette Lanham
- If you might be unable to flush the toilet during/after the storm, place a heavy-duty contractor trash bag in the toilet bowl to hold waste. Tie with a plastic tie and dispose of when full or as needed. Another option is to place the bag in a five-gallon plastic bucket. For added comfort, slit a foam pool noodle on one side and slip over the bucket edge for a “seat”; cut to fit. You can have two buckets – one for liquid waste and the other for solids.
- Before the storm arrives, wash dishes, catch up on laundry, clean the kitchen and bathrooms, and empty wastebaskets. This reduces clutter and promotes a clean environment in which to ride out the storm. It also reduces extra work and stress after the storm when water and electricity may be limited or unavailable.
For additional preparation tips, visit Homeowner’s Handbook to Prepare for Natural Disasters
Sources:
Ready.gov
DisasterSafety.org
by Judy Corbus | May 12, 2021
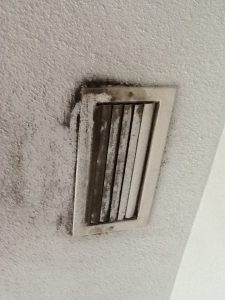
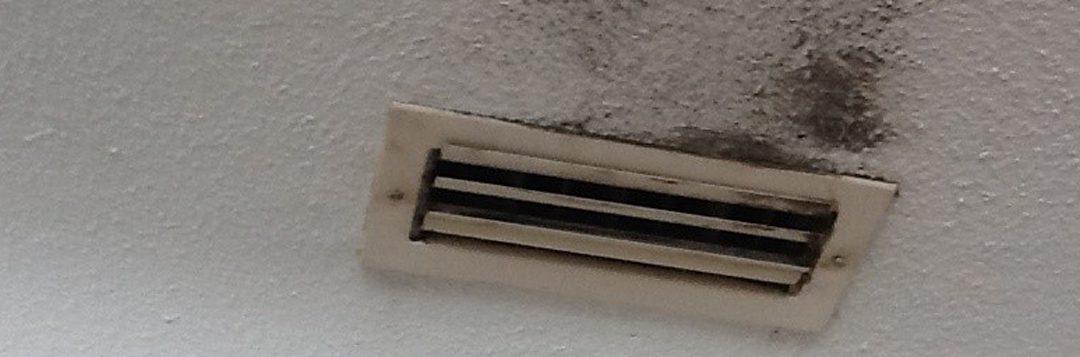
Removing the moisture source is the first step in combatting mold. Photo source: UF/IFAS Extension Pinellas County
Have you seen black, gray, white, or orange stains on your bathroom tile’s grout? Does it look slimy or cottony? Well, you guessed it—that’s mold. There are good molds – yogurts, cheeses, and antibiotics – and bad molds, like the kind that grows in the bathroom.
Mold and mildew refer to a fungus that flourishes in warm, humid, indoor environments. Florida’s heat and humidity supply the ideal habitat for molds of all kinds. Because mold reproduces by releasing spores into the air, mold can go undetected until it has grown into a colony, as in our grout example. Certain molds really are toxic, however, and not only cause health problems, but also damage building structures, furniture, books, and other items.
Health Impacts of Mold
Exposure occurs by touching mold or inhaling air containing its spores. Exposure may cause allergic symptoms and health problems, ranging from sneezing, coughing, or a runny nose to chronic sinus problems, nosebleeds, asthma, skin and/or eye irritation, headaches, difficulty concentrating, and even memory loss.
How to Prevent Mold
Mold is a part of nature and there is no way to keep it entirely at bay. However, we can limit its growth by keeping our house:
Cool – Keep the temperature below 77°F inside your home if you think mold might be an issue.
Dry – Keep the relative humidity below 60%. You can purchase an inexpensive humidity meter (hygrometer) from a hardware store.
- Dry wet surfaces or items as soon as possible. Do not leave anything wet for more than 24 hours.
- Wipe down shower walls with a window squeegee or towel right after showering.
- Fix leaks.
- Pull the shower curtain across the tub/stall to allow the curtain to dry.
- Run the bathroom exhaust fan while you are showering and up to 15 minutes after you finish or open the bathroom window to allow moisture to escape.
- If bath towels remain damp in your bathroom several hours after bathing, hang them in the garage or outside to dry. This reduces moisture in the bathroom and keeps towels from souring.
Clean – Keep your house clean to minimize nutrients for mold.
- Wipe countertops to remove any food residue.
- Refrigerate perishables. (This also reduces foodborne illness risk).
- Clean bathrooms – pay special attention to the shower/tub area and sink to remove soap scum and dead skin cell residue that some molds feed on.
- Change the air conditioner filter monthly.
Mold Removal
When you find mold inside your home, it means there is a moisture problem – leaky plumbing, a roof leak, or water entering around a window or door. Fix the source of the problem or mold will continue to be a problem. If you cannot find the source, if there has been a lot of water damage, or the moldy area is larger than 10 square feet (about a 3 ft. X 3 ft. square), it is recommended to get professional help.
To clean small areas, scrub the moldy surface with a solution of dishwashing or laundry detergent and water, or a mild solution of bleach and water. Wear waterproof gloves and protective goggles to protect your skin and eyes from direct contact with the mold. Wear an N-95 respirator (available at most hardware stores) to avoid inhaling the mold spores. After cleaning, dry the wet area thoroughly to prevent further mold growth.
For more information on controlling mold and mildew, contact your local UF/IFAS Extension Office.
Resource: Keeping It Clean: Controlling Mildew
Source: “Keeping Your Home Healthy,” Taking Good Care of My Home, UF/IFAS Extension.
by Judy Corbus | Nov 2, 2020
Ahhh…Fall! I love this time of year – changing leaves, cooler temperatures, and lower humidity make it a joy to be outside. It’s also the perfect time to give your house some TLC after the summer heat and before the cold winter winds blow. Regular maintenance keeps your home healthy, can lower your power bill, and saves you money on costly repair jobs as you catch them early on.

Clear roofline “valleys” of debris to reduce the risk of leaks. Photo source: Judy Corbus
Here are eight things to check inside and outside your home this fall:
Check weather-stripping and caulking around windows and doors. Check for signs of leaks, then repair or replace as needed. This keeps your heated or cooled air in and pests out.
Paint exposed wood. Check eaves, doors and frames, and other wood surfaces for chipped or flaking paint and touch up with a fresh coat to protect against rotting.
Check windows and doors for smooth operation. Install or patch screens, lubricate window tracks and door hinges, and repair as needed.
Clean gutters and downspouts. Use gloved hands or a trowel to scoop out debris from gutters. Flush downspouts with water or use a drain “snake” to clear blockages. Make sure they discharge water 2-3 feet away from the house to protect the foundation; a downspout extender can funnel water further away from the house. Clear gutters and downspouts allow water to drain properly from your roof to reduce the risk of leaks.
Clean roofline “valleys.” The V-shaped area where two roof slopes meet is the perfect catch-all for leaves, pine straw, and other debris. If allowed to accumulate, this debris can trap moisture, leading to a breakdown of the roofing material and eventual leaks. Use a leaf blower to clear the valleys to keep your roof dry and water flowing freely off it.
Clean the chimney. If you plan to use your fireplace, have it inspected and cleaned by a professional chimney cleaning service before you light the first fire of the season. This will remove creosote, an oily by-product of burned wood that builds up inside the chimney and increases the risk of chimney fires.
Change the batteries in all smoke and carbon monoxide detectors. This ensures the batteries are fresh, whether your detectors are hardwired, with a battery backup, or completely battery-operated. Test detectors regularly to ensure they are operating properly.
Have your heating and cooling system serviced. Your service professional will make necessary tune-ups, so your system operates efficiently for a comfortable environment and lower utility bills.
For a complete home maintenance checklist, click here.
Adapted from: https://www.fcs.uga.edu/extension/healthy-housing#mantained

by Angela Hinkle | Sep 15, 2020
Most of us know there is a great deal of cleanup after a disaster hits. But how often do you think about what to clean before disaster strikes?
Here are some helpful cleaning measures you can do before a storm or other calamity so your burden is not so great after.
Outside
Mow the Lawn
If your lawn is mowed low and even now, you won’t have tall grass to trudge through later. Refill any gas cans and/or re-charge any lawnmower batteries after mowing. It will be much easier to pick up and remove any debris that lands on the mown lawn. And you may need to use the gas in the filled can to operate other equipment for the after-cleanup.
Trim, Whack, and Blow
Trim the hedges, whack down those weeds, and blow those leaves now. Otherwise, you may later find yourself with a big mess on top of a big mess.
Bring It In
Bring in any garbage cans, lawn furniture, or other yard items that could make a mess if blown over, broken, or made into dangerous shrapnel.
Inside

Lightning storm. Photo Source: UF/IFAS
Leave No Piles
Make sure there are no dirty dishes in the sink or the dishwasher. Make sure everything is cleaned, dried, and put away. Then, if you lose electricity after the storm or are not sure of the safety of your water, you don’t have to worry about clean plates to eat on, glasses to drink from, or utensils to eat with. And you don’t have a mess to look at or a stink from the sink to deal with.
Clean, dry, and put away all the dirty laundry now. If you lose that all-important electricity later, you won’t have to worry about stepping over piles of clothes or wonder how you’re going to deal with wearing the same dirty clothes over and over again. If you have a generator, you could use that to clean your clothes, but most of the time those generators are best used to keep food safe in the refrigerator or to operate emergency equipment.
Scrub
If your bathroom tub is scrubbed clean now, you can fill it with water for flushing toilets, cleaning, or purifying and using as extra drinking water. You can also take a relaxing, cleansing bath from a hard, dirty day’s work after the storm.
And cleaning a dirty toilet now means you’ll have one less thing to have to deal with later – along with everything else on your to-do list.
Get Rid of It
Make sure the garbage can, recycle bin, and compost container are all emptied. The last thing anyone needs is old piles of trash with new piles of trash added on top.
Been meaning to give away those extra items (knick knacks, doodads, toys, etc.) you don’t use or like anymore? Doing that now makes for a cleaner house as opposed to having more “stuff” in the house, adding to the mess you may have to deal with later.
Clear the Clutter
Pick up papers, bills, tools, and any other important items that may be on various surfaces throughout the house (you may actually want to eat on that dining room table some day). Then organize them together in a safe place. This helps to keep them from getting water damaged or tossed around and you’ll be able to find them later.
Have your emergency kit filled and ready to go in a plastic tub or waterproof container. Make sure everyone in the house knows where it is. For other disaster preparation and recovery resources, go to https://disaster.ifas.ufl.edu/ and/or talk with your county UF/IFAS Extension Agent.
If your home or property are destroyed in a disaster, these measures probably won’t really help much. But if all is not lost and there is just some debris and damage cleanup to be done after a large weather event, the above measures taken before can alleviate a lot of extra stress after. And if there is no disaster, hey, your house is nice and clean. Relax and enjoy it!
Make sure you clean before disaster strikes.
by Judy Corbus | Aug 27, 2020
Eeekkk! A roach! Quick – where’s the bug spray? That seems like a logical way to get rid of the pesky critter, right? But what if the roach is in your kitchen? Or you have pets or small children? Is there a less toxic way to keep pests out of your home?
Integrated Pest Management, or IPM, uses a combination of methods to help you:
- Stop pests
- Inspect and monitor for pests
- Identify pests
- Have a game plan to protect your home
- Know if your plan is working
Pests, like people, need food, water, and shelter to thrive, so if you eliminate one or all these factors, you increase your pest control success. You can use IPM to prevent indoor and outdoor pests and solve existing pest problems.
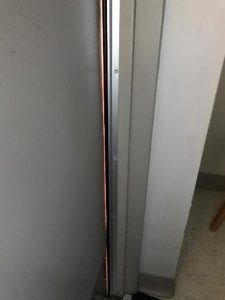
If you can see light around the door edge, insects can enter. Photo source: UF/IFAS
Exclusion is a major part of prevention in IPM; it prevents outdoor pests from entering.
- Check the weather-stripping around exterior doors and windows – if you can see light, pests can enter. Did you know an American cockroach can enter through a gap the thickness of a quarter?
- Install door sweeps on exterior doors so insects can’t enter under the door – be sure the sweep brushes the floor.
- Patch or replace window and door screens to keep flying insects out.
- Use sealants around doors and windows to fill tiny gaps where pests can enter. It will help to conserve energy, too!
- Cover vent pipe openings, like dryer vents, on your home’s exterior with strong mesh or other covering to keep rodents and other small animals from entering.
Our Habits
We sometimes make it easier for pests to move in and thrive in our home due to our habits. Here are a few easy ways to prevent pests:
- Wash dishes promptly. Pests feast on food particles so wash dishes immediately after meals.
- Quickly clean up grease and spills. Just like dirty dishes, grease and food spills attract pests so clean them as soon as they occur. This also will keep the spill from spreading, saving you cleaning time in the long run.
- Store food items in sealed plastic containers. This keeps pests out and food items fresher for longer.
- Clean on a routine schedule. Regular sweeping, vacuuming, mopping, dusting, and general cleaning removes food sources for pests and creates a healthier indoor living space for you and your family.
- Get rid of clutter. Piles of paper, clothes, and other items can provide a dark, cozy home in which pests can hide and multiply. Organize these areas so your home is less inviting to pests. Cockroach control alone can significantly reduce allergen levels.
- Dispose of recycling frequently. This removes a breeding ground for pests.
- Inspect incoming goods or items before bringing them into your home. This will reduce the risk of “stowaways” entering.
- Use plastic bins for long-term storage. Cockroaches love cardboard boxes and paper bags so transfer items you plan to store for longer than three to six months to plastic storage bins with tight-fitting lids.
Treatment
There are a variety of treatment options for controlling pests.

Use window cleaner, rubbing alcohol, or baby wipes to disrupt ant trails in your home. Photo source: Judy Corbus, UF/IFAS Extension
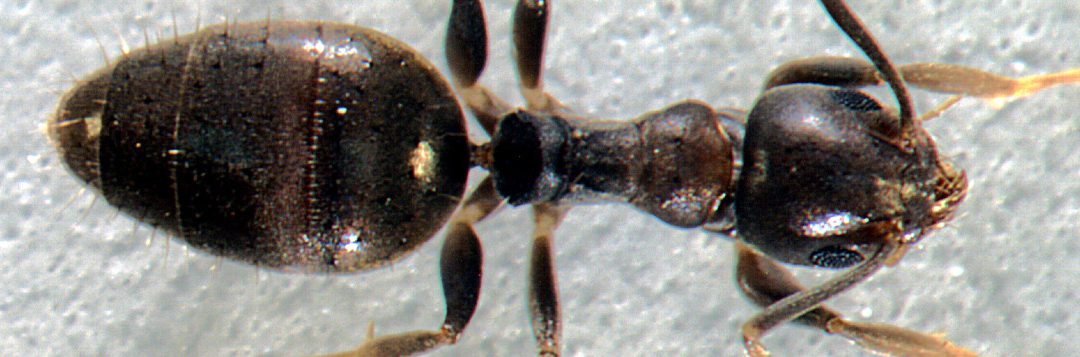
- Window cleaner, rubbing alcohol, baby wipes: Ants travel in trails to and from their food source, emitting pheromones, or scent trails, to “mark” their path to the food. To disrupt ant trails, spray window cleaner on or apply rubbing alcohol to a paper towel or use baby wipes to wipe the ant trail. This removes the scent trail so the ants cannot find their way back to their food.
- Whole home gel bait: These products come in a syringe-type applicator with formulations for cockroaches and ants. Examine your home carefully to see where these pests are entering and apply a pea-sized dollop of the gel bait at the entry points. The pests eat the bait and return to their nest, where the gel bait eliminates the nest. The gel bait can be used anywhere in and around the house where cockroaches or ants are found and is more effective than treating kitchens and bathrooms only, a common pest control practice. Gel bait works well behind appliances, swtichplates, and outlet covers. Reapply gel bait periodically to keep pests from returning. You may need to rotate brands, as pests can develop immunity over time.
So, the next time you see a bug in your home, consider IPM before you reach for the spray. For more information about integrated pest management for homes, contact your local UF/IFAS Extension office.
by Angela Hinkle | Aug 10, 2020
You may be spending more time creating and experimenting in your kitchen these days. But are you taking the time to clean and enjoy the beauty of the kitchen when you’re not making those new culinary masterpieces? Here are 11 super simple kitchen cleanups that can take away the stresses caused by kitchen grime, stink, and clutter.
That’s Dirty!
- Dust and Cover
For space between upper cabinets and the ceiling, begin by using a duster (and soapy sponge if needed) to get rid of all those dust bunnies. Then lay down wax paper (which holds the dust) or newspaper, paper grocery bags, or parchment paper. Then you can just lift the old paper and put down new a few times of year without having to clean years of dust and grime by hand. You may want to start with this because dust may fall from the top. Then work your way down to the rest of the kitchen.
- Clean the Microwave
Add about one cup of water to a large microwave-safe bowl. Cut a lemon in half. Squeeze the lemon juice into the bowl then add the lemon halves too. Microwave on high for about 2 minutes until the liquid boils and the window steams up. Don’t open the door yet; let the bowl sit for about 5-10 minutes. The steam loosens the gunk. Then it’s just an easy wipe down with a sponge inside and out.
- Wipe Down Surfaces
Wipe cabinet shelves and doors, counter tops, and trashcans with warm soapy water. Use the rough side of a double-sided non-scratch sponge for stuck-on areas and the softer side for crumbs and easier messes. You can also disinfect these surfaces with a spray bottle filled with a solution of one tablespoon bleach to one quart water, using paper towels to wipe dry.

Ever Cleaned?
Photo: A. Hinkle
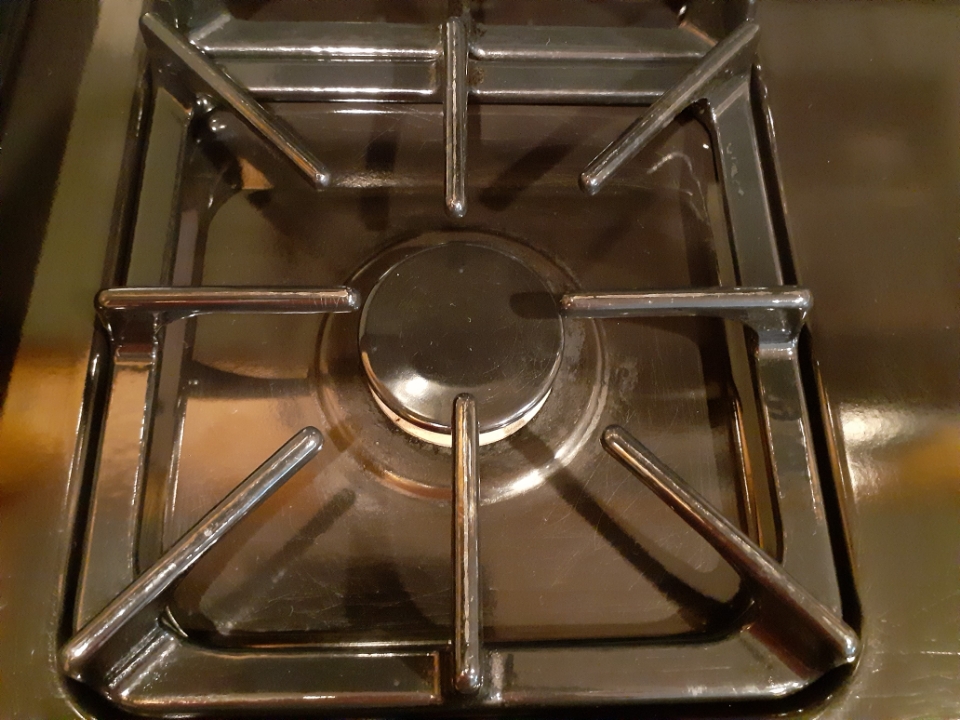
- Scrub a Stove-top
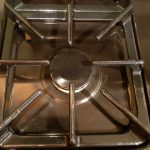
Clean/ready to cook.
Photo: A. Hinkle
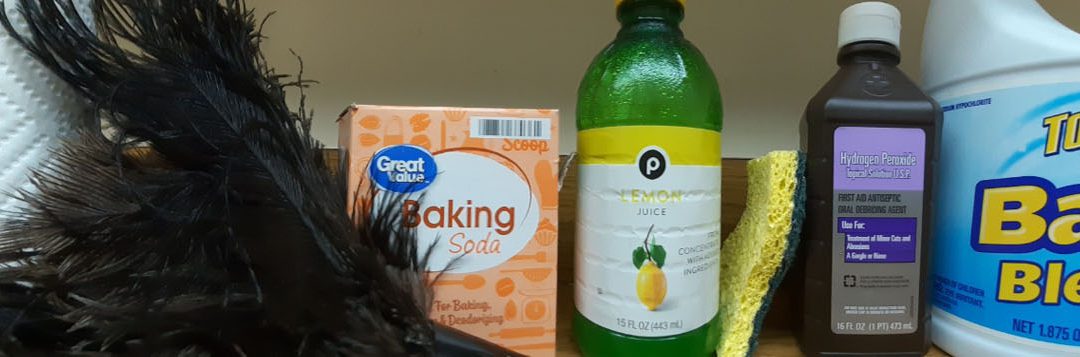
First, wipe down with warm soapy water. Put half a cup of baking soda in a bowl. Then slowly pour in hydrogen peroxide, mixing until it becomes a thin paste. Pour a little paste on the stubborn spots and rub with a heavy-duty paper towel or rag. The stains should come right off. For stubborn stains, pour a bit more of the paste onto the stuck-on stain and let it soak for about 10 minutes. Then scrub, scrub, scrub some more until the stove-top is completely clean.
(Check manufacturer’s directions for smooth top stoves.)
- Wash the Refrigerator
Take out shelves, drawers, and other removable parts of your refrigerator and freezer and wash with hot water and dish soap – just as if they were dishes. Wash the inside walls and door compartments of the refrigerator and freezer with a solution of 2 tablespoons baking soda and 4 cups warm water to clean and reduce any strong odors. Rinse with clear warm water and dry with a soft cloth. Wipe off all jars and dishes as you replace them in the refrigerator.
Wash the outside of the refrigerator and freezer with hot soapy water, rinse, and dry. Don’t forget the door gaskets – sticky gaskets can cause air leaks, using more energy over time.
That Stinks!
- The Garbage Can
Sprinkle baking soda into the bottom of the trash bag to help keep the shudder-inducing smellies away and/or add a cotton ball soaked in essential oils to add a nice scent.
- The Stinky Sink
First, run hot water down the drain. Follow that with a cup of baking soda. Finish off with a cup of lemon juice. This fizzy reaction is fun to do with the kids.
- That Refrigerator Smell
Placing an open box of baking soda on a shelf in the refrigerator gets rid of most smells. If your unit has a pan or plastic tray on the very bottom to collect the condensation or defrost water, remove and clean it once or twice a year. Dust and moisture in this pan can lead to mold growth and cause health problems for persons with allergies. It also can develop an unpleasant odor. Check your care manual for the location of the pan.
That’s Got to Go!
- Food – Organize, Keep, Toss
Go through your refrigerator, freezer, and pantry and throw away anything that is expired, moldy, or you have no idea what it is. (To learn more about Use-By, Sell-By, and Best-By dates on food packages, check out Understanding Date Labels.) FIFO (First In First Out) your pantry foods by placing the older foods at the front and newer foods in the back. This way, you use up the foods that will expire first. Throw away any foods with freezer burn.
- Herbalicious…or Not
Toss out any herb or spice containers that are past their best-if-used-by date. Herbs and spices begin to quickly lose their wonderful tastes and aromas after this date. If it has no date and you have no idea how long you’ve had it, best bet is to throw it away.
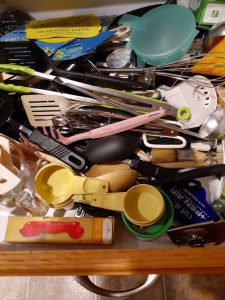
That Kitchen Drawer
Photo Source: A. Hinkle
- That Drawer
Where is that ladle? I know I put it in this drawer. Why is the kitchen tool I want to use always at the bottom of the utensil (or junk) drawer? And why do I have five corkscrews when I don’t even drink wine? Help beat these frustrating dilemmas. De-clutter and organize this drawer. Start by taking everything out – yes, everything. Pick out things you never use. If you’ve had a melon baller for 10 years and used it once nine years ago, put it in a giveaway pile. Put four of the five corkscrews in that pile too. Throw away anything that’s broken or unusable. Wipe out the drawer using a sponge and warm soapy water or disinfectant wipes. Refill the drawer starting in the bottom/back with those tools you don’t use as often. Work your way forward and up with the tools you use most often. Ah, so much better now, and from now on.
Try tackling two or three of these tips a week. You can complete the whole list in one month. Your kitchen will be cleaner and more comfortable, and you can be less stressed and happier.