by Judy Corbus | Feb 3, 2018
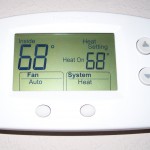
Set your thermostat to 68 degrees or lower in the winter to reduce heating costs. Photo credit: Judy Corbus
We have recently gotten a taste of what our neighbors to the north typically experience this time of year – frigid temperatures! As the mercury plummets, utility bills move in the opposite direction. Winter is not over yet so follow these easy steps to save money on your electric bill during the next cold snap:
- Set your thermostat to 68 degrees F or lower in the winter. Dress in layers for added warmth.
- Grab a throw or blanket to stay warm while reading or watching television.
- Check air filters monthly and clean or change when they become dirty. This will help your unit to operate more efficiently and last longer. A clogged filter can cause your heating system to shut down to prevent the compressor from overheating – this requires a service call to reset it.
- Use a ceiling fan, moving in a clockwise direction on low speed, to move heated air down from the ceiling into the living space. Turn fans off when leaving the room.
- Open curtains and blinds on south-facing windows to let the sun naturally warm your house. Close them at night to reduce heat loss.
- Caulk or weather-strip around windows and exterior doors to seal air leaks.
- Insulate water heater supply pipes with foam pipe wrap to reduce heat loss.
For more energy-saving tips, visit My Florida Home Energy.
by Judy Corbus | Apr 5, 2016
 Spring has sprung and this is the perfect time to clean and freshen your house. But you don’t have to spend a lot of money on cleaning products when you can whip up your own with a few simple, inexpensive ingredients.
The basic ingredient list includes:
- White Vinegar
- Baking soda
- Rubbing alcohol
- Ammonia
- Mild dish detergent
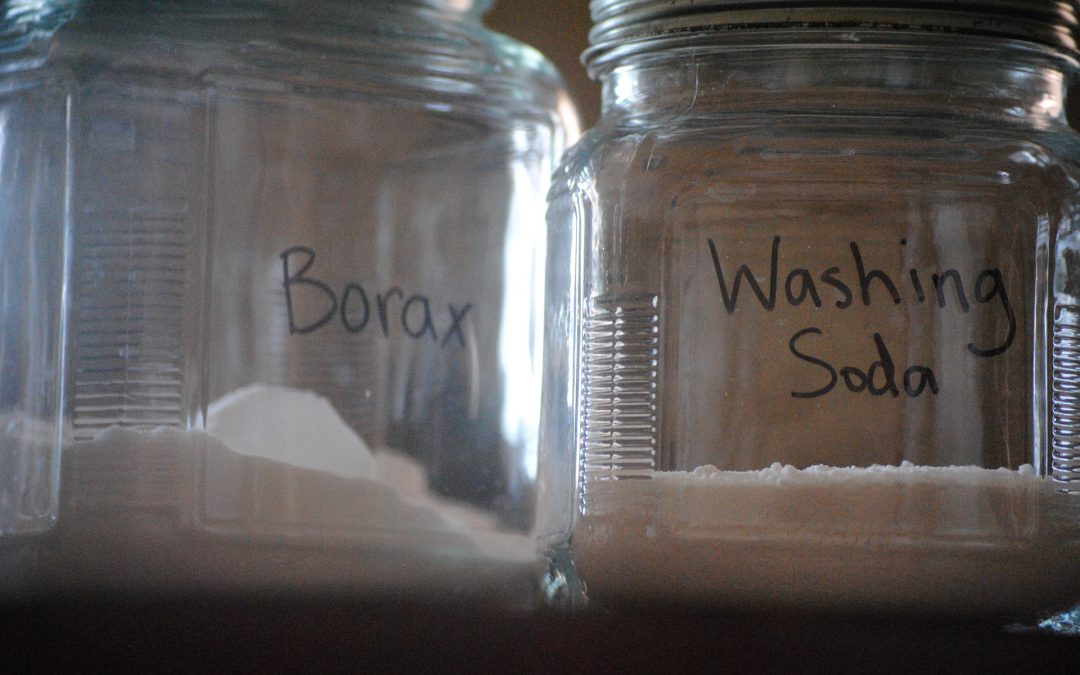
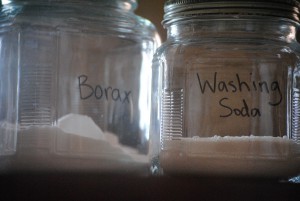
- Washing soda (can be found in the laundry products aisle)
- Borax (also in the laundry section)
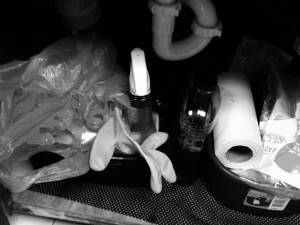
Use clean jars or bottles for mixing and storage. Do not use food containers – children can think the contents are something to eat. Also, don’t mix your products in empty cleaning product bottles; residue from the original product may interact with your product, causing a dangerous reaction. Label each product and store out of reach of children. NEVER mix chlorine bleach with ammonia or vinegar – it will create dangerous, toxic fumes!
Here are a few recipes to get you started:
ALL-PURPOSE CLEANER
Mix in a 16 oz. or larger spray bottle:
- 1 cup white vinegar
- 1 cup water
Use on sinks, countertops, lightly soiled range surfaces, floors, toilets, and showers.
WINDOW CLEANER
- 3 tablespoons ammonia
- 1 tablespoon white vinegar
Put in a spray bottle and fill the rest with water.
HOMEMADE LAUNDRY DETERGENT
- 1 bar Ivory® or 1/3 bar Fels Naptha® soap
- 1/2 cup washing soda
- 1/2 cup borax powder
Grate the bar soap into a cooking pot. Add 6 cups of water and heat until the soap melts. Add the washing soda and borax and stir until dissolved. Remove from heat. Pour 4 cups hot water into a clean bucket. Add the soap mixture from the pot and stir. Add 1 gallon plus 6 cups of water and stir. Let the soap sit for about 24 hours and it will gel slightly. Optional: Add 1 ounce essential oil or fragrance oil of your choice.
Use 1/2 cup per load. This is a low-sudsing soap which removes dirt and odor and can be used in high-efficiency machines.
For more product recipes, check out Homemade Household Cleaners and Green Cleaning: Recipes for a Healthy Home.
Sources: Homemade Household Cleaners
Clean It Green!, C. Rogers, UF/IFAS Extension Suwannee County.
by sbouie | Mar 30, 2016
 Home ownership means different things to different individuals.
- “We feel that owning our own house is a sign of wealth.”
- “We would purchase a house so our kids would be in the right school zone.”
- “It was property we could sell once the children had moved out. We could down size and sell the house and use the funds toward retirement.”
You might purchase a home for one or all of the reasons listed above. Some people want the comfort but not the issues of lawn maintenance and repairs. Many of us have very busy schedules and do not want the hassle of maintenance.
In some cities you have the rising cost of leasing an apartment. It can be cheaper to purchase a house than rent an apartment. Always factor in utilities, lawn care, repairs, insurance and taxes. If you are buying your house, the insurance and taxes can be included with the mortgage.
Keep in mind that the interest you paid on your mortgage and taxes can be claimed on your income taxes. Your rent payment cannot be claimed on your income taxes. Equity also builds up in your home. Even if you are renting you should have renter’s insurance.
When renting, you have the freedom of movement once your lease has expired. If you own your house, you can rent it or sell it, but you would need to move.
Owning your home gives you freedom to decorate your home as you please. If you do not abide by the restrictions of your apartment lease, you could forfeit your deposit.
Whether you decide to own or rent is your personal choice. Make the right decision for you.
by Heidi Copeland | Mar 24, 2015

On March 4, 2015 the EPA (Environmental Protection Agency) unveiled a new Safer Choice label/logo, which makes it easier to find household cleaners and other home products that are safer, more environmentally friendly—and still get the job done!
Finding cleaning and other products that are safer for you, your family, and the environment should be easy. Products with the Safer Choice label help consumers and commercial buyers identify and select products with safer chemical ingredients, without sacrificing quality or performance.
Safer Choice labels can be found on laundry products, all-purpose cleaners, car care products, dishwashing products, tub and tile products as well as floor care products. Some of these products will also carry a “Fragrance-free” notation.
The Safer Choice standard, formerly known as DfE’s – Standard for Safer Products (or the “DfE Standard”) identifies that the products and their ingredients met the Safer Choice label/logo requirement.
Safer Choice used the technical expertise of its workgroup (EPA scientists, formulators and even environmentalists to identify ingredients with the lowest hazard profile). While many of us take cleaning products for granted most are a highly scientific formula of ingredients, each with its distinct functional properties. Take dish washing liquid for example. Many of these products contain surfactants that aid in cleaning by reducing surface tension, solvents that dissolve or suspend materials, and chelating agents that reduce water hardness. Without the use of these ingredients we would probably complain about the effectiveness of the product.
A Safer Choice product contains the safest possible ingredients. Each ingredient has been screened for negative synergies (dangerous chemical combinations), potential human health effects, and environmental effects– based on the best available data. Safer Choice products will use ingredients with the lowest hazard in their functional class while still be high-performing.
Only products who have become Safer Choice partners can earn the right to display the Safer Choice product label/logo. Products using the Safer Choice label/logo have invested heavily in research, development and reformulation to ensure that their ingredients and finished product align at the green end of the health and environmental spectrum, while maintaining product performance.
Please note, the use of the Safer Choice label/logo does not constitute endorsement from the Environmental Protection Agency (EPA). It does however, recognize the company using the Safer Choice label/logo has gone through rigorous screening and uses ingredients with more positive human health and environmental characteristics than conventional products of the same type.
For more information see:
http://www2.epa.gov/saferchoice/safer-choice-standard
Heidi Copeland
Extension Agent II
Have a question? Contact the University of Florida IFAS – Leon County Extension office at 606-5203, weekdays 8 a.m. to noon or 1 to 5 p.m.
University of Florida IFAS – An Equal Opportunity Institution
by Heidi Copeland | Mar 24, 2015
Spring cleaning of one’s home is a tradition dating back centuries that is tied to the vernal equinox – the first day of spring. At the spring equinox, days are approximately 12 hours long with day length increasing as the season progresses. In many cultures this longer, lighter, warmer day is often a cause for celebration! And who could even think about celebrating a longer, lovelier day without a clean home?
The kitchen is a great place to start! You can protect yourself by preventing the spread of germs where food is prepared. However, the terms clean, sanitize and disinfect are often used interchangeably which can cause confusion. Best practices based upon current research state that cleaning and sanitizing is multi-step process. And even though surfaces look visibly clean, they may still be contaminated with microorganisms (infectious fungi, bacteria and viruses).
Cleaning is the removal of dirt from food preparation surfaces. These can be counters, cutting boards, dishes knives, utensils pots and pans – even your refrigerator.
- Wash surface with soap and warm water
- Rinse with clean water
- Air dry or dry with a clean disposable towel
Sanitizing reduces germs on inanimate – nonliving surfaces.
- Wash surface with soap and warm water using appropriate cleaning agents and equipment. Detergents can penetrate soil quickly whereas solvent, acid or abrasive cleaners may be needed for deep cleaning. The friction of cleaning — often with soap and water — removes most surface germs, which is adequate for most household surfaces.
- Rinse with clean water
- Air dry or dry with a clean disposable towel
Disinfecting destroys or inactivates most germs on inanimate surfaces.
- Wash surface with soap and warm water
- Rinse with clean water
- Disinfecting is not appropriate in all cases. However, it’s a good idea to get in the routine of disinfecting countertops, door and cabinet handles, and sink and sink faucets as these places are used frequently- think where dirt and guck can collect!
- Air dry or dry with a clean disposable towel
Also remember to disinfect dishcloths – often. Launder dishcloths frequently using the hot water cycle of the washing machine. Be sure to dry cloths thoroughly. These items can harbor bacteria and when wet, promote bacterial growth. Also, consider using disposable towels to clean up surfaces.
And don’t forget your kitchen sink drain and disposal. Once or twice a week clean, sanitize and disinfect.
Bathroom surfaces can be of critical concern. Surfaces closest to the toilet bowl – seat, cistern and nearby walls and shelving are most affected. When cleaning and disinfecting bathroom surfaces it is important to understand fecal matter is especially a huge matter of concern!
Then there are our general housekeeping surfaces, floors, walls, and furniture, which are low–touch surfaces that require low-level of disinfections. Cleaning these surfaces frequently with a bit of detergent or a low-level disinfectant designed for general housekeeping can decrease the level of contamination. General procedures should be followed. Remove dirt form surfaces (dust, vacuum or sweep) sanitize or disinfect, allow surfaces to air dry.
Thorough cleaning of all surfaces is important to reduce the spread of pathogens. High-touch surfaces, surfaces that are handled frequently, throughout the day, by numerous people, need cleaning and disinfecting. These surfaces can include doorknobs, light switches, phones, keyboards etc. that can become contaminated by objects such an inadequately cleaned rag, sponges or even improperly washed hands.
Cleaning regularly prevents the build-up of materials that can carry pathogens and support their growth. Some pathogens, viruses especially, can have a long shelf life and can stay on surfaces if they are not properly cleaned, sanitized or disinfected.
Take a look at The University of Florida IFAS EDIS publication explaining the use of common household products to use effectively as sanitizers. Also remember, it is critical to read and follow the safety instructions on any product you use.
http://edis.ifas.ufl.edu/pdffiles/FY/FY128000.pdf
http://www2.epa.gov/saferchoice
Heidi Copeland Extension Agent II Family and Consumer Sciences
615 Paul Russell Road Tallahassee, FL 32301-7060 850/606-5203
by Judy Corbus | Nov 21, 2014
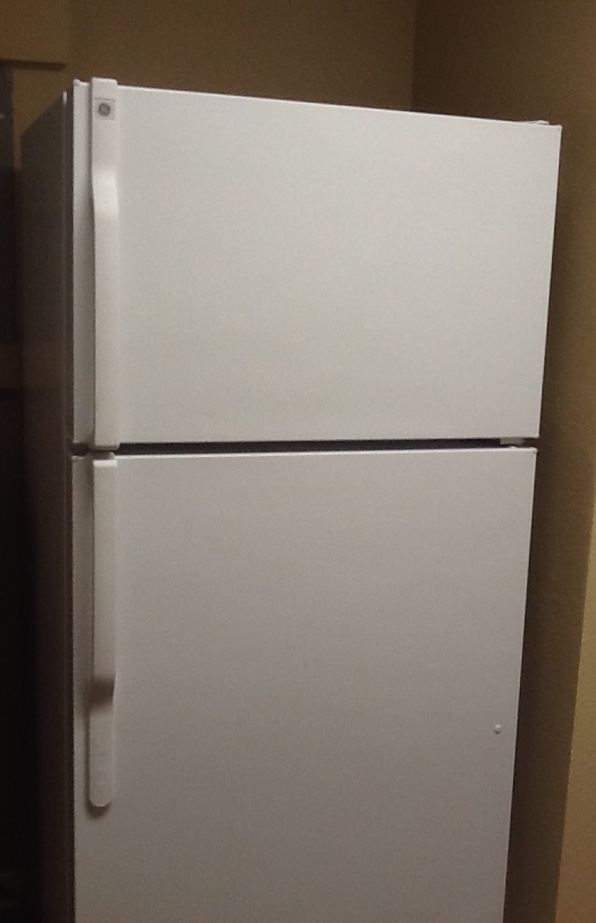
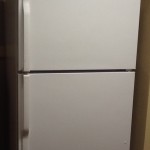 Do you have food containers growing green fuzzies in the back of your refrigerator? It’s easy for leftovers and other food items to overstay their welcome in the fridge, creating a food safety hazard as well as unnecessary clutter. With Thanksgiving and the start of the holiday season just around the corner, now is the perfect time to super-clean your refrigerator. Follow these tips to get your refrigerator ready for Thanksgiving leftovers and other holiday treats:
- Remove everything from the refrigerator.
- Examine each container – discard outdated leftovers and any items of whose age you are uncertain or you don’t plan to use in the near future.
- Remove shelves, drawers, and bins. Wash with a solution of baking soda and warm (not hot) water.
- Clean the interior of the refrigerator with baking soda and warm water. Dishwashing detergent can leave a residue that can lead to odors if not rinsed thoroughly. Dry with a soft cloth or paper towel.
- Clean each container before returning it to the refrigerator.
- Wash the outside of the refrigerator with sudsy water (using hand dishwashing detergent), rinse, and dry. Wash the gaskets around the refrigerator doors – sticky gaskets can cause air leaks, costing you more energy over time.
- Vacuum the dust off the condenser coils, usually on the back of the refrigerator, or under it. Dirty, dusty coils make the refrigerator work harder to cool and use more energy, costing you more money.
- Remove and clean the “pan” or plastic tray at the very bottom of the refrigerator that collects the condensation or defrost water. Look in your care manual to find where this “pan” is located. Dust and moisture in this “pan” can cause mold to grow, causing health problems for people with allergies.
- Clean the floor around and underneath the refrigerator.
Your fridge is now ready for the holidays!
Sources: My Florida Home Book – Taking Care of Your Home, Chapter 5. Taking Care of Indoor Features, University of Florida/IFAS Extension, 2008.
http://www.cooksinfo.com/clean-out-your-refrigerator-day