by Melanie Taylor | Mar 12, 2020

Speak openly with your doctor about any concerns you may have regarding your health. (Photo source: Tyler Jones, UF/IFAS)
We are in the depths of flu season and now the Coronavirus (COVID-19). Although we need to proceed with caution, we also want to avoid causing a panic. Both viruses are very concerning, but with good hand washing skills and a few other daily steps you can do your best to prevent you and your family from becoming sick.
Hand washing is one of the best ways to protect yourself and your family from getting sick. You can help yourself and your loved ones stay healthy by washing your hands often, especially during these key times when you are likely to get and spread germs:
- Before, during and after preparing food
- Before eating food
- Before and after caring for someone at home who is sick with vomiting or diarrhea
- Before and after treating a cut or wound
- After using the toilet
- After changing diapers or cleaning up a child who has used the toilet
- After blowing your nose, coughing or sneezing
- After touching an animal, animal feed or animal waste
- After handling pet food or pet treats
- After touching garbage
Follow these Five Steps Every Time You Wash Your Hands:
- Wet your hands with clean, running water (warm or cold) and apply soap.
- Lather your hands by rubbing them together with the soap. Lather the backs of your hands, between your fingers and under your nails.
- Scrub your hands for at least 20 seconds. Need a timer? Hum the “Happy Birthday” song from beginning to end twice.
- Rinse your hands well under clean, running water.
- Dry your hands using a clean towel or air dry them.
Use Hand Sanitizer When You Can’t Use Soap and Water
You can use an alcohol-based hand sanitizer that contains at least 60% alcohol if soap and water are not available. Washing hands with soap and water is the best way to get rid of germs in most situations. If soap and water are not readily available, you can use an alcohol-based hand sanitizer that contains at least 60% alcohol. You can tell if the sanitizer contains at least 60% alcohol by looking at the product label.
- Sanitizers can quickly reduce the number of germs on hands in many situations.
- Sanitizers do not get rid of all types of germs.
- Hand sanitizers may not be as effective when hands are visibly dirty or greasy.
- Hand sanitizers might not remove harmful chemicals from hands like pesticides and heavy metals.
How to Properly Use Hand Sanitizer:
- Apply the gel product to the palm of one hand (read the label to learn the correct amount).
- Rub your hands together.
- Rub the gel over all the surfaces of your hands and fingers until your hands are dry. This should take around 20 seconds.
Caution! Swallowing alcohol-based hand sanitizers can cause alcohol poisoning if more than a couple of mouthfuls are swallowed. Keep it out of reach of young children and supervise their use.
Conclusion – Other Basic Tips to Prevent Spread of Illness:
- Wash your hands often with soap and water for at least 20 seconds. If soap and water are not available, use an alcohol-based hand sanitizer.
- Avoid touching your eyes, nose and mouth with unwashed hands.
- Avoid close contact with people who are sick.
- Stay home when you are sick.
- Cover your cough or sneeze with a tissue, then throw the tissue in the trash.
- Clean and disinfect frequently touched objects and surfaces.
Be sure to utilize credible sources to find your information. The Centers for Disease Control and Prevention (CDC) and the Florida Department of Health are excellent resources.
CDC page Preventing COVID-19 Spread in Communities https://www.cdc.gov/coronavirus/2019-ncov/community/index.html
CDC frequently asked questions (FAQs) https://www.cdc.gov/coronavirus/2019-ncov/downloads/2019-ncov-factsheet.pdf
Florida Department of Health frequently asked questions (FAQ) http://www.floridahealth.gov/diseases-and-conditions/COVID-19/faq.html
If you have further questions or concerns, please contact your local Department of Health for assistance.
Sources:
Center for Disease Control and Prevention – https://www.cdc.gov/
Florida Department of Health – http://www.floridahealth.gov/

by Dorothy C. Lee | Mar 3, 2020
Spring showers not only bring flowers, but beautiful fresh produce from the garden.
March in National Nutrition Month. Celebrate with nutritious delicious GREENS.
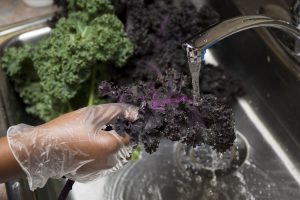
Be sure to carefully wash greens before preparing to ensure a safe and delicious product. (Photo source: Tyler Jones, UF/IFAS)
The dark leafy vegetable we refer to as “greens” range from earthy to peppery in flavor. Collard greens, mustard greens, turnip greens, and kale are often grouped together because of their texture, pronounced flavor, and general uses. They actually come from several vegetable families. In general, these tart greens are cooked before eating. The season for some varieties peak November through March.
Choose leafy greens with fresh full leaves. Avoid greens that are brown, yellow spotted, wilted, or have slimy leaves. Wash greens before use. Cut stems from leafy greens before cooking. Sauté collard greens with garlic, onions, and tomatoes a little bit of olive oil. Simmer greens in low-sodium chicken broth until greens are wilted and tender. Store greens in a plastic bag in the refrigerator for two to five days.
NUTRITION TIPS: A 1/4 cup of cooked greens is about the size of one cupped handful.
Beans and Greens
1 can white kidney beans or cannellini beans rinsed and drained
1 tablespoon olive oil
1/2 cup diced onion
2 cloves garlic, minced
2 pounds fresh kale, stemmed and chopped into large pieces
Salt and pepper to taste
Sauté onion and garlic in olive oil. Add greens to the skillet. Sprinkle with 2 tablespoon of water. Cook, tossing often, until greens are bright green and slightly wilted. Remove from heat. Drain and heat beans and add to green mixture. Toss mixture, season and serve. Serves four; 1 cup serving
Savory Greens
3 cups water
1/4 pound skinless turkey breast
1/2 cup chopped onions
2 cloves garlic, crushed
1/4 teaspoon cayenne pepper
1/4 teaspoon ground cloves
1/2 teaspoon dried thyme
1 green ground ginger
2 pounds mixed greens (collards, turnips, mustard, and kale)
Place all ingredients except greens into large pot and bring to a boil. Wash greens and remove stems. Chop greens into small pieces and add to stock. Cook 20 to 30 minutes until tender. Serves six; 1 cup serving
NUTRITION INFORMATION: Cooked greens are excellent sources of Vitamins A, C, K, and Calcium.
AVAILABLE FRESH: March – June & October – December
To learn about fresh Florida greens, please read our fact sheet: Panhandle Produce Pointers – Greens.
For more delicious produce preparation tips, please visit: http://www.panhandleproducepointers.com.
by Angela Hinkle | Jan 24, 2020
My favorite time – snack time! For February, National Snack Food Month, let’s celebrate these tasty morsels for a whole month.
Go Beyond the Snack Aisle
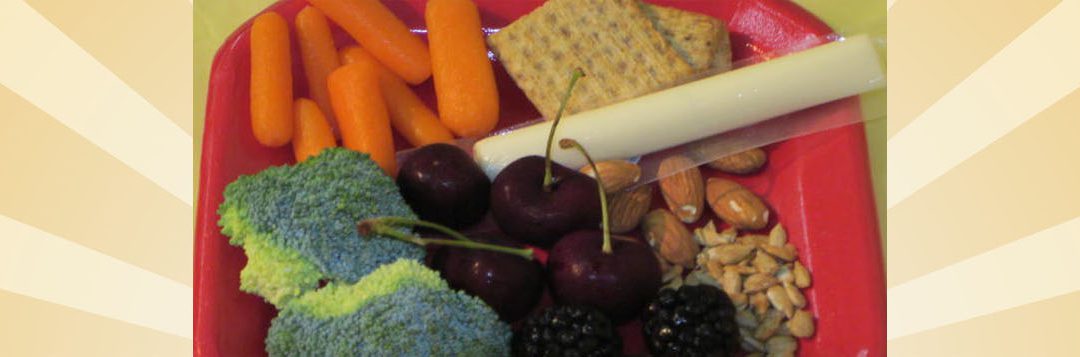
Snacks often have a bad reputation, at least in terms of health. It’s true that snack food aisles are often filled with high fat, high calorie, high sodium, and high sugar choices. But snacks can be great sources of fiber, vitamins, minerals, proteins, and healthier fats and carbohydrates. You may just have to wander to other parts of the store next time you shop.
Think Mini Meal
When you snack, think of it as a mini meal. Though you could plan tomorrow’s dinner to be a plate of snack cakes with a side of potato chips, hopefully you come up with something more satisfying than that – both in taste and nutrition. Additionally, when we snack on healthier foods in between meals, it gives our bodies the sustainable energy it needs to make it to that next meal.
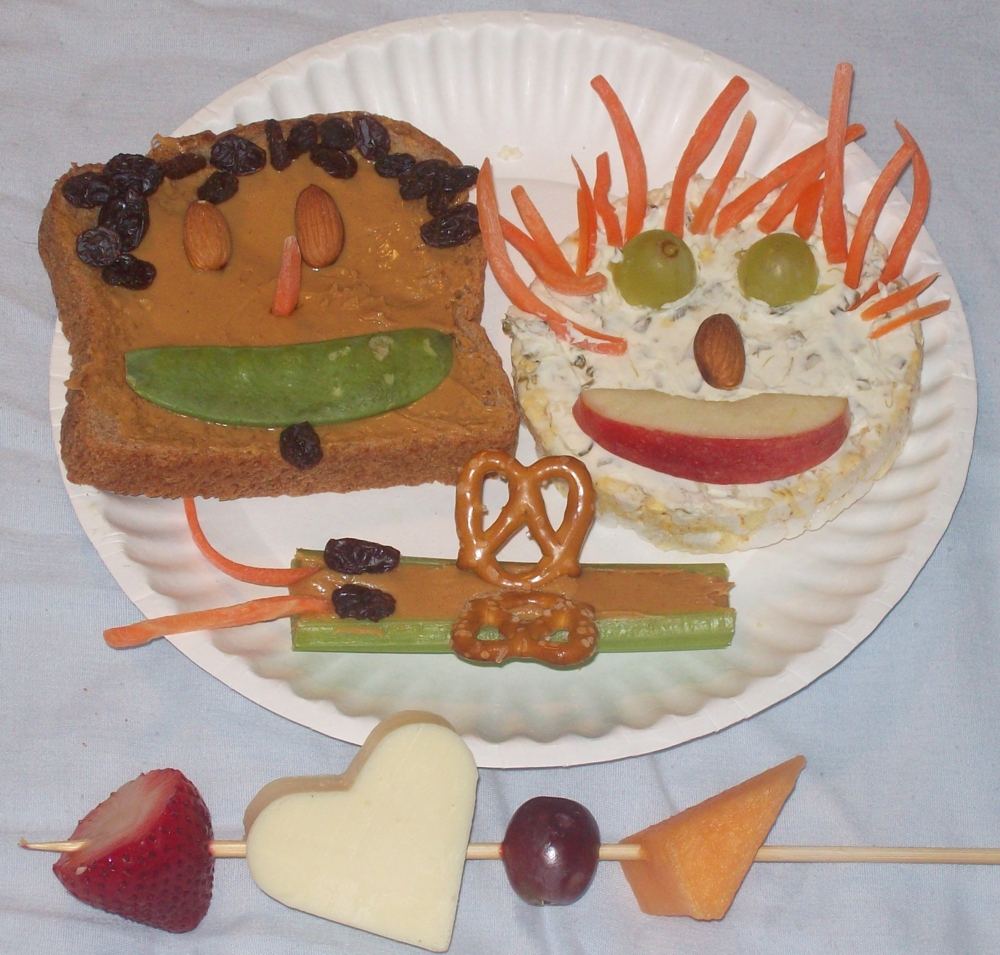
Snacks – Fun, Tasty, and Healthy
Photo Source: Angela Hinkle
Snack MyPlate
Try snacking from all five food groups this month.
- Whole grains – popcorn, granola, whole grain crackers
- Fruits – apples, bananas, oranges, raisins
- Veggies – pea pods, cucumber slices, carrots
- Dairy – string cheese, yogurt cups, individual shelf stable cartons of milk
- Protein – hard-boiled eggs, mixed nuts, healthy beef jerky
Make Homemade Mixed-Up Food Group Snacks
- Whole grain pita or multi-colored pepper slices dipped in guacamole or hummus
- Apple slices or carrots with peanut butter dip
- Cherry tomatoes with mozzarella and basil
- Fruit smoothies or protein shakes
- Yogurt with granola and mixed berries
- Banana Sushi – smear a whole wheat tortilla with peanut butter, put a banana in the middle, roll it up, then cut it into “sushi” slices
For more great snacking ideas, check out 10 Snack Tips for Parents, MyPlate Snack Tips for Kids, and 25 Healthy Snacks for Kids
Delicious, healthy, on-the-go snacks. Be creative and keep it healthy this February – National Snack Food month.
by Dorothy C. Lee | Oct 23, 2019
Pumpkins have been grown in the Americas for thousands of years. They are indigenous to the western hemisphere and were unknown in Europe before the time of Columbus. There was probably some kind of pumpkin served at the first Thanksgiving Feast.
Pumpkins, gourds, and other varieties of squash are members of the family Cucurbitaceae.
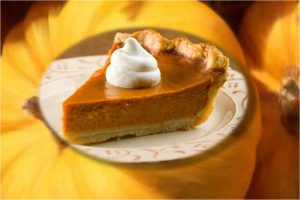
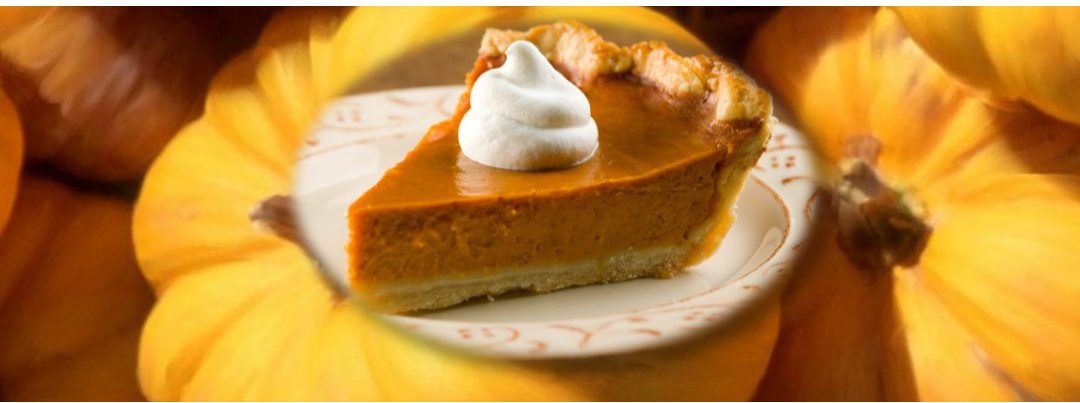
Pumpkin King of Pies
Photo Source: Esther Mudge
Baking with pumpkins during the holiday season has become a popular tradition. Pumpkin pie is king of the holiday pies.
Freshly baked pumpkin dishes are a delicious delight. It may surprise you that pumpkin is classified as a fruit, not a vegetable. Pumpkin is an excellent source of many nutrients. Pumpkin is rich in minerals like phosphorus, calcium, and iron. The pumpkin is also rich in carbohydrates. It contains vitamin A as well.
Small to medium size pumpkins are best for baking and cooking because they have a finer textured flesh than large pumpkins. Look for heavy pumpkins, and ones that do not have a hollow sound when you thump on them.
To use fresh pumpkin rather than canned pumpkin, scoop out the seeds and cut into small even pieces. The pumpkin can be peeled before or after cooking. Boil the pumpkin until tender and then mash it and use to prepare a variety of pumpkin dishes.
I like to cut the pumpkin in half, place the cut side down on a glass plate, and microwave on high for 20-25 minutes, depending on the pumpkin’s size, until tender. Then I remove the skin and beat the pumpkin in a mixer until smooth (strings will remain on the mixer blades). It’s now ready to use in any recipe.
One cup of raw pumpkin yields about ¾ to one cup of cooked, pureed pumpkin. It takes about 1 ½ to 2 cups of cooked pumpkin for a well-filled 9-inch pie.
When you carve that jack-o-lantern, don’t throw away the seeds. Roasted pumpkin seeds make a delicious, nutritious snack anytime and can be easily prepared in the microwave. See recipe below.
Pumpkin pie usually comes to mind first when the fall pie season arrives. However, pumpkin lends itself to a variety of bread, cookies, pancakes, muffins, butters, and a variety of other sweet treats. Happy Fall!!
ROASTED PUMPKIN SEEDS (in the microwave)
- 1 cup pumpkin seeds
- 1 tablespoon butter
- ¼ teaspoon seasoned salt
- Remove any fiber clinging to pumpkin seeds.
- Wash and drain well.
- Spread seeds in a single layer to dry, stirring occasionally.
- Line a 9-inch pie plate with two layers of paper towels. Sprinkle seeds on the towels.
- Microwave on HIGH 13 -14 minutes or until seeds are dry but still white, stirring every 5 minutes. Let stand 5 minutes.
- Place butter in a 2-cup measure and microwave until melted. Add seeds and salt; stir and coat.
- Serve as a snack.
FRESH PUMPKIN PIE
INGREDIENTS
FILLING:
- ¾ cup packed brown sugar
- 1 ¾ teaspoons pumpkin pie spice
- ¼ teaspoon salt
- 1 (12-ounce) can evaporated low-fat milk
- 2 eggs
- 1 ½ cup of fresh pumpkin (cooked and drained)
CRUST:
- Frozen 9-inch-deep pie crust
TOPPING:
- ¼ cup whipping cream
- 2 teaspoons powdered sugar
PREPARATION:
Place the oven rack to its lowest position. Preheat oven to 425ºF. Prepare fresh pumpkin as directed above. Be sure to drain the pumpkin after cooking. Now you are ready to use the pumpkin in recipes. To prepare filling, combine first 6 ingredients in a large bowl, stirring with a whisk. Add pumpkin and stir with a whisk until smooth. Pour pumpkin mixture into the crust. Place pie plate on a baking sheet. Place baking sheet on lowest oven rack. Bake at 425ºF for 10 minutes. Reduce oven temperature to 350ºF (do not remove pie from oven); bake an additional 50 minutes or until almost set. Cool completely on wire rack. To prepare topping, beat cream with a mixer at high speed until stiff peaks form. Add the powdered sugar and beat until blended. Serve with pie. Yield 1 Pie, about 6 -8 pieces.
by Angela Hinkle | Oct 22, 2019
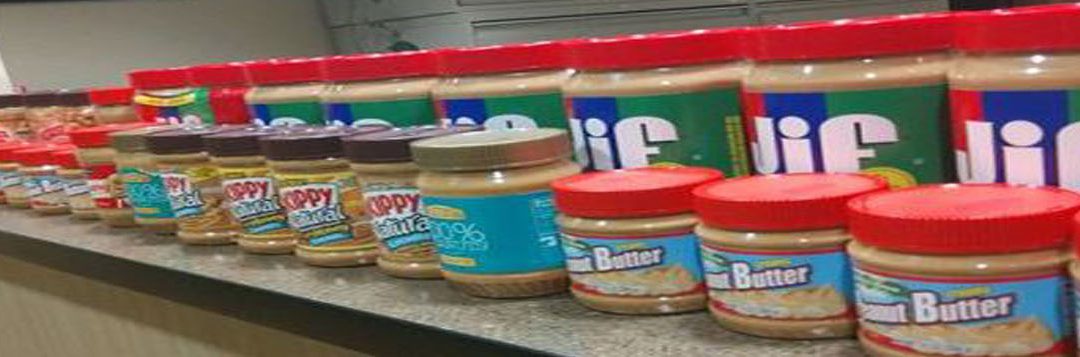
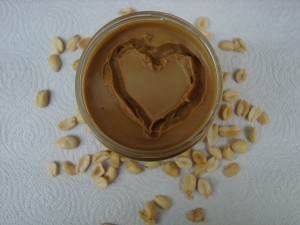
Delicious, nutritious, and super helpful for today’s needs, peanut butter is a great addition to your shopping cart. But it’s more than just a tasty and healthy food that also helps those in need (more on that below). Pound for pound, peanut butter saves.
Nutty for Peanut Butter
Photo Source: Angela Hinkle
Compared to a pound of ground beef, a pound of peanut butter saves:
- Money at the grocery store. A pound of peanut butter currently comes in at around $2.50. A pound of ground beef will run you around $3.82.
- Time. It takes about 2-3 minutes to make a peanut butter and jelly sandwich. A burger at home will take you anywhere from about 8-15 minutes to prepare.
- Environmental costs. If you make a peanut butter and jelly sandwich for lunch instead of a hamburger, you can save 2.5 pounds of carbon dioxide, 133 gallons of water, and 24 square feet of crop land.
- Saturated fat. That’s the kind that tends to clog up arteries and cause health problems. Eating the PB&J gives you about 3 grams. You consume about 10 grams of saturated fat in a 90% lean quarter pound hamburger.
- Utilities. No gas, coals, or electricity is required to cook or safely store peanut butter.
- Hunger. Families in hardship situations often need help from food pantries. The most requested item from these pantries is – yes, you guessed it – peanut butter. It is shelf stable so you don’t have to worry about keeping it cold or heating it up. People like it. And it is a healthy plant-based food with fiber and oleic acid – a healthier monounsaturated fat.
Maybe you’re like me – you like a really good, juicy all-beef burger. Every once in a while, sure. But pound for pound, peanut butter really can save the day.
Here’s how you can help with the local hunger part:
- Buy peanut butter. Look for BOGOS (Buy One Get One Free Sales). Keep one for yourself. Then…
- Now through November 27, donate unopened jars of peanut butter for the Peanut Butter Challenge. Check with your Florida Panhandle UF/IFAS Extension Office for collection sites.
- All collected peanut butter will be given to local food pantries to assist hungry families in need.
So save, save, save with peanut butter. And help save a family from hunger.
Check out 2019 Peanut Butter Challenge for additional information.
Resources: https://foodtank.com/news/2013/12/why-meat-eats-resources/ and https://www.farmprogress.com/peanut/peanut-s-environmental-footprint-stretches-beyond-farm