by Jena Gilmore | May 15, 2015
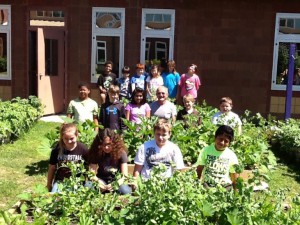
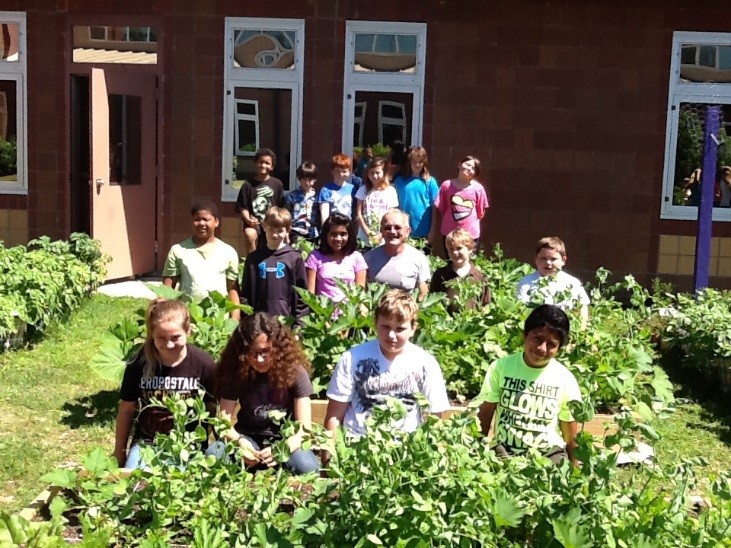
4-H School Gardens help youth learn about science, food and nutrition, and life skills such as responsibility.
Mary, Mary quite contrary, how does your garden grow?
With 4-H volunteers, Essential Elements of Positive Youth Development, and UF IFAS Extension all in a row!
School gardens have become the perfect avenue to implement experiential learning. They provide the students with a safe environment which fosters cooperative learning, and focuses on nurturing the essential elements youth require in order to become competent caring citizens. Joe Crozier is a Master Gardener and 4-H volunteer in Walton County. Joe has extensive knowledge in gardening including container gardening and hydroponics. Joe has shared his success and expertise in hydroponics through Master Gardener workshops in the Florida panhandle. However, Joe has a passion for sharing his knowledge with children through the 4-H gardening project and was recruited by the Assistant Principal at Freeport Elementary to begin gardening with the 4th Grade classes.
When asked what inspires Joe to continue to be a 4-H Volunteer, he says “The questions the students ask, and most of all, the smiles on their faces as they plant seeds and become part of the 4-H School Garden Program.”

The 4-H School Garden at Freeport Elementary would not have been possible without Joe’s volunteer service
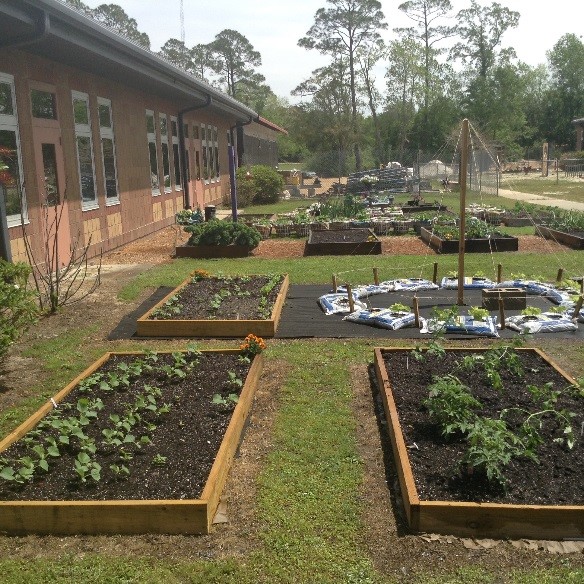
Last year, Joe developed a raised bed garden at Freeport Elementary, which has now expanded to include a bean tee-pee and additional beds. Each student had their own section, per their request, in order to master their green thumb. Prior to this, and the ignition to their new found passion for gardening, the students participated in the “Potato Project,” and grew potatoes in laundry baskets. The students were amazed that this was possible, not to mention the quantity and quality of potatoes that emerged! Once the potatoes were harvested, the children prepared them for cooking and the lunchroom returned the favor by providing each classroom with their own piping hot buttery new potatoes. Children who wouldn’t normally touch vegetables eagerly awaited the moment they could taste the fruit of their labor.
Joe has devoted countless hours to the 4-H School Gardens Program. When asked how 4-H has made a difference in the lives of the students at the school, Joe stated “They involve their parents when they take what they’ve learned in the garden home! Some children have never been taught how to garden or how to grow their own food. Spending time teaching these children makes me so happy and is so contagious that my family notices how proud I am of them.” Thanks to his diligence and dedication, more schools are eager to join the Potato Project and develop their own 4-H School Gardens in Walton County.
If you have a green thumb, consider going “totally green” as a 4-H gardening volunteer! 4-H needs caring adults like you to share their knowledge and passion for gardening with the next generation. Through the 4-H gardening project, youth not only learn gardening knowledge and skills, they also learn responsibility, teamwork, and other life skills that will help them grow up to be compassionate and competent citizens. To get involved, contact your local UF IFAS Extension Office, or visit http://florida4h.org./volunteers.
Your opinion matters! Please provide feedback on this short survey to help us improve our blog: https://ufl.qualtrics.com/SE/?SID=SV_3gtLKjqia3F75QN.
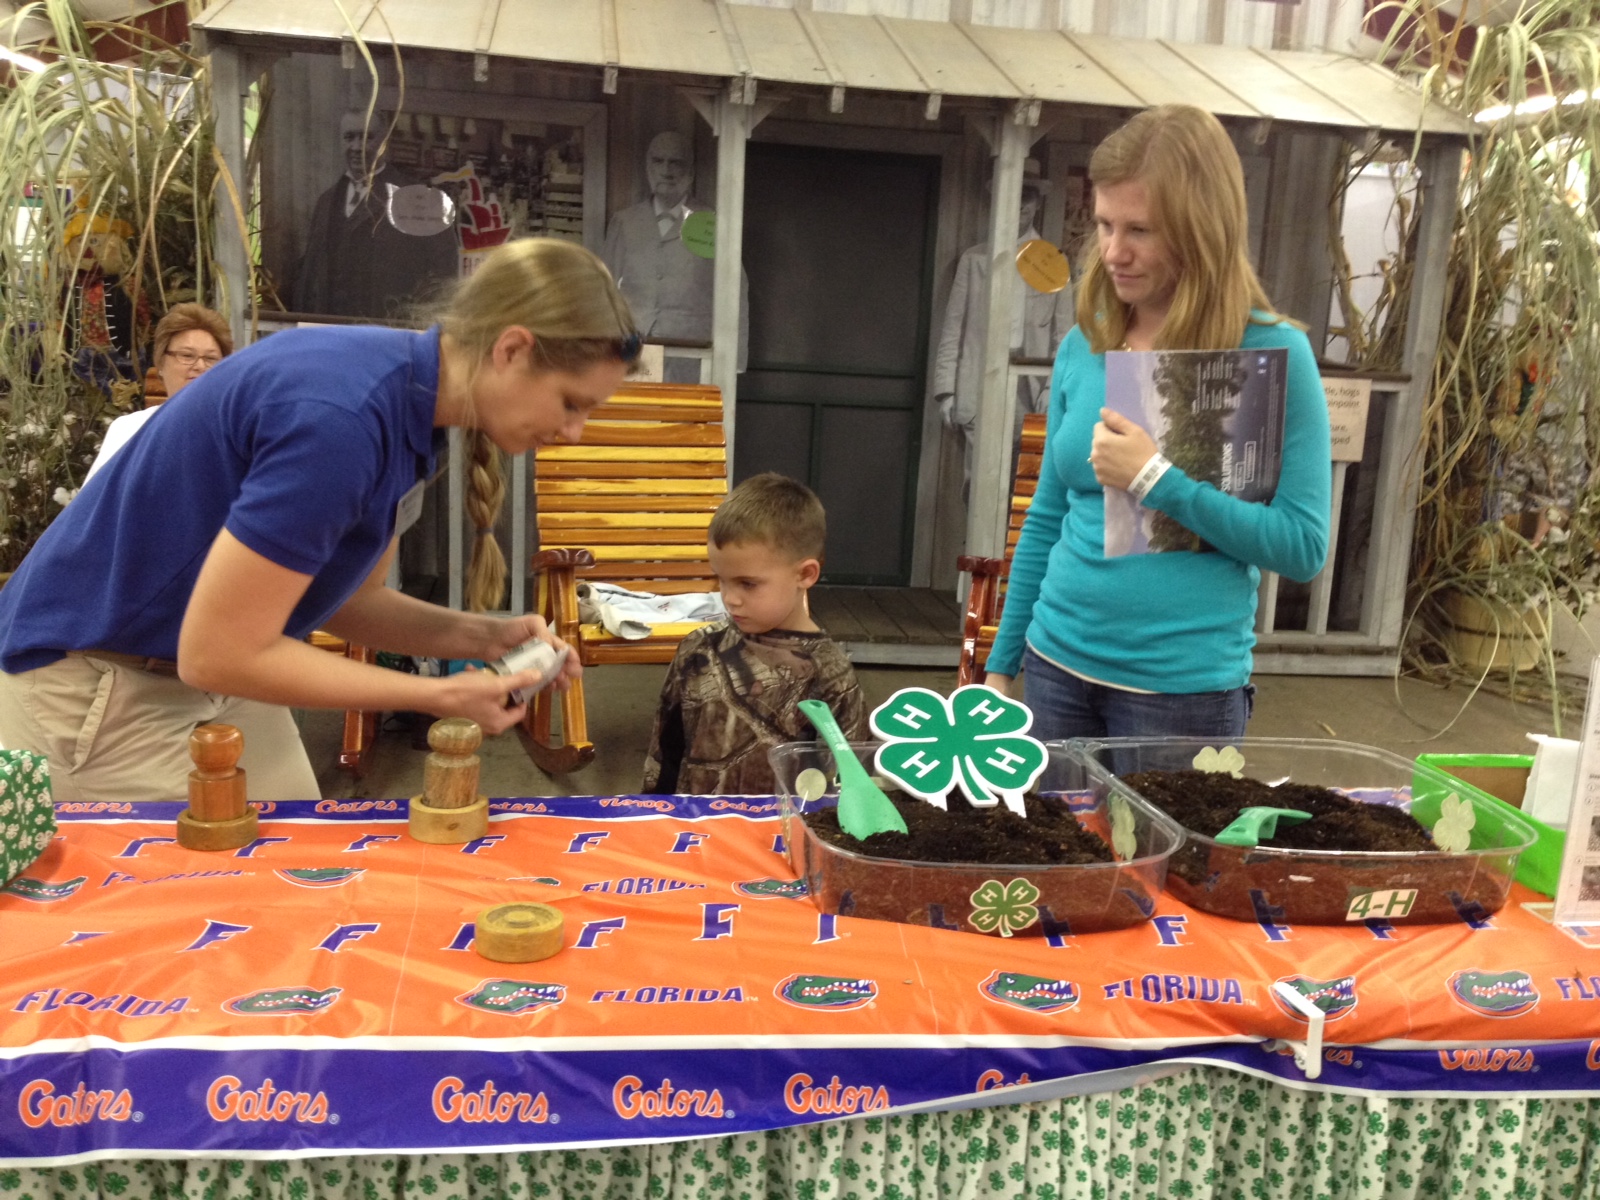
by Whitney Cherry | May 8, 2015
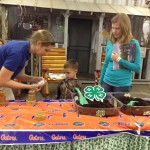
Photo Credit: Whitney Cherry, UF IFAS Extension
4-H literally got its roots in gardening (pardon the pun). The very first 4-H Clubs focused on growing tomatoes and corn, and many youth and volunteers still enjoy gardening projects today. Gardening enriches your life, promotes good health, and saves money. One way to save money is to make your own paper pots to start your seeds. They are fun and inexpensive to make and are a perfect activity for your next club meeting! For beginners, we recommend growing tomatoes, peppers, eggplant, okra, beans, basil, chives, parsley, and lettuce. Not into vegies? Try starting sunflowers, zinnias, pansies, or petunias instead.
Items you will need:
- Newspaper strips (not glossy inserts)
- Bottle (not glass) or can to wrap paper around
- Seeds and Soil
What to do:
- Cut strips of newspaper about 4” wide.
- Wrap strip of newspaper around an empty juice bottle and roll; try to keep the paper wrapped tightly. Half of the strip of paper should overlap the open end of the bottle.
- Fold the ends of the paper against the bottom of the bottle.
- Push the bottom of the bottle against a flat, hard surface (such as a table) to seal the bottom of your pot.
- Pull the bottle out and you have a finished paper pot. Fill with soil an plant your seeds.
- When the seedling is ready to transplant, simply drop the entire pot into the ground. The newspaper will biodegrade in your garden, and your plant will never be uprooted. Make sure paper is not sticking out of the ground – it will wick water away from the plant if not underground.
You can print a PDF version of the instructions for this activity. Other great gardening resources include:
If you have a green thumb, consider going “totally green” as a 4-H gardening volunteer! 4-H needs caring adults like you to share their knowledge and passion for gardening with the next generation. Through the 4-H gardening project, youth not only learn gardening knowledge and skills, they also learn responsibility, teamwork, and other life skills that will help them grow up to be compassionate and competent citizens. To get involved, contact your local UF IFAS Extension Office, or visit http://florida4h.org./volunteers.
Your opinion matters! Please provide feedback on this short survey to help us improve our blog: https://ufl.qualtrics.com/SE/?SID=SV_3gtLKjqia3F75QN.
by jgl1 | May 1, 2015
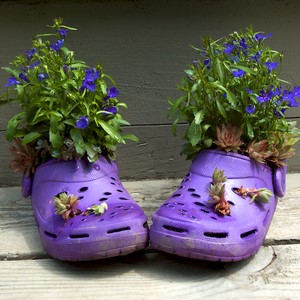
Outgrown clogs can make an excellent container garden.
Research shows that gardening in school and clubs positively influences youth environmental attitudes, nutritional attitudes, self-esteem, test scores, school attitudes, interpersonal skills, social concerns and behavior. For example, students in third and fifth-grade who learn science through gardening scored higher than students who did not learn science through the use of a garden (National Gardening Association, 2002). The first step is helping your club or class select a garden style. The three most common types of gardens are raised-beds, container, and your typical in-ground garden. This article will provide some tips in helping you decide what type garden is perfect for your 4-H Club or 4-H Classroom.
Container Gardens– Container gardens are extremely kid-friendly and are an excellent choice if you have little space, poor soil, or are surrounded by cement and blacktop. Even the smallest outdoor nook can feature a thriving crop of vegetables, herbs, and flowers in containers.
Benefits of Container Gardening Include:
- Maximizing your space. You can take advantage of small areas like sunny window ledges and courtyards.
- Testing the waters. You may want to make sure gardening will work well with your club before committing lots of resources.
- Portability. If you are faced with challenges — vandalism and theft, or upcoming construction that will displace your plots — you can design container gardens that can be easily moved on a daily or seasonal basis.
- Soil control. By using containers, you can be confident about the safety of your growing media and enjoy eating your harvest. This is a concern where soil may be contaminated with lead or other industrial pollutants.
- Blacktop greening. Perhaps you are in an area void of soil and green space. You can place containers on concrete or cement surfaces.
- Deer, rabbits, and other wildlife are less likely to dine on plants in your container garden.
- Keep in mind though, that bigger is often better. The bigger your container, the more soil it will hold. In container gardening, more soil means better water retention, which means you have more latitude with watering and that usually increases your chances of success.
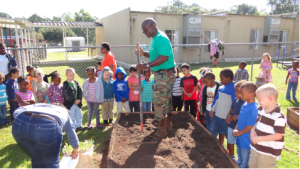
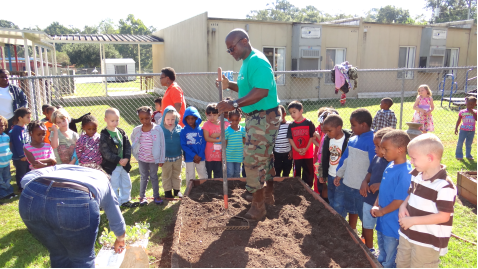
Jefferson County 4-H Agent, John Lilly, shows teachers how to prepare a raised bed garden.
Raised-bed Gardens– A raised bed garden is built from wood or plastic boards, typically four feet wide and as long as desired (four-feet-by-four feet for square foot gardening, up to 14 feet long rectangular beds). Because much of Florida soil is sandy and does not hold many nutrients, the deeper the garden beds, the better the soil will be. Many schools stack two boards on top of one another to achieve a 10 to 12-inch high garden bed, using 18-inch wooden stakes to keep the boards together. Potting mix, compost or garden sand from the site itself are added to fill the boxes, leaving two inches from the top as clearance. Raised beds help prevent kids from walking on delicate plant roots, clearly marks the boundaries of the bed and reduces some soil-borne pest problems. Clubs in urban areas have constructed raised beds directly on asphalt or concrete surfaces with successful results.
Benefits of Raised-Bed Gardening include:
- More control over the location of the garden
- Ability to choose the best soil for your particular plants
- More efficient draining
- Can be easier on backs and knees due to less bending and stooping
- Easier to keep out weeds
- The soil warms up earlier in a raised bed, so you can plant earlier and extend your growing season
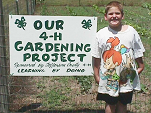
The 4-H gardening project teaches valuable science and life skills.
In-Ground Gardens– Vegetables, fruit trees, and flowerbeds (such as butterfly gardens) can all grow directly in the ground, as farmers have for centuries. Gardens can be as small as four-feet-by-four-feet, or as large as the garden committee is willing to implement. Before planning a garden, dig several holes at the proposed site to collect soil samples for a pH test and to determine the soil type. Your local County Extension Office can test the soil. Most plants grow best with a pH of seven, but some have different pH requirements. Low-lying or seasonally moist areas will require different plants than high, dry, sunny areas with sandy soil.
Benefits of In-Ground Gardening Include:
- Use of existing soil. Most soils are perfectly fine for gardening, provided the soil is properly tilled, mulched and watered. Even without organic amendments, most soils can produce a bountiful harvest.
- Less start-up work (and cost). A flat, well-drained area can be quickly and easily prepared with a large rotor-tiller. You can also save on soil and bed or container materials.
- An in-ground garden can easily be replaced by another crop or moved to another location.
- Lower water requirements. In-ground beds won’t dry out as quickly as raised beds and will, therefore, require less water to maintain.
- Irrigation systems for flat, in-ground gardens are simple to design and easy to install compared to raise beds that require careful design and installation.
If you have a green thumb, consider going “totally green” as a 4-H gardening volunteer! 4-H needs caring adults like you to share their knowledge and passion for gardening with the next generation. Through the 4-H gardening project, youth not only learn gardening knowledge and skills, they also learn responsibility, teamwork, and other life skills that will help them grow up to be compassionate and competent citizens. To get involved, contact your local UF IFAS Extension Office, or visit http://florida4h.org./volunteers.
Your opinion matters! Please provide feedback on this short survey to help us improve our blog: https://ufl.qualtrics.com/SE/?SID=SV_3gtLKjqia3F75QN.
by ewestbrook | Apr 24, 2015

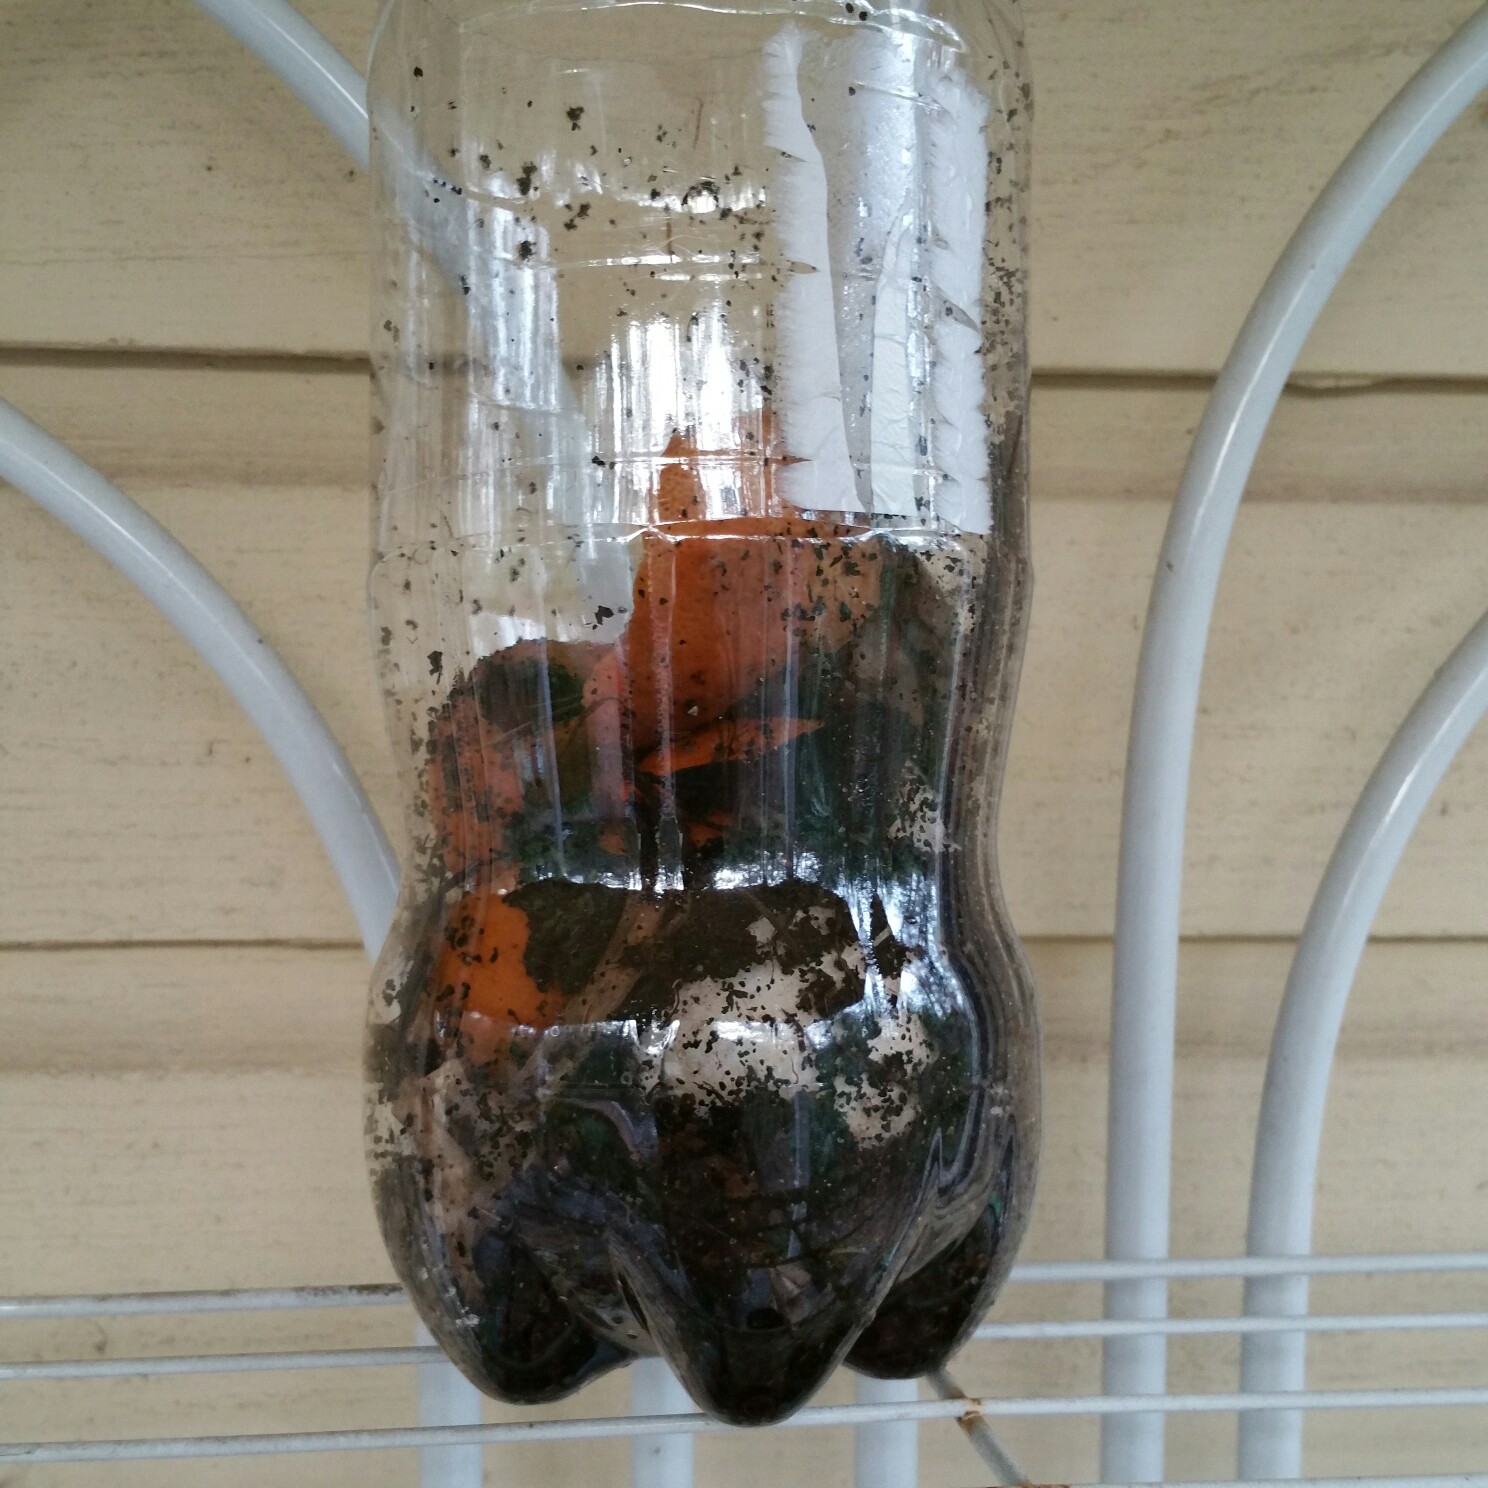
A two liter soda bottle with the top cut off makes a great mini compost bin. This is a a new batch with soil mixed in to experiment with jumpstarting the composting process.
With the promise of fresh vegetables just around the corner, now is a great time to think about starting a compost pile to save money on fertilizer and potting soil for your garden. Composting makes an excellent (and environmentally friendly) project for youth. It can save you money on commercially sold soil amendments as well as improving the quantity and quality of your vegetable harvest. Compost is simply organic material that has been broken down by living organisms until it can be used by plants as nutrients. This decomposed material is called humus and it is a great natural fertilizer. All that you need to get started composting are a few key ingredients:
- An even mix of nitrogen rich “green” organic materials and carbon rich “brown” organic materials. Greens include items like fresh grass clippings, manure and vegetable scraps from the kitchen. Browns are things like dead leaves, straw, or newspaper.
- Moisture is needed for the organisms that break the compost down to live, but not too much. The pile should be damp, not soggy.
- Air should be introduced to the compost periodically by mixing it up.
- Time is necessary for microorganisms to turn the brown and green materials into humus.
There are several methods of composting, from something as simple as a pile in a corner of your yard to a commercially sold rotating bin. Whatever composting system your group chooses the basic method of creating a good composting mixture is the same. Simply make even layers of browns and greens and moisten the pile slightly with water. Over the course of the next few weeks, microorganisms will begin decomposing the mixture, releasing heat as a byproduct. Temperatures will sometimes to as high as 140° F. The mixture will reduce in volume by nearly half as it breaks down. Once the mixture is entirely composted it will be close to ambient temperature and will resemble fine dark rich soil with some large clumps. To test the compost, plant a few fast growing radish seeds in it. If they don’t grow or are unhealthy it means bacteria are still decomposing the compost mixture and competing with the plants for nutrients. If the plants are healthy the mixture is ready to use in the garden either by spreading it like a mulch, mixing it into the soil or making a compost tea.
A two liter soda bottle with the top cut off makes a great mini compost bin. This is a a new batch with soil mixed in to experiment with jumpstarting the composting process.
As an alternative to a large compost pile or bin you can create mini compost mixtures in a variety of recycled containers, such as a mason jar or empty 2-liter bottle. These are great for small classroom projects, science experiments and take home projects. Make sure to that the compost can be mixed and is getting air. Keep it in a sunny spot so it is warm enough for the microbes to work. Here are some ideas to extend this activity into a project to learn the science behind composting:
- Help youth research composting methods and choose the best one for them. Encourage them to consider things like cost, labor and time when deciding the best method.
- Try different types of composting methods and mixtures. Have the youth make predictions about which mixture will be the most effective. Have them design an experiment to find out what happens if more greens are in a composting mixture than browns? Or, why would one method decompose faster than the other? What is the fastest method of composting?
- Keep records and observations about the compost as it decomposes. By measuring factors like temperature, texture, smell and look youth learn the value of recordkeeping as they use the data they collected to research the best composting methods.
- Have the finished compost soil tested. Ask your county 4-H Agent to invite a UF/IFAS Agriculture or Horticulture Agent to help perform the test and explain the results to the group.
For more resources to help your club or group to learn composting by doing visit these sites:
Do you have a passion for gardening that you would like to share with others? Last year, nearly 20,000 youth participating in the 4-H Gardening Project. This would not have been possible without our 4-H volunteers. If you would like to help the next generation develop gardening skills and an appreciation for agriculture and the environment, consider becoming a volunteer. To find out more, contact your local UF IFAS Extension Office, or visit http://florida4h.org/volunteers.
Your opinion matters! Take this short survey to help us improve our blog https://ufl.qualtrics.com/SE/?SID=SV_3gtLKjqia3F75QN.
by pmdavis | Jan 5, 2015

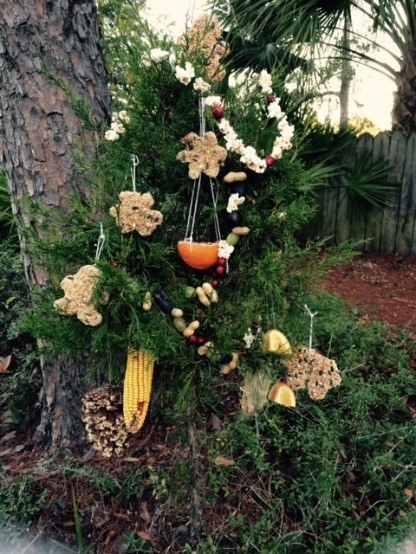
While youth are home over winter break, encourage them to do something fun that will attract wildlife. Nothing is more fun than watching birds or squirrels play in your yard. One way to make this happen is to provide a supplemental food source for them. You can create a special “Tree for Wildlife” in your yard. In fact, a great family activity is making some very inexpensive simple feeders. The most wonderful part is these feeders, they not only look attractive, but help wildlife survive through the winter.
You can create feeders out of bread, bird seed and a binding agent like eggs, lard or peanut butter. Cut stale bread into shapes with cookie cutters. Make a small hole in the top to put twine or string through. If using egg, brush the bread with egg wash and dip in seeds. Then let it dry for a day or so. Attach string and hang in the trees. If using lard or peanut butter, toast the bread to dry it out then spread like you would on a sandwich and roll in bird seed.
Another type of feeder that is popular especially if you have lots of pine trees are pine cone bird feeders. Attach string to a pine cone. Mix peanut butter and oats together then apply to pine cone. After the cone is covered with the mixture roll in bird seed. Lard can be used in place of peanut butter. Hang from tree.
One last type of feeder is using apple and orange slices. Cut thin slices of apples and oranges, attach string and hang each slice separately all around the tree.
Additional feeders could be strings of grapes, raisins, cranberries, raw peanuts, salt free crackers or popcorn. If you are using popcorn be sure it does not have butter and salt. Just use a needle and thread to make the strings. All edible decorations should be hung with biodegradable materials such as cotton string, twine, or thread.
For more information to help you invite wildlife into your yard check out Junior Master Gardener: Wildlife Gardener or Cornell Feeder Watch. Inviting wildlife into your yard provides a fun way for kids to develop a culture to care about nature, while teaching them about their environment. It also makes a great family traditional activity to do not only during the holiday season but throughout the year. 4-H is one of the nation’s most diverse organizations and includes people from all economic, racial, social, political, and geographic categories. There are no barriers to participation by any young person. Participants are given the opportunity to engage in activities that hold their personal interest, while being guided by adult volunteers. The local 4-H Agent is a youth development professional who provides direction and program leadership as part of the nationwide Cooperative Extension System. For more information, contact UF/IFAS Extension at http://florida4h.org/
.
by Julie Pigott Dillard | Nov 8, 2013
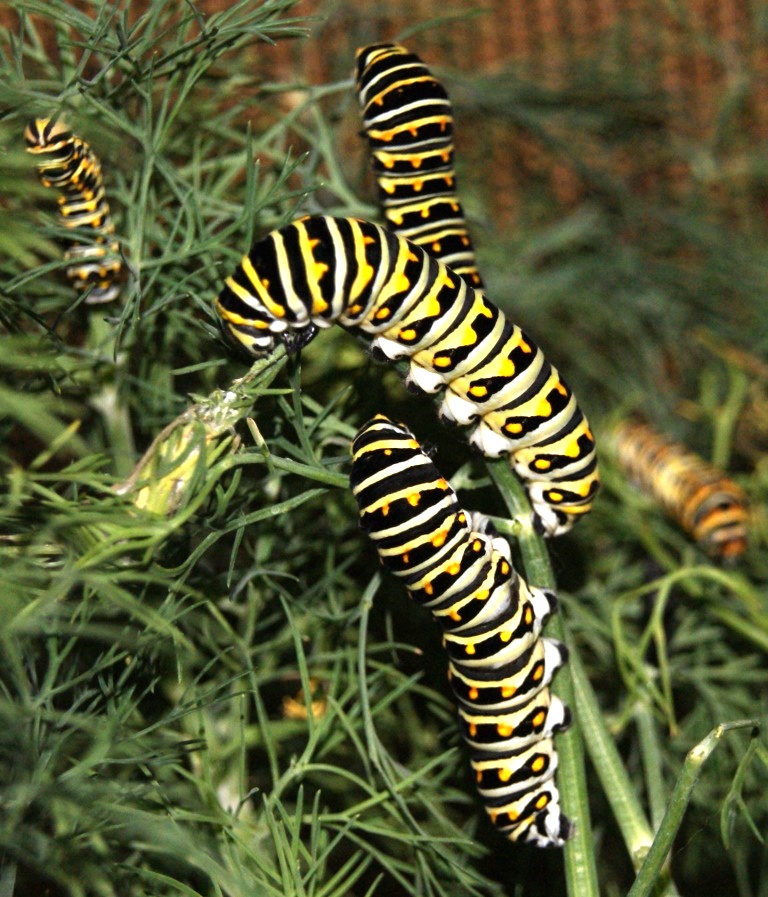
All of you 4-H members with fall herb gardens: Would you be willing to sacrifice your apiaceous herbs to the Black Swallowtail Caterpillar?
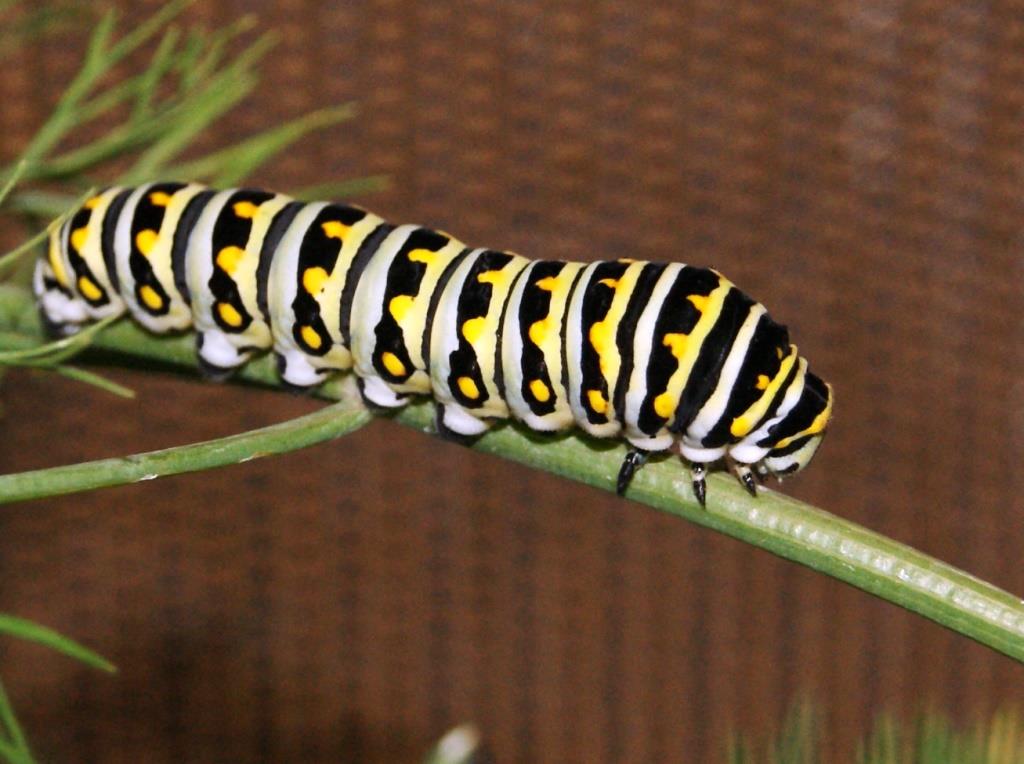
Busily devouring dill and fennel, the lime green, black striped caterpillars in the UF IFAS Extension Washington County Office have quickly become a popular attraction. It is fortunate that the South’s climate is warm enough to allow for three generations of this species every year.
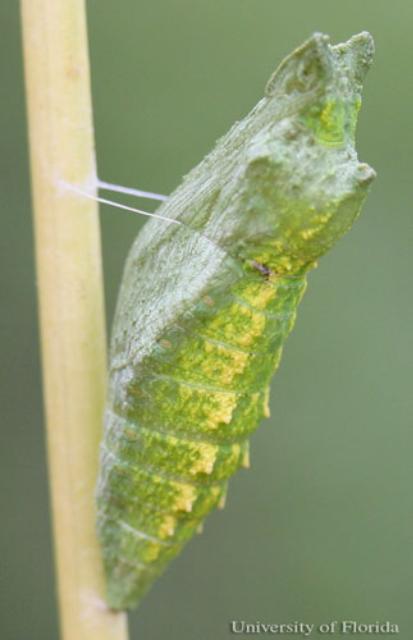
Soon, the caterpillars of the Black Swallowtail (Papilio polyxenes asterius ) butterfly species will continue their pupae stage by forming a chrysalis and emerging as one of Florida’s most recognized swallowtail butterflies.
The chrysalis is formed by two glands located inside the caterpillar that secrete silk. The silk threads stick together and harden when exposed to fresh air. The hard, protective coating is usually camouflaged from predators and blends in with the environment. Inside the chrysalis, the process of metamorphosis continues as the adult structure forms while the juvenile structure breaks down. The insects are very inactive during this time as they grow and change. This stage can last from two weeks to an entire season in temperate climates and tropical dry seasons. When hormones indicate it’s ready, the butterfly emerges by splitting the chrysalis open either biting its way out or using spit to soften the ends.
The Black swallowtail has quite a heavy appetite for such a small creature. They eat a variety of plants in the carrot family (Apiaceae) such as dill, fennel, parsley, celery, and carrot leaf. In addition to these cultivated species, they will feast on mock bishopweed, roughfruit scaleseed, spotted water hemlock, water cowbane, and wedgeleaf eryngo. They have also been known to enjoy Common Rue (Ruta graveolens L.).
They exhibit several interesting behaviors throughout their life cycle. For example, when they feel threatened the Black Swallowtail will exhibit yellow antennae-like structures called osmeterium. These flare out and emit a foul odor, like rotten cheese, if one’s finger gets too close.
Even though they are voracious plant eaters and honorable defenders of their territory, butterflies play a vital role in agriculture by pollinating crops and flowers. They’re an indicator of a healthy ecosystem; an abundance and diversity of butterfly species illustrate the overall health of an area. With their acute sensitivity to contaminants and toxins, butterfly populations will not be found in polluted areas. Recognized for their beauty, butterfly watching has also become a popular hobby and pastime.
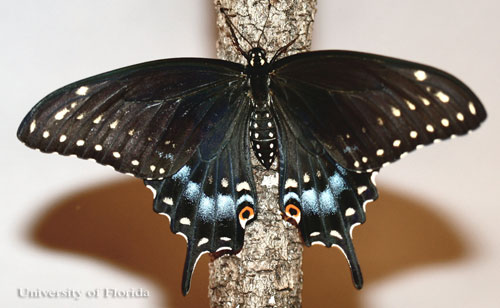
- Photo courtesy of Donald Hall, University of Florida.
It’s never too early to think about planning a butterfly garden. For more information on creating a backyard butterfly habitat, download this 4-H fact sheet for kids and parents. For more information on this specific butterfly, visit the UF IFAS EDIS website for a publication on the Eastern Black Swallwtail.
Additional Content by:
Matthew Orwat, Extension Faculty I, Horticulture, UF IFAS Extension Washington County