by Heather Kent | Jul 30, 2014
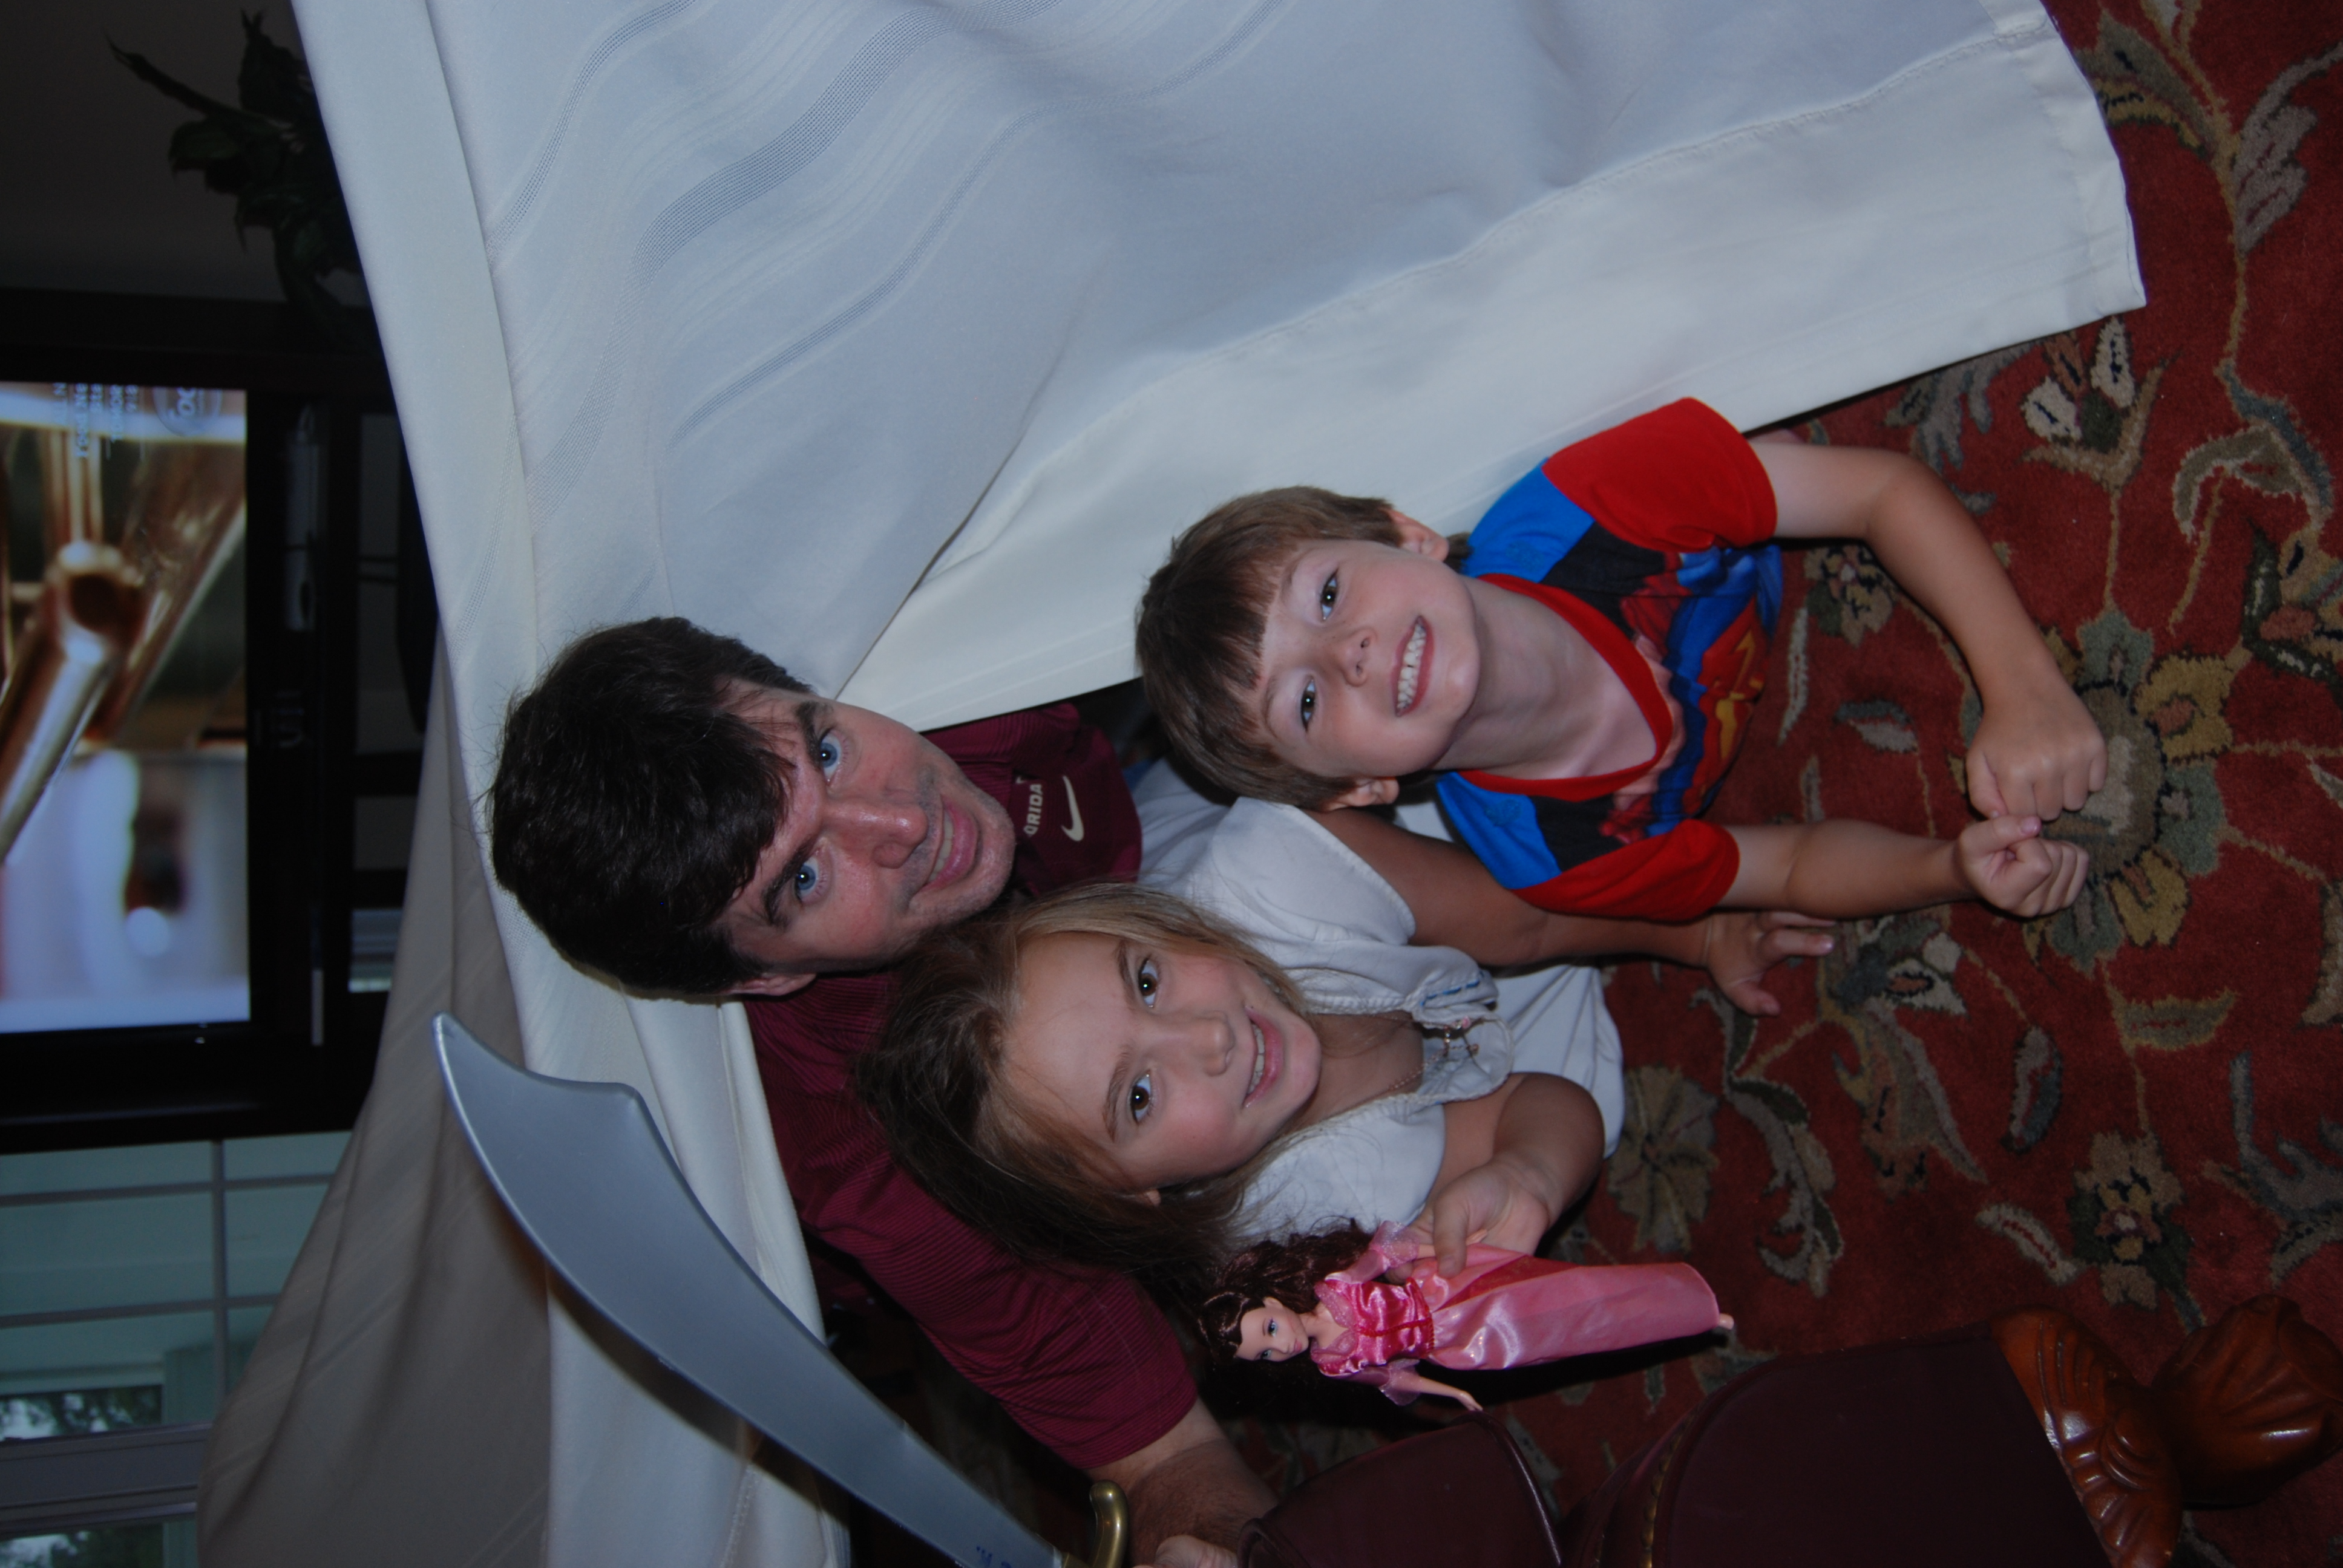
Couch Camping with Cloverbuds
Sometimes, kids are just too young to fully enjoy the overnight camping experience. In 4-H, children need to be a least 8 years old (by September 1st) to attend overnight camps. Couch camping is a great way for Cloverbuds (4-H members between the ages of 5 and 7) to explore the world of camping without the mosquitos, rain, or anxiety of being away from home. Couch camping is also a great alternative when your work schedule or the weather do not allow for a “real” camping trip. Below are three simple tips for getting the most out of your next couch campout!
- Atmosphere– Push the furniture against the wall and set up a tent in your living room. Bring out the sleeping bags, pillows, and camp chairs. String white lights over the tent to simulate stars and let the kids decorate empty paper toweling tubes to simulate logs for the campfire. Red lights or tissue paper make great flames. Download sounds of frogs, crickets, and other forest sounds to play in the background. Then all that’s left is to dim the lights and turn on your battery operated lanterns.
- Food– Camp food is a must! Serve hotdogs or your favorite campfire meal and don’t forget the popcorn and s’mores. To make s’mores indoors, simply place your marshmallows, graham crackers, and chocolate in the microwave for 10-20 seconds. The marshmallows and chocolate will get gooey- the perfect consistency for s’mores. If you are worried about stains on the carpet, place a tarp or plastic tablecloth under your “campfire” eating area.
- Activities– This age group will really enjoy pretend play. Have toy fishing poles and nets for them to fish with. Use stuffed animals (such as frogs, bears or squirrels) and allow them to “track” the animals. Let them build a campfire with wooden blocks. Make shadow puppets or try flashlight reading. Build a simple birdfeeder out of a pinecone, peanut butter, and birdseed. You can also try a scavenger hunt or campfire BINGO. 4-H campfire songs are also fun, but we do not recommend ghost stories for this age group.
If you enjoy working with 5-8 year olds, consider becoming a 4-H Cloverbud Volunteer. There will be a training for Cloverbud Volunteers and preschool teachers on January 24th in Marianna, FL from 10AM-3PM. Participants will receive teaching kits for working with 5-7 year olds, and CEUs will be available for teachers. For more information, contact Heather Kent at hckent@ufl.edu.
by Heather Kent | Jul 23, 2014
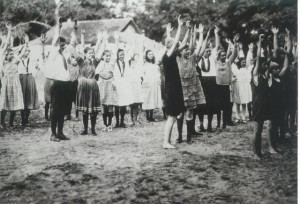
Physical exercise was an important component of 4-H Camp, even back in the 1930’s!
For many Florida 4-H members, attending a week-long overnight camp at one of the four Florida 4-H Camping centers is a rite of passage. For nearly 90 years, 4-H youth and volunteers have been making their way to the shores of the Choctawhatchee Bay, home to Florida’s oldest camp, Camp Timpoochee.
Camp Timpoochee was started in 1926 when Jackson County 4-H members auctioned off their poultry flocks at the train station in Marianna to raise money for the camp. During the early years, many 4-Hers paid for their week of camp by bringing chickens and other goods. In those days, camp was a vacation from working on the farm in the summer heat and a chance to meet other youth. Over the last decades, several 4-Hers have even met their future spouse at 4-H camp!
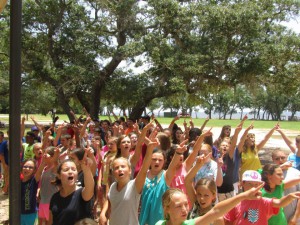
Youth still enjoy many of the same activities at Timpoochee, but they also have opportunities to build robots, rockets, and GPS units.
Today, camp is still a safe environment where youth feel like they belong, learn independence, mastery, and generosity towards others. It is also a vacation from the peer pressure and bullying that many youth experience at school. One camper shared “I love coming to 4-H Camp, because it is the one week where I feel like I belong and no one makes fun of me or puts me down.” Other campers look forward to camp because it is an opportunity to do things they don’t normally get to do, like fish, shoot a bow and arrow, build and launch a rocket, or paddle a kayak.
How do we ensure that Camp Timpoochee will be around for future generations? It pretty much all boils down to volunteers. As long as there are volunteers working with Extension to support 4-H clubs and youth, donors will continue to support the work they do to make sure that future generations can learn valuable life lessons at camp.
How many generations of your family have attended 4-H Camp Timpoochee or Cherry Lake? Let us know in the comment box below. Feel free to share your favorite thing about camp on our blog or on Facebook. The family with the most interesting story will be featured in a future blog post!
To learn more about the Florida 4-H camping program, visit http://florida4h.org/camps_/. If you have a special place in your heart for 4-H Camp Timpoochee, consider serving as a 4-H Camp Volunteer, or even making a donation so that youth can enjoy the same experiences as generations before them. Florida 4-H Camps are also available to host family reunions, church retreats, corporate functions, and other events. You can help support Camp Timpoochee by scheduling your next event there. For more information, contact Heather Kent at hckent@ufl.edu.
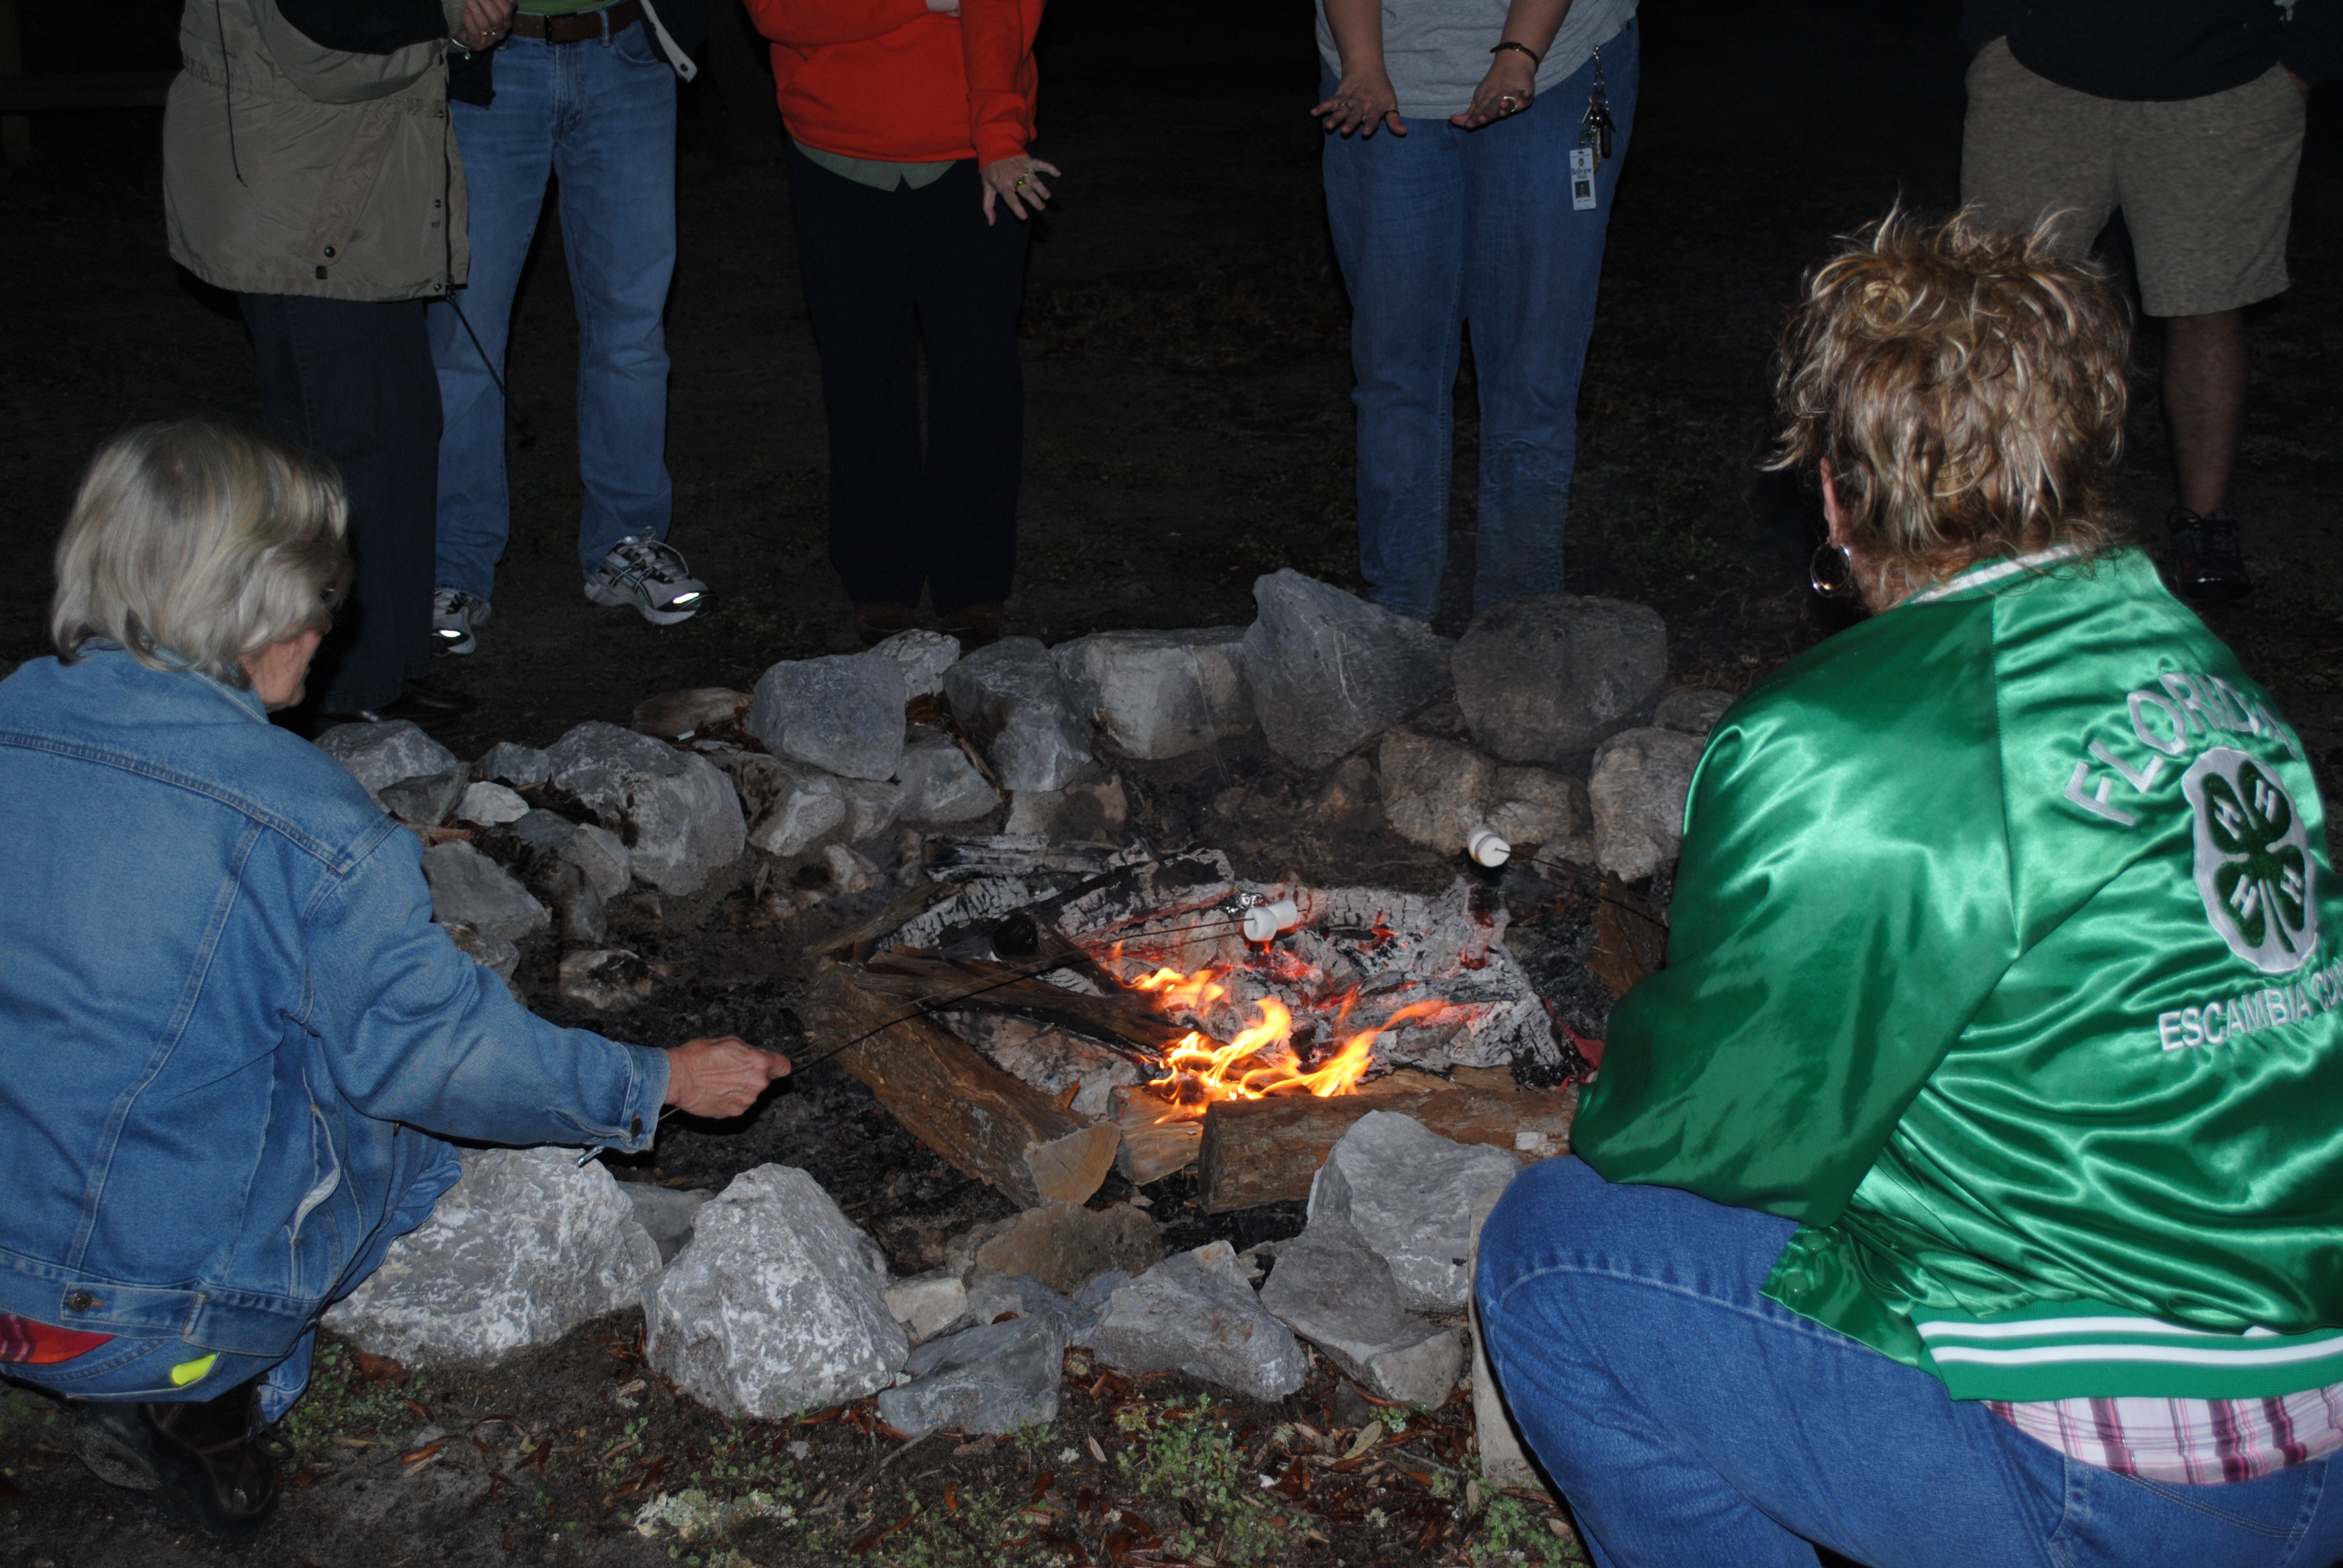
by Heather Kent | Jul 16, 2014
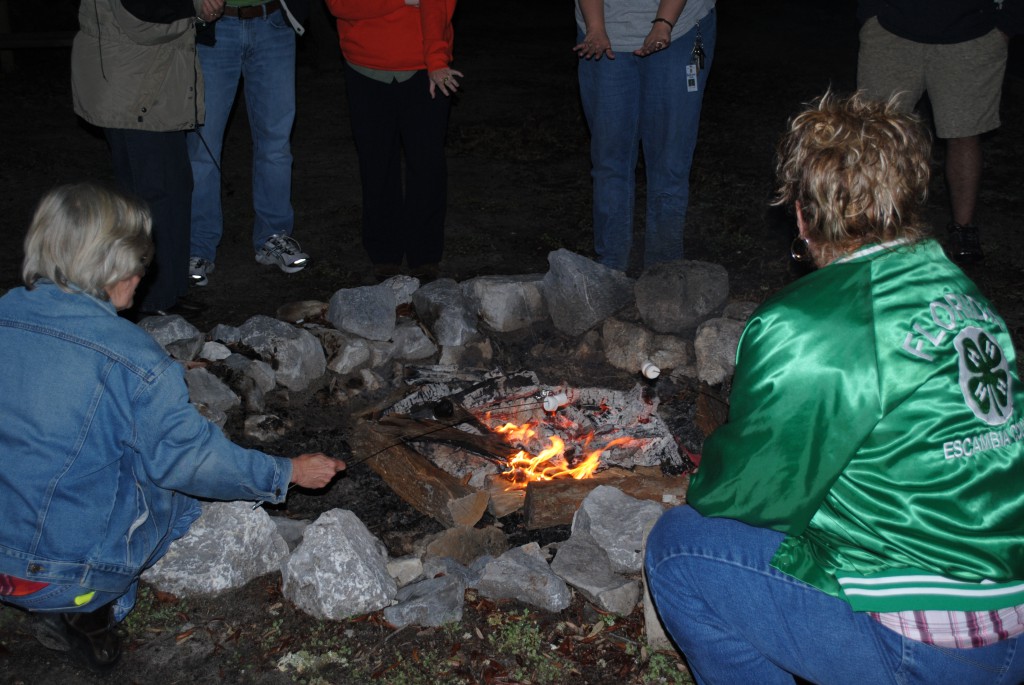
4-H Volunteers cook s ‘mores over the campfire at Camp Timpoochee
For many families, summer is synonymous with camping. Whether you are at 4-H Camp, a family camping trip, or a stay-at-home-vacation, cooking over the campfire is a fun (and yummy) activity that the whole family can enjoy. In support of the 4-H initiative for Healthy Living, we have selected 24-hours’ worth of delicious and nutritious food that your family can enjoy over your next campfire.
Breakfast Camporitos– this is a campfire version of breakfast burritos. Dice and sauté the veggies of your choice (we recommend onions, bell peppers, tomatoes, and/or potatoes). Place sautéed veggies in a bowl for later. Next, scramble your eggs. To assemble, spoon veggies and eggs onto a tortilla, then sprinkle with cheese. You can add a bit of salsa if preferred. Wrap your tortilla burrito style, then wrap the entire burrito in foil. Camporritos can be prepared and assembled in advance, and stored in a cooler until breakfast time. To serve, place the foil packets over the campfire for 5-7 minutes until the cheese is melted and the burritos are thoroughly heated through. Serve with seasonal fruit and orange juice or milk.
Campfire Calzones (for lunch or dinner)- use store-bought pizza dough or your favorite recipe. On a 2-foot section of aluminum foil, roll out a portion of pizza dough into a circle the size of a paper plate. Next, spoon on some tomato or marinara sauce, sprinkle with basil and oregano. Working on just one half of the circle, sprinkle on 1/3 cup of mozzarella cheese and add your favorite pizza toppings (we recommend pepperoni or ham, spinach, olives, and mushrooms). Fold the half of the dough without toppings over, and crimp the edges tightly, next fold over the aluminum foil, creating an envelope and crimp the foil together securely to make a foil packet. Place your packet over the grate or coals of your campfire. Bake your calzone 5-10 minutes on each side, depending on the temperature of your fire.
Campfire Veggie Dip (a tasty snack)- for this recipe, you will need a large, empty can that has been washed out. In the clean can, layer the following ingredients: Black beans, shredded cheese, salsa, fat free refried beans, and fresh cilantro. Place the can on the grate over your campfire and allow the contents to heat up. Once the cheese is melted and heated through, remove the can. Wrap the can with a festive bandana and serve the dip with carrots, bell pepper, broccoli, celery, or tomatoes.
Campfire Chili and Corn Bread in a Jar (for lunch or dinner)- in a clean mason jar, ladle a cup or two of your favorite chili. On top of the chili, place about 1/3 cup of your favorite cornbread dough (made from scratch or use a mix). You can screw on the jar lids to make the chili easier to transport. Place your jars over the campfire and allow them to back for 30-45 minutes, until a toothpick inserted into the cornbread comes out clean. By then, your chili should be thoroughly heated through. If you prefer, you can assemble this recipe in a large Dutch oven, rather than in individual jars.
Desert Campfire Cones– Stuff a waffle cone or bowl (not the regular sugar cones) with diced fresh strawberries and bananas, along with mini marshmallows, chocolate chips, or even peanut butter chips. Wrap your cone or bowl with aluminum foil, and place over the grate of the campfire. Rotate the foil packet every 1-2 minutes. After 5-7 minutes, your cone should be ready to eat. If you are camping in the fall, try a variation of this technique with diced apples and caramel sauce.
To learn more about the Florida 4-H Program and our Healthy Living Initiative, visit http://florida4h.org. If you are interested in volunteering or donating to 4-H, contact Heather Kent at hckent@ufl.edu.
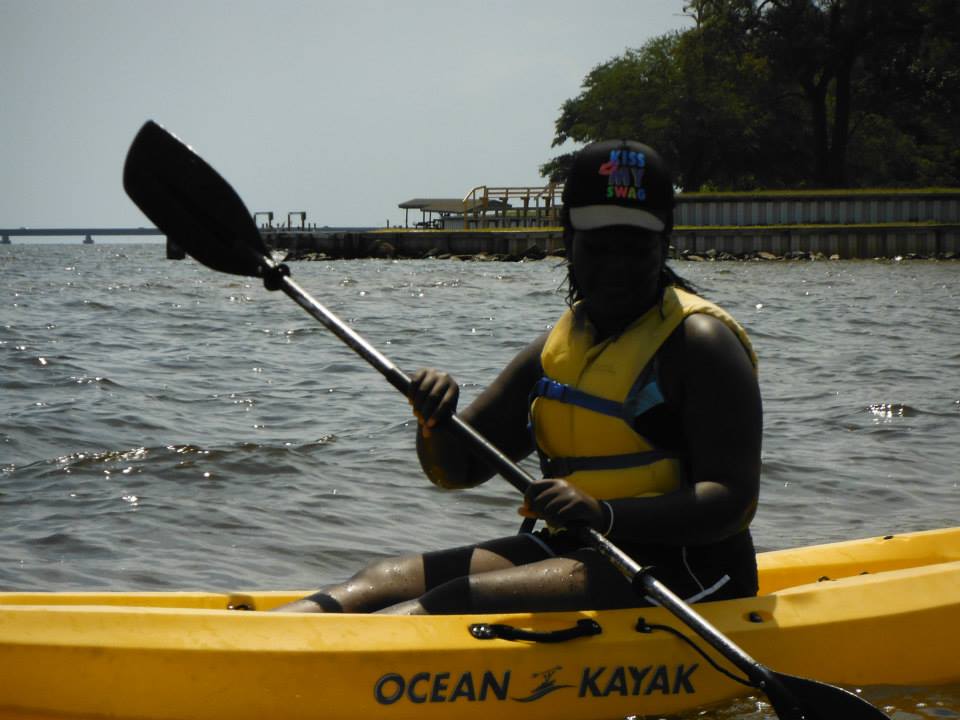
by Melanie Taylor | Jul 9, 2014
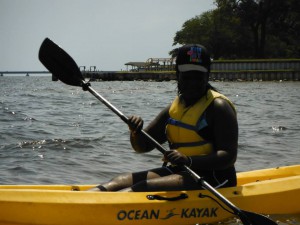
4-Hers still enjoy swimming and kayaking in the Choctawhatchee Bay. Photo provided by Jackson County 4-H.
Summer is here, and for most 4-H families, that means camp is on the horizon. If this will be your child’s first summer camp experience, you and your child both may have some camp anxieties. But never fear! Here are some simple steps you can take to prepare your camper (and yourself) for camp:
Preparing Campers:
• Plan several sleep overs before the week of camp arrives. Resist the urge to pack their bags for them or to check on them while there. If they have a cell phone, have them leave it at home. This is a good way to practice not having direct or constant contact.
• Encourage them to write a letter to someone (maybe you) while at camp. You will be so excited when you receive a letter from camp! Be sure to include envelopes, addresses, stamps, paper, and a pen in their luggage.
• Gear up physically. If you have purchased new tennis shoes, break them in with a few long walks, so the blisters don’t have to happen at camp.
• Especially for teenagers, have them take a mini-vacation from their electronic devices. A couple of hours or a weekend.
• Have them write a statement for their social media pages. “Peace out Facebook, I will be at camp for the next week. Check in with you when I get back.” Or something similar.
• Have them write down their goals for camp. So they can mentally prepare themselves for what they hope to do and see.
• Make a homesick plan:
1. Homesickness isn’t entirely bad. It’s great to love your home. It’s sometimes part of the process, and it’s a confidence booster when a camper gets through it.
2. Make a happy place plan and write it down. This is an amazing opportunity to learn a life skill. Today’s youth go to technology to escape, and studies show this increases their stress. Some ideas might be: taking 10 deep breaths, traveling to a happy place in your mind, packing a certain stuffed animal, or tossing a football. They are capable of this independence.
3. Your plan should NOT be, “Give it a couple of days and if you don’t like it, we will come get you.” This will set them up to give it a couple of days and knock the confidence right out of them.
4. Let your camper know what to expect with correspondence. You don’t need to write every day, but let them know what to expect.
Parents:
• You are giving your child an incredible gift. I cannot promise you that they will not lose some socks, that they will love every meal or activity, or that they will adore every counselor. But you are preparing them for college and beyond; you are giving them the freedom to gain confidence, independence, and leadership skills; and you are instilling in them that they can do it.
• What do YOU want to do during their time at camp? Plan a vacation for a later time, time to organize, time to have one-on-one time with your other children, or some “date nights” with your spouse or friends.
• If you have apprehensions, work to resolve them. If you are worried that your camper is not going to know anyone, set up a pre-camp get-together. If you are worried about your camper’s medical needs, become friendly with the camp staff. If you are anxious about their food allergies, talk to the camp’s director. Make a camper-sick plan for yourself. Make sure there is only excitement and optimism coming from you, and share your anxiety with another adult.
• Pack self-addressed envelopes in their luggage.
• Whether they are flying or driving, refrain from crying your eyes out until they cannot see you. Take a deep breath, trust, and remind yourself that you are giving them an awesome gift.
And, what is this gift everyone is talking about? At camp, they will be part of a community all their own. They will become emotionally attached to handmade rope bracelets on their wrist, and have a song for any occasion on cue, and maybe even forget they need to shower, and think sunscreen is just a normal daily moisturizing technique. They will learn to do things on their own, and they’ll learn to rely on others. They will learn how to survive on their own for a week or two, and they’ll learn how to help each other through it.
They may even grow up on summers away from TV, and forget Facebook exists. They will relish in the joy of sleeping in cabins, swatting mosquitoes at campfire, and swimming every day. They will savor the feeling of pushing water behind them with a paddle and the whoosh of air behind the tail of an arrow as they fire. They’ll forget about appearances, relish tan lines, and recognize the beauty of a smile over anything else.
So send your kids to camp. Send them so they’ll learn to set tables and make beds and wake early. Send them so they’ll know how to be a leader, paddle a kayak, weave a bracelet, and sing as loud as they can. Send your kids to camp so they’ll learn to love themselves and learn to love others. Send your kids to camp because they’ll realize who they are, or who they want to be. And, prepare yourselves for a year of camp stories, and for a flurry of songs. Prepare to learn names of kids you’ve never met. And for your kids to have a need for sunshine, a need for campfires, and companionship. They will be forever grateful for your awesome gift of summer camp.
Source:
American Camping Association, Inc. (http://www.acacamps.org)
by Whitney Cherry | Jul 1, 2014
Article by guest blogger, Georgene Bender (South Central Regional Specialized 4-H Agent)

Photography by David Perkiewcz,, The Cleveland Plain Dealer
Photography is a popular 4-H project and this time of year, it is fun to experiment taking pictures of fireworks and sparklers. With helpful tips you will be amazed at what you can do. Let’s review some basics. The word “photography” means drawing with light….so the key is the amount of light needed for these unique shots. Basically there are two camera types a) point & shoot and b) Digital Single-lens reflex. Each camera type has various features. It is good to familiarize yourself with them in the Menu or camera manual. What? You don’t have that book anymore. No problem – search for it online.
Focus on Infinity- Set your focus to just less than infinity (or choose a landscape setting if you can’t manually adjust focus) and use an aperture of f/8 t- f/16.
Equipment- Be sure to take a small flashlight to adjust your settings in the night and a sturdy tripod – this is the best to reduce movement and blurred photos. Another great tool for the SDLR is the cable release cord that you can control the shutter’s button or the digital remote. Digital cameras will have a setting.
Bust Shooting- Also known as ‘continuous drive’ allows you to shoot multiple shots automatically. On a DSLR go to your menu and select Self-timer and you will see two options inside. A) Self-timer delay allows you to set time after how many seconds camera should take a shot and available values are 2s, 5s, 10s, and 20s. B) Number of shots you want to take in self-timer mode. You can choose between 1 and 9 shots.
Five Top Tips:
- Observe the wind direction from where you are. Pick a location upwind so that your photos do not turn out hazy.
- Pack extra batteries and memory cards- long exposures drain battery life, and you will need to shoot lots of pictures to get a few great shots.
- Watch for the fireworks as they travel and push and hold the release button. (This will take time to practice – and also the bust shooting will help for better capture)
- Learn more online. A couple of good sources include the Walt Disney World (WDW) Photography series. There are YouTube videos by Cory Disbrow from WDW Photography.com http://youtu.be/yZh_ADUsgrY and http://wdwphotography.com.
- Practice playing with light before the fireworks by having friends ‘air write’ their name with the flashlight or sparklers. You, with your trusty tripod and camera settings shoot pictures. You will be amazed at what you get.
This chart below gives you the areas of each camera type to prepare before shooting.
|
SETTINGSMenu screen or, Bulb |
SHUTTERControls the open/close of light into camera |
ISOSensitivity of the light |
FLASHArtificial light |
APERTUREControls amount of light |
| Point and Shoot |
Manual(Check your manual as compact cameras have this as a menu optionLook for information on a delay release timer. |
Keep open for 10– 30 seconds; find your ‘night setting’ might be a half moon with starsThere is no B setting on Compact Cameras |
Lowest it will go |
OFF |
N/A |
| DSLR |
M = MANUALB= BULBTurn on noise reduction
Delay release setting |
On B setting, you can hold the camera button for as long as you want10 – 60 sec then went you release the button the shutter will close out the light. |
100 or lower |
OFF |
Changing the aperture is changing the f-stop.Set between f2.8 and f8
The lower the f-stop the more light |

Photo by Jill Wellington
Take lots of pictures this weekend– and please SHARE your best shot on our blog, Facebook, or Twitter! To learn more about the 4-H Photography Project and Contests, visit http://florida4h.org/programsandevents_/photo/photo-contest-resources/. If you have a passion for photography, consider serving as a 4-H photography project leader or becoming a sponsor of your local 4-H photography program. For more information, contact Heather Kent at hckent@ufl.edu.
Credits to:
Fleenor, S., Asdtroth, K. and Peters, C. 2010. “Catch the Spark” University of Arizona Extension 4-H Youth Development.
“How to Take Multiple Shots in Self-Timer Mode.” http://www.dailyphotographytips.net/question-answer/how-to-take-multiple-shots-in-self-timer-mode/
Harnocz, A. July 1, 2014 “How to Photography Fireworks” The Cleveland Plain Dealer. http://www.cleveland.com/interact/2014/07/how_to_photograph_fireworks_5.html