by Heather Kent | Oct 24, 2014
 Fairs are often the highlight of the 4-H year. From a youth development perspective, fairs provide an opportunity for 4-H members to demonstrate new knowledge, abilities, skills and attitudes. When youth, parents and volunteers work together, fairs are a great way for youth to learn and also be recognized for their efforts. Being properly prepared is key to having a great fair experience.
Youth Responsibilities- Establish a realistic timeline to work on your exhibits. Be sure to read the rules and regulations outlined in the 4-H section of the fair book. Pay close attention to deadlines and specific requirements for each project. Make sure that your exhibit is your own work. Exhibits should be in good condition, clean, and labeled with your name, county, and club. Judging score sheets for individual projects can help guide you as you prepare your exhibit.
Parent Responsibilities- Parents can help 4-H members obtain the materials and resources needed to complete 4-H projects, but should never do the project for the youth. Encourage your child to set realistic timelines and goals so that they do not miss entry deadlines. Help them complete their entry form. Many counties offer workshops or clinics in the weeks leading up to fair to help members prepare- take advantage of these sessions!
Volunteer Responsibilities- Share information about fair exhibit categories and deadlines with your 4-H parents. Project leaders are a great resource to help members decide what to exhibit about their project. It could be something they made, or it could be a poster or tabletop display about what they have learned. If possible, assign an older, more experienced member to mentor new members as they prepare.
Consider having a mock judging of exhibits so that any last minute adjustments can be made. Invite parents to attend along with the members and use this meeting as an opportunity to provide feedback and recognition to individual members and to promote club unity and pride.
4-H members are encouraged to try something more challenging each year and to practice good sportsmanship. Exhibiting is designed to be an enjoyable educational experience not just a contest. If you would like to help 4-Hers in your county get ready for the fair, or serve as a judge for your fair, contact your local county Extension Office.
by Melanie Taylor | Jul 9, 2014
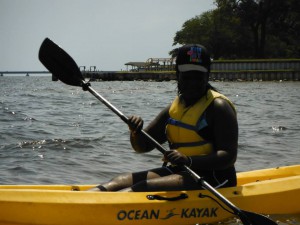
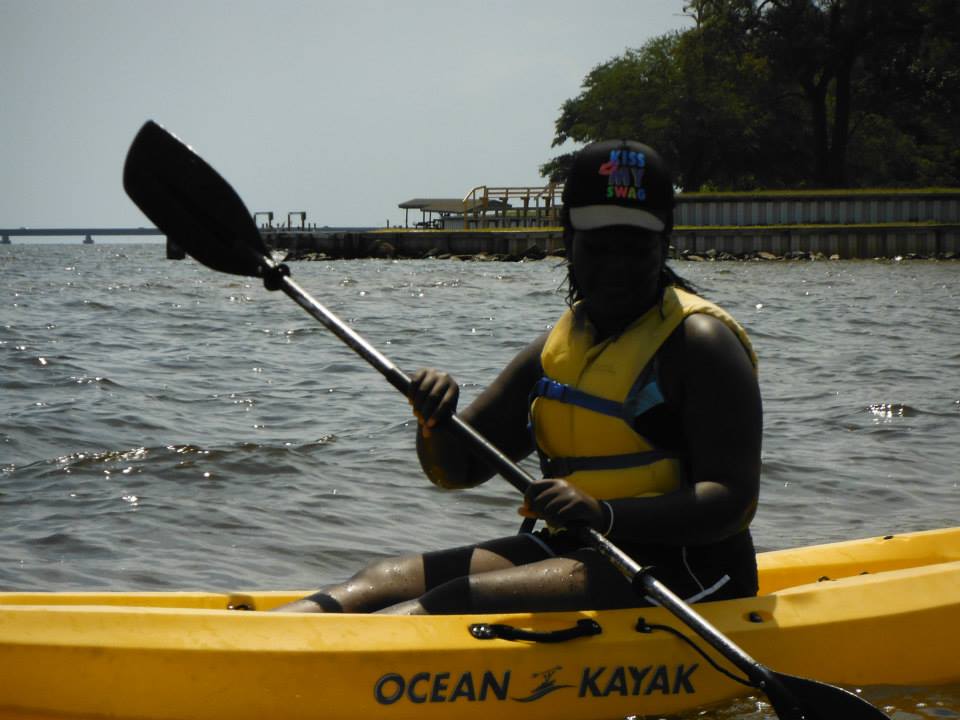
4-Hers still enjoy swimming and kayaking in the Choctawhatchee Bay. Photo provided by Jackson County 4-H.
Summer is here, and for most 4-H families, that means camp is on the horizon. If this will be your child’s first summer camp experience, you and your child both may have some camp anxieties. But never fear! Here are some simple steps you can take to prepare your camper (and yourself) for camp:
Preparing Campers:
• Plan several sleep overs before the week of camp arrives. Resist the urge to pack their bags for them or to check on them while there. If they have a cell phone, have them leave it at home. This is a good way to practice not having direct or constant contact.
• Encourage them to write a letter to someone (maybe you) while at camp. You will be so excited when you receive a letter from camp! Be sure to include envelopes, addresses, stamps, paper, and a pen in their luggage.
• Gear up physically. If you have purchased new tennis shoes, break them in with a few long walks, so the blisters don’t have to happen at camp.
• Especially for teenagers, have them take a mini-vacation from their electronic devices. A couple of hours or a weekend.
• Have them write a statement for their social media pages. “Peace out Facebook, I will be at camp for the next week. Check in with you when I get back.” Or something similar.
• Have them write down their goals for camp. So they can mentally prepare themselves for what they hope to do and see.
• Make a homesick plan:
1. Homesickness isn’t entirely bad. It’s great to love your home. It’s sometimes part of the process, and it’s a confidence booster when a camper gets through it.
2. Make a happy place plan and write it down. This is an amazing opportunity to learn a life skill. Today’s youth go to technology to escape, and studies show this increases their stress. Some ideas might be: taking 10 deep breaths, traveling to a happy place in your mind, packing a certain stuffed animal, or tossing a football. They are capable of this independence.
3. Your plan should NOT be, “Give it a couple of days and if you don’t like it, we will come get you.” This will set them up to give it a couple of days and knock the confidence right out of them.
4. Let your camper know what to expect with correspondence. You don’t need to write every day, but let them know what to expect.
Parents:
• You are giving your child an incredible gift. I cannot promise you that they will not lose some socks, that they will love every meal or activity, or that they will adore every counselor. But you are preparing them for college and beyond; you are giving them the freedom to gain confidence, independence, and leadership skills; and you are instilling in them that they can do it.
• What do YOU want to do during their time at camp? Plan a vacation for a later time, time to organize, time to have one-on-one time with your other children, or some “date nights” with your spouse or friends.
• If you have apprehensions, work to resolve them. If you are worried that your camper is not going to know anyone, set up a pre-camp get-together. If you are worried about your camper’s medical needs, become friendly with the camp staff. If you are anxious about their food allergies, talk to the camp’s director. Make a camper-sick plan for yourself. Make sure there is only excitement and optimism coming from you, and share your anxiety with another adult.
• Pack self-addressed envelopes in their luggage.
• Whether they are flying or driving, refrain from crying your eyes out until they cannot see you. Take a deep breath, trust, and remind yourself that you are giving them an awesome gift.
And, what is this gift everyone is talking about? At camp, they will be part of a community all their own. They will become emotionally attached to handmade rope bracelets on their wrist, and have a song for any occasion on cue, and maybe even forget they need to shower, and think sunscreen is just a normal daily moisturizing technique. They will learn to do things on their own, and they’ll learn to rely on others. They will learn how to survive on their own for a week or two, and they’ll learn how to help each other through it.
They may even grow up on summers away from TV, and forget Facebook exists. They will relish in the joy of sleeping in cabins, swatting mosquitoes at campfire, and swimming every day. They will savor the feeling of pushing water behind them with a paddle and the whoosh of air behind the tail of an arrow as they fire. They’ll forget about appearances, relish tan lines, and recognize the beauty of a smile over anything else.
So send your kids to camp. Send them so they’ll learn to set tables and make beds and wake early. Send them so they’ll know how to be a leader, paddle a kayak, weave a bracelet, and sing as loud as they can. Send your kids to camp so they’ll learn to love themselves and learn to love others. Send your kids to camp because they’ll realize who they are, or who they want to be. And, prepare yourselves for a year of camp stories, and for a flurry of songs. Prepare to learn names of kids you’ve never met. And for your kids to have a need for sunshine, a need for campfires, and companionship. They will be forever grateful for your awesome gift of summer camp.
Source:
American Camping Association, Inc. (http://www.acacamps.org)
by pmdavis | Nov 25, 2013
 Thanksgiving is a time of family traditions, reflection and thankfulness! Remember to include children in the planning and preparation. In 4-H, we stress learn by doing and want to encourage you to consider that motto. Children love being included that inspires their creativity, imagination and sense of belonging. Being involved teaches life skills, such as measuring, meal preparation, teamwork, design and relationship building.
Some ways to involve children are very simple! Have them help shop or find bargains with a Thanksgiving Scavenger Hunt. Give each child a list of grocery products to find. They will have fun locating items at the store or finding the best buys in advertisements. Older kids can clip coupons.
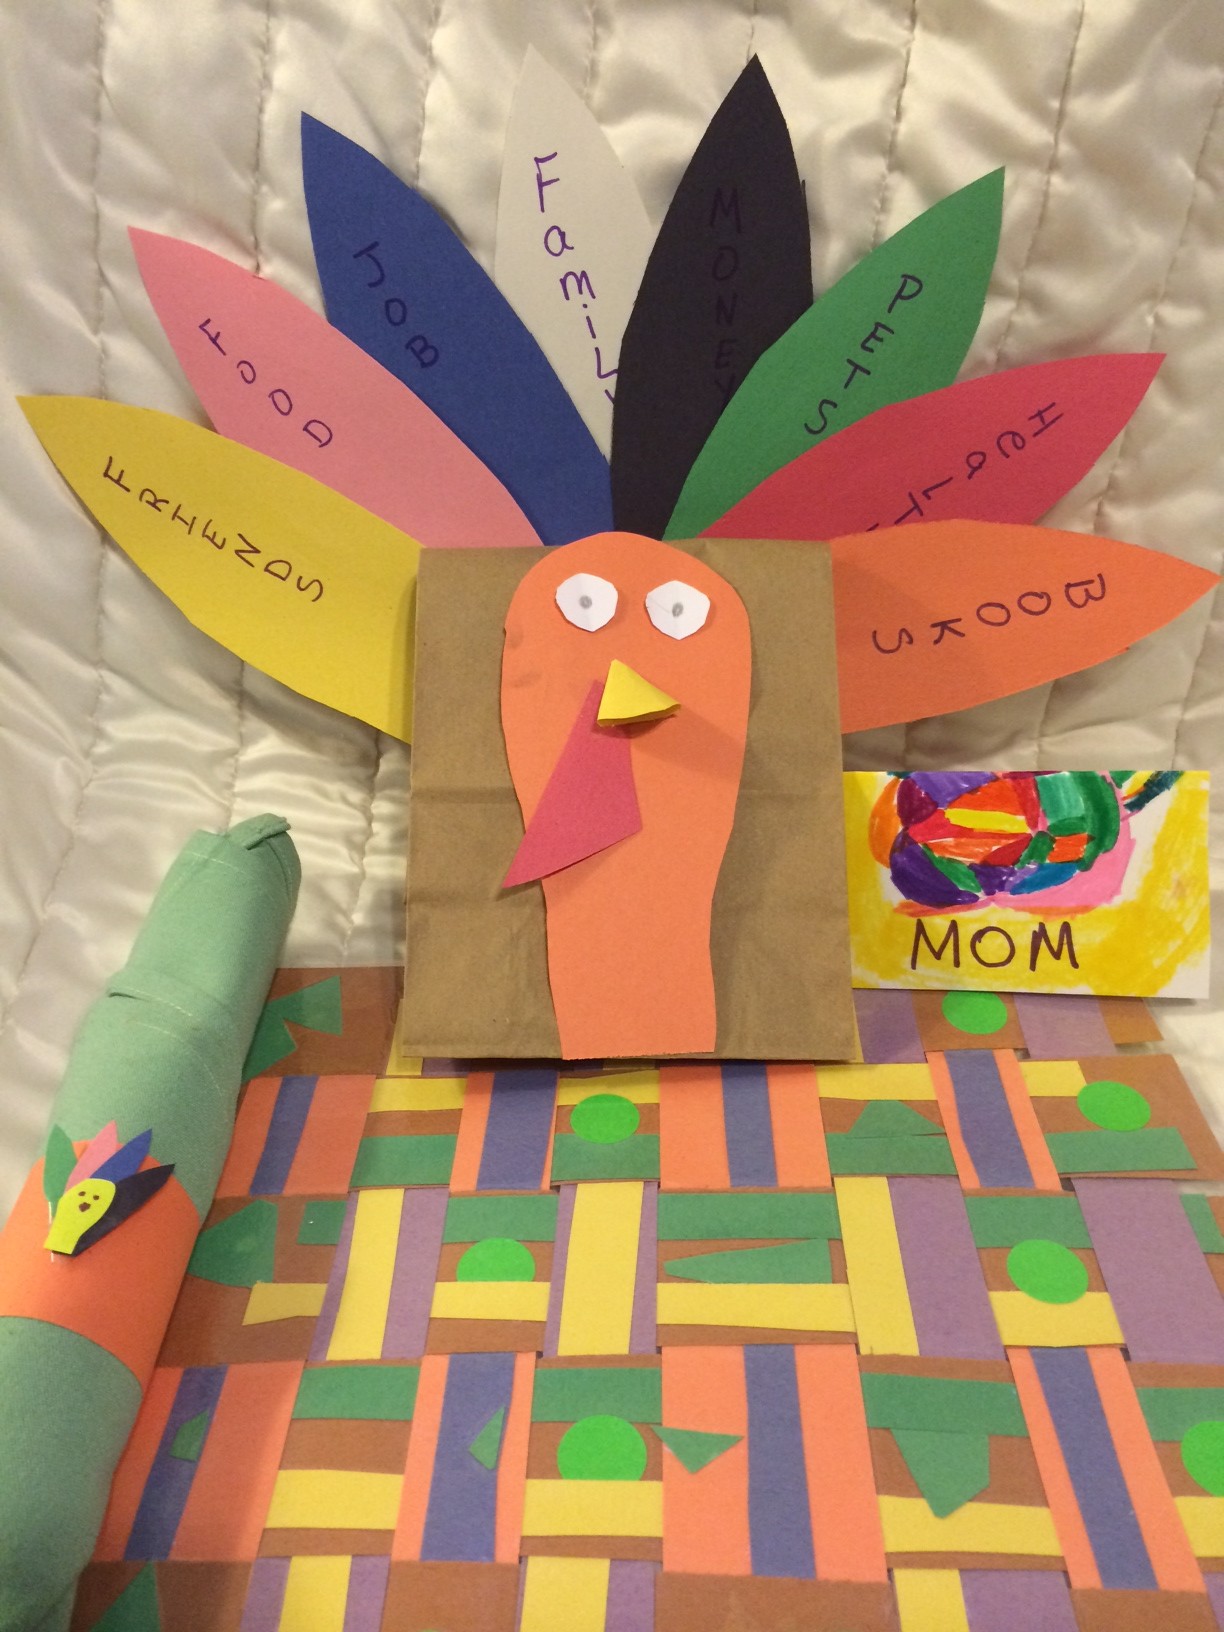
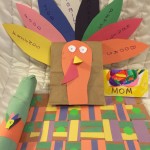
Make simple inexpensive decorations. Create turkey hand or leaf wall hangings, wreaths, a tree of thanks, clay or play dough holiday ornaments, centerpieces, placemats, name cards, napkin rings. Napkin rings can be made out of cut paper towel rolls or construction paper glued in a circle and decorated with artwork, fabric, leaves or even feathers. Guests will admire these items while enjoying the meal.
To help the day go smoothly, consider your needs and home size. For example, if you have a small kitchen let them help you prepare items ahead of time for the meal i.e cranberry salad. Consider having older youth select a recipe to be the lead chef. Doing a trial run prior to the holiday meal. Kids can easily help: wash fruits and vegetables, snap green beans, crack eggs, stir cake batter, roll out pie crusts, mash potatoes, sprinkling marshmallows or put relish items on a tray.
Let kids set the table. Make the task simple by using printable table-setting cheat sheet, showing where items should be placed. Have kids count out the number of place-mats, name cards and napkin rings needed.
Other traditions to consider include:
- 1. Create a turkey of thanks. Have children cut paper feathers and place them at each place setting. When everyone sits down to eat, have them write one thing they are thankful for. Create a paper turkey centerpiece by passing a paper bag and glue stick letting each person glue on their feather telling why they are thankful.
- 2. Make a family trivia game. Have children ask each person to write down trivia questions about events that happened during the year, or family history. Collect the questions and give out small prizes for each correct answer.
- 3. Play the A to Z family gratitude game. Have everyone sit together and each person says what they’re grateful for, according the letter of the alphabet the player is up to.
- 4. Read a book about Thanksgiving to help children learn the meaning of Thanksgiving.
- 5. Help someone less fortunate or in poor health by serving meals, raking leaves, taking a plate of food.
Sounds simple, and in all reality it is. Adults give guidance to children helping them identify and feel good the positive things in their lives. The trick is to relax, plan and enjoy the holiday together. One web page that gives lots ideas for holiday decorations the family can do together http://aboutfamilycrafts.com/30-turkey-crafts-for-kids/. All Extension programs are open to all persons regardless of race, color, age, sex, handicap or national origin.
by Stefanie Prevatt | Sep 13, 2013
Welcome to the new 4-H year! As you begin making plans to re-connect with your club members and families, make plans to create a year-long plan for your 4-H Club.
Why should your 4-H club plan up to a year in advance?
A plan will help to:
- Meet the needs of all members
- Share responsibilities (among youth, parents, and volunteers)
- Provide better communication to members and families
- Practice cooperation, compromise, and planning skills
- Avoid calendar conflicts

4-H members plant trees for a community service project during Arbor Day.
What should be in your 4-H club plan?
- Monthly Business Meetings
- County, District, and State Activities
- Tours and Trips
- Community Service
- Workshops
- Recreation
- Guest Speakers
- Fund Raising
There are many different ways to create a “year plan” for your 4-H club. The following are a few examples of activities that can be done during a meeting to ensure that all members’ thoughts and ideas are expressed. Keep in mind, when beginning to discuss plans for your club’s focus, education should be the top priority (what youth want to learn during the year).
Sharing Ideas:
Tape a large piece of paper to the wall. On the paper, write two statements: (1) “This year in _____ 4-H Club, I want to learn…” (2) This year in _____ 4-H Club, I really want to….” As youth arrive, direct their attention to the paper and ask them to complete the statements. At a designated time during the meeting, discuss the responses.
Collages:
Have youth create a collage of his/her “year plan” for the club. Materials needed for this activity are: magazines, newspapers, crayons, markers, scissors, glue, construction paper, etc. You can also do this activity in groups.
Design Your Own Clover
Have each member complete the “Design Your Own Clover.” Members can share one leaf of the clover a designated point during the meeting.
Creating a Program Planning Committee
Now that you have all these ideas from your club members, how do you implement your plan? Form a program planning committee. It is important that this committee be representative of your entire club. Older members are likely to be effective planners, but might leave out needs of younger members. In general, committee members are: vice president, secretary, recreation leader, and an adult. It is also good practice to add two or three members who are not officers. This committee can meet on a separate day from the club meeting or convene before/after a club meeting to complete their responsibilities. Once finalized, the committee should report back to the entire club to receive final approval for their plan.
Club planning is not a cut and dry process. Every club can modify these practices to best suite your members – keeping in mind the reason for creating such a plan is to keep the actions of your club directed toward your goals. Your 4-H Extension Agent is also a great resource during this process. Contact your local agent to receive help in creating a plan or for a list of important dates/deadlines for your local office.
Resources:
http://www.uaex.edu/other_areas/publications/PDF/4HCF1.pdf
http://gallia.osu.edu/adams/topics/4-h-youth-development/making-the-best-4-h-clubs-better-twenty-minutes-at-a-time/Handout%20-%20Design%20Your%20Own%20Clover.pdf
http://florida4h.org/clubs/files/4H%20GCL%2020.PDF
by Haley Worley | Aug 30, 2013
It is always a little bit difficult starting something new in a new place with new people. In 4-H we want to create a safe environment where all youth and volunteers can speak their mind, share ideas, and work together as a team. That is why we try our best to make anyone and everyone always feel welcome.
Teambuilding is a major part of 4-H and a very important one too. In order for youth to grow and expand they must be able to work together and accomplish tasks as a team. This also helps them feel accepted, wanted, and confident in the role they play as part of their club or team.
The new 4-H year is upon us, and I felt it was a good idea to share some great icebreakers and get to know you activities, so as we have new members join our 4-H programs all over the district we can reference some great resources from our toolbox to get everyone acquainted.
Listed below are the icebreaker activities I have included with directions and links to pdf’s so you can print.
- Two Truths and a Lie
- Purpose: Teambuilding/Icebreaker
- Groups of: 4-20 (split groups larger than 20 into smaller groups)
- Age Range: 9 and above
- Procedures: Everyone is given a card or piece of paper on which they are instructed to write two truths and a lie about themselves. After they have done this, each participant takes their turn reading aloud their three statements about themselves and the group must guess which they think is the lie.
- TIPS: As they are writing them, encourage them to find unique and possibly strange things about themselves that are true, so that it will be harder for people to guess. You can also prepare them for this by letting them know a day early what will be asked of them so they can take some time to think up some good stuff.
- Icebreaker 1
- Ball Toss
- This activity can be high energy, but with a large group ends up being more about focus and group problem-solving.
- Directions 1. Ask group to form a circle
- 2. Explain that you will toss the ball to one person and they must say their name. They will then toss it to a new person and they must say their name, but everyone must remember who threw it to them and who they threw it to and their name. This will create a pattern which will include everyone in the circle. Everyone must get the ball once (but only once), until the ball ends up with the person who started it.
- 3. Rules: If the ball is ever dropped, it immediately starts over. Also, you may not toss to the person immediately next to you.
- 4. Note to facilitator: When the ball is dropped, encourage the group by saying its okay. Help them support each other. After a few drops, before starting over again, pause the activity and ask the group to problem-solve: ‘What can we do as a group to help us succeed?’
- 5. Sometimes, it will take a group very long (10-15 minutes) just to get it around one time. If that’s the case, you may celebrate and be done. If the group is able to complete this in a relatively short period of time (a few minutes), start them over, but let them know that you will be adding a second ball, which will follow the same pattern. Plus, if any ball is dropped, all balls must start over. If the group is expert, you can then add in a third, fourth, or even fifth ball. When you’ve reached a level of high challenge, let them know that if they succeed here they will have finished the task at its highest level of difficulty.
- Icebreaker 2
- Name Association
- Items Needed: None
- Each person sits in a circle and thinks of one thing (food, animal, etc.) that starts with the same letter as their name. Then the children can introduce themselves: “I am _______, and I like ________.” The next person repeats what the first child said and then adds his/her own.
- example – child 1: My name is Alex and I like apples; child 2: Alex likes apples. My name is Jara and I like junk food; child 3: Alex likes apples. Jara likes junk food. My name is Carlos and I like carrots; continue around circle until everyone has had a turn.
- Icebreaker 3
- Find the Guest
- Items Needed: Sticky-type Name Tags, Marker, 3×5 cards, Pens or Pencils
- Place another person’s name tag on the back of each person in the group.
- Do not tell the person whose name is on their back. Give each person a 3×5 card and a pen or pencil and instruct group members to find out from others as much as they can about the person whose name is on their back and write the information on the card.
- While gathering information, he/she tries to guess whose name is on his/her own back.
- At the end of a set time limit, have the group gather together and allow each person a chance to guess whose name they had on their back.
- After finding out whose name was on his/her back, have each person introduce the person whose name they had on their back by using the information gathered on their card.
- Icebreaker 4
I hope you find these activities beneficial and helpful for your new 4-H year. If you have any questions about 4-H or being involved in your local county programs contact your local Extension Office for more details.
Thank you to http://4hvolunteercafe.wordpress.com/ice-breakers-energizers/ and http://utah4-h.org/htm/resource-library/resource-materials/by=category/category=300 for the icebreakers and directions. These two websites also have many more to choose from, so I urge you to take a look.

 Fairs are often the highlight of the 4-H year. From a youth development perspective, fairs provide an opportunity for 4-H members to demonstrate new knowledge, abilities, skills and attitudes. When youth, parents and volunteers work together, fairs are a great way for youth to learn and also be recognized for their efforts. Being properly prepared is key to having a great fair experience.