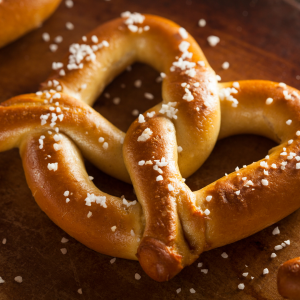
 Who doesn’t love a warm, soft pretzel? Did you know they are fast and easy to make? Pretzels are a yummy way to introduce youth to the science of bread baking. Following a recipe can also help them practice following directions and measuring ingredients. Plus….it’s just fun! In honor of National Pretzel Day, we are sharing our tried and true soft pretzel recipe, which is perfect for your next 4-H club meeting or a fun family night. Of course, be sure to note any youth with food allergies and plan accordingly! This recipe makes 12 pretzels, so you may need to double (or triple) the recipe depending on the number of people you have.
You can demonstrate making the dough, or divide youth up into groups of 4-5 to make a recipe of dough each. In addition to the ingredients below, you will need either a stand mixer or a bowl and spoon for each group, measuring spoons, a liquid 1-cup measuring cup, 1-cup measure for solids, baking sheets, parchment paper, pastry brush, oven, and pot-holders.
Tips for baking with youth:
- Create stations with all the supplies (including the recipe) needed. If possible, have a teen or adult for each station.
- Demonstrate how to measure ingredients
- Demonstrate how to knead and shape the dough
Ingredients:
1 1/2 cups of warm water (around 100 degrees Farenheight
2 1/4 teaspoons instant or active dry yeast (this is about 1 packet)
1 tablespoon of sugar or honey
1 teaspoon salt
3 1/4 cups all-purpose flour (plus a little more for kneading)
3 tablespoons of melted butter
- Traditional-course sea salt
- Cheesy- nutritional yeast (if allergic to dairy), or cheese-flavored seasonings (like the kind you use for popcorn)
- Ranch, or any other seasoning you prefer
- Stir the yeast into warm water and sugar (or honey). Allow to sit for 1 minute. Slowly add 3 cups of flour, 1 cup at a time. Mix with a wooden spoon (or dough hook attached to stand mixer) until dough is thick. Add 3/4 cup more flour until the dough is no longer sticky. If the dough is sticky, continue to add flour (a small bit at the time) until it is no longer sticky. This will depend on how much humidity is in the air (this is a great science discussion!).
- If using a stand mixer, keep the dough in the mixer and beat for an additional 5 full minutes. If mixing by hand, place the dough on a lightly floured surface and knead with clean hands for 5 full minutes. If the dough becomes too sticky during the kneading process, sprinkle more flour on the dough as needed. After kneading, the dough should slowly bounces back when you poke it with your finger.
- Shape the kneaded dough into a ball. Cover lightly with a towel and allow to rest for 10 minutes. While the dough is resting, preheat oven to 400°F (204°C) and line two baking sheets with parchment paper or silicone baking mats.
- After the dough has rested, use a knife to cut it into 12 even portions. Give one portion to each youth, and show them how to roll the dough into a rope, or “snake” shape. Form a circle with the dough bringing the two ends together. Twist the ends and bring them back down over the circle to form the pretzel shape. Place pretzels onto the baking sheets and brush with melted butter and the topping of your choice.
- Bake for 12-15 minutes until golden brown and enjoy!
Further Engagement:
Youth who enjoy this activity may also enjoy the 4-H Breads Project. Youth can enter their baked goods in their local county fair or the North Florida Fair. Youth can also do a demonstration on breadmaking for county events, district events, or 4-H University.
- Meet our Summer Intern- Andy Franklin! - June 13, 2025
- Blue Ribbon Baked Goods - September 23, 2024
- Blue Ribbon Photos and Posters - September 21, 2024
