You can exhibit canned food at the North Florida Fair to earn ribbons and fair premiums. Whether you grew or harvested the food yourself, or you purchased food that was in season to preserve, exhibiting canned food is a big part of any 4-H food safety or preservation project. This article will help you prepare your canned goods to exhibit at the North Florida Fair, and includes a link to the fair rules, a short video highlighting common issues to avoid, and how to prepare your entry tag.
Class 6 Rules- Preparing your canned food for entry in the North Florida Fair requires following careful guidelines to ensure your food is safe to eat. The rules for entry outlines these required elements.
Class 6 Preparation Tips & Video– When selecting your recipe, check with your local Extension office to ensure the recipe is following the appropriate guidelines. Canned food entries are required to include a copy of your recipe and it’s source if you choose to retype for the entry. The preparation instructions on the recipe are the required procedures including appropriate jar preparation. This video explores a few of the overlooked requirements of entries and some of the judging criteria.
Preparing your entry tag– You will want to fill out your exhibitor’s form with all the items you plan to enter in the North Florida Fair. When filling our your exhibit tag, be sure to write the red tag number on your Fair Entry Form. Here is the information you need to correctly complete your entry tag:
Section – 210
Class- 6
Lot- This will be your age division; write “A” for juniors (8-10 years old), “B” for intermediates (11-13 years old), or “C” for seniors (14-18 years old).
Exhibit- a short description of the item you are entering (example: canned tomatoes)
Exhibitor- Your name
Address- Name of your county
Once your tag is filled out, you will want to make sure that it is securely attached to your exhibit. Use the perforations at the bottom to remove your claim check- this has your exhibit number on it. You will want to keep track of your claim check to find your exhibit once the fair is over.
For more information about canning and food preservation, contact your local UF/IFAS Extension Office. Most offices offer canning and food preservation classes as well as educational resources.
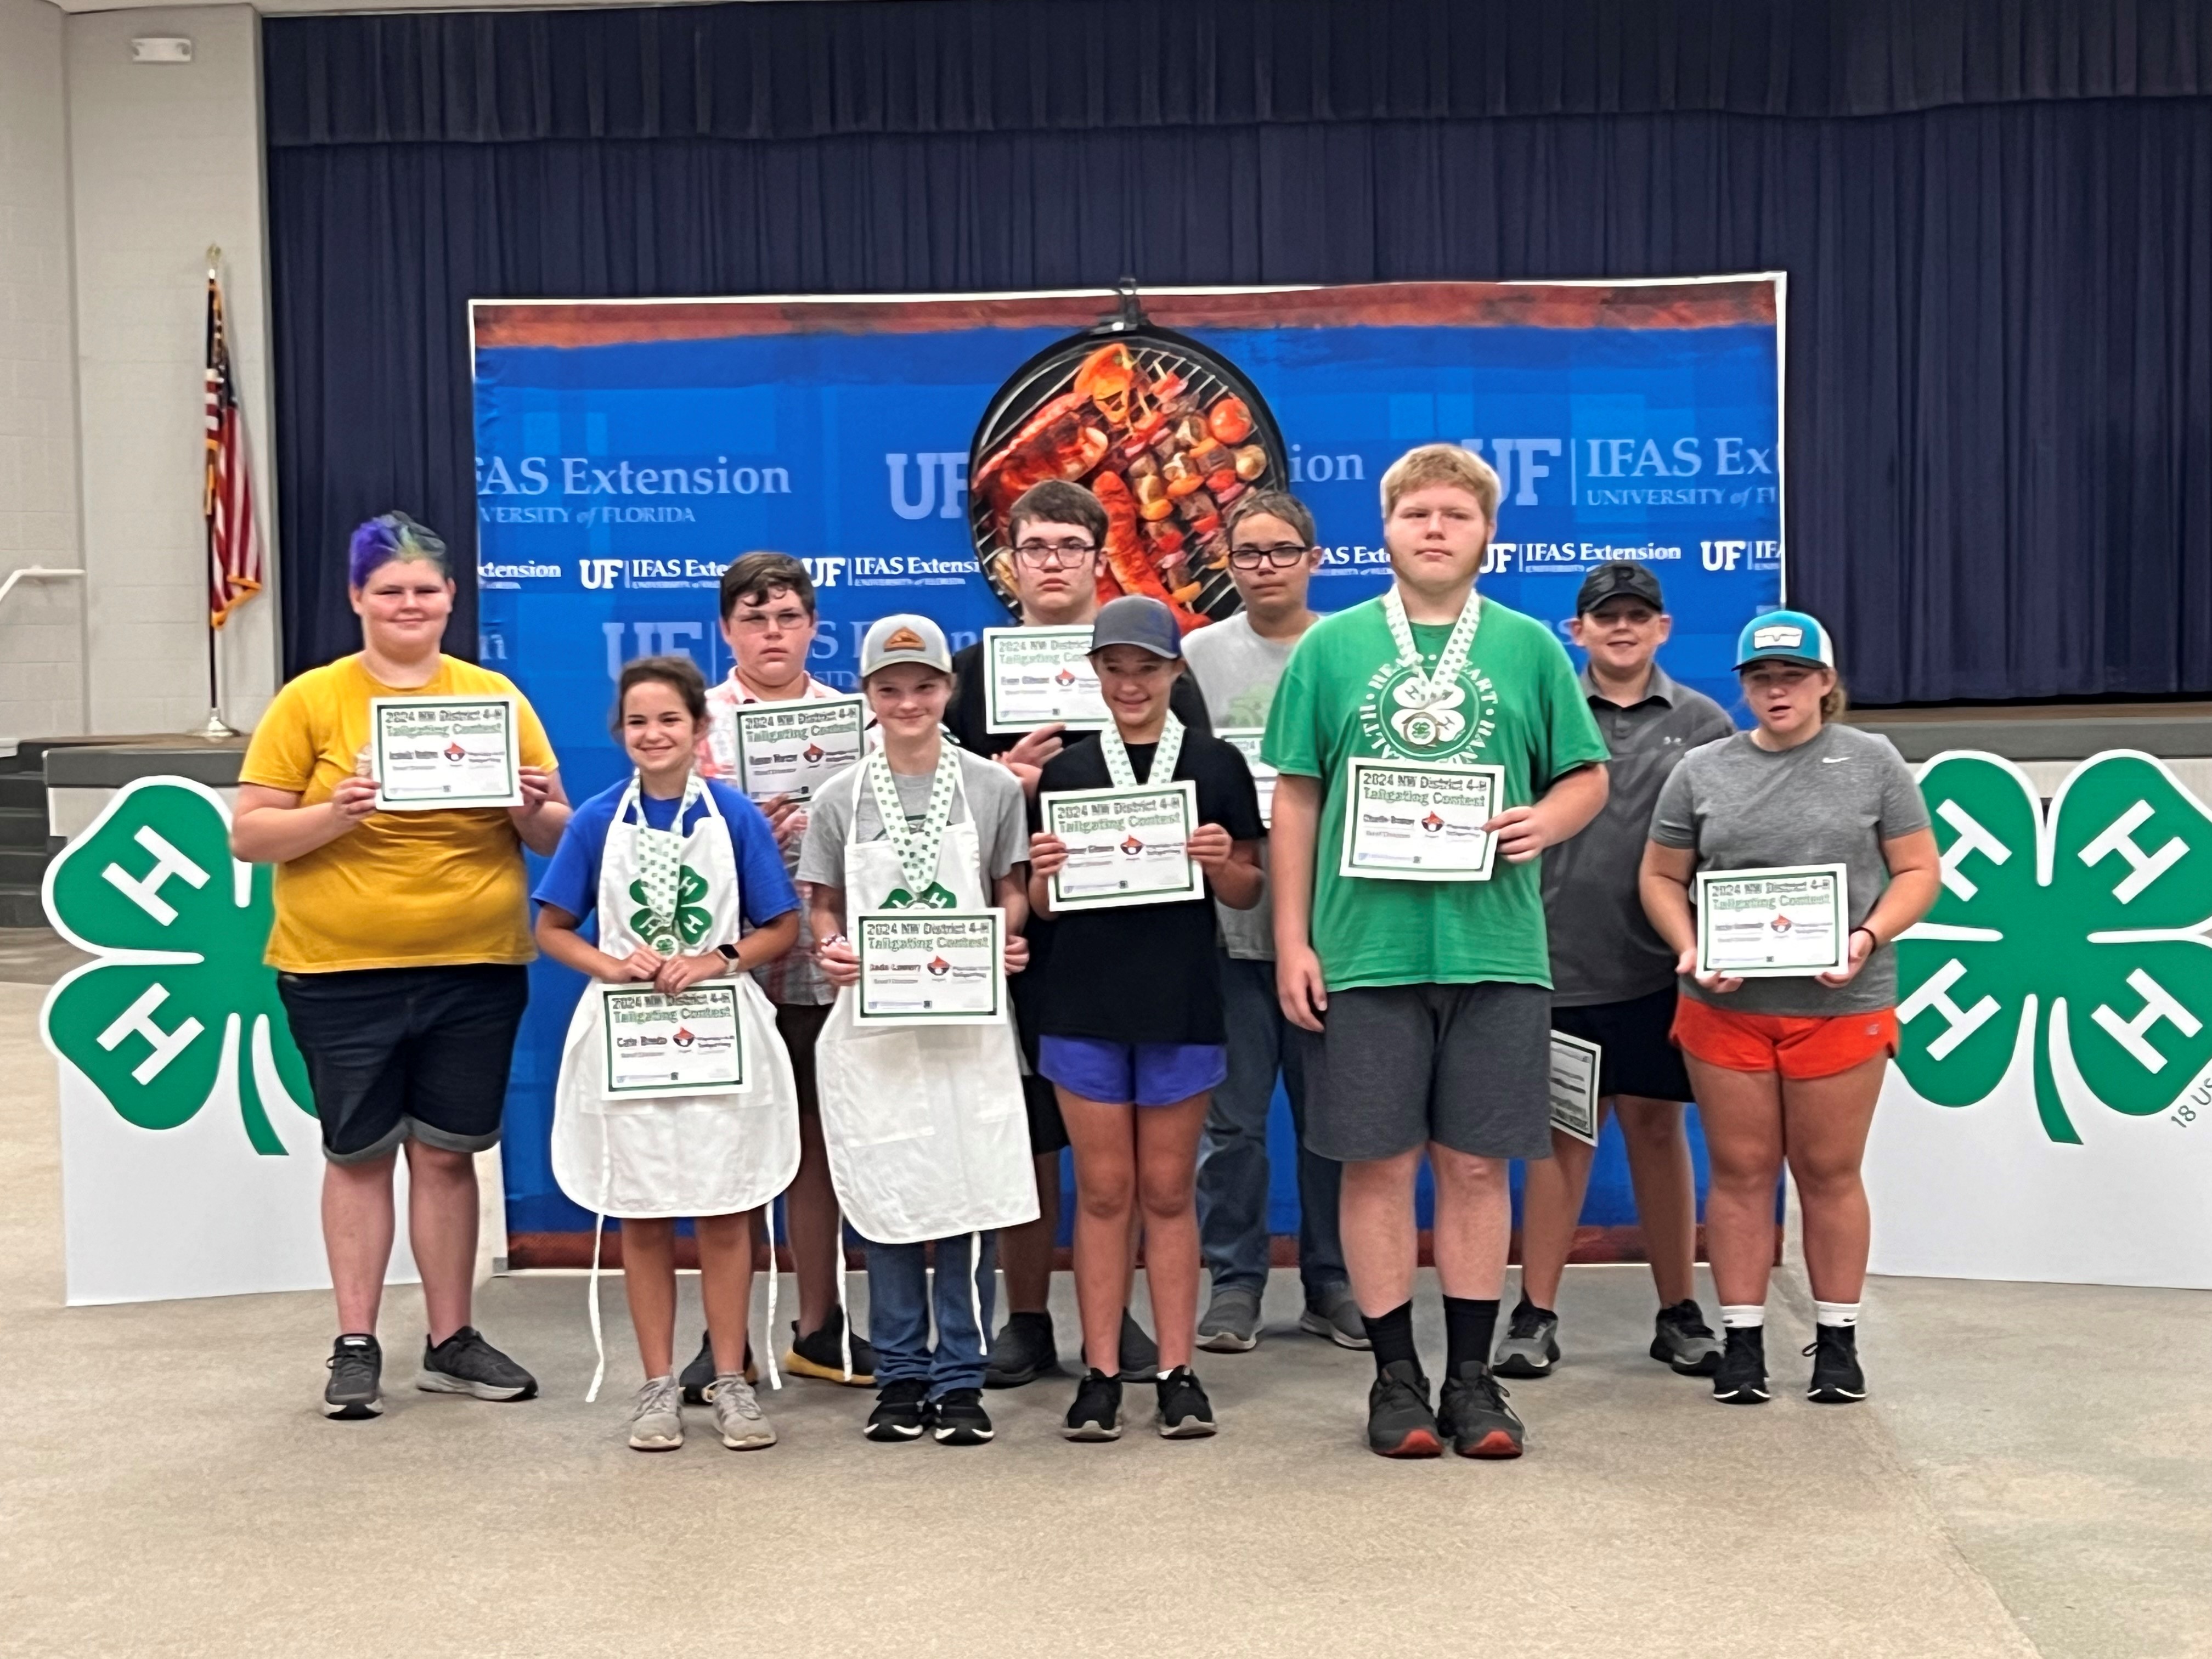
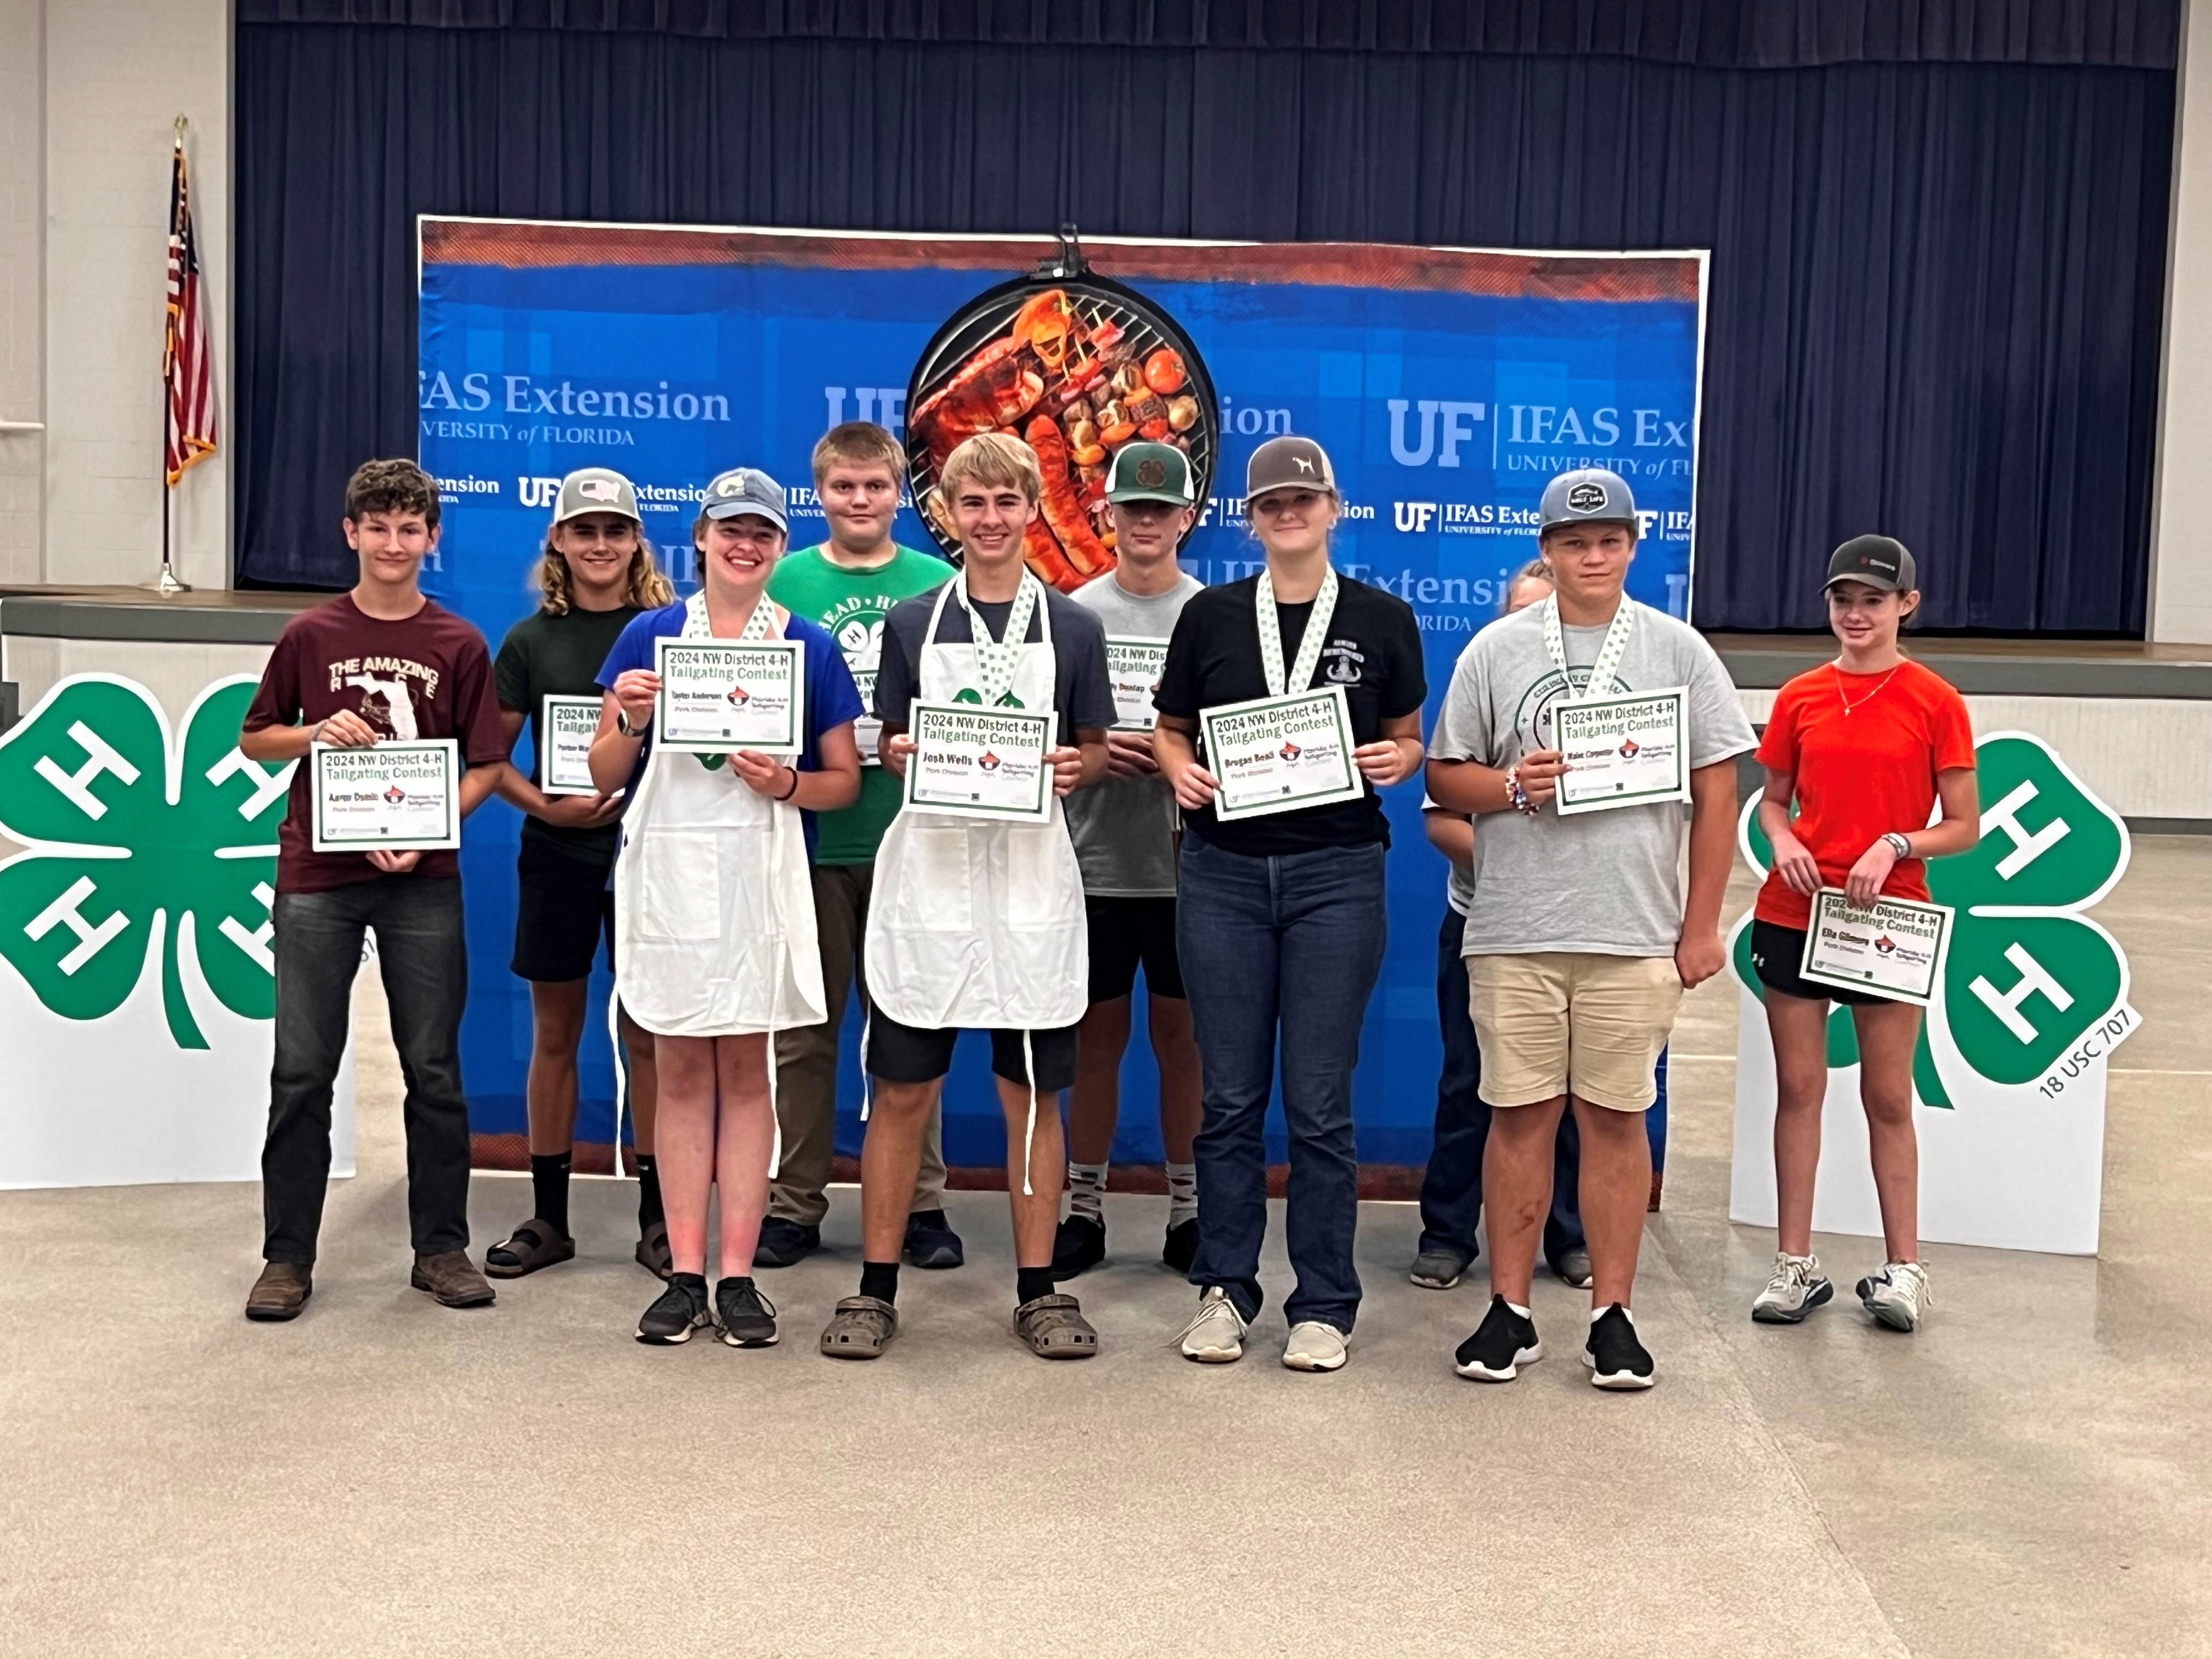
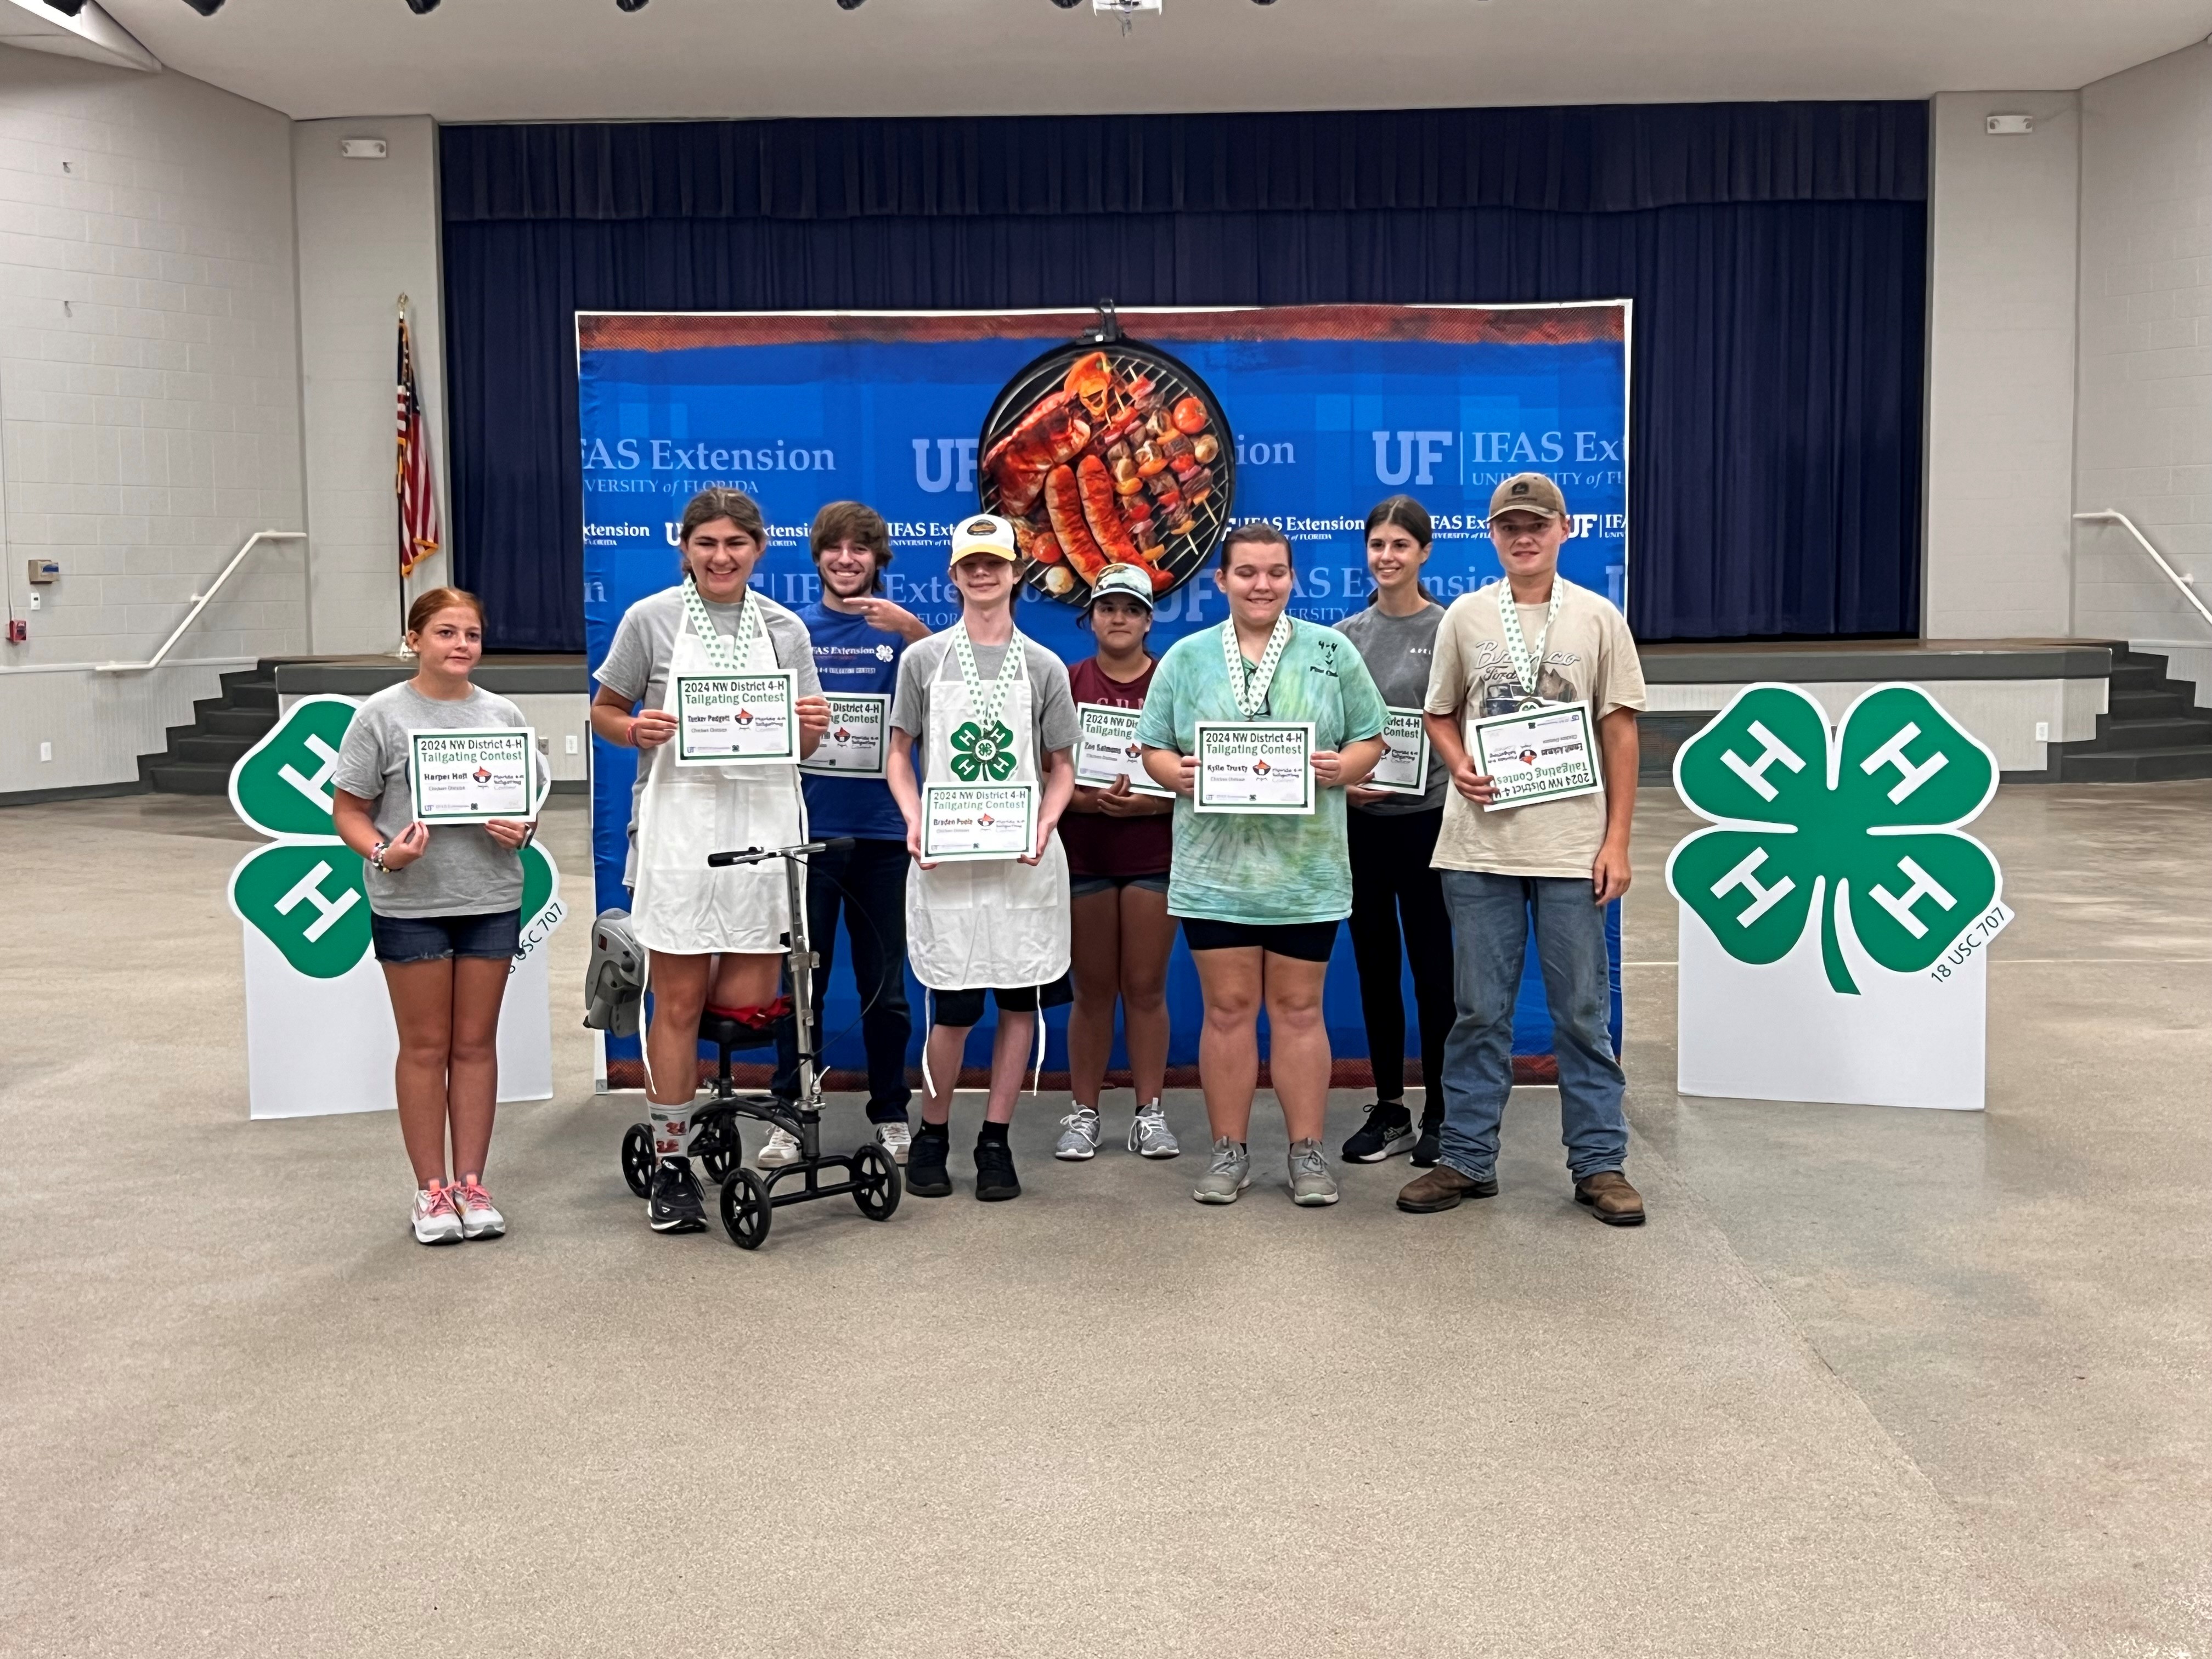
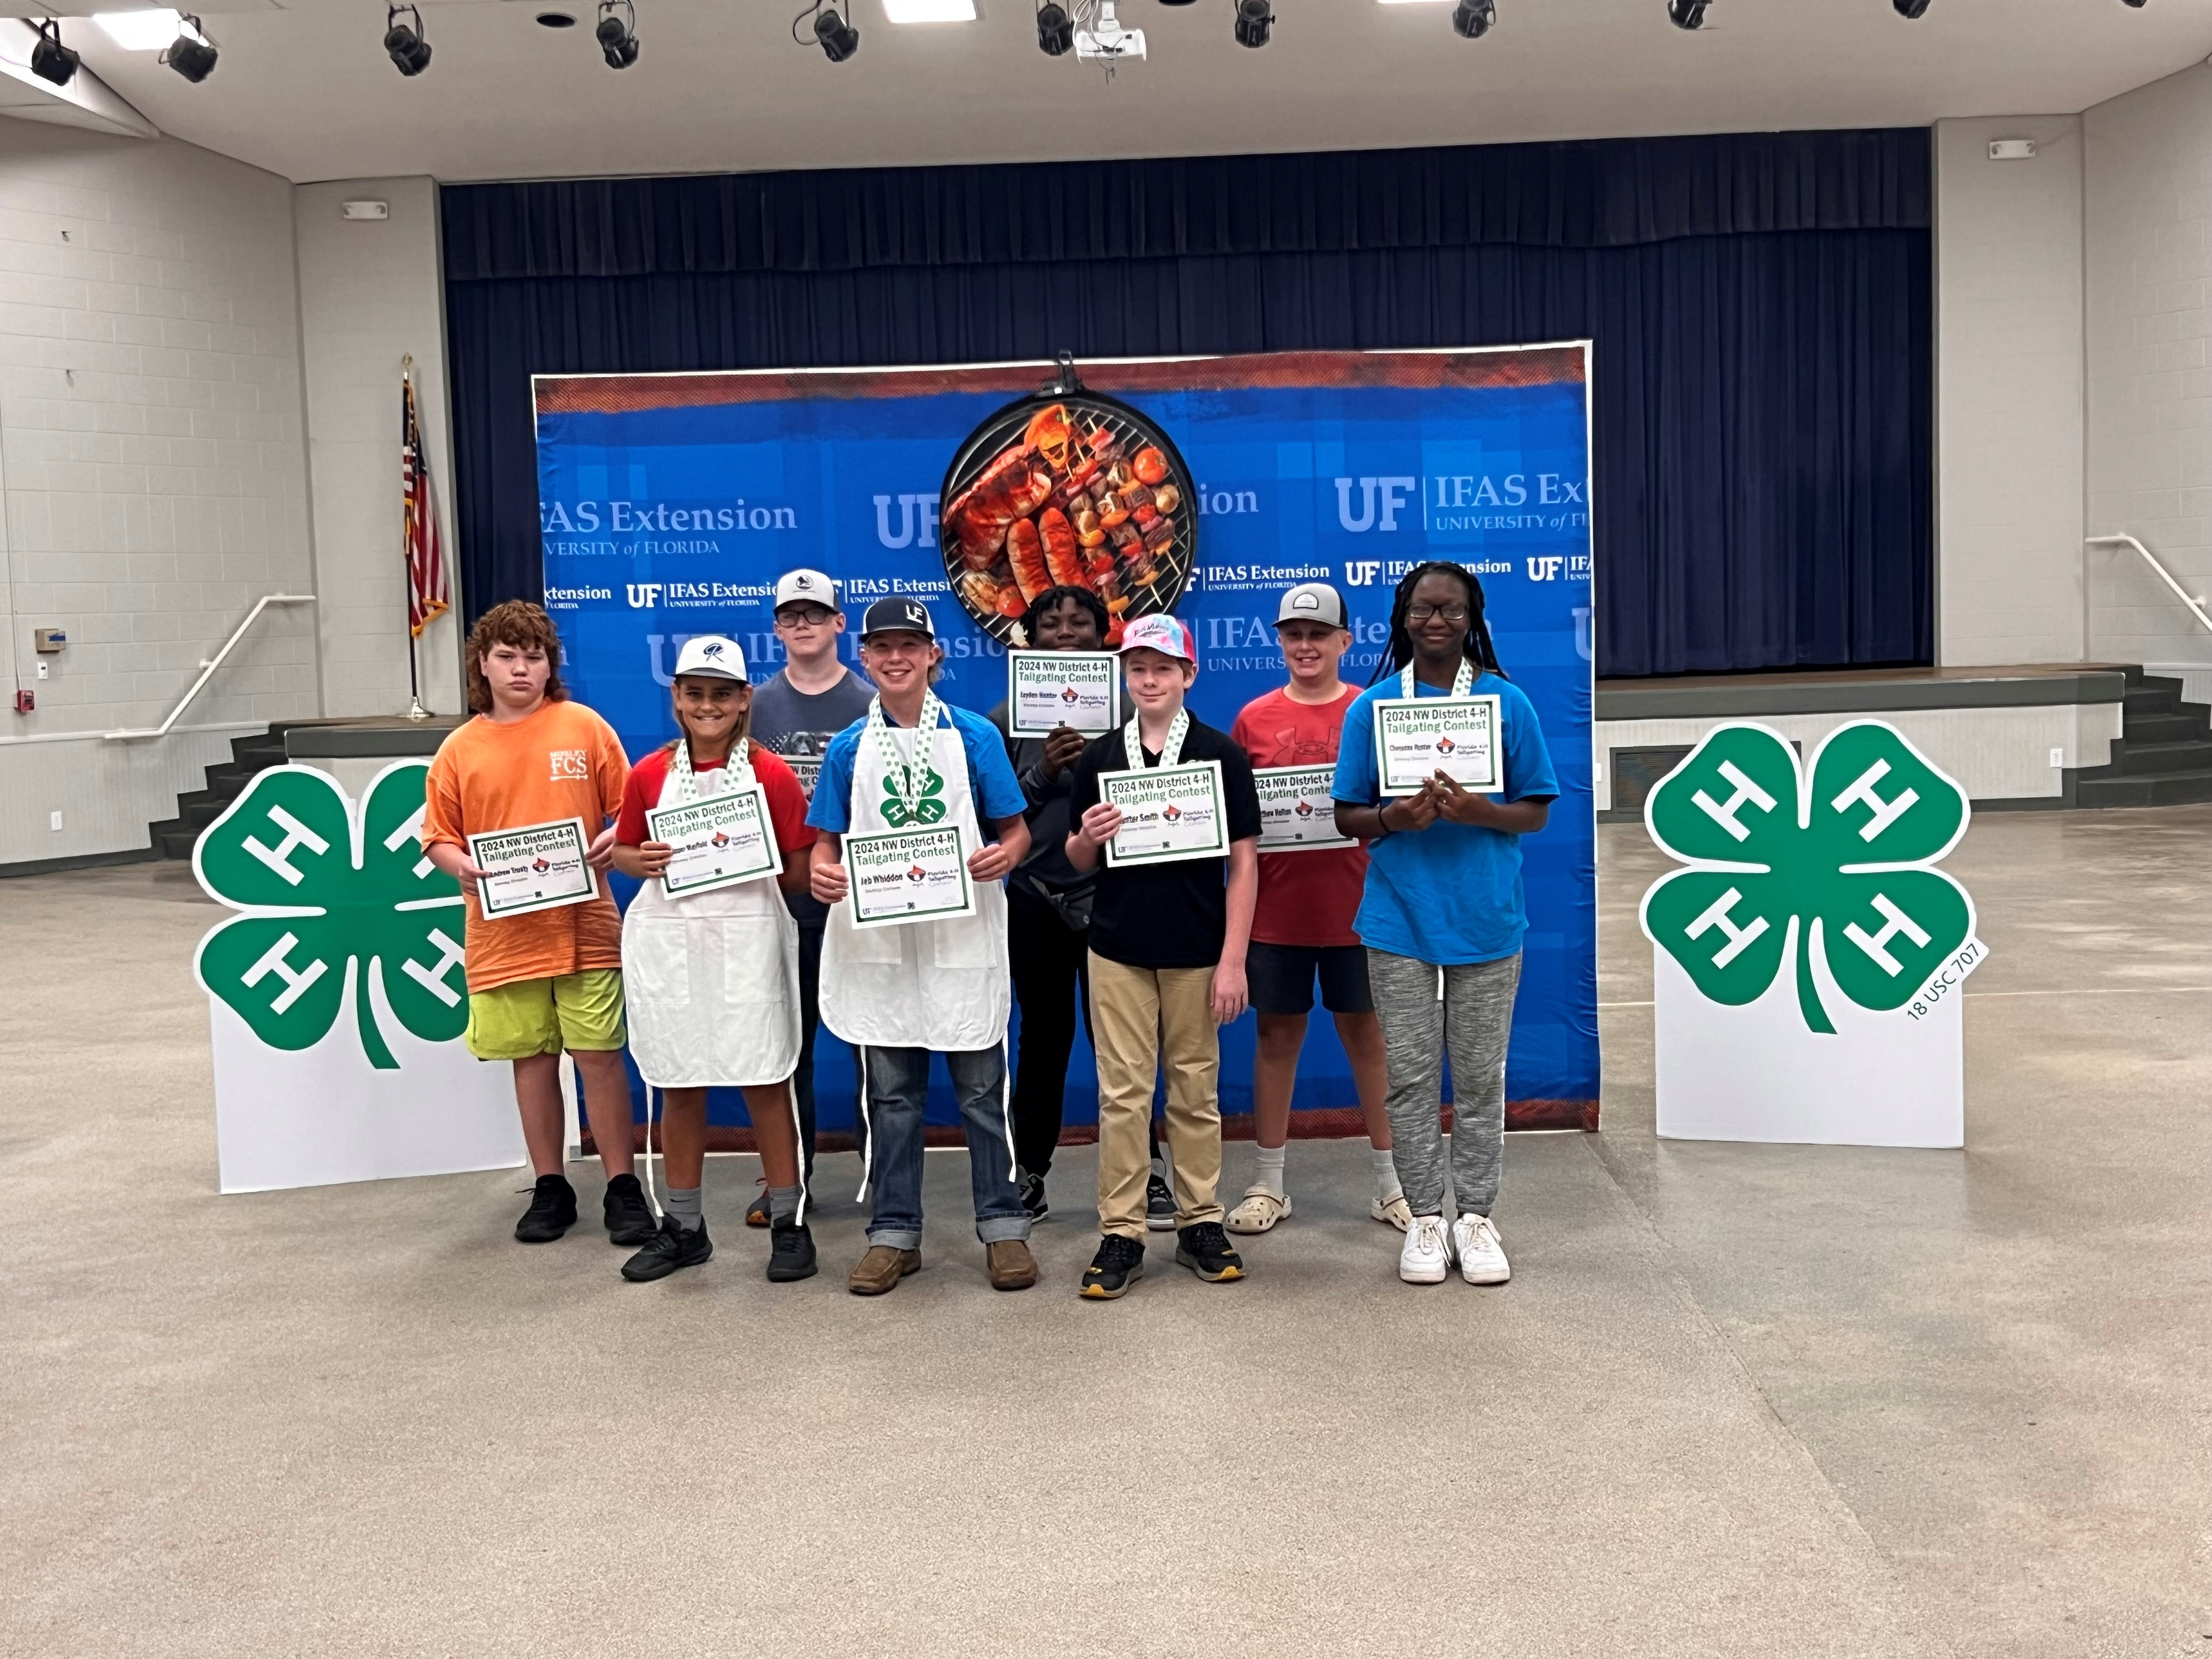
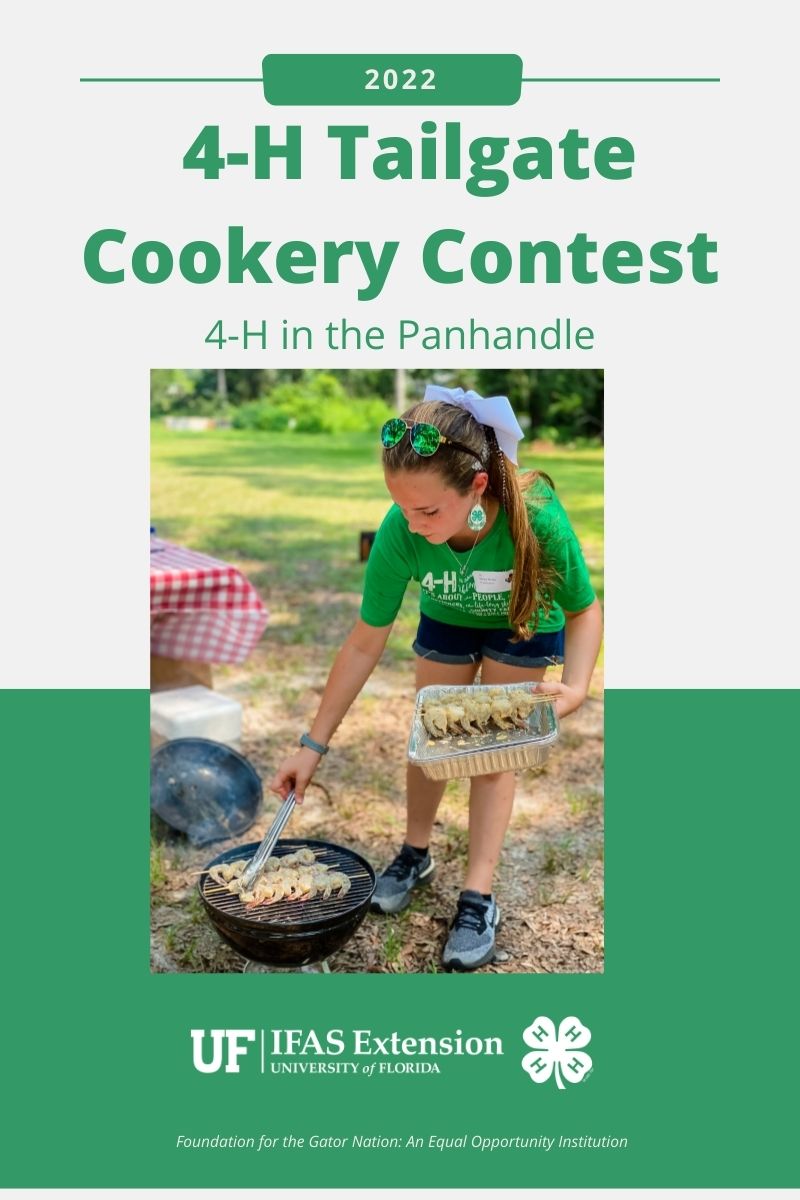
2024 4-H Northwest District Tailgating (Grilling) Contest Results
The 2024 4-H Northwest District Tailgating (Grilling) Contest was a great success and served as a platform to showcase the grilling talents of youth from various counties. This event is part of the broader Florida 4-H Tailgating Contest program, that aims to promote the safe preparation of animal proteins and develop valuable life skills in youth. The 2024 Florida 4-H District and State Contests are sponsored by Publix Super Markets and Sonny’s BBQ.
Program Overview
The Florida 4-H Tailgating Contest encourages participants to grill different types of proteins, including beef, pork, poultry, and shrimp. Youth compete at county and district levels, with top performers advancing to the state competition. The Contest also requires participants to create a tabletop display to show off their recipe and creativity. Participants may use a laptop/iPad/poster & easel to complement their tabletop display to describe their recipe. The overall program emphasizes the development of grilling skills, highlights food and fire safety, and promotes healthy lifestyle choices.
2024 CONTEST RESULTS
Beef Category
1st Place: Cate B. (Okaloosa)
2nd Place: Jade L. (Liberty)
3rd Place: Sydney G. (Escambia)
4th Place: Charlie B. (Gadsden)
Pork Category
1st Place: Taylor A. (Escambia)
2nd Place: Josh W. (Washington)
3rd Place: Brogan B. (Holmes)
4th Place: Malec C. (Liberty)
Chicken Category
1st Place: Tucker P. (Escambia)
2nd Place: Braden P. (Escambia)
3rd Place: Kylie T. (Bay)
4th Place: Emmit A. (Holmes)
Shrimp Category
1st Place: Chipper M. (Holmes)
2nd Place: Jeb W. (Gadsden)
3rd Place: Hunter S. (Escambia)
4th Place: Cheyanne H. (Gadsden)
Prizes
Winners in each category were awarded as follows:
1st Place: $400
2nd Place: $250
3rd Place: $100
4th Place: $50
State Competition
The top two winners from each category will advance to the Florida 4-H Tailgating State Contest on October 5, 2024, at the Animal Sciences Beef Teaching Unit in Gainesville, FL. Participants will have the opportunity to compete for further recognition and scholarships.
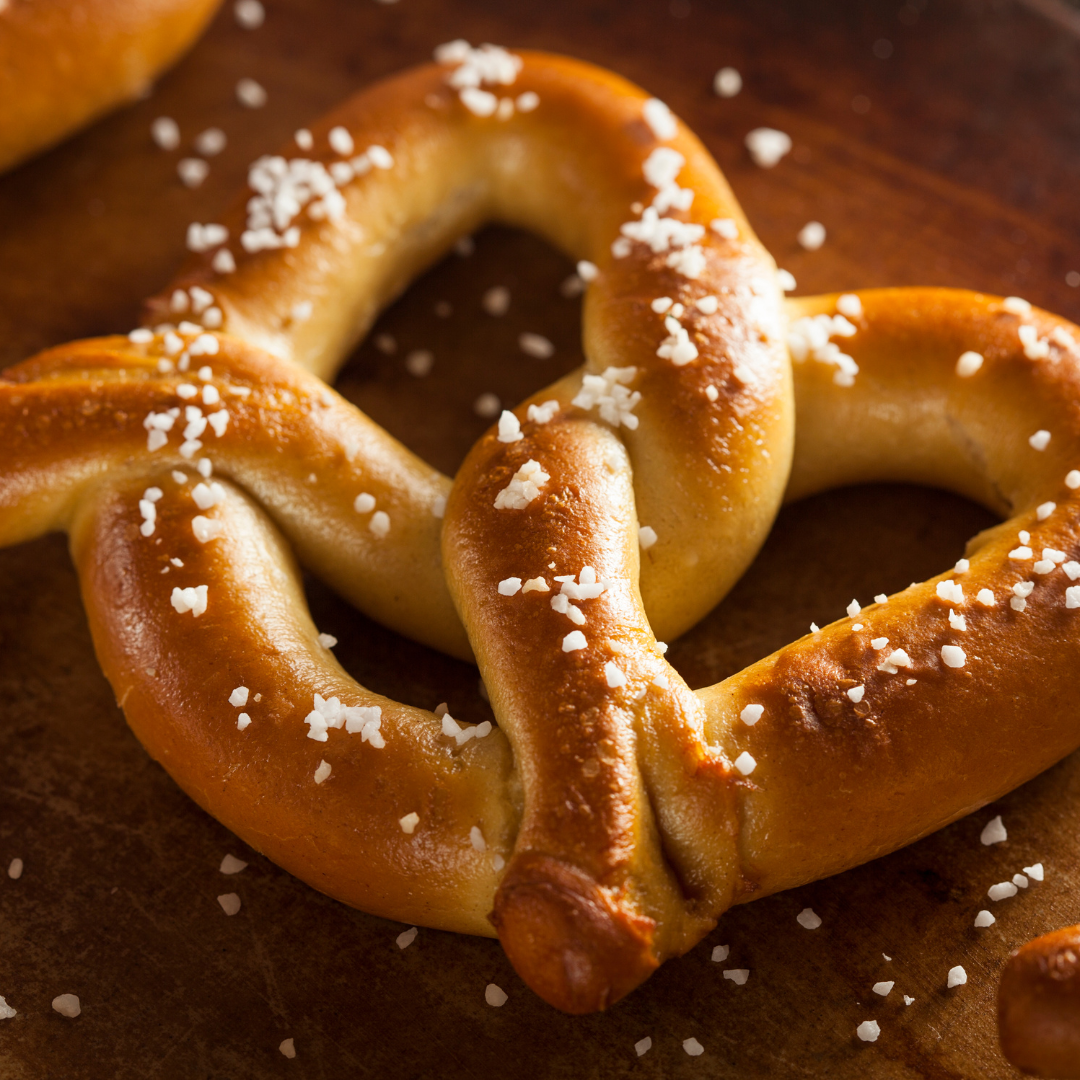
Who doesn’t love a warm, soft pretzel? Did you know they are fast and easy to make? Pretzels are a yummy way to introduce youth to the science of bread baking. Following a recipe can also help them practice following directions and measuring ingredients. Plus….it’s just fun! In honor of National Pretzel Day, we are sharing our tried and true soft pretzel recipe, which is perfect for your next 4-H club meeting or a fun family night. Of course, be sure to note any youth with food allergies and plan accordingly! This recipe makes 12 pretzels, so you may need to double (or triple) the recipe depending on the number of people you have.
You can demonstrate making the dough, or divide youth up into groups of 4-5 to make a recipe of dough each. In addition to the ingredients below, you will need either a stand mixer or a bowl and spoon for each group, measuring spoons, a liquid 1-cup measuring cup, 1-cup measure for solids, baking sheets, parchment paper, pastry brush, oven, and pot-holders.
Tips for baking with youth:
Create stations with all the supplies (including the recipe) needed. If possible, have a teen or adult for each station.
Demonstrate how to measure ingredients
Demonstrate how to knead and shape the dough
Ingredients:
1 1/2 cups of warm water (around 100 degrees Farenheight 2 1/4 teaspoons instant or active dry yeast (this is about 1 packet)
1 tablespoon of sugar or honey
1 teaspoon salt
3 1/4 cups all-purpose flour (plus a little more for kneading)
3 tablespoons of melted butter
This is optional, but you can have a variety of toppings for youth to try:
Traditional-course sea salt
Cheesy- nutritional yeast (if allergic to dairy), or cheese-flavored seasonings (like the kind you use for popcorn)
Ranch, or any other seasoning you prefer
Instructions:
Stir the yeast into warm water and sugar (or honey). Allow to sit for 1 minute. Slowly add 3 cups of flour, 1 cup at a time. Mix with a wooden spoon (or dough hook attached to stand mixer) until dough is thick. Add 3/4 cup more flour until the dough is no longer sticky. If the dough is sticky, continue to add flour (a small bit at the time) until it is no longer sticky. This will depend on how much humidity is in the air (this is a great science discussion!).
If using a stand mixer, keep the dough in the mixer and beat for an additional 5 full minutes. If mixing by hand, place the dough on a lightly floured surface and knead with clean hands for 5 full minutes. If the dough becomes too sticky during the kneading process, sprinkle more flour on the dough as needed. After kneading, the dough should slowly bounces back when you poke it with your finger.
Shape the kneaded dough into a ball. Cover lightly with a towel and allow to rest for 10 minutes. While the dough is resting, preheat oven to 400°F (204°C) and line two baking sheets with parchment paper or silicone baking mats.
After the dough has rested, use a knife to cut it into 12 even portions. Give one portion to each youth, and show them how to roll the dough into a rope, or “snake” shape. Form a circle with the dough bringing the two ends together. Twist the ends and bring them back down over the circle to form the pretzel shape. Place pretzels onto the baking sheets and brush with melted butter and the topping of your choice.
Bake for 12-15 minutes until golden brown and enjoy!
Further Engagement:
Youth who enjoy this activity may also enjoy the 4-H Breads Project. Youth can enter their baked goods in their local county fair or the North Florida Fair. Youth can also do a demonstration on breadmaking for county events, district events, or 4-H University.
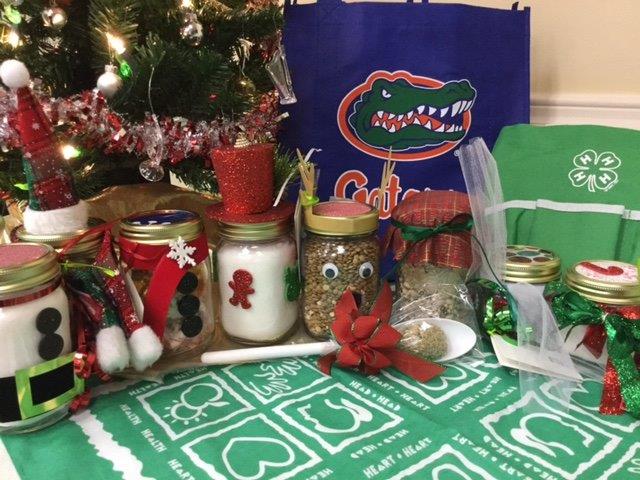
A variety of yummy treats in jars to give as gifts for the holidays.
The Holidays hold some of my fondest memories! Our family would often make special presents for friends and family members. We made things like cookies, candies, breads, and soups that could be shared with others. This can be a fun tradition for your family or 4-H Group to create together!
These gifts usually are not super expensive but can let everyone know you are thinking about them. A lot of times we would make a treat and deliver it along with a container of pre-made mix they could use later to make another serving. That way they know what they are getting and are more likely to make another batch. If this sounds like a fun tradition you may want to incorporate it but remember to be safe while making these special treats. You don’t want to prepare these delights and cause someone to have an allergic reaction or become sick from eating them.
If you like crafting you can decorate bags, jars, spoons, clean ornaments, mugs etc. A bow, ribbon, piece of fabric, dried flowers, sprigs of fresh flowers, holly or pine can make beautiful packages. Remember a little decoration can go a long way and make your gift giving more economical and festive.
Some of our Extension Colleagues from Kentucky KY1 and KY2, Maine, North Dakota and Iowa have some great recipes to share for gifts in a jar, on a spoon or in a mug. Many of these already have premade tags you can download and attach to the item. It also has the individual recipes you can follow and use to make your own special gifts. If you want to make a chocolate cocoa bomb, Maine had the cocoa mix recipe you can use with your molded chocolate! These are definitely yummy treats your friends and family will enjoy!
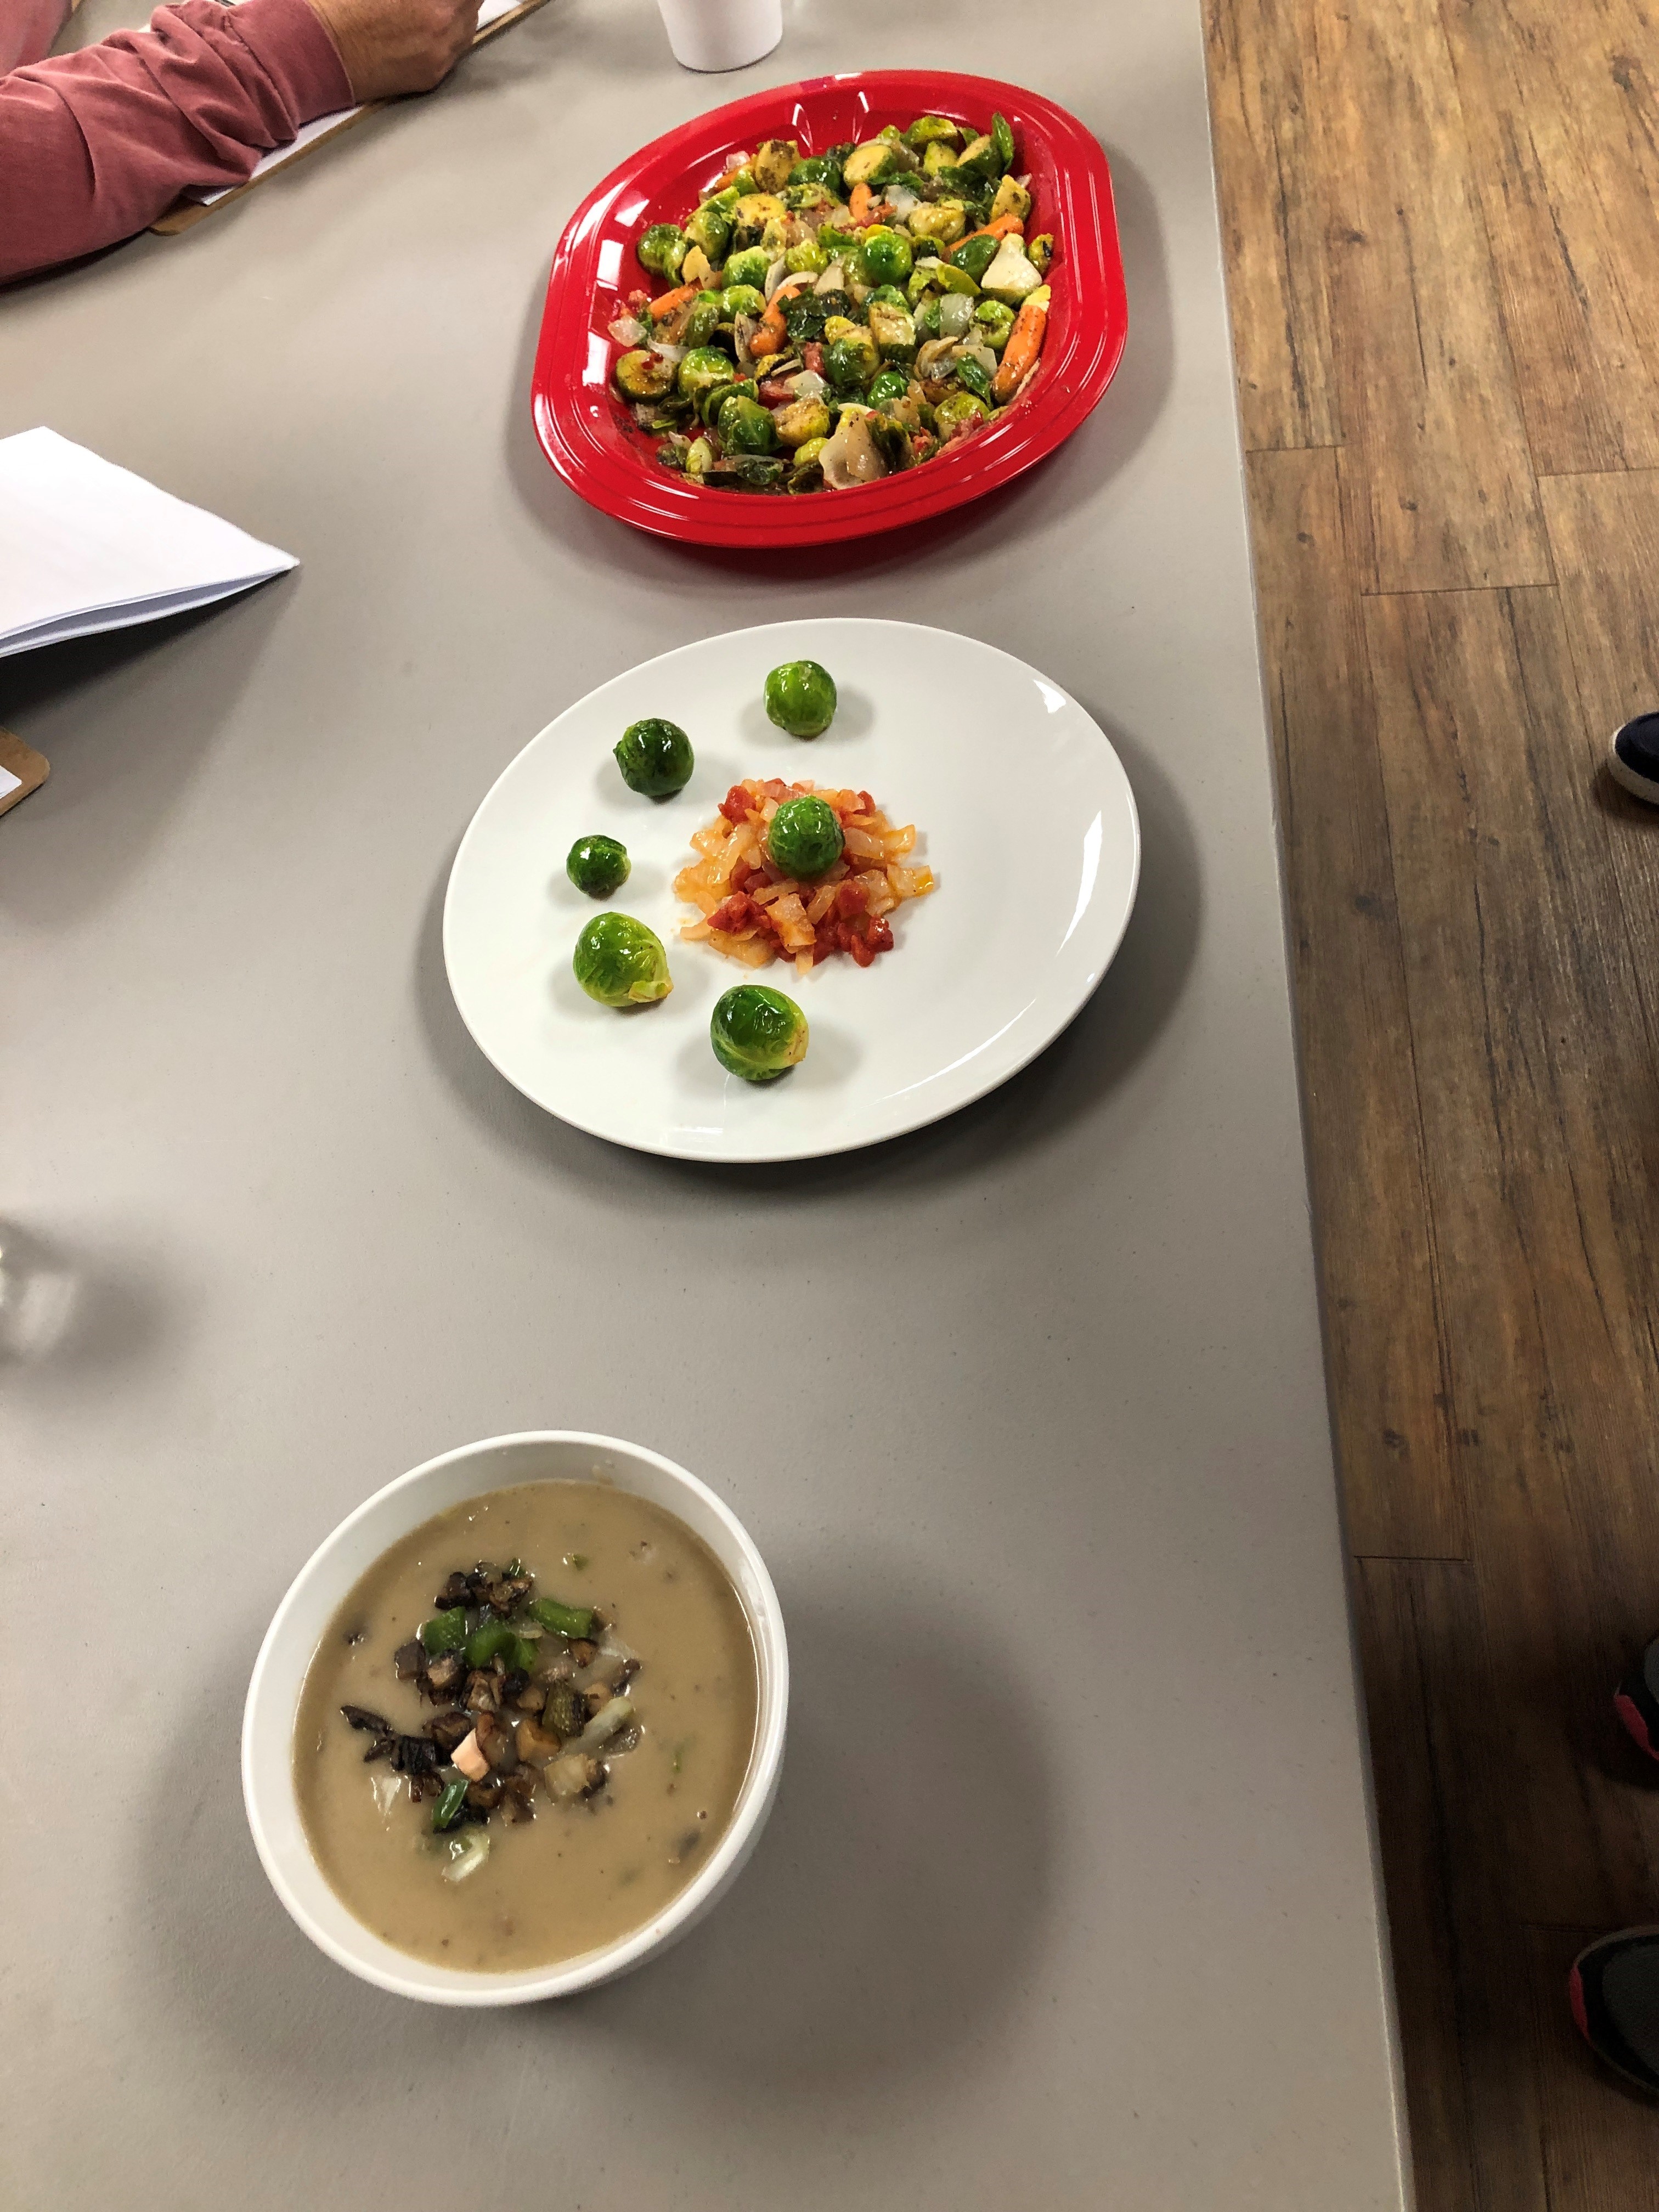
Judging table display of culinary creations. Top, Liberty’s, center Escambia’s intermediate, bottom Escambia’s senior.
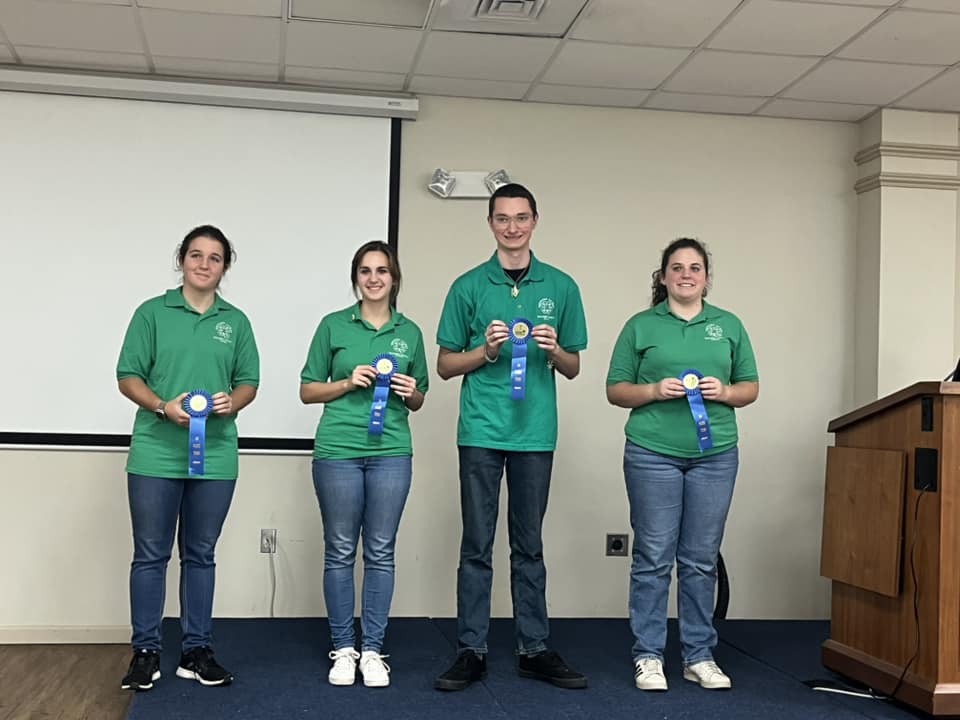
The Northwest District 4-H Food Challenge took place on January 7, 2023, and the results were phenomenal! This new competition challenges youth to work as teams of no less than two or more than four, and practice critical thinking, open communication, and presentation skills. Presentations are to include the knowledge and skills youth have learned through the project such as kitchen safety, food safety, cooking techniques, recipe creation, and how they worked together. But that is not all, additionally, teams are using a set of specific cooking supplies, a mystery ingredient, a specific dish category (main dish, side dish, appetizer, or healthy dessert), and a set amount of 4-H money to spend at the challenge grocery store. The entire competition allows 40 minutes for youth to put all of this into practice. Escambia County entered a senior and intermediate team while Liberty County entered an intermediate team into the inaugural competition.
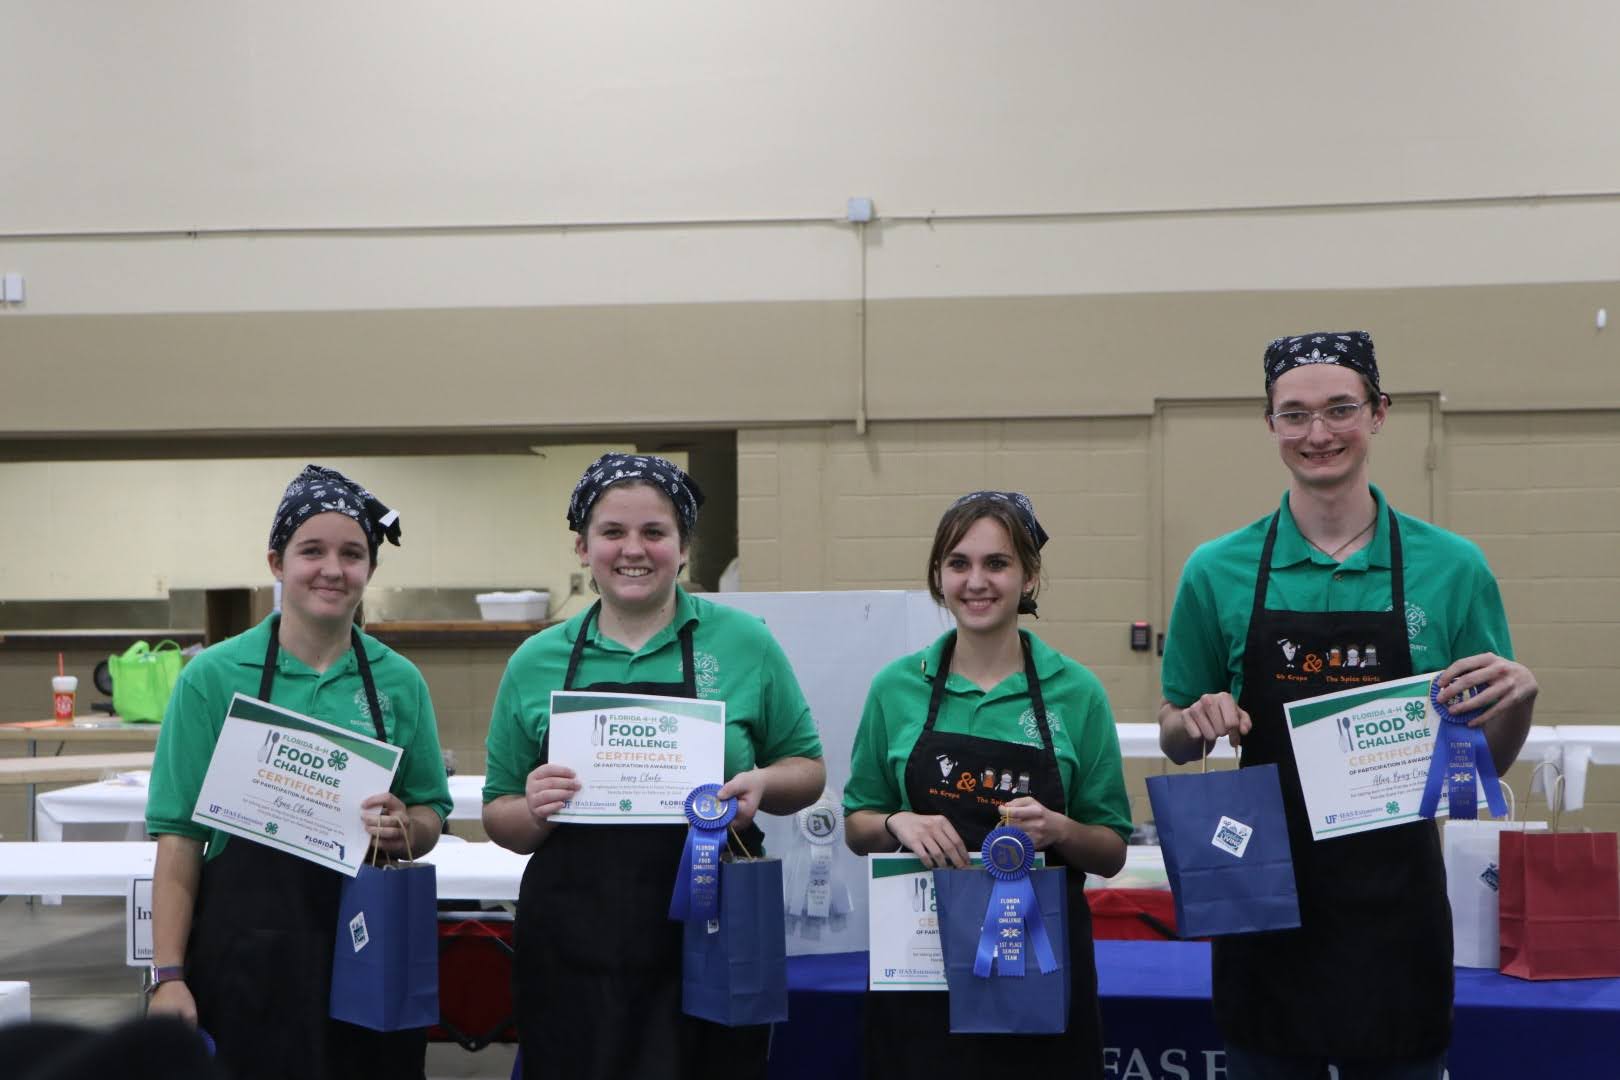
Escambia County’s senior team, dubbed O Crepe and the Spice Girls consisted of Alan Bray-Crews, Laney Clarke, Ryan Clarke, and Aubrie Dillon, who were presented with portabella mushrooms for their mystery ingredient with the category of the main dish. The team produced an excellent mushroom soup as their main dish. The dish along with their well-prepared presentation earned them a place in the Florida 4-H State Food Challenge competition at the Florida State Fair in Tampa on February 18.
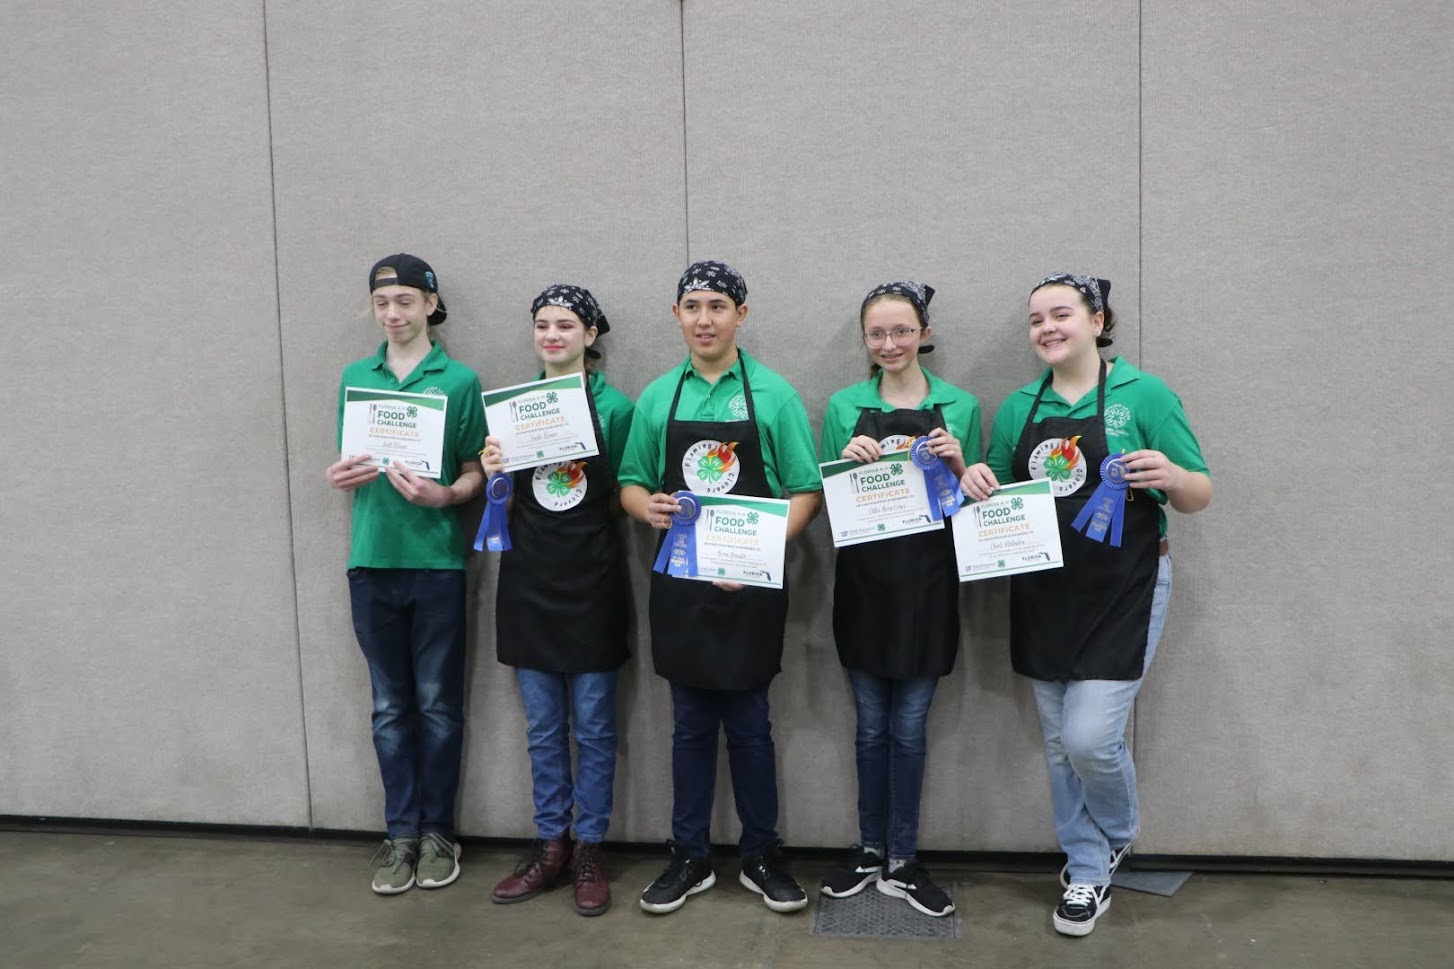
The two intermediate teams’ mystery ingredient was Brussel sprouts and the side dish category. The Flaming Clovers of Escambia County consisted of Chloe Bray-Crews, Brian Brewster, Charli McClendon, and Kayla Weaver with alternate member Scott Weaver on hand. The Culinary Criminals represented Liberty County made up of Harper Holt, Jansen Capers, Isabella Ransom, and Lexi Ford. The two teams created uniquely different dishes and presentations. While the Escambia team received the first-place ribbon, Liberty County’s team came in a very close second place. Escambia’s intermediate team also earned a place at the Florida State Food Challenge competition at the Florida State Fair in Tampa!
photo credit D. Clarke O Crepe and the Spice Girls
With both Escambia teams representing the Northwest District at the state competition, it was exhilarating to watch the kids interact and quiz one another while awaiting the competition to begin. Seniors were given a red bell pepper as the mystery ingredient with the category of side dish and intermediates were given a tangerine for their mystery ingredient with the category of healthy dessert. Again, Escambia County dominated and secured first place in both age categories. The first-place senior team at the Florida State Fair, Escambia County’s O Crepe and the Spice Girls, is eligible to compete in the National 4-H Food Challenge at the State Fair of Texas in Dallas this fall.
photo credit D. Clarke Flaming Clovers
This new 4-H opportunity has been embraced in several counties thus far and will continue to grow. This project promotes practical life skills youth will use for the rest of their lives. If your child is interested in food and nutrition and/or healthy lifestyles projects, contact your local 4-H Agent to explore project opportunities.
A special thanks to Escambia County’s volunteer leader, Linda Crews, who has embraced this competition and has worked with these youth to truly make the best better, and to Mr. Dave Clarke for sharing state event photos.
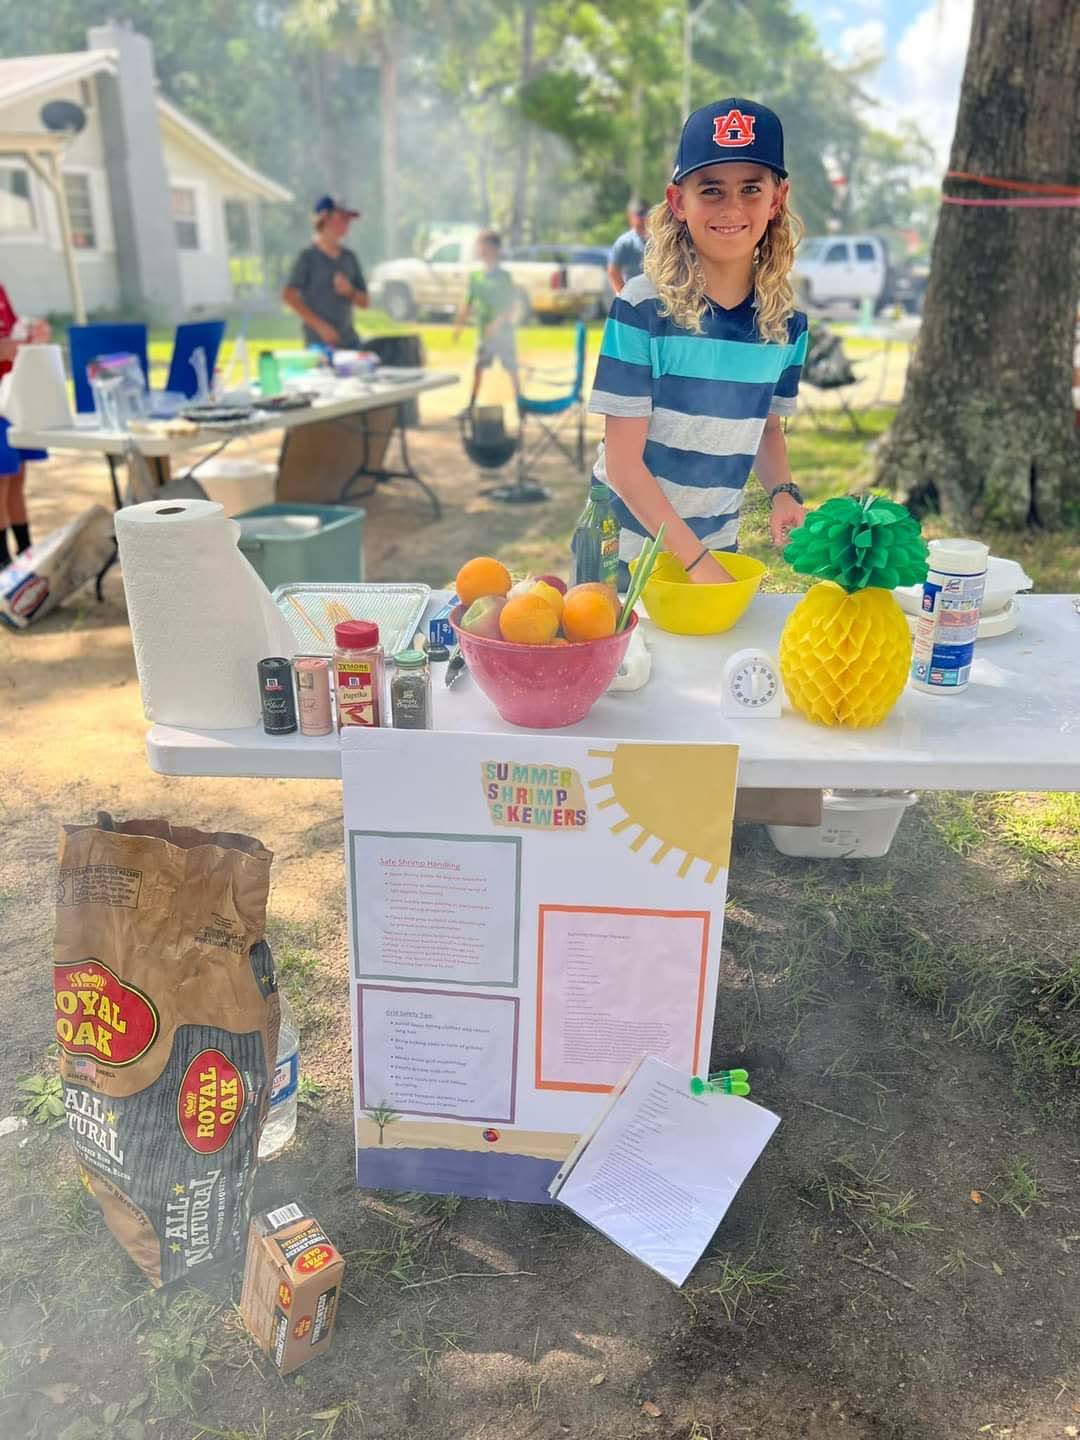
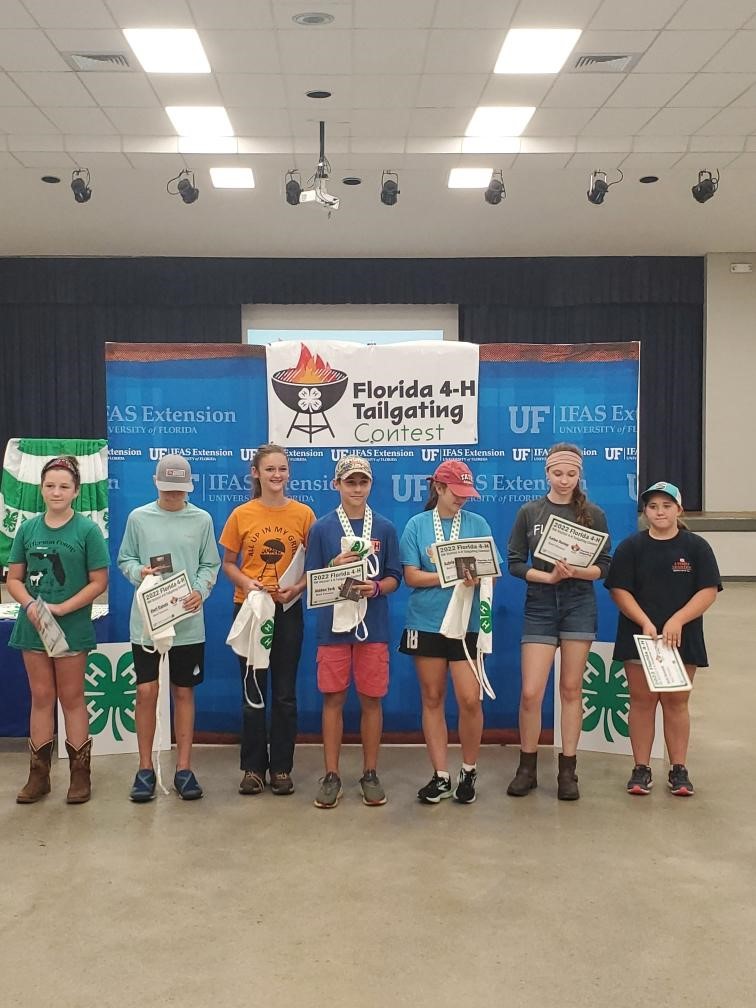
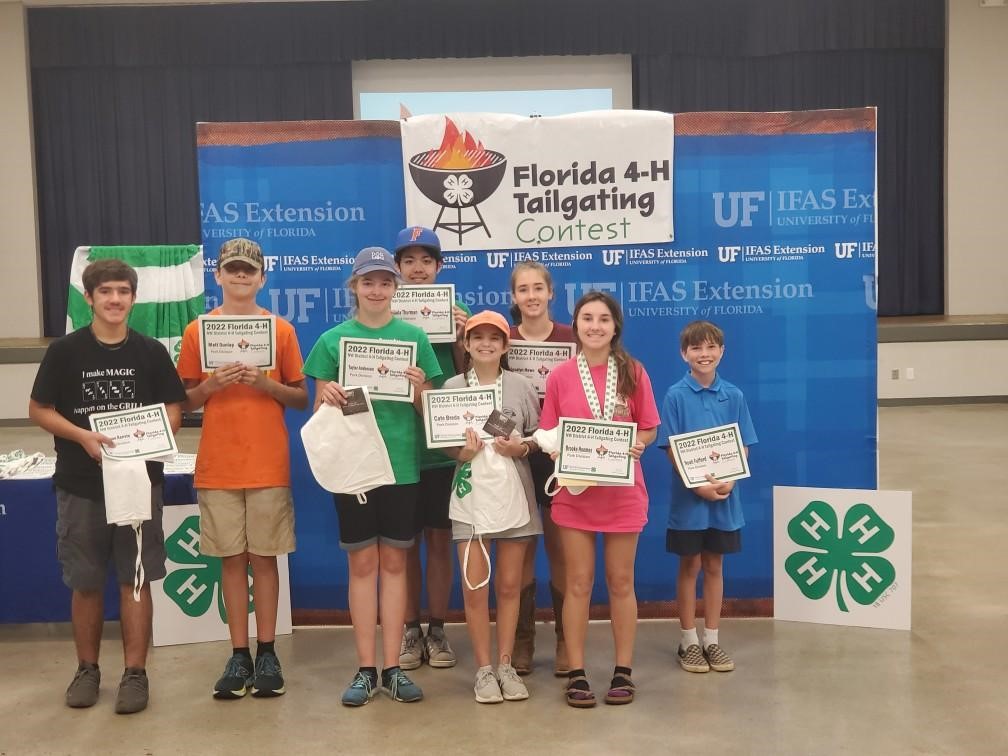
Did you get to do any grilling this summer? Many of our 4-Hers did! Over 100 youth from throughout the Florida panhandle participated in 4-H summer day camps that taught them food and fire safety, safe grilling, and proper cooking skills.
Day camps offered unique experiences to youth on grilling techniques all summer and helped youth prepare for our District Competition. On July 30, 2022, 28 youth from eight counties participated in the Northwest District Tailgating Contest at the Washington County Ag Center in Chipley, Florida. Youth participated in competitions in beef, pork, chicken, and shrimp divisions and were judged on their food and fire safety skills around the grill and the taste of their chosen protein. In all, $3,200 was awarded to panhandle youth for placing 1st-4th in their competitions.
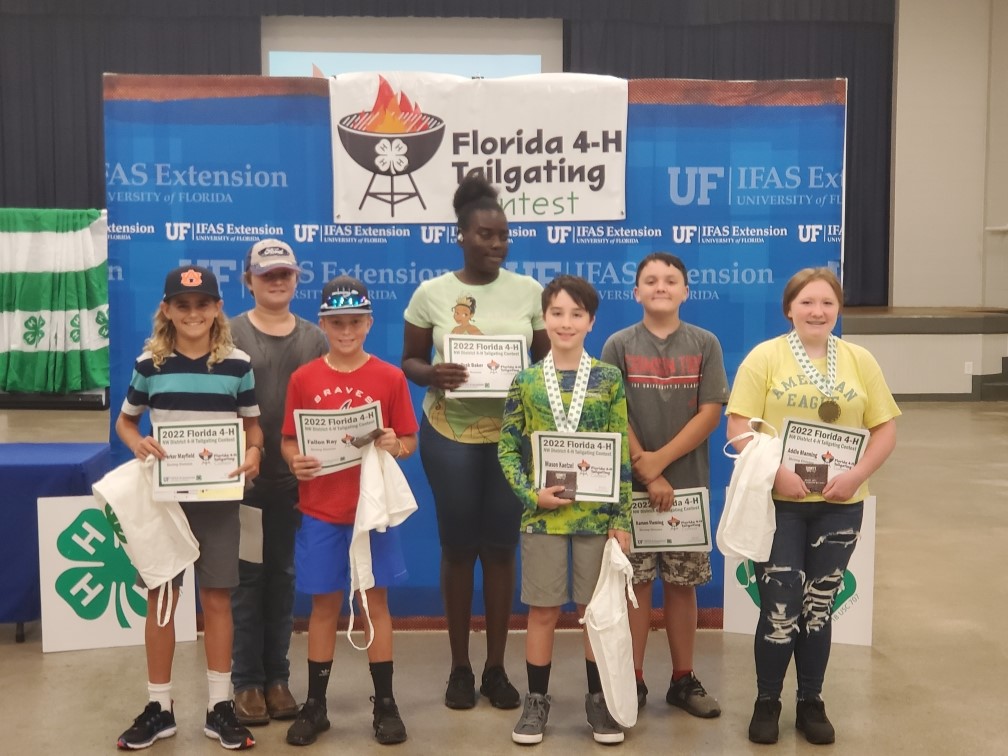
Now the top two youth in each protein category will compete at the Florida 4-H Tailgating Contest in Gainesville on October 1, 2022. They will compete against youth from across Florida for an opportunity to win college scholarships. For the state contest, the first-place winner in each protein area receives a $1,500 college scholarship and the second-place winner receives a $1,000 college scholarship.
Join us as we cheer on the following NW District 4-H participants as they represent us at the Florida 4-H State Tailgating Contest:
2022 Seafood Category Winners
2022 Beef Category Winners
Beef Division
Aubrie D.-Escambia County
Aidden Y.-Walton County
Pork Division
Brooke H.-Escambia County
Cate B.-Okaloosa County
Chicken Division
Vanessa E.-Wakulla County
Jamison S.-Jackson County
Shrimp Division
Addie M.-Escambia County
2022 Pork Category Winners
Mason K.-Escambia County
2022 Chicken Category Winners
If you are interested in furthering your grilling skills, please check out the Florida 4-H Tailgate Series of EDIS documents. If you would like more information on the Tailgating Contest to prepare for next year, check out our brand new handbook! Finally, the top two winners in each protein category are sharing their award-winning recipes in this free, downloadable eBook!

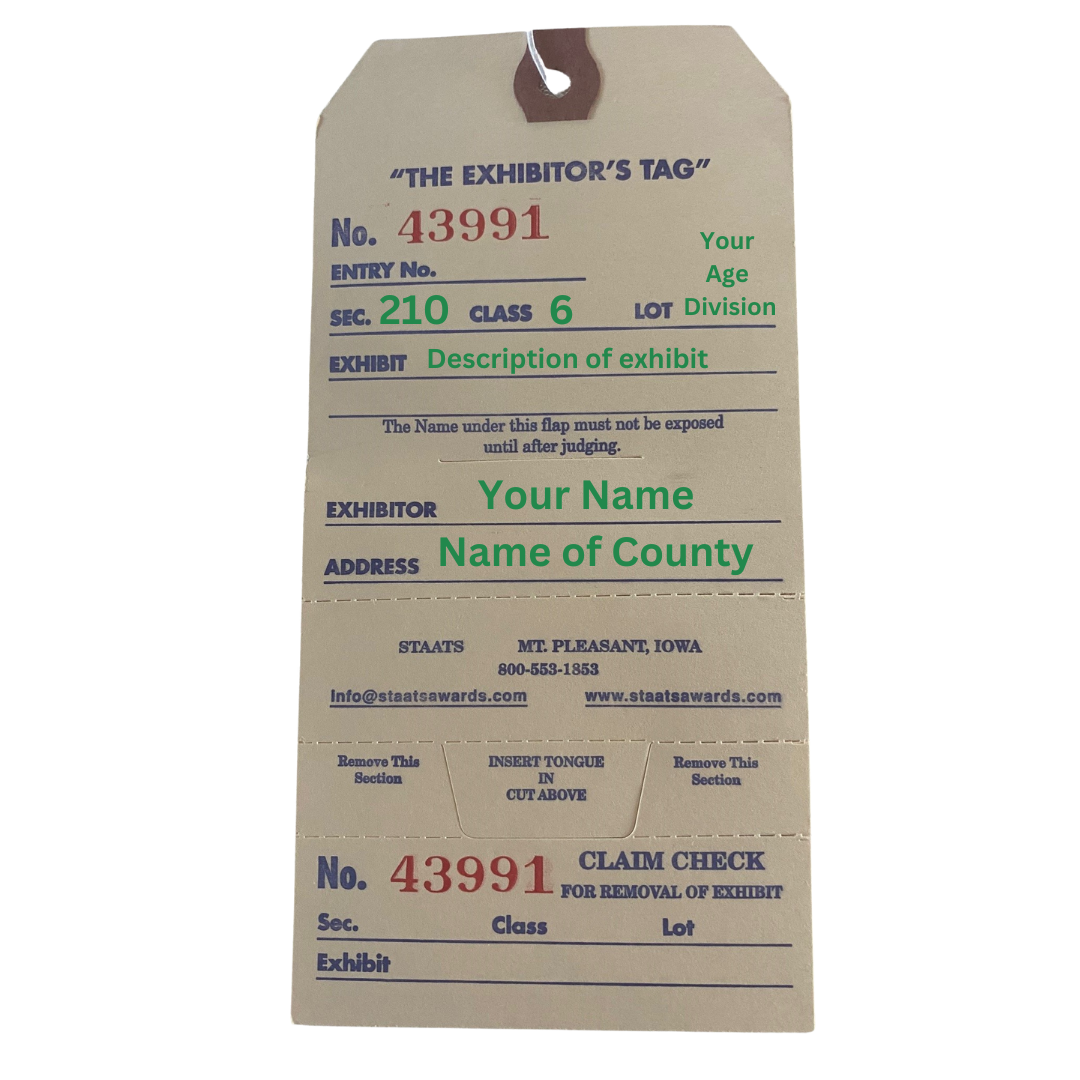 exhibit tag, be sure to write the red tag number on your Fair Entry Form. Here is the information you need to correctly complete your entry tag: