For 4-H members and spectators alike, livestock shows are one of the most anticipated parts of a fair. Preparing your animal for a show begins months in advance. Great care is needed in feeding your animal, practicing showmanship, and making sure your animal is healthy. After all the time and effort that goes into raising your animal, you want to make sure that you have everything you need once you arrive at the fairgrounds.
Angel Granger, the 4-H Agent in Jackson County (also a former livestock club leader and 4-Her) suggests investing in a show box or rubber tote to keep all of your show supplies together.
General supplies- water hose, spray nozzle, rubber boots, extension cord, extra rope, pitch fork, square point shovel, rake, and wheel barrow. Depending on the time of year, a fan is also a good idea (the temperature tends to change quickly in the fall and spring and can be unpredictable). Also pack a sign or poster about your animal (breed, age, name, sponsor, etc).
General animal first-aid kit. Antibiotic cream/salve, aspirin boluses and balling gun, blood stop powder, and bleach. It is a good idea to disinfect the sand before you place your animal on the ring. A simple bleach mixture of 1 part bleach to 4 parts water, in a spray bottle will do.
Show equipment. Show stick, show halter/lead, tie out halter and lead ropes.
Grooming tools (brush, comb, nail file, nail clippers, grooming apron or old clothes)
Feed supplies- feed, feed containers, water bottle
General supplies- bucket, rags, string or tie wire, sign for your animal (name, breed, age, sponsor, etc)
General animal first aid kit.
Show equipment- most dog shows require a leash.
Supplies needed for every show regardless of the species you are showing:
Show clothes. There is no uniform for 4-H, but you will want to dress neatly and modestly. A button down shirt and dark pants are appropriate. A neck tie or 4-H bolero tie is a nice touch. Make sure your hair is neatly styled and pulled back away from your face. You may also want to bring some safety pins for your exhibitor tag.
Human first aid kit- you can purchase one for less than $10.00, or put one together yourself (band aids, antibiotic ointment, pain reliever).
Paperwork: A copy of the registration form you mailed/submitted, your animal’s health papers, your lease document (if applicable), and your ORIGINAL breed registry papers. Photocopies will not be accepted at check-in. It is a great idea to put these papers in a three-ring binder inside sheet protectors.
Your knowledge and good sportsmanship! Be familiar with your animal so that you are prepared to answer any questions the judge may ask. Look over your feed record and record book. Remember to both win and lose gracefully.
Be sure to label your items with your name. Consider laminating your packing list and keeping it in your show box with a dry-erase marker. That way, you can check the items off as you load them into your box or trailer. Being prepared will help you be less nervous and make your experience much more enjoyable. See you at the fair!
Fairs are often the highlight of the 4-H year. From a youth development perspective, fairs provide an opportunity for 4-H members to demonstrate new knowledge, abilities, skills and attitudes. When youth, parents and volunteers work together, fairs are a great way for youth to learn and also be recognized for their efforts. Being properly prepared is key to having a great fair experience.
Youth Responsibilities- Establish a realistic timeline to work on your exhibits. Be sure to read the rules and regulations outlined in the 4-H section of the fair book. Pay close attention to deadlines and specific requirements for each project. Make sure that your exhibit is your own work. Exhibits should be in good condition, clean, and labeled with your name, county, and club. Judging score sheets for individual projects can help guide you as you prepare your exhibit.
Parent Responsibilities- Parents can help 4-H members obtain the materials and resources needed to complete 4-H projects, but should never do the project for the youth. Encourage your child to set realistic timelines and goals so that they do not miss entry deadlines. Help them complete their entry form. Many counties offer workshops or clinics in the weeks leading up to fair to help members prepare- take advantage of these sessions!
Volunteer Responsibilities- Share information about fair exhibit categories and deadlines with your 4-H parents. Project leaders are a great resource to help members decide what to exhibit about their project. It could be something they made, or it could be a poster or tabletop display about what they have learned. If possible, assign an older, more experienced member to mentor new members as they prepare.
Consider having a mock judging of exhibits so that any last minute adjustments can be made. Invite parents to attend along with the members and use this meeting as an opportunity to provide feedback and recognition to individual members and to promote club unity and pride.
4-H members are encouraged to try something more challenging each year and to practice good sportsmanship. Exhibiting is designed to be an enjoyable educational experience not just a contest. If you would like to help 4-Hers in your county get ready for the fair, or serve as a judge for your fair, contact your local county Extension Office.
4-H National Youth Science Day (NYSD) is a great opportunity to engage youth in 4-H Science. Each year, National 4-H Council announces a National 4-H Science Experiment. NYSD is October 8th, but the experiment can be conducted anytime. This year, youth will be tasked with the same mission: in light of the recent natural disasters such as Typhoon Haiyan, National 4-H Council is asking youth to design and build an aerodynamic food transportation device that can deliver a payload of nutritious food to disaster victims. Youth will learn engineering concepts, develop math skills, learn about nutrition and help solve a relevant, global issue.
You can purchase a pre-made experiment kit from the 4-H Mall, or you can make your own for less than $10.00. All of the supplies can be found at your local hardware or big box store. A “how-to” video shows you how to set up and facilitate the experiment. A word of caution- the video shows youth jumping onto the launcher with both feet- this weakens your launcher and could cause youth to lose their balance. We recommend that youth only stomp on the bottle with one foot.
Experiment guides for volunteers and youth can be found online for free. If you register your event online, you will get access to three more activities that you can do with your kit. For teachers who lead in-school or afterschool 4-H clubs, this experiment achieves many of the common core science standards There are several contests and prizes for clubs, teachers, and youth. Many of these contests offer cash prizes or gift cards. To find out more, visit the NYSD website.
We would love to know how you and your youth benefited from this program. Please complete the evaluation for volunteers, and share the link for the evaluation for youth with your club members.
How do you plan on celebrating NYSD this year? Share your photos and ideas on our District Facebook and Twitter! Also, make plans to join us on October 20th for Make a Difference Monday at 7/6 central. Dr. Dale Pracht will be sharing how to create safe environments in our 4-H clubs. If you cannot make our live presentation, it will be archived along with this month’s presentation at http://florida4h.org/madmondays.
4-H Meetings should be fun for both the members and the volunteers. Club environments that cultivate belonging, mastery, independence, and generosity. Leading a 4-H club should be a fun and rewarding experience. Earlier this month, during our Make a Difference Monday Volunteer Leader Series, Tycee Prevatt shared some simple, but creative ideas to make club meetings fun, but also more manageable!
Divide your club into teams of 3-5 youth. Assign an older 4-Her (intermediate or teen) to serve as the team leader. This will not only make your club more manageable, but it also fosters leadership, teamwork, and cooperation- three essential skills for a happy and productive life.
How this works:
Assign each team a color (buy inexpensive plastic tablecloths at the dollar store in each team color).
Teams sit together during club meetings/functions. Parents sit behind the teams so as not to interfere.
Teams can earn points for: attendance, being prepared for club meetings, being on time, doing a club demonstration, participating in a club service project, and attending 4-H events and activities beyond the club level (such as a day camp or canning workshop).
As the leader, you can also use “pop quizzes” or project skill a thons to allow more opportunities to collect points. Parent can help with the skill a thon stations and your 4-H agent can help you set up a skill a thon. Stations can be project specific, such as naming the parts of a saddle, or they can be more general, such as reciting the 4-H pledge from memory or answering 4-H trivia questions.
You will also need to decide on appropriate incentives. Some clubs give out a grand prize to the top team, others give prizes for 1st, 2nd, and 3rd teams. Ideas include: partial scholarships to 4-H camp, cash award, pizza or bowling party, or a fun field trip related to their project. Your club may need to do some fundraising to help pay for the prizes.
The team approach works well because it really encourages the members to attend the meetings on time and prepared. It helps motivate them to become more engaged. You will also have fewer interruptions or discipline issues, because teams can lose points for that! This approach works particularly well for medium to large clubs and can even be adapted for use during camp.
What are your best tips for making meetings fun? Let us know in the comment box below. Also, make plans to join us on October 20th for Make a Difference Monday at 7/6 central. Dr. Dale Pracht will be sharing how to create safe environments in our 4-H clubs. If you cannot make our live presentation, it will be archived along with this month’s presentation at http://florida4h.org/madmondays.
4-H Volunteers are busy people. Most volunteers volunteer for other organizations outside of 4-H and they are active in their communities. Many volunteers also have children or grandchildren that they care for. Leading a 4-H club should be a fun and rewarding experience. Earlier this month, during our Make a Difference Monday Volunteer Leader Series, Julie Dillard shared some great tips to help club leaders stay organized, and most importantly, save time and enjoy being a 4-H Volunteer!
Create a Sense of Belonging– one of the basic things that will help your club is to make sure everyone feels welcome and that they belong. This task is an easy one to delegate to a club parent or even your club officers.
Names – know and use the names of your 4-H’ers. Use name tags if needed until you get to know all of their names
Designate a member of parent each month to welcome 4-H’ers as they arrive
Ask a 4-Her or officer to plan an icebreaker each month
Create opportunities for 4-H’ers to work together on simple projects such as a team club demonstration or committee work
Keep meetings fun! Look for some really creative ideas to make meetings fun (and less work for you) next week…
Utilize the Club Leader Notebook- Meet with your 4-H agent to pick up your club leader notebook. This notebook has been designed to make it easy for club leaders to keep track of meeting information, club dues, and other club and county events. In your notebook, you will find:
Club summary worksheet– This basically answers who, when and what. The top box is a record of what kind of event or activity whether it’s a club meeting, an educational workshop or some other event like an end of the year party or a field trip. At every 4-H event, both youth and adults should sign in. The notes section is a handy way to jot down reminders.
Monies Received Form– Using a monies received form allows you to see quickly who has given you money and what it is for and also allows it to be quickly entered in our accounting software. This creates a paper trail, which makes handling funds much easier and also protects the club and club leader.
Check Request Form– This form is for purchases that are planned ahead of time to a specific place of business or a person. It’s also for those times when you didn’t have time to go to the 4-H Office to pick up a check, so you picked it up and paid for it yourself. Just use this form and attached a copy of your receipt.
Fundraising Permission Form– This purpose of this form is not only to inform the club about a fundraiser, but also to identify the purpose of the funds. Funds should have a planned purpose to benefit the club members. Not only that, but your 4-H Agent should be kept in the loop on all fundraisers so he or she can approve it as well as be able to tell others what the funds are being used for. Most importantly, this helps youth learn about goal setting and planning to achieve those goals.
Accident and Injury Form- No matter how long we have been a volunteer, or how organized we are, there is always a chance that the unexpected will happen. When it does, we need to document it. Any time there is an accident or injury that occurs to a youth or volunteer during a 4-H event, we need to complete this report as soon as possible (after the injured person is cared for).
How to reduce risk and what to do when an accident does happen is the topic for next month’s Make a Difference Monday. On October 20th, at 7/6 central, Dr. Dale Pracht will be sharing how to create safe environments in our 4-H clubs. If you cannot make our live presentation, it will be archived along with this month’s presentation at http://florida4h.org/madmondays.
It’s that time of year again- time to re-enroll in 4-H! All volunteer and member profiles were set to inactive on August 23rd, so in order to be a member or volunteer this year you will need to re-enroll. The online enrollment system that we use is called Florida 4-H Online and can be accessed at http://florida.4honline.com . To re-enroll, you will need access to a computer and the internet. If you do not have access at home, you can visit your local library or Extension office. Many offices will have a kiosk set up in their lobby this time of year so that volunteers and members can quickly stop by and complete the re-enrollment process.
If you were a volunteer or member last year, you will just need to update your profile. If you forgot your family login, contact your extension office and they can re-set it for you. Be sure to enter any changes to your contact information or health form. Members will also need to select a club and project for the year. If you are a volunteer, and it has been at least 5 years since you were screened, you will be asked to complete the application and screening process again. The level of screening will be determined by your level of involvement as a volunteer. Your local extension office will notify you if you need to complete a new application and screening.
If you are new to 4-H this year (or to our state), then you will need to create a new family profile, and then a profile for each family member old enough to participate in 4-H. Your first time enrolling will take a little longer, but each year after that the process is not as involved.
Club leaders may want to work with their local 4-H agent to set up a club kickoff meeting and arrange to have an enrollment kiosk set up so that parents can enroll or re-enroll their children when they drop off/pick up children from the club meeting. For step by step instructions on how to re-enroll, visit: http://florida4h.org/4honline/files/Instructions-for-4-H-Online-Enrollment.pdf. Your local extension office is also happy to help you if you have any questions. Many fall fairs, as well as state events have enrollment requirements within so many days of the event, so do not wait to re-enroll!
Maybe your child is too picky to eat school lunches on a regular basis, maybe they have food allergies, or you just want them to eat a little healthier. It could be that your family does not qualify for free or reduced lunch, but you would rather not spend $400-$500/year on school lunches. Whatever your reason for sending a school lunch, keeping it fun, fresh, and delicious can be a challenge.
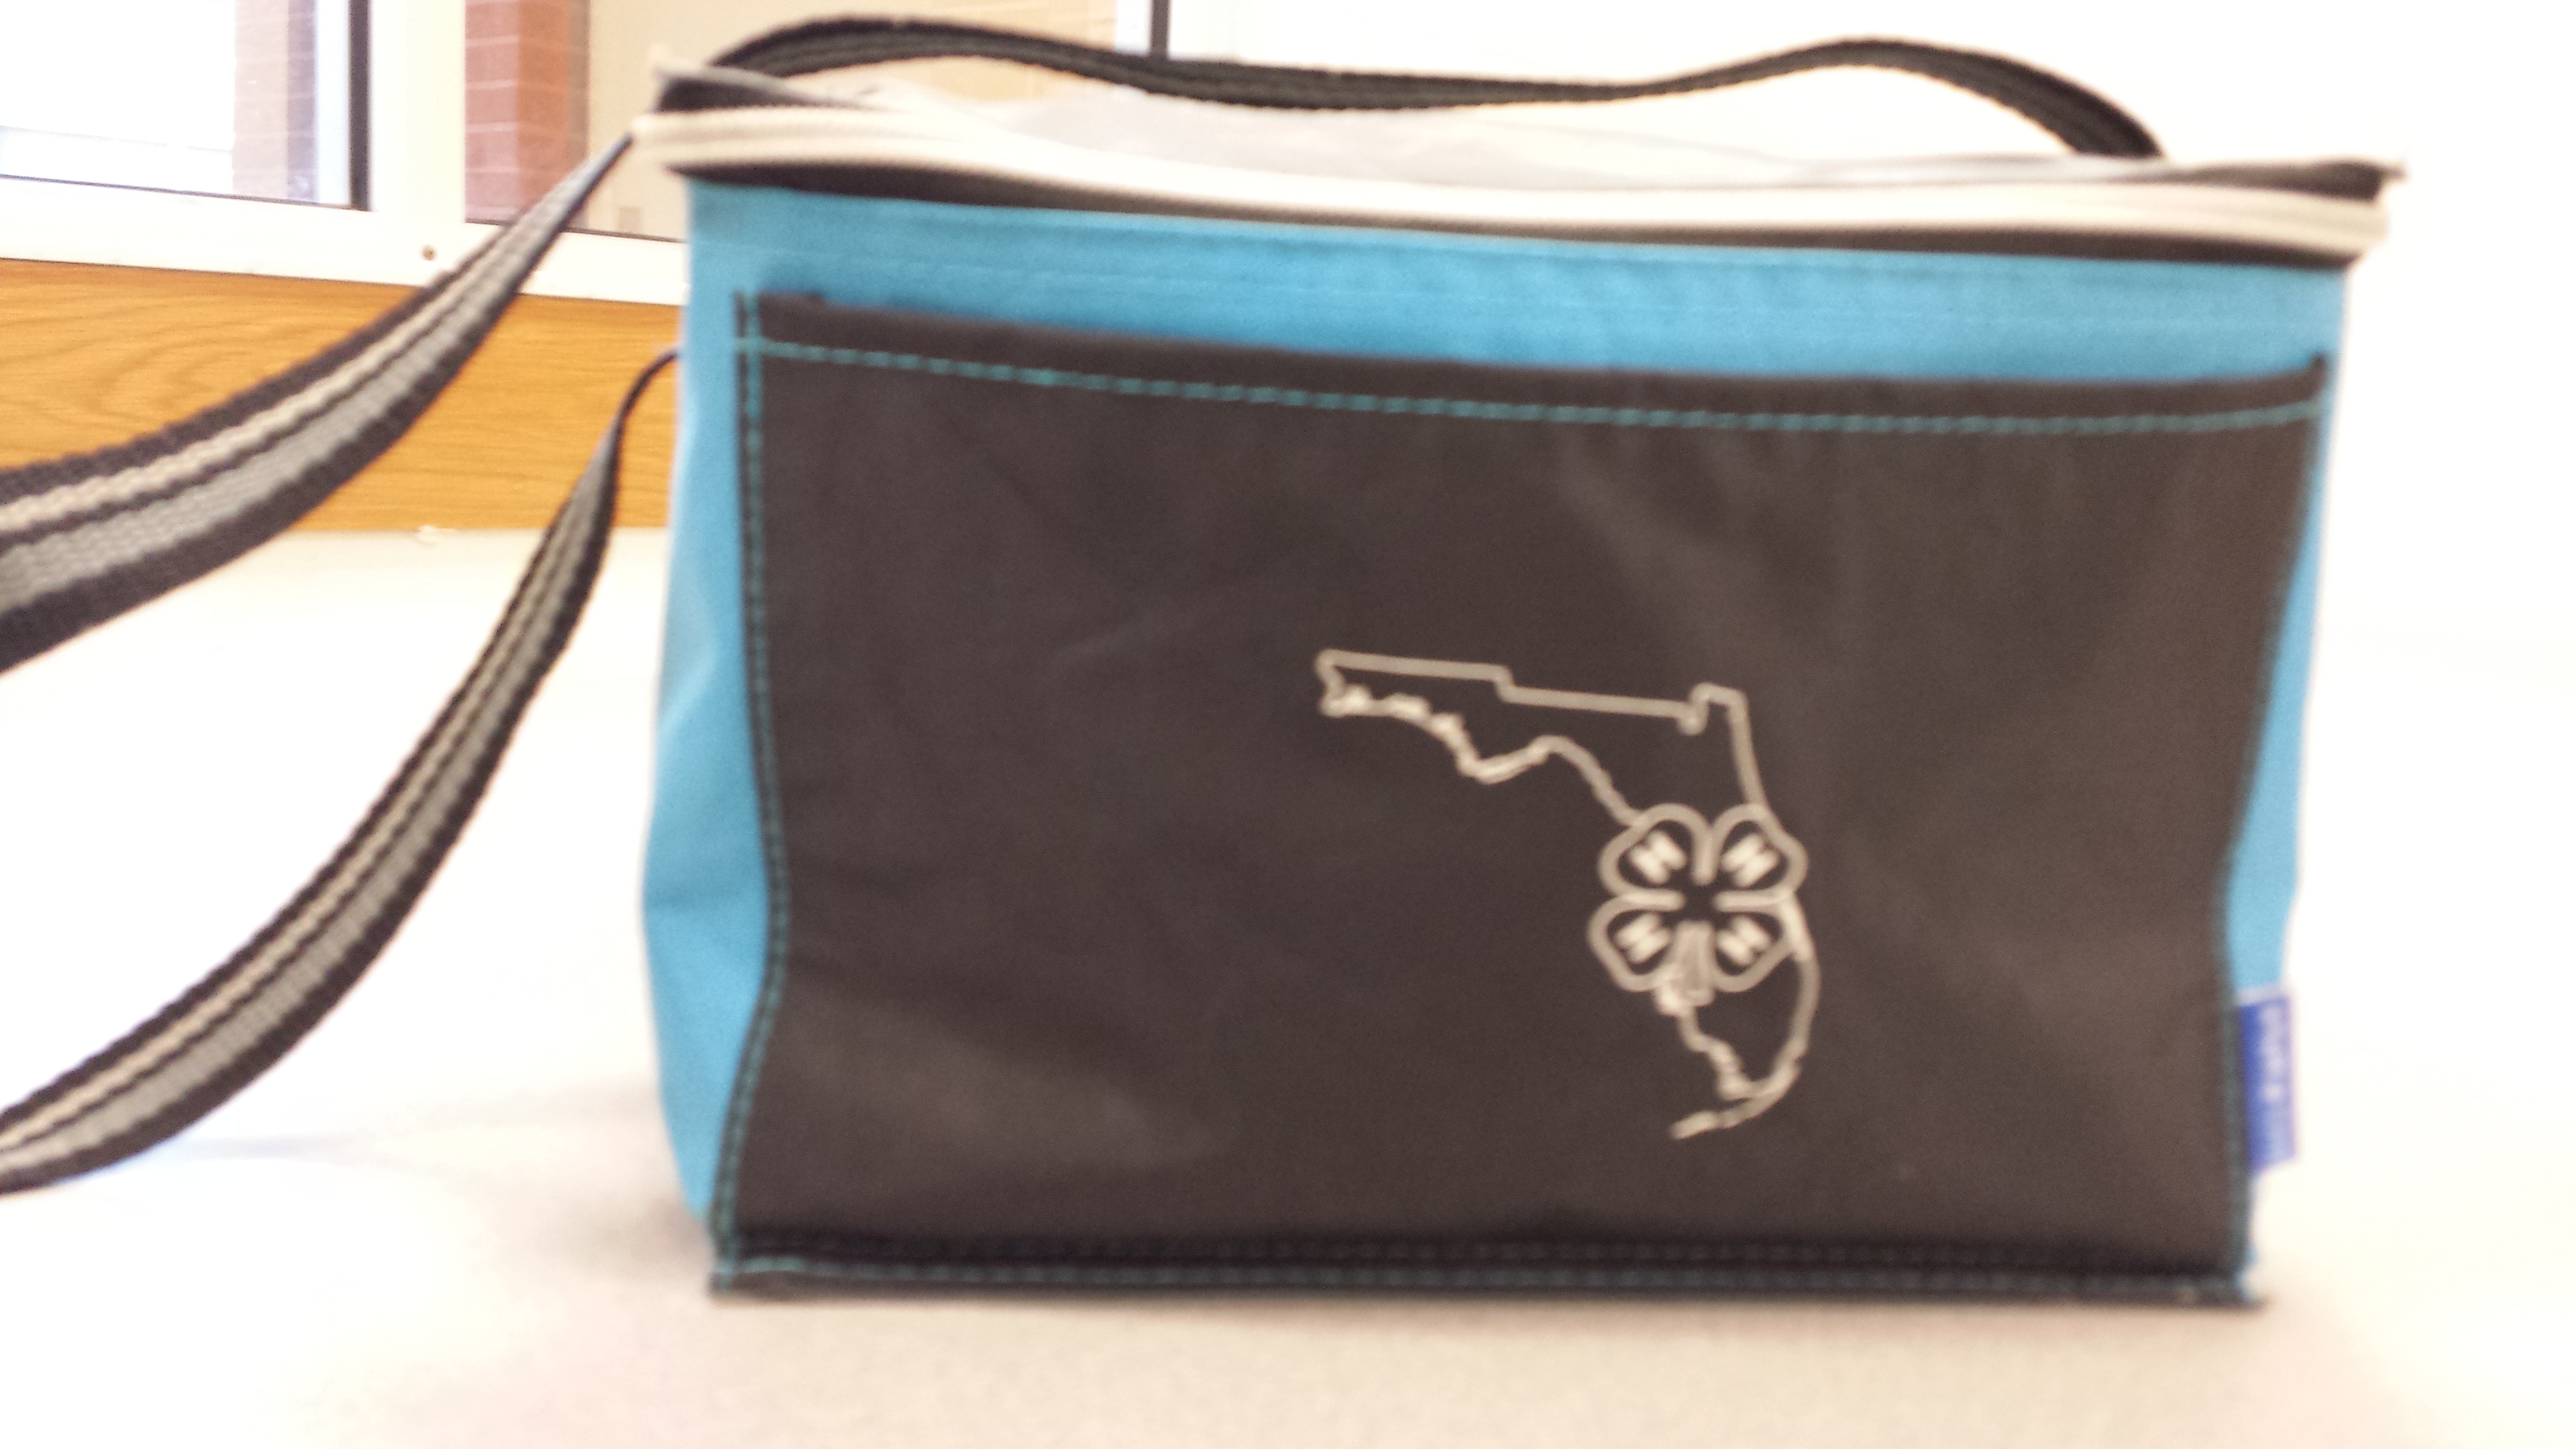
It’s all about the box- Allow your child to select a lunch box that they like, and preferably one that is insulated. You might also want to invest in plastic containers in a variety of sizes. A thermos is also handy for hot soups and pastas. When selecting bottles for beverages, make sure they are easy to clean and if you plan on packing milk to drink, an insulated bottle or a bottle with a built in ice pack is a must.
Many children are obsessed with pre-packaged lunchables, but not only are they expensive, they are not really filling for most children and often high in sodium. Making your own lunchables at home is easy. All you need are some dishwasher safe plastic containers with individual compartments (readily available at grocery and big box stores) and some creativity. Involving your child in planning and packing their lunch will encourage them to try new things and also teach them responsibility.
10 Home-made Lunchables to Try:
Basic- assortment of whole wheat crackers, cheese, and deli meats
Sandwich bar- whole wheat slider roll, cheese, deli meats, and condiments (try hummus or pesto for something different). Children LOVE to create their own sandwiches!
Sandwich on a stick- skewer cubed cheese, meat, bread, cherry tomatoes, and pickles onto a coffee stirrer.
DIY Pizza- ½ English muffin, sauce, cheese, and mini turkey pepperoni
Mac and cheese muffins- add ham and broccoli to your favorite mac and cheese recipe. Spoon into greased muffin tins and bake at 350 degrees for 12-15 minutes. These freeze well.
Sushi sandwich- whole wheat tortilla, layered with pesto, hummus, or other favorite condiment, and cheese and deli meat or left over rotisserie chicken. Roll up and slice into sushi rolls.
Snack tray- pack an assortment of fruit, nuts, cheese, veggies, and crackers.
Rice cakes with individual packs of cream cheese, hummus, or nut butters.
Pizza calzones- flatten a canned biscuit, and spread marinara and cheese. Fold in half, and use a fork to crimp the edges shut. Bake at 350 on a baking sheet covered with parchment paper for 12-15 minutes. Serve with additional marinara for dipping.
More tips:
Place purchased or homemade fruit cups in the freezer the night before. By lunch time, your child will have a frozen fruit slushy.
Dip sliced apples in pineapple juice to prevent browning- pineapple juice will not leave a bitter or sour aftertaste.
Spread a very light layer of whipped cream cheese on bread before making a mayonnaise based salad sandwich (such as tuna or chicken salad). The whipped cream cheese will prevent the sandwich from becoming soggy- a great tip if you make lunches the night before.
Substitute low fat vanilla yogurt for pudding. Add fresh fruit and granola for a “dessert” parfait.
Use cookie cutters to cut fruit and veggies into fun shapes for dipping.
Buy yogurt, canned fruit, pudding, and applesauce in larger containers, and then portion them out in re-useable ½ plastic containers. This can save you about 50% on individual size snack items and also will help reduce waste.
Have a theme for each day of the week:
o Monday- Sandwich day
o Tuesday- Wrap day
o Wednesday- Dip day (hummus and veggies, salsa, bean dip, fruit dip)
o Thursday- Salad day (fruit, pasta, chicken, or veggie salad)
o Friday- Thermos day (hot soup, mini pasta with marinara, mac and cheese)
Lunch Box Pantry Staples (buy extra when on sale to keep in your pantry or freezer):
Carbohydrates: whole wheat crackers, tortillas, slider rolls, loaf bread, bagel thins, rice cakes, pretzels, and pasta in fun shapes
Protein– nut butters, ham, turkey, chicken, boiled eggs
Dairy– yogurt, cottage cheese, deli cheeses such as mozzarella, cheddar, and Muenster
Fruit– fresh, dried, and canned fruit for fruit cups, parfaits, trail mix, and granola. Purchase canned fruit in light syrups if possible.
Veggies– keep a variety of your child’s favorite veggies on hand. Don’t be afraid to sneak in new ones every now and then for them to try such as a slice of avocado or roasted red bell pepper on a sandwich or wrap.
Condiments– stock up on condiments such as mayo, mustard, ketchup, marinara, hummus, pesto, and tapenade.
Sweets– it’s okay to sneak in some sweets every now and then. Animal and graham crackers, mini marshmallows, puddings, and homemade cookies are all good alternatives.
We hope that these ideas will help you live a healthier life this coming school (and 4-H) year. As your family prepares for back to school, don’t forget that the 4-H year will be coming to a close at the end of this month. Enrollment in Florida 4-H beings August 23rd. To re-enroll, visit: http://florida.4honline.com or contact your local UF/IFAS County Extension Office.
These days, children as young as kindergarten age can have homework. Getting your child to do homework during the hectic evening hours is frustrating for many busy parents, but setting up a simple homework center can make it easier.
Select a location for your child to do homework- an eating nook in the kitchen or at the dining room table are good ideas. Try to keep your homework center location clutter free, and well lit. If you have younger children, they may need a booster seat in order for them to sit at the proper height for writing. Remember that children (even teens) need supervision and assistance with homework, so planning a homework area in a common location is more convenient so that parents can also work on other tasks such as preparing dinner. If the homework center is set up in a bedroom or loft space, you will need to plan on checking in from time to time to monitor their progress. Younger children or children with learning disabilities will need additional, or more frequent help.
Gather Supplies– it is helpful to have a plastic cleaning caddy, tub, or recycled shoe box filled with supplies that your child might need for completing his homework, so that you don’t waste time looking for supplies each day. Recommended supplies include: pencils/pencil sharpener or mechanical pencils, erasers, colored pencils/markers, crayons, stapler/extra staples, index cards, highlighters, scotch tape, glue stick, dictionary, thesaurus, atlas or globe. Have your child decorate the caddy or box with stickers, paint, glitter glue, or other decorations.
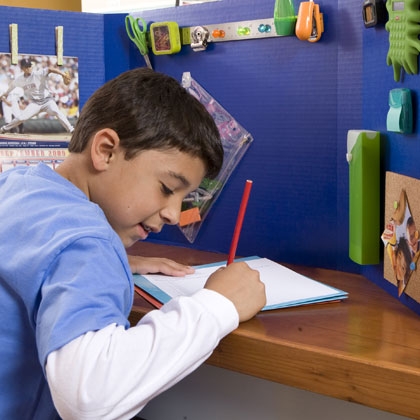
Limit Distractions– it is best to limit television and stereo/iPod during homework time. If you have more than one child, or a child with ADD/ADHD, you might also want to consider a study carrel. Study carrels limit distractions and help children focus on their work. Your child can help create a study carrel and customize it to his own needs with a tri-fold display board (readily available for less than $5.00 at office supply and big box stores). One display board will make two study carrels. Step by step instructions for creating one can be found online at: http://spoonful.com/crafts/homework-central courtesy of Family Fun Magazine.
Set up a Reward System– reward your child for getting their homework completed in a timely and neat manner. You can set up a sticker system for earning small prizes, TV or video game time, or even to see an upcoming animated movie or for a family bowling night.
As your family prepares for back to school, don’t forget that the 4-H year will be coming to a close at the end of this month. Enrollment in Florida 4-H beings August 23rd. To re-enroll, visit: http://florida.4honline.com or contact your local UF/IFAS County Extension Office.
Next Week: School Lunch and Snack Ideas that are “Out of the Box”
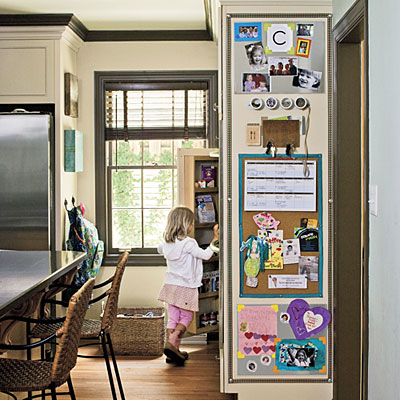
As summer comes to a close, many parents are overwhelmed getting ready for “back to school” let alone the new 4-H club year! Over the next few weeks, we will share some timely tips for busy 4-H parents so that you are less likely to miss a school event, practice, 4-H meeting, or deadline. One of the best ways to stay organized and on track is to have a home communication center.
The first thing you will need to decide is where to place your command center. It should be located in a well-traveled area of your home, such as a kitchen, entry way, den, or family room. You can use a blank wall space that you walk by several times a day, a corner of your kitchen countertop, or even a cabinet. There are lots of ideas on Pinterest and organizing blogs that can inspire you.
Once you have determined a location, consider which elements you want to include in your command center. Every command center needs at least three items:
Calendar– Some families have a calendar for each member of the family, but for smaller families, it is recommended to use one calendar and assign each family member a color, and write their activities in that color on the calendar. You can use a traditional paper calendar or a dry erase calendar. Remember that if you use a one-month dry erase calendar, you will need another calendar or space to put important future appointments.
Folders or cubbies– You can use wall mounted folders/magazine holders, or file folder holders that sit on a counter or desk. One folder per family member to contain important homework assignments, 4-H project information, receipts, bills, and so forth. Folders are not a permanent filing solution- they are only to contain information that is not ready to be filed, or information that that you need to access frequently such as a school lunch menu, or soccer practice schedule.
Message Board– Bulletin boards, dry erase boards, chalk boards, or magnetic boards work well for reminders, important phone numbers, directions to a birthday party, grocery lists, and other bits of information that you do not want to put in a folder or on a calendar. If you are limited on wall space, consider installing self-adhesive cork board to the inside of a kitchen cabinet located above or next to your command center.
Other items that you might want to include in your command center: chore charts, weekly/monthly menu plans, a hook for keys, backpacks, jackets, and a charging station for cell phones.
Last but not least, think about how you want your center to look. You can keep it very basic and functional, or you can design it to coordinate with the rest of the room’s décor/color palette. Much of the look and feel of your command center will depend on your budget. Many companies sell coordinating command center components in a variety of finishes that you can mix and match, but they are more expensive. A less expensive alternative is to purchase the individual elements that you need from your local office supply or big box store, and then paint them to match, or cover them with contact paper in a fun print or color. Your command center can be as simple or elaborate as you prefer- you are only limited by your creativity!
As your family prepares for back to school, don’t forget that the 4-H year will be coming to a close at the end of this month. Enrollment in Florida 4-H begins August 23rd. To re-enroll, visit: http://florida.4honline.com or contact your local UF/IFAS County Extension Office.

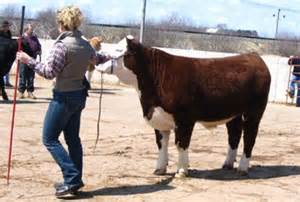 For 4-H members and spectators alike, livestock shows are one of the most anticipated parts of a fair. Preparing your animal for a show begins months in advance. Great care is needed in feeding your animal, practicing showmanship, and making sure your animal is healthy. After all the time and effort that goes into raising your animal, you want to make sure that you have everything you need once you arrive at the fairgrounds.