It is late summer and many of us enjoy being outdoors in the landscape and taking early morning walks before the temperature rises for the day. There are precautions to take while being outdoors and the activities as many insects are very active, including the yellow jacket. Late summer and many of us being outdoor brings us increases the change of being stung by this insect. The Yellow Jacket sting can be painful and potential dangerous to certain individuals with strong reactions to stings.
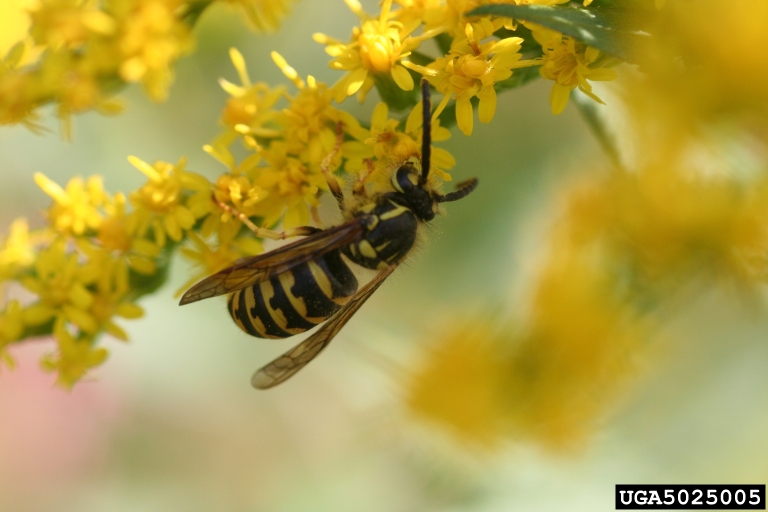
Yellowjackets are pollinators and eat caterpillar pests! Credit: Whitney Crenshaw, Colorado State University, Bugwood.org
In the State of Florida there are two species of this Yellow Jacket Wasp, the Eastern Yellow Jacket and the Southern Yellow Jacket. It is difficult to distinguish between them and for this article I will refer to them as Yellow Jackets. Yellow Jackets most often colonize in the ground and are often found in lawns that tend to stay dry, landscape beds and edge of woodlands. Colonies of this flying insect can grow into hundreds or even larger numbers. Often by observation in morning or evening light the entry and exit point of the nest can be see with some luck. It looks like an extremely busy airport with lots of landings and departures. The unfortunate way to find the nest can occur by mowing the lawn disturbing the nest with many yellow jackets emerging from the nest to protect it. The colony quickly goes into defense mode with vibrations occurring nearby. This has occurred with me on more than one occasion. All modesty can be lost while run away from the nesting area with several yellow jackets stinging you move quickly move away. Clothing has been known to be shed to hopefully remove the yellow jackets busily stinging either under or on the outside of clothing.
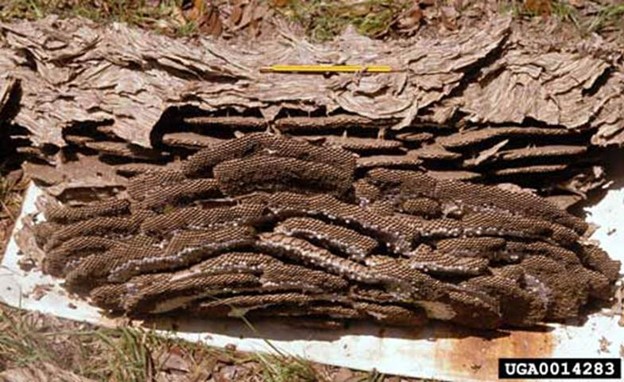
Southern yellowjacket, Vespula squamosa (Drury), nest dug from ground.
Credit: Gerald J. Lenhard; http://www.insectimages.org/
During the early part of the spring and summer season yellow jackets are busy foraging for protein sources to feed to queen and young larvae. During the consuming of the insects, with many of those harvested being harmful insects to plants. The yellow jackets derive their sugar sources from the larvae secretions as they consume the proteins provided. This is part of the reason we do not often see Yellow Jackets in late spring and early summer. As the queen begins to reduce the amount of egg laying, hence the less numbers of larvae to feed and harvest the sugar for a wasp population at its peak creates a more aggressive need to find alternate sources of sugar. This is part of the reason why yellow jackets show up in greater numbers at outdoor sporting events and other places to look for additional sugar sources. Sugar water for hummingbirds is another backyard site for yellow jackets to work hard for the sugar. Even the birds are careful about approaching the feeders.
I do not advocate the destruction of yellow jacket nesting sites unless they are in proximity to human activity as this can set the situation of stings and potential health challenges for people. If you identify a nest location do not approach and call a company that specializes in addressing these types of stinging insects. Keep in mind that this insect provides a benefit in harvest of many harmful pests to plants yet do pose a potential threat. Be observant as you garden situations that seemed fine last month may have changed quickly.
There are many considerations to make when landscaping with small trees (under 20 feet) in the landscape that are not suitable for large trees. Some of the trees discussed can at times be considered large shrubs depending on definitions and opinions. For the purpose of this article, if it reaches 15 to 20 feet consider it a tree.
Choosing small trees for the right setting involves a number of reasons that could include the need for more privacy from other homes, use as a sound barrier from busy roads, hiding your utility area of the landscape or something unattractive nearby and making sure power lines are not obstructed. Other considerations might include soil types, drainage and holding capacity of the soils, irrigation needs, rate of plant growth and maturity height at 20 feet. Below are a few to consider for the Panhandle of Florida.
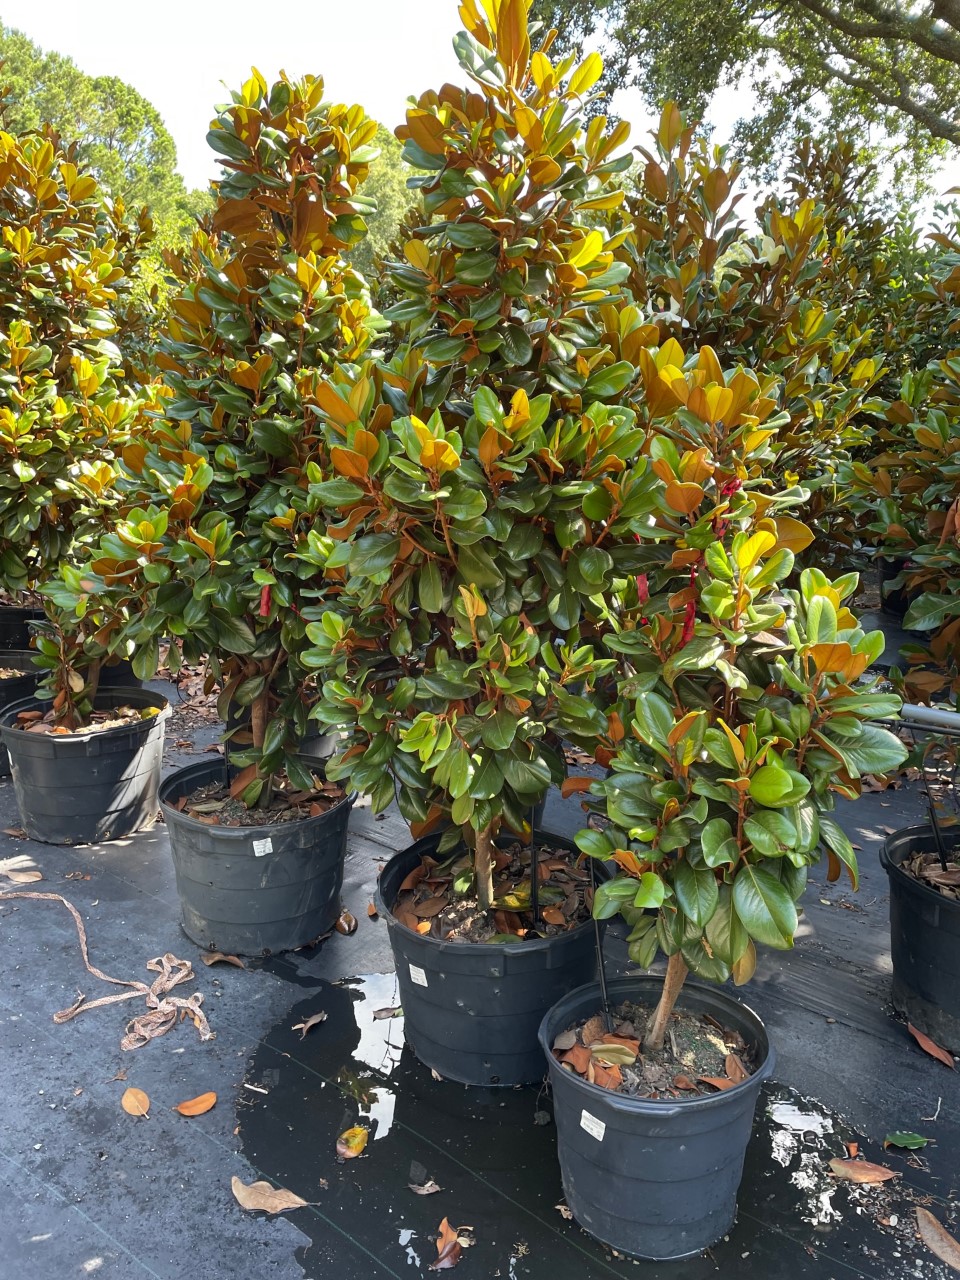
Little Gem Magnolia (Magnolia grandiflora ‘Little Gem’) and Teddy Bear Magnolia (M. grandiflora ‘Teddy Bear’) are strong hardy plants once established (within the first 6 months to a year). Both are evergreen with dark green foliage. The ‘Little Gem’ will grow to 20 feet tall by 15 to 18 feet wide. As it matures it tends to become more open and less dense which adds a nice character to show parts of the lower limbs. The ‘Teddy Bear’ will grow to 18 to 20 feet tall but at an even slower rate of maturity to 12 to 15 feet wide while maintaining its density of foliage from bottom to top. It may take a little work to locate the ‘Teddy Bear’ Magnolia.
Photo courtesy: Stephen Greer Teddy Bear Magnolia (Small compact grower)
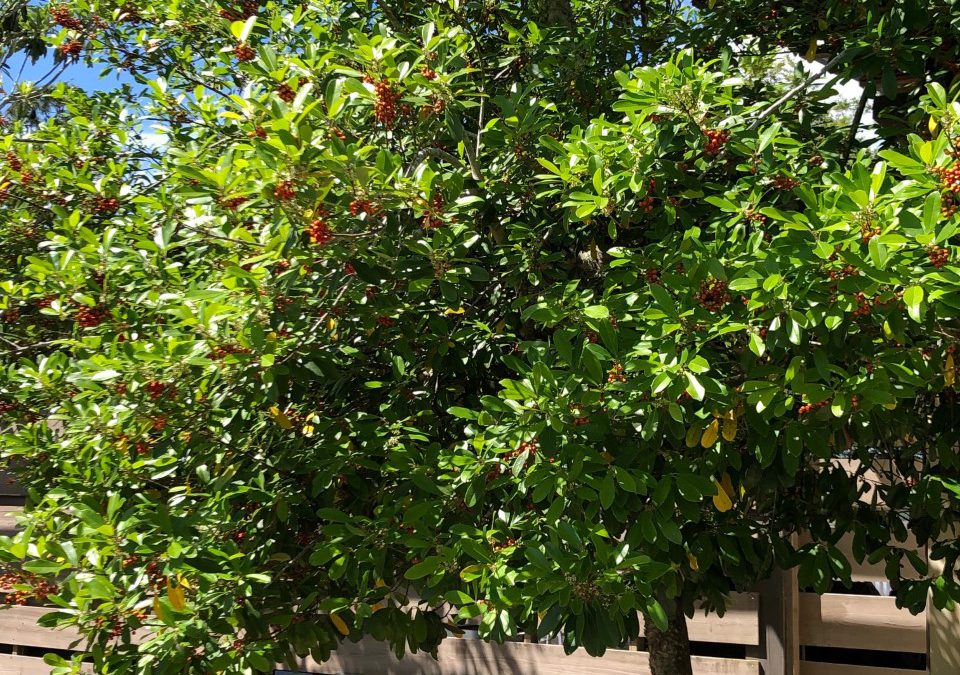
Several hollies to consider would include the Cassine Holly ‘Tensaw’ (Ilex cassine ‘Tensaw’) and American Holly (Ilex opaca). Both are evergreen and produce red berries during the fall that are bird favorites. They have similar heights of 15 to 20 feet and widths of 10 to 12 feet. Pruning can assist in shaping and slowing these measurements, but keep in mind this will change the look of the tree and create a more formal plant presentation.
Photo courtesy: Stephen Greer Cassine Holly ‘Tensaw’
The Fringe Tree (Chionanthus virginica) has been a popular tree southeast U.S. for many years. It brings a bright spot to the landscape with white flower panicles that cover the tree in mid to late spring depending on location. For a full color effect, plant it with an evergreen hedge behind it. This oval deciduous tree will grow to 12 to 20 by 10 to 15 wide. The dark blue fruit appears in the fall and serves as good bird food source. This fruit is usually hidden behind the foliage. There might even be a nice yellow leaf change in the fall if temperatures and weather allow.
Are you Firewise with your home landscape? We plan for many situations in our lives from homeowner insurance to maintaining the car to planning for the future. Planning for defensive space around your home should also be part of long-term planning to protect it from possible wildfires.
Landscaping adds value to your home and with proper planning, planting and management it can be the first line of defense against a potential woodland fire. The first step is to plan a defensible space between your home and woodlands. This will be your buffer to slow, redirect or stop the fire movement. This buffer area can be planned and planted into a beautiful setting for all to enjoy with correct plant choices and maintenance.
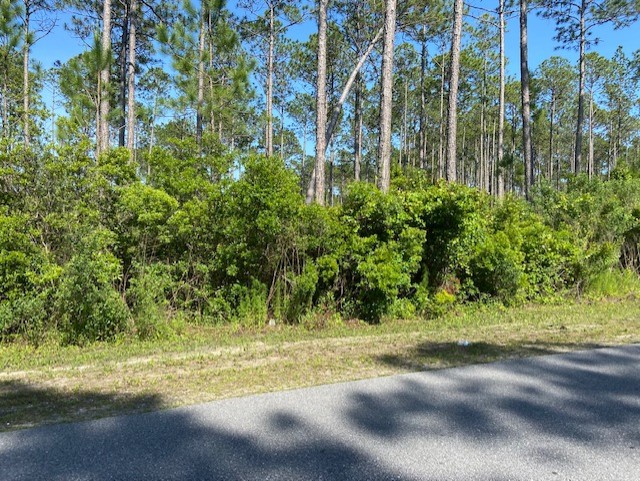
The minimum of 100 feet is recommended space from the house and other structures to woodland areas that may have dense understory growth. These are plants growing under tall tree settings including small young trees, shrubs, perennials and fallen limbs, leaves or pine needles.
Photo courtesy: Stephen Greer Firewise Landscaping Heavy Understory Plant Growth
Plant selection considerations to the plant’s flammability potential should be a significant part of this process. First steps will include preparing the soil site according to Florida Friendly standards making sure the plants have a healthy establishment and future growth. This allows for greater moisture retention within the plant. The need to identify and use plants with low flammability characteristics is important in many ways including going with plants that grow more slowly with reduced natural dead branch production. Look for plants with open branching and with less leaf density.
There are three defense zones to mitigate potential fires near the home or other structures. Plan according to these three zones.
Photo courtesy: Stephen Greer Defense Zones
The immediate zone is within the 5-foot area of the structure. This is the area most vulnerable to embers being dispersed by the wind. Regular general maintenance on and around these areas is important to reducing places embers can settle and begin a fire. Make sure the roof and gutters are inspected and cleaned on a schedule and after storm events. Keep flammable materials such as firewood or leaf piles out of this area. Install permeable and impermeable hard surfaces and other noncombustible landscape in this immediate zone. The materials in this area can be stone, walkways and others.
The intermediate zone is the 5 to 30-foot area from the structure. Plan this landscape area with plants properly spaced to reduce fire jumping from plant to plant assisting in slowing the fire movement. Maintain lawn and native grasses to reduce excessive growth that can dry during certain times of year. Prune or remove overgrown plants under or near trees reducing the chance of the fire moving up into the canopy of the trees. Driveways and paths can service as fire breaks along with patios made of non-flammable materials.
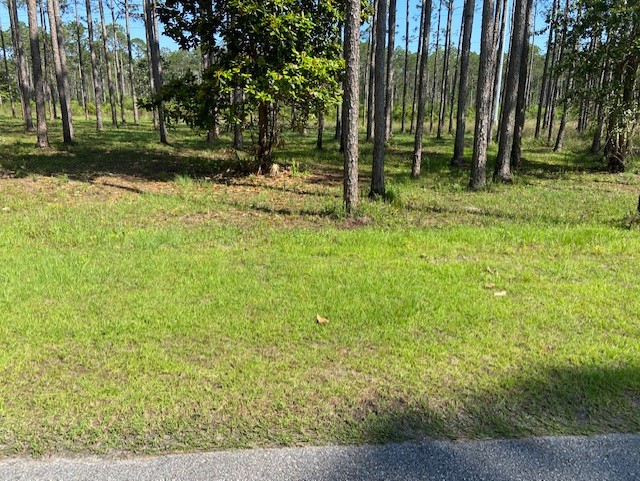
The extended zone is the 30 to 100 plus foot zone from the structure. Spacing trees and other vegetation to keep fires small and manageable is the key. Keeping flames low to the ground and separated provides the chance to make mini-fire breaks. Be sure to remove any fallen or low dead branches from this area.
Photo courtesy: Stephen Greer Firewise Mowing
Become involved in neighbor or community conversations about best practices to prepare for a potential future wildfire event. It often takes hard work and focus to accomplish nearly a lifetime of building a home and setting it up to how you like it. Build time to plan for defending it from potential wildfires.
We all must begin somewhere in horticulture, including growing yummy vegetables of your own to enjoy and share. This activity, or is it passion, has a long colorful history while most of the time provides an exceptional food source. It can be a bit daunting the first time you try and maybe even the others to follow with determining what, when, where and how to plant for a future harvest.
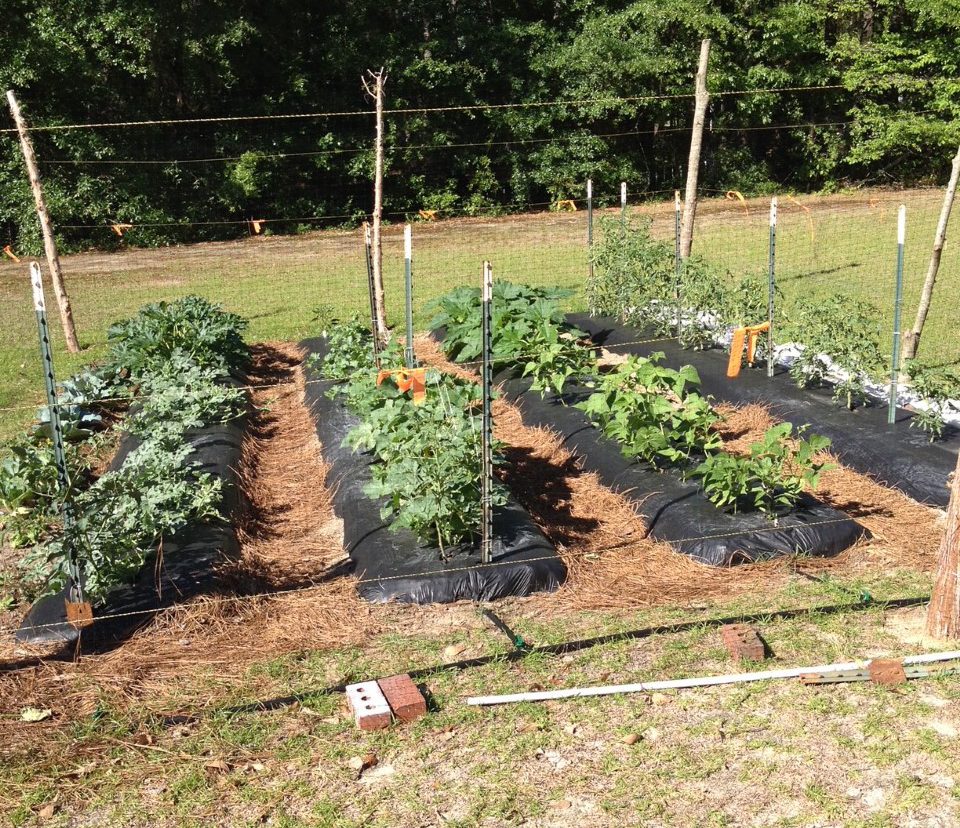
Raised Bed Vegetable Garden with Drip and Black Plastic. Photo Credit: Stephen Greer, UF/IFAS Extension – Santa Rosa
Selecting that convenient site in full sun easy with access to check on the plants progress. Things you will need to consider are the number of hours of direct sun the garden area will receive. Most garden vegetables will need at least eight hours of sunlight. Many of the leafy greens can be grown with less than eight hours with the least amount of sun at six hours. All others will need eight or more hours of sunlight. Water is a critically important part of successful vegetable garden. Too little water and the plants will not survive well and produce little and too much will reduce or end plant production. A general rule is one inch of water a week during the growing season. This can come from rain or irrigation and likely is a combination.
Mid-Spring Production with Managed Irrigation. Photo Credit: Stephen Greer – UF/IFAS Extension – Santa Rosa
Planning your garden before doing anything else is critically important. Take out a paper and pencil and sketch out how you want to plant your garden and what you want to grow. Start by drawing rows and labeling each row. Think about spacings between plants in the rows and between rows. Do you plan to plant everything in the ground, raised beds or on a trellis? More effective space utilization can occur by planting two- or three-foot-wide beds to plant multiple narrow rows that can be managed and harvested from both sides of the bed. Some plants to think about growing this way are leafy greens such as lettuce, kale, onion and others.
Going vertical to grow vine type plants like beans, cucumbers, early spring peas and others can be a fun part of gardening. This type of gardening allows for more space use over the same ground area. Other plants can be grown in the same bed depending on the light.
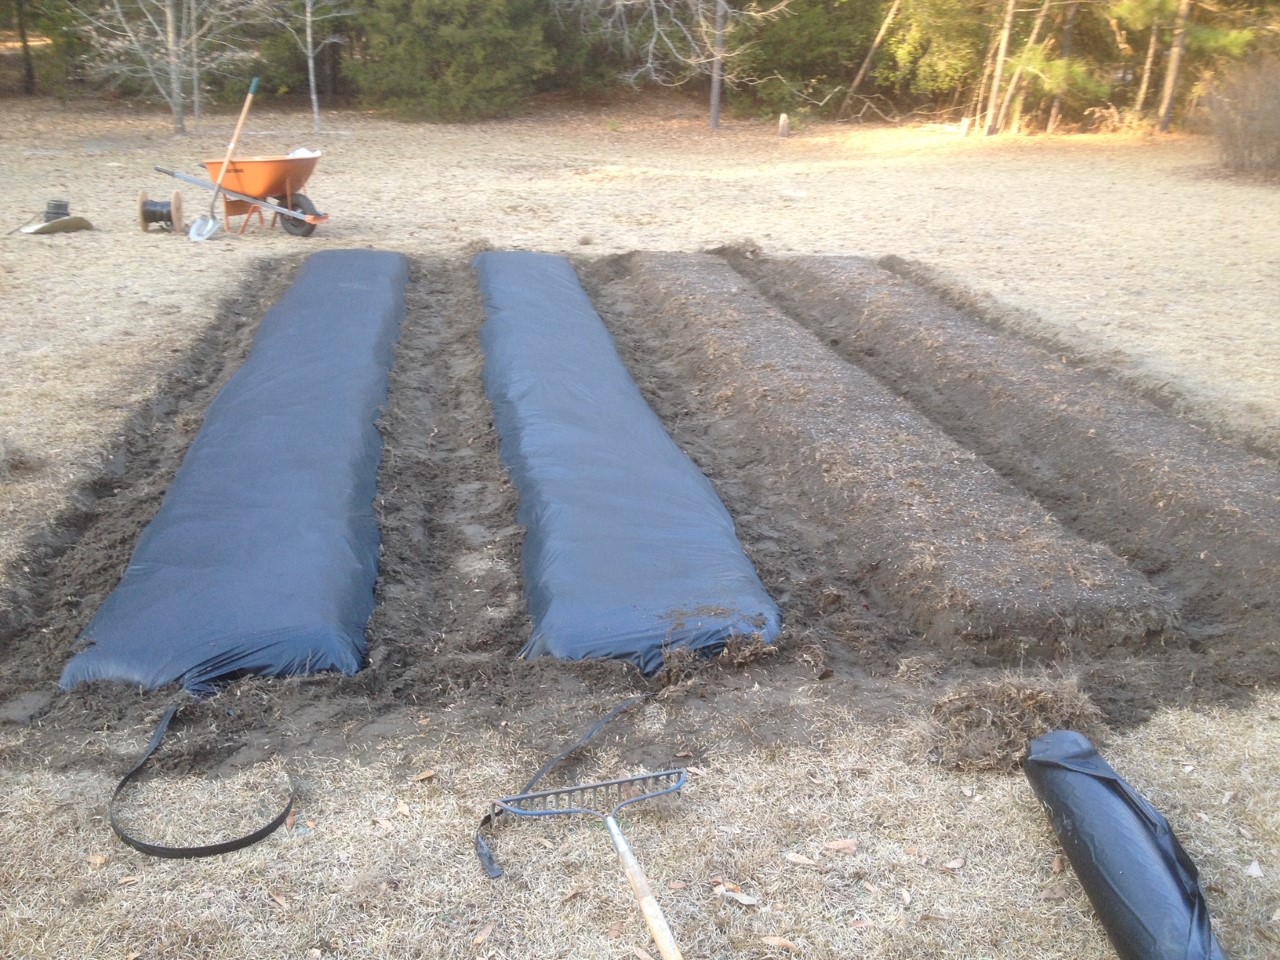
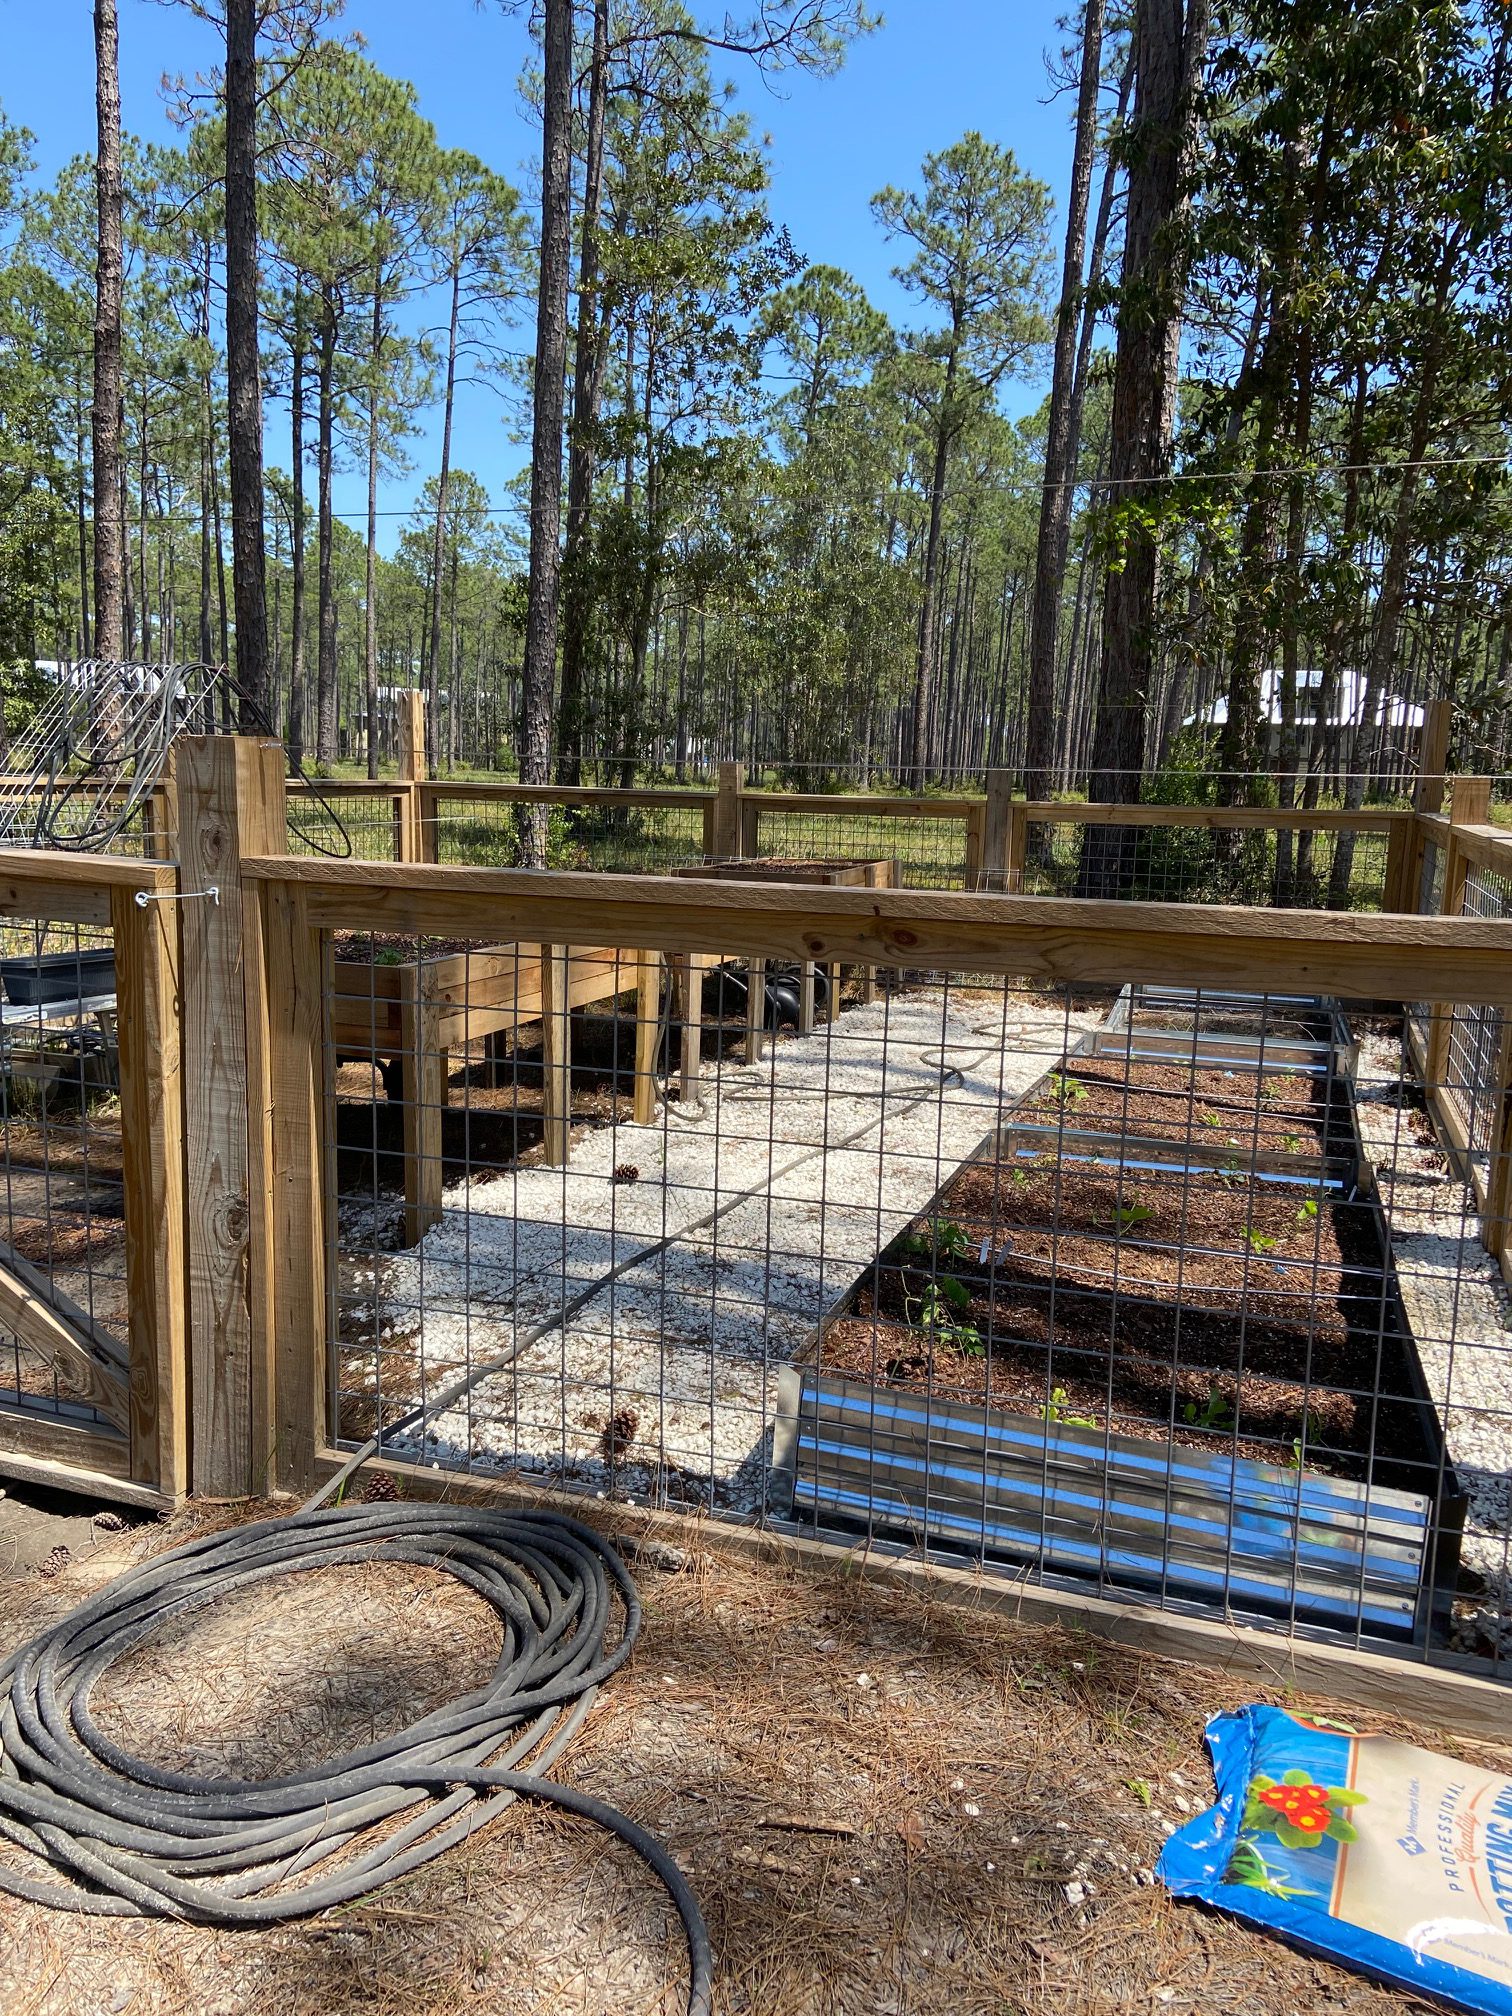
Multiple Types of Raised Beds. Photo Credit: Stephen Greer, UF/IFAS Extension – Santa Rosa
If you have interest in growing with raised beds, there are a number of materials that are used to build the beds. First do not use old railroad ties as they will leach chemicals into the soil that the vegetables can possibly take up or contaminate your soil. I have seen all kinds of creative materials used including cedar wood, plastic boards or preformed beds, even old whiskey barrels with legs built under. Do not forget all kinds of planting containers are available in the marketplace. Make sure there are drain holes in the bottom to allow the water to properly move through.
This is just the beginning of vegetable gardening. Other things to plan involve when to plant, what to plant, what is the budget, use seeds or transplants, depth of planting, watching for plant pests, harvest, storage and so on. Enjoy your gardening adventure!
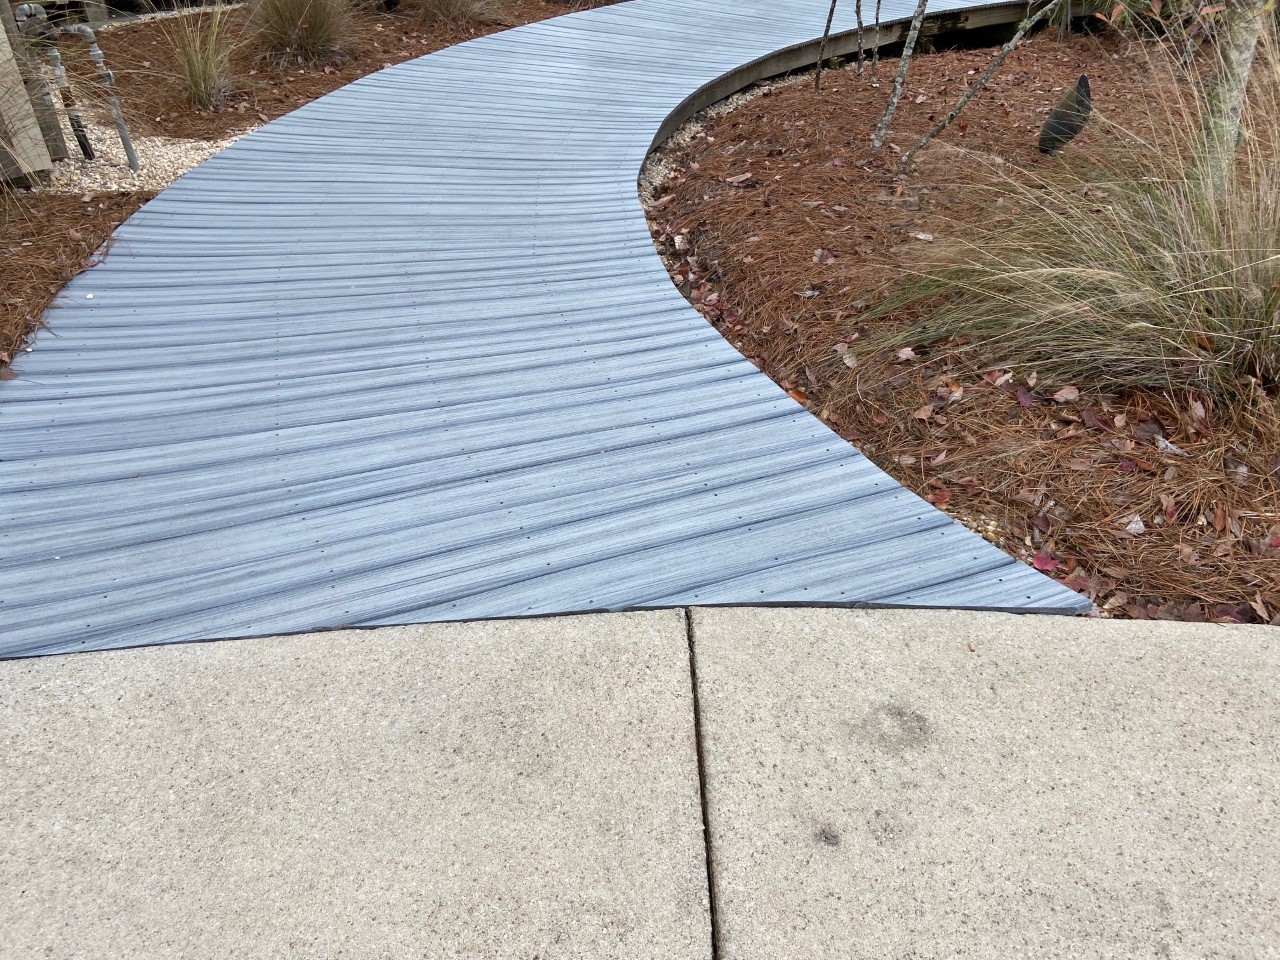
There are multiple ways to creatively construct avenues for foot traffic to areas in your landscape, community and public access areas. Over the years I have observed and enjoy many walks that curve and snake around well landscaped corners either created or provided by nature. Paths and trails can provide educational opportunities, recreation, observation points, food collection and water management. 
Designing a path, trail and walkway can happen with the eye and adventurous mind, paper and pencil, by a professional landscaper or landscape architect. Just remember these walkways can be changed and redirected if the environment in which they are set changes. Trails and paths should be determined and installed by the interests and needs at hand. Always remember to plan for who may visit these wonderous settings. Will this be a place for adults, high energy youth, or individuals with disabilities? Access to these areas may be challenging with transitions from walks to bridges, elevation changes, wet areas and others. Clearly determining the purpose of these areas is important and needed. Include others in the conversation and planning for a broader look and understanding to determine the scope of the project.
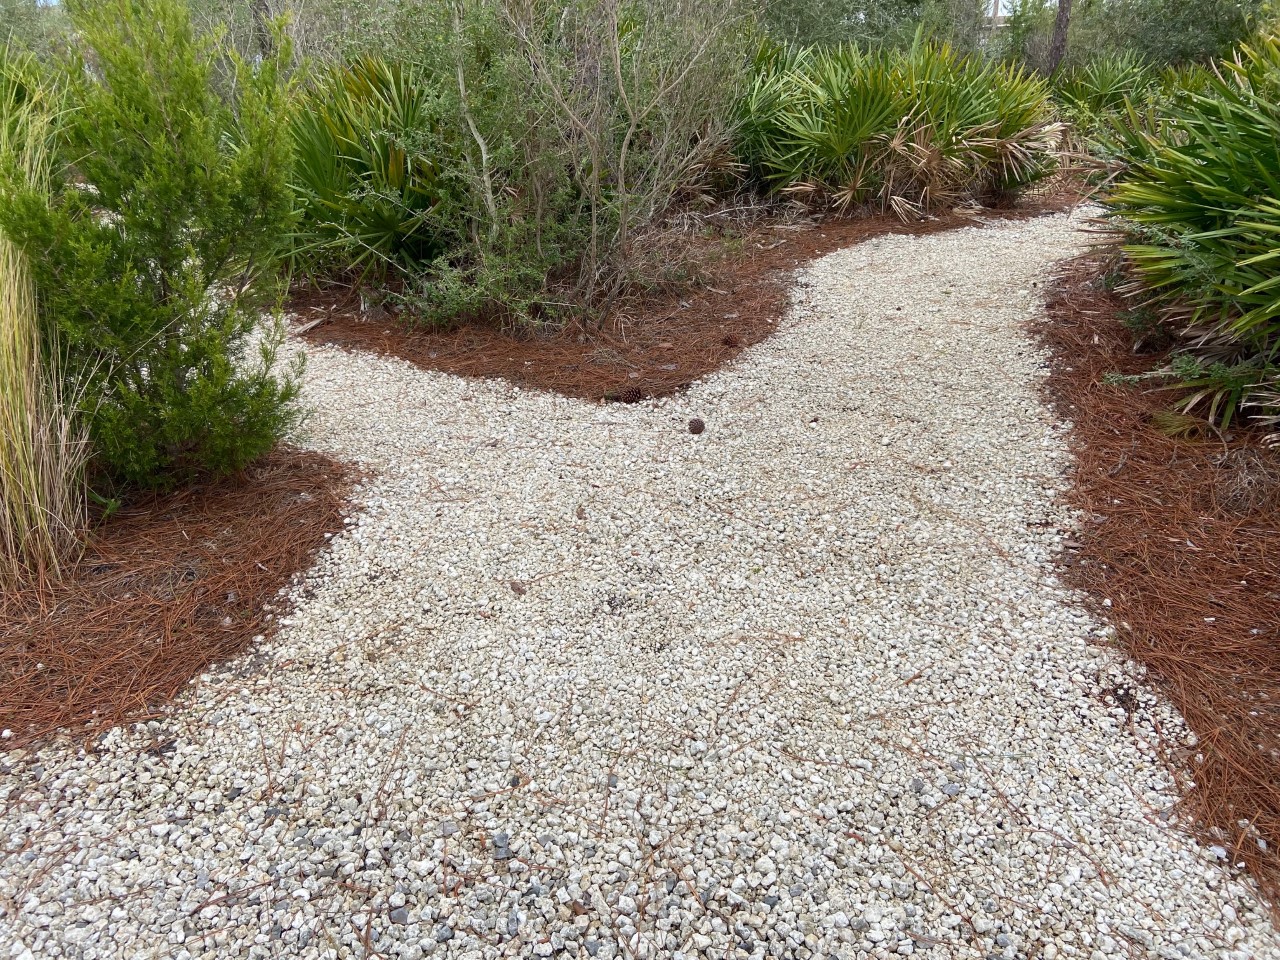
Photo courtesy: Stephen Greer, Santa Rosa Couty
With past history of marking bike, walk and running trails this is the time of year to walk the area that will become these adventures followed by planning, construction and completion before the hot weather of summer. Identifying and locating features to be included on a plat for these pathways must occur early in the process. Flag plants and strategic areas to save and highlight as a part of roughing out the path. Use signage to direct or educate. Will the walk be on a loop back to the same location or lead to other areas? All of this is a way to lead visitors and yourself to the next best point to enjoy. Jot down notes and pencil a drawing of the area with all of these observed and planned spots. Seasonal changes in the landscape along these paths are important to keep in mind and could include early emergence of flowers, spring leaves on many trees, shrubs and perennials.
Keep in mind some root removal may be needed to properly prepare the pathway subsurface, so be careful where you select a path location to reduce the impact on existing tree roots. Enjoy your gardening adventure of hardscaping!
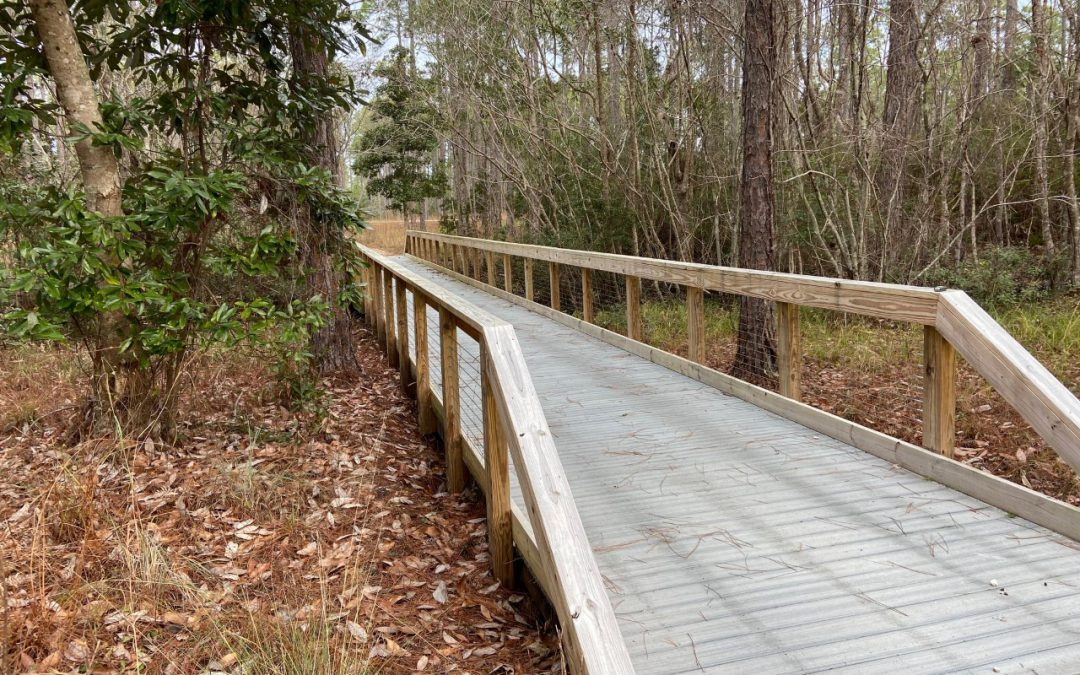
Photo courtesy: Stephen Greer, Santa Rosa County
The strenuous part of paths and trails is the construction involving plant removal, pruning and establishing a subsurface material before placing the final layer material to walk, run or bike on. Check for clearing heights that will not create high obstructions for the head by walkers or bikers. Some of this work may require the use of a tractor and rotary implement to till the walk area before placing the base material. Be careful in selecting the appropriate final path material that reduces the chance of slipping on or tripping visitors. Enjoy the journey, as a coworker and friend would always close with.