by Joshua Criss | Dec 26, 2025
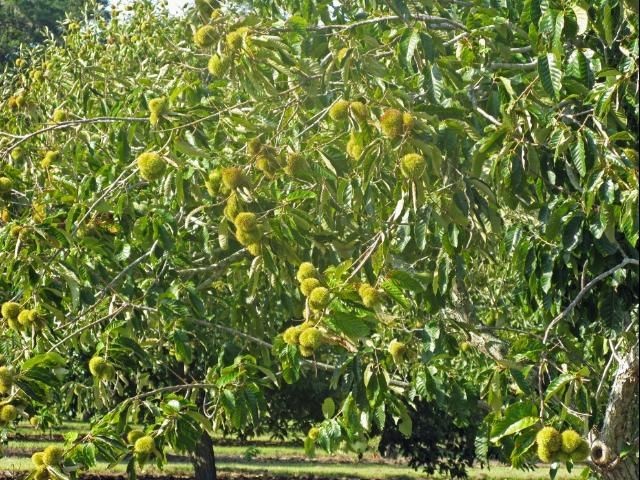
Christmas is a season rife with horticultural significance. Extracts from the Boswellia and Commiphora myrrah trees were presented at the nativity as frankincense and myrrh. Holly (Ilex spp.) and Ivy (Hedera spp.) are common in decorations, and a huge number of spices are used to flavor our favorite dishes of the season. Without plants, Christmas just would not be quite the same. One plant made famous thorough “The Christmas Song” sung by Nat King Cole is the humble Chestnut tree (Castanea spp.).
UF/IFAS Photo
A Brief History
Chestnuts once grew prolifically throughout the United States. They were prized rot resistant lumber produced alongside their staple nut crop. Further they were a critical resource for wildlife providing a food and shelter resource. This all came to crashing halt in the early 1900’s when a fungal blight took hold all but eliminating them from America’s forests.
Hybridization has brought this tree back into relevance. American Chestnut (C. dentata) and Chinese Chestnut (C. mollissima) has provided reinvigoration this tree’s once known potential. The reason is that the mixed genetics of this hybrid provide resistance to the blight while providing the products for which this tree is known.
Growing These Trees
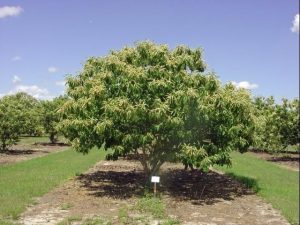
Chestnut trees are known to grow upwards of 40 feet tall and wide. Keep in mind that these plants are monoecious, meaning you’ll need two if you would like a harvest. For this reason, you’ll really want to implement the concept of right plant, right place as they will take up a lot of real estate.
Though they prefer acidity, a wide array of well-draining soils will suffice. That said, these trees will appreciate some active irrigation beyond that required to establish the tree.
As all Extension professionals will tell you, fertilization should be planned and executed based on soil testing. It is common though to apply one pound of a 10-10-10 fertilizer per year of tree age up to 15 years.
Growing this way, you can expect these trees to bear in roughly five years. Nuts will be produced on the new wood where branches maximize sunlight interception. Therefore, pruning for this will produce the highest yield.
UF/IFAS Photo
Pest Concerns
There are minimal pest concerns with chestnut trees. The main concern is Chestnut blight, which has been largely mitigated through hybridization. There are some other concerns, but these again can be mitigated through cultural practices. Keeping the areas under these trees clean will deny overwintering habitat to any insects while appropriate irrigation will greatly reduce the risk of any fungal infections. If managed appropriately, the biggest pest you’ll find near these trees is squirrels and deer seeking to deny you a harvest. As always, the only real way around this is physical barriers.
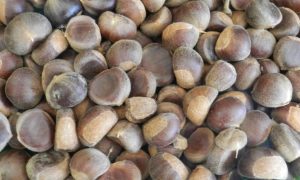
Chestnut trees are certainly worth a second look in your landscape. New hybridization has brought these back into the spotlight. With both wood and edible nuts they are certainly one that you should consider for your property. Done properly, you’ll soon be roasting chestnuts on an open fire as Nat King Cole suggested many years ago. As always, for more information on this or any gardening topic, call your local extension office.
by Daniel J. Leonard | Dec 4, 2025
My previous article outlined the benefits of planting trees during the winter dormant season. Once planted, it’s then time to implement one of the best practices that helps ensure successful establishment of recently installed trees and shrubs – mulching.
Mulching, by definition, is simply the process of adding a layer of material over the top of the soil. Like planting at the right time, mulching does many great things for your landscape. Mulching helps moderate temperatures; the soil stays warmer in the winter and cooler in the summer. Mulching increases water retention; when the sun isn’t blasting directly onto the soil, it dries out much more slowly. Mulching reduces weed pressure; most weed seeds require sunlight to germinate. Etc. Etc. The benefits of mulch abound. But what material you use and how you apply mulch figure heavily into whether your mulch helps or harms the plants whose roots it lies over.
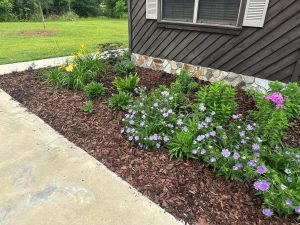
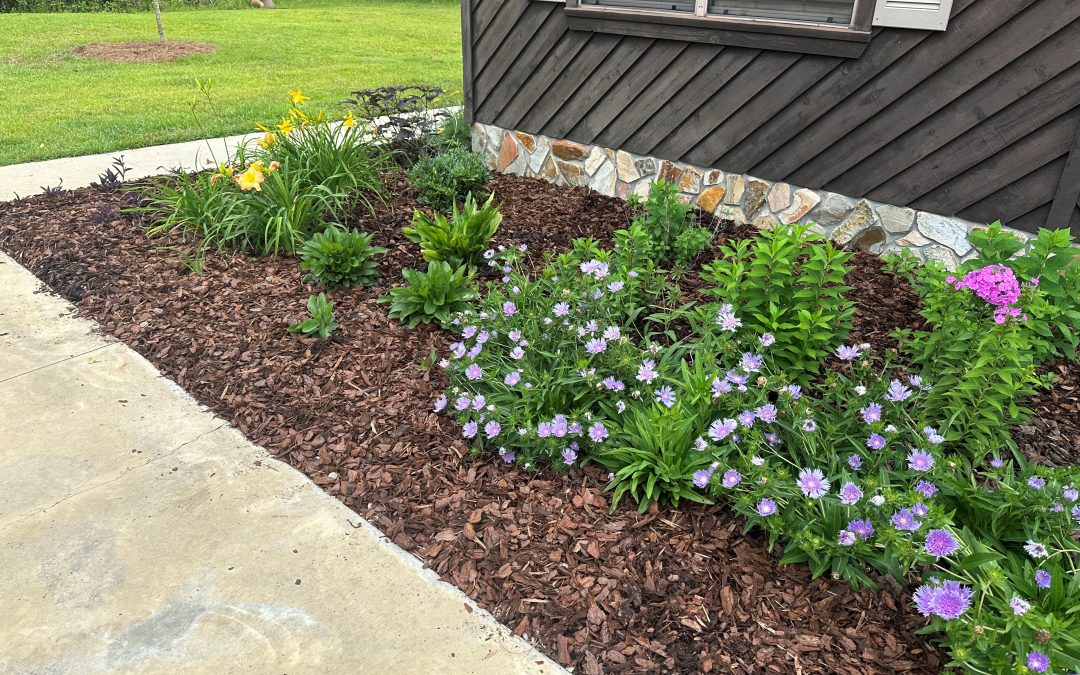
Pine bark mulch applied correctly in a landscape. Photo courtesy of Daniel Leonard.
There are two basic options when considering mulch: organic or inorganic sources. In general, you should always select an organic mulch that is derived from local sources. Organic mulches are mulches derived from natural materials like pine straw, leaves, tree bark, or shredded wood chips. These mulches break down over time and benefit soil health through bettering water holding capacity, increasing soil porosity and organic matter content, and drastically expanding the soil biome (beneficial worms, fungus, and bacteria that live in the soil). Organic mulches also allow landscapes to blend in with the natural areas surrounding homesites as they typically use materials found in local ecosystems. For example, in the coastal south, pine forests dominate, pine straw is plentiful, and purchasing usually supports local businesses that grow, harvest, and market the straw. So, unless you happen to live in a desert environment where rocks are natural, steer clear of rocks or other inorganic mulches.
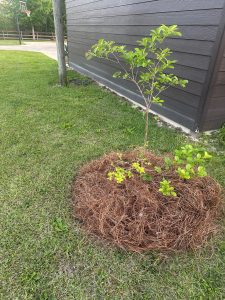
Pinestraw mulch applied around a newly planted tree. Photo courtesy of Daniel Leonard.
As with most things, there is a Goldilocks zone for mulch. Too little isn’t enough to keep weeds from easily poking through and soil from quickly drying. Too much and you risk depriving plant roots from oxygen exchange with air above, trapping too much moisture and causing rot issues, or even creating a hydrophobic layer of dried mulch that repels rainfall and irrigation. Instead, just the right amount of mulch should be applied, enough to create a 2-3” layer of helpful mulch. With some mulches like straw, this may mean applying a 6-8” layer that will settle down to the magic 2-3” number with a good rain, interlocking the individual pieces of straw. With others like wood chips or bark nuggets, there will be little settling, and the applied amount should be 2-3” deep. A final tip is to always pull mulch back a little from the crowns of plants and the trunks of woody trees and shrubs to prevent potential disease issues.
So, after you install your new landscape plants this winter, remember to mulch well. Be sure to select an organic mulch that supports local industries, enhances the soil in your landscapes, protects your plants’ roots, prevents weeds, and looks natural! For more information about mulch or any other horticultural topic, contact your local UF/IFAS County Extension Office. Happy Gardening!

by Daniel J. Leonard | Nov 26, 2025
With cold temperatures having arrived in the Panhandle last week, we’re finally getting close to prime landscape planting season. But why is winter the best time to install landscape trees and shrubs? Shouldn’t we plant when things are leafed out and growing? While it’s counterintuitive to think bitter cold, dreary days are significantly better to plant landscape plants in than the warm, sunny days of summer, it’s usually true! Let’s explore why winter is the time to plant woody trees and shrubs and then look at some of the best woody plants no Panhandle landscape should be without.
Most people from elsewhere think that Florida is always lush, green, and tropical. Those people have clearly never been to the Panhandle – heck it snowed last year! Our region of Florida has more in common, climate wise, with the rest of the south – subtropical with long hot, humid summers and wet, mild winters (though rain has been hard to come by recently), occasionally wracked by intense cold fronts. Because of those cold fronts, tropical plants cannot survive, and woody plants enter a dormant stage where above ground growth ceases. This cold-forced dormant season is the perfect time to plant woody plants because the planting process is stressful (the root system is purposefully damaged to remove circling and J-shaped roots and encourage outward growth) and regular rainfall and cool temps means conditions are right for plants to get a solid root system re-established before growth and transpiration begins in the heat of spring/summer.
Now that you know why we plant woody landscape plants when we do, let’s select a few quintessential, versatile Florida-Friendly trees and shrubs (2 each, one native and one non-native) to install in our landscapes this planting season.
Nuttall Oak (Quercus texana) is one of the most adaptable landscape trees around. The species is tolerant of many soil types, native to moist bottomland areas but tolerating drier spots well once established. While it’s a large tree – up to 70-80’ tall, I find its rounded upright habit to often be more in scale with landscapes than the wide spreading Live Oak (Quercus virginiana). Nuttall Oak certainly has many positive attributes (tough, wind-resistant, pollinator friendly, etc), but its fall color is probably my favorite. For the Panhandle it is quite good, delivering autumnal hues of red and orange.
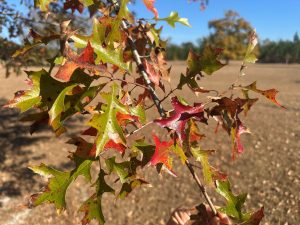
It’s not North Carolina Sugar Maple color but Nuttall Oak possesses attractive foliage. Photo courtesy of Daniel Leonard.
Crape Myrtle (Lagerstroemia indica) is the most widely grown landscape tree in the South for good reason! They’re tough, widely adapted, offer excellent summertime flower displays, and possess interesting architecture and unique bark. The primary consideration with Crape Myrtle is simply picking the right one. Do you need an upright, compact tree? Choose ‘Sioux’ or ‘Apalachee’. Do you want a big crape that can double as a small shade tree? Choose ‘Natchez’ or ‘Muskogee’. Do you want a new dwarf variety or one with black foliage? There’s now plenty of those to choose from as well. There’s truly a Crape Myrtle for every yard.
Oakleaf Hydrangea (Hydrangea quercifolia) is a wonderful native flowering deciduous shrub that’s at home in all Panhandle landscapes. It prefers moist soil with a little afternoon shade but can tolerate most conditions thrown at it. Growing 5-7’ in height, sporting footlong white flower panicles each summer, and beautiful foliage each fall, Oakleaf Hydrangea is a must. You can find unnamed seedlings of the species or look for named varieties such as ‘Snow Queen’, ‘Semmes Beauty’, and ‘Alice’. In my experience, you can’t go wrong with any of them.
Camellia Sasanqua is without a doubt my favorite fall flowering shrub. Impossibly durable (it’s common to find specimens over 100 years old), incredibly beautiful in flower and form, and coming in all shapes, sizes, and flower color, a Sasanqua of some kind belongs in ever yard. A few of my favorites are ‘Leslie Ann’ (upright form, white/pink bicolored flowers), ‘Shi Shi Gashira’ (dwarf that makes an excellent informal hedge), and ‘Yuletide’ (compact plant with red flowers & showy gold stamens).
So, as the weather continues to be mild with those cold front swings occasionally and rain begins to be more regular, think about getting some woody trees and shrubs planted into your landscape this winter. Keep in mind the excellent above selections and be sure to check out the Florida-Friendly Landscaping Plant Guide for more possibilities! Happy Gardening!
by Evan Anderson | Nov 20, 2025
Talking about a live oak might bring to mind pictures of grand, old, stately trees, limbs dripping with Spanish moss. The Southern live oak is a staple of the coastal south, but it prefers to live inland from our beaches. It leaves the salt-sprayed beach sand to its cousin, the sand live oak.
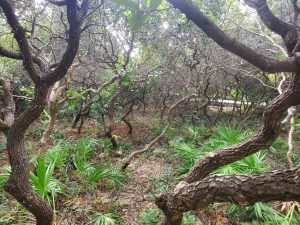
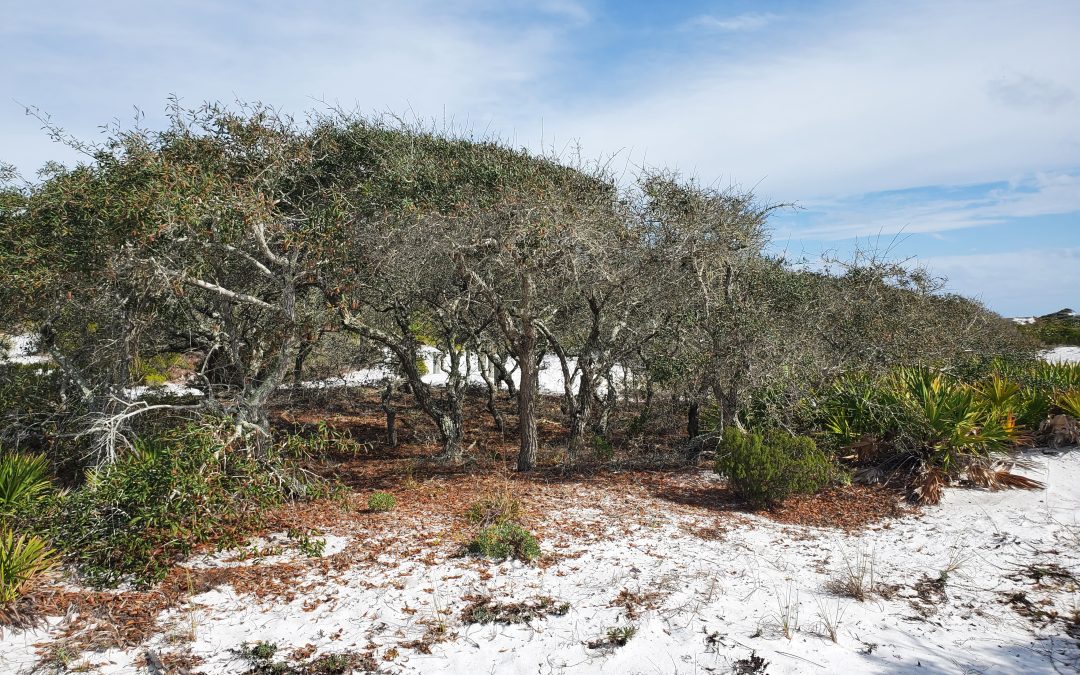
A grove of sand live oak trees.
Sand live oak can potentially grow as tall as its relative, but is rarely seen reaching such heights. Growing on beach dunes, it is constantly pruned back by the wind and sometimes remains as a low shrub. When given some relief from the elements, it will happily grow taller.
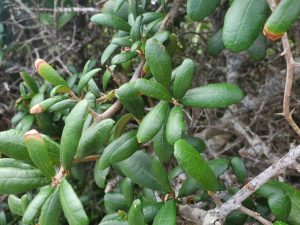
The leaves of a sand live oak.
Its scientific name, Quercus geminata, comes from latin, meaning ‘twinned‘. This refers to its acorns, which are typically borne in pairs. The tree’s leaves are tough, leathery, and relatively small, with the edges curled downward. The bottoms of the leaves are gray to whitish, often with a fuzzy texture to them. While the sand live oak stays green all year, it does drop its leaves in the spring and immediately replaces them. It often grows in clusters, sometimes due to its ability to regenerate from its roots after a fire. This can lead to groves of wavy, leaning trunks that spread out widely, each reaching for its own patch of sunlight.
Very little seems to harm a sand live oak. They are sturdy in intense wind, able to withstand extreme drought, tolerant of salt spray, and do not mind intense sun and blazing hot temperatures. They are usually pest and disease free, though overwatering can damage their roots and cause dieback in the above ground parts.
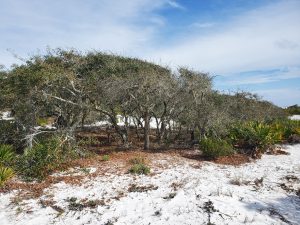
Sand live oaks pruned by salt spray and constant wind.
Potential drawbacks of this species include their copious pollen production, and their tendency to stain surfaces with their tannin-rich leaves and acorns. In all, however, they are incredibly hardy and beautiful trees when planted in their native habitat. They require little to no maintenance and offer benefits to wildlife, who will snack on their acorns. For a shade tree near the beach, make sure to put the sand live oak at the top of your list.
Evan Anderson
Walton County Horticulture Agent
by Ben Hoffner | Sep 11, 2025
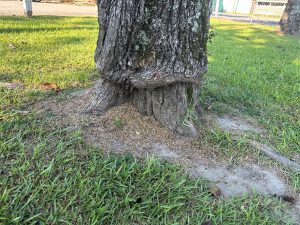
Photo credit to Daniel Leonard, Calhoun County Extension Agent
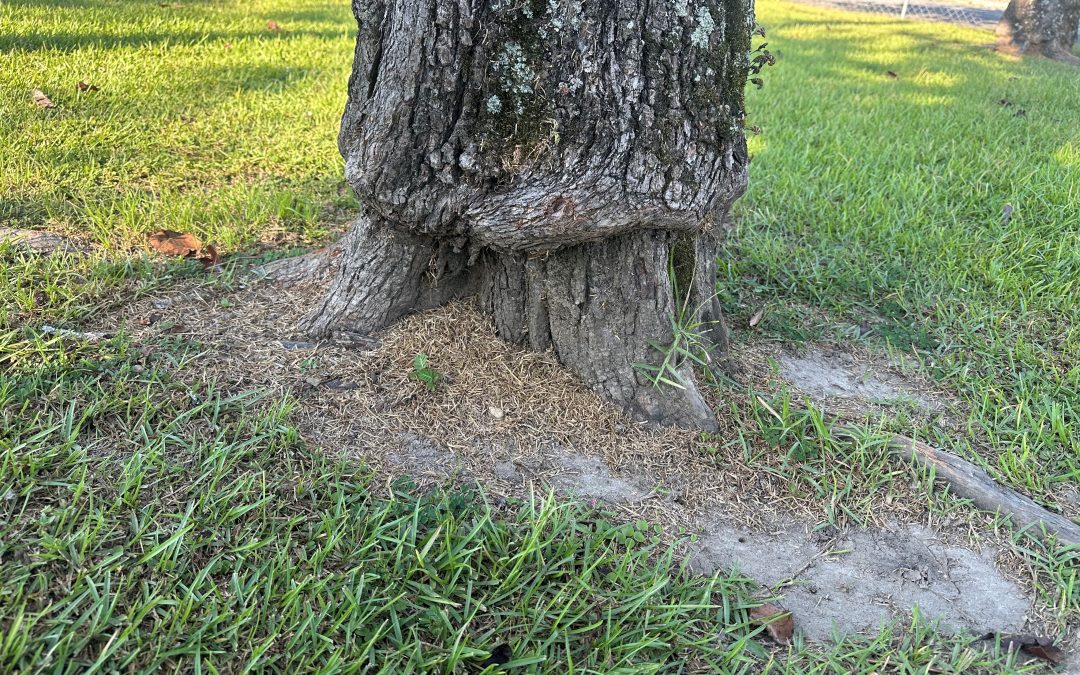
When maintaining proper care of your trees and shrubs in your lawn or landscape it is important to not damage stems and trunks. It is best practices to keep the area around the tree clean, but it needs to be done properly. Mowing and weed eating is not recommended due to the possibly of severe damage to the trunk and stems. Repeated damage from mowers and weed eaters cause damage called girdling. There are a few very effective ways to protect the trunk and stems from damage such as mulching and using tree rings/tubes.
Repeated damage to the base of the tree and stems will affect the cambium layer. The cambium layer is a thin layer of living tissue directly under the bark of the tree, and it supports the growth and well-being of the tree, actively dividing cells located between the xylem (wood) and phloem(bark). Constant damage of this layer will cut off the flow of carbohydrates to the roots, which will cause the tree to die. This layer is the green material you see after the bark of the tree has been damaged. It is imperative to keep the cambium layer damage free to insure the best tree health.
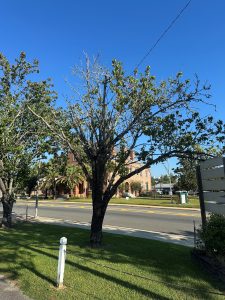
Photo credit to Daniel Leonard, Calhoun County Extension Agent
Taking preventive measures will ensure the prolonged life of your tree. Using mulch around the perimeter of the tree for protection from injury is the most effective method of protection. There are different mulch types like straw, bark, leaves, needles, wood or grass. These are examples of organic mulches. Tree rings and tubes can be helpful to protect young trees. If mulch is not the best option for the plant, other materials such as cut sections of plastic pipe or rubber tires could be an option for protection.
Mulch is not only a great way to protect your trees from injury. It also helps with retaining moisture, erosion control, weed suppression, organic accumulation and aesthetic appeal. Following simple guidelines when using mulch will make sure that you are maximizing the material used. Maintain a 2-to 3-inch layer around your established trees. Avoid “volcano mulching”. “Volcano mulching” is when mulch is piled against the base of the tree, it holds moisture. High amounts of moisture can cause the trunk to rot.
To prolong the life of your trees and shrubs you must protect them from injury that can cause girdling. Avoid constant contact with lawn mowers and weed eaters that will destroy the cambium layer. Using mulch is a very effective way for protection as well as retaining moisture, erosion control, weed suppression, organic accumulation, and aesthetic appeal.
For more information contact your local UF/IFAS Extension Office.
by Danielle S. Williams | Aug 28, 2025
Persimmons are an increasingly popular fruit crop in North Florida that are prized for their rich flavor, vibrant color, and adaptability to the state’s climate. With varieties ranging from astringent to non-astringent, persimmons offer growers and consumers a diverse and delicious harvest. Persimmons thrive in well-drained soils and require minimal pest management, making them an attractive crop for both commercial and backyard growers.
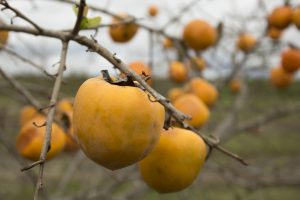
Persimmons. Photo by Tyler Jones, UF IFAS
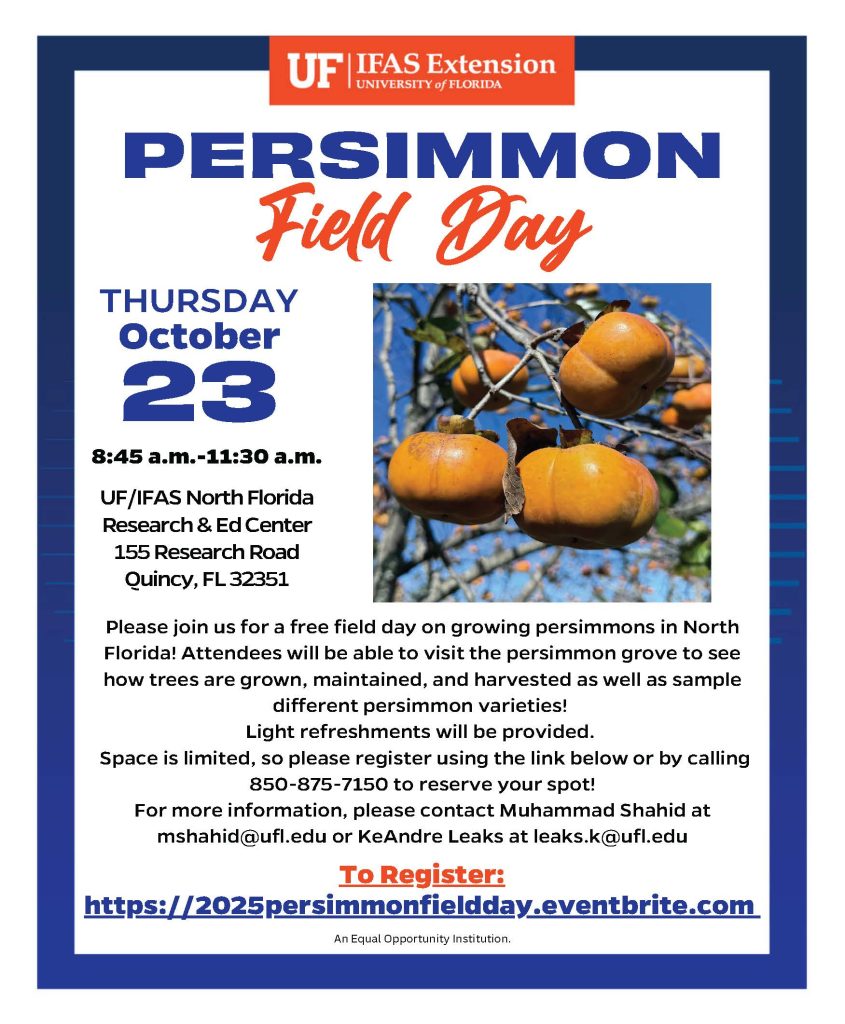
To help growers, home gardeners, landowners, and enthusiasts learn more about persimmons, UF/IFAS Extension is hosting the 2025 Persimmon Field Day on Thursday, October 23rd from 8:45AM to 11:30AM EST at the UF/IFAS North Florida Research and Education Center (NFREC), located at 155 Research Road, Quincy, FL.
Attendees will:
- Tour the NFREC’s persimmon grove to learn about tree care, maintenance, and harvesting techniques
- Sample a variety of persimmon cultivars
- Connect with experts and fellow growers
Light refreshments will be provided. Space is limited, so please register using the link below to reserve your spot!
For more information, please contact Muhammad Shahid at 850-875-7150 or via e-mail at mshahid@ufl.edu
The University of Florida is committed to providing universal access to all our events. For disability accommodations such as sign language interpreters and listening devices, please contact Muhammad Shahid, (mshahid@ufl.edu, 850-875-7255) at least 2 weeks in advance. Advance notice is necessary to arrange for some accessibility needs.


