by Joshua Criss | May 22, 2025
Sweet potatoes (Ipomea batata) are a much ballyhooed southern food staple. Valued primarily for their tuberous roots, they also boast an edible leaf. That, however, is not the end of their story. Some cultivars find use strictly as an ornamental. While not the subject of this article, you will typically find these dangling over rock walls or cascading from a hanging basket. While these can be quite impressive, this article will focus on the edible version of this plant, and its nutritional benefits.
UF/IFAS photo: M. Bailey
What Cultivar?
As with any vegetable, these have been heavily bred to optimize growth and yield in our southern environment. In Florida’s Panhandle, ‘Centennial’ and ‘Beauregard’ are two varieties that perform admirably. They have a vining growth habit and are very productive. For those gardeners with less space, ‘Vardaman’ sweet potatoes. This cultivar has a bushy growth habit rather than a trailing vine.
Planting
Sweet potatoes are not planted by seed, but rather from a “slip”. These are the vegetative growth from the mature sweet potatoes. While it is possible to grow these yourself, it is better to utilize certified disease-free slips from a reputable garden supply store. Use slips that are 6 to 9 inches long, planting them in rows 48 to 54 inches on center, with plants spaced 12 inches apart.
Sweet potatoes can be planted in early spring through late June. These plants thrive in sandy soils, which are typical in the Panhandle with very little fertilization (approximately 0.04 lbs. of N on a 10 x 3-foot row). The downside to sweet potatoes is their exceptionally long growth season of 100 to 150 days after planting.
UF/IFAS photo: J. Criss
Pests
There are some pests which you’ll need to be wary when growing sweet potato. Most notably of these is the sweet potato weevil (Cylas formicarius). Even small amounts of damage from this insect can induce sweet potatoes with a foul taste. Control them through cultural practices such as turning your soil several months prior to planting, and adequate irrigation. Wireworms and beetle larvae are also concerns with sweet potatoes. Sample for grubs throughout the growing season, remove vegetation post harvest, and rotating your crops will keep these pests at bay. If all else fails, there are insecticidal options available. Consult your local extension agent to choose the appropriate option.
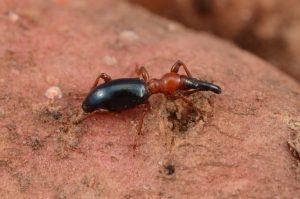
Sweet potato weevil UF/IFAS Photo: L. Buss
Time to Cure
Post harvest, sweet potatoes should be placed in a dark 85° room with 90% humidity for about two weeks. This is known as curing and will convert some of the starches of this vegetable to sugar making it slightly sweeter. Once the curing process is finished, store them in a cool, dry pantry at temperatures below 50°. This will keep them a viable staple in your pantry for several months.
The end result of all this work will be a food high in vitamin A, vitamin C and fiber that can be used for anything from home fries to pies.
To Sum Up
Growing your own vegetables in your own garden is a very rewarding experience. Sweet potatoes are an easy way to produce a lot of food for your family. If you’d like to know more about growing sweet potato, please consult these document. For more information on this topic or any other horticultural concern please contact your local U/IFAS extension office here.
by Molly Jameson | May 15, 2025
Sweet summer basil thrives in the heat – regular harvesting encourages bushier growth and delays flowering. Photo by Molly Jameson.
As the weather heats up, many spring vegetables begin to bolt, wilt, or shut down entirely. But for gardeners willing to shift gears, summer presents an opportunity to grow a new cast of crops that thrive in high temperatures, intense sun, and even occasional drought. Whether you’re growing in raised beds, in-ground rows, or large containers, these heat-loving vegetables are well-suited to our long summer season in the Panhandle.
Here are some of the best summer veggies to keep your garden productive when the thermometer climbs:
Okra

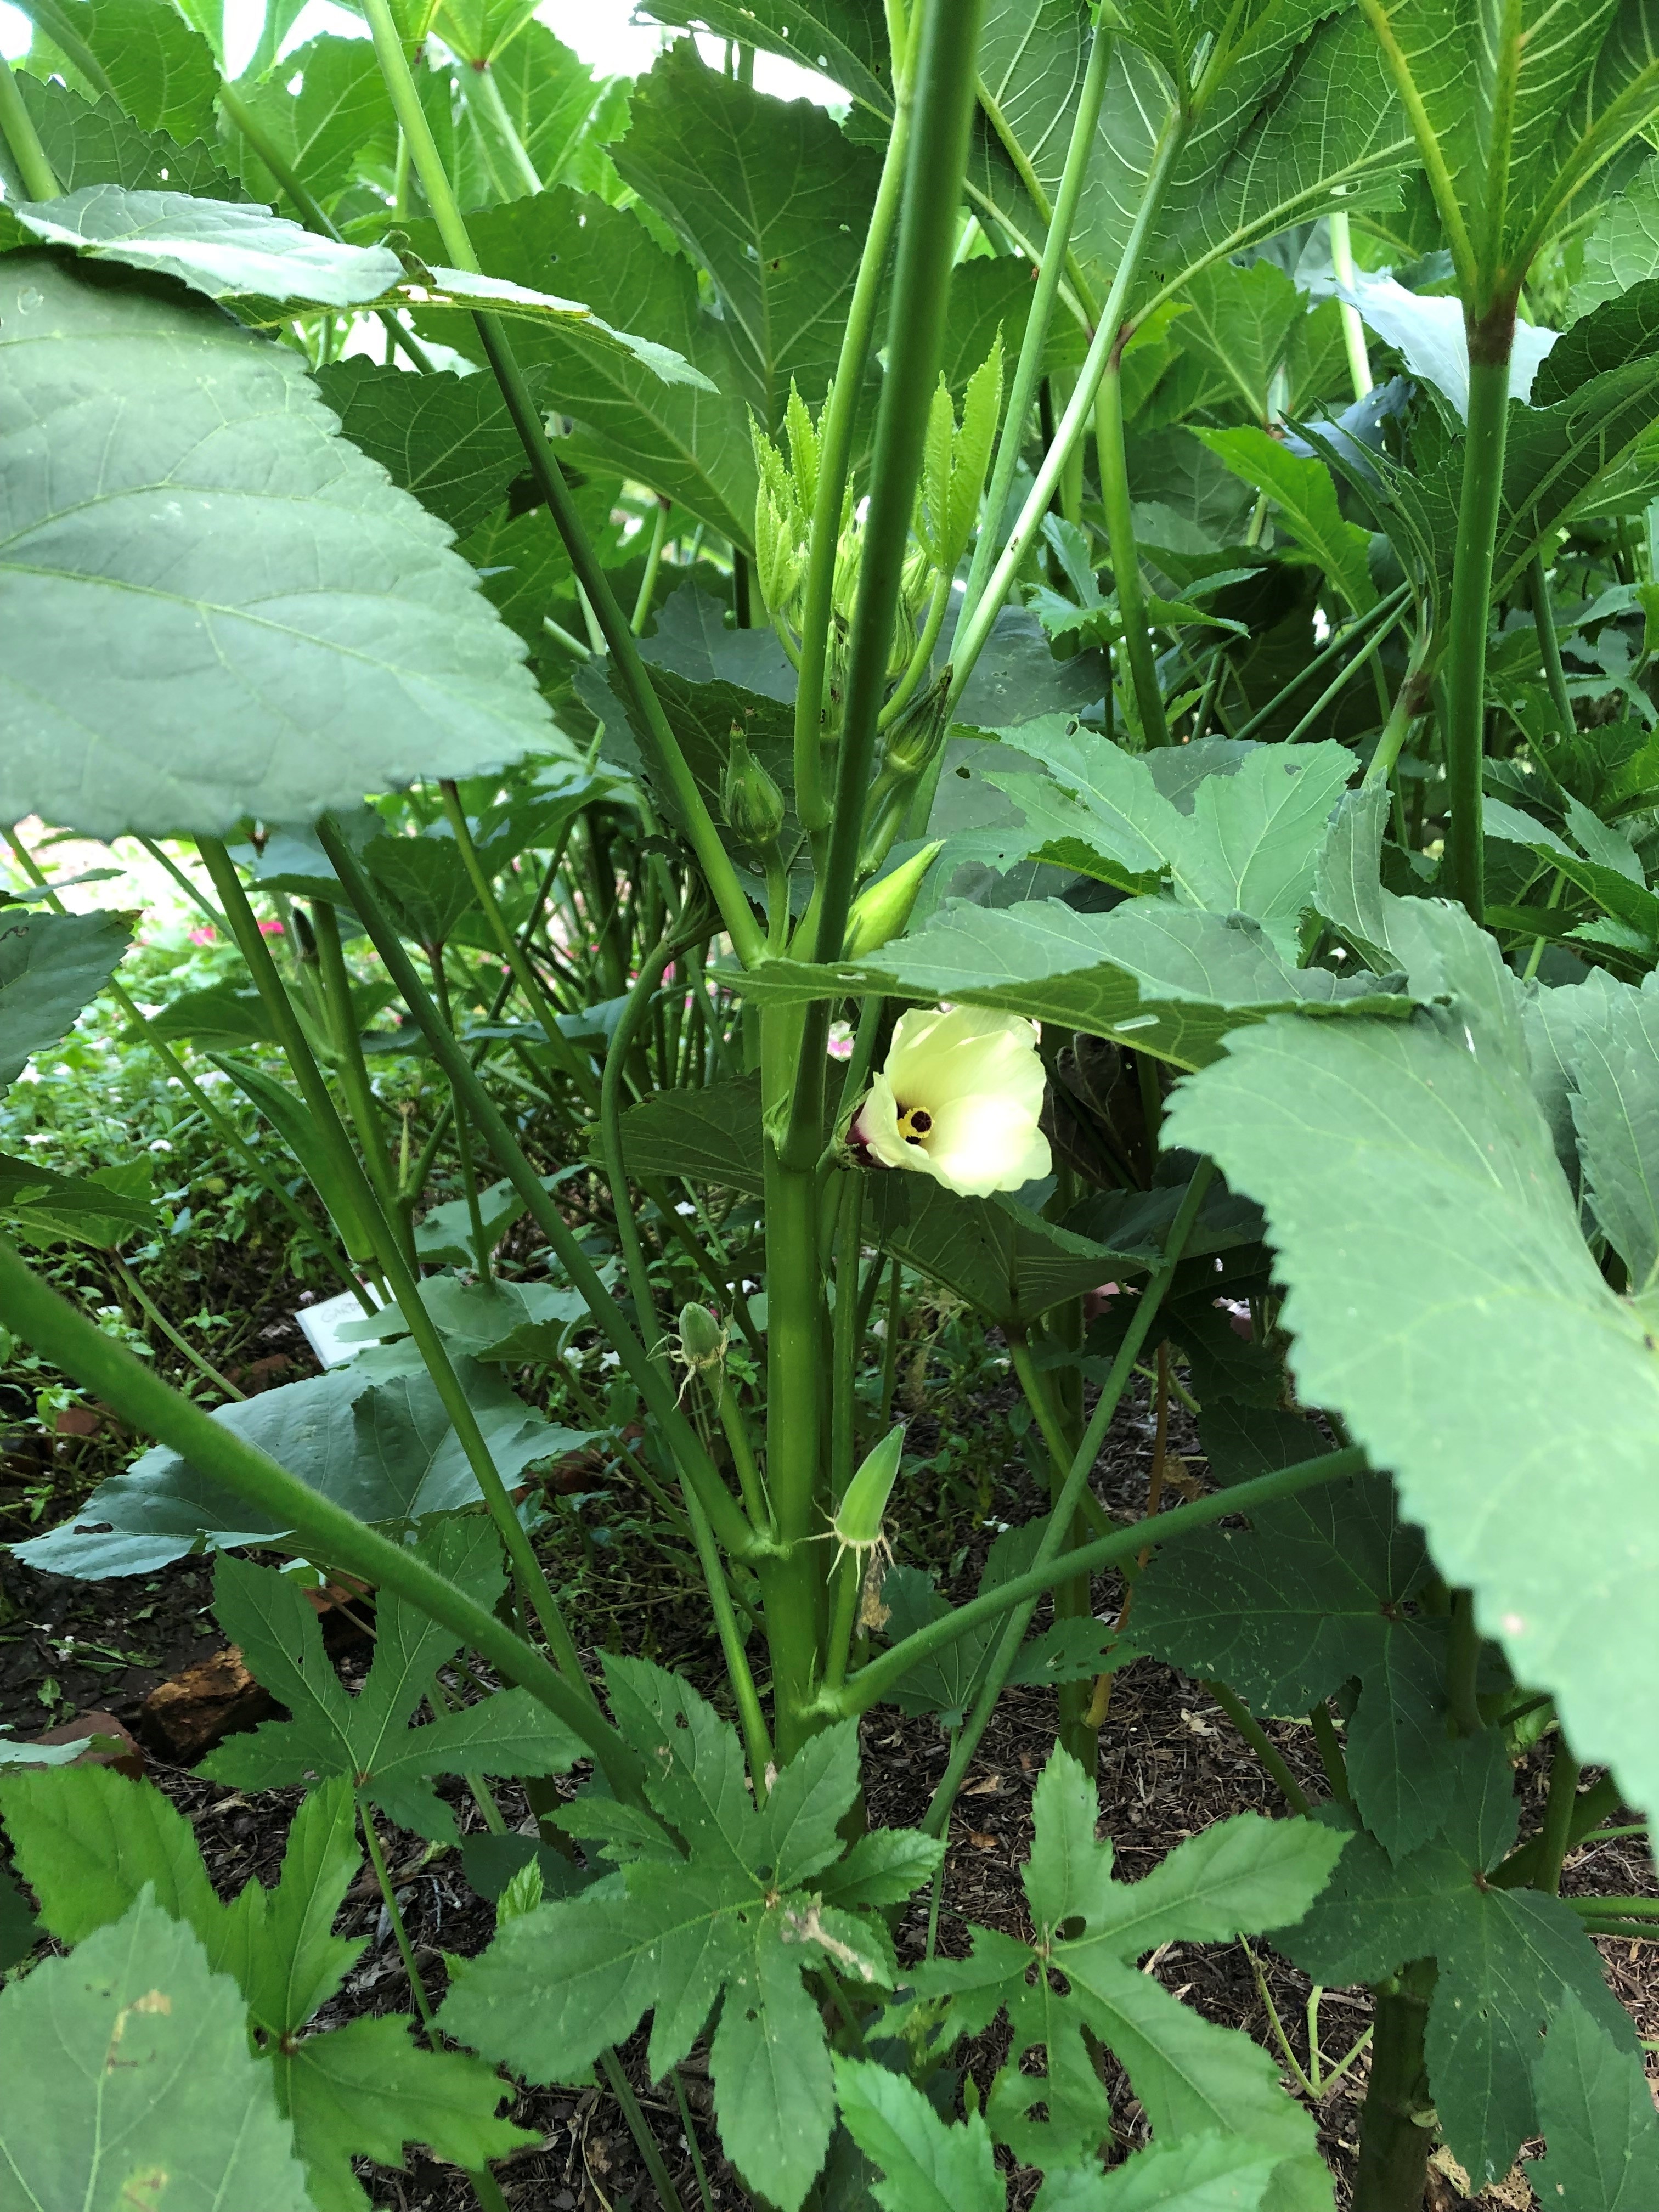
Okra thrives in the summer heat, producing edible pods just days after flowering. Photo by Molly Jameson.
Okra is a true warm-season crop that thrives in the heat and even tolerates periods of drought. For better germination, soak seeds in water for several hours or overnight before planting. Sow seeds directly into the garden once soil temperatures are at least 65°F and the danger of frost has passed – typically from late March through July. Plant seeds 1 inch deep and 4 to 6 inches apart in rows spaced 3 feet apart. Once seedlings are several inches tall, thin them so the remaining plants are spaced 1.5 to 2 feet apart. Pick pods when they’re two to four inches long, usually within a few days of flowering, to avoid tough, fibrous texture. Regular harvesting encourages more production throughout the summer.
Okra varieties well suited for our area include ‘Clemson Spineless’ and ‘Emerald,’ both known for their productivity and tender pods.
Southern Peas

‘Zipper Cream’ southern peas are heat-tolerant and productive, with easy-to-shell pods and creamy, mild flavor. Photo by Molly Jameson.
Also known as cowpeas or field peas, southern peas are a staple crop across the South for good reason – they tolerate heat, sandy soil, and inconsistent rain. Sow seeds directly in June through August, spacing them about 2 to 4 inches apart in rows 18 to 30 inches apart, depending on the variety. Southern peas are nitrogen fixers, so they can improve soil fertility over time.
Popular southern pea varieties include ‘Pinkeye Purple Hull,’ ‘California Black-eyed,’ ‘Creel Crowder,’ and ‘Zipper Cream.’ These plants are also relatively pest- and disease-resistant, making them a great low-maintenance option.
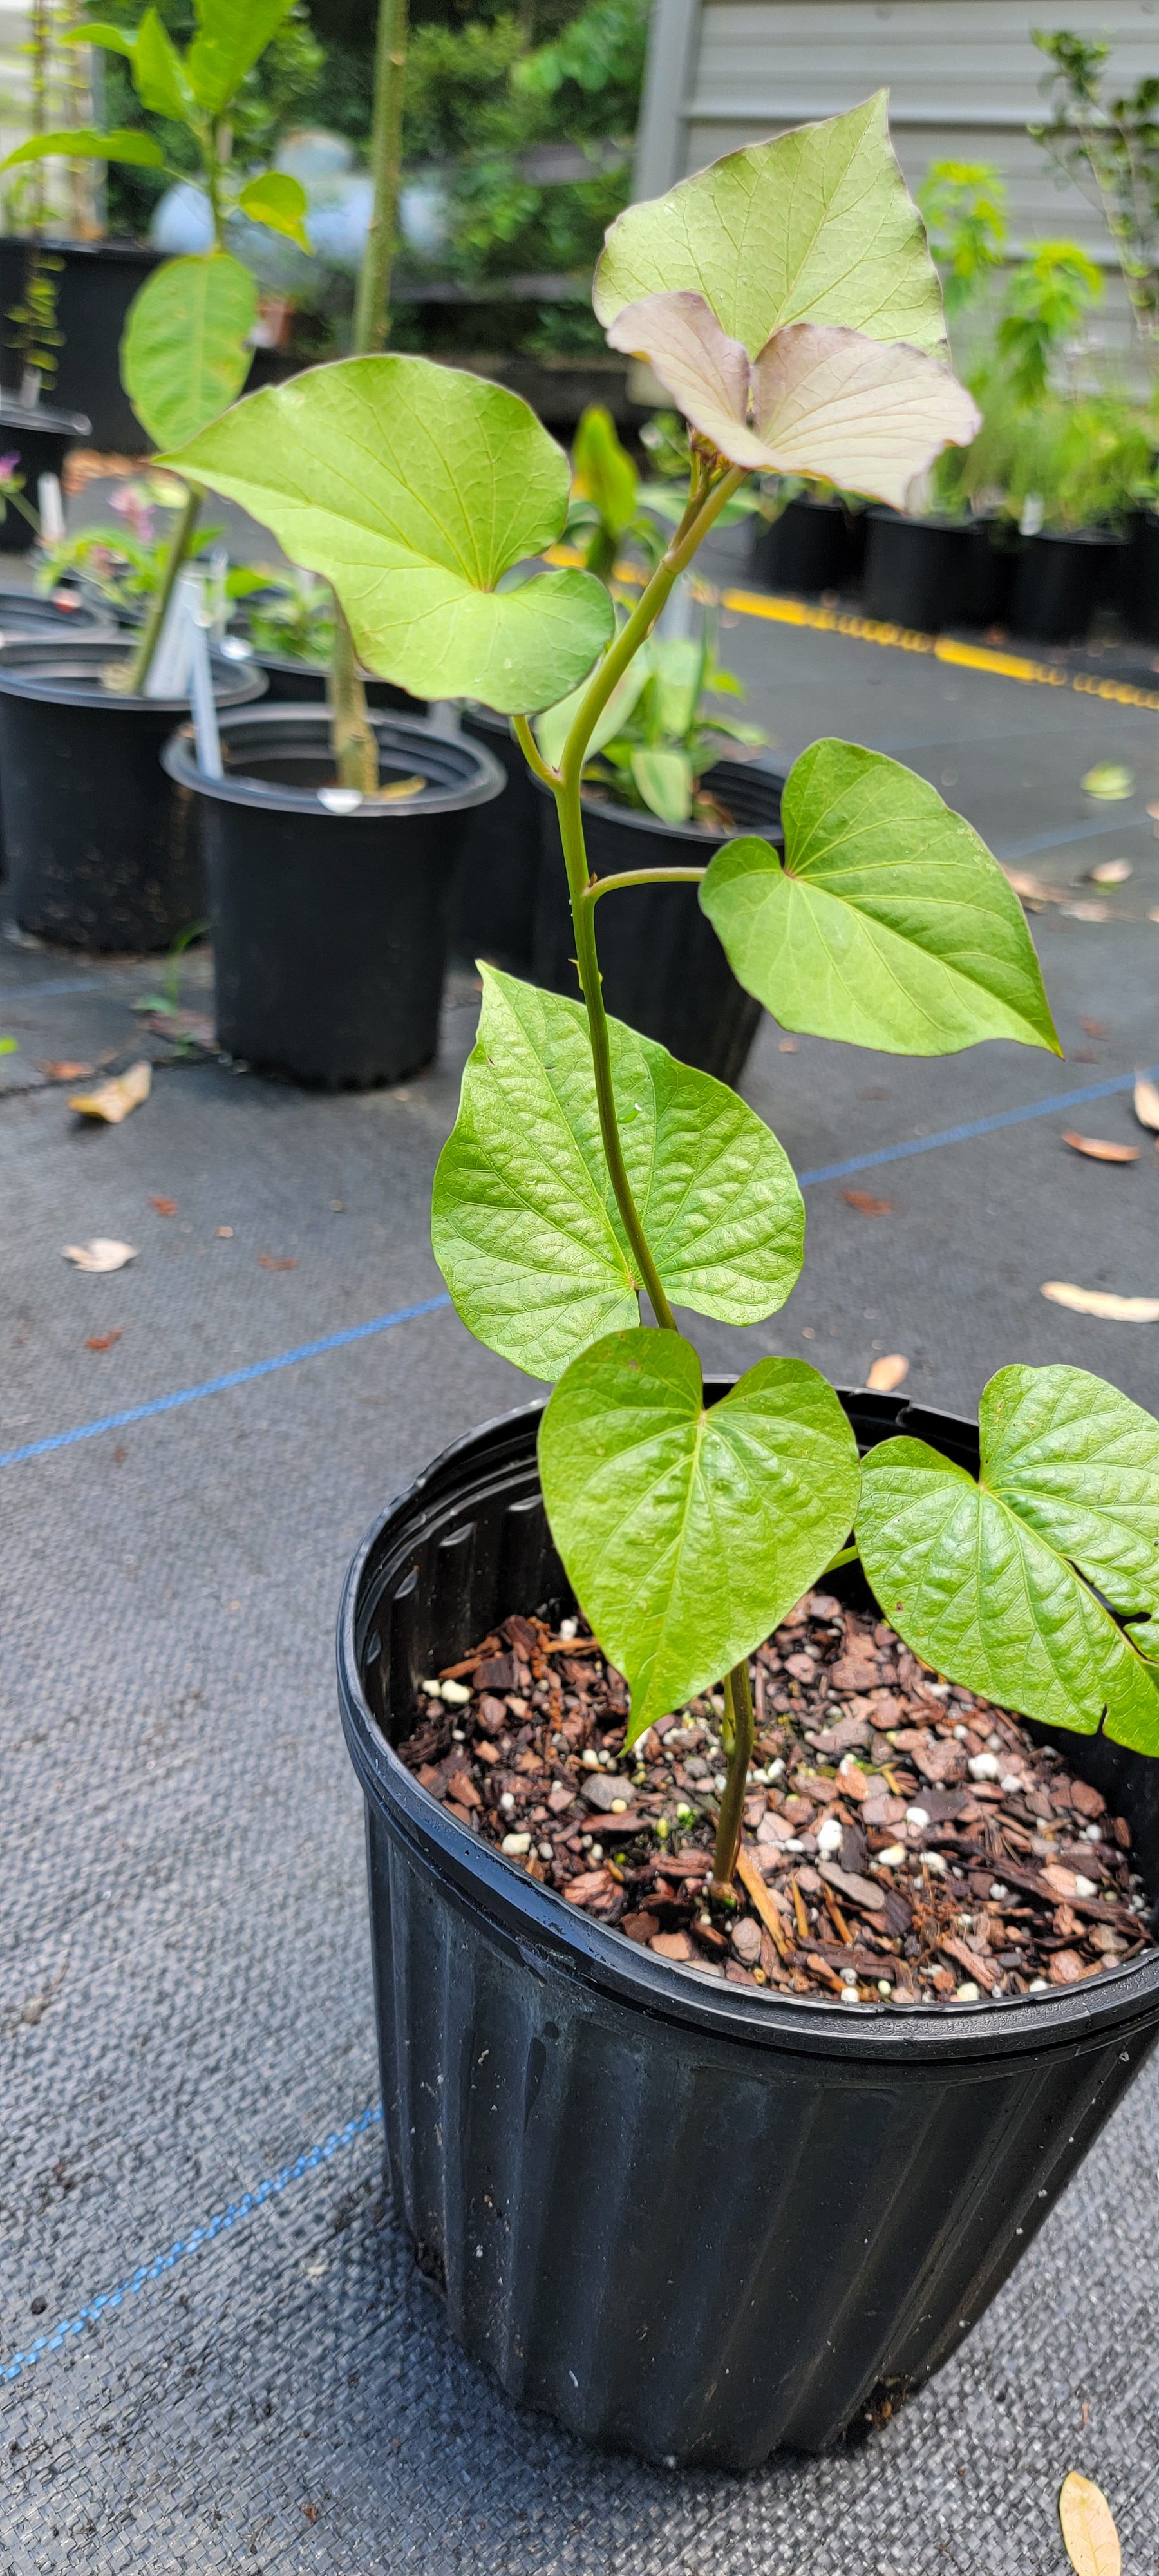
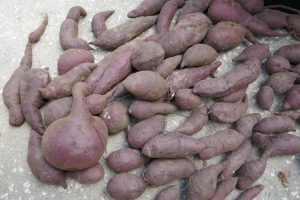
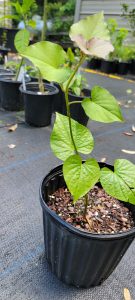
Sweet Potatoes
Sweet potatoes are grown from slips – vine cuttings taken from sprouted tubers. These slips should be planted after the danger of frost has passed and soil temperatures are consistently above 65°F, typically April through June. Space slips about 12 to 18 inches apart in loose, well-drained soil. While mounding isn’t always necessary, creating raised ridges or planting in raised beds can help promote tuber development and improve drainage, especially in heavier or poorly drained soils. Sweet potatoes require a long growing season – around 90 to 120 days – but they produce abundantly and require minimal care once established. Their vines also form a dense ground cover that suppresses weeds and reduces soil erosion.
Two reliable sweet potato varieties for Florida gardens are ‘Centennial’ and ‘Beauregard,’ both known for their sweet flavor, high yields, and adaptability to southern growing conditions.
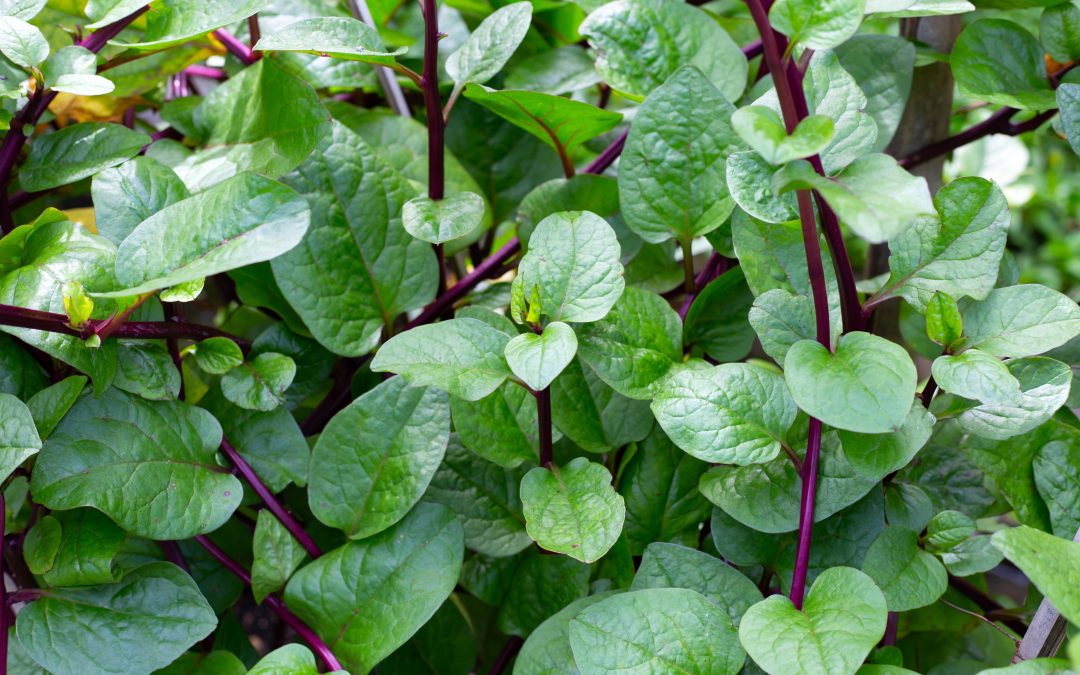
Malabar Spinach
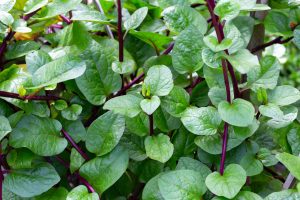
Red-stemmed Malabar spinach thrives in summer heat, producing tender, edible leaves on vigorous climbing vines. Photo by Bowonpat, Adobe Stock.
Malabar spinach is not a true spinach, but it provides tender, edible leaves throughout the hot months when traditional greens fail. It grows as a climbing vine, so give it a trellis or support to climb. Sow seeds directly into the garden or transplant young seedlings from mid-April through early June. This plant enjoys both sun and partial shade, and its thick, glossy leaves can be harvested regularly for salads or to thicken soups and stews. Just like regular spinach, frequent picking promotes new growth.
Both red-stemmed and green-stemmed Malabar spinach types are available, with the red-stemmed variety more commonly grown for its ornamental appeal.
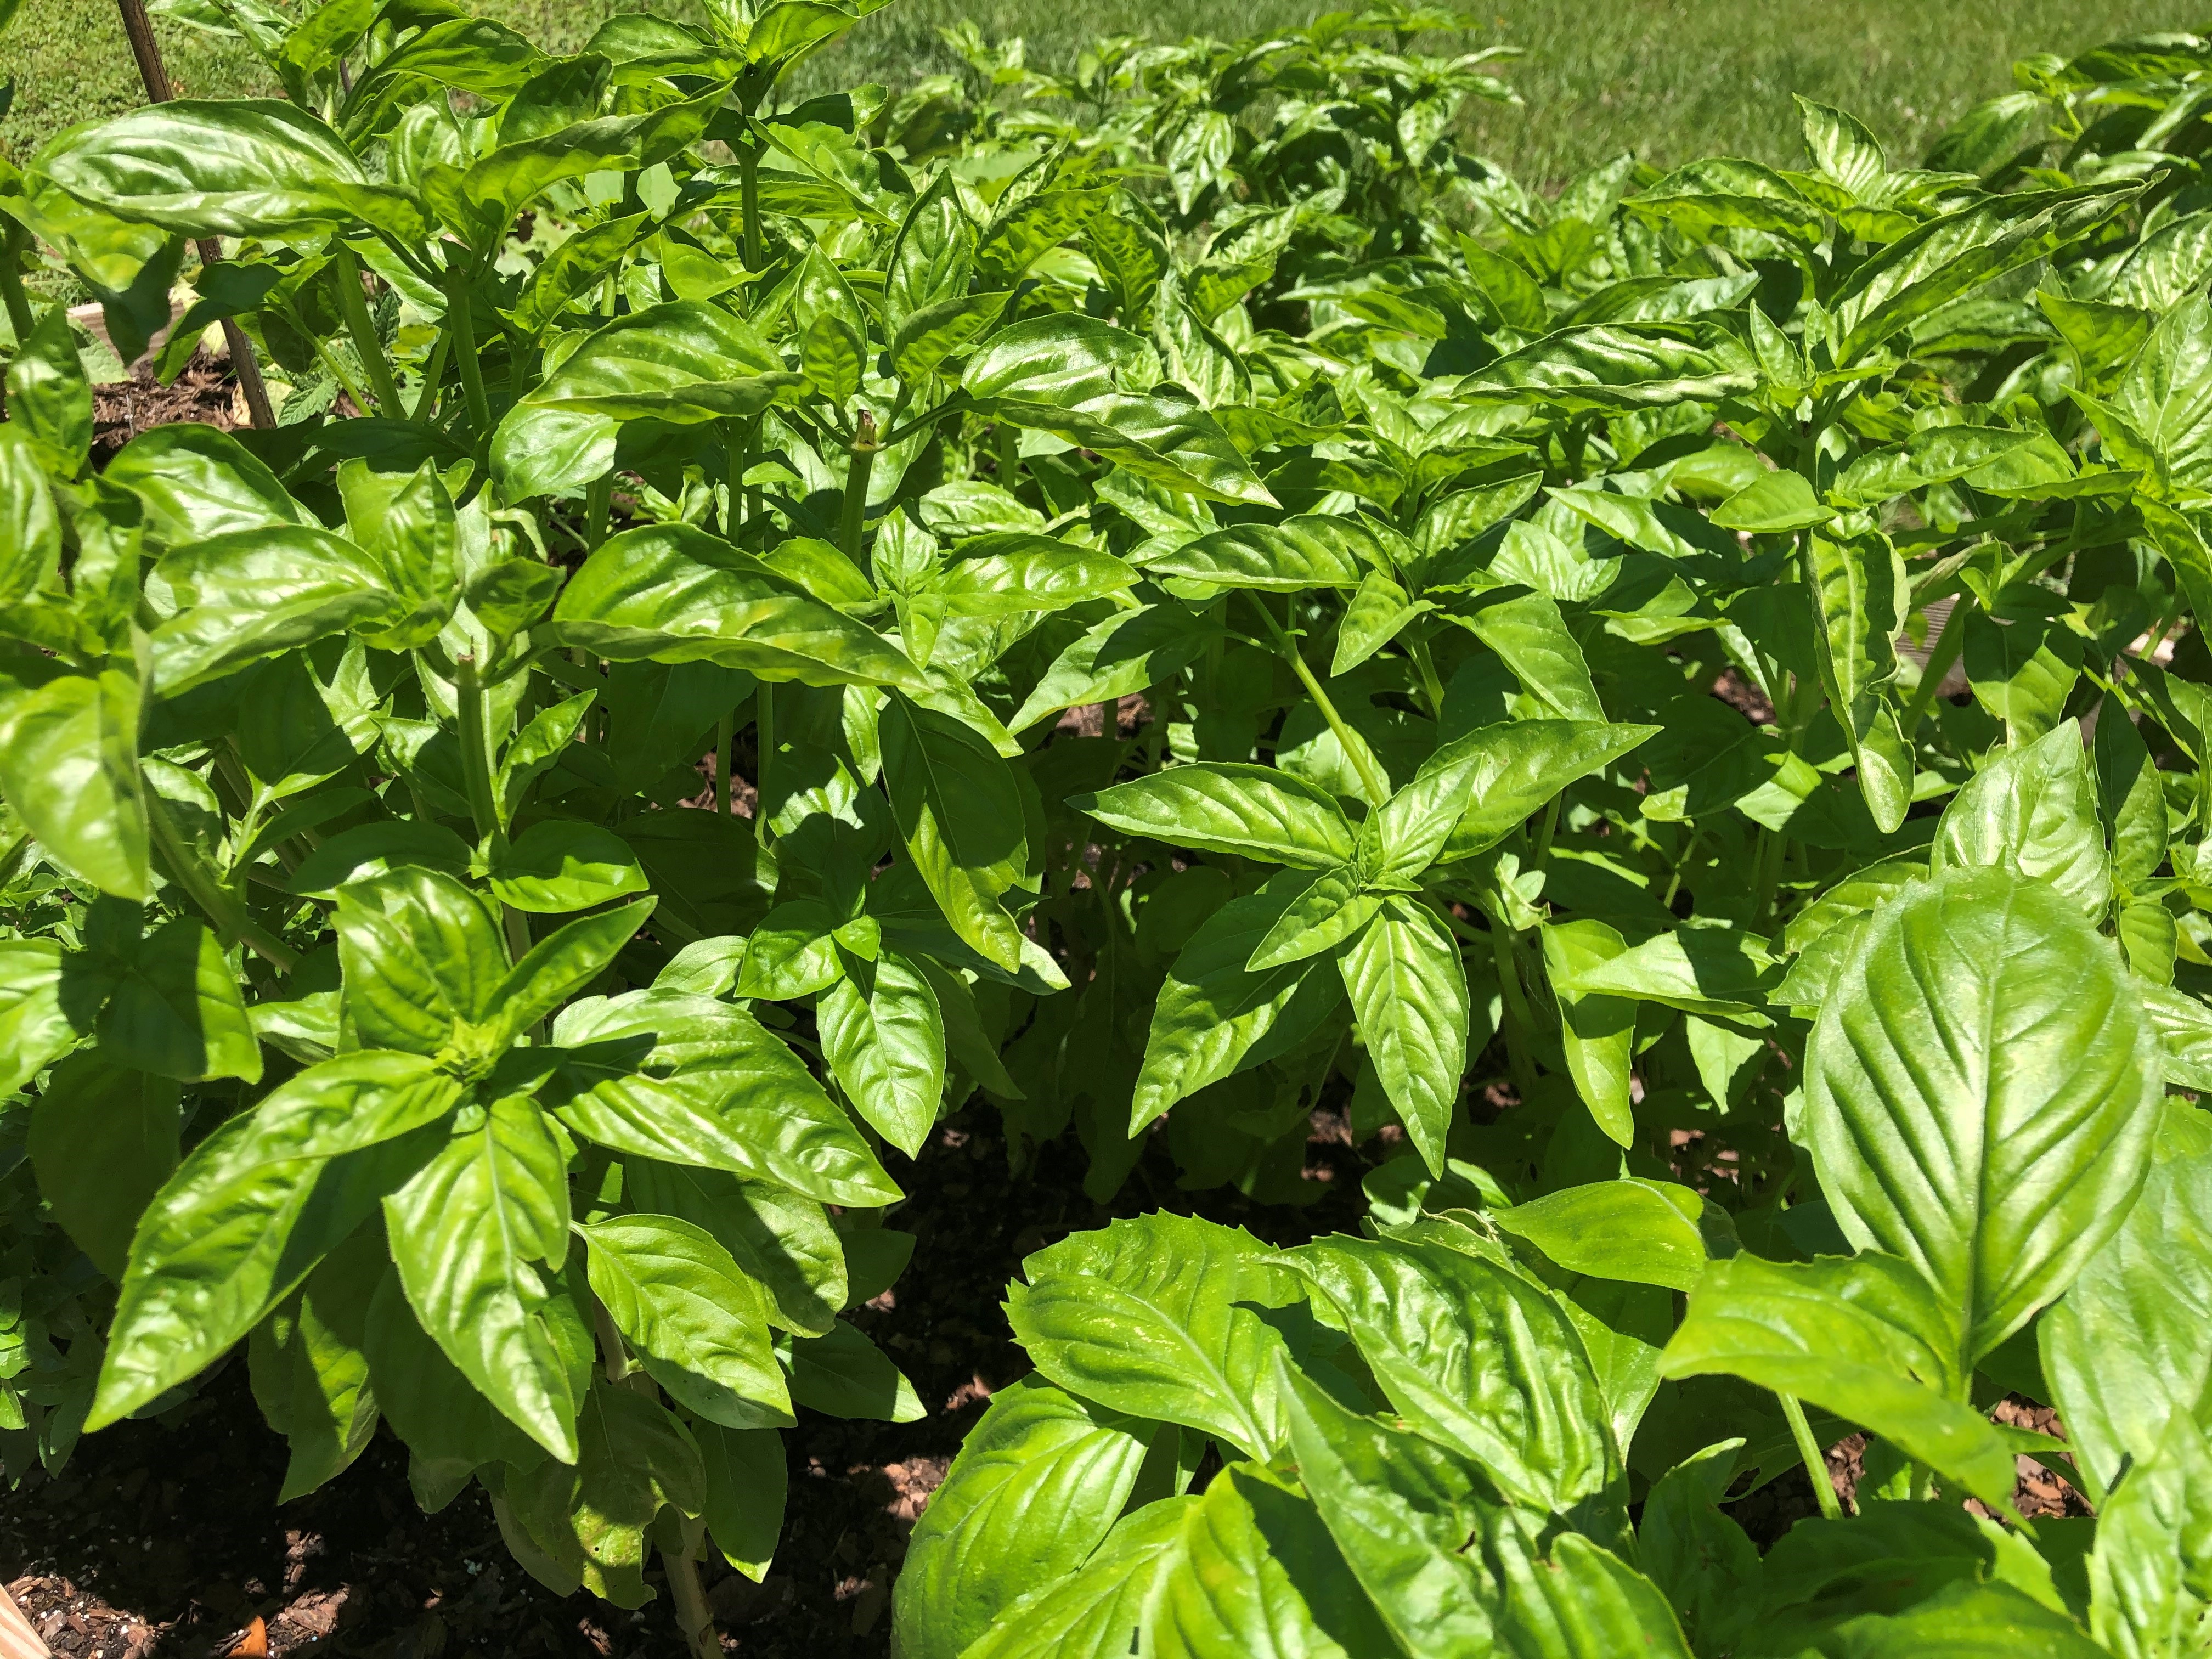
Basil
Basil is a heat-tolerant herb that loves full sun and thrives in the warmth of summer. It can be direct-seeded or transplanted once the weather settles into consistent warmth, typically March through May in North Florida. Space plants about 10 to 12 inches apart and harvest often to prevent flowering and promote bushier growth.
In addition to classic sweet basil, try Thai basil or lemon basil for unique flavors that hold up in hot dishes and drinks alike.
Peppers
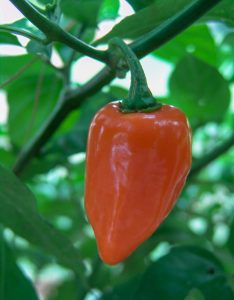
Habanero plants yield intensely hot peppers with a distinct tropical flavor. Photo by Gerald Holmes, Strawberry Center, Cal Poly San Luis Obispo, Bugwood.org.
Peppers – especially hot varieties – are well-adapted to Florida summers, although they benefit from a bit of afternoon shade during the most intense heat. Start with healthy transplants in spring or early summer, spacing them 18 to 24 inches apart. Keep the soil consistently moist and apply mulch to help retain moisture.
For sweet pepper options, try ‘Corno di Toro’ or ‘Sweet Banana.’ For heat lovers, datils, jalapeños, and habaneros all perform well in warm conditions. Just note that some varieties may slow production during extreme heat, then pick up again as temperatures moderate.
Take a Break with a Cover Crop
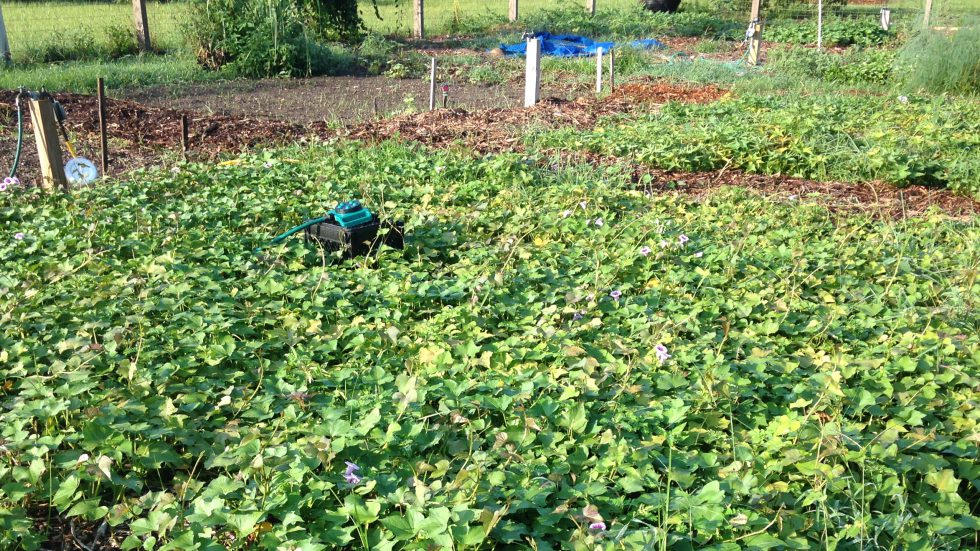
If summer gardening starts to feel overwhelming, you don’t have to plant every square foot. Consider giving part of your garden a seasonal rest with a warm-season cover crop like cowpeas, velvet beans, buckwheat, or even sweet potatoes. These vigorous growers help suppress weeds, improve soil structure, and add organic matter – and in the case of legumes like cowpeas and velvet beans, they also fix nitrogen to benefit future crops. Sweet potatoes, while edible, can also serve double duty as a weed-smothering ground cover.

Sweet potato vines form a dense summer ground cover that suppresses weeds and protects the soil. Photo by Janis Piotrowski.
For a lower-maintenance splash of color, consider heat-loving flowers like sunflowers, French marigolds, or zinnias – all of which attract pollinators and beneficial insects while brightening up your garden space.
Don’t let the summer heat bring your garden to a standstill! By choosing vegetables that are naturally adapted to our hot, humid conditions, you can keep your garden thriving and productive all season long.
by Larry Williams | Apr 10, 2025
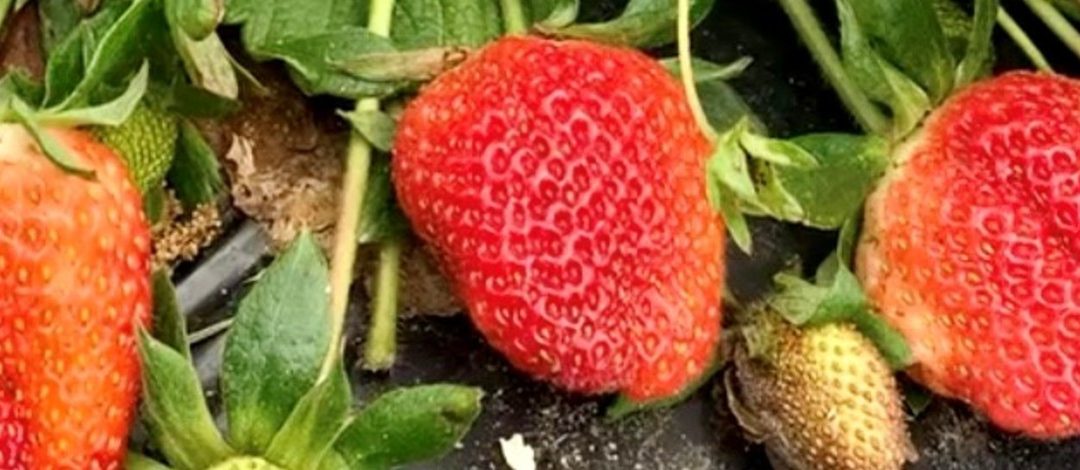
Strawberries are being harvested in North Florida now and sweet onions will be harvested soon. Spring is the time to harvest these crops, however; fall is the time to plant these crops in our area.
Planting time and variety selection are keys to sweet onion and strawberry success in North Florida.
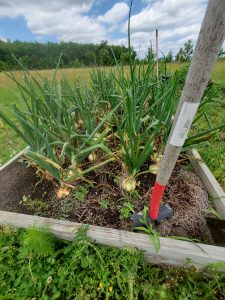
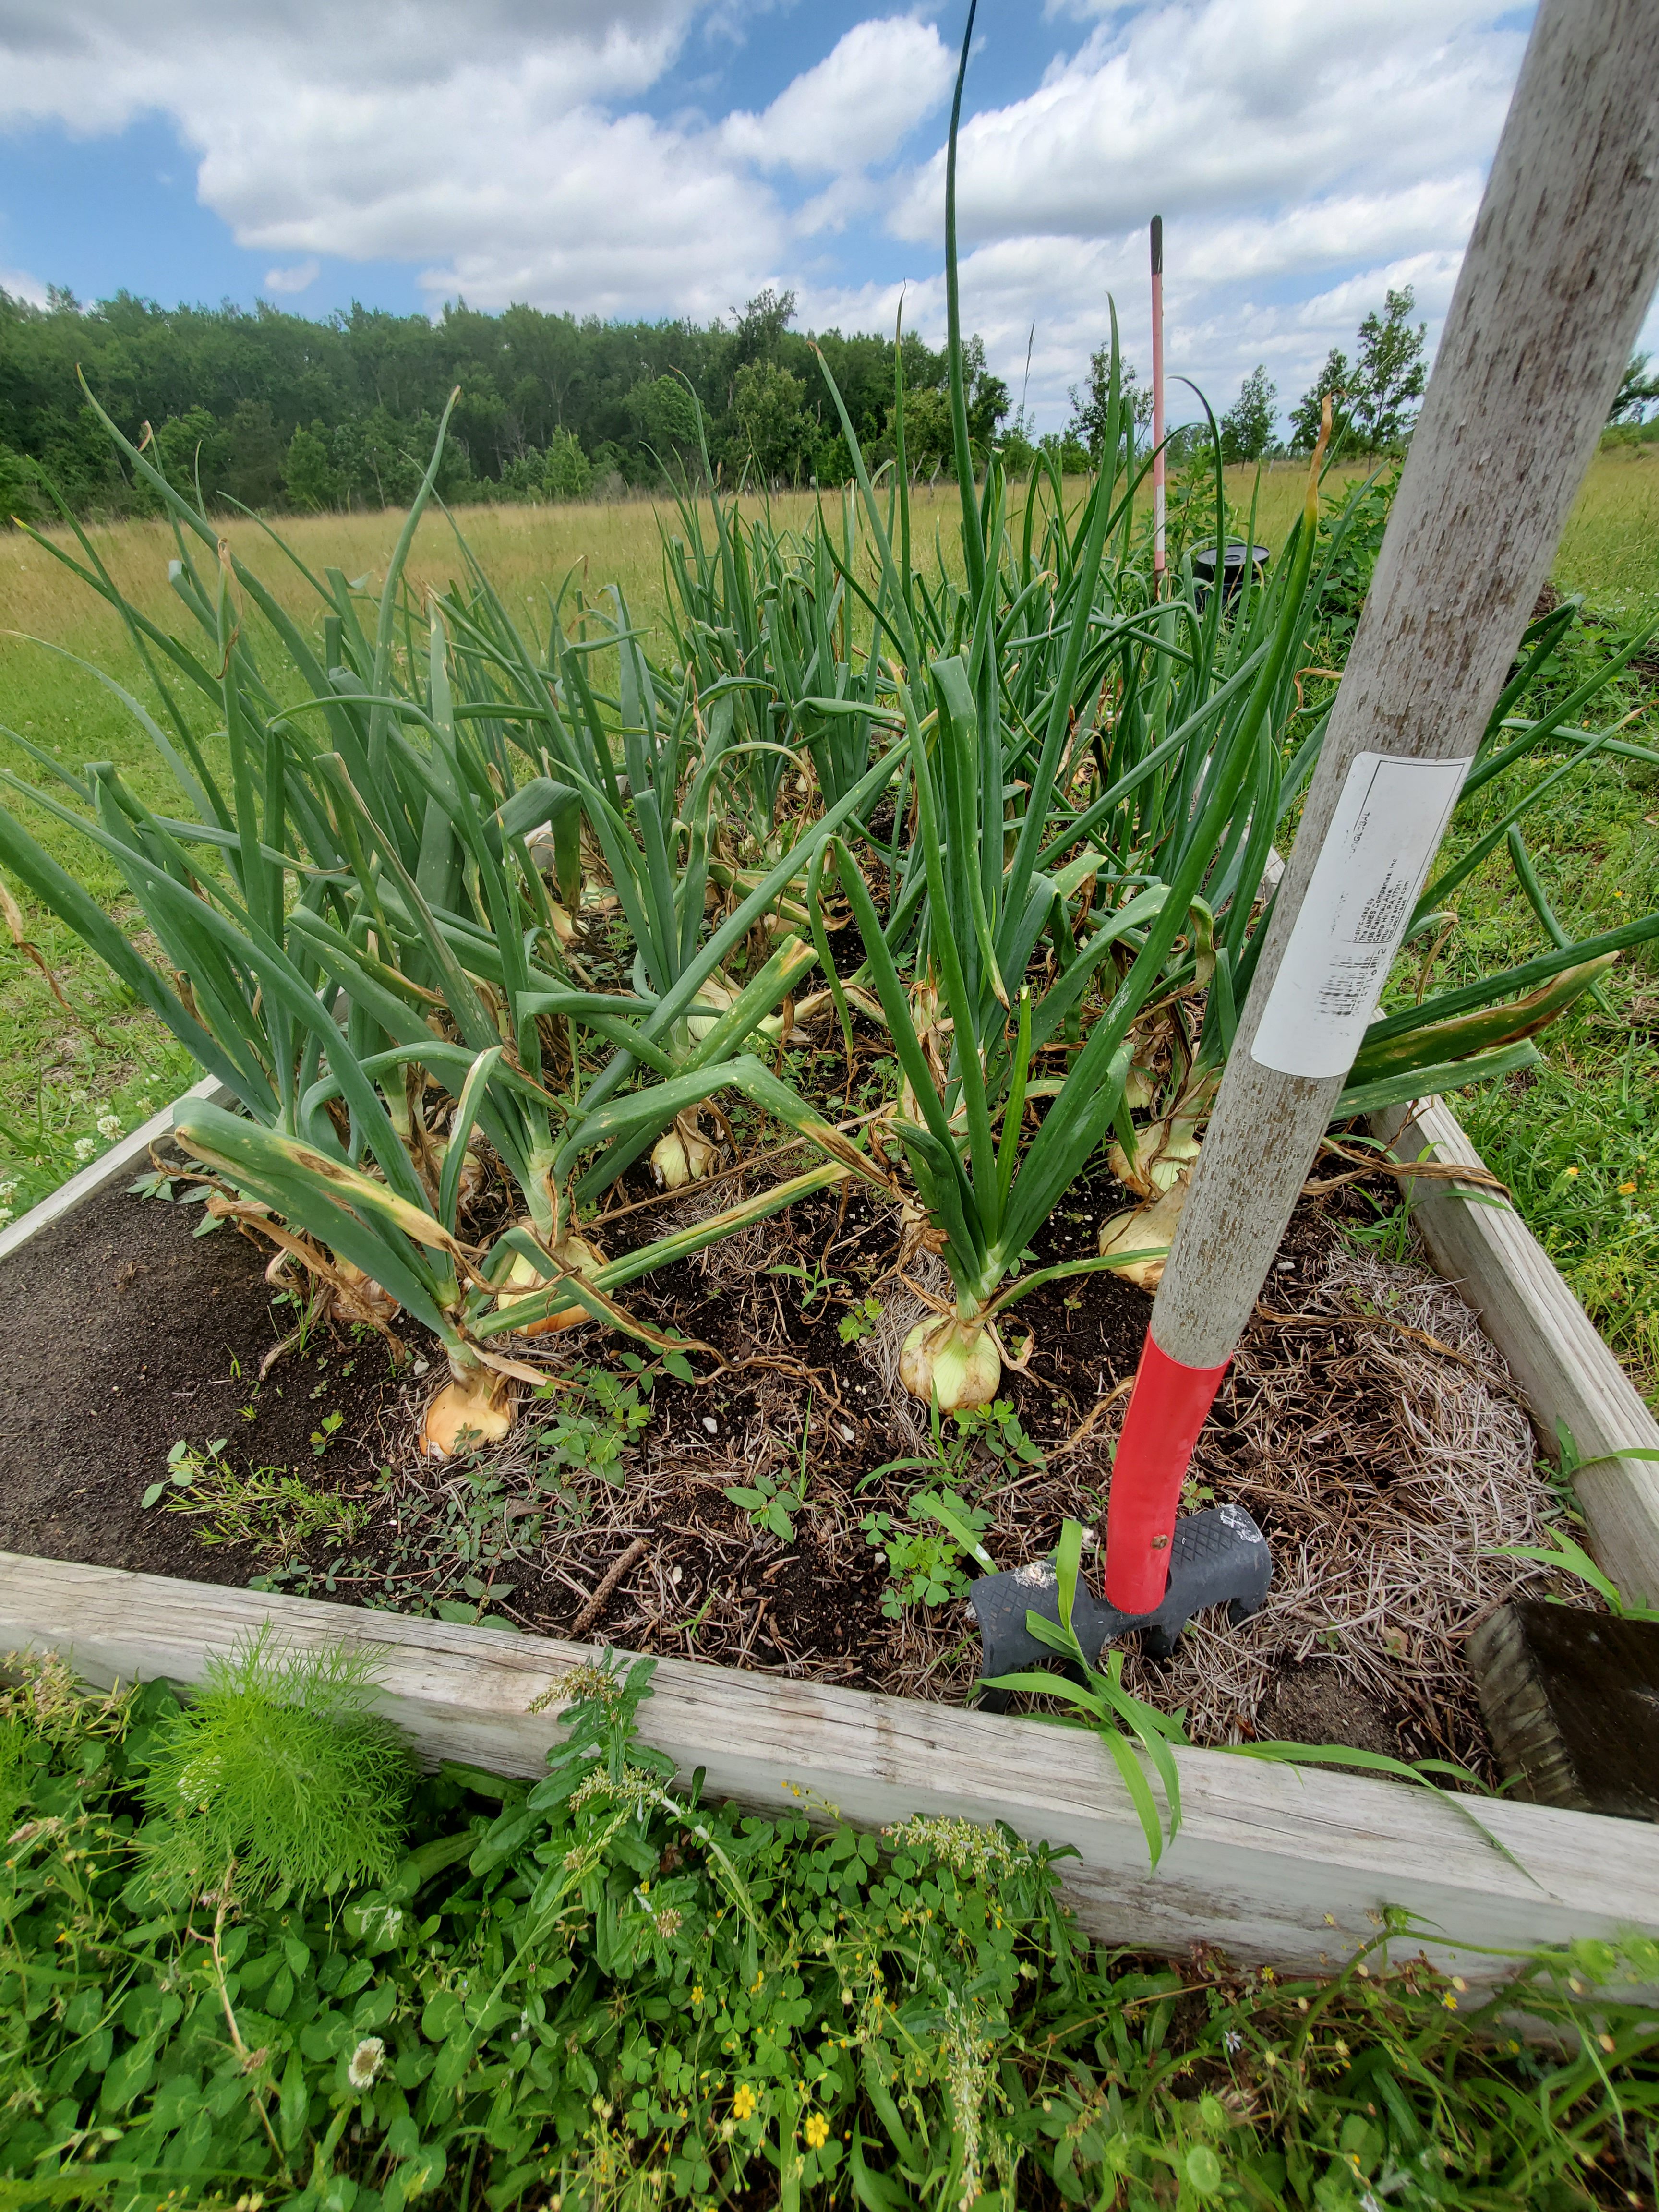
Sweet onions almost ready for harvest in a Calhoun County garden. Credit: Joe Leonard.
We can produce large, tasty sweet onions in North Florida. When using the correct varieties and when planted at the right time, we can produce bulbs up to four inches in diameter with flavor that rivals the famous Vidalia onions.
To be successful at growing large sweet onion bulbs, you have to set out plants in the fall. Waiting to plant in spring, as is done up north, results in small onions. As a matter of fact, onions planted after the first of the year make puny little bulbs. To produce large bulbing onions, you should plant your transplants during October to mid-November. Otherwise, you may get big green onion plants verses big bulbs.
In order to be successful with growing large onions in our area, you have to select the correct varieties. Basically, you need to use varieties of “short-day” onions such as ‘Grano’, ‘Granex’, ‘Texas Grano’, ‘Excel’ or ‘Tropicana Red’. ‘Granex’ is the variety that is used for producing Vidalia onions and St. Augustine Sweets.
Some gardeners seed their onions in September in order to have plants ready for transplanting to the garden later in the fall. Others buy the plants of these varieties during the

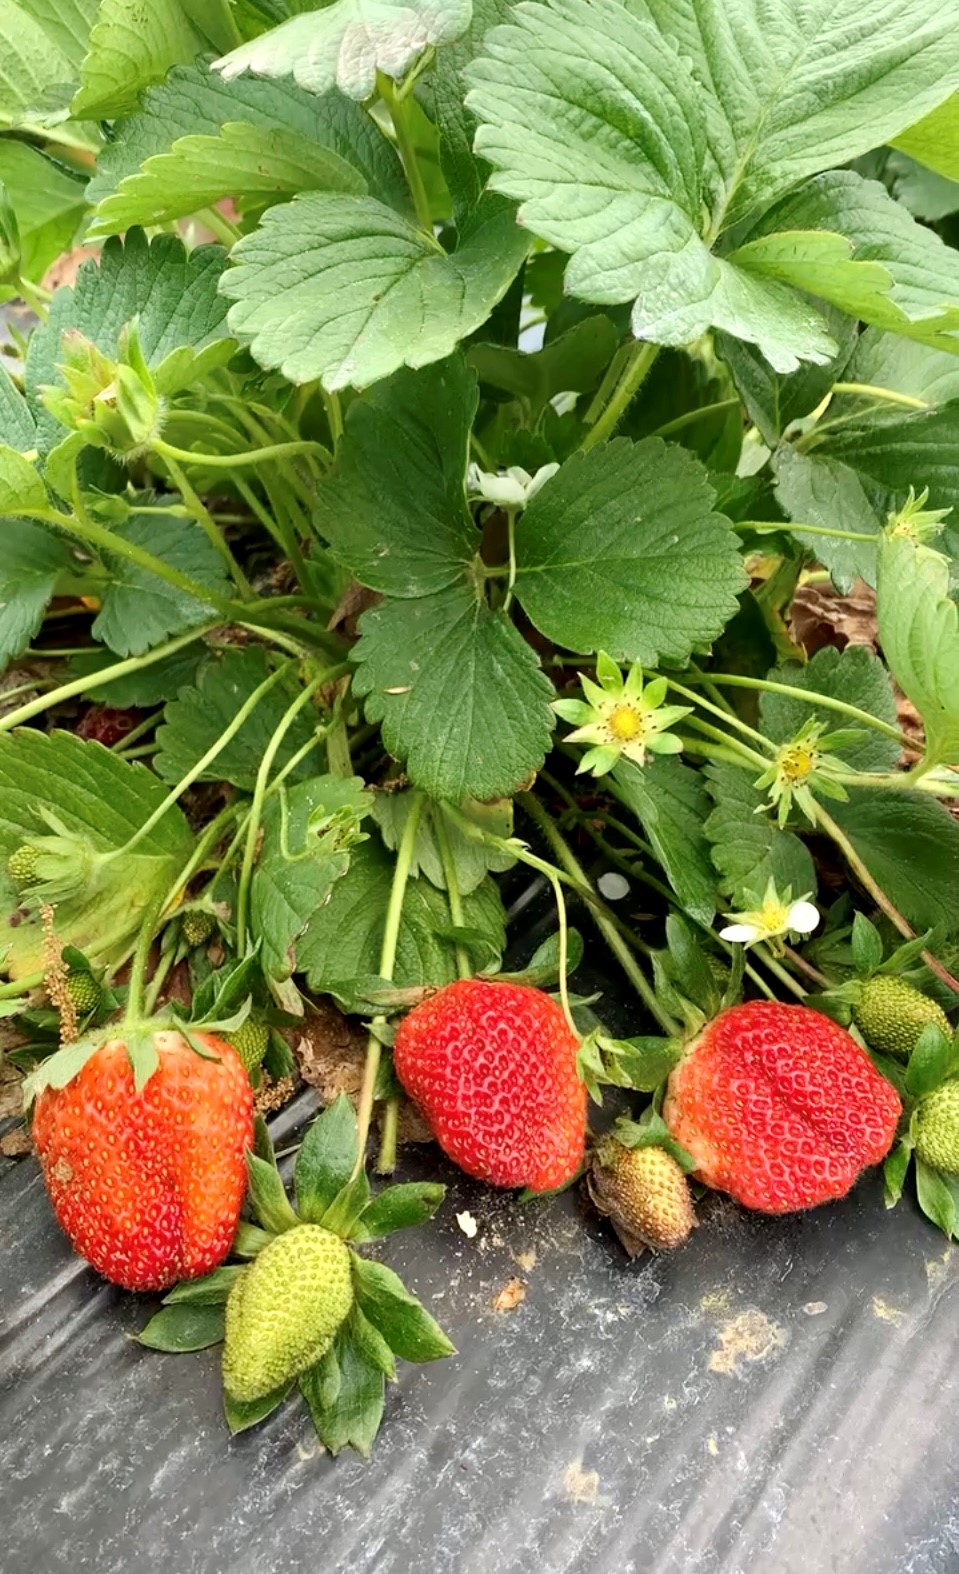
Strawberries ready to harvest in spring. Credit: Larry Williams
fall. These onion plants should be placed four to five inches apart in rows that are twelve to twenty-four inches apart. Fertilization is required during the winter and particularly as the onion bulbs begin to size up in the spring. Onions grow well during our relatively mild winters and will be ready for harvest in early May, as the tops of the plants begin to turn yellow and fall over.
Many gardeners fail with strawberries in North Florida by waiting to plant in spring and by planting the wrong varieties for our area. In Florida, strawberries are treated as annuals
. They are planted during October and November. Like onions, strawberry plants are cold hardy, producing a full sized plant by spring and yielding a crop during March through May. Once you’ve harvested the berries, do away with the plants. It’s not worth trying to carry strawberry plants through our hot, wet summers. Start next fall with fresh plants.
Use only “short-day” strawberry varieties. These include ‘Camarosa’, ‘Sweet Charlie’, ‘Festival’, ‘Chandler’, ‘Dover’, ‘Selva’, ‘Sequoia’, ‘Tioga’, ‘Oso Grande’, ‘Florida Belle’ and ‘Florida 90’. “Everbearing” varieties of strawberries, which are frequently advertised, are not well suited for Florida. More info is available at http://edis.ifas.ufl.edu/hs403.
Enjoy the spring harvest season of these two delicious crops, but plant them in the fall.
For more information on growing your own vegetables, contact the UF/IFAS Extension Office in your County or visit http://edis.ifas.ufl.edu/topic_vegetable_gardening.
by Molly Jameson | Apr 3, 2025
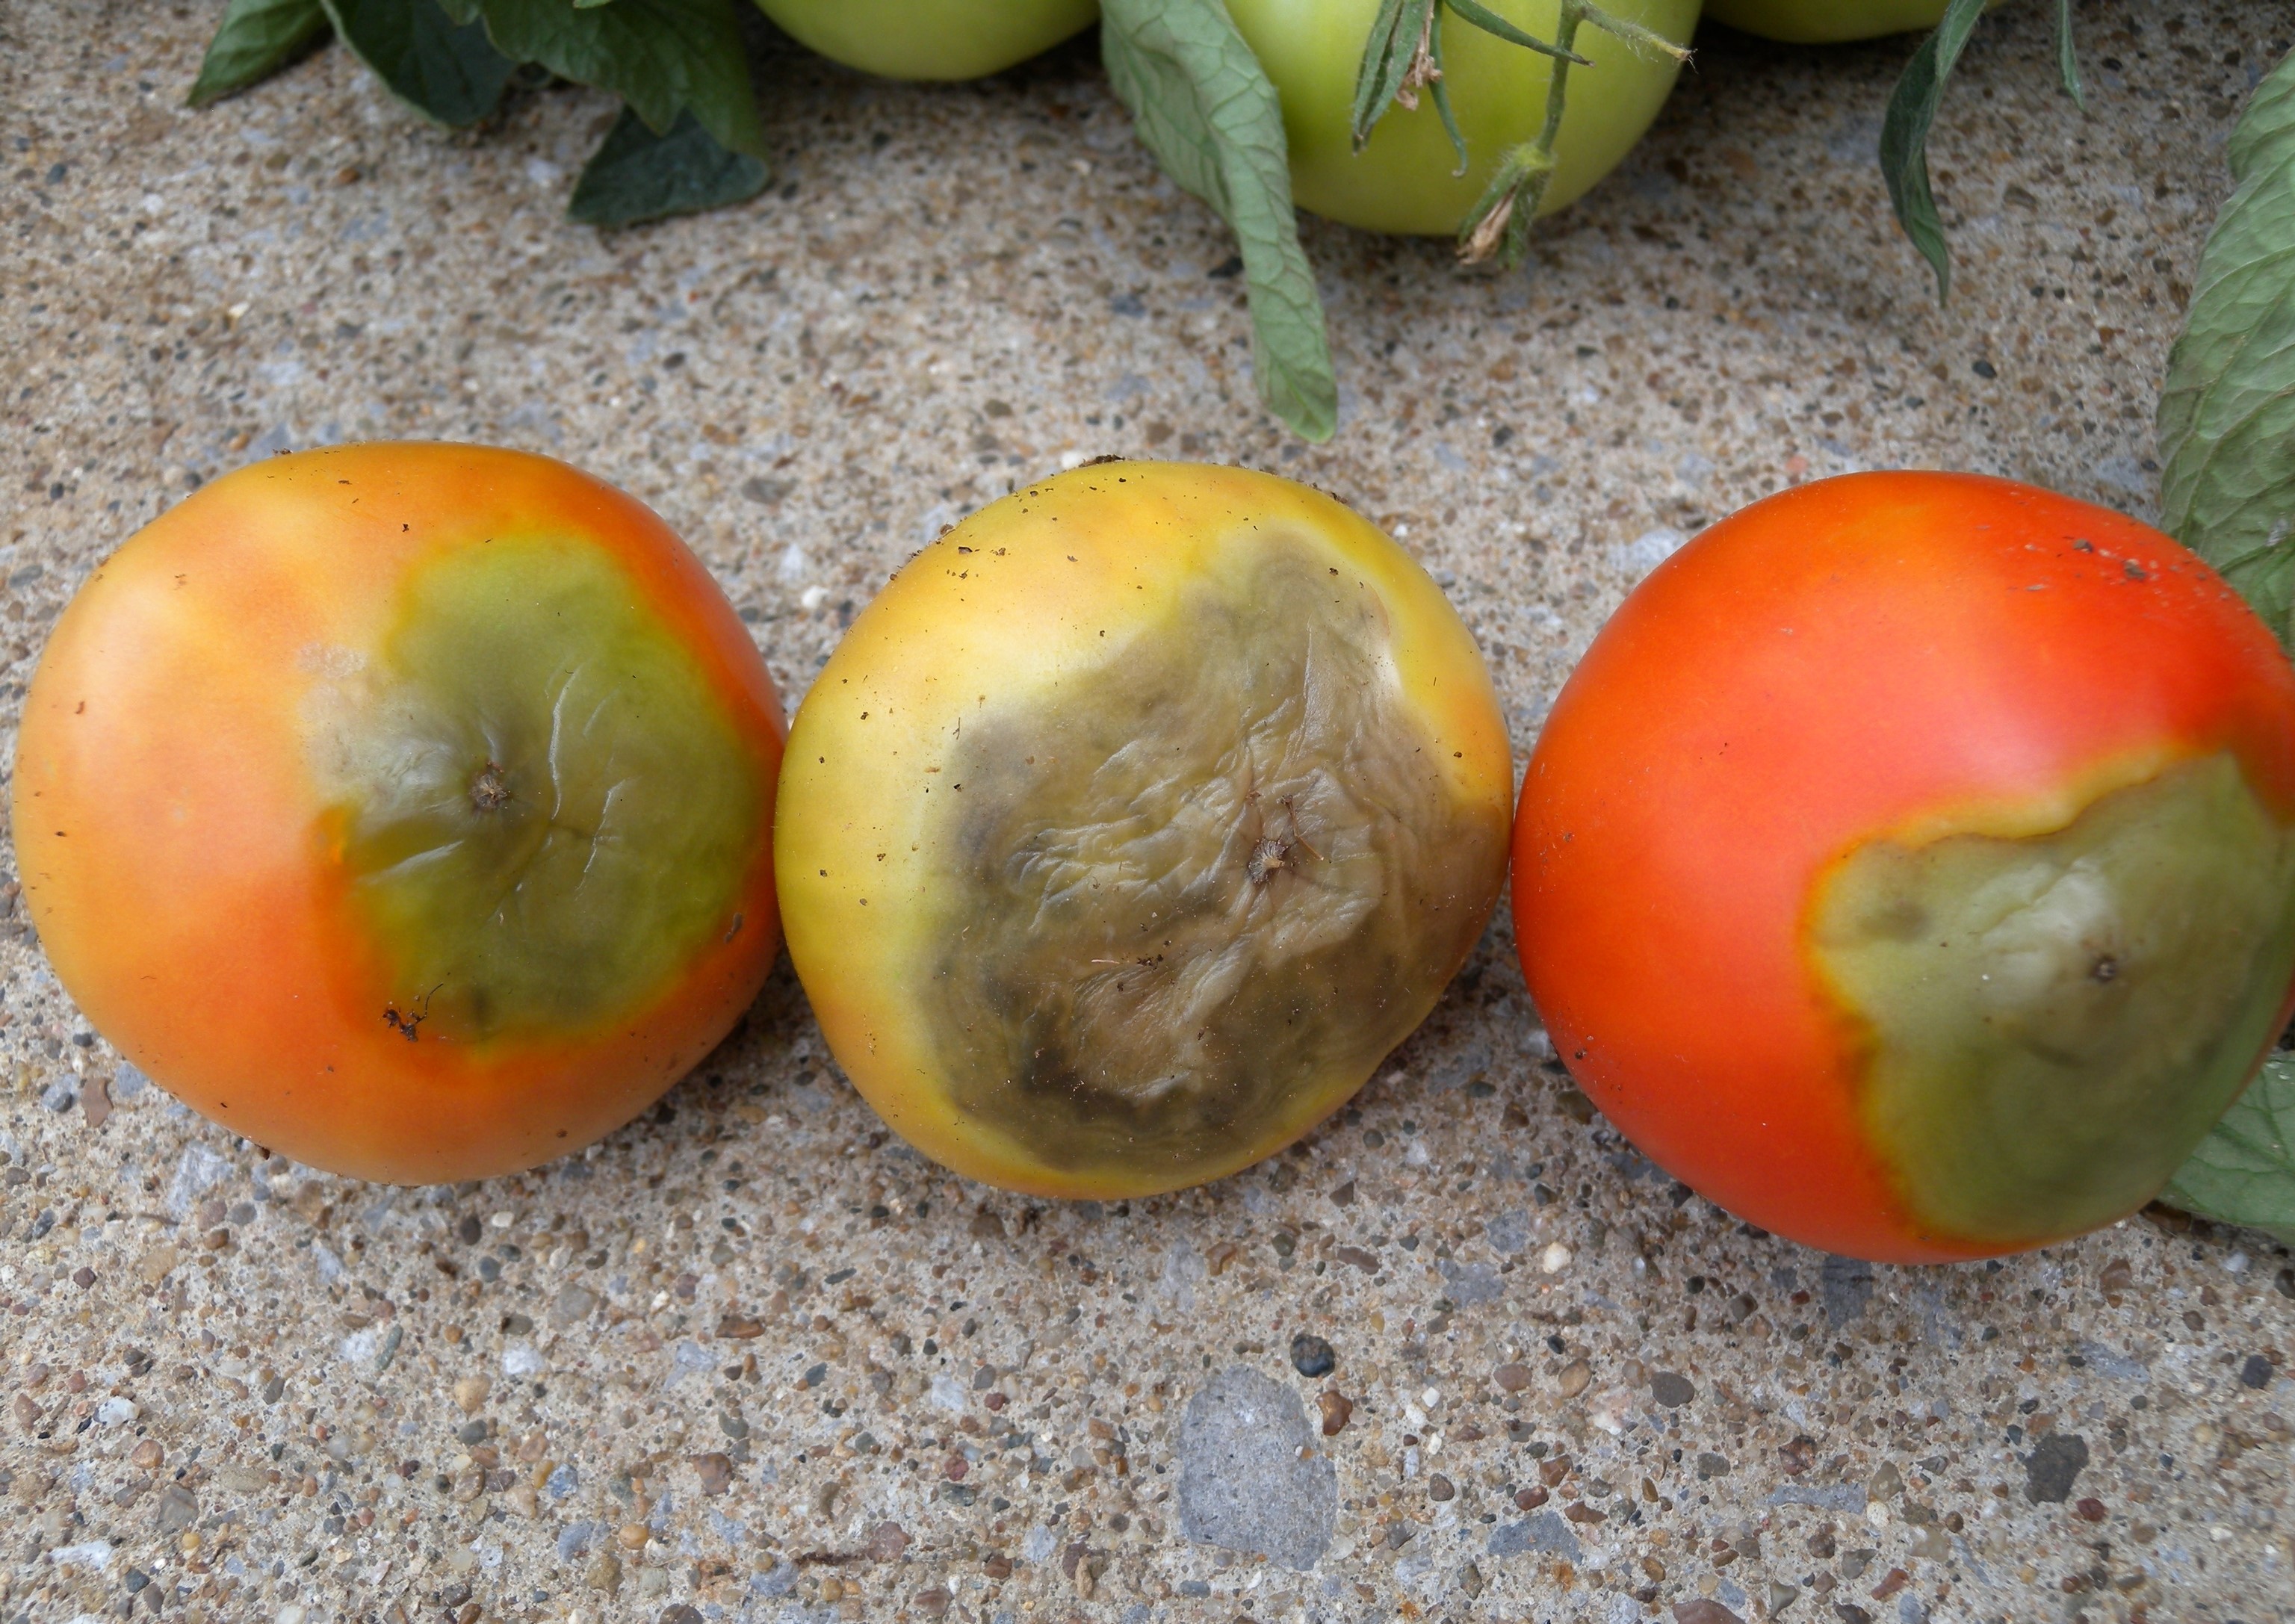
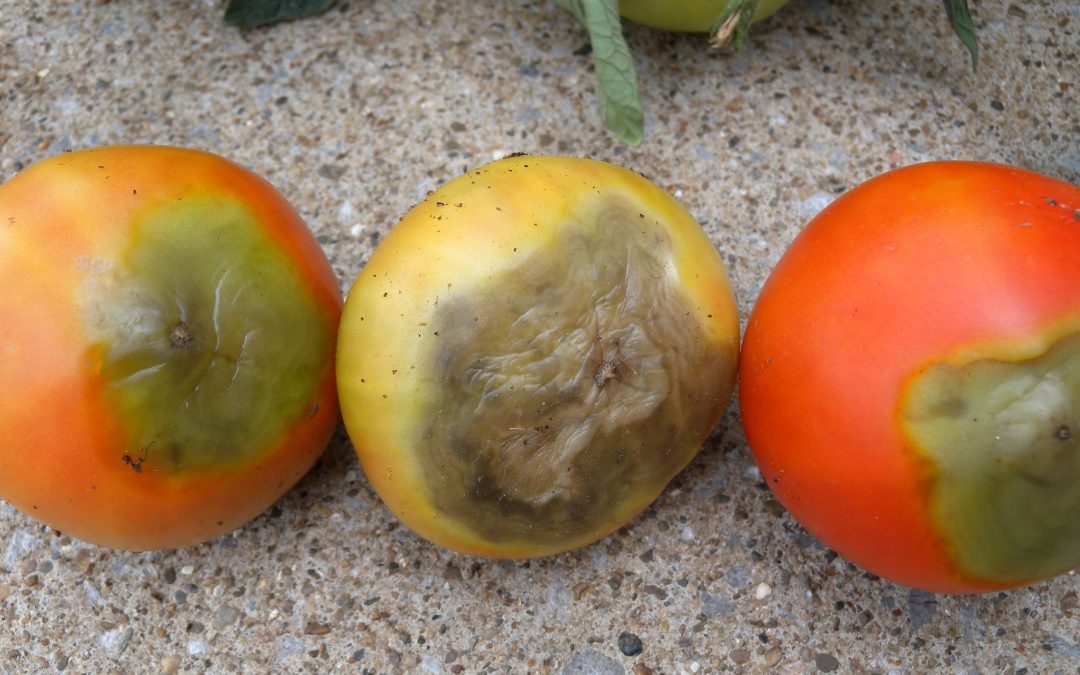
A promising start, until blossom-end rot strikes. Keep your tomatoes healthy by maintaining consistent watering, balanced fertilization, and proper soil pH. Photo by Mila Makhova, Adobe.
It’s the moment you’ve been waiting for – after weeks of careful tending, the first set of tomatoes is beginning to form. Each day, you check your plants with anticipation, imagining the juicy, homegrown harvest to come. But one morning, while inspecting your developing tomatoes, you notice some have sunken, leathery brown patches at the blossom end. Your excitement turns to frustration – what went wrong?
Blossom-end rot is one of the most frustrating disorders for home gardeners and commercial growers alike. This common issue appears as a sunken, leathery brown or black spot at the blossom end of tomatoes, usually occurring on the first fruits the plant produces. Though it may look like a disease, blossom-end rot is actually a physiological disorder caused by calcium deficiency in the fruit. Understanding what triggers it and how to prevent it can help ensure a healthy tomato harvest.
What Causes Blossom-End Rot?

Blossom-end rot can appear at any stage of ripening. These tomatoes developed severe lesions due to calcium deficiency caused by inconsistent watering. Photo by Brenda Kennedy, University of Kentucky, Bugwood.org.
Although blossom-end rot results from calcium deficiency in the fruit, it is rarely caused by a lack of calcium in the soil. Instead, the issue arises when calcium uptake is disrupted due to fluctuations in soil moisture, root damage, or excessive fertilization.
Calcium moves through plants via active transpiration, traveling with water as it evaporates from above-ground plant parts. Since leaves lose more water through transpiration than fruits, calcium is more likely to accumulate in leaves rather than being directed toward developing tomatoes. This imbalance is made worse by excessive nitrogen fertilization, which encourages leafy growth and further diverts calcium away from the fruit.
The following factors contribute to blossom-end rot:
- Inconsistent Watering. Calcium is transported through water in the plant, so periods of drought followed by excessive moisture can hinder uptake.
- Excess Nitrogen Fertilization. Too much nitrogen, especially in ammonium form, can interfere with calcium absorption and promote excessive foliage growth at the expense of fruit development.
- Soil pH Imbalance. Acidic soils (below pH 5.5) can limit calcium availability to plants.
- Root Damage. Over-cultivation or compacted soils can reduce root function, limiting nutrient uptake.
Prevention Strategies

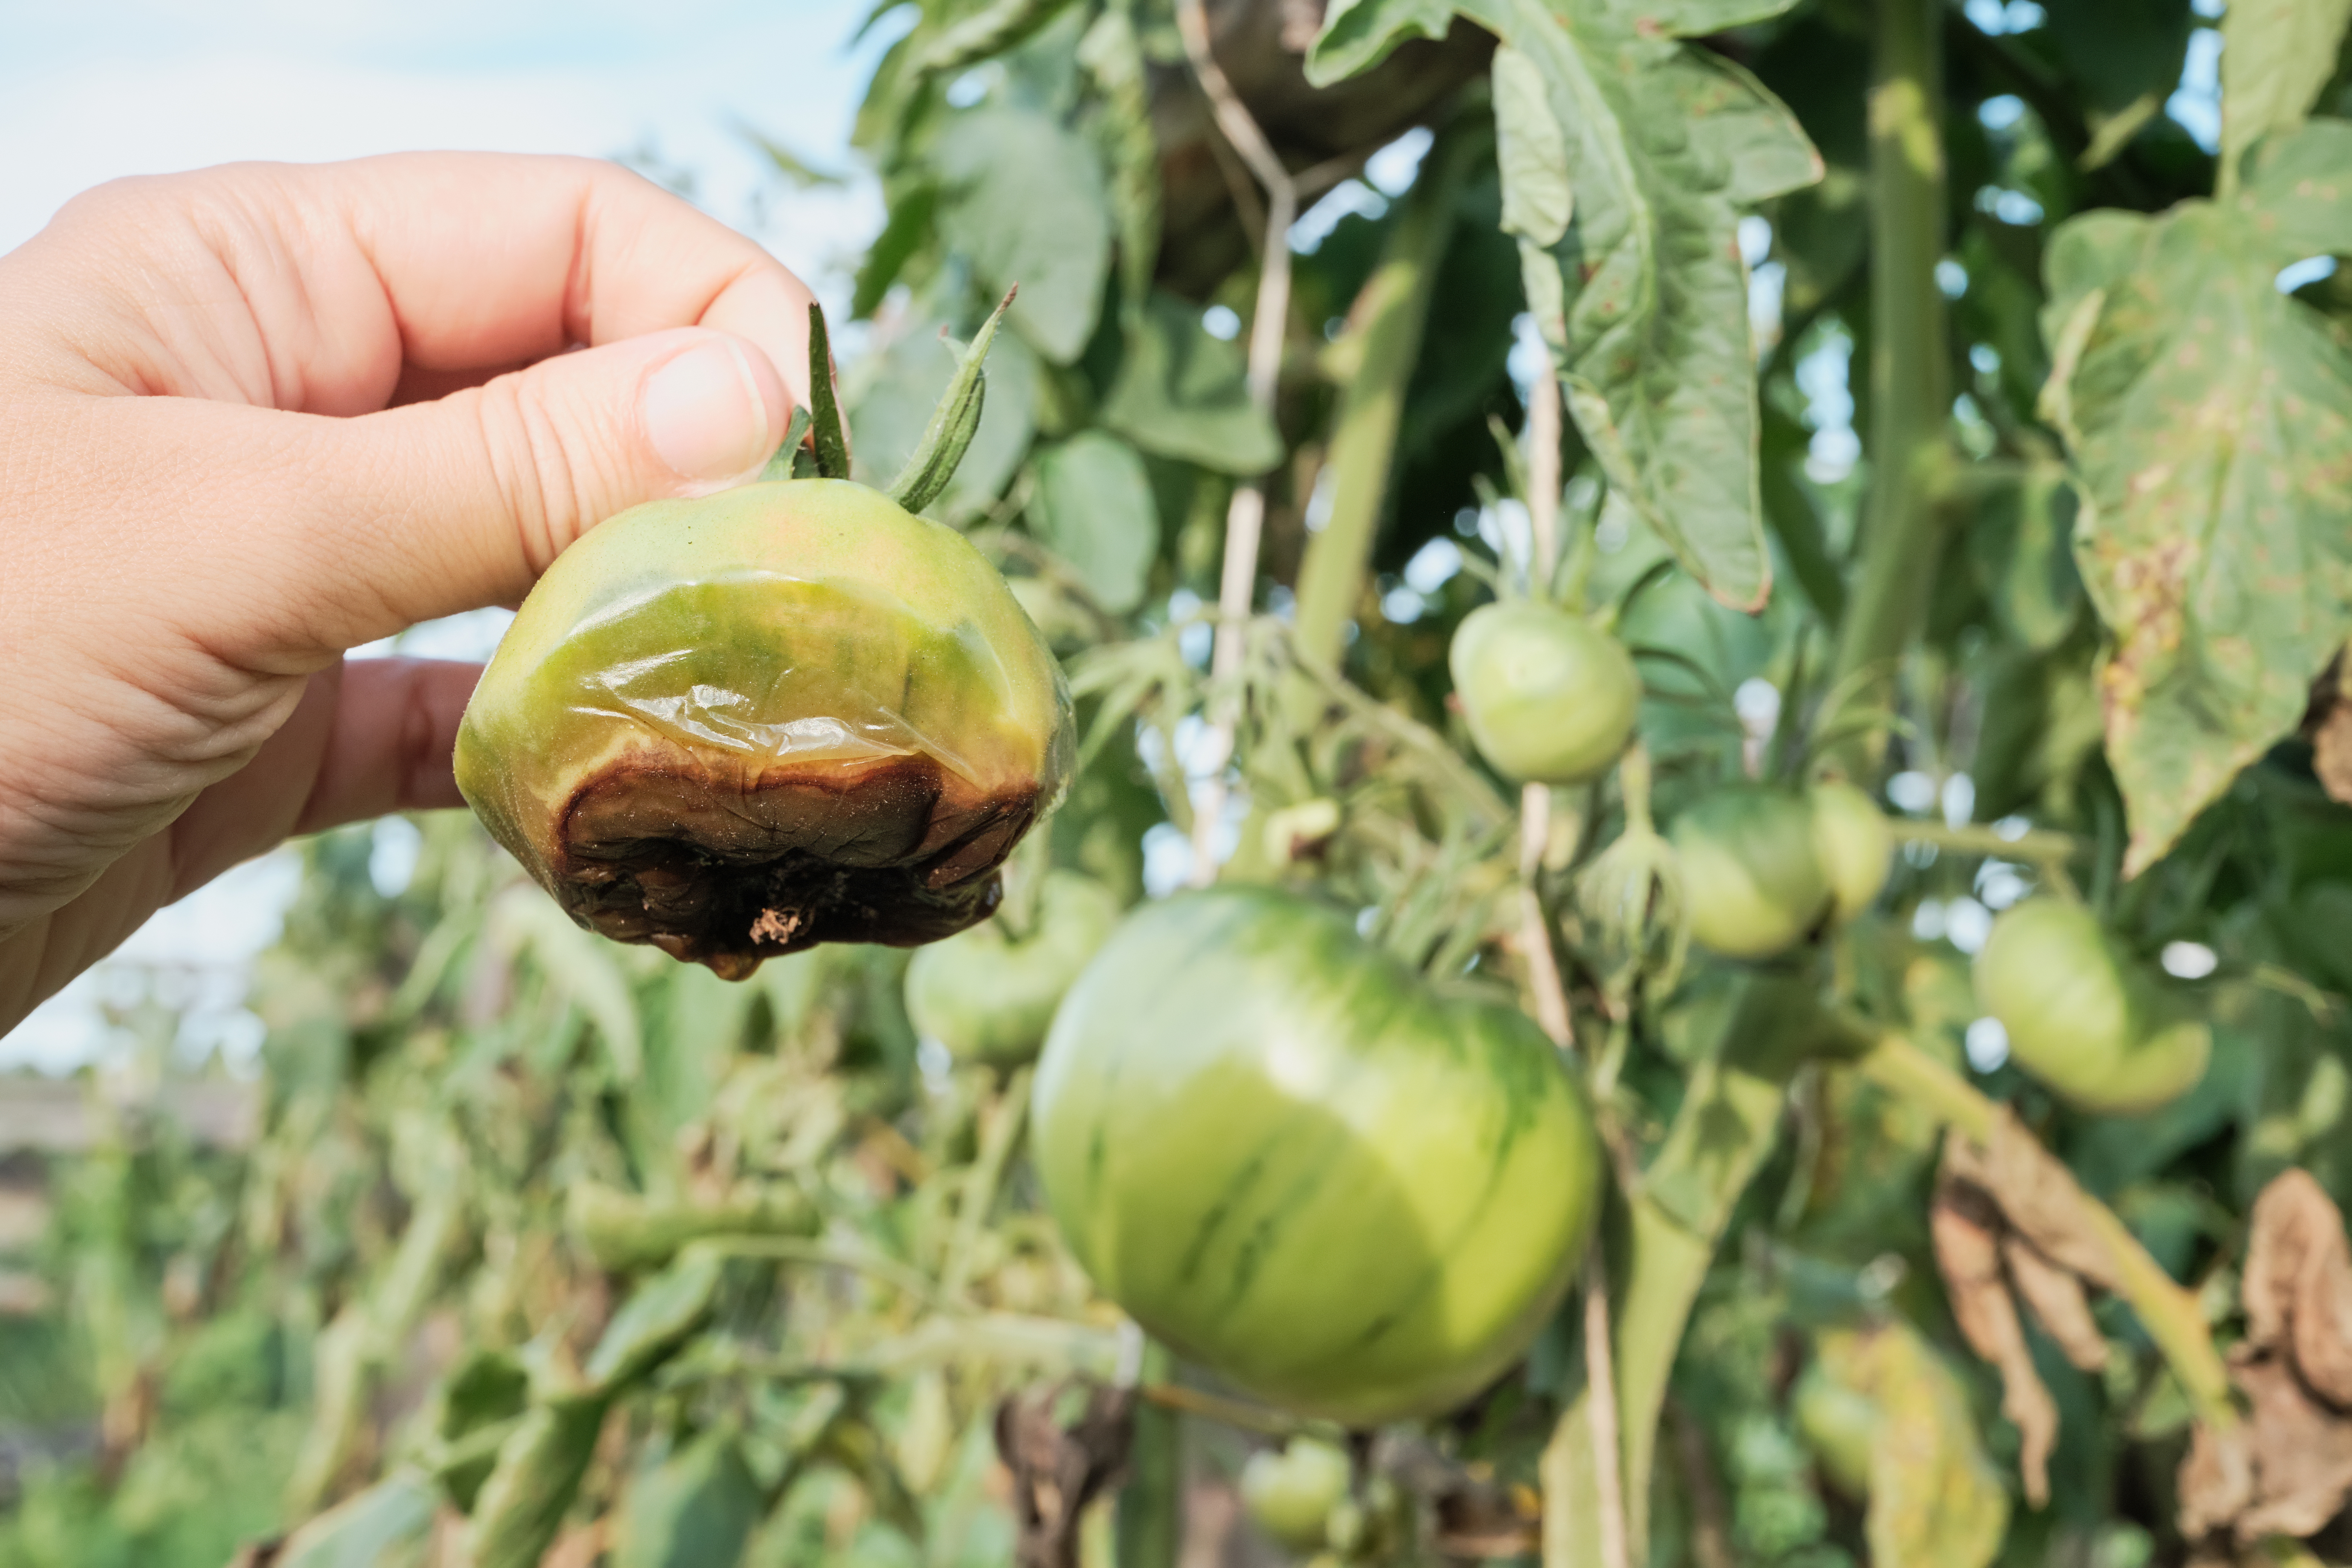
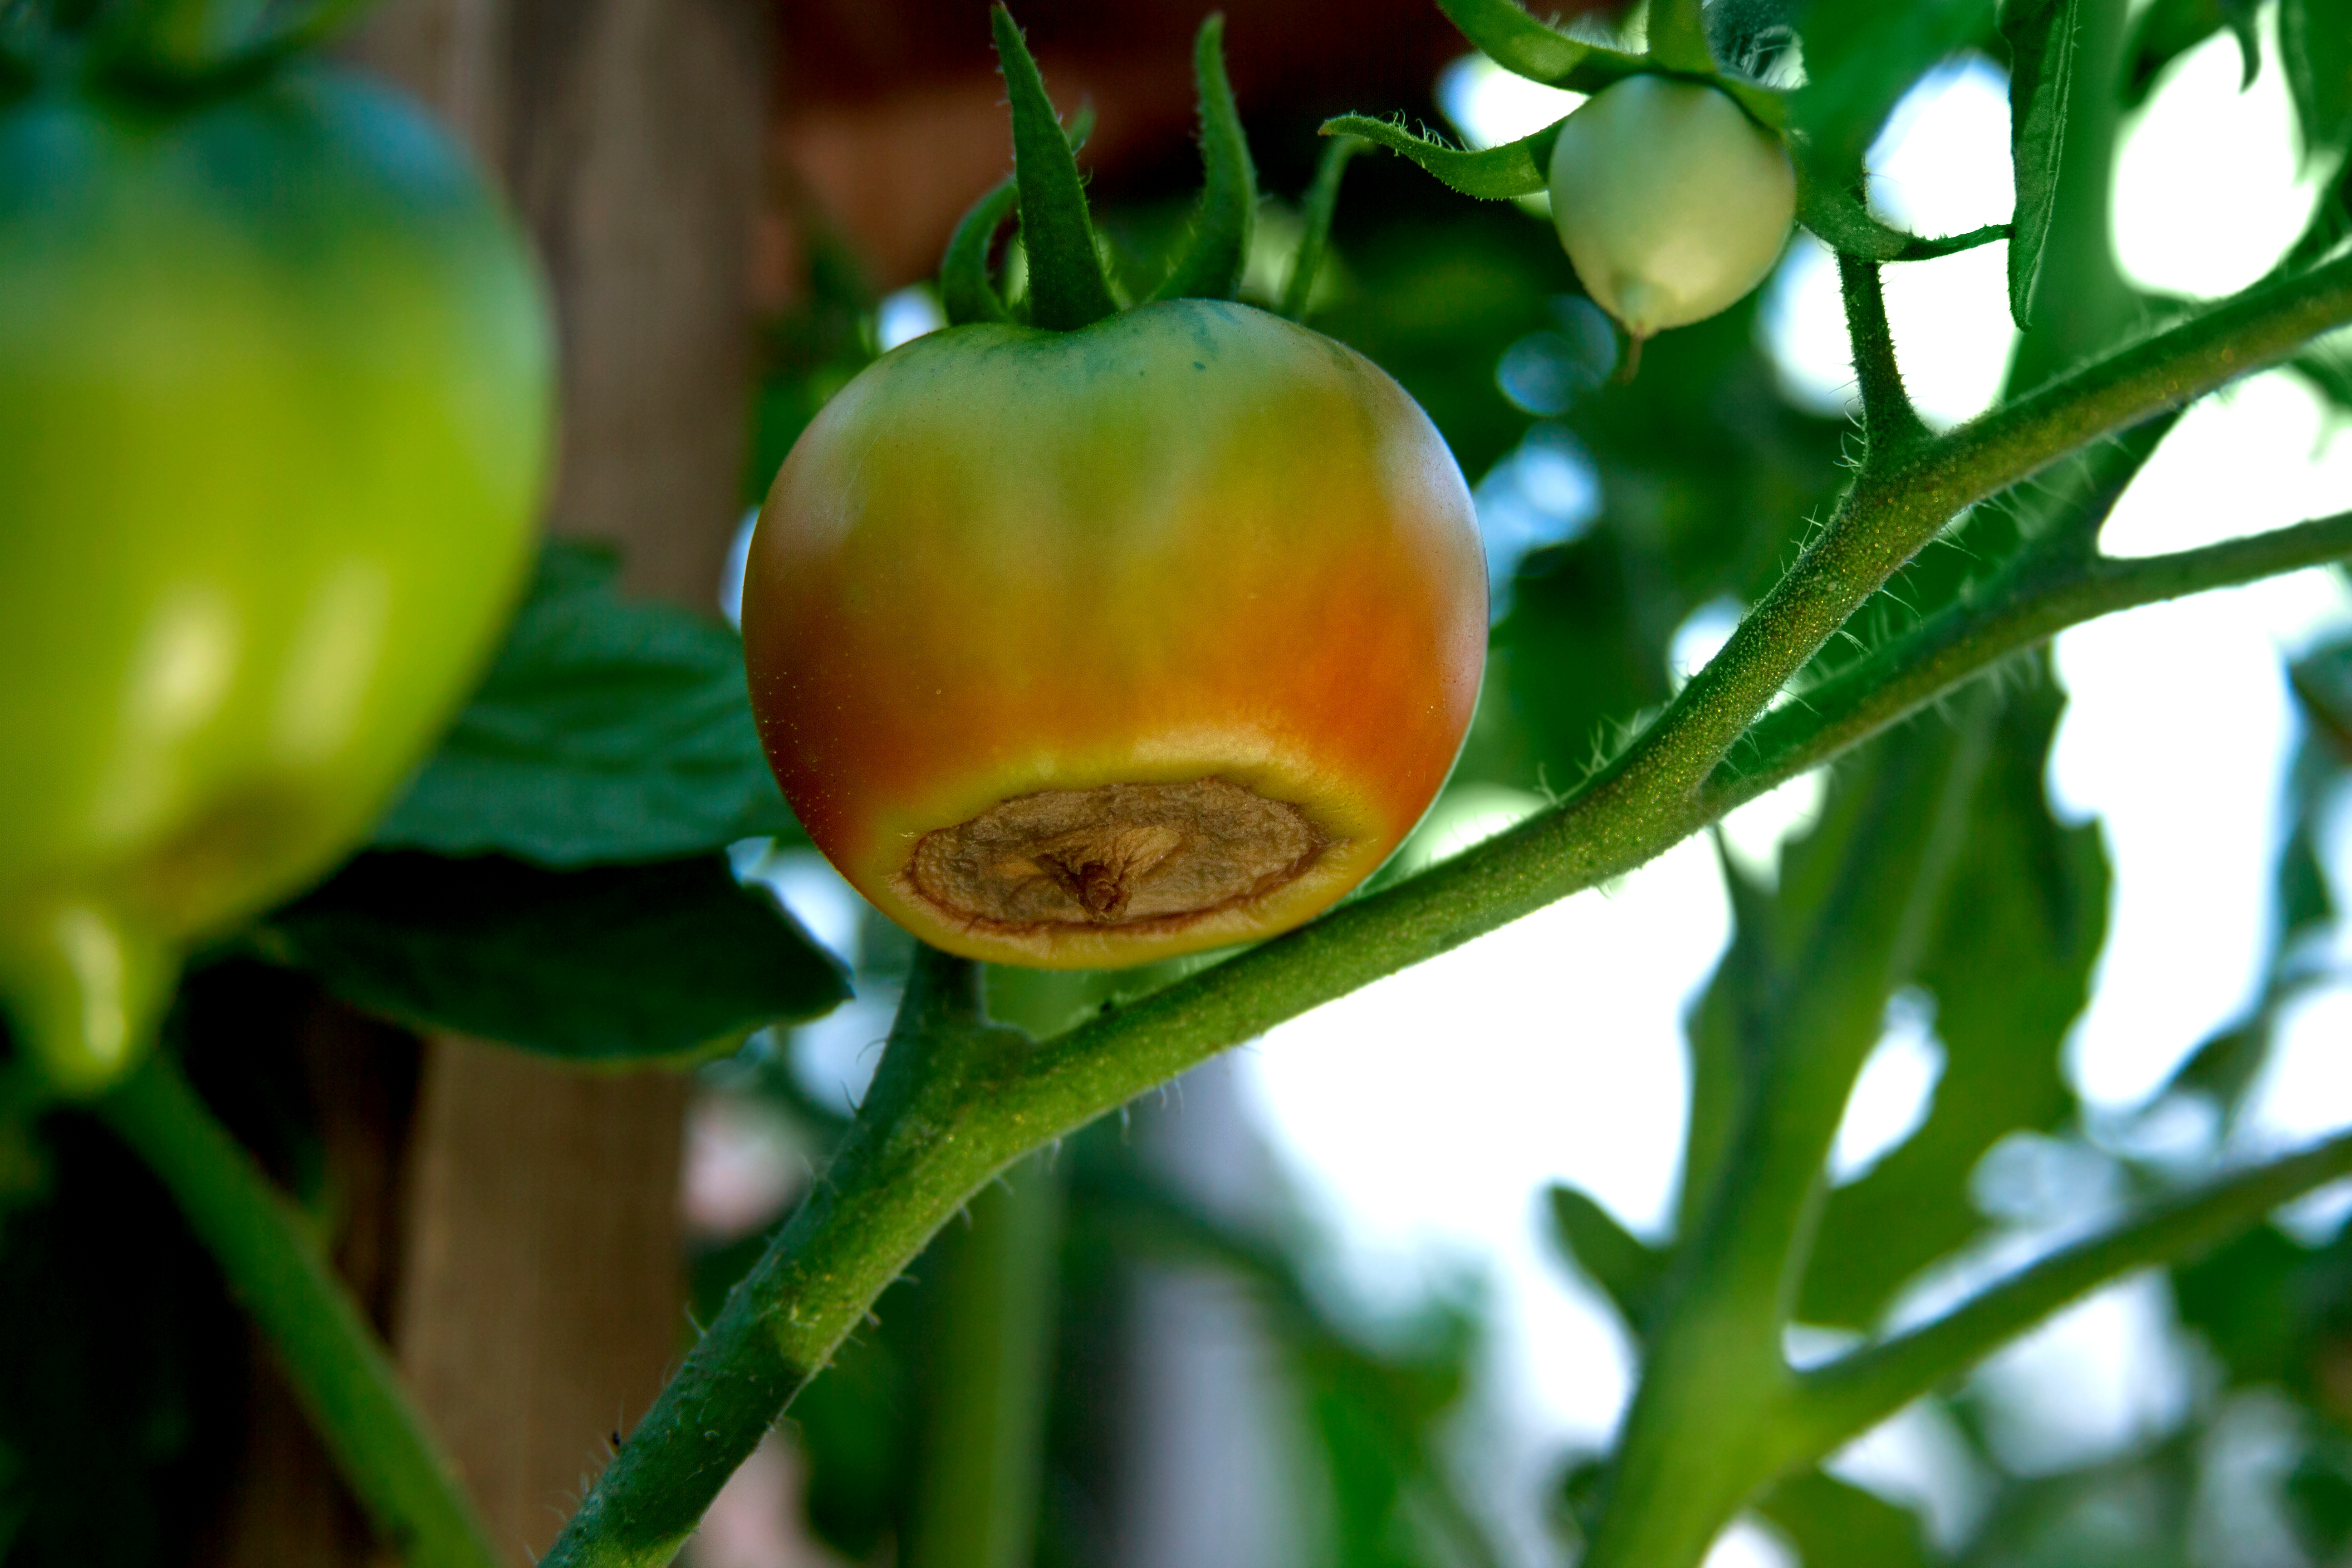
A severe case of blossom-end rot on an unripe tomato. Photo by Col Nihko, Adobe.
Blossom-end rot cannot be reversed once it appears, but often the plant will produce healthy fruit as the season progresses. Several cultural practices can help prevent it from occurring in the first place.
- Maintain Consistent Soil Moisture. Water deeply and consistently, adjusting for temperature and weather conditions. As a general rule, tomatoes need about an inch of water per week, with an additional half-inch for every 10-degree increase above 60°F. In hot summer months, when temperatures reach the 80s and 90s, this means tomatoes may require closer to two inches of water per week to maintain adequate soil moisture. Mulching with straw, pine needles, or shredded leaves helps regulate soil moisture and reduce evaporation. It is also important to avoid letting the soil dry out completely between waterings to ensure steady calcium uptake by the plant.
- Test and Amend Soil. Vegetable gardens, especially those rich in compost, often contain adequate amounts of calcium, but its availability depends on factors like soil pH and consistent watering. A soil test can determine if nutrient or pH adjustments are needed. If the soil pH is below 6.0, applying lime can help raise it to the optimal range of 6.0–6.5, improving calcium availability to plants. If a soil test confirms low calcium levels, adding gypsum (calcium sulfate) can provide a supplemental source of calcium without altering soil pH.
- Fertilize Properly. Using a balanced fertilizer with moderate nitrogen is key to preventing blossom-end rot. Avoid high-ammonium formulations, as they can interfere with calcium absorption. Excess fertilization early in the season encourages vigorous leaf growth, diverting calcium away from fruit development and increasing the risk of blossom-end rot.
- Choose the Right Tomato Varieties. Cherry and other small-fruited tomato varieties tend to be less prone to blossom-end rot than larger slicing types, making them a good option for gardeners concerned about calcium-related issues.
What to Do If You See Blossom-End Rot
Once symptoms appear, affected fruit will not recover, but the plant can still produce healthy tomatoes with proper care. Remove damaged fruit to encourage new growth and address the underlying moisture and nutrient issues. If watering and fertilization practices are adjusted, subsequent fruits should develop normally.
For more information on identifying blossom-end rot, visit the UF/IFAS Plant Pathology U-scout page: https://plantpath.ifas.ufl.edu/u-scout/tomato/blossom-end-rot.html.

by Julie McConnell | Apr 3, 2025
Some years it can be hard to tell that the season has shifted from winter to spring in Northwest Florida, but this year we are seeing ideal temperatures for summer vegetable gardens as we shift into April. Soil temperature is affected by ambient temperature and the last few weeks of warm weather has helped to make the ground more conducive to germination of warm season seeds and support growth of transplants. If you have not started your garden yet, do not despair, you still have time to get things growing!
Below is a short list of ideas for your vegetable garden, and you can find more detailed information in the Florida Vegetable Gardening Guide.
Direct seed (plant seeds directly into the garden instead of transplant) recommendations:
Transplant (grown from seed at home or purchased in the garden center) recommendations:
More helpful resources for Florida vegetable gardeners can be found below:
Growing Vegetables in Containers
Harvesting and Storing Vegetables
Starting from Seed

by Matt Lollar | Jan 2, 2025
It’s a new year and if you’re still contemplating resolutions, here’s one for you. Stay organized with your vegetable planting schedule. Since it’s January, let’s start with what you can do now. Crops like beets, broccoli, and Brussels are best planted as transplants in January. But carrots and celery can be started from seed and potatoes can be planted as seed potatoes, which are usually pieces of potato tubers containing at least 3 buds (eyes). January is also a good time to start transplants indoors for the spring garden. Tomato and pepper transplants can be planted in the garden as early as February or March depending on the year. If all this planting talk is overwhelming, then at least consider collecting and mailing off a soil sample for nutrient analysis. More information on soil testing can be found on askIFAS. This will give you a head start on adjusting pH with lime and improving soil health with compost and other organic materials. To help plan this “Year of the Vegetable Garden” please click below to enlarge the image of the handy “Florida Panhandle Planting Guide”.