by Joshua Criss | Dec 26, 2025
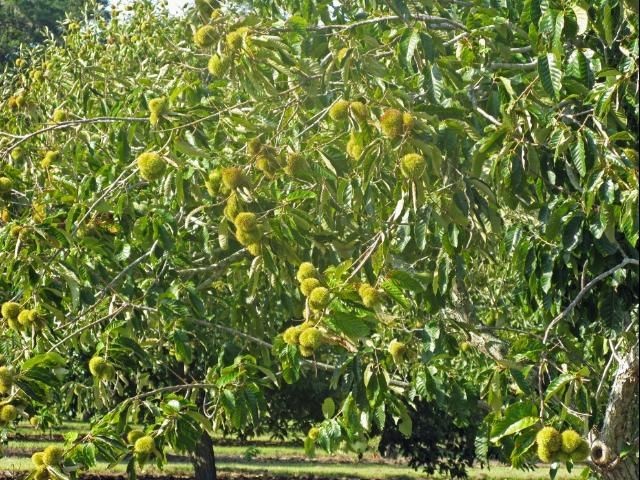
Christmas is a season rife with horticultural significance. Extracts from the Boswellia and Commiphora myrrah trees were presented at the nativity as frankincense and myrrh. Holly (Ilex spp.) and Ivy (Hedera spp.) are common in decorations, and a huge number of spices are used to flavor our favorite dishes of the season. Without plants, Christmas just would not be quite the same. One plant made famous thorough “The Christmas Song” sung by Nat King Cole is the humble Chestnut tree (Castanea spp.).
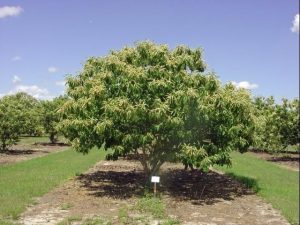
UF/IFAS Photo
A Brief History
Chestnuts once grew prolifically throughout the United States. They were prized rot resistant lumber produced alongside their staple nut crop. Further they were a critical resource for wildlife providing a food and shelter resource. This all came to crashing halt in the early 1900’s when a fungal blight took hold all but eliminating them from America’s forests.
Hybridization has brought this tree back into relevance. American Chestnut (C. dentata) and Chinese Chestnut (C. mollissima) has provided reinvigoration this tree’s once known potential. The reason is that the mixed genetics of this hybrid provide resistance to the blight while providing the products for which this tree is known.
Growing These Trees
Chestnut trees are known to grow upwards of 40 feet tall and wide. Keep in mind that these plants are monoecious, meaning you’ll need two if you would like a harvest. For this reason, you’ll really want to implement the concept of right plant, right place as they will take up a lot of real estate.
Though they prefer acidity, a wide array of well-draining soils will suffice. That said, these trees will appreciate some active irrigation beyond that required to establish the tree.
As all Extension professionals will tell you, fertilization should be planned and executed based on soil testing. It is common though to apply one pound of a 10-10-10 fertilizer per year of tree age up to 15 years.
Growing this way, you can expect these trees to bear in roughly five years. Nuts will be produced on the new wood where branches maximize sunlight interception. Therefore, pruning for this will produce the highest yield.
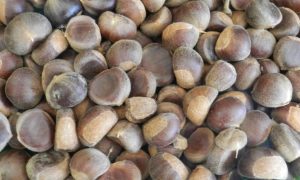
UF/IFAS Photo
Pest Concerns
There are minimal pest concerns with chestnut trees. The main concern is Chestnut blight, which has been largely mitigated through hybridization. There are some other concerns, but these again can be mitigated through cultural practices. Keeping the areas under these trees clean will deny overwintering habitat to any insects while appropriate irrigation will greatly reduce the risk of any fungal infections. If managed appropriately, the biggest pest you’ll find near these trees is squirrels and deer seeking to deny you a harvest. As always, the only real way around this is physical barriers.
Chestnut trees are certainly worth a second look in your landscape. New hybridization has brought these back into the spotlight. With both wood and edible nuts they are certainly one that you should consider for your property. Done properly, you’ll soon be roasting chestnuts on an open fire as Nat King Cole suggested many years ago. As always, for more information on this or any gardening topic, call your local extension office.
by Joshua Criss | Nov 6, 2025
Another North Florida winter is here! With that comes a new plants from leafy greens to snapdragons. It also means the inevitable freeze is on the way. It is prudent for all gardeners to review what needs to be done to protect your non-freeze hardy plants.
Hardiness Zones
Before we get into what actions you may need to take, let’s examine plant hardiness zones. These are geographic areas created by the US Department of Agriculture defined by their average extreme minimal temperature. In the Panhandle these are zones 8b through 9b. In winter we will likely see low temps between 15 – 30 degrees depending on your zone. Sourcing plants appropriate for your zone can mitigate quite a bit of cold damage in your landscape. If you like plants susceptible to the cold, you can interplant them to add a little protection.
Microclimates
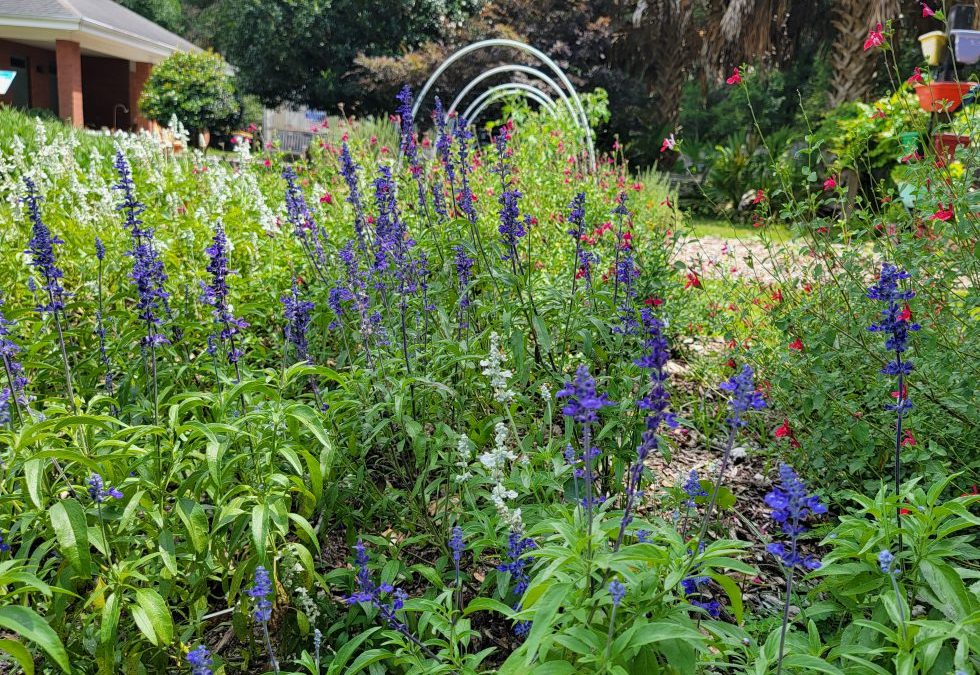
Find and utilize your yard’s microclimates. Areas under larger trees are likely to remain warmer in the winter. This is also true behind a windbreak, or near a structure with high sun exposure. Look around your yard and plant any cold sensitive plants in these areas.
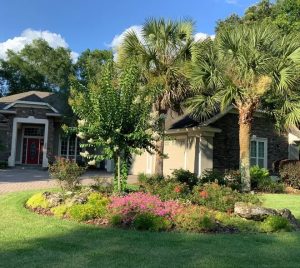
This area is likely to have multiple microclimates. UF/IFAS Photo
Full Season Plant Care
Cold protection begins with warm season plant care. Pay close attention to the irrigation and fertilization needs of your landscape plants. Apply these properly to ensure stress free plants moving into the colder months as these will perform better as the mercury begins to drop.
Imminent Freeze Actions
Ok, now that everything is planned, we know our microclimates, and we’ve cared for our landscape through the year let’s see what can be done when a freeze is imminent.
Water the morning prior to a freeze event. Wet soils retain warmth better than dry. That heat will be re-radiated through the freezing night keeping your plant slightly warmer. Adding some mulch will aid this effort. Watering again the next day will break any ice formed in the soil. Keep in mind that prolonged saturation could be detrimental to root systems. Scout your plants regularly after using this strategy to ensure plant health.
Protect potted plants by bringing them indoors. Those that are too big to move should be padded with extra mulch, and clustered together when possible. Make sure to move them back in place when the warmth returns.
For those trees with graft points (i.e. Citrus), tree wraps may be used as protection. If you don’t have these, pile mulch around the base of the tree to insulate the graft. The idea here being that even if the branches above the graft succumb to the cold, the tree can rebranch above the graft thus keeping the desired fruit of that tree.
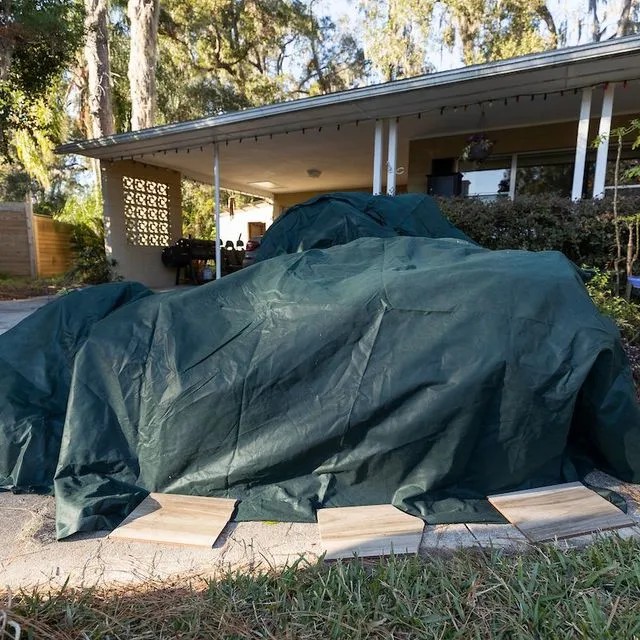
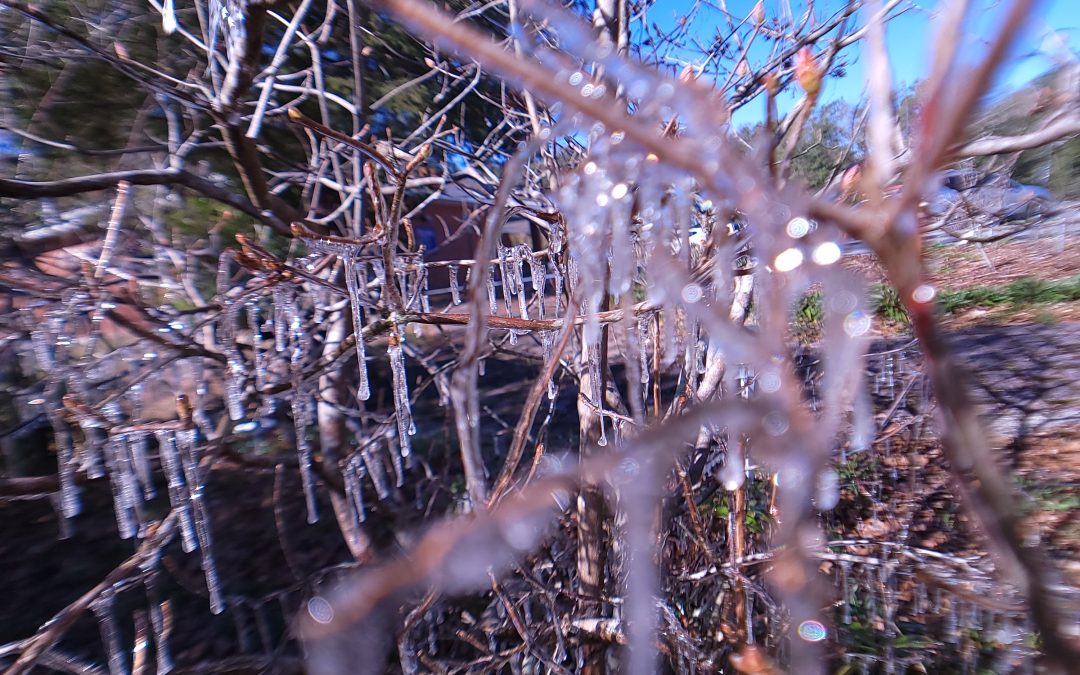
Finally, cover your plants. Covers are more useful for frost than freezing temps but are better than direct exposure to cold air. Keep these off the plant’s foliage while ensuring they reach all the way to the ground. Think ghosts over lollipops. Taking them to the ground will capture any heat radiated out of the soil overnight. The addition of lights underneath the cover can help keep that area a little warmer. Be very cautious when doing this as too much heat under the cover could be dangerous.
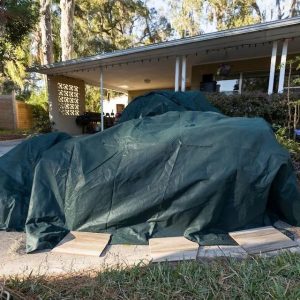
Plants covered above the foliage, and to the ground. UF/IFAS Photo
You may see some nurseries apply irrigation via sprinklers through the freeze as protection. While this method does work, it requires some specialty equipment. Additionally, you’ll need to apply the water prior to the freeze setting in and continue until the temps return. It not a practical solution for homeowners.
Once the cold passes, keep an eye on your plants. Wait until you see new growth before pruning damaged plant tissue. If in doubt you can slightly scrape the bark. If the cambium beneath the scrape is green, it is still alive.
For more information on cold protection or any other horticultural topic contact you local UF/IFAS Extension office.
by Joshua Criss | Oct 10, 2025
Planning landscaping is undoubtedly not easy. The primary concern relegated to each individual homeowner is what you want out of your yard. Many are content with just grass, while others desire a diverse array of plant life. One aspect oft overlooked is your landscape’s capacity to be a boon for local wildlife. With a bit of planning, your property could be literally buzzing with insect pollinators, wild birds, and even our reptilian friends.
Where to Start
For this article, let’s begin with a newly established development. What has happened in this scenario from an ecological perspective, with what we’d call primary succession? In short, this means an area that experienced a complete reset of its plant communities. In nature, this would be the result of events such as a volcanic eruption, but in Florida, it’s far more likely due to bulldozers.
Now, the good news in this scenario is that you won’t be receiving your property in this condition. The developer has fast-tracked the process by planting grasses and some basic trees by the time you’ve purchased the property. It’s from this basic setup that you, my new homeowning friends, can begin your husbandry of our local animals.
Begin by investigating the where your new home was built. If it began as a wetland, you’ll want to select plants appropriate for that environment. The same is true if you’ve moved into what was forest land. This thought aligns directly with the first of our FL Friendly Landscaping principles: right plant, right place. There is little sense in putting plants that don’t like wet feet into a poorly draining soils common in wetlands.
UF/IFAS Photo: J. Criss
Consider Your Environment
You’ll also want to investigate the wildlife that is endemic to those environments and areas. Knowing what is there, and what you’d like to attract to your landscape, will help you decide which plants will be best. For instance, replacing a crape myrtle (Lagerstroemia indica) with a red maple (Acer rubrum) in what was previously a wetland environment puts a tree better suited to that environment, which will require less maintenance from the homeowner. Additionally, red maples are known to be an early-season nectar source for a multitude of moths and butterflies while providing nesting sites for local birds.
Red maples are a great example of plant selection and what it can do to attract wildlife to your yard, but there are other guidelines with which you’ll want to be familiar should this be your goal.
Guidelines for Attracting Wildlife
Water is critical to all life on the planet, including wildlife. Providing water features in your garden will increase the chance for animals visits to your garden. This can be as basic or as elaborate as you’d like. Everything from a pond to a simple dish of water will suffice. One common water feature challenge to consider for Florida gardeners are mosquitos. Avoiding these pesky creatures could be as easy as creating flowing water features. Solar fountains are an easy and cheap way to accomplish that goal.
Shelter is another critical aspect to attract wildlife. Either natural or man-made, it is essential to attracting and keeping various species in your yard. Bird, bat, or owl houses are perfect solutions to this issue. Just ensure you site them correctly to provide the correct environment for the animal in question.
Design your landscape to be layered. In this instance, this means integrating shrubs, trees, herbaceous plants, and groundcover. Doing so will provide some cover for feeding while providing visual interest to your home.
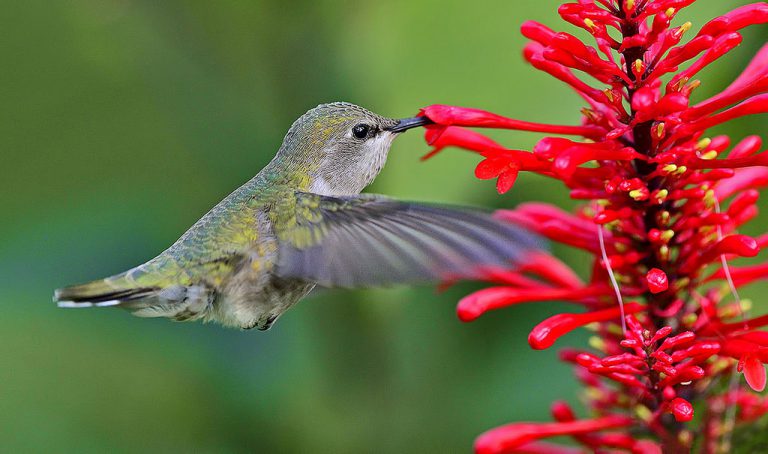
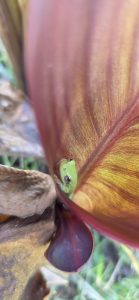
Last and certainly not least, choose plants known to be a food source. When doing so, you’ll want to research how those animals you’d like to attract eat. For instance, hummingbirds (Trochilidae) have a small, curved beak. If this is the species you’d like, you’ll want to select plants rich in nectar with tubular flowers. Firebush (Hamelia patens) is an excellent example of a plant for this purpose.

UF/IFAS Photo
Conclusion
Bringing local wildlife into your yard is an excellent way to get to know the small creatures living in your area. A few simple changes may go a long way toward reintroducing habitat to an area where it may be waning. For more information on attracting wildlife or any horticulture topic, refer to your local Extension office

by Joshua Criss | Aug 23, 2025
Identifying the plants present in your gardens and landscapes is a critical skill. These plants are the sculptors of our local environment. As such, it’s important to understand how they affect local ecology, and what services they may provide. Three overarching categories you’ll find as you delve into plant ID are “native”, “introduced”, and “invasive”. The latter of these is the subject of this post. Invasive is often a misunderstood term but hopefully this will clear up some of that misconception.
Definitions
Before any other conversation can even take place, it’s important to define terms. The first, and most important of these is “Invasive”. Believe it or not, there is an official definition laid out by the USDA under Executive Order 13112. It states, “an alien species whose introduction does or is likely to cause economic or environmental harm or harm to human health.” Alien in this instance being any propagation material of a species not native to a particular ecosystem.
Invasive contrasts with “Native” or “Introduced” species which either naturally occur in an ecosystem or were brought to said system through human activity. Keep in mind that many introduced species have served gardeners very well providing food, beauty, and pollinator support without the risks associated with invasive plants. You can find all these terms defined on the USDA’s website.
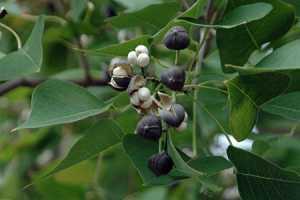
Chinese Tallow “Popcorn Tree” Photo: J. LaForest UGA
What’s the Damage
So why is it important to know these species, and more importantly what can gardeners do about them? The primary issue with these plants is how they impact our natural areas. They compete for real estate crowding out more desirable species. They also deprive these species of resources such as sunlight or nutrients often denying nectar to our pollinators.
Not worried about the impact on natural areas? On an economic front, it costs Florida’s taxpayers roughly $179 million per year to manage invasive species, the majority of which is applied to plant species. This number may seem high, but considering a single invasive insect has cost the citrus industry billions in lost production it seems appropriate.
Economics not persuasive? Some invasive plants such as castor bean (Ricinus communis) are very dangerous for humans. Ingestion of this plant carries a high potential of illness and often results in fatality.
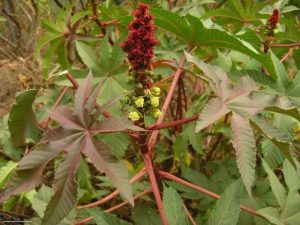
Castor Bean Plant
Photo: J. Hollinger
Summing it all up
The bottom line is that invasive plants are not innocuous. The plants we grow in our landscape can and do have detrimental effects on the surrounding environment, the economy, and are potentially deadly to humans. It’s incumbent upon all gardeners to know how to identify these plants. Once you have identified them, it’s important to learn how to eliminate them so they don’t return.
There are many resources out there to help with identification. UF/IFAS has an assessment tool here. This tool allows you to search for individual plants and provides their known status. Another great way to discover the invasive status of your plants, is through the Florida Invasive Species Council or FISC. They are the convergence point between scientists, land managers, and local governments which inform a list of plants with invasive tendencies. That list may be found here.
For more information on controlling invasive species or any other gardening topic, please contact you local UF/IFAS Extension office.
by Joshua Criss | Jul 6, 2025
The Panhandle has experienced a significant amount of rain lately. It seems like there isn’t a day that goes by in which even walking out the door seems impossible due to the downpour. While this is hard enough for the people living in the area, without a mitigation strategy, your lawn and landscapes may be suffering just as much. The good news is that there are several methodologies to usher the excess into local surface water reservoirs.
The Issue
Before we get started, let’s first talk about why storm water needs to be managed. Storm water can be defined as any rainfall failing to infiltrate the soil. In short, it is water that flows from your property onto impervious ground into storm water drains and ultimately into the Gulf of America.
This water can and will carry pollution from houses, pet waste, and heavy metals, amongst other things, into our local waters. All of that is before we even account for nitrogen moving from the atmosphere during these storms. All of this may be detrimental to local aquatic populations, ultimately leading to eutrophication due to excess nutrients. In the worst cases, these nutrient-rich waters cause red tide, which limits recreational use and fishing in our area.
The good news is that homeowners can take specific actions to mitigate the risks associated with storm water. The three primary types of these are rain gardens, swales, and rain barrel catchment systems.
Rain Gardens
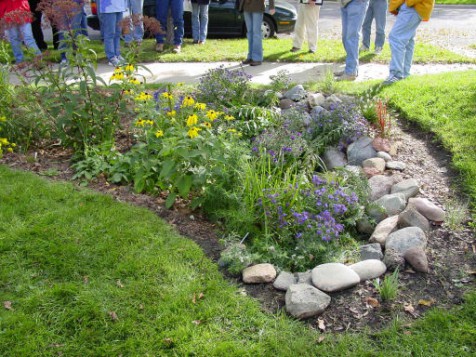
A rain garden is an area planted with vegetation designed to prevent mass water flow on your property. They may be sited in multiple locations, including sloped yard areas, or those in which you notice pooling following a rain event.
Carve out the area and backfill with porous soil materials. The plants you’ll want to select for this garden should be able to tolerate drought followed by periods of flooding. One solid strategy for this mitigation system is to direct the downspouts from your house into one of these garden spaces. Between the turfgrasses planted along the water’s path and the root systems of the plants within the rain garden, storm water will be pushed through a biofiltration system while being redirected from the local watershed. To learn more about rain gardens, consult these document.
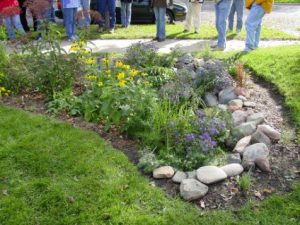
UF/IFAS Photo: Theresa Watkins
Swales
Swales are like rain gardens in that their primary purpose is to redirect water flow. While these may be outfitted with vegetative plantings termed bioswales, the highway for water flow in traditional swales typically consists of turfgrasses.
These are quickly draining soils, aided further by the thick root masses inherent to grass. Where they differ from rain gardens is in the amount of work they require. Critical to this system is selecting turfgrass species suitable for the site and applying the correct water, fertilizer, and mowing practices. These practices allow for strong and stress-free grass growth.
Rain Barrels
Last, though certainly not least, are rain barrels. These may be found at the downspout of gutter systems attached to houses. Their purpose is to collect the stormwater flowing from the roof. They can be a handy tool in eliminating stormwater runoff. To learn more about designing rain barrel catchment, consult this document.
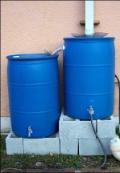
UF/IFAS Photo
Stormwater is a significant concern in our lawns and landscapes. If allowed to go unchecked, it provides an avenue for pollutants and excessive nutrients to enter our waterways. Implementing the strategies in this article can significantly reduce these risks. For more information on stormwater management or any horticulture topic, refer to your local Extension office.