by Joshua Criss | May 22, 2025
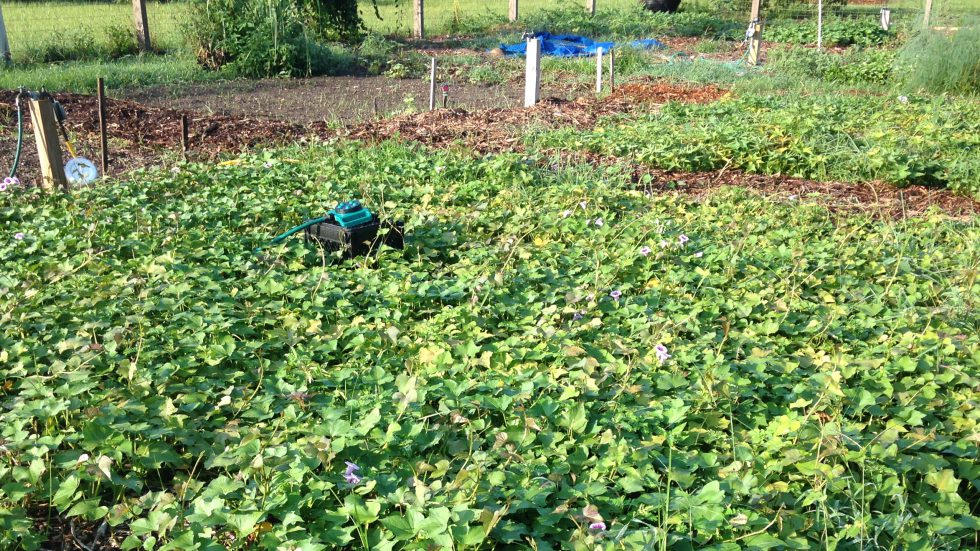
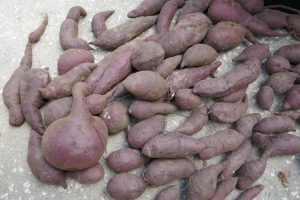
Sweet potatoes (Ipomea batata) are a much ballyhooed southern food staple. Valued primarily for their tuberous roots, they also boast an edible leaf. That, however, is not the end of their story. Some cultivars find use strictly as an ornamental. While not the subject of this article, you will typically find these dangling over rock walls or cascading from a hanging basket. While these can be quite impressive, this article will focus on the edible version of this plant, and its nutritional benefits.
UF/IFAS photo: M. Bailey
What Cultivar?
As with any vegetable, these have been heavily bred to optimize growth and yield in our southern environment. In Florida’s Panhandle, ‘Centennial’ and ‘Beauregard’ are two varieties that perform admirably. They have a vining growth habit and are very productive. For those gardeners with less space, ‘Vardaman’ sweet potatoes. This cultivar has a bushy growth habit rather than a trailing vine.
Planting
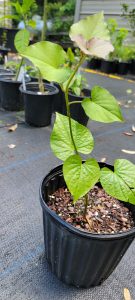
Sweet potatoes are not planted by seed, but rather from a “slip”. These are the vegetative growth from the mature sweet potatoes. While it is possible to grow these yourself, it is better to utilize certified disease-free slips from a reputable garden supply store. Use slips that are 6 to 9 inches long, planting them in rows 48 to 54 inches on center, with plants spaced 12 inches apart.
Sweet potatoes can be planted in early spring through late June. These plants thrive in sandy soils, which are typical in the Panhandle with very little fertilization (approximately 0.04 lbs. of N on a 10 x 3-foot row). The downside to sweet potatoes is their exceptionally long growth season of 100 to 150 days after planting.
UF/IFAS photo: J. Criss
Pests
There are some pests which you’ll need to be wary when growing sweet potato. Most notably of these is the sweet potato weevil (Cylas formicarius). Even small amounts of damage from this insect can induce sweet potatoes with a foul taste. Control them through cultural practices such as turning your soil several months prior to planting, and adequate irrigation. Wireworms and beetle larvae are also concerns with sweet potatoes. Sample for grubs throughout the growing season, remove vegetation post harvest, and rotating your crops will keep these pests at bay. If all else fails, there are insecticidal options available. Consult your local extension agent to choose the appropriate option.
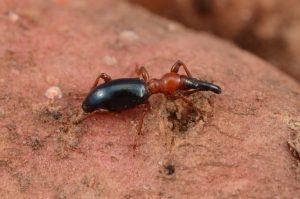
Sweet potato weevil UF/IFAS Photo: L. Buss
Time to Cure
Post harvest, sweet potatoes should be placed in a dark 85° room with 90% humidity for about two weeks. This is known as curing and will convert some of the starches of this vegetable to sugar making it slightly sweeter. Once the curing process is finished, store them in a cool, dry pantry at temperatures below 50°. This will keep them a viable staple in your pantry for several months.
The end result of all this work will be a food high in vitamin A, vitamin C and fiber that can be used for anything from home fries to pies.
To Sum Up
Growing your own vegetables in your own garden is a very rewarding experience. Sweet potatoes are an easy way to produce a lot of food for your family. If you’d like to know more about growing sweet potato, please consult these document. For more information on this topic or any other horticultural concern please contact your local U/IFAS extension office here.

by Joshua Criss | Apr 21, 2025
Lawns are as American as apple pie, and Granny’s cookies. It’s where you play ball with your kids, and have summer cookouts. It’s also quite likely a huge source of frustration. How much water, how much fertilizer, how much work, and why bother? All of these are valid questions, and ones this article seeks to clarify. We’ll delve into the benefits of healthy lawns, and cover some easy cultural practices you can implement right now for a green and lush lawn all summer long.
The Benefits of Lawns
Turfgrass provides a number of ecological services. These are defined by the USDA as “direct and indirect benefits provided to humans by an ecosystem to include provisioning, regulating, supporting and cultural services”. This term has multiple categories, which are outlined below.
Provisioning (AKA Material and Energy Output)
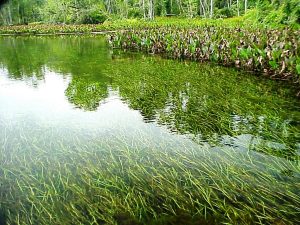
Provisioning or material/energy output is linked to a grass’ bio-filtering capability. Grasses remove pollutants from applied water including stormwater, while enabling ground infiltration. This recharges surface reservoirs, and by removing pollutants, mitigates eutrophication while providing clean drinking water to communities.
UF/IFAS Photo: Jess Van Dyke
Regulating (AKA Moderation and Control of Ecosystem Processes)
Grasses are known to cool the surrounding environment, capture dust, and prevent erosion.
Water absorbs heat as it vaporizes as it does in the evapotranspiration processes in plants. As Ben Franklin taught us many years ago, that process cools the environment around through heat absorption as water vaporizes. This cooling effect can be quite significant, and translates to saving through reduced air conditioning of your home.
Grasses remove dust and pollen particles from the air as well. This is usually a process by which wind blows the dust onto the grass, the dust settles and is captured beneath the grass canopy.
To complete the trifecta, grass has a thick root mass locking soil in place. The two main methods for soil erosion are through wind, and water flow. The grass’ root system negates both of these.
Supporting Services (AKA Maintaining Fundamental Ecosystem Processes)
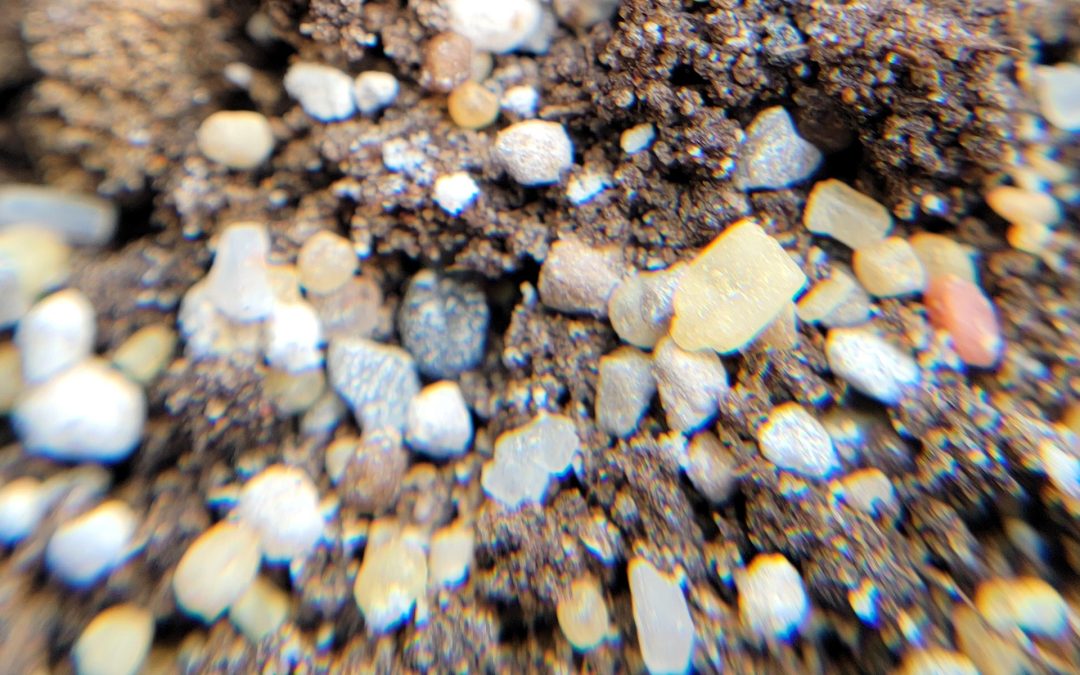
Supporting services, as this sections title suggests, are those which support life processes. In the case of grasses, this comes in the form of organic matter. As I hear often, soils in Florida are quite sandy and lacking in the aforementioned organic matter.
It may surprise you to hear that grass is probably the easiest method to make these additions. As we leave clippings on the lawn and root systems slough off only to regrow the following spring we actually are adding organic matter from two directions. Hence grass’ reputation as a great soil builder.
This organic matter is where our supporting services really shine. Your turfgrass acts as habitat for microbiota, and macrobiota. These terms refer to the bacteria, fungi, algae, earthworms, and other insects which help cycle soil nutrients while breaking down the same organic matter you’ve added simply by not removing your grass clippings.
Cultural Services (AKA Societal Benefits)
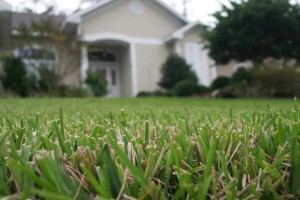
These are somewhat self explanatory. It is in this realm where we begin to discuss those neighborhood block parties. Lawns are an excellent place to meet with neighbors and build communities. Well maintained lawns can also affect home prices, improve neighborhood aesthetics, and even effect crime rates in a given area.
UF/IFAS Photo
It Starts with Cultural Practices
Hopefully by now, you are sold on keeping a healthy stress free lawn. The real question is how to achieve one? You’ve likely heard that lawns are difficult to maintain, but you’ll be happy to know it’s much easier than advertised. You’ll see rapid results if you start paying attention to three practices.
Irrigation
Easily the biggest killer of grasses in North Florida is irrigation. Often too much is applied, and is at the wrong time of day. All turfgrass species in Florida require only ½ -3/4 inch of water per irrigation event. Water your grass before dawn when you notice bent grass blades, slight color changes, and a lack of rebound when stepped upon.
Not sure how much you’re applying? Place some containers in your watering zone spread evenly and run the system for 15 minutes. Measure that outcome with a ruler, adjust your timing as necessary to hit the right amount.
Fertilization
Fertilization is based on turfgrass species. Overdoing things can be quite harmful to your lawn, so make sure you check the Florida Lawn Handbook for the specifics on your grass species.
Before you get started fertilizing, there are a few bits of information of which you should be aware. The first is your soil’s pH, as it dictates nutrient availability for your grass. The second factor in fertilization is timing. Apply fertilizer in multiple applications beginning April 15th and ending in September. This ensures your grass will have enough root mass to utilize the nutrients.
Mowing
Our final cultural practice is mowing. It is critical to mow plant to the appropriate height. Mowing to proper height keeps grass stress free reducing susceptibility to insects, disease, drought or sunscald. Here again, height is dependent on grass species. Consult the Florida Lawn Handbook for greater detail.
Whatever the height required. Make sure to mow grass with sharp blades, only when dry, and weekly to avoid damage to your plants.
To Sum it All Up
Turfgrasses are an integral part of any landscape when sited correctly. They provide a wealth of functions both ecological and cultural. Take a little time to integrate the practices outlined above and you’ll discover an easy to maintain groundcover primed for your next family cookout. As always, if you have any questions or need any help on this topic and more, contact your local Extension Office.
by Joshua Criss | Mar 6, 2025
Ah, springtime is approaching quickly. You and I both know you’re getting anxious to get out into your gardens to grow your plants. I’m not faulting you, far from it. You’ll find that your local Extension agents want your garden to succeed as much as you do. Because we all want you to have a bountiful harvest, we need to have a conversation about fertility in your lawns and gardens.
Definitions
Before we get too deep into this topic, let’s define nutrition. You may hear some refer to fertilizers as “plant food.” While this is a common phrase concerning fertilizers, it is not factually accurate. Food is associated with energy creation within an organism. Plants are autotrophs, meaning they convert sunlight into energy. So, under this premise, sunlight is plant food, whereas plant nutrition is the building blocks of tissues or catalysts of metabolic processes.
The 17 elements designated as plant essential nutrients are categorized based on the quantity needed for healthy growth. All are important to have in your soil; as per the “Law of the Minimum,” your plant’s development will be limited based on the most deficient element.
UF/IFAS Photo
Macros
Those elements with the largest demand within the plant are known as macronutrients. The three most critical of these are very often absent in fertilizer conversations as they cannot be added to soil in granule form. These are carbon, hydrogen, and oxygen, and their presence in your garden results from your cultural practices. You get them from air and water in the pore spaces of your soil. Appropriate tillage and irrigation are the only ways to provide these elements to your plants. They are critical for proper photosynthesis and fluid balance in the plant.
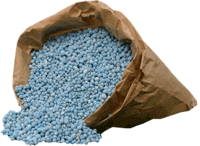
The most discussed elements are so vital that they make up the three numbers on every bag of fertilizer. These are nitrogen (N), phosphorous (P), and potassium (K), all of which may be added to soil to overcome deficiencies (N often being the limiting factor). These elements are crucial for protein creation, photosynthesis, and fluid movement.
Secondary Nutrition
UF/IFAS Photo: J. Criss
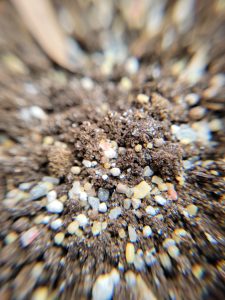
The next set of nutrients have less demand than NPK. They are sulfur (S), magnesium (Mg), and calcium (Ca). Ca is essential for cell structure but is often abundant in our soils. S is frequently rained out of the atmosphere (though you may still need to add some) and facilitates enzymatic processes in plant cells. Mg needs the most attention in this category as it has a lot of mythology among gardeners. You’ve likely heard you should add this element to “green up” your plants. While it is true that Mg is critical to chlorophyll, adding it without testing for deficiencies first is a recipe for poor plant growth.
Micros
Our final category of fertilizer is micronutrients. These are iron (Fe), manganese (Mn), boron (B), chlorine (Cl), zinc (Z), copper (Cu), molybdenum (Mo), and nickel (Ni). These serve various functions in the plant, mainly in metabolic processes.
To Sum Up
Plant fertilization is critical for lawns and gardens. It behooves gardeners to understand these elements and their role in plant growth. Once you do, you’ll understand the importance of applying the correct version of the element in the proper amount at a time and location to maximize use efficiency. You can learn more about what they do and how they react in the soil here. For more information, contact your local extension office.

by Joshua Criss | Jan 9, 2025
Well folks, the earth has made yet another trip around the sun, and we find ourselves in another of hopefully many a new year. The weather has been cold, but it’s important that we spend a few moments plotting a strategy for our lawns in the coming year. Lawncare is a subject which is shrouded in myths and often misunderstood. Luckily, a little bit of knowledge can help you achieve stress free healthy turfgrasses.
Lifecycle
The first thing homeowners should understand is how turfgrass grows throughout the year. Turfgrass is split into warm and cool season species. You may have guessed that in the Florida Panhandle, warm season grasses are dominant. These grasses perform well in warmer weather going dormant when temperature begins to fall. During this dormant period, these grasses turn brown and may appear to have died. The grass itself is alive and well, but the roots have died back significantly.
Fertilizers
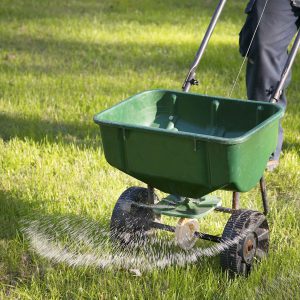
Why is this an important piece of information? There is no point in applying fertilizers to turfgrasses with no ability to absorb them. Instead, waiting until mid-April (think Tax Day) for fertilizers provides two key benefits. First, it allows time for the grass to develop a thick mat of roots. As roots are the main tissue for nutrient entry into plants allowing your lawn to utilize the applied nutrition. Second, waiting until a little later evades late season freezes. Cold weather may harm early season growth which stresses your lawn which could cause die back allowing weeds to take over.
UF/IFAS photo: GI-BMP
Weed Prevention
The subject of weeds brings us to a critical cultural practice in terms of lawncare. The application of preemergent herbicides. These herbicides are designed to create a barrier in the top 1/2 inch of soil which prevents shoot and root growth after weed seed germination.
Now, it’s important to understand, there are hundreds of thousands of weed seeds in the top layers of soil all over the world. Weeds take advantage of open spots in your lawn as does any plant in any ecological system.
A preemergent herbicide prevents weed from being able to fill those spaces, by preventing their growth. Given the proper watering and fertilization, your grass may now fill these voids. Your lawn will outcompete the weeds and become its own preventative.
Selecting and application of a pre-emergent herbicide does have some nuance. Not every product is compatible with every grass type, consult our Weed Management Guide to select a product that will work for your lawn. Another concern is application timing and frequency. Multiple applications will likely be required in the spring due to those triggers which break seed dormancy combined with product efficacy timelines. Local extension offices are a great resource for specificity, but generally application will need to be mid-February with a second application 6-8 weeks later based on the product label. Also important to note is that this is a long-term process. It may take a few years of spring and fall application to eradicate the weeds in your lawn.
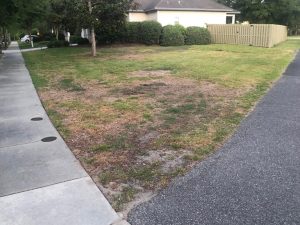
Lawn decline from weed infestation UF/IFAS Photo: Pawel Petelewicz
To Sum Up
Turfgrasses make excellent groundcovers and are look best when grown as stress free as possible. In the early parts of the year that entails holding off on fertilization and adding a layer of protection for summer weeds. Getting to know your turfgrass and familiarizing yourself with proper cultural practices will go a long way to making a healthy lush lawn. For more information you may read through our Florida Lawn Handbook or consult your local Extension Agent.
by Joshua Criss | Nov 21, 2024
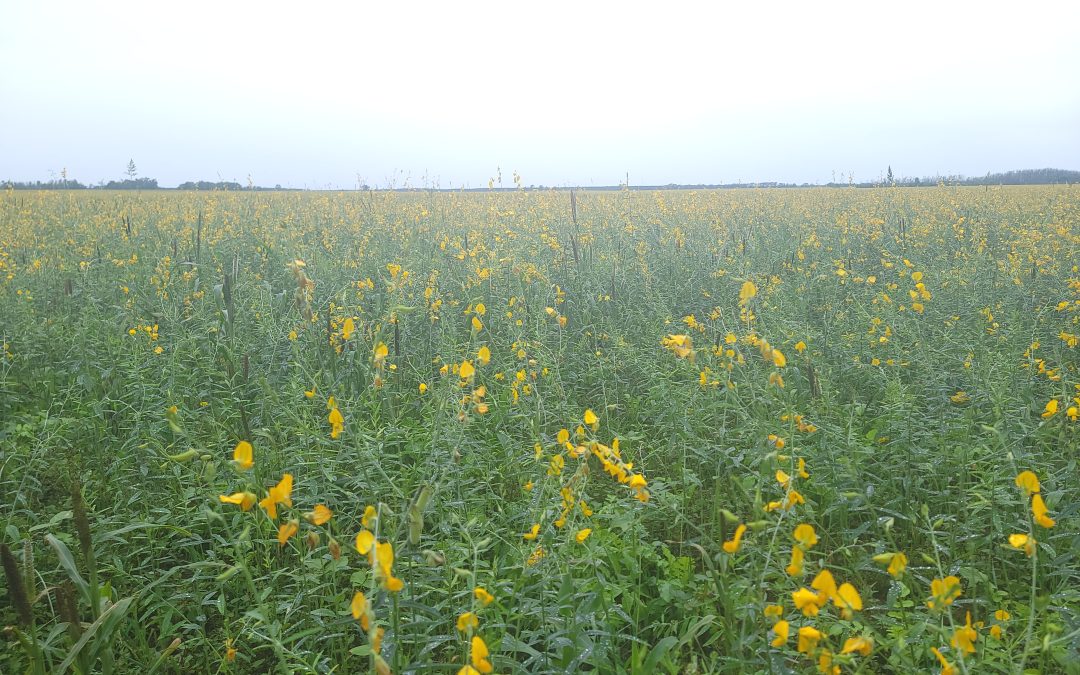
A Sea of Yellow
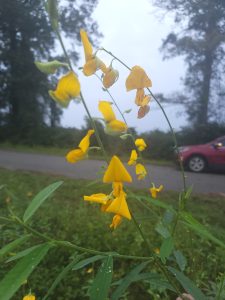
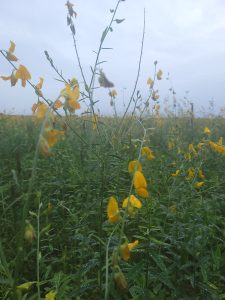
You do not often see a sea of yellow flowers on what was recently a field of row crops in North Florida. In this instance, the culprit is a cover crop called sunn hemp (Crotalaria juncea). Cover cropping, or green manure as it is sometimes known, is not a new concept. It is a great method for improving soil quality, adding organic matter, augmenting nitrogen supply, supporting pollinators when resources begin to wane, and combating nematodes. Incorporating this sustainable agriculture practice into home vegetable gardens is an excellent method to build long-term viability and production.
Many plants may be used in this capacity, but this article will focus on sunn hemp. This annual is an herbaceous, short-day flowering plant in the Lamiaceae or legume family. Its erect stems produce a great deal of biomass and, as a legume, will augment nitrogen stores within your soil profile. As if that wasn’t enough to sell you, this plant is also known to suppress nematode populations. Native to India and Pakistan, where sunn hemp is grown for fiber, this plant grows well in tropical and temperate environments. It will thrive in even sub-par conditions and requires little fertilizer input.
UF/IFAS Photo: Josh Criss
Seed Time
Seed this plant once your summer gardens have begun to wane. The shorter day length will keep the plant confined to about 3-4 feet while still allowing it to flower. It may also be planted earlier in the year to maximize below-ground biomass and add organic matter. In this scenario, the plant will likely grow to 7 feet tall with a closed canopy within 10 weeks.
Sunn hemp requires little fertilization as it is a legume, a plant family known to fix nitrogen from the atmosphere. This same mechanism is one of the features of this plant as a cover or green manure crop, as it can add up to 320 pounds of nitrogen per acre back to the soil when planted en masse.
Seeding rates within a home garden are much smaller. A farmer may plant 30-50 pounds of seed, which is not practical in small-scale growing. Instead, aim to cover the garden area through broadcasting seed, as a denser planting will reduce the later branching of this plant. Ensure you have 8-12 weeks of warm, frost-free weather, and terminate them prior to reaching the full bloom stage. Doing so will provide your gardens with the same benefits seen in farm fields utilizing this sustainable practice.
UF/IFAS Photo: Josh Criss
To Sum it Up
Sunn hemp is an excellent plant for your gardens before your fall greens. The biomass it produces and the nitrogen it recovers make it very attractive to farmers and should raise eyebrows even in the home garden. The trick is learning to manage this plant within your crop rotation. For more information on soil management refer to these IFAS documents, or contact your local extension agent for additional information on this and any topic regarding your gardens and more.


