by Larry Williams | Jan 27, 2020
Q. I have a camellia plant that is about 25 years old. It forms flower buds but the buds never fully open. The plant otherwise looks healthy. Is there something that I’m doing or not doing that causes this?
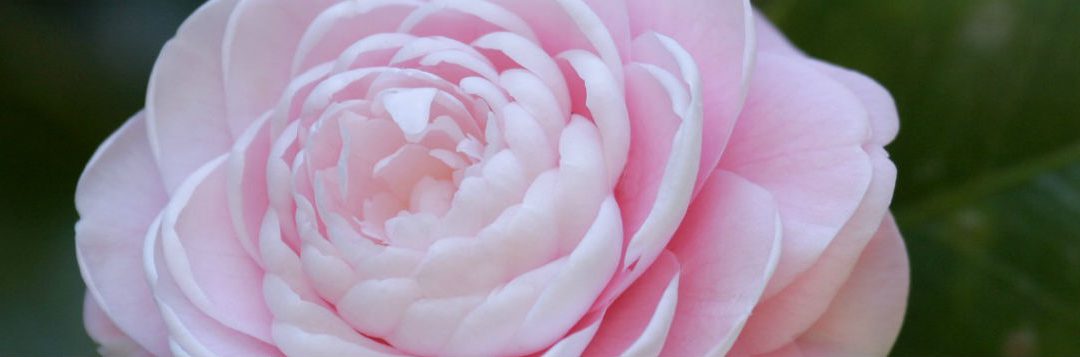
Sasanqua camellia bloom, Photo credit: Larry Williams
A. I have seen this happen over the years. There are a number of possibilities for why this happens. If the camellia cultivar is otherwise known to do well in the area, the problem could be caused by one or more of these factors.
- Stress (primarily drought stress could inhibit buds from opening)
- Freeze damage
- Too many buds on the plant to allow each and every bud to open
However, with this being the norm for your camellia plant for that many years, it may be the wrong camellia variety in the wrong place.
Camellias have been so common in our Southern landscapes that some people think they are native to our area. However, camellias are native to Asia. They were first brought to America during the latter part of the 1700’s.
Years ago, people planted any camellia they could get their hands on because camellias weren’t as common or available and definitely had a more limited selection.
Some camellia cultivars are simply not well adapted to the Gulf Coast and, as a result, will not flower well even though they may grow well here. This is why some varieties are favored in Seattle, some do better in California, some do better in New England and others perform well here in the South.
Even though camellias are a common sight in shady Southern gardens now, not all camellias will perform well here. So, it is important to do some homework before purchasing and planting just any old camellia.
As stated in the UF/IFAS Extension publication Camellias at a Glance, “There are numerous species of Camellia, but the types commonly grown as landscape shrubs in Florida are Camellia japonica, Camellia sasanqua, and hybrids of these.” This publication is available online at https://edis.ifas.ufl.edu/pdffiles/EP/EP00200.pdf or from the UF/IFAS Extension Office in your County.
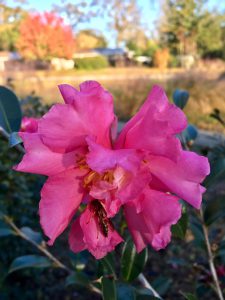
Sasanqua and japonica camellias come in whites, pinks, reds, double and single flowers and sizes from four to twenty feet tall.
The sasanqua types bloom as early as October while the japonica types begin flowering later.
It is possible to select a few different varieties, instead of just one, to extend the color in your landscape from weeks to months. Selecting camellias for staggered flowering times can provide color all fall and winter long.
When purchasing camellias, research the bloom times of varieties for your area.
by Larry Williams | Dec 4, 2019
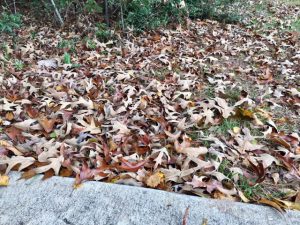
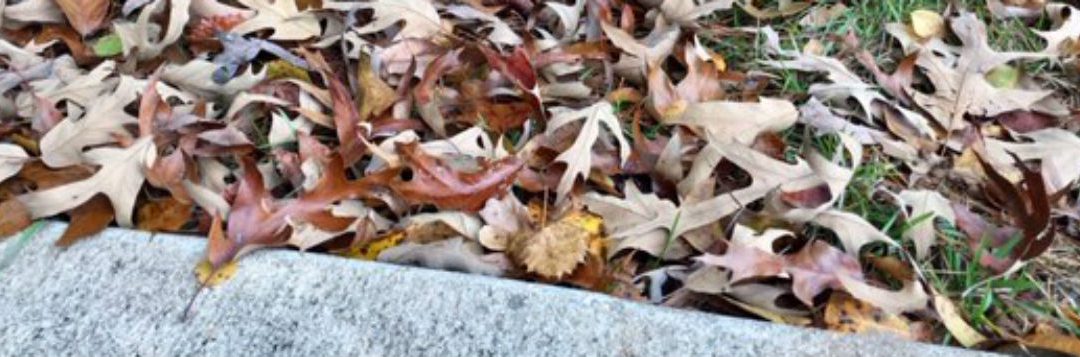
Fall oak tree leaves abound and can be recycled as landscape mulch. Photo credit: Larry Williams
Weed control is not top on my list as a reason to use mulch. There are weeds that can push through mulch such as nutsedge (nutgrass) or that can germinate and grow in the mulch. But done correctly, mulching plant beds and gardens can help inhibit some weeds. Tree leaves can be used as a mulch.
In addition to weed control, mulch provides other benefits. It can make landscapes look more attractive. It keeps roots evenly moist, acts to insulate roots from extreme heat and cold and can help decrease loss of soil from wind and water erosion. Mulch serves as a barrier to some soil-borne diseases, especially in the vegetable garden. And, as organic mulch breaks down, it improves the soil’s fertility, aeration, structure and drainage.
Tree leaves make good mulch. They can be placed on the soil surface beneath and around shrubs, trees, perennials, annuals and vegetables.
Fall leaves are abundant. Some people feel overwhelmed by the volume. One resident reported raking more than 100 large bags of leaves from his half-acre property. One large oak tree can contain over 250,000 leaves!
Tree leaves can be placed in landscape beds or around vegetables “as is” or chopped up with a shredder or mower into smaller pieces and then spread around vegetables, shrubs and trees. Mixing leaves from several different species of trees can make better leaf mulch. Leaves of the same size tend to mat together and produce a shingling effect that can shed water and reduce gas exchange in the soil. Shredded leaves stay seated better on the landscape than whole leaves.
A mulch layer three inches deep after settling is enough for most plants. If possible, extend the mulched areas out to the outermost leaves (called the drip line) and beyond. And be sure to pull the mulch back a few inches from the main trunk. Never pile mulch around the trunk.
Using those fallen tree leaves as mulch recycles a natural resource and saves you money, enriches your soil, fertilizes your plants and keeps them out of the local landfill.
So, instead of putting all those leaves curbside in plastic bags to be hauled off, use them to benefit your landscape, which may include less weeds.
For additional information on landscape/garden mulch, contact the UF/IFAS Extension Office in your County or access the following sites.
http://gardeningsolutions.ifas.ufl.edu/care/planting/mulch.html
http://edis.ifas.ufl.edu/topic_mulch
by Larry Williams | Dec 4, 2019
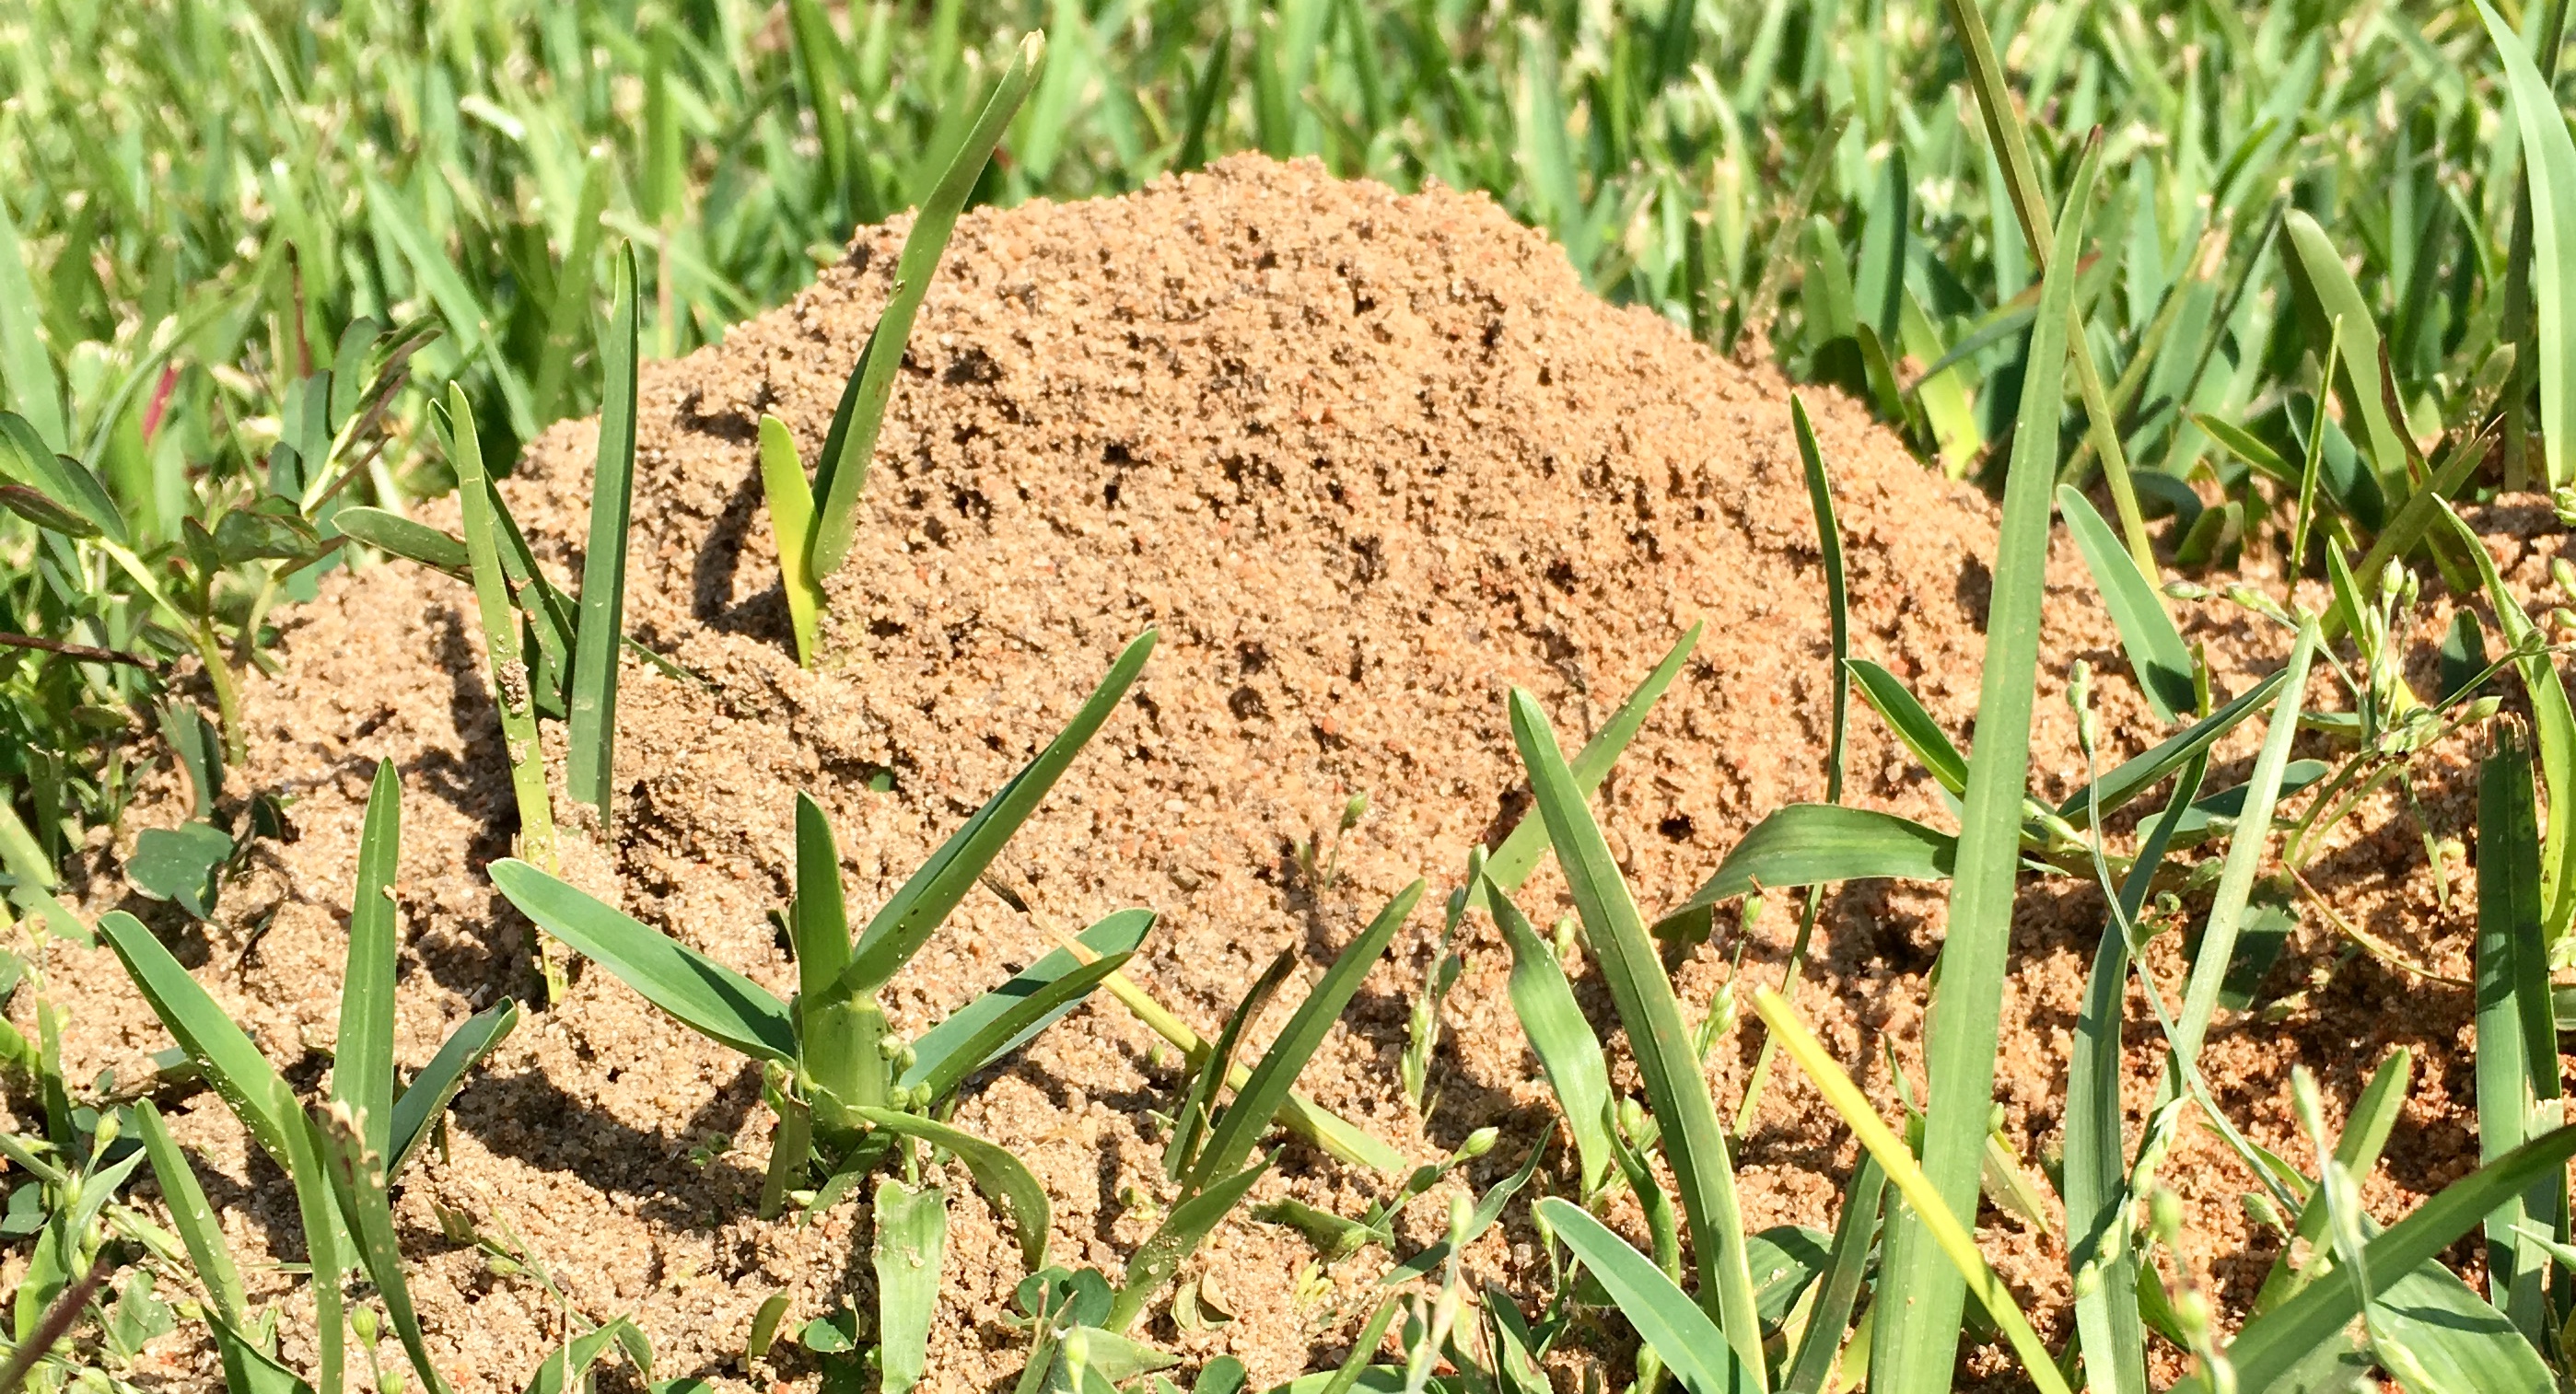
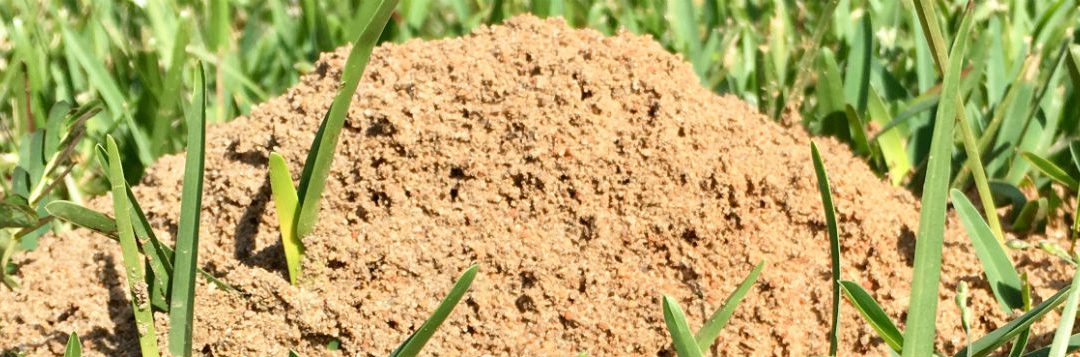
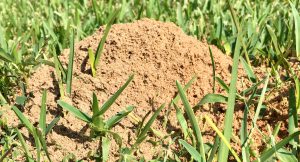
Fire ant control options in some situations include doing nothing.
 Fire ant colonies consist of the brood (eggs, larvae and pupae) and adult ants. The adults include winged males, winged females, one or more egg producing queen and workers. The winged males and females mate in spring or early summer after a rainy period. Males die shortly after mating. Newly mated females can fly as far as twelve miles from the nest (or farther carried by wind). After landing, mated females shed their wings and begin digging chambers in which they lay eggs to start a new colony.
A single queen can lay over 2,000 eggs per day! She can live an average of six to seven years. A mature fire ant colony may contain 100,000 to 500,000 workers. Fire ant mounds/colonies can reach densities of 200 to 800 per acre.
You should now begin to understand why fire ants are difficult to control. Where they don’t present a direct threat to human health, the best management practice may be to leave them alone.
Homeowners may have to find a tolerable level. Waging war on this insect can be expensive and requires a long-term commitment. There is no single, universal solution to controlling fire ants. A one-time treatment may make the problem worse. In areas where native ants and fire ants have been reduced or eliminated with insecticides, reinfestation by fire ants into these treated areas is rapid.
A balanced approach to fire ant management is recommended. Those mounds that pose no threat to humans should be left alone. Instead target specific mounds such as those close to buildings and walkways.
When treating single mounds with contact insecticides, it’s critical to treat when the queen and brood are close to the surface, which is between 70ºF to 85ºF. When using fire ant baits, it’s important to apply the bait when the ants are foraging for food. They are most actively doing that between 70ºF to 85ºF. Actively foraging ants will pick up the bait and carry it into the nest within minutes. That’s important because baits tend to quickly go rancid and then are no longer attractive to ants. When using season-long control products, it’s a must to achieve uniform coverage of the area. Always read and follow the label precautions and directions when using any insecticide.
Where fire ants create no threat in out-of-the-way areas on your property, consider the option of leaving them alone.
The following link to a UF/IFAS Extension publication provides options for fire ant control in lawns, gardens and landscapes. http://edis.ifas.ufl.edu/lh059
by Larry Williams | Jul 25, 2019
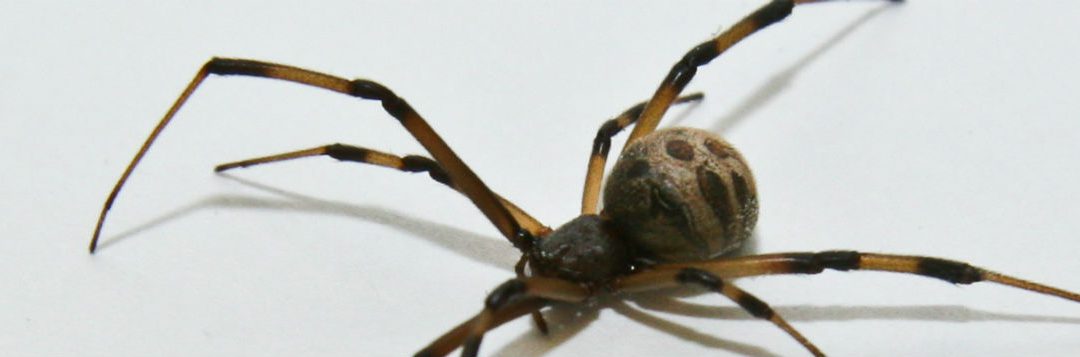
Recently, Okaloosa County Commissioner Carolyn Ketchel mentioned to me that she had seen brown widow spiders in parts of Okaloosa County on multiple occasions. Concerned about this and to provide better awareness of this spider, she asked if I could write an article about this spider.
Most people seem to be aware of the black widow spider but many people have never heard of the brown widow spider.
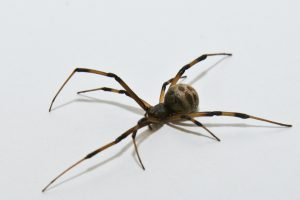
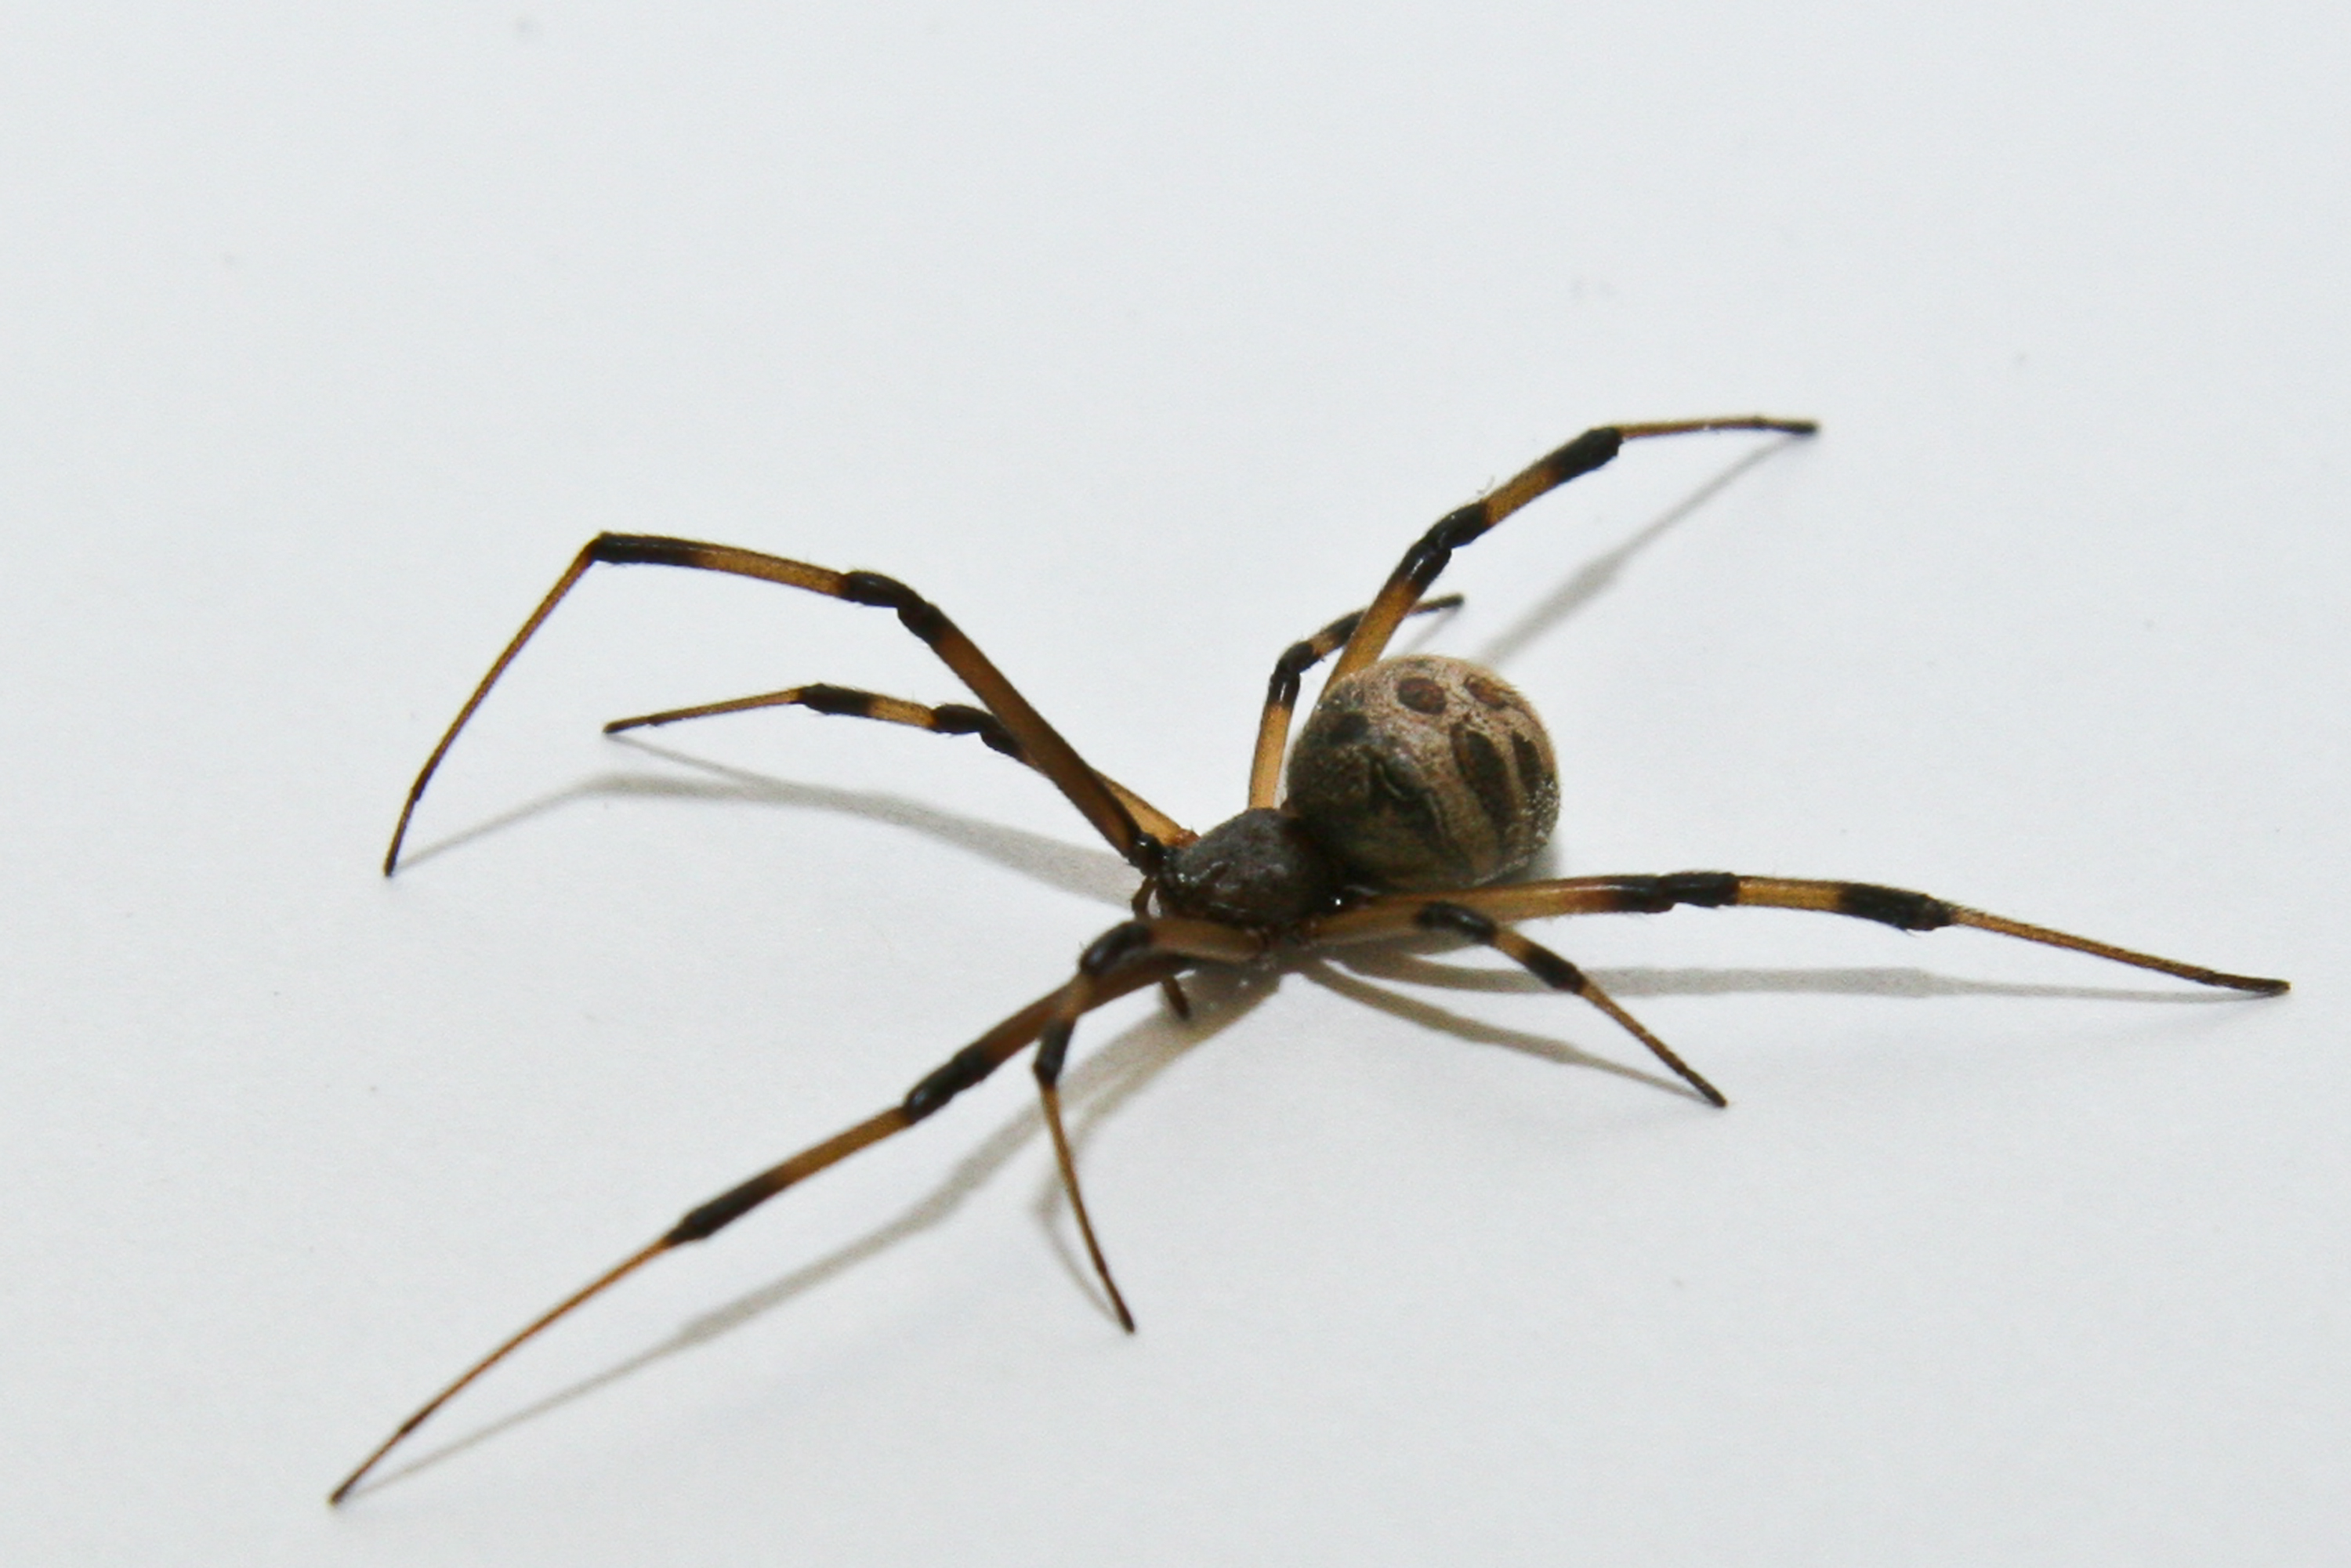
Brown Widow spider. UF/IFAS Photo: Thomas Wright
There are four widow spiders found in Florida. They include the southern black widow, northern black widow, red widow and brown widow. All are highly venomous but they are also timid. Bites usually occur when the spider can’t easily get away and becomes unintentionally caught between a person’s skin and clothes or when a person is reaching for something where a widow spider is hiding. A UF/IFAS Extension publication on brown widow spiders states, “According to Dr. G.B. Edwards, an arachnologist with the Florida State Collection of Arthropods in Gainesville, the brown widow venom is twice as potent as black widow venom. However, they do not inject as much venom as a black widow, are very timid, and do not defend their web.”
Widow spiders are about 1½ inches long with legs extended. All have rounded, relatively large abdomens. Both of the black widows are shiny black in color. The southern black widow possesses the classic red hourglass marking on the underside of its abdomen. While the northern black widow has two reddish triangles that resemble an hourglass on the underside of its abdomen and red spots in a row along the middle of its back. The red widow’s head, thorax and legs are reddish orange. Its abdomen is black and lacks a complete hourglass but there may be one or two red spots on the abdomen. The brown widow may be gray, light brown or black in color with an orange or yellowish-red hourglass marking on the underside of its abdomen.
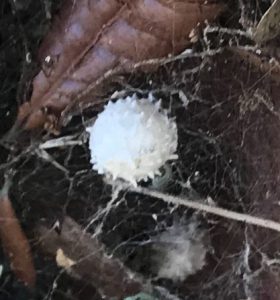
Brown widow egg sac. Photo credits: Carolyn Ketchel
The brown widow egg sac looks different as compared to the other widow spiders. They are less than ½ inch in diameter with pointed white silk spikes on the surface which are not present on egg sacs of the other widow spiders. The egg sacs of the other widow spiders have smooth surfaces.
The brown widow likes to build its web in secluded, protected areas such as empty plant containers, mail boxes, building entry way corners, under eaves and inside of old tires.
More information on widow spiders is available from the UF/IFAS Extension Office in your County or from the below links.
http://edis.ifas.ufl.edu/mg206
http://entnemdept.ufl.edu/creatures/URBAN/SPIDERS/brown_widow_spider.htm
You’d be wise to learn to identify these spiders.
by Larry Williams | Jun 25, 2019
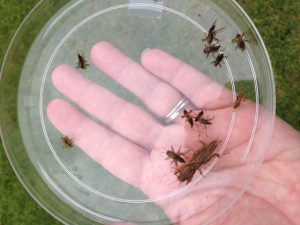
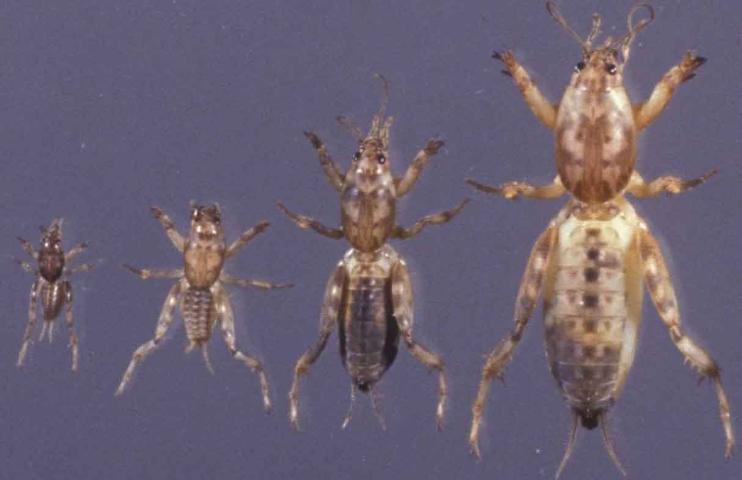
Adult and nymphs of mole crickets. Photo: Julie McConnell, UF/IFAS
The best time to treat for mole crickets is during June through July. But don’t treat at all if mole crickets have not been positively found and identified in the affected lawn areas.
Don’t worry about the adults that are seen flying around lights in the evenings or about the mole crickets found dead in swimming pools this time of year. They are in a mating phase and are doing very little to no damage to lawns during late winter and spring.
We can take advantage of the fact that there’s only one generation per year in North Florida. The eggs will have all hatched by mid to late June. At that time, you’re dealing with young mole crickets that can’t fly and that are much more susceptible to the insecticides designed to kill them. Mole crickets spend winter as adults in the soil. In late February and March, adults emerge and begin mating. Shortly after mating, males die and females fly to suitable areas for egg laying. Mated females deposit eggs in tunnels. After depositing her eggs the female dies. Attempting to control adult mole crickets during this mating period a waste of time, money and product. Plus, adult mole crickets are difficult to control and can easily fly out of treated areas.
You can easily determine if mole crickets are the cause for your lawn problem by flushing them out with a soap and water mixture.
Mix 1½ ounces of a lemon scented liquid dish-washing soap in two gallons of water in a sprinkling can or bucket. Pour the soapy water over an area approximately four square feet and count the number of mole crickets that emerge. It only takes several minutes for mole crickets to crawl to the surface after the soap treatment if they are present. Repeat the process around the yard where you suspect mole cricket problems. If you flush an average of two to four crickets are flushed out per site, control may be needed.
There are a number of insecticides on the market to control mole crickets. But before using any product, first identify the problem as mole cricket damage by using the soap flush technique. Then choose a lawn insecticide that lists mole crickets on its label. And finally read the label carefully for use directions, application techniques, irrigation requirements and precautions.
For more information on mole crickets, including recommended insecticides and other non-chemical control options, contact the UF/IFAS Extension Office in your County or access the following links.
Insect Pest Management on Turfgrass
Shortwinged Molecricket
Mole Cricket IPM Guide for Florida