by Larry Williams | Jan 14, 2019
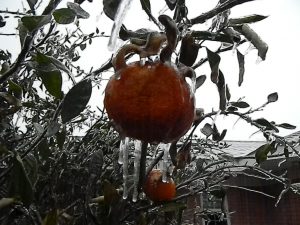
Ice on Satsuma fruit from January 2014 ice storm in Crestview, FL. Photo credit: Larry Williams
Northwest Florida winters can be a rollercoaster ride of temperatures. One week it dips to freezing for a short time and the next week it rises to spring-like temperatures. We need to hold on for this ride of up and down temperatures but not over react too soon.
Following the sudden ride down to the lower temperatures, we may think winter is over. But we don’t see the next drop in temperatures that’s coming, as we are experiencing the ride upwards in temperatures.
On average, it’s not until we reach mid-March that we expect our last killing frost. A killing frost is heavy enough to kill tender plant growth. And, we can have light frosts well into the latter part of March and into early April. This is particularly true in the more northern portions of our Panhandle Counties.
The main point is to not get spring fever too early and encourage new plant growth by pruning or fertilizing too soon.
When landscape plants freeze, the first impulse may be to get out the pruning shears and cut away dead and dying leaves and branches. But this isn’t a good idea. Pruning can force new tender growth that is more likely to be injured by the next freeze. And, you can’t tell how much damage has been done until plants start new growth in spring. If you prune immediately after a freeze, you may cut away live wood that doesn’t have to be lost. Also, leaves and branches, which have been killed, can help protect the rest of a plant
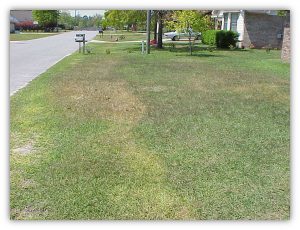
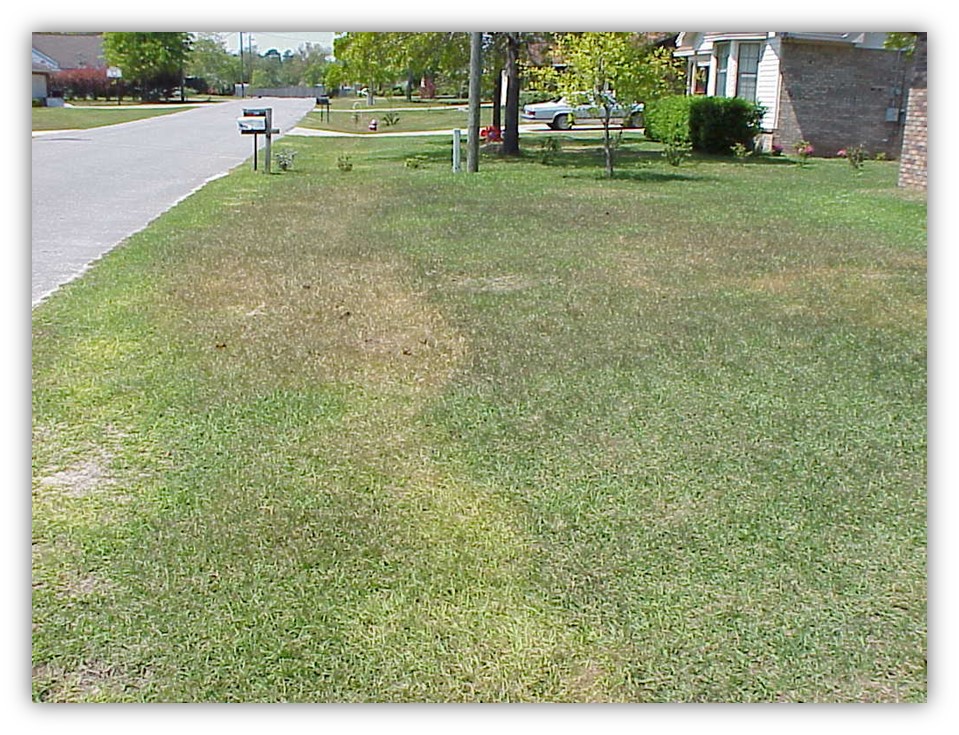
Cold injury to lawn that happened March 31 in Crestview, FL. Photo credit: Larry Williams
against further cold injury.
Some people want to “jump start” their lawns before our weather will allow our grasses to grow. Waiting allows for more efficient use of the lawn fertilizer. You will not injury your lawn by
waiting but you can certainly injure your lawn by fertilizing too early.
So, have patience, allow your lawn to green up on its own and then fertilize, even if it’s not until April or May.
Finally, be a little philosophical. If you do lose one or two of your tender ornamentals, so what? Worse things could happen. And now you have a chance to add something new, perhaps some species native to our area that are not as subject to cold damage.
Even with this winter/spring rollercoaster ride, with thousands of plants to choose from and a generally mild climate, who can complain?
by Larry Williams | Nov 21, 2018
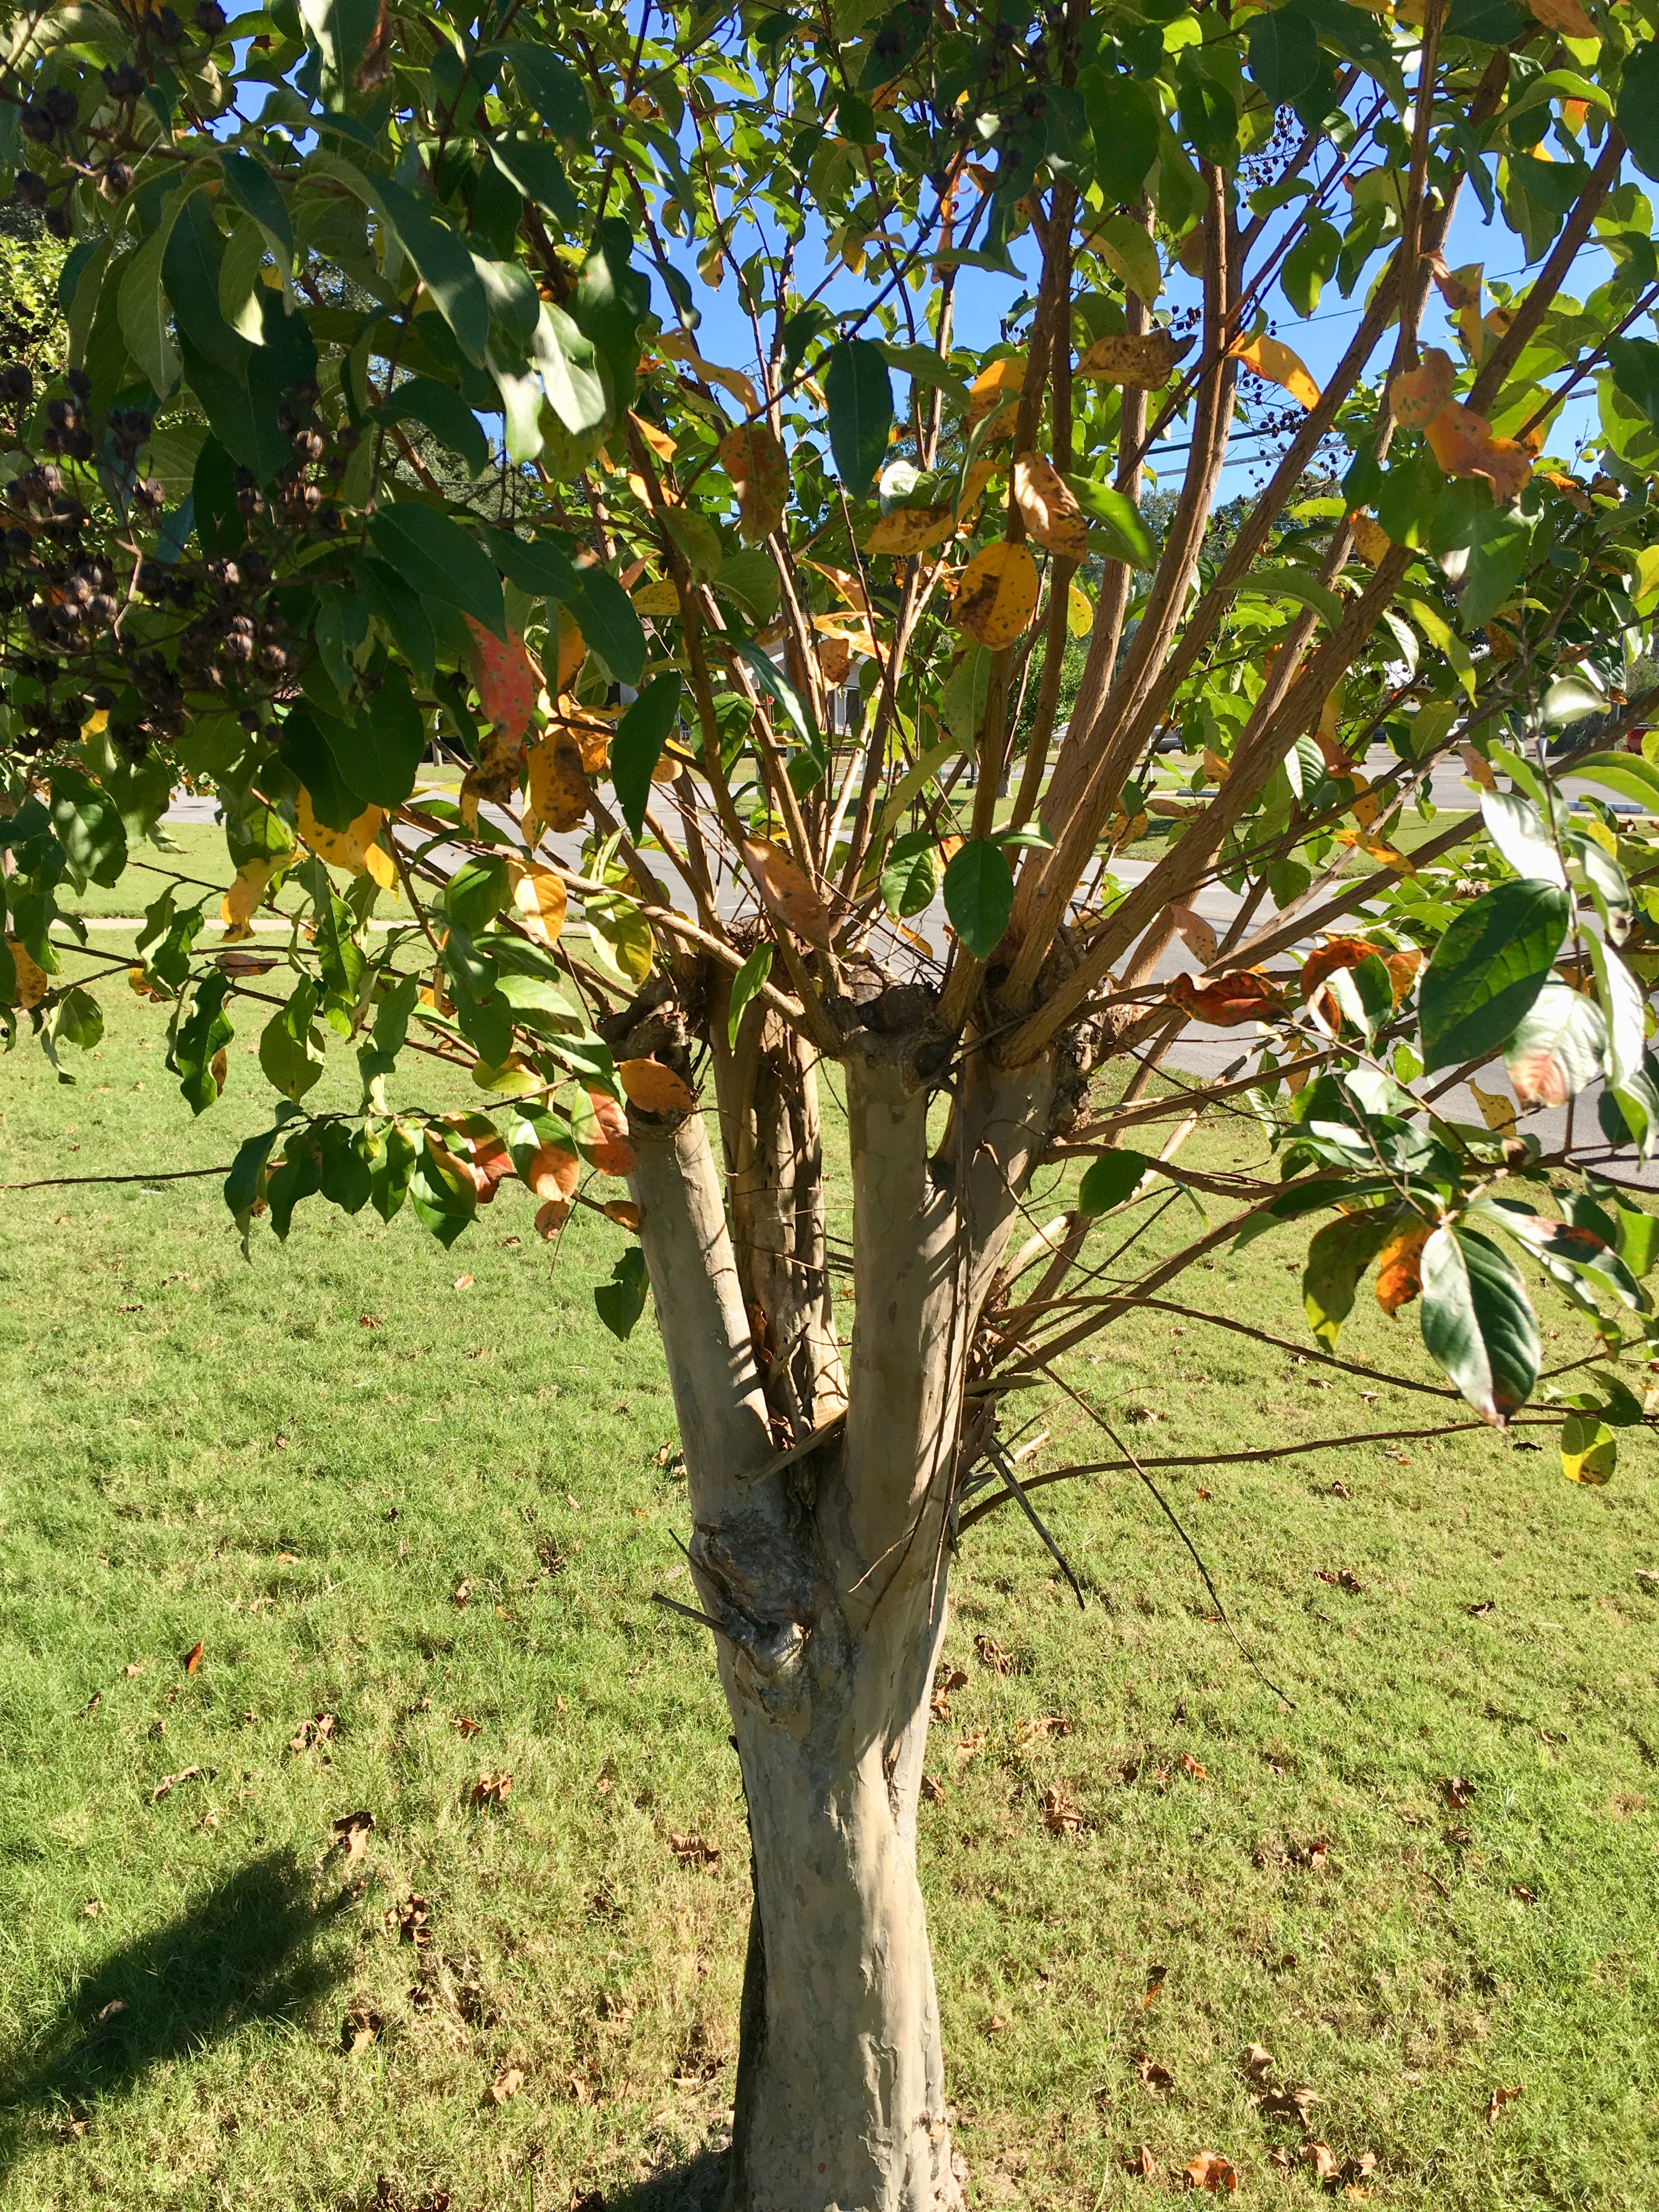
Improperly pruned crape myrtle tree. Photo credit: Larry Williams
Too often people hack away at crape myrtle trees and “butcher” them. The term “crape murder” was coined to describe this drastic topping of crape myrtles.
Properly selected and properly placed crape myrtles need little pruning. A crape myrtle that requires routine pruning to force it to fit into a smaller space should be considered for
replacement with a smaller-maturing cultivar. The real problem here is that you have the wrong plant in the wrong place. The person that planted the tree did not do their homework. To avoid having to annually “butcher” a nice tree, choose a smaller maturing crape myrtle.
After topping, the tree will insist on growing to its genetically designed size, again and again.
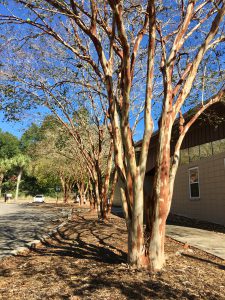
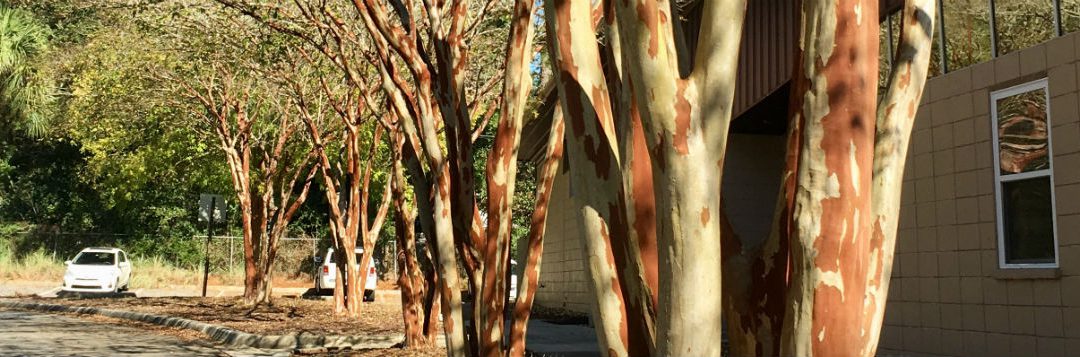
What crape myrtle trees are supposed to look like. Photo credit: Larry Williams
If you want a crape myrtle that will naturally stay below four feet in height, buy a dwarf cultivar such as Pocomoke. There are semi-dwarf cultivars that grow to about twelve feet or less in height such as Acoma. There are intermediate crape myrtles that top out at less than twenty feet in height such as Osage. And there are crape myrtles that grow greater than twenty feet in height such as the popular Natchez cultivar. Choose the right size plant to fit the selected space.
Topping trees is a bad practice. It weakens a tree by removing food reserves that were stored in the now removed wood. It also radically reduces the size of the canopy decreasing the plant’s ability to produce food
through photosynthesis. The large open cuts caused from topping invite wood-rotting organisms and ultimately decay. Topping results in many dead stubs throughout the tree. Topping a crape myrtle forces the tree to produce many unsightly root suckers. Ultimately, topping results in an ugly, odd-looking, higher maintenance and short-lived crape myrtle.
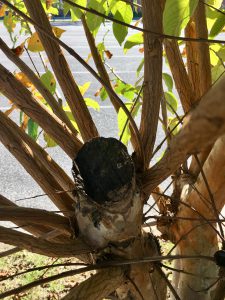
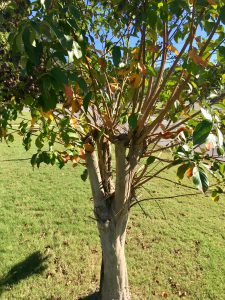
Note open wound, decay and weak attachment of multiple shoots as a result of improper pruning. Photo credit: Larry Williams
Many people believe crape myrtles have to be cut way back in order to produce an abundance of blooms. Flower clusters may be slightly larger on topped trees. But topping usually delays flowering up to one month and since the tree is smaller, it produces fewer flowers. The long, weak shoots supporting the large, heavy flower clusters on topped crape myrtles bend awkwardly and are more likely to break away from the plant.
When pruning crape myrtle trees, avoid cutting back or shortening branches much larger than your finger, although cutting larger branches back to a side branch or to the trunk when needed is fine.
More information on crape myrtle selection and care is available at the below links.
http://edis.ifas.ufl.edu/mg266, http://edis.ifas.ufl.edu/ep399
by Larry Williams | Oct 20, 2018
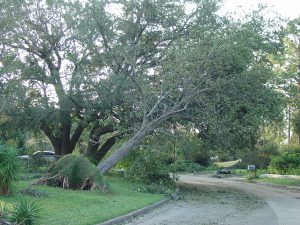
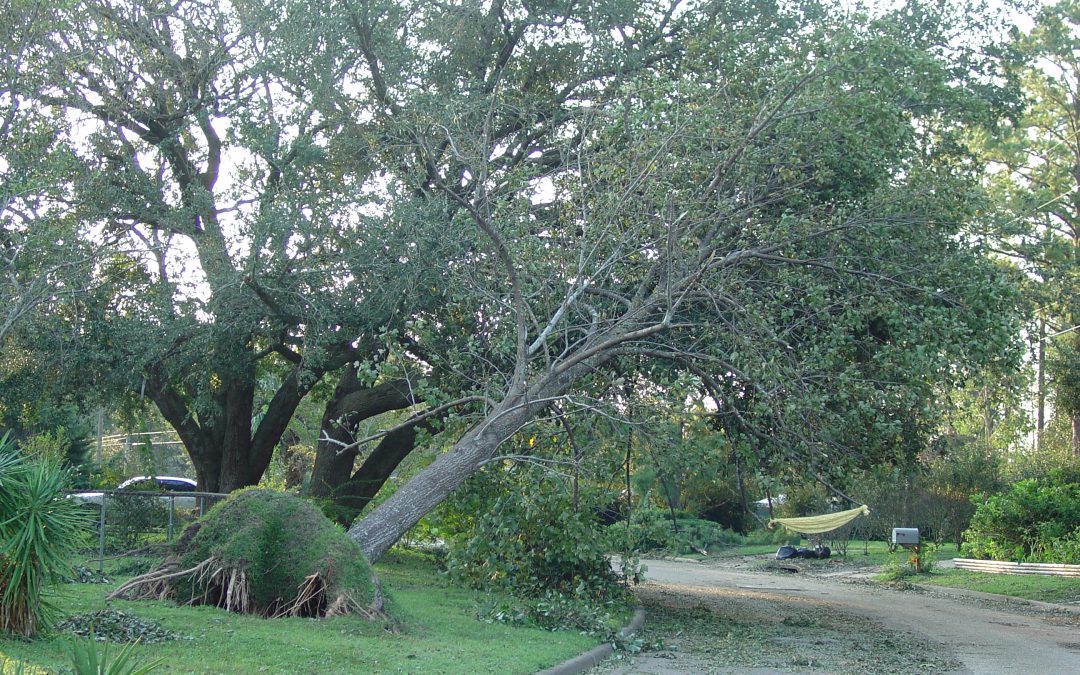
Partly uprooted tree from hurricane. Photo credit: Larry Williams
Hurricane damaged plants should be cared for as soon as possible. Partially uprooted small trees and shrubs should be securely staked in their original positions. Until plants are reset, protect exposed roots and prevent drying. Soil, moist burlap sacks or moist sphagnum moss can be put on exposed roots. Remove damaged roots so the tree can be reset at ground level.
Once reset, trees should be secured. Two or three, four-foot long, 2 x 2 inch wood stakes can usually anchor trees with trunk diameters less than two inches. Stakes should be placed about a foot outside root ball and inserted eighteen inches into soil. Secure stakes to trunk with ties made from wide, smooth material or hose-covered wire. Trees two inches or larger in diameter should be guyed with three or four wires or cables. Guy wires are secured to deeply driven short stakes evenly spaced outside the root ball. Guy wires should be run through rubber hose and secured to trunk at only one level. Mark support wires with bright materials to prevent accidents.
Guy wires should be adjusted several times during growing season to minimize trunk injury. Support stakes and wires should stay in place for one year.
Soil should be filled around root area once the tree is staked into position. Firm around roots to eliminate air pockets and provide support. Excess soil over the normal root area can be damaging. Only replace soil that has been washed or worked away from roots.
In cases where all branches were destroyed, remove the tree. This is especially important for trees such as pine that do not normally regain their natural form. You may be able to keep other trees such as oaks, where strong bottom limbs still exist. However, emerging sprouts from ends of large, cut limbs will be poorly secured to the tree and are likely to fall from the tree during a storm. In addition, decay organisms usually enter these large wounds. Trees and shrubs that lost their leaves from high winds can usually be saved and should resume growth.
Any tree work, including tree removal should be done by a professional arborist, preferably a certified arborist. To find a certified arborist in your area contact the International Society of Arboriculture (ISA) at 217 355-9411 or at http://www.isa-arbor.com/. You also may contact the Florida Chapter of ISA at 941-342-0153 or at http://www.floridaisa.org/.
Reset plants should be watered twice a week and fertilizer should not be applied. Until re-established, fertilizer will be of no benefit and may injure new roots.
Plants exposed to saltwater, including lawns, should be irrigated with fresh water as soon as possible. Apply water more frequently than under normal conditions.
For additional information, visit http://sfyl.ifas.ufl.edu/disaster-prep-and-recovery or contact the UF/IFAS Extension Office in your county.
by Larry Williams | Oct 2, 2018

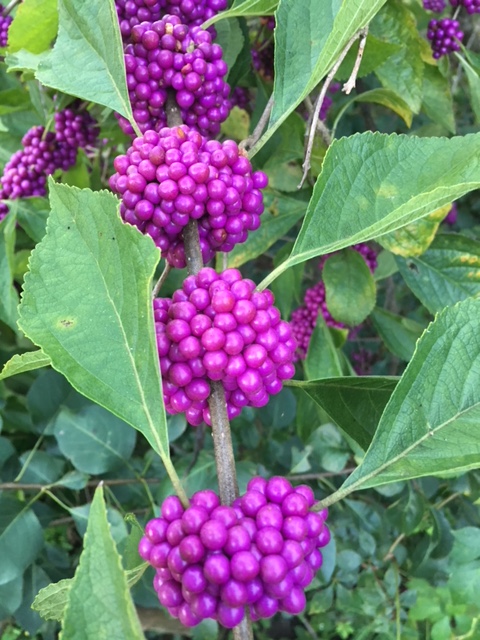
American Beautyberry Fruit.
Photo credit: Larry Williams
American beautyberry (Callicarpa americana) puts on quite a show during late summer and fall with its bright purple fruit. I have some of these plants in my landscape and they are beginning to show color now with their profusion of berry-like fruit found along the thin branches, resulting in the plant taking on a weeping habit.
Each fruit is only about 1/3 inch in diameter but collectively form roundish clusters that encircle the stems. The berries are particularly showy in September and October. They remain on the plant, even after its leaves have dropped, into early winter if not eaten by birds and other wildlife.
Many species of birds will eat beautyberry fruit including robins, cardinals, mockingbirds, brown thrashers, finches and towhees. Birds are a major method of seed dispersal for this plant.
One of my neighbors noticed my plants a number of years ago and commented, “I had never thought about using this plant in a landscape.” He grew up in Northwest Florida and had always been used to seeing American beautyberry plants growing in the wild as they are native. The plant is not well suited for manicured, formal landscapes but can be useful in a naturalized garden.
Even though I consider the showy fruit its best attribute, the small, lavender flowers tightly bunched together along the stems during June to August are attractive, as well.
American beautyberry is a deciduous shrub without much ornamental value during the winter. But during the growing season, its somewhat course, fuzzy, light-green leaves look good in a setting with other darker-leaved shrubs.
It grows well in part shade/part sun as an understory plant beneath larger trees such as pines and oaks.
Be sure to allow enough room for this sprawling shrub to develop into its mature size of three to eight feet in height with an equal spread.
It may also be used as an informal screen or even as a specimen plant. But avoid using it where it will require regular shearing as the flowers and fruit are produced on new growth.
Thinning out old or low-growing branches is a better method of pruning this plant. American beautyberry may self-seed but I have not seen this to be a bothersome problem.
America beautyberry is somewhat available in the nursery trade and is fairly easy to propagate from stem cuttings. It can be propagated from seeds, as well. In addition to the purple fruiting types, look for cultivars such as ‘Russell Montgomery’ that produce white fruit. There are also other nonnative species of Callicarpa worth looking at, such as C. dichotoma and C. japonica.
by Larry Williams | Aug 20, 2018

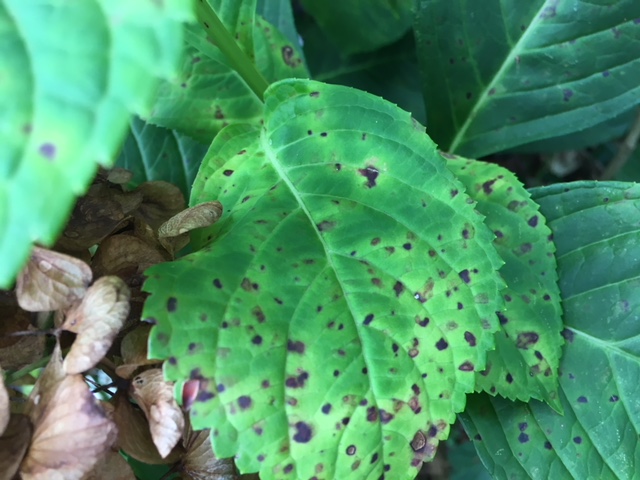
Hydrangea leaf spot disease
Photo credit: Larry Williams
It is not uncommon to see leaf spots on your hydrangeas during late summer and fall.
These spots are caused by a number of fungal diseases. Plant fungi and wet weather go hand-in-hand. Florida’s high humidity, heavy dews and frequent rains during spring and summer provide perfect conditions to allow fungal diseases to flourish. Bacterial leaf spots can be part of this foliage disease mix, too.
Common foliage diseases seen on hydrangeas this time of year include Phyllosticta leaf spot, Target leaf spot, Bacterial leaf spot, Botrytis and Cercospora leaf spot.
These foliage diseases are the norm rather than the exception as we move into the wet summer months and on into fall. As a matter of fact, you would be hard-pressed to find any hydrangea in our area without some evidence of infection now.
This late in the year it is more of a “grin and bear it” problem. In other words, it’s too late to do much about the fact that your hydrangea plant has leaves covered in ugly spots. By now many of the infected leaves are turning brown, withering and dropping prematurely from the plant.
Cercospora leaf spot is one of the most common foliage diseases of hydrangeas. Along with most of the leaf spot diseases, it begins as small dark-colored specks on the leaves. The small specks generally go unnoticed. But as the spots continue to slowly enlarge, mostly maintaining a circular shape, they become more obvious. With heavy infection, individual spots can coalesce forming larger irregular shaped brown areas on individual leaves. The individual spots may have a purplish halo with gray center.
There are some fungicides that can help prevent these leaf spots. But you’d have to begin treatment early in spring before any leaf spots exist and spray the plant every 10 to 14 days during favorable disease development (humid, rainy weather), which is pretty much our spring and summer months. These types of diseases are prevented, not cured. That’s the “grin and bear it” part of waiting until now.
The fungus survives on infected leaves. So, the best thing to do now is to remove and dispose of infected leaves. Also, be careful to not wet the leaves when irrigating the plants during the growing season.
New leaves of spring should be spot/disease free as they emerge. But the cycle of life for these leaf spot diseases will again result in spotted/diseased leaves on your hydrangeas next summer and fall without persistent treatment.
The good news is that these leaf spot diseases normally do not cause permanent/long-term damage for hydrangeas. They just make the plant look ugly.