by Larry Williams | Dec 1, 2017
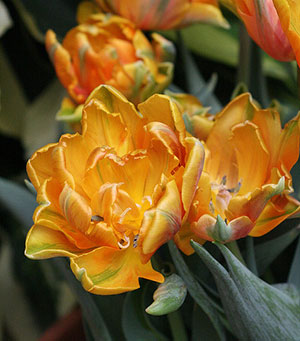
Tulips at the U.S. Botanical Garden in Washington, D.C. Image Credit: IFAS Gardening Solutions
Q. I’ve seen the beautiful tulips of Amsterdam and would like to grow some here in North Florida. So I ordered some tulip bulbs. Can I plant these in North Florida?
A. Tulips are treated as annuals in Florida. We have two problems with tulips this far south. First, they do not receive enough cold weather to meet their requirements to bloom. Secondly, it gets hot quick enough in the spring to cause the foliage to die prematurely, which does not allow the tulip plants enough time to store sugars in the bulb to resume growth the following year. As a result, the bulbs become smaller and weak and flower poorly if at all the following year. At best you may get one to three years’ worth of blooms out of a tulip in our area no matter what you do. Most tulips will only bloom once in our area and then they are spent. Florida doesn’t provide the right kind of weather for tulips. We may have cold weather for a few nights. Then it warms again. This goes on all winter. Tulips need consistently cold weather in order to initiate flower buds.
You can provide an “artificial cold winter” by placing the bulbs in a refrigerator for about 8 weeks prior to planting. This requires purchasing the bulbs ahead of time in order to provide this chilling treatment and still have time to plant during late fall to mid-winter (late November to mid-January). Some nurseries sell pre-chilled bulbs, most don’t. The above treatment will meet their requirements for flowering but does nothing to offset the fact that it gets warm too quickly in the spring for tulips.
The few people that grow tulips in Florida either buy pre-chilled bulbs or place them in the refrigerator, plant them, enjoy their blooms the following spring and then throw them away. They treat them like annuals.

by Larry Williams | Nov 6, 2017
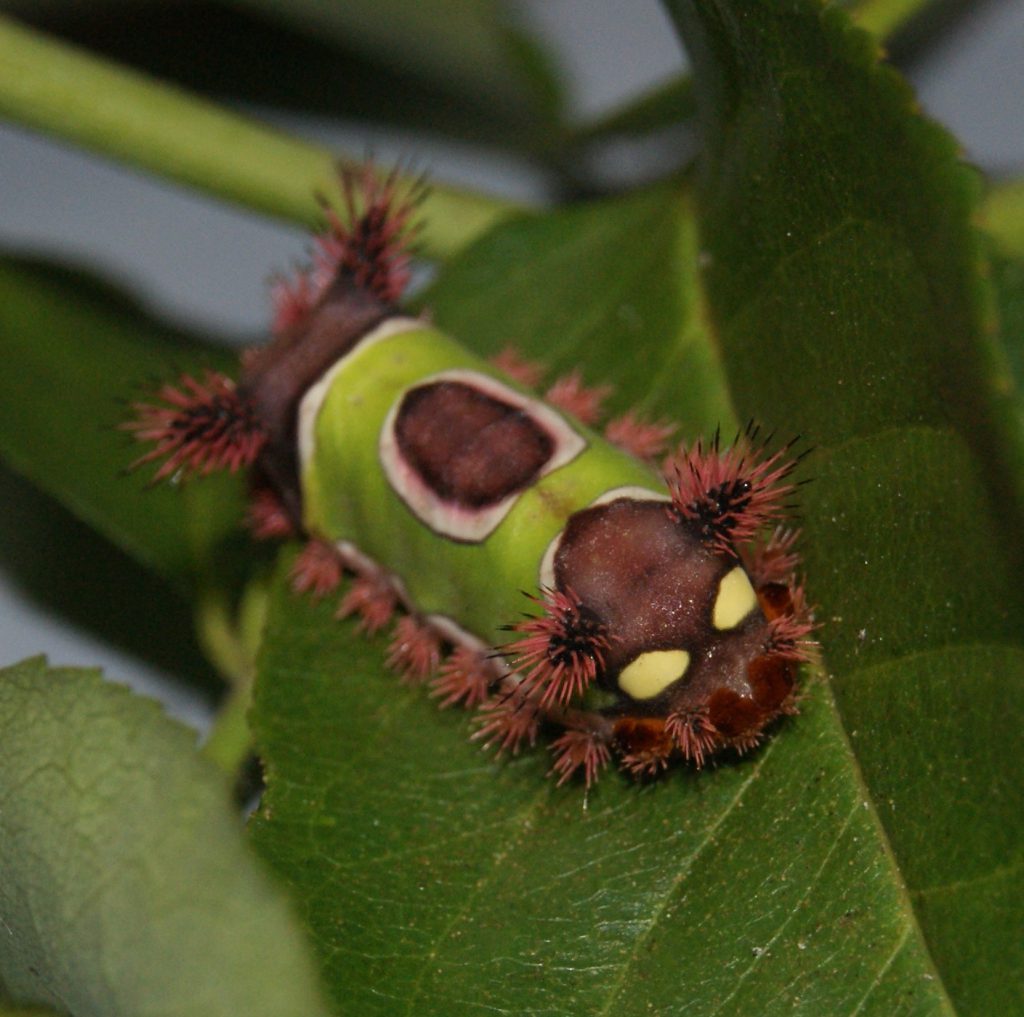
Saddleback Caterpillar. Image Credit: Matthew Orwat UF / IFAS
Did you know we have caterpillars that sting here in Northwest Florida? Well, we do and you’d be wise to learn about them and how to recognize them.
These caterpillars do not sting in the same way that a wasp or bee might sting. They do not have “stingers.” But they do have spines, also called nettling hairs, which are connected to poison glands that can inflict a painful reaction if touched.
The four nettling caterpillars that you are more likely to encounter in Florida are the hag caterpillar, Io moth caterpillar, puss caterpillar and saddleback caterpillar. Those that you are less likely to come in contact with include the buck moth caterpillar, flannel moth caterpillar, spiny oak-slug caterpillar and tussock moth caterpillar.
The “sting” is unintentional, not deliberate. When brushed against or touched, the toxin-bearing spines break off, releasing toxins. In some cases, broken spines pierce the skin. In other cases, toxins leak out onto the surface of the skin.
A University of Florida-IFAS Extension publication about these caterpillars states, “Some people experience severe reactions to the poison released by the spines and require medical attention. Others experience only an itching or burning sensation.”
The kind of reaction can depend on the type of caterpillar, extent of contact and susceptibility of individual. Fortunately, most of these caterpillars spend most of their time high up in trees away from us. But they can blow out of the trees during windy weather or come down still attached to branches and limbs that fall.
The saddleback caterpillar is more likely to be encountered because it feeds on many of our common landscape plants such as hibiscus and palms. But it is also known to feed on azaleas, fruit trees and even canna lilies. The saddleback caterpillar is striking in appearance with what looks like a bright green “blanket” draped over its back and a brown saddle-shaped oval area in the center of the blanket. Its spines are colorful, sharp and protrude from the front, back and sides of the caterpillar. It is stout and 1 to 1.5 inches long.
I’ve received questions about the puss caterpillar recently from people who have encountered it. This caterpillar is stout-bodied, almost 1 inch long and completely covered with gray to brown soft hairs. They seem to prefer leaves of oaks and citrus but they will feed on a variety of broadleaf trees and shrubs,
Because of their bright colors and interesting appearance, children may be tempted to touch or pick up some of these stinging caterpillars.
More information on these caterpillars is available at these websites:
http://edis.ifas.ufl.edu/pdffiles/IN/IN01400.pdf
http://www.poisoncentertampa.org/poison-topics/venomous-critters/caterpillars
by Larry Williams | Aug 18, 2017
A New Yorker cartoon shows a lady shopping a garden center bench for plants. She has three choices at three price points: annuals, $6; perennials, $10; eternals, $749.95.
No matter what the cost, plants don’t live forever. And if they did, what would they cost? They’d probably cost more than $749.95. Even though we know plants don’t live forever, we still don’t want a plant that we purchased, planted and cared for to die an early death.
All too often, I find myself in the position of reminding a person of this fact of life – plants don’t live forever.

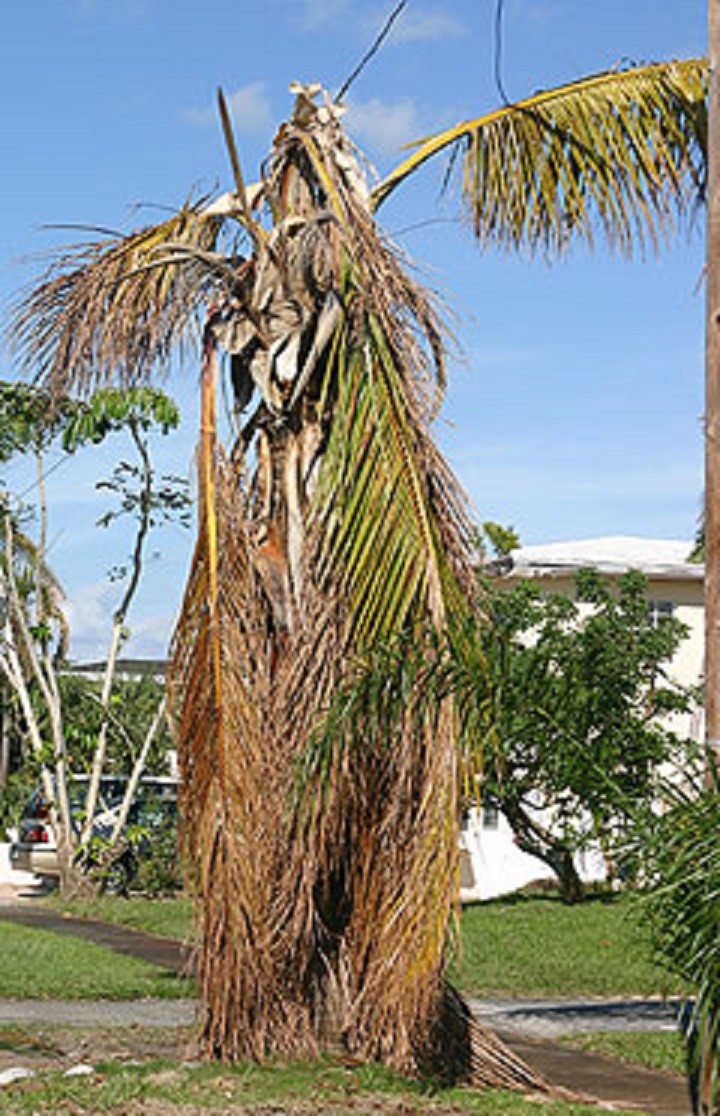
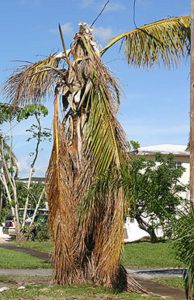
Palm in decline.
Credit: Edward F. Gilman, UF/IFAS.
There are extremes, though. The bristlecone pine can live thousands of years. There is one that was named Methuselah, which, at one time, was believed to be the oldest living tree on record approaching more than 4,800 years of age in central California. But in the 1970’s, offspring of Methuselah all died because they were sent to low-altitude locations. The parent tree’s location in the White Mountains is two miles above sea level.
Even though the bristlecone pine can live thousands of years, misplacing it (planted at too low an altitude) results in the tree living a fraction of its potential life. The point is to plant the right plant in the right place. Make sure the plant is well suited for Florida and to the site conditions: that wet site, that dry site, that salty site, that high pH site, that shady site, that sunny site, etc.
The second point is to have realistic expectations based on the plant species. Some plants genetically will live longer than others. One of our longest-lived tree species in Florida is the live oak. There are live oak trees in Florida that are hundreds of years old. But don’t expect a silver maple to make it that long. It’s a shorter-lived tree species. In Florida, a thirty-year-old silver maple is probably in a state of decline due to old age.
The third point is to learn how to correctly plant and maintain the plants you have. For example, most woody plants (trees and shrubs), will live a much shorter life simply from being planted too deep. And an over fertilized centipedegrass lawn will go into a state of decline resulting in the lawn living a shorter life.
Plant the right plant in the right place, learn what it likes and provide it. And when the plant reaches the end of its life, replace it.
Many homeowners spend more than $749.95 attempting to turn a short-lived plant into an eternal plant.
by Larry Williams | Jul 21, 2017
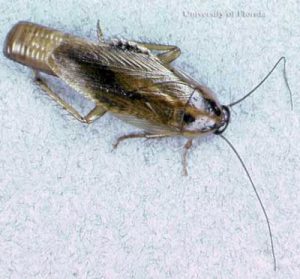
Figure 1. Adult female Asian cockroach, Blattella asahinai Mizukubo, carrying an egg case (ootheca). Photograph by R.W. Baldwin, University of Florida.
The Asian cockroach was first identified as a newly introduced species in the U.S. in Lakeland, Florida in 1986. I started seeing this small cockroach in our area about 17 or 18 years ago. They’ve done well recently with the rains and their numbers are probably higher now as a result. They prefer warm, wet conditions. Populations of 30,000 to 250,000 per acre are reported in some literature.
They are mostly active at night, hiding in mulched landscape beds and lawns during the day. It’s not uncommon to disturb them as you walk through or hand water mulched plant beds during daytime hours. When doing so, the little roaches, which may be mistaken for small moths, quickly fly as they are disturbed.
Asian cockroaches occasionally fly into homes or automobiles at night, attracted to lights. Thankfully, they don’t live long indoors, though.
Control is difficult. Because they can fly 120 feet or more in a single flight, large areas around a home require treatment. And cockroaches in surrounding untreated areas (lawns, mulched plant beds and nearby woods) may result in re-infestation.
Traditional indoor treatments are ineffective because Asian roaches don’t typically live and breed indoors. The best control has been attained by using insecticide baits (labeled for roach control) in infested areas outdoors. Always follow the label directions and precautions when using any pesticide, including insecticides.
Sodium vapor lamps for outdoor lighting and yellow incandescent bulbs for porch lighting are less attractive to the flying adults.
Both the German and Asian cockroach adults are about 5/8 inch long and are brown to dark brown in color with two darker parallel bands running lengthwise just behind their head. But unlike the German cockroach, the Asian cockroach is a strong flier. Even though German cockroaches have wings, they do not fly. Also, unlike the German cockroach, which prefers to live indoors and is a major household pest as a result, the Asian cockroach prefers to live outside.
For more info on this roach species, visit the below UF/IFAS Extension EDIS website.
http://edis.ifas.ufl.edu/in277
by Larry Williams | Jun 10, 2017
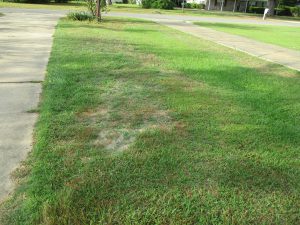
Typical ground pearl damage to lawn. Photo Credit: Larry Williams
There are numerous reasons why maintaining a North Florida lawn is challenging and ultimately frustrating.
One such reason is ground pearls.
Ground pearls, small-scale insects that bother turfgrass roots, are soil dwelling pests that are not much of a problem in northern lawns. But they are quite the problem in North Florida lawns.
Most people, having never heard of ground pearls, may blame weeds, mole crickets and a multitude of other possible causes for their lawn’s demise. But in the last two to three years, this insect seems to have become more of a problem in many of our lawns, including mine.
Unfortunately, there is no effective chemical control for ground pearls in lawns.
Ground pearls feed on roots of bermudagrass, bahiagrass, St. Augustinegrass and zoysiagrass but prefer centipedegrass. They suck juices from the roots. Their feeding eventually causes areas of the lawn to thin and die out to bare ground, especially when the grass is under stress due to drought, nutritional deficiencies, etc.

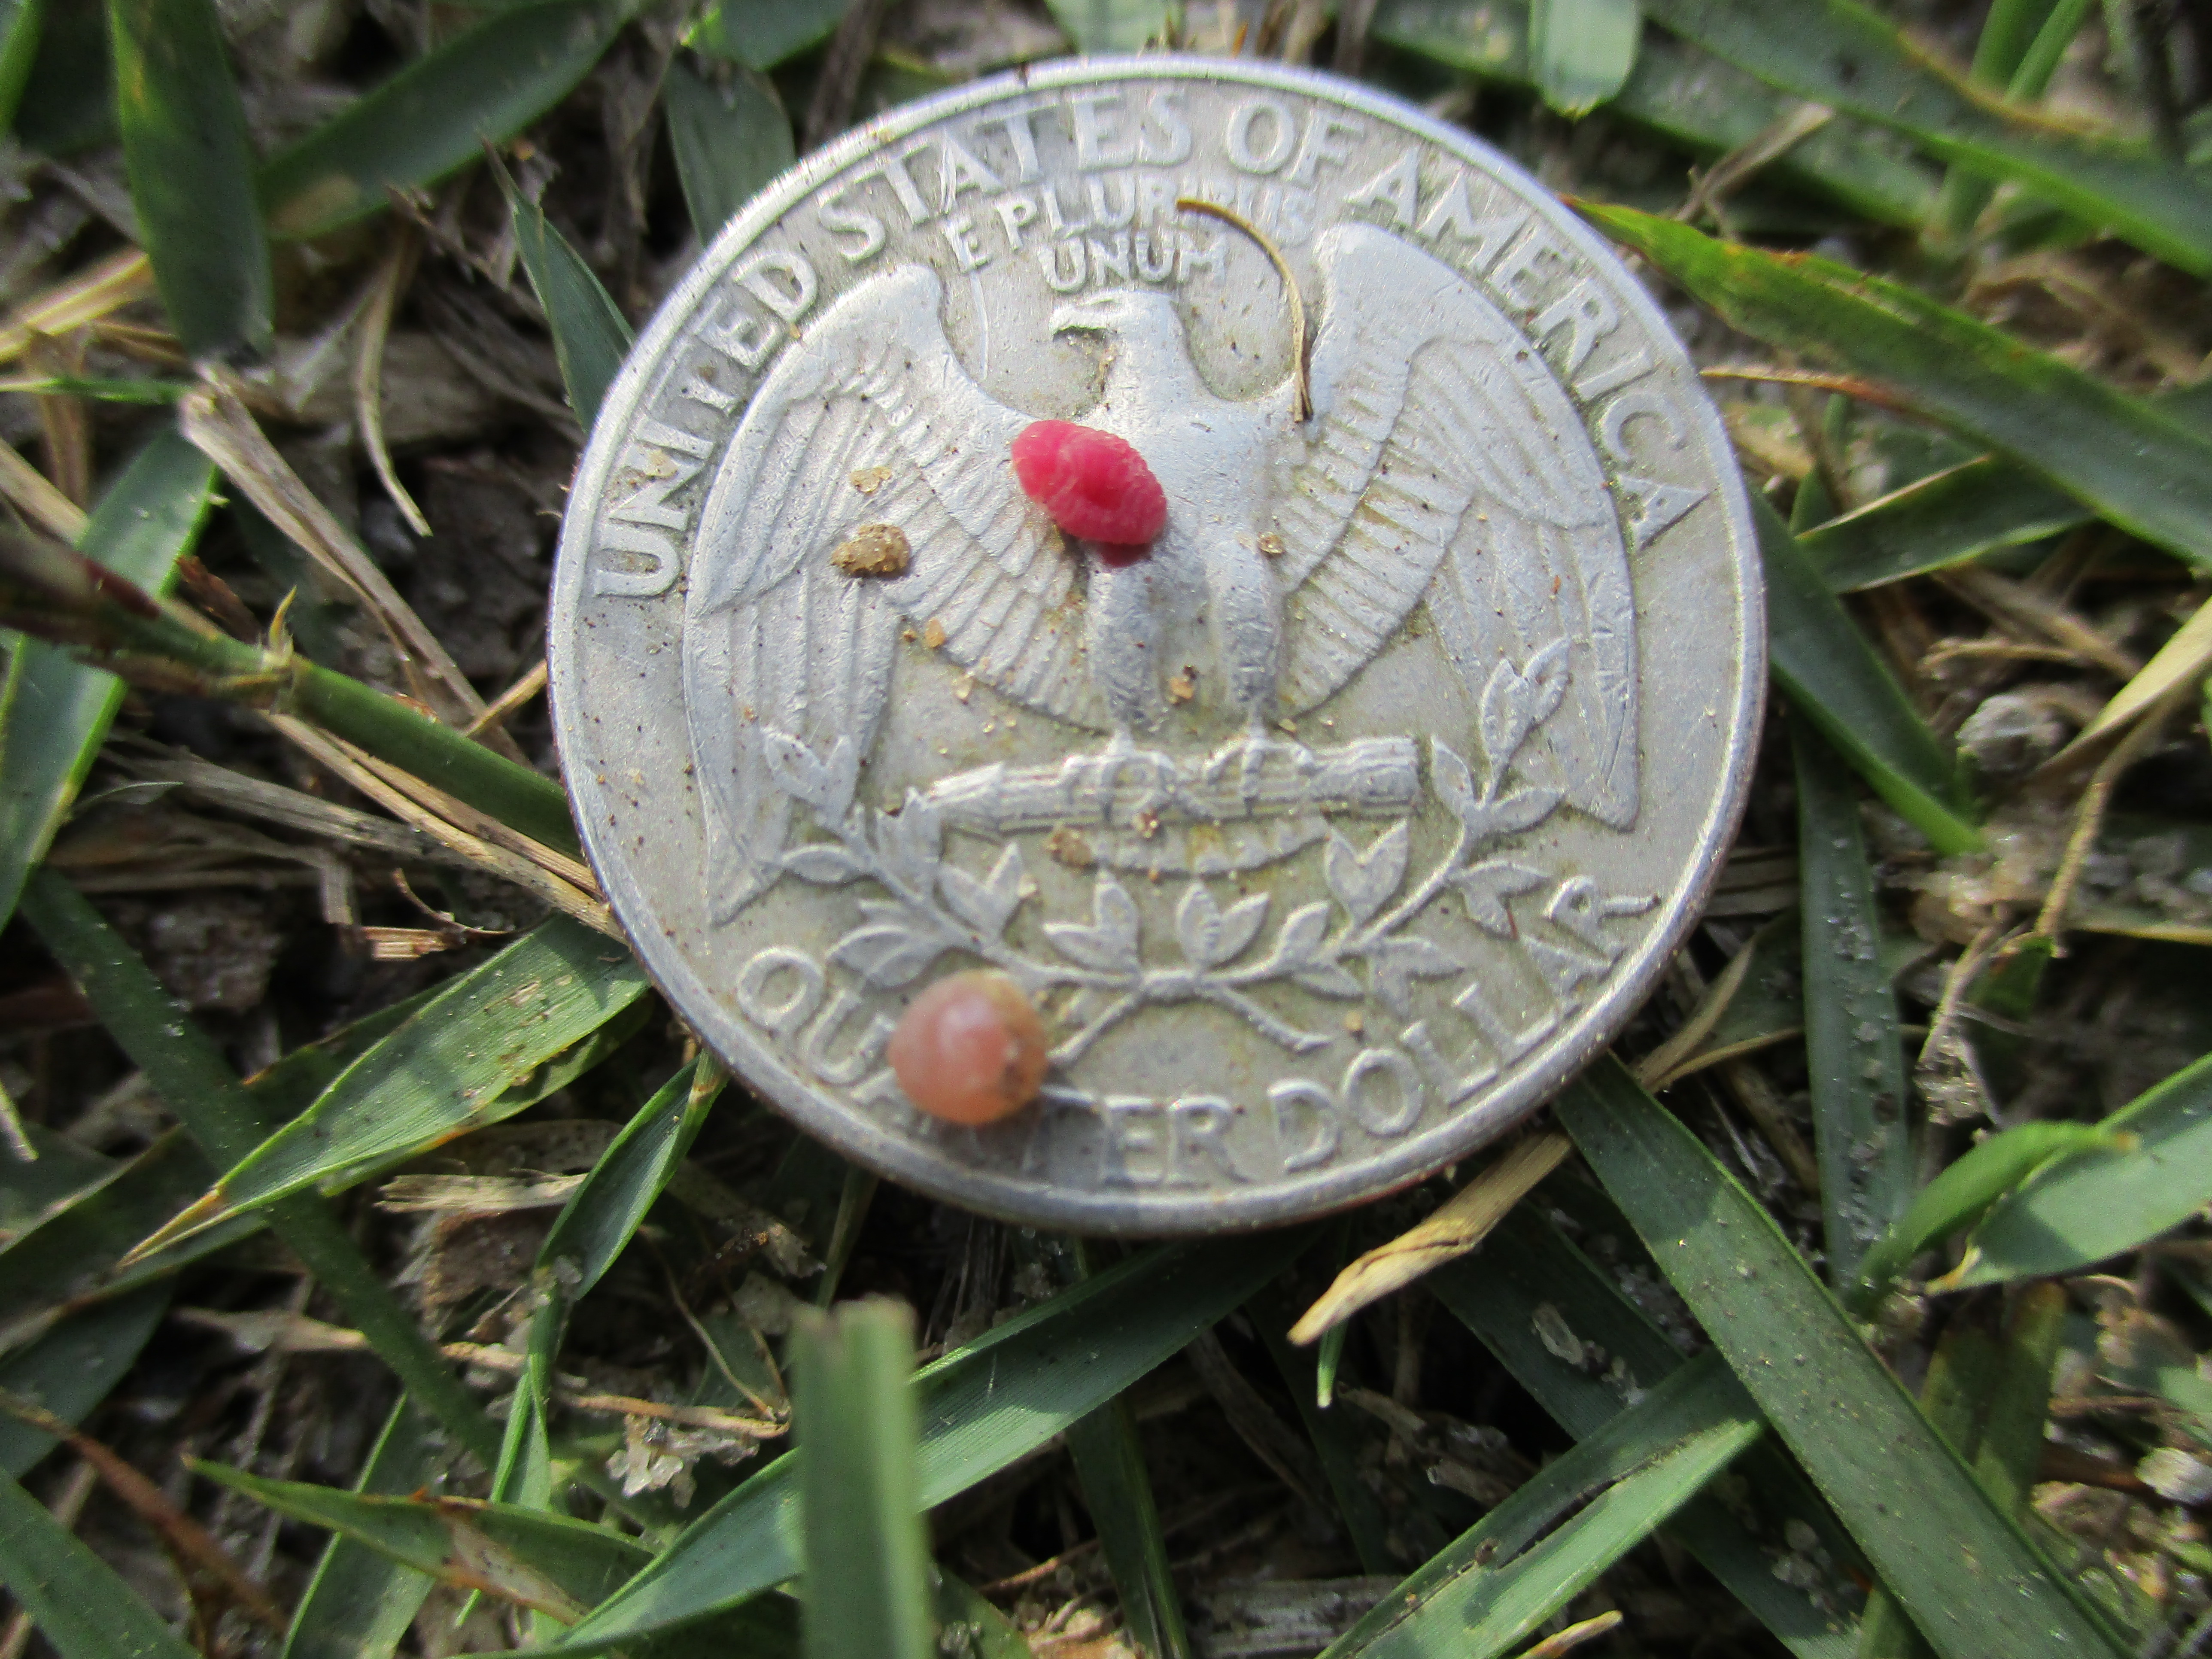
Reddish adult female ground pearl & immature “pearl” stage. Photo credit: Larry Williams
Many times, the dying areas are somewhat circular or serpentine in pattern. Sometimes the circular areas coalesce, forming larger, irregular shaped dying areas. Weeds tend to invade infested areas.
The quote below, taken from a UF/IFAS Extension publication on this insect, provides some insight into their life cycle. “Clusters of pinkish-white eggs, covered in a white waxy sac, are laid in the soil from March to June. Tiny crawlers attach to roots and cover themselves with a hard, yellowish to purple, globular shell. These “pearls” range in size from a grain of sand to about 1/16 inch. They may occur as deep as 10 inches in the soil. The adult female is 1/16 inch long, pink in color, with well-developed forelegs and claws. Adult males are rare, tiny, gnat-like insects. One generation may last from 1 to 2 years.”
It is the immature stage (nymphs), which look somewhat like tiny pearls from which they get the “ground pearl” name. In this stage, they look like tiny shiny pearls once they are uncovered and exposed to sunlight. They are less than a BB in size. They overwinter in the “pearl” stage.
The ineffectiveness of insecticides is at least partly due to the ground pearl’s ability to avoid insecticides because of being protected in the soil and because of the prolonged protective “pearl” stage of its life cycle.
Since there are currently no biological or chemical controls that work, it’s recommended to minimize lawn stress and maintain proper fertilization and irrigation to help grass tolerate the damage.
Additional information on ground pearls is available at the following UF/IFAS Extension publication “Ground Pearls”.