by Larry Williams | Oct 6, 2015

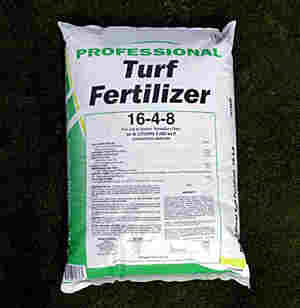
Fertilizer: Image Credit UF / IFAS
In Northwest Florida, all of our lawn grasses begin to fade and slowdown in growth during fall.They are supposed to go dormant. Some will go dormant earlier than others based on species, location and management.
The grasses we use to create lawns are warm season grasses such as centipedegrass, St. augustinegrass, bahiagrass, bermudagrass and zoysiagrass.
The cooler temperatures (particularly cooler night temperatures) and the shorter days of autumn trigger these grasses to slow down. Their color begins to fade and eventually they turn brown, usually after a frost or freeze.
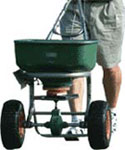
Fertilizer Spreader: Image Credit UF / IFAS
As these warm season grasses go dormant, they don’t need to be fertilized, particularly with a high nitrogen fertilizer. Some of the so called “winterizer” fertilizers available in our area can cause more damage than good despite the advertisements.
Nitrogen encourages new growth and interferes with the dormancy process, forcing the lawn to produce new tender growth at the wrong time of year. This sets the lawn up for damage. That young tender growth is very susceptible to cold injury and is likely to be damaged by the first frost. This greatly weakens the lawn and many times the damage goes unnoticed until the following spring when sections of the lawn do not green up. If you insist on “winterizing” your lawn, use a fertilizer with low nitrogen (represented by the first number in the fertilizer analysis) and high potassium (represented by the last number in the analysis). In most cases the center number (phosphorus) should also be low. But never use a high nitrogen fertilizer late in the season.
Fertilizer: Image Credit UF / IFAS
Large patch disease is another reason to avoid fertilizing after September, particularly with a high nitrogen fertilizer. Too much nitrogen at the wrong time promotes a common lawn disease called large patch, formerly known as brown patch. This disease is caused by the fungus Rhizoctonia. Large patch functions as a pathogen in our lawns during the cooler weather of fall and spring. Applying a high nitrogen fertilizer when large patch is active can be like applying gasoline to a fire, allowing this lawn disease to rage out of control.
In order for the fertilizer to do any good at all for the lawn, it needs to be applied while the grass is actively growing, when the grass can readily take it in. After the lawn is dormant and when the soil temperature is cooler, much of the fertilizer that could have benefited the grass is wasted.

by Larry Williams | Sep 3, 2015
Tropical storm season officially ends November 30. I’m not predicting a storm but even with our average winds during a typical thunderstorm, you’d be wise to prepare.
Falling trees and flying landscape debris during a storm can cause damage. Evaluate your landscape for potential tree hazards. Pruning or removing trees once a hurricane watch has been announced is risky and tree trimming debris left along the street is hazardous.
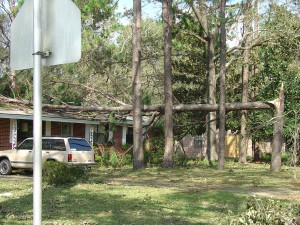
Photo credit: Larry Williams, UF/IFAS.
Now is a good time to remove dead or dying trees and to prune decayed or dead branches Also inspect trees for signs of disease or insect infestation that may further weaken them.
Professional help sometimes is your best option when dealing with larger jobs. Property damage could be reduced by having a professional arborist evaluate unhealthy, injured or questionable trees to assess risk and treat problems. Hiring a certified arborist can be a worthwhile investment. To find a certified arborist in your area contact the International Society of Arboriculture (ISA) at 217-355-9411 or at www.isa-arbor.com. You also may contact the Florida Chapter of ISA at 941-342-0153 or at www.floridaisa.org.
Consider removing trees that have low wind resistance, are at the end of their life span or that have potential to endanger lives or property. For example, laurel oaks are relatively short-lived, usually showing considerable dieback as they reach 50 years. They tend to lose their strength and stability faster than most other oaks and have low wind resistance. Consider removing a big, old laurel oak within falling distance of your home before the next storm.
Tree species with the lowest wind resistance include pecan, tulip poplar, cherry laurel, Bradford pear, southern red oak, laurel oak, water oak, Chinese tallow, Chinese elm, southern red cedar, Leyland cypress, sand pine and spruce pine.
Pine species vary in their wind resistance, usually with longleaf and slash pines showing better survival rates than loblolly and sand pine. However, when pines become large, they may cause damage if located close to homes or other valuable structures.
by Larry Williams | Aug 3, 2015
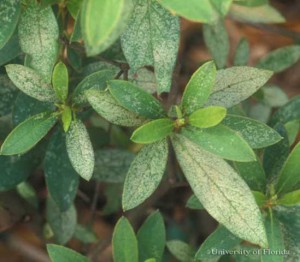
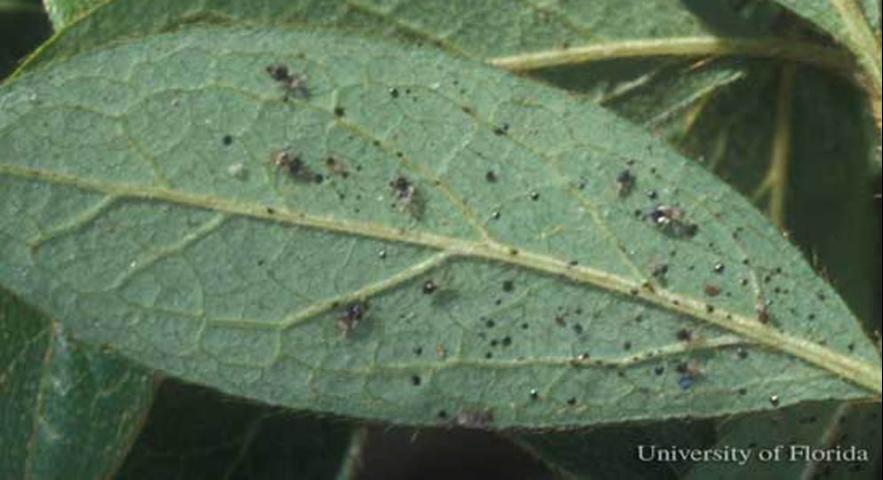
Damage caused by azalea lace bug. Photo credit: James Castner, UF/IFAS
When azaleas are in a garden, azalea lace bugs are sure to follow. The good news is these insects, that discolor the leaves of azaleas, can be controlled.
Lace bugs live on the underside of leaves and damage their hosts by piercing leaves with their straw-like mouthparts and removing the plant’s juices. Infested leaves have tiny yellow spots on the top surface and are discolored with dark, varnish-like excrement and old insect parts on the underside. Azalea plants begin to look unhealthy as insect numbers increase through spring and summer.
Azalea lace bugs spend winter as eggs on the underside of azalea leaves. They hatch in early to mid-March and then begin to feed and develop into adults.
Lace bugs complete their first generation by late April. They increase in number throughout the remainder of spring, summer and fall. These insects can complete three to five generations in a single growing season. In late September adult lace bugs, in their final generation of the season, lay eggs that will carry the population through winter.
The key to easily controlling azalea lace bugs is to properly time control efforts.
Inspect plants in early spring to see if insects are present. Look for leaves that are whitish to yellow on the top surface (they may be mottled in appearance) and have small, dark, varnish-like spots on the undersides. If leave damage is heavy continue to check plants every week for small lace bugs, which should begin to be visible in late March through April.
Early to mid spring is the best time to control the first generation of the bugs. Proper insecticide application timing will reduce need for further sprays during the rest of the growing season.
Insecticidal soap, horticultural oil, neem oil and most synthetic insecticides provide good control of lace bugs on azaleas. When using these types of chemicals, make sure to spray the backs of the leaves.

Azalea leaf with lace bugs. Photo Credit: James Castner, UF/IFAS
Systemic insecticides available for use against lace bugs include dinotefuran (Safari), imidacloprid (Bayer Advanced Tree & Shrub Insect Control, Merit) and acephate (Lilly Miller Ready-to-Use Systemic, Orthene). When properly applied, one application may provide season long control.
When using any chemical treatment on plants, it’s best to apply the product during early morning or late evening under cooler temperatures but never during the heat of the day or when the plant is in full sun. And always follow instructions on the pesticide label concerning mixing, application and safety precautions.
by Larry Williams | Jul 7, 2015
There are a number of plants in my landscape that bring back fond memories – plants that I propagated.

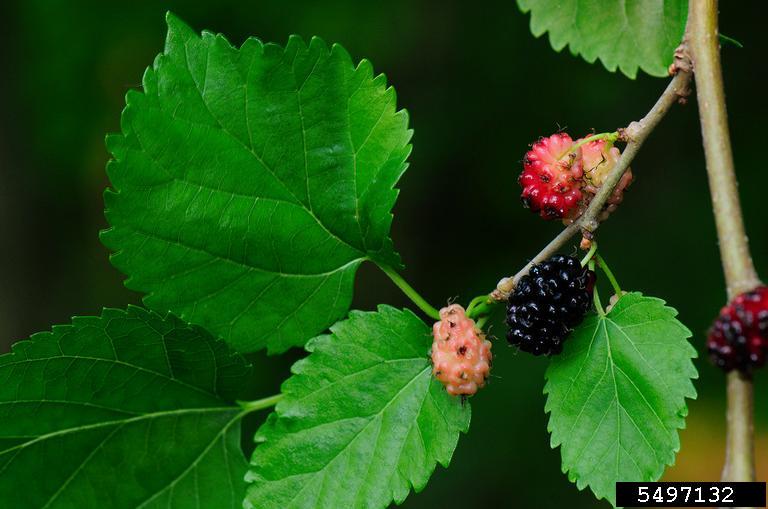
Red Mulberry. Photo credit: Vern Williams, Indiana University, bugwood.org.
There’s a mulberry tree in my backyard that I rooted years ago. I took the cuttings from an old mulberry tree in my hometown. As a boy, I climbed the tree, got in trouble once for coming home with mulberry stains on my clothes. I liked the berries and still do. I have good childhood memories about the tree.
About twenty years ago I visited the property adjacent to my childhood home. The tree was still there. It was during mulberry season. I enjoyed a few mulberries. I took about eight or ten cuttings from the tree. About a year after my visit, the property sold. The new owner bulldozed the tree.
But because of the cuttings that I rooted, the tree still lives and not just in my memory. The trees produced by those cuttings are genetically the same as the parent tree. Essentially, they are clones. The one in my backyard produces mulberries each year.
You too can propagate memories. Not all plants can be propagated from cuttings but many can be. Sometimes trial and error is necessary to learn proper timing in taking cuttings. But most reliable references will provide the time of year to take cuttings based on the plant species.
Stem cuttings should be removed from the parent plant with a clean, sharp knife or pruner. Ideally your cutting should be 4-6 inches in length and not much thicker than a pencil in diameter.
Take the bottom two-thirds of leaves off on each cutting. The cuttings should be stuck upright in a propagation medium. I usually use a good quality potting mix and mix in a little course sand or perlite for better drainage. The cuttings should be inserted deep enough to hold them upright, usually ½ to 1 inch.
To help promote rooting of moderate to difficult to root plants, wound the cuttings by scraping the lower ½ to 1 inch of the stem with a clean, sharp knife. The scrape should remove the bark or “skin.” Then dip the cutting in a rooting hormone covering the scrape with the rooting powder prior to inserting the cutting into the rooting medium.
I usually use a four inch pot, gallon size pot or bedding plant flat with drainage holes as a rooting container. I may stick as many as ten stem cuttings in a gallon size pot. I place the container of cuttings in a shady location outdoors and keep it moist. The cuttings should produce roots in two to sixteen weeks, depending upon plant species and the environment.
After the cuttings have rooted, carefully remove them and individually plant each rooted cutting in its own four inch to one gallon size pot. Keep the potting medium moist but not soggy. After the roots adequately fill the pot, the plant should be strong enough to be planted in the ground.
As your rooted cuttings grow, hopefully they will provide fond memories.
by Larry Williams | Jun 9, 2015
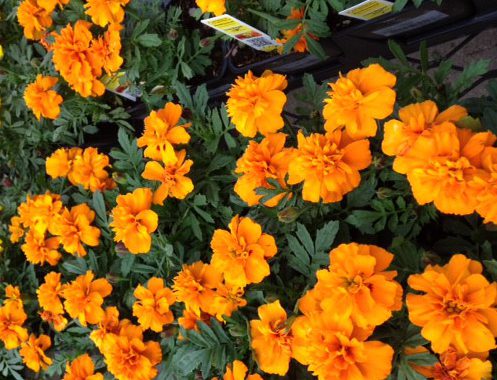
There are areas in most landscapes where it just is not practical or possible to bring in the tiller and create a flowerbed. A little imagination, a decorative container and appropriate plants can turn a bare spot into a splash of color.
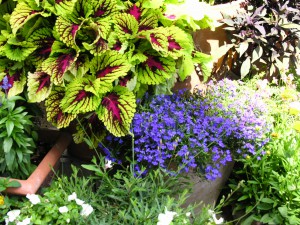
Colorful containers bring life to your small spaces.
Consider using a container of annuals to add color to a backyard deck or a paved entrance way. Or what about that area under the tree where grass doesn’t want to grow and where it would be difficult to till without damaging the tree’s roots and the tiller? How about the dry spot where there is no irrigation but where it would be more practical to occasionally hand water a well-placed container of colorful caladiums?
A wide variety of flowering annuals work well in containers. But be sure to select plants based on the exposure. Some annuals will quickly bake from full sun exposure and others will become leggy and bloom poorly in a shady location.
Impatiens and begonias do well in shaded places and remain in flower almost continuously. Caladiums with their colorful leaves also do well in containers in shady areas.
It’s more difficult to grow container plants in full sun but there are some annuals to consider for sunny spots. A few to consider include blanket flower (Gaillardia), portulaca and salvia.
There are many other annuals that can be successfully grown in containers. There are even sun-tolerant begonia and sun coleus varieties for full-sun places.
Don’t be afraid to try something different. To learn more about this topic, please see:
Container Gardens for Outdoor Spaces
Gardening Solutions


