by Mark Tancig | Jun 17, 2021
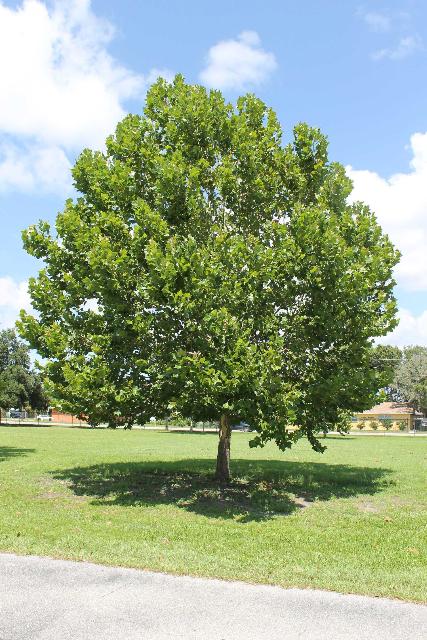
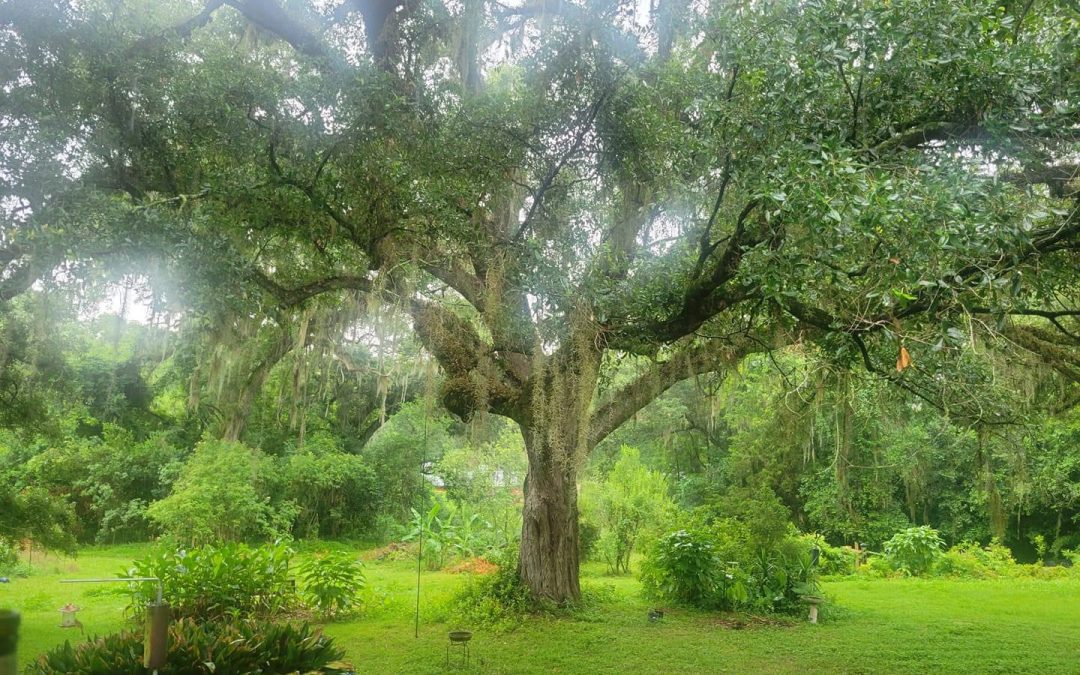
Spending time outdoors during the Florida summer is not for the faint of heart. It’s hot! And it’s humid! Just moving around outside for a moment in the early morning causes you to break out in a sweat. Most evenings, even after the sun is low in the western sky, but there’s still enough light to enjoy the outdoors, the sweat doesn’t stop. A Floridian’s only hope is that nearby, there is a large shade tree to take cover under. In north Florida, there’s nothing more inviting than a huge live oak draped in Spanish moss for a drink of ice water and a slight breeze. If you don’t have such a spot, start thinking about planting a shade tree this winter!
A large live oak is great for shade! Credit: Dawn Reed.
In north Florida, we have many options to choose from, as we live in an area of the United States with some of the highest native tree abundance. Making sure you get the right tree for the right place is important so make a plan. Where could this tree go? Is there plenty of space between the tree and any structures? You’ll want to give a nice shade tree plenty of room – 20’ to 60’ away from structures and/or from other large trees – to grow into a great specimen. Be sure not to place a large tree under powerlines or on top of underground infrastructure. You can “Call 811 before you dig” to help figure that out. If space is limited, you may want to consider trees that have been shown to be more resilient to tropical weather. Also try and place the tree in a way that provides added shade to your home. Deciduous trees planted along your home’s southeast to southwest exposure provide shade during the summer and let in the sun during the cooler winter. However, be careful that the tree doesn’t grow to block the sun from your vegetable garden!

A density gradient map of native trees in the US. Notice where the highest number occur. Credit: Biota of North America Program.
Here are some ideas for shade trees, those trees that are tall (mature height greater than 50’) and cast a lot of shade (mature spread greater than 30’). All of these are native trees, which have the added benefit of providing food and shelter to native wildlife.
- Red maple (Acer rubrum)
- Pignut hickory (Carya glabra)
- Green ash (Fraxinus pennsylvanica)
- Tulip poplar (Liriodendron tulipifera)
- Southern magnolia (Magnolia grandiflora)
- Sycamore (Platanus occidentalis)
- Shumard oak (Quercus shumardii)
- Live oak (Quercus virginiana)
- American elm (Ulmus americana)
It’s best to plant during the winter and follow good planting practices.
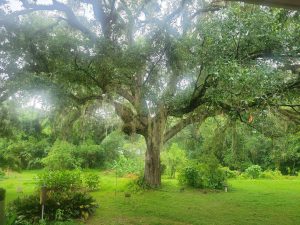
Even with this young sycamore, you’ll be made in the shade. Credit: UF/IFAS.
While it may take a while for you to relax under the shade of your tree, they can surprise you in their growth and, as they say, there’s no time like the present. If you have questions on selecting or planting shade trees, contact your local UF/IFAS Extension office.
by Mark Tancig | Apr 8, 2021
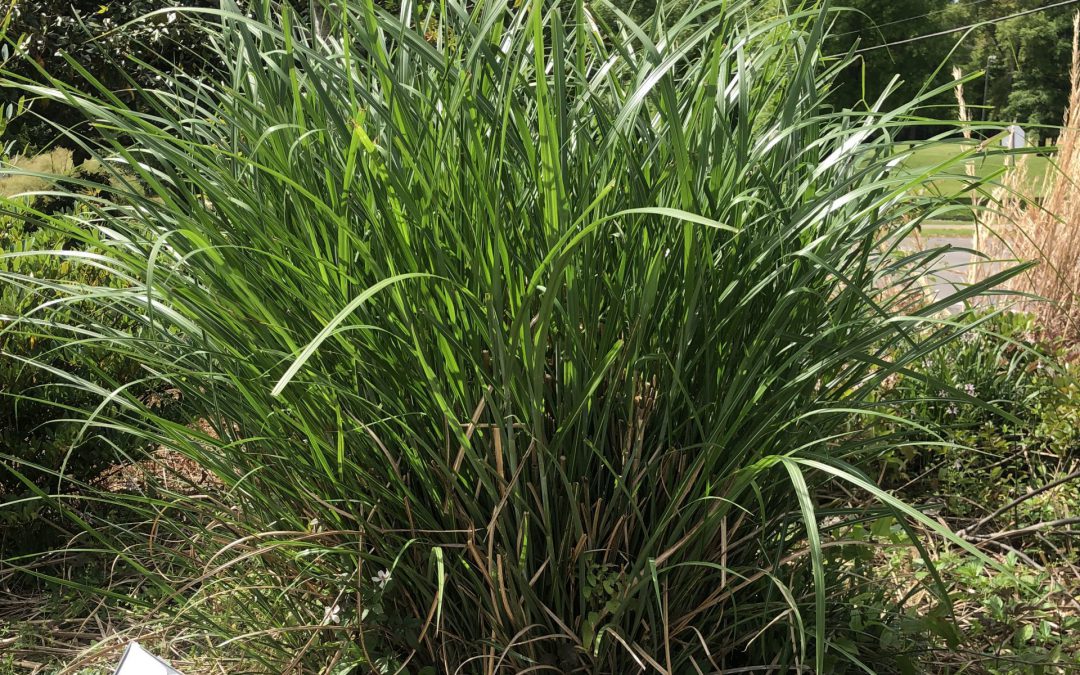
Ornamental grasses are a great addition to the landscape. Most are usually easy to establish, need little water and fertilization, provide different textures, and are generally low maintenance. The one main maintenance activity that is necessary for most of our north Florida ornamental grasses is a good “haircut” in the spring.
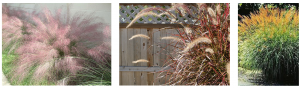
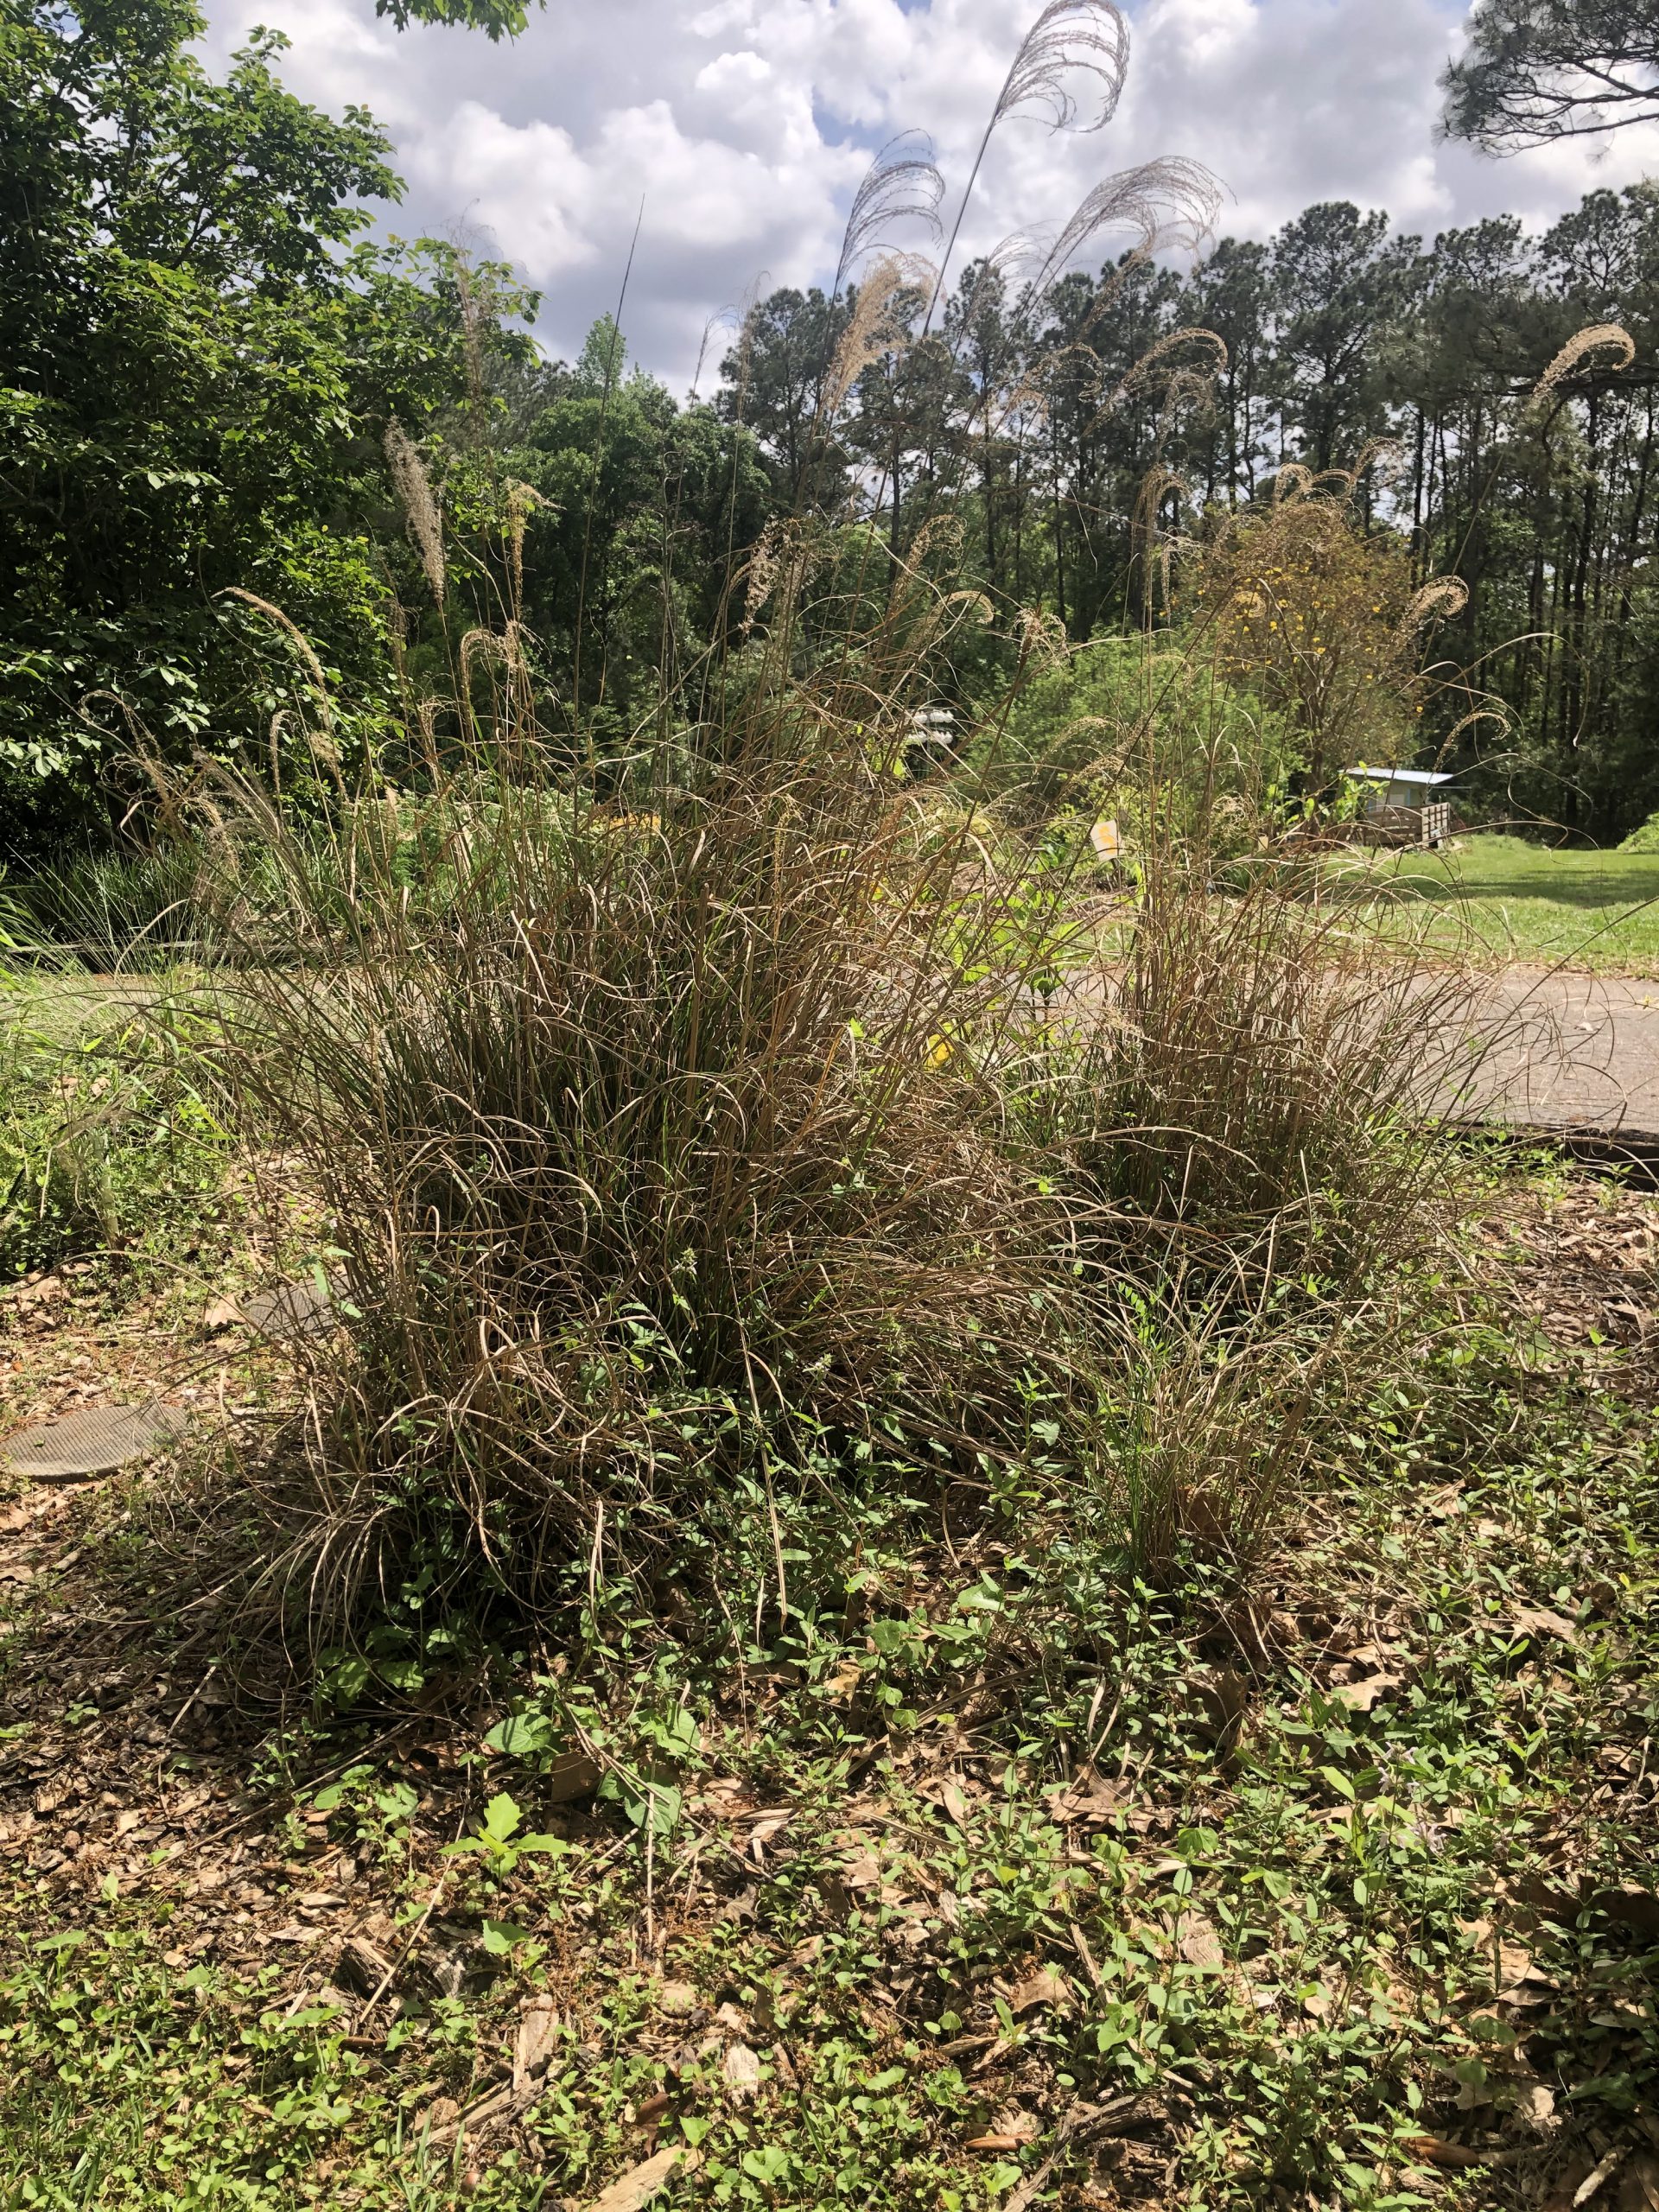
Ornamental grasses for north Florida, such as muhly grass, purple fountain grass, and Miscanthus (l to r), add texture, color, and winter interest to a landscape. Credit: UF/IFAS.
Pruning grasses removes the spent flowers and seed heads, as well as all of the brown leaves, which provided the fall and winter interest that ornamental grasses bring to the landscape. These leaves also serve as a sort of natural wind-chime during the cold, windy days of our winters and may even provide cover and nesting material for wildlife. However, now it’s spring, and lush green growth is waiting to pop through that dead mix of leaves and stems. Pruning clears all that out, allowing for good air movement and a rejuvenation of the plant that can help minimize pests and disease.
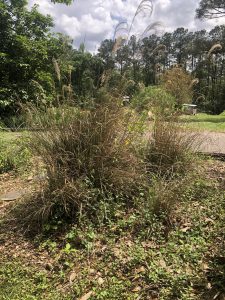
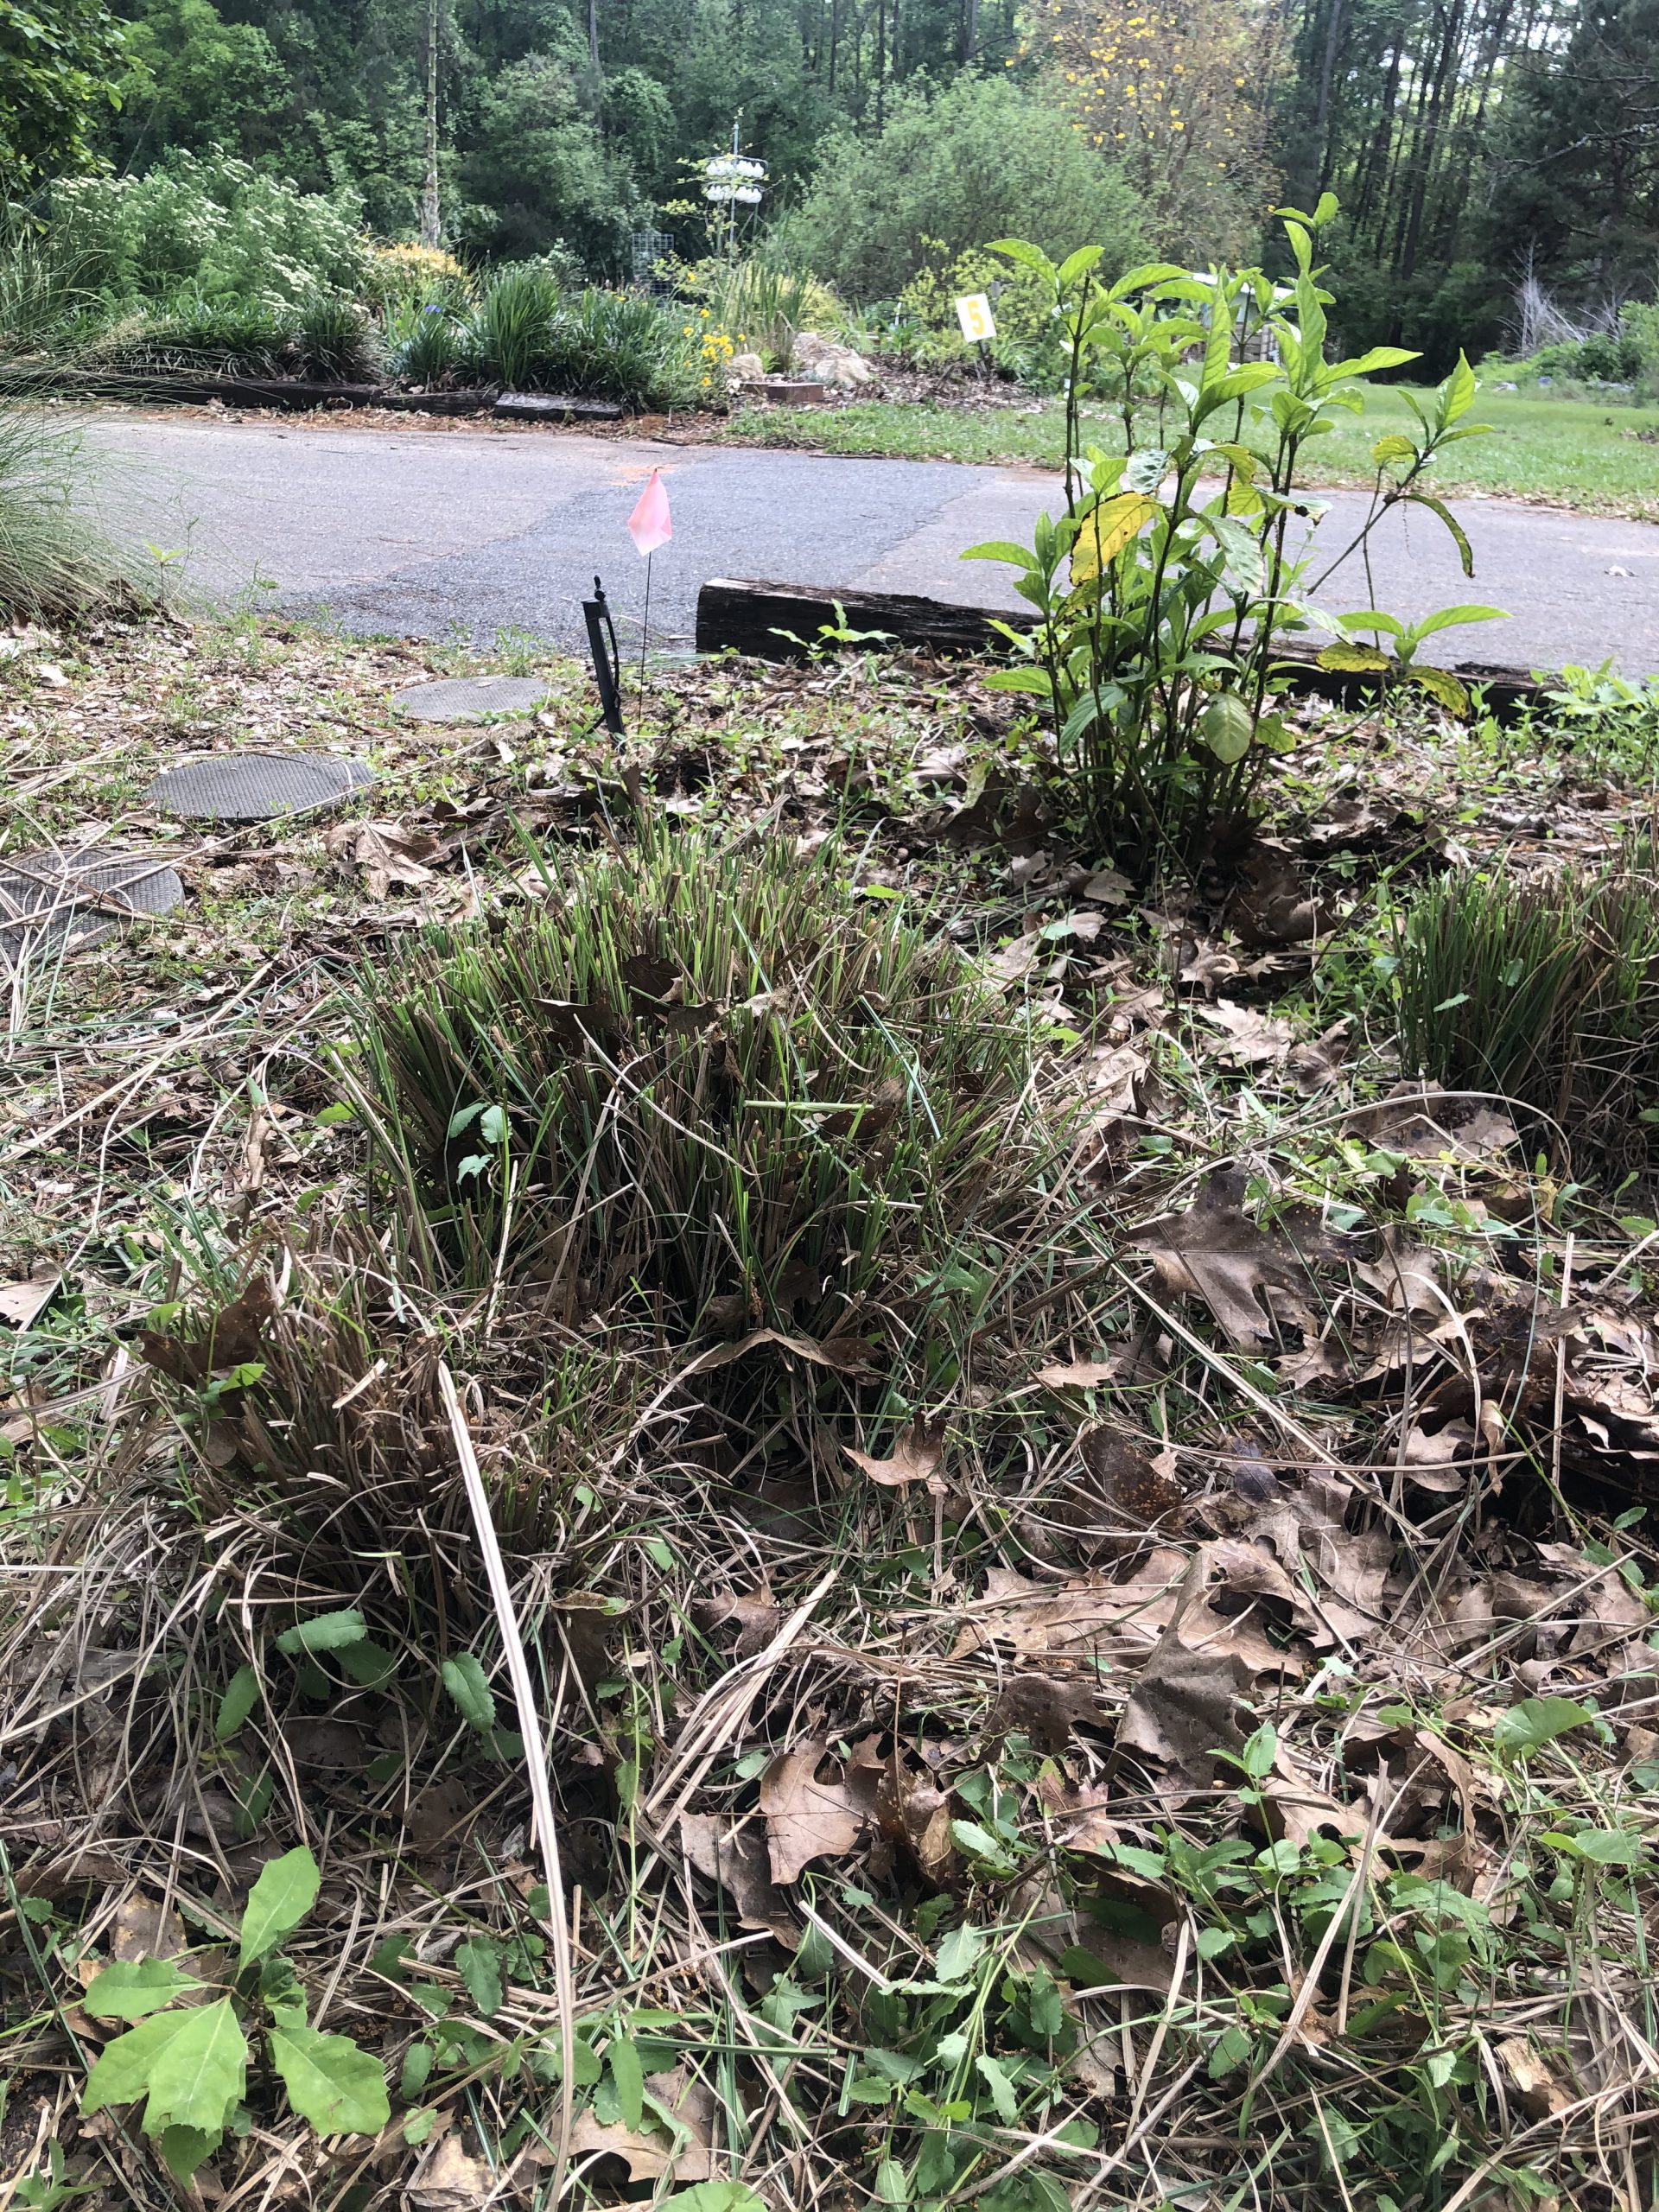
Miscanthus grass before a spring “haircut”. Credit: Mark Tancig, UF/IFAS.

Miscanthus grass after a spring “haircut”. Credit: Mark Tancig, UF/IFAS.
To prune ornamental grasses, wait for after the last average frost date and grab some nice sharp shears. Next, just shear the clump about six inches above the soil line working from the outside towards the center with a slight angle, creating a sort of fade effect. For larger specimens you may need to adjust the cut a bit higher and may even want to use a hedge trimmer. Nice clean cuts are preferred.
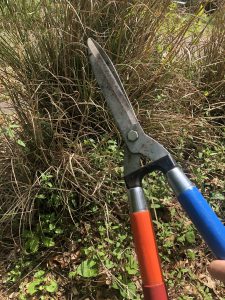
Shears are the way to go when pruning ornamental grasses. Orange and blue handles optional! Credit: Mark Tancig, UF/IFAS
One good pointer I saw online is to also bring along an old belt or a piece of rope to cinch up the dead material before pruning to easily collect the debris. I tend to use a cut and swipe motion that pushes the large material to one side of the plant, and I follow up with a metal garden rake to pull out more of the old, coarser material.
Within no time, new growth will flush out from the mound and often surprise you with how quick it can grow. This proves just how dynamic ornamental grasses can be in the landscape, showcasing lush green growth during one season and providing stark, whimsical interest during another.

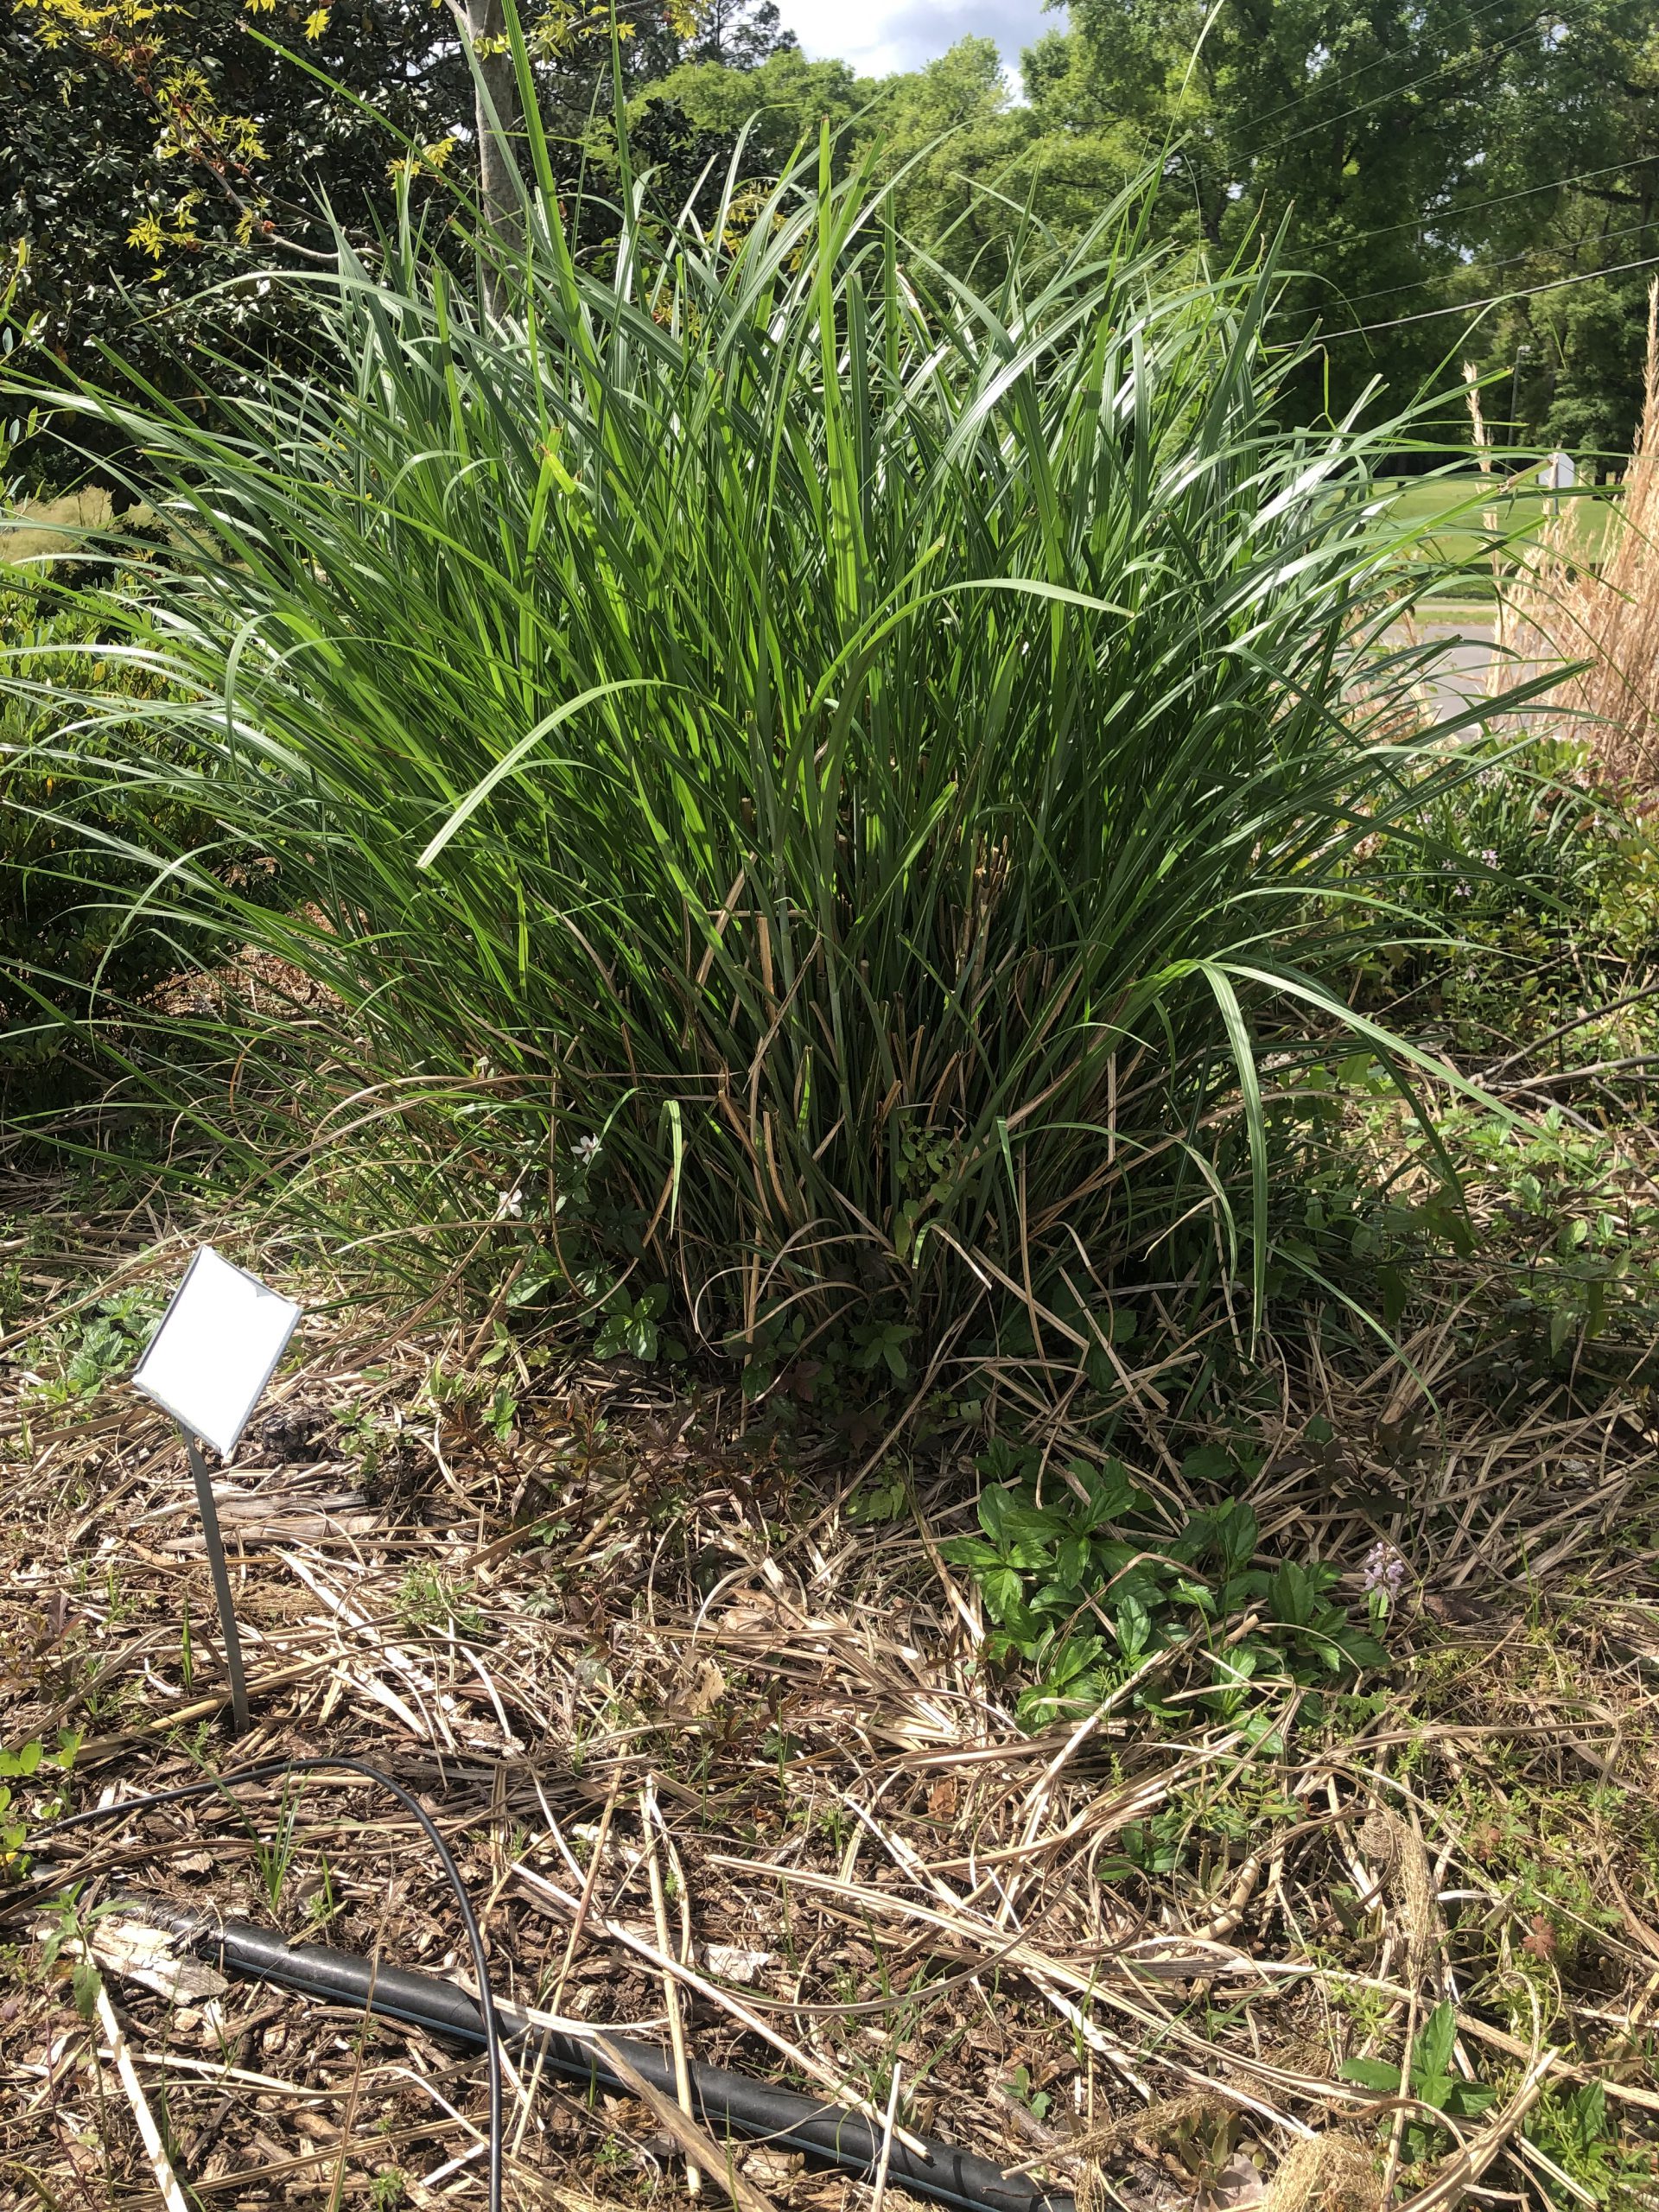
Miscanthus grass two weeks following pruning. Credit: Mark Tancig, UF/IFAS.

by Mark Tancig | Feb 25, 2021

February 22-26, 2021 is National Invasive Species Awareness Week.
February 22 to 26, 2021 is National Invasive Species Awareness Week (NISAW). This is a time where many organizations involved with land management and conservation will be sharing information to educate the public about the issue of invasive plant and animal species. Living in Florida, we should all be well aware of the concerns with invasive species as we have experience with many, including the fire ant, kudzu, iguanas, climbing fern, and pythons. Oh my! Due to Florida’s climate and our many active ports, we are prime for introductions of many non-native species. These invasive species alter our unique ecosystems and can cause harm to us humans by blocking waterways (aquatic plants like Hydrilla), affecting our health (allergenic plants like Chinese privet) and the health of our pets and livestock (dogs allergic to tropical dayflower and cattle killed by Nandina). Since many of these pests were brought here for the ornamental landscape trade, gardeners have a responsibility to be aware of these invasive species and do what they can to control them.
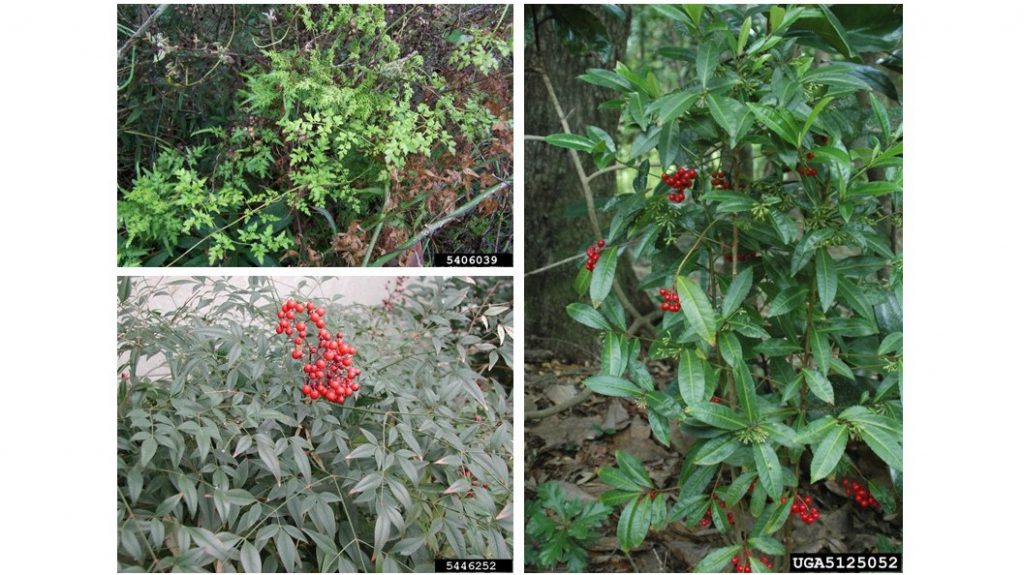
A few of the most common invasive species you may find in your north Florida landscape. Clockwise from top left – Japanese climbing fern, coral ardisia, and heavenly bamboo. Image Credit: Bugwood.org
There are several great resources from UF/IFAS to help with identification and control of invasive species, from your local county extension agents to a slew of online publications and websites. This year, the Florida Invasive Species Partnership (FISP), of which UF/IFAS is a partner, is coordinating a pandemic-safe, stay-at-home Weed Wrangle to encourage Floridians to work on controlling invasive species. If you share your efforts, you’re eligible for prizes, including weed pullers and gift certificates for native plants! For more information, check out the website for the Florida Weed Wrangle Week event – https://www.floridainvasives.org/flwww.cfm.
For more help identifying and controlling invasive species, contact your local county extension office or visit this UF/IFAS website that is a clearinghouse of invasive species information – https://sfyl.ifas.ufl.edu/natural-resources/invasive-species/.
by Mark Tancig | Feb 11, 2021
Gardeners worldwide and throughout time have bemoaned weeds. In Florida, we get to enjoy weeds all year long! Our February Gardening in the Panhandle (GIP) Live episode focused on weeds and weed control. Many homeowners are interested in ways to control weeds and UF/IFAS Extension and your local extension agents are here to help. The following is a summary of the topics we discussed and links for more research-based information on weeds.
What is a Weed?
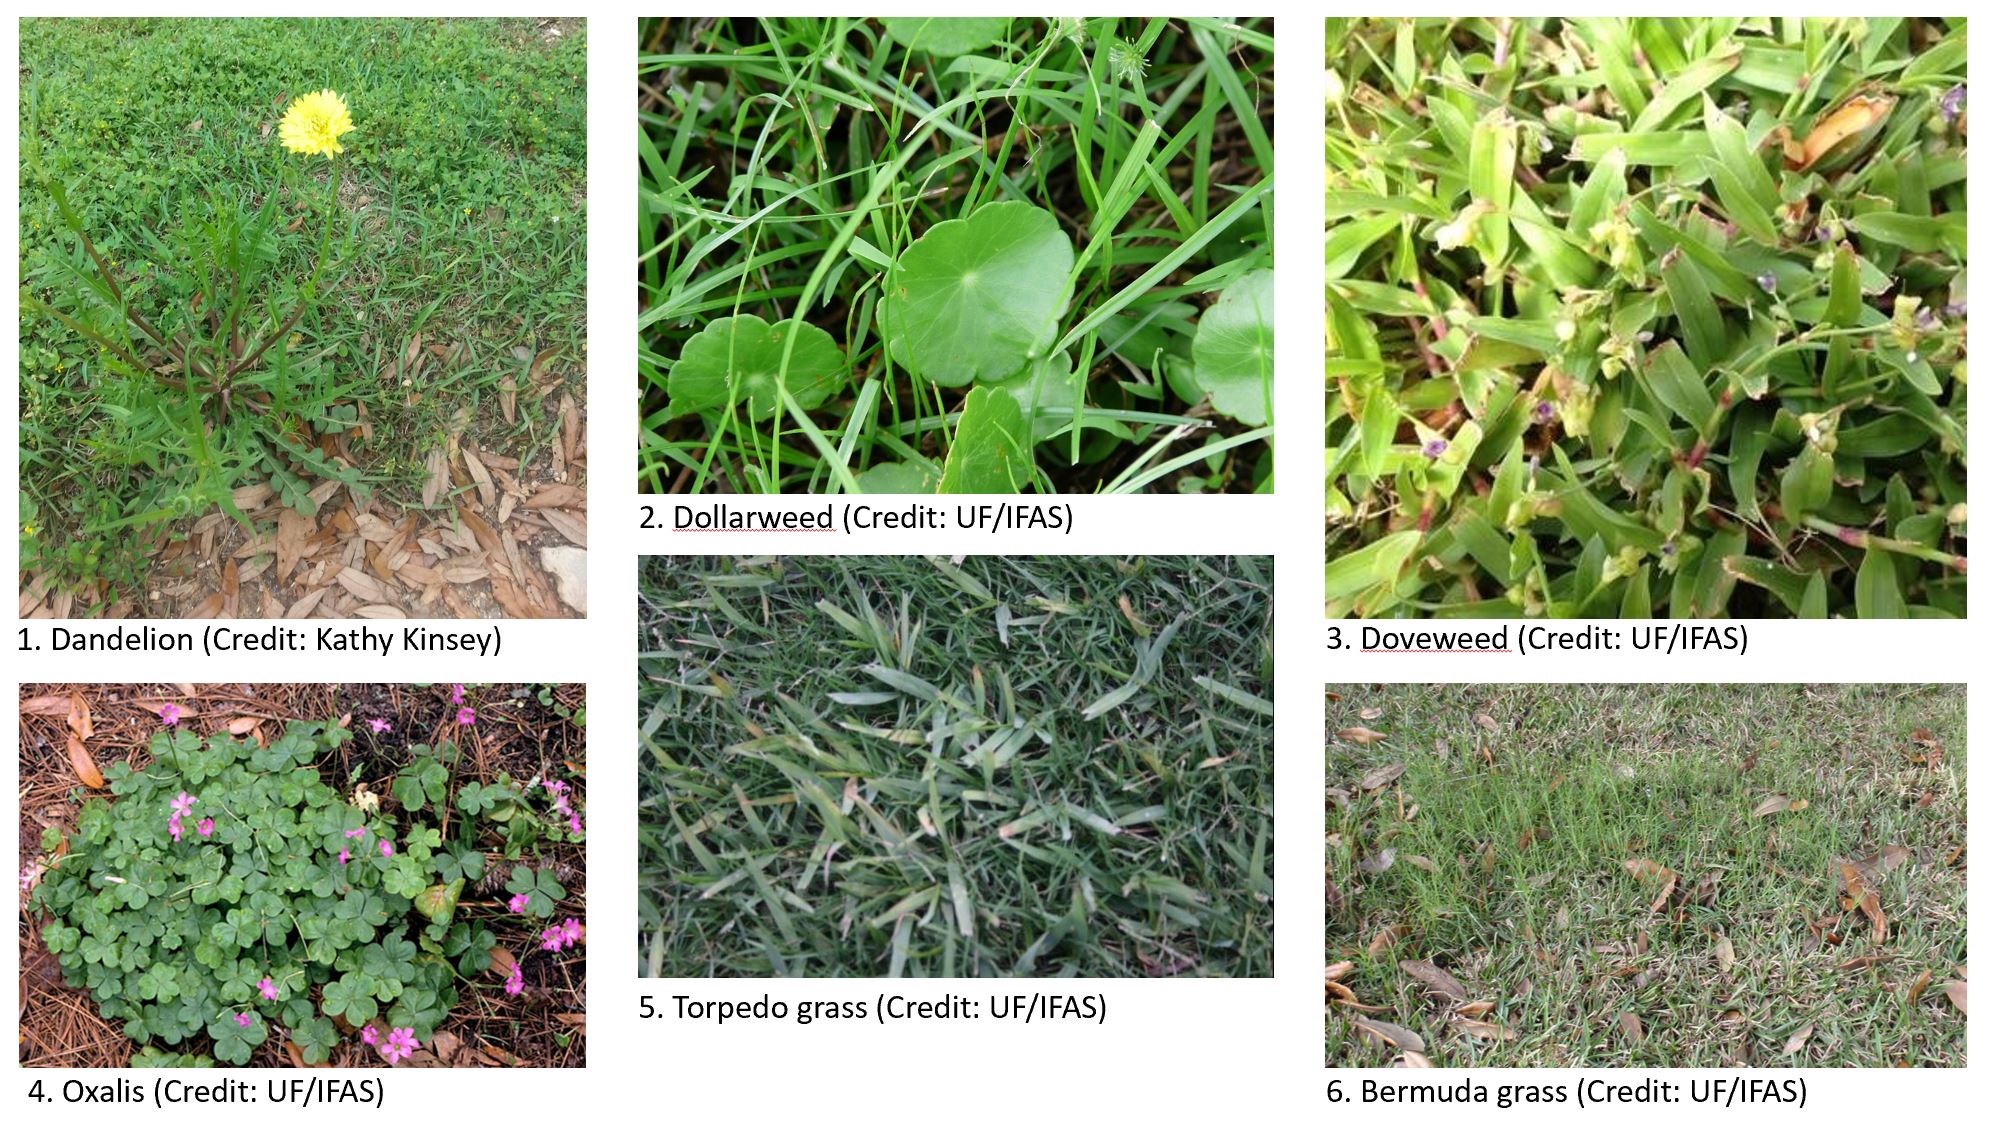
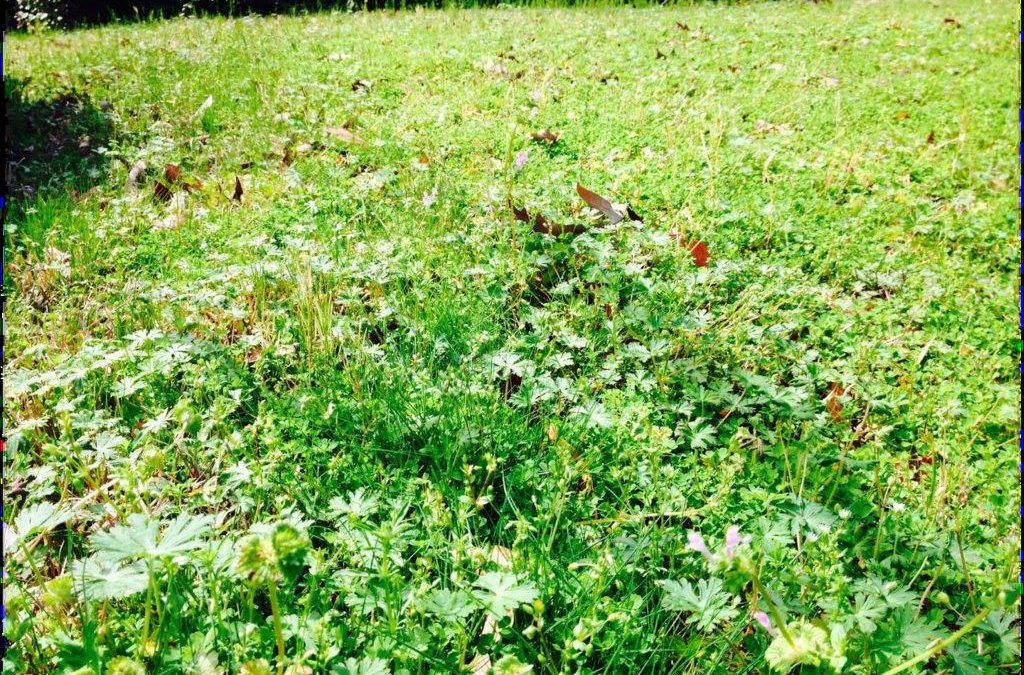
Many folks come to the extension office holding a plant and ask, “Is this a weed”? Well, whether it is a weed or not is up to the individual, as the only definition for a weed is “a plant out of place”. Bermudagrass and Oxalis are good examples of plants that some try to grow while others try to kill. One person’s weed is another’s wildflower! However, to be clear, plants classified as invasive by UF/IFAS and governmental entities are officially weeds. There are resources to help identify several common plants that are generally considered weeds by most homeowners and landscapers.
Weed ID Links
Common, and aggravating, weeds.
How to Prevent Weeds?
There are some general gardening practices that can help prevent weeds so there is less of a need to control them. A lawn that is healthy is less likely to be invaded by weeds and the use of mulch can greatly reduce weed growth in planting beds. Other practices, like the placement of weed fabrics/cloths are less effective and/or less practical in many garden situations.
Weed Prevention Links
How to Control Weeds?
Once you know and/or decide that what you have is a weed and that it needs to be dealt with, then you have to consider your control options. Prevention, as mentioned above, is key but sometimes you may need to use other methods of control, such as physical, mechanical, and/or chemical means. With chemical weed control, it is important to always read and follow the product label.
Weed Control Links

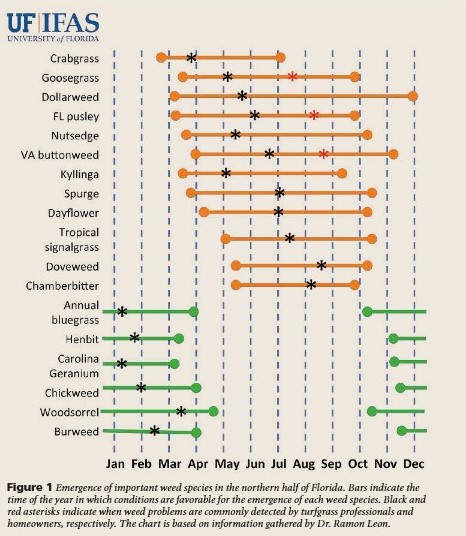
General dates of common annual weed emergence. Credit: Dr. Ramon Leon, UF/IFAS.
Specific Weed Recommendations
When managing pests, proper identification is key to effective control. Because some weeds are annuals, and present either during the cool or warm season, and others are perennials, proper weed identification can provide a more detailed control strategy. Use the weed ID links above and the document links below for more precise, and effective, weed management.
Species-Specific Control Links
If you need additional assistance with weed control, please contact your local county extension office. Please tune in for future GIP LIVE episodes for more research-based information on gardening topics.
by Mark Tancig | Dec 16, 2020
Many folks are giddily decorating their homes for the holiday season. For some outdoor enthusiasts and/or environmental educators, now is the time to collect and preserve a natural decoration, with care. Hornet nests offer a large natural ornament that can be used as a conversation piece or to teach people about an interesting native wasp that is often feared.
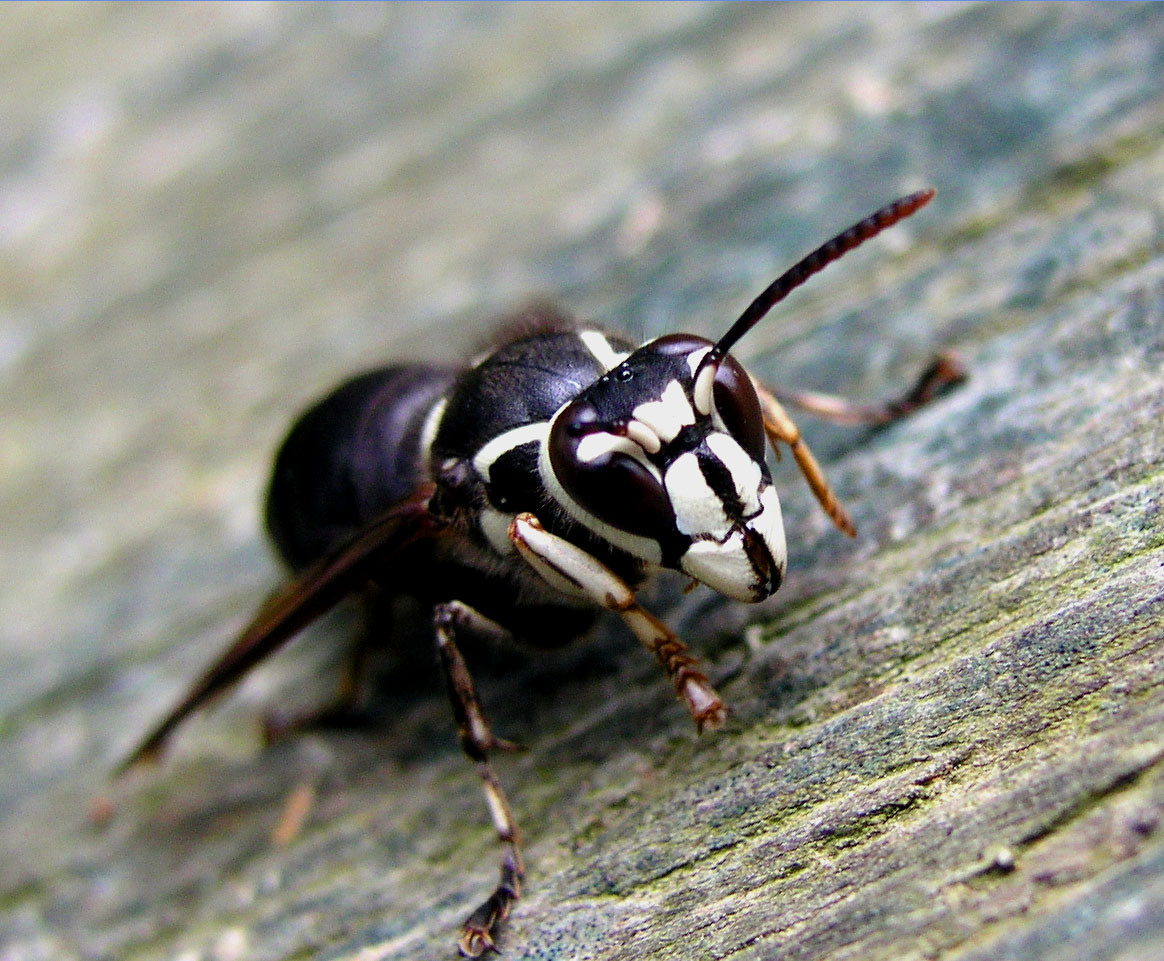
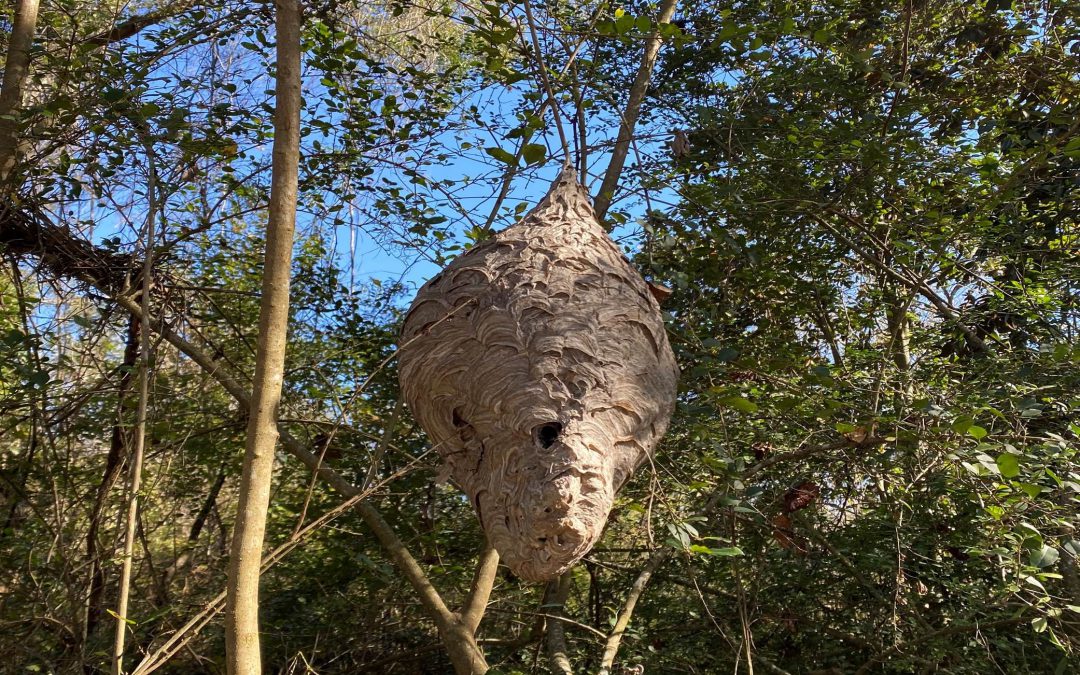
The face of a baldfaced hornet! Credit: Piccolo Namek, Wikimedia Commons.
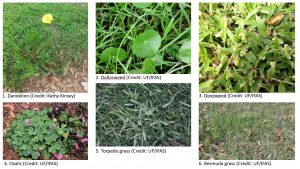
The bald-faced hornet (Dolichovespula maculata) is a type of wasp closely related to yellowjackets, of which there are two species that are known from Florida, the eastern yellow-jacket (Vespula maculifrons) and southern yellowjacket (Vespula squamosa). The bald-faced hornet is different than its yellowjacket relatives in that it creates a large aerial nest rather than a subterranean nest. If you have seen a hornet’s nest in person, you know how impressive they can be. Surprisingly, they can be safely preserved for indoor display!
Hornet colonies begin each spring and are “founded” by a lone adult queen that made it through the winter, hiding under the bark of logs and such. The lone queen begins creating the papery brood cells and laying eggs. Once those eggs begin to hatch, the newly hatched all-female crew of hornets begin assisting in nest building and foraging while the queen shifts to only laying eggs. Towards the end of fall, some of the eggs receive more food (they become queens) and the queen also begins to lay male eggs. Once these emerge, they mate, and the cycle starts all over again, with the colony dying back, leaving an abandoned and impressive aerial nest behind.
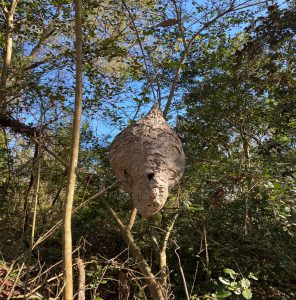
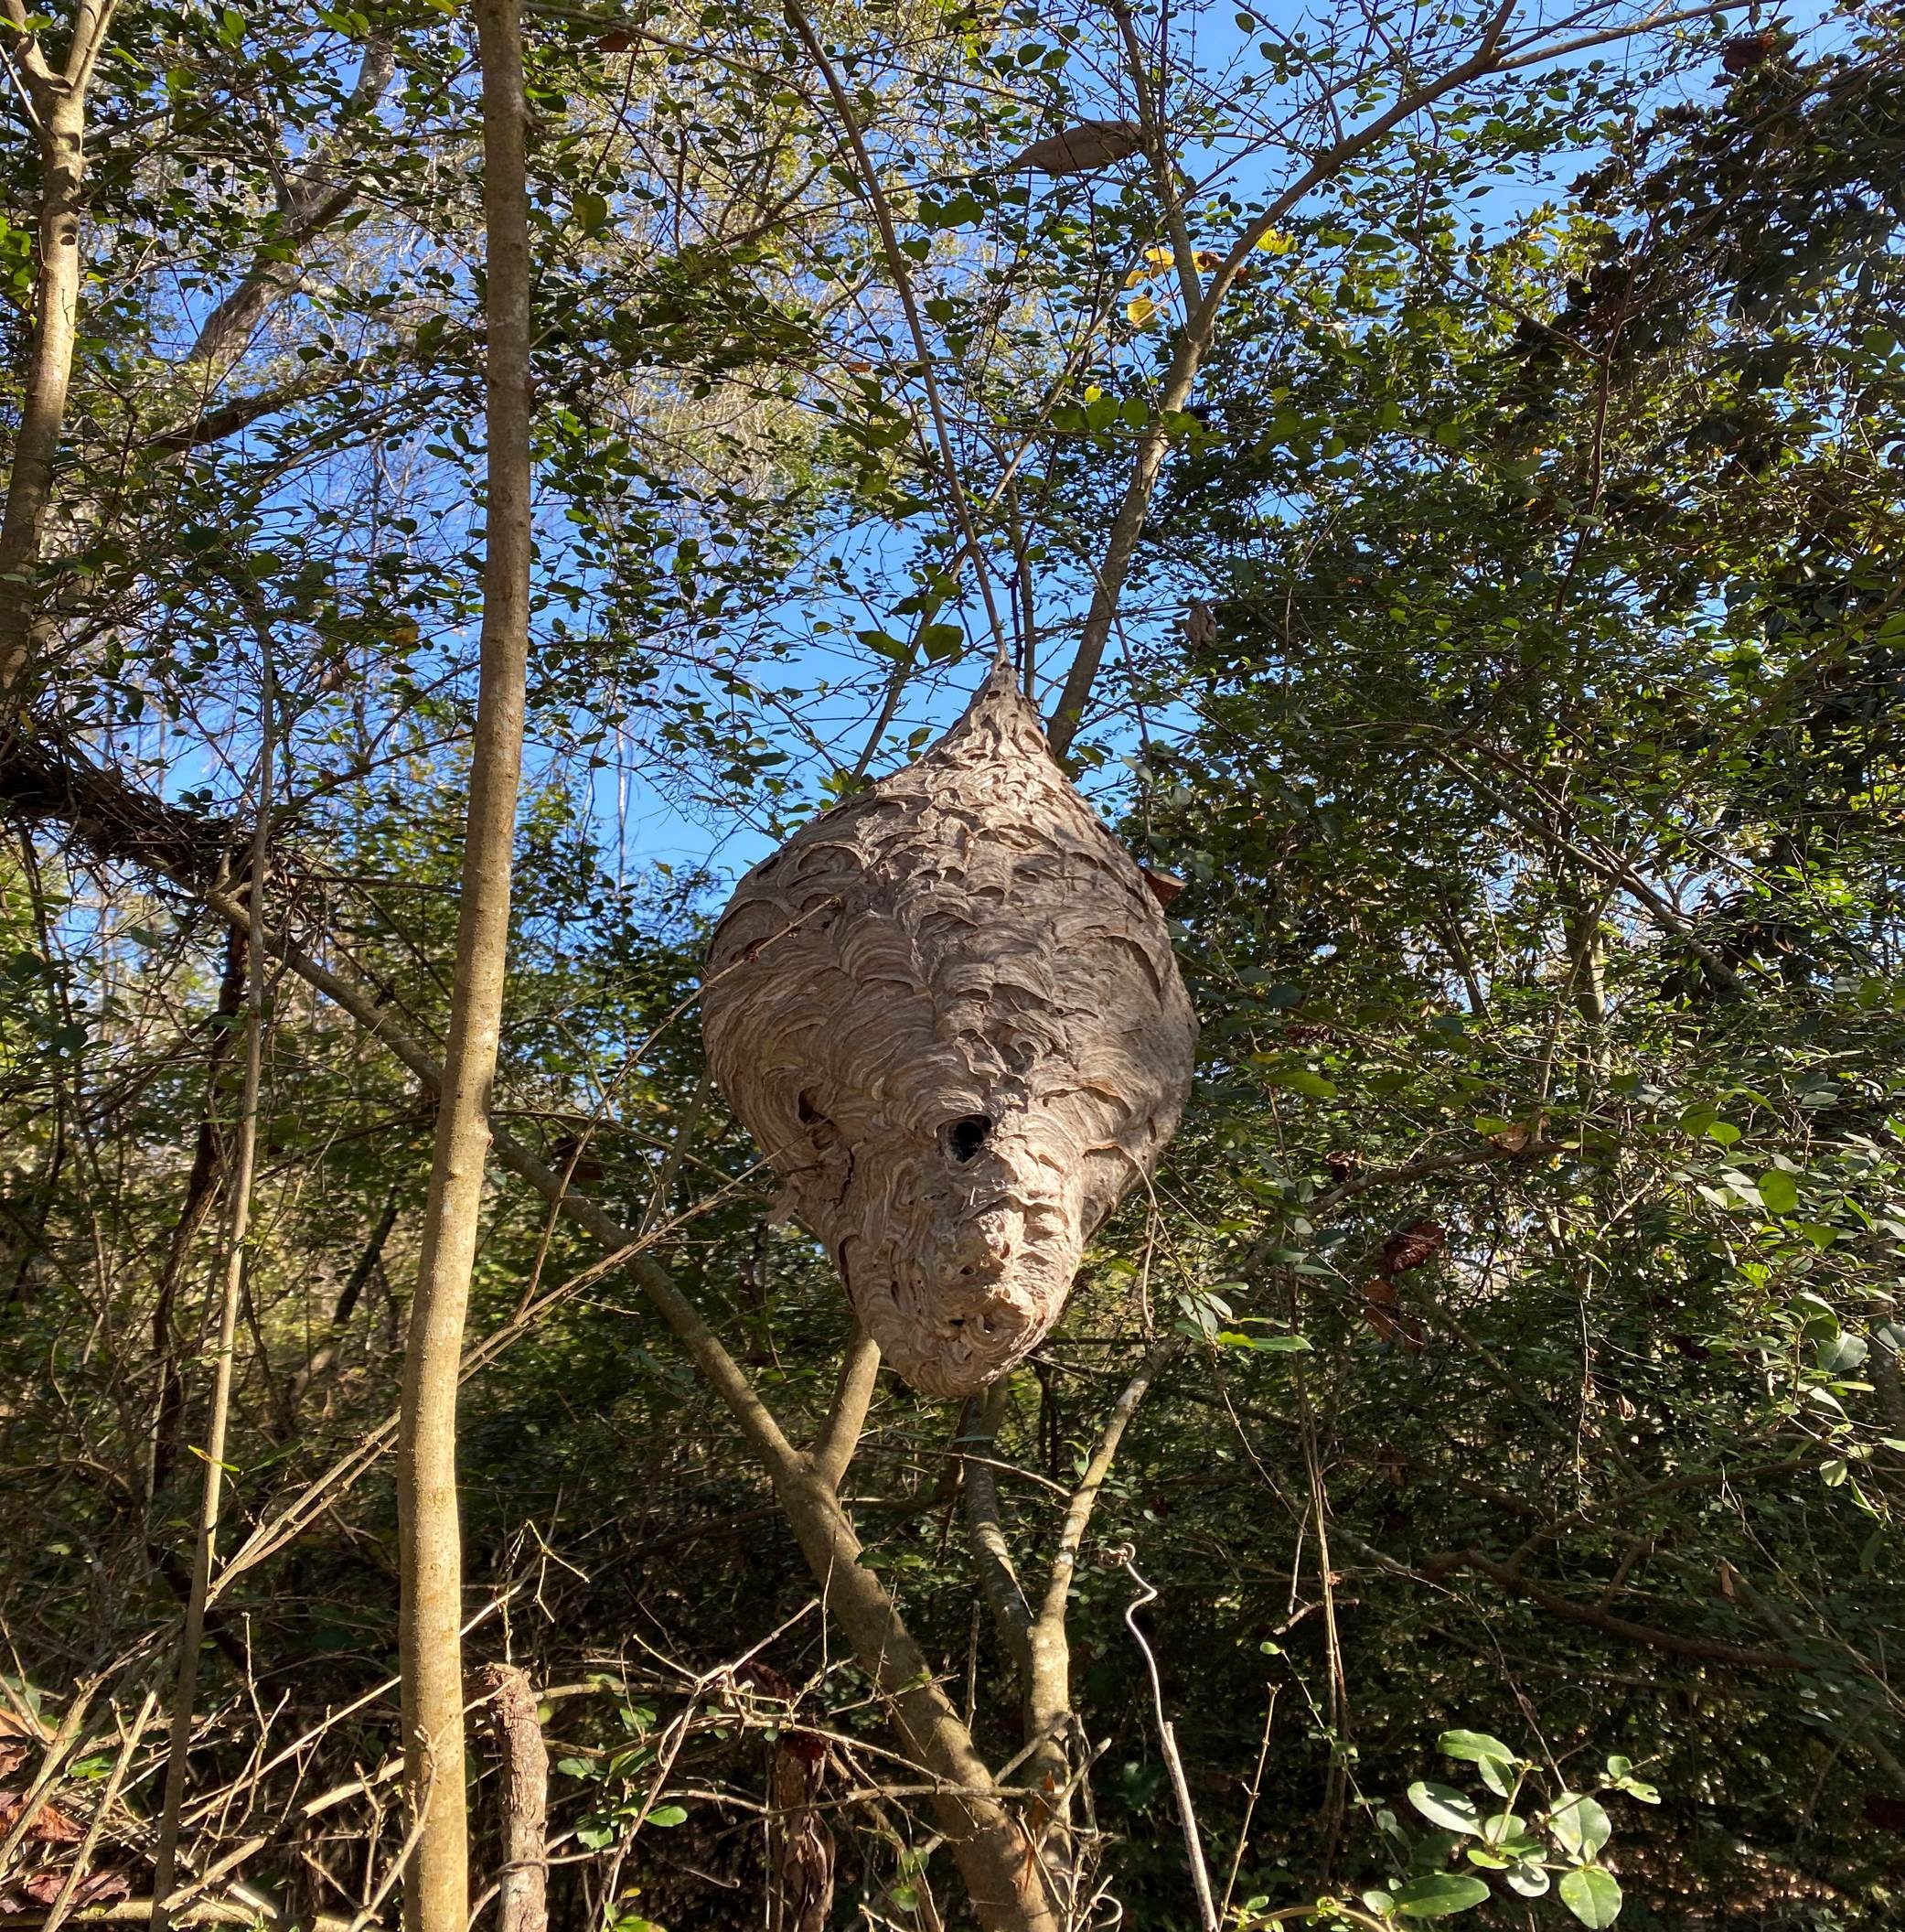
The aerial nest of the baldfaced hornet. Credit: Preston Robertson, Florida Wildlife Federation.
To collect that impressive nest safely, wait until a couple of freezes have passed. At this point, most, if not all, of the hornets will have perished and that lone queen will be sheltering through the winter. Don’t wait too long since these nests are utilized by other wildlife and may be destroyed or get beaten up by the weather. Simply cut the nest off its support (realize it may be heavy). To be extra sure you don’t bring live hornets inside, you can leave the nest in a protected outdoor location, such as a garden shed or the garage, where it will be exposed to further cold temperatures. This also allows any “off” smells from rotting larvae to air out. Don’t worry about harming these larvae as they would starve either way since they must be fed by adult hornets! There is no need to use varnishes or polyurethanes for preservation as the nest will keep indefinitely as long as kept in a dry environment free from a lot of handling or vibrations.
Bingo, you now have a natural ornament that can last through many seasons and provide for learning opportunities and lots of conversation!
For more information on wasps, including hornets and yellowjackets, please see the Yellowjackets and Hornets EDIS document from UF/IFAS. Information from Iowa State University’s website Preserving and Displaying a Hornet’s Nest was also used to help write this article.