by Mark Tancig | Apr 24, 2017
Source: UF/IFAS.
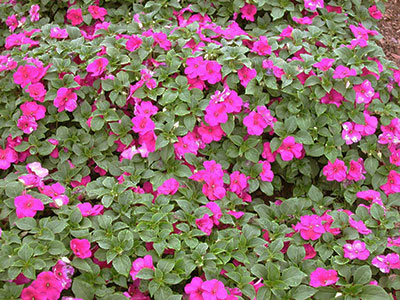
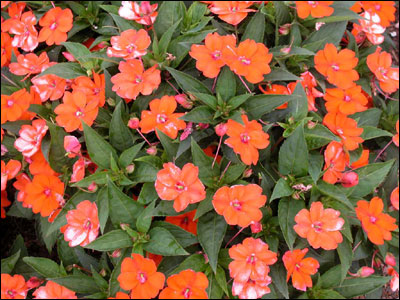
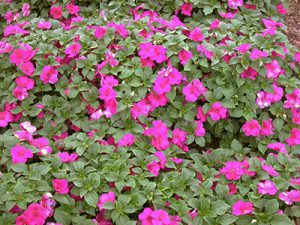
Impatiens are a very popular annual, bedding plant that provide a nice burst of color in the landscape. The traditional Impatiens (Impatiens walleriana), or touch-me-not, is the one that most gardeners know as needing part shade, but there are also the New Guinea Impatiens (Impatiens hawkeri) that are able to tolerate more sun. In addition to being able to withstand more sunlight, the New Guinea Impatiens also have larger flowers and leaves. Another highlight of the New Guinea impatiens is their increased resistance to downy mildew, a major concern for growers of touch-me-nots, especially in south Florida.
While native to the Old World, Impatiens are not known to invade Florida natural areas but may reproduce by seed. Touch-me-nots are known to spread easily be seed. An interesting fact about Impatiens is their bursting seed pods that can send seeds several feet from the parent plant. This characteristic is what led to the scientific name Impatiens – for impatient – and one of the common names – touch-me-not.
May is a good time to plant Impatiens in north Florida. They prefer slightly acidic soil and should be planted at a 12-18 inch spacing. Impatiens work well as a border planting or in mass plantings. While New Guinea Impatiens tolerate more sun, they still would prefer some afternoon shade. Those growing in full sun will need extra care to ensure they remain well watered. An all-purpose plant food can be applied at monthly intervals for best performance.
Some common varieties of touch-me-nots include ‘Accent’, ‘Blitz’, ‘Carousel’, ‘Dazzler’, ‘Impact’, ‘Impulse’, and ‘Super Elfins’. Common New Guinea Impatiens varieties include ‘Celebration Candy Pink’, ‘Celebration Light Lavender’, ‘Nebulus’, ‘Equinox’, ‘Sunglow’, and ‘Tango’. The newer ‘Sunpatiens’ variety is quite popular and comes in different forms – compact, spreading, and vigorous.

Source: UF/IFAS.
If you have any questions regarding Impatiens, please contact your local UF/IFAS Extension Office or visit our EDIS website at www.edis.ifas.ufl.edu.
by Ray Bodrey | Apr 24, 2017
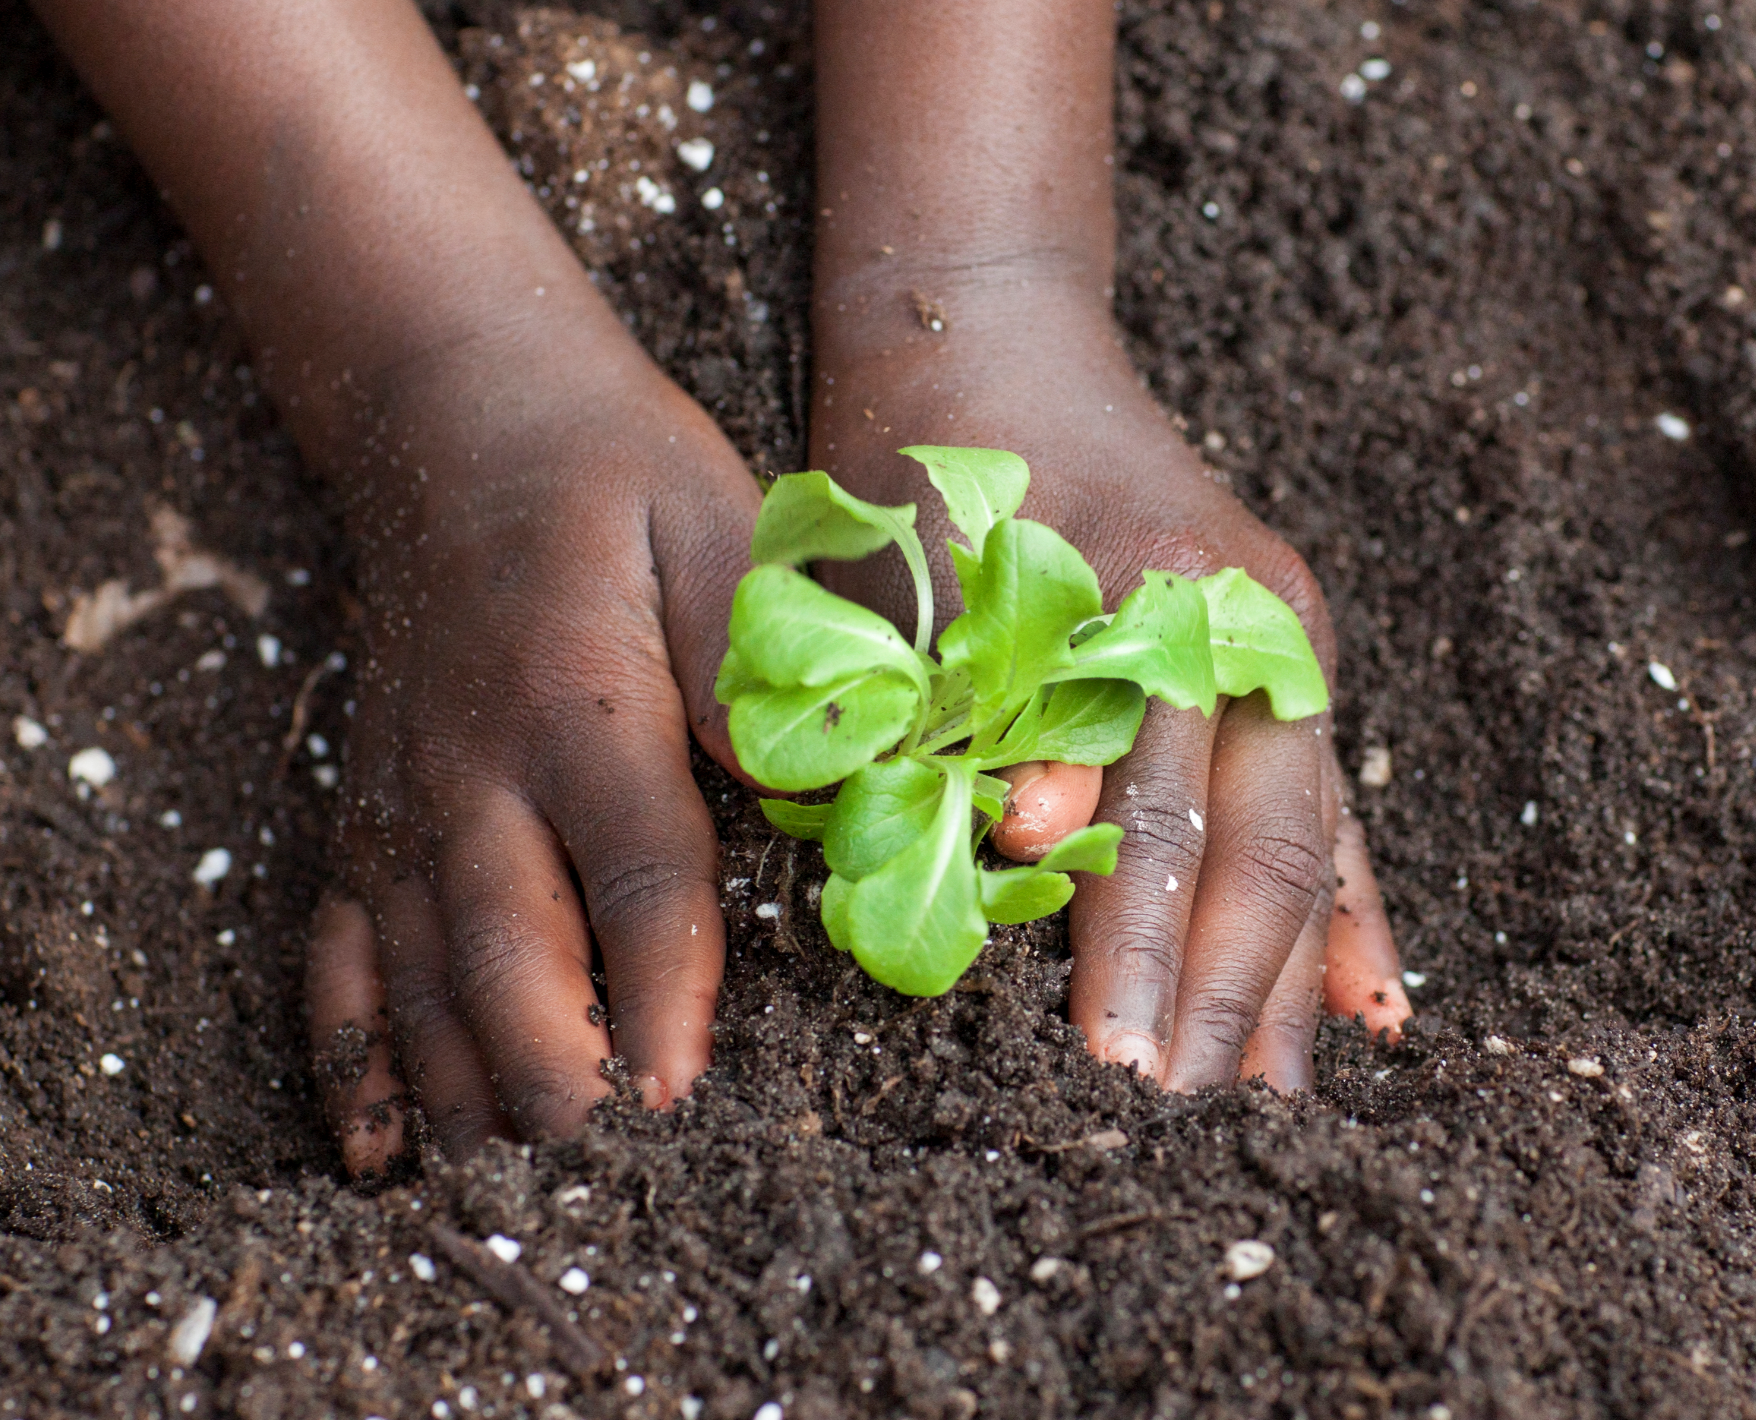
If you haven’t already, it’s time to prepare the garden space for the summer bounty of fresh vegetables. The following information will help you get started. Just remember, as the soil preparation goes, so goes the vegetable production.

Figure 1: Planting Vegetables in Prepared Soil.
Credit: Tyler Jones, UF/IFAS.
By far the most physical part of vegetable gardening is soil preparation. This is the foundation that your garden is built on, so let’s not cut corners at this stage. Plain and simple, poor soil prep will result in poor garden performance. Before you begin prep, it is a good idea to have a soil sample analyzed. With a soil analysis complete, a more customized fertilizer and application may be recommended for your needs. However, a complete fertilizer like 8-8-8 or 10-10-10 can be used as general purpose. Also, pH can be determined through this test. If the soil is too acidic for vegetables, then a liming requirement may be needed. pH is key information, especially regarding planting time. If one needs lime, it is recommended to wait at least a month before planting to allow the lime to adjust soil pH. Generally, a small amount of lime can be added to a garden space regardless, as lime also contains the vital micronutrients calcium and magnesium. Contact your local extension office for more information on soil testing.
To begin the garden prep, one will first need to remove the weeds from the space. The next step is to turn the soil. This will help aerate the soil and accelerate soil decomposition which leads to higher organic matter. Turing the soil will also eliminate any soil compaction issues that would stifle seed germination. With sandy soils throughout the Panhandle, one will most likely need to amend by spreading a rich organic compost in the space. An application of fertilizer can be mixed in at this stage as well. Always follow the manufacturer’s label regarding application directions. Once complete, the soil should then be turned by digging down six to eight inches. A large garden will require a motorized tiller, but hand-held implements should be fine for smaller spaces.
After the soil is turned, be sure to break up any clods and rake so that the area is level. The soil should be of a fine texture by this point. Again, this makes seed germination much easier and will assist in further root development of transplants.
To have a vegetable garden that all will envy, it begins with soil prep. Remember, not only does a vegetable garden provide nutrition, but it also provides for exercise, a feeling of accomplishment and even could save you a few bucks. Please contact your local county extension office for more information.
Supporting information for this article can be found in the UF/IFAS EDIS publication: “Florida Vegetable Gardening Guide” by Sydney Park Brown, Danielle Treadwell, J. M. Stephens and Susan Webb: http://edis.ifas.ufl.edu/pdffiles/VH/VH02100.pdf
Information on garden plot preparation was also provided by Emeritus Vegetable Specialist Jim Stephens, of The University of Florida’s Institute of Food and Agricultural Science.
UF/IFAS Extension is an Equal Opportunity Institution.
by Daniel J. Leonard | Apr 24, 2017
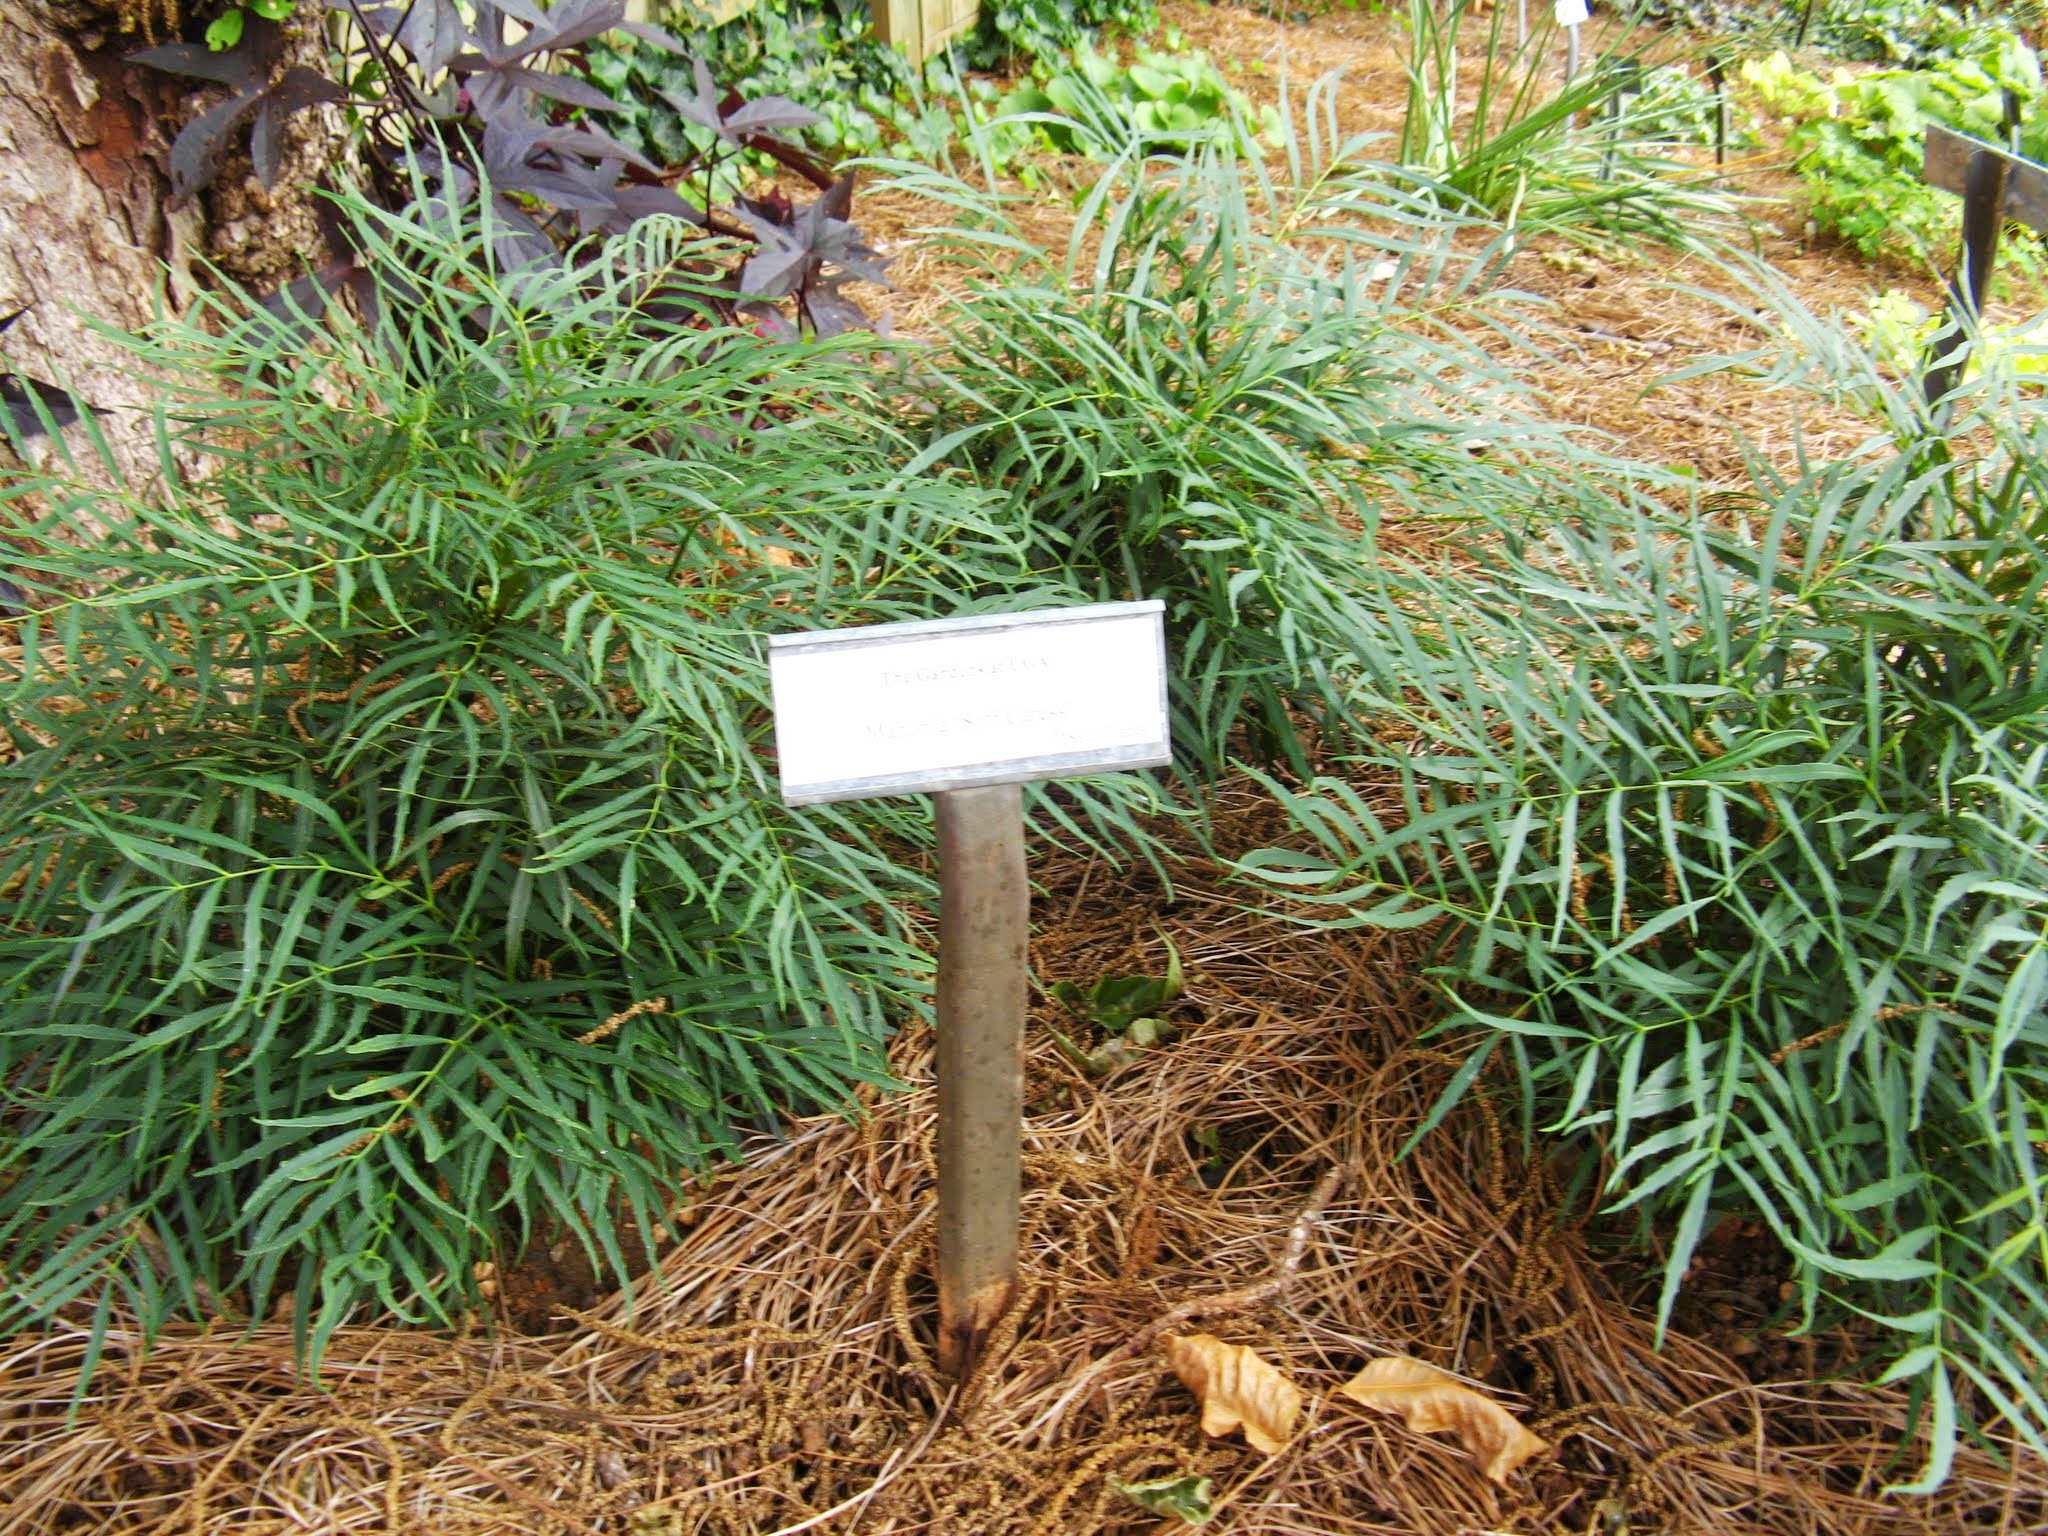
Almost every landscape has a problem area where the sun just doesn’t shine and many plants won’t make it, maybe it’s the north side of your house, under a small tree, or tucked away in an oddly-shaped alcove. We all know the same old boring green choices that work well here (Holly Fern, Cast Iron Plant, etc.) but maybe you want something a little bit different, something that will provide a pop of color and interesting texture! Look no further than a recent introduction, a whole-plant mutation discovered from the little-used Grape Holly (Mahonia spp.), aptly named ‘Soft Caress’.
‘Soft Caress’ Mahonia is a beautiful little evergreen shrub from the Southern Living Plant Collection (one of the best of the collection in my opinion) and really is a game changer for full-shade areas. Some of you may remember the traditional Mahonia, also known as Grape Holly, from your grandmother’s lawn. Those plants were coarse, spiny, produced messy purplish berries and often appeared generally unkempt. ‘Soft Caress’ is a major departure from its parent. Possessing finely-cut, deep green, bamboo-like foliage, this plant’s texture really contrasts well with many traditional shady species. As a bonus, ‘Soft Caress’ sends up brilliant yellow-gold flower spikes in the dead of winter, certainly a welcome respite from the other barren plants in the landscape; although in this unusually warm year, the plants are just now blooming in the Panhandle.

Photo courtesy: Daniel J. Leonard
‘Soft Caress’ is advertised to grow three feet in height and width, a more manageable size than the larger traditional Mahonia species, but I’m not sure I’d take that as gospel, the three-year old plants (hardly mature specimens) in my parent’s landscape are already that size and show no signs of slowing down. However, I’ve found you can easily manage their size with a once a year prune to slow down some of the more rapidly-growing canes. Be sure to time the prune as soon as possible after flowering is finished as ‘Soft Caress’ blooms only once a year and produces its flowers on the previous season’s wood, just like Indica Azaleas and old-fashioned Hydrangeas.
The uses in the landscape for ‘Soft Caress’ Mahonia are nearly endless. It pairs well with almost anything in a shady mixed shrub border. It works nicely as a foundation plant against a porch or under windows on the north or east side of a house where it will be protected from hot afternoon sun; I have employed a grouping of the plants in this way in my own lawn with success. It even thrives in containers! If you want to show off some serious horticultural design skills, mix ‘Soft Caress’ in a large container on the porch with some like-minded perennials for a low-maintenance, high-impact display that you don’t have to replant each season. All this shrub requires is partial to full shade, moist well-drained soil, and an occasional haircut to keep it looking tidy! If you’ve been struggling to find a plant that’s a little more unusual than the standard garden center fare and actually looks good in shady spots, you could do a lot worse than ‘Soft Caress’ Mahonia. 
As always, happy gardening and contact your local UF/IFAS County Extension office for more information about this plant and other gardening questions!
by Larry Williams | Apr 13, 2017
Spittlebug damage on centipedegrass. Photo credit: Larry Williams UF/IFAS
Mole crickets, chinch bugs and spittlebugs are common lawn insect pests to begin watching for this time of year.
Mole crickets can be active in lawns spring through fall, but the best window of opportunity to control them is in June and July.
Soap flushing is a technique to survey for mole crickets. Mix two ounces of liquid dishwashing soap in two gallons of water and apply with a sprinkling can to four square feet of turf in several areas where mole crickets are suspected. If an average of two to four mole crickets appear on the surface within several minutes, then a treatment is probably needed.
Chinch bugs only damage St. Augustinegrass. So if your lawngrass is something other than St. Augustine, don’t worry about this insect.
Damage from chinch bugs tends to begin in April. However, they are more likely to be active during warmer summer months through early fall in the more sunny areas of the yard, particularly if it’s dry.
Inspect a St. Augustinegrass lawn weekly during spring, summer and fall. Look for areas that quickly turn yellow and then straw brown. Part the grass at the margin of the yellowed areas and closely examine the soil surface and base of the turf for tiny insects. Immature chinch bugs are pink to red and are about the size of a pinhead. The adults are only 1/8 inch long and black with white wings.
Spittlebugs attack all turfgrass species but centipedegrass is their favorite. The first generation of adult spittlebugs is abundant in June and the peak population usually occurs in August to early September.
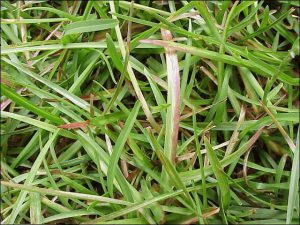
An early sign of spittlebug activity are masses of white, frothy spittle found in the turf. Each piece of spittle contains one immature spittle bug. Infested turf turns yellow and eventually brown. Damage resembles chinch bug injury but usually first appears in shady areas. Closer inspection reveals discolored individual grass blades with cream colored and pinkish-purple streaks running the length of individual blades. As the population builds, the ¼ inch long adults are abundant. As you walk through or mow an infested area, numerous adult spittlebugs fly short distances when disturbed. Adults are black with two orange transverse stripes across their wings.
Correct lawn management can minimize many pest problems. If a pesticide becomes necessary to control a lawn pest, be sure to follow the product’s label instructions and precautions.
by Julie McConnell | Apr 7, 2017
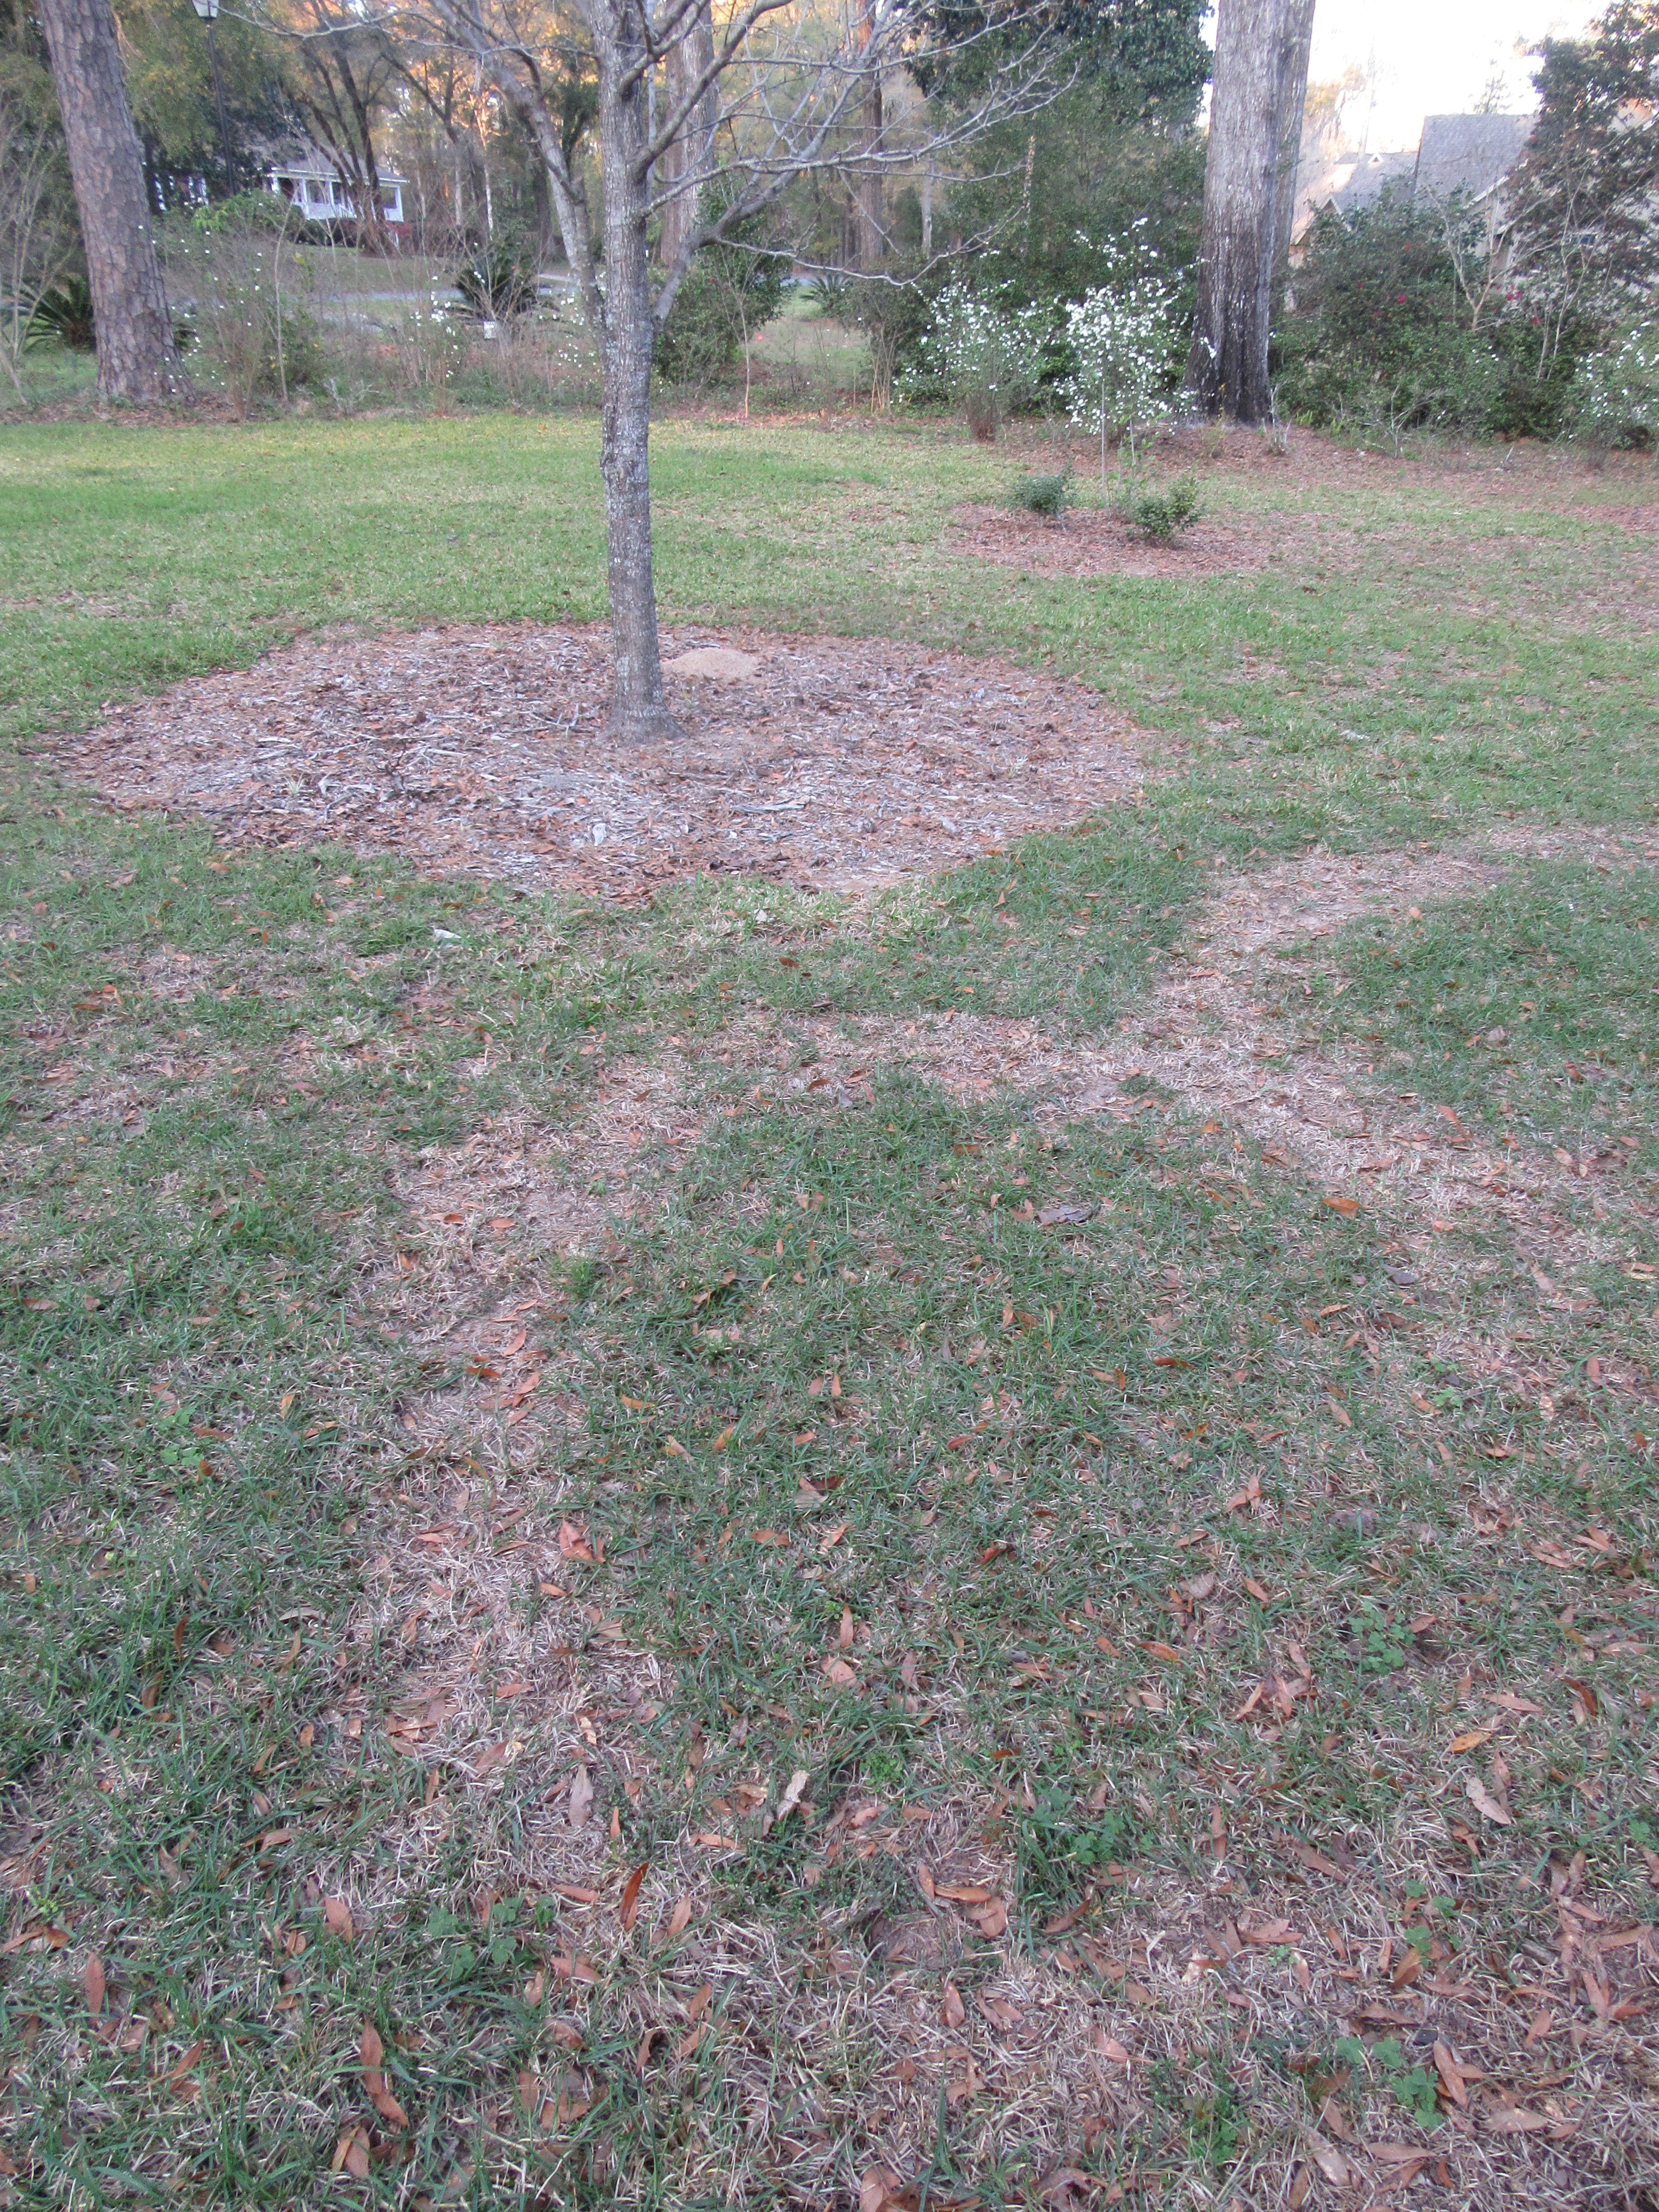
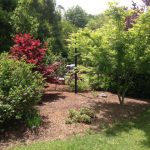
It’s really tempting to buy a tree and plant it in the middle of your lawn or directly in front of your picture window, but instead take some time to choose the best spot first. Several considerations such as maintenance and mature size should be taken into account before the site is selected.
Mowing close to the trunk of this Pindo palm has caused repeated injury to the trunk. Photo: JMcConnell, UF/IFAS
Placing a tree in a lawn area without creating a bed can lead to maintenance issues for both the tree and the turfgrass. It is easy to simply cut out a small patch of turf the size of the rootball and install a tree, however, as the grass grows up towards the trunk over time maintaining that grass will become difficult. It is common to see mechanical injuries to tree trunks because weed eaters or mowers have chipped away at the bark when trying to cut the grass. Other potential problems are irrigation zones calibrated for turf delivering the wrong amount of water to trees and herbicides used on grass that may cause injury to trees.
Over time, as the tree canopy grows, it will create shade and any grass trying to grow in that area will thin and be more susceptible to disease and insect pressure. By creating a large ornamental bed for your tree, you will prevent some pitfalls associated with placing the tree in the lawn.
Another common mistake is planting a tree too close to a house or other structure. It can be difficult to imagine how large a tree will grow at maturity because it is not a quick process. Trees placed close to houses may grow into eaves and shed leaves onto roofs and into gutters. This adds to maintenance and can provide mosquito breeding grounds. Also, some tree roots may interfere with walkways or septic systems and should be sited far enough away to avoid these issues.
These Japanese Maples are planted in a bed separate from the lawn making care for both plant types easier. Photo: JMcConnell, UF/IFAS
Be sure to research any tree you plan to install to find out ideal growing conditions and mature size. If you plan ahead and use good maintenance practices, a tree can become an valuable part of your home landscape to be enjoyed for years to come.

by Matt Lollar | Mar 20, 2017

A type III fairy ring. Photo Credit: Alex Bolques, Assistant Professor, Florida A&M University
Mushrooms often are grouped in a circle in your lawn. This is due to the circular release of spores from a central mushroom. “Fairy Ring” is a term used to describe this phenomenon. Fairy rings can be caused by multiple mushroom species such as Chlorophyllum spp., Marasmius spp., Lepiota spp., Lycoperdon spp., and other basidiomycete fungi.
Occurrence
Fairy rings most commonly invade your yard during the summer months, when the Florida panhandle receives the most rain. The mushrooms cause the development and spread of the rings by the release of spores. Spores produce more mushrooms and are similar to the seed produced by plants.
Fairy Ring “Types”
Fairy rings can be seen in three forms:
- Type I rings have a zone of dead grass just inside a zone of dark green grass. Weeds often invade the dead zone.
- Type II rings have only a band of dark green turf, with or without mushrooms present in the band.
- Type III rings do not exhibit a dead zone or a dark green zone, but a ring of mushrooms is present.
The size and fill of rings varies considerably. Rings are often 6 ft or more in diameter. The fill of a ring can range from a quarter circle to a semicircle or full circle.
Cultural Controls
The rings will disappear naturally, but it could take up to five years. Although it is possible to dig up the fairy ring sites, it is a good possibility the rings will return if the food source (buried, rotting wood or other organic matter) for the fungi is still present underground.
In some situations, the fungi coat the soil particles and make the soil hydrophobic (meaning it repels water), which will result in rings of dead grass. If the soil under this dead grass is dry but the soil under healthy grass next to it is wet, then it is necessary to aerate or break up the soil under the dead grass with a pitchfork or other cultivation tool.

Rings of dead turf due to fairy ring fungi. Photo Credit: University of Florida/IFAS Extension.
Chemical Controls
Effective fungicides include products containing the active ingredients azoxystrobin, flutolanil, metconazole, pyraclostrobin, and triticonazole.
Fungicides inhibit the fungus only. They do not eliminate the dark green or dead rings of turfgrass and do not solve the dry soil problem.
A homeowner’s guide to lawn fungicides can be found at the University of Florida/IFAS Extension Electronic Data Information Source (EDIS) website (http://edis.ifas.ufl.edu/document_pp154).