
by Les Harrison | Mar 11, 2017
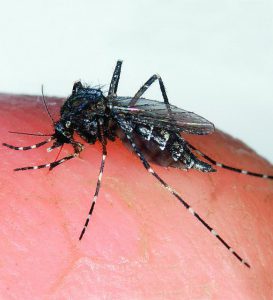 It is an often made wish of summer that the cold weather of winter will kill all the mosquitoes, gnats and no-see-ums. This climactic fete would spare people, pets and livestock the irritation of encountering these low flying pest and their predatory behavior.
Unfortunately, the thermometer would have to drop to levels approaching the surface temperature of the planet Neptune to eliminate these winged annoyances.
There are individual steps which will help minimize the potential for exposure to exotic diseases.
Check surroundings for standing water, especially in secluded spots or small quantities. The home landscape and patio garden can produce hundreds, if not thousands, of hungry mosquitos during the summer if standing water is left for long.
Trays and dishes under flower pots commonly collect water which is usually left to evaporate or be absorbed by the plant over time. To mama mosquito this shallow and protected source is an ideal location to deposit eggs for the next generation of voracious airborne insects.
Plants with natural depressions or “cups” can accumulate enough irrigation and rain water to establish an effective mosquito nursery. Even though it may evaporate, these tiny pools will last long enough to hatch many mosquito larvae into potential disease vectors.
Back porch bromeliads can easily deliver this undesirable outcome. So too can mature live oak trees which commonly have hollow spaces between large branches.
Even a wheelbarrow left to the elements can serve as a portable pond to maternity minded mosquitos. Dumping the water on a frequent basis is the easiest method, but there are also larvae-cides which are effective in difficult to dump reservoirs.
Protective clothing when outdoors is useful to reduce exposed skin which mosquitos view as an excellent dining site. Heavier fabrics and loose-fitting designs provide the best protection while maintaining maximum comfort for the wearer.
Minimizing exposure at dusk and dawn, when native mosquitos are most active, will reduce the probability of serving as an unsuspecting blood meal for a swarm or lone hunter. Unfortunately, some of the exotic mosquitos are prowling 24 hours a day and are pleased to attack at any opportunity.
As the weather warms, be ready for mosquito season. This past winter only whetted their appetite.
by Julie McConnell | Feb 23, 2017
Regardless of what the tag says one size does not fit all. As with clothing, a piece will undoubtedly be too large for some and too small for others. Trying to go with a “one size fits all” approach to lawn care will lead to the same kind of frustration and disappointment as an ill-fitting garment.
All turfgrass is not created equal. Thus management of our various turf species requires different methods. It is common for a homeowner to be unaware of what type of turfgrass they have – it’s all grass after all – what difference does it make? Misidentification leads to problems because proper management for one type may be counterproductive to another type. In order to create a practical turf management plan, it is critical that the species of grass is properly identified.

Although many grasses look similar it is important to know exactly what kind you have to maintain it properly. This photo shows Empire Zoysia. Photo credit: Julie McConnell, UF/IFAS
Why is it important to know the species of turf in a lawn?
Two of the most common mistakes extension agents observe is excessively low mowing height of St. Augustinegrass and over-fertilizing Centipedegrass. Both of these errors can reduce turfgrass vigor and decrease its tolerance to pest issues. Another potential maintenance pitfall is using a herbicide that is not labeled for use on a given type of turfgrass. Several popular herbicides available on the market can cause damage to St. Augustinegrass and/or Centipedegrass. Thus turf can be inadvertently killed by herbicides when they are applied to the wrong species.
Before a lawn maintenance plan is developed, be sure to know what type of grass is present and then follow UF/IFAS recommendations for proper care. If assistance is needed with identification, contact your local extension office.
To learn more about lawn care, visit this site or plan to attend “Caring for Your Florida Lawn” at the UF/IFAS Extension Bay County office on April 8th. For more details call 850-784-6105.
by Julie McConnell | Nov 22, 2016
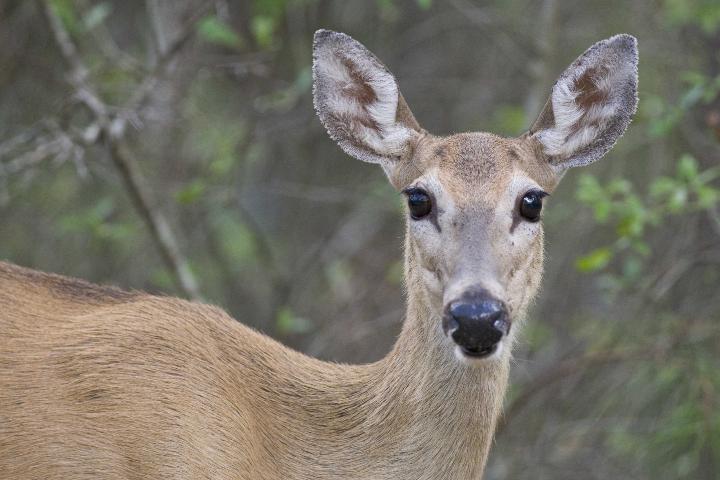
 Missing rose buds, pulled up pansies, and damaged tree trunks are all signs that something has been visiting your garden while you are away. But what could it be? Most gardeners are familiar with leaf spots caused by fungal diseases or minor feeding damage by insects, but to see half a shrub or an entire flower bed demolished overnight indicates a different type of pest.
There are several mammals that visit home landscapes and may cause damage, especially in times of drought when natural food sources are limited. Because we provide water for our landscapes, our plants tend to have lush new growth at times when plants in natural areas have slowed growth because of a lack of water or other stressors that managed gardens do not face. So, it’s no surprise that herbivores will be attracted to our landscape for a midnight snack.
It is important to determine what is causing damage so that you can employ protective tactics if possible. Some things to look for to try to figure out who the culprit is are footprints, dropping, feeding clues (bite marks, scrapes, etc.), or other distinctive damage. For more details about how to tell the difference between damage caused by multiple pests see How To Identify the Wildlife Species Responsible for Damage in Your Yard.
Once you have determined what is causing the damage you can try some different strategies to deter future feeding. Some plants may be impossible to protect, but before you spend your money and time check out these recommendations by wildlife specialists at the University of Florida in How to Use Deterrents to Stop Damage Caused by Nuisance Wildlife in Your Yard
by Beth Bolles | Nov 22, 2016
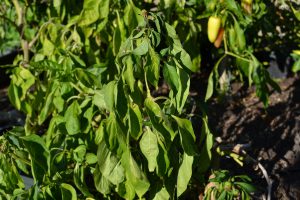
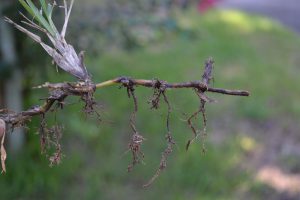
Leaf wilt may indicate more than just dry soil. Photo by Beth Bolles
Plants have specific ways of telling gardeners that there is a problem, but not all plant symptoms lead us directly to the cause. During drier conditions, we often use wilting leaves as an indicator that water is needed. This can be a reliable symptom that the soil is lacking moisture but it is not always the case. Wilting leaves and herbaceous branches actually tell us that there is not adequate water in the plant. It does not necessarily indicate lack of moisture in the soil.
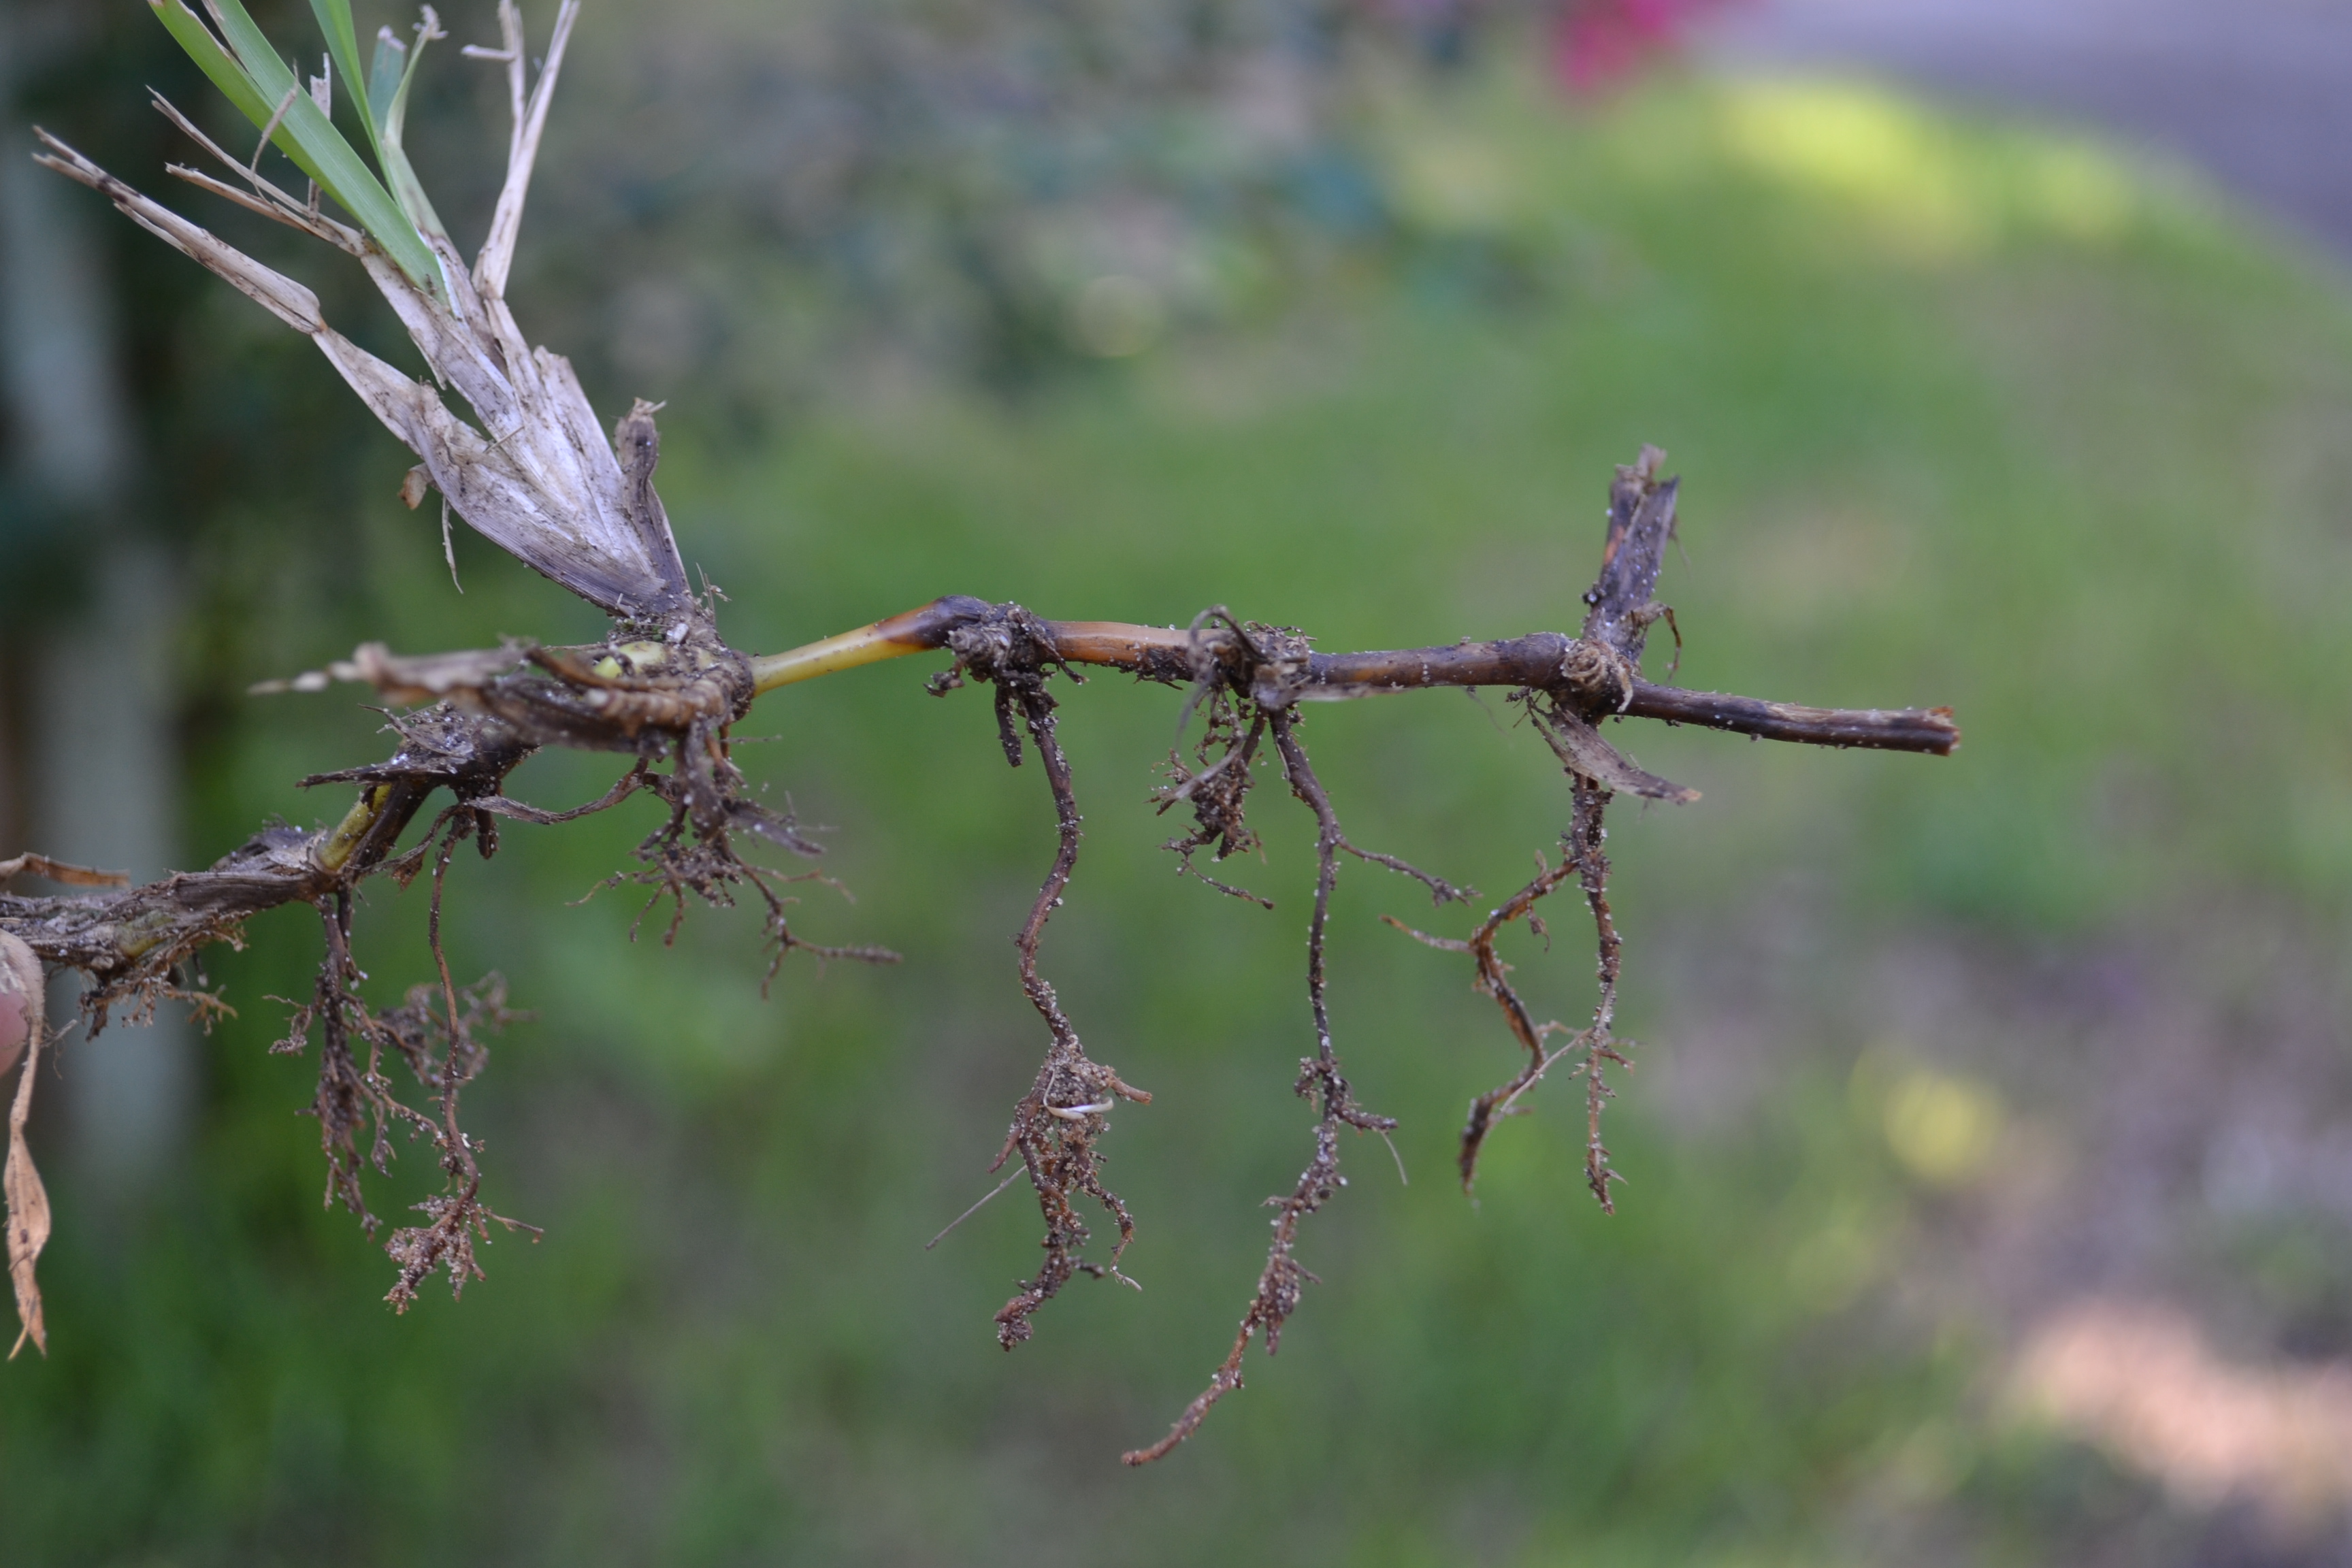
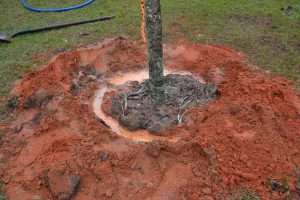
There can be many reasons why water is not being absorbed by roots and moved to tissues in the plant. The obvious place to start is by checking soil moisture. If soil is powdery several inches deep around the plant, water is likely needed. However, if you ball the soil up in your hand and it holds together, there may be another reason for lack of water reaching the upper plant parts. The harder part is determining why the root system is not taking up water. Causes can be a rotted root system from too much water, a poorly developed root ball that has circling or kinked roots, and even problems in the soil such as compaction. Insects, diseases, and other pathogens can also injure root systems preventing the uptake of water.
Too much water can cause roots to decay, preventing the uptake of water. Photo by Beth Bolles
So before automatically grabbing the hose or turning on the sprinkler, do a little soil investigation to make sure that the plant wilt is really indicating lack of water in the soil. If you need help in your diagnosis, always contact your local Extension office.
by Sheila Dunning | Oct 7, 2016

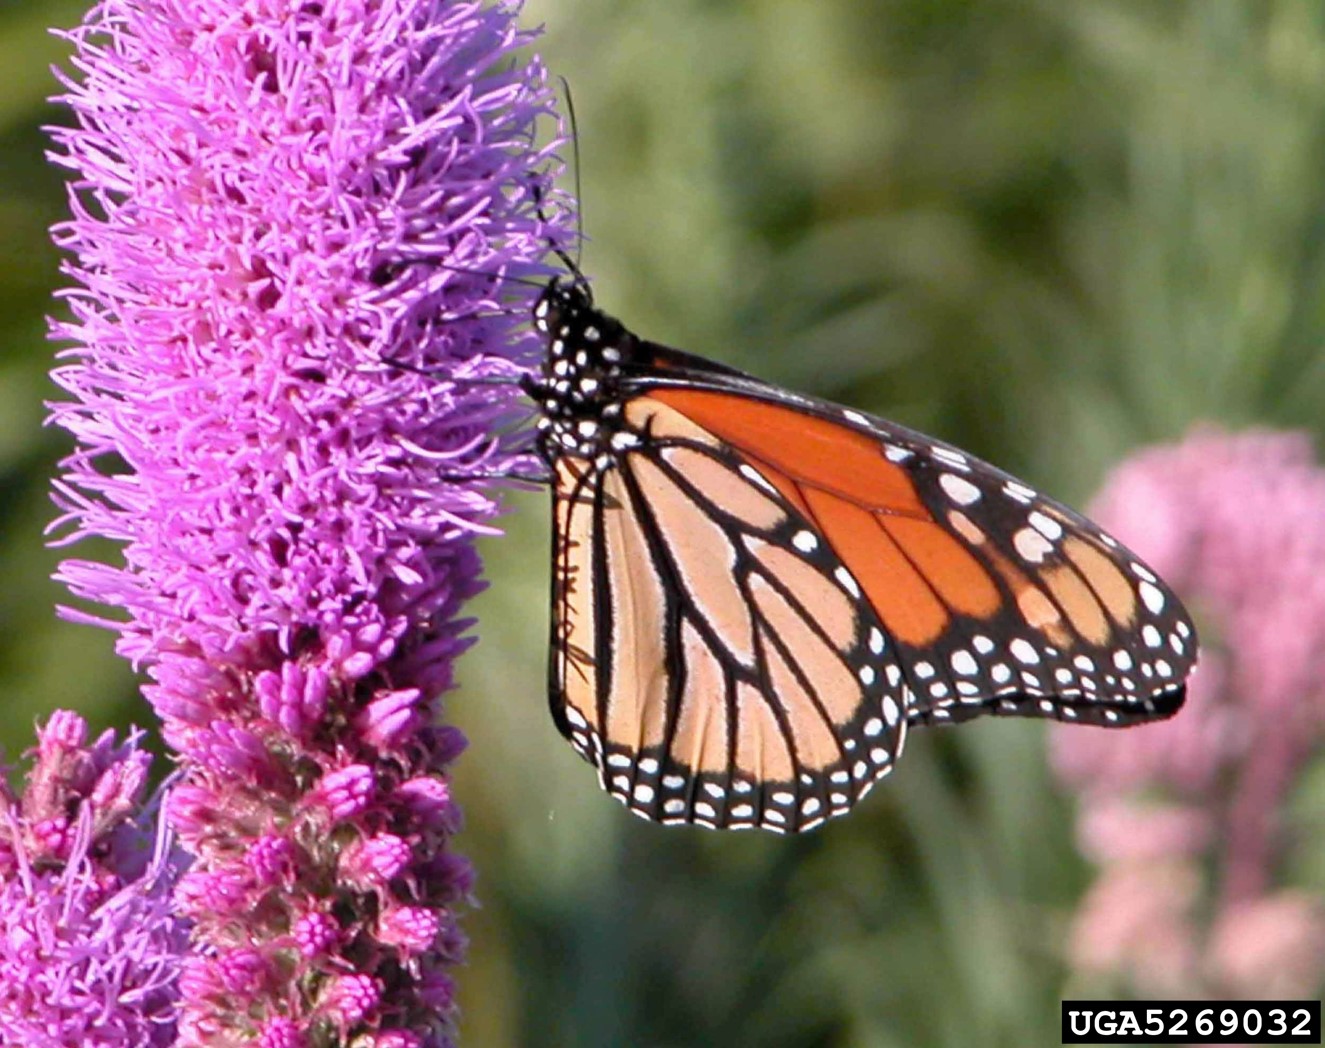
Monarch butterfly on dense blazing star (Liatris spicata var. spicata).
Beverly Turner, Jackson Minnesota, Bugwood.org
Each fall, nature puts on a brilliant show of color throughout the United States. As the temperatures drop, autumn encourages the “leaf peepers” to hit the road in search of the red-, yellow- and orange-colored leaves of the northern deciduous trees.
In Northwest Florida the color of autumn isn’t just from trees. The reds, purples, yellow and white blooms and berries that appear on many native plants add spectacular color to the landscape. American Beautyberry, Callicarpa americana, is loaded with royal-colored fruit that will persist all winter long. Whispy pinkish-cream colored seedheads look like mist atop Purple Lovegrass, Eragrostis spectabilis and Muhlygrass, Muhlenbergia capillaris.
The Monarchs and other butterfly species flock to the creamy white “fluff” that covers Saltbrush, Baccharis halimifolia. But, yellow is by far the dominant fall flower color. With all the Goldenrod, Solidago spp., Narrowleaf Sunflower, Helianthus angustifolius and Tickseed, Coreopsis spp., the roadsides are golden. When driving the roads it’s nearly impossible to not see the bright yellows in the ditches and along the wood’s edge. Golden Asters (Chrysopsis spp.), Tickseeds (Coreopsis spp.), Silkgrasses (Pityopsis spp.), Sunflowers (Helianthus spp.) and Goldenrods (Solidago spp.) are displaying their petals of gold at every turn. These wildflowers are all members of the Aster family, one of the largest plant families in the world. For most, envisioning an Aster means a flower that looks like a daisy. While many are daisy-like in structure, others lack the petals and appear more like cascading sprays.
So if you are one of the many “hitting the road in search of fall color”, head to open areas. For wildflowers, that means rural locations with limited homes and businesses. Forested areas and non-grazed pastures typically have showy displays, especially when a spring burn was performed earlier in the year. Peeking out from the woods edge are the small red trumpet-shaped blooms of Red Basil, Calamintha coccinea and tall purple spikes of Gayfeather, Liatris spp.
Visit the Florida Wildflower Foundation website, www.flawildflowers.org/bloom.php, to see both what’s in bloom and the locations of the state’s prime viewing areas. These are all native wildflowers that can be obtained through seed companies. Many are also available as potted plants at the local nurseries. Read the name carefully though. There are cultivated varieties that may appear or perform differently than those that naturally occur in Northwest Florida. For more information on Common Native Wildflowers of North Florida go to http://edis.ifas.ufl.edu/ep061.

by Beth Bolles | Sep 8, 2016
By the look of the crowded nurseries during March and April, springtime seems to be the best time for planting. This is the case for our frost tender annuals and perennials but we are actually heading into our best seasons for planting trees and shrubs.
The fact that above ground portions of trees and shrubs go through a time of slowed growth or dormancy is the good reason for planting during the fall and winter. Although we don’t see it, roots are still growing slowly and the upcoming months give new plants the time for roots to spread into surrounding soil before hot temperatures return. Water stress is also not as significant during the cooler months. Plants still need to be supplied regular water but needs are not as high, especially if rainfall occurs.
A tree installed in the cooler months has more time to establish before hot weather returns.
Start gathering your ideas for new or replacement trees and shrubs that will match your landscape and visit a local nursery this Fall.
If you need an update on tree and shrubs planting and care techniques read more in the UF IFAS publication.

