by Julie McConnell | May 6, 2015
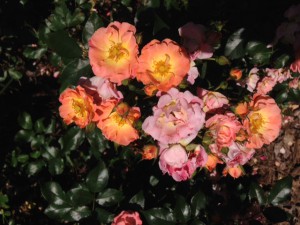
Peach Drift® Rose blooming in Quincy at the UF/IFAS NFREC Photo: J.McConnell, UF/IFAS
Growing roses in the South can have challenges and many gardeners think that they are just too high maintenance to plant. Plant developers are aware of this opinion and have worked to develop low maintenance roses that can make a novice gardener look like a pro.
The trend in horticulture is to develop and release plant series where closely related plants have similar characteristics but offer some diversity such as different flower color and size. A new series that is performing well in North Florida is Drift® Groundcover Roses. Available with flower colors ranging from white, yellow, pink, apricot, to red. All exhibit a low growing habit and will remain under three feet tall and spread up to four feet wide. Flowers are born in dense clusters for most of the year, only taking a break in the winter months.
Although not completely disease free, these roses do show resistance to rust, powdery mildew, and black spot which are common problems with roses. Deadheading is not necessary, but can be done to increase bloom and keep plants looking tidy. One of the best characteristics of the Drift® Groundcover Rose series is that they don’t get very tall, so they fit in small spaces. If you are looking for incredible color in a sunny site with limited space give this series a try.
Although low maintenance, roses do still require some attention, for more information read Growing Roses in Florida.
by Taylor Vandiver | Oct 7, 2014
I think it’s safe to say fall is officially here. Shouts can be heard from local football stadiums, occasionally a crisp fall breeze will send us looking for a light jacket, and coffee shops are pushing all things pumpkin. Now that we can officially appreciate the cooler fall weather, it may be time to stretch our legs and marvel at the spectacular show of color our landscapes are putting on. Here are a few plants that are showing off this time of year.
Firebush (Hamelia patens) – This charming Florida native will delight everyone with beautiful orange-red flowers throughout most of the year. Hummingbirds and butterflies enjoy the nectar in the flowers. Firebush can reach a height and width of 8 to 12 feet. It is a fast growing plant that will grow well in part to full sun environments.
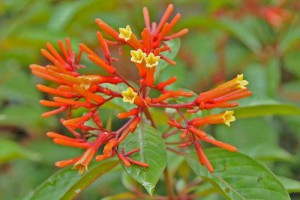
Bright orange-red blooms on a firebush. Photo courtesy UF/IFAS.
Salvia (Salvia spp.) – Salvias are great plants for bringing butterflies and hummingbirds to your garden and as a bonus, they have no serious pests. With hundreds of annual and perennial species coming in an array of colors and sizes, you can easily find one or more to complement your landscape. Salvias perform best in full sun environments and are considered drought tolerant.
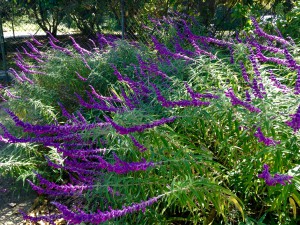
Deep purple blooms on a salvia in the landscape. Photo courtesy Taylor Vandiver.
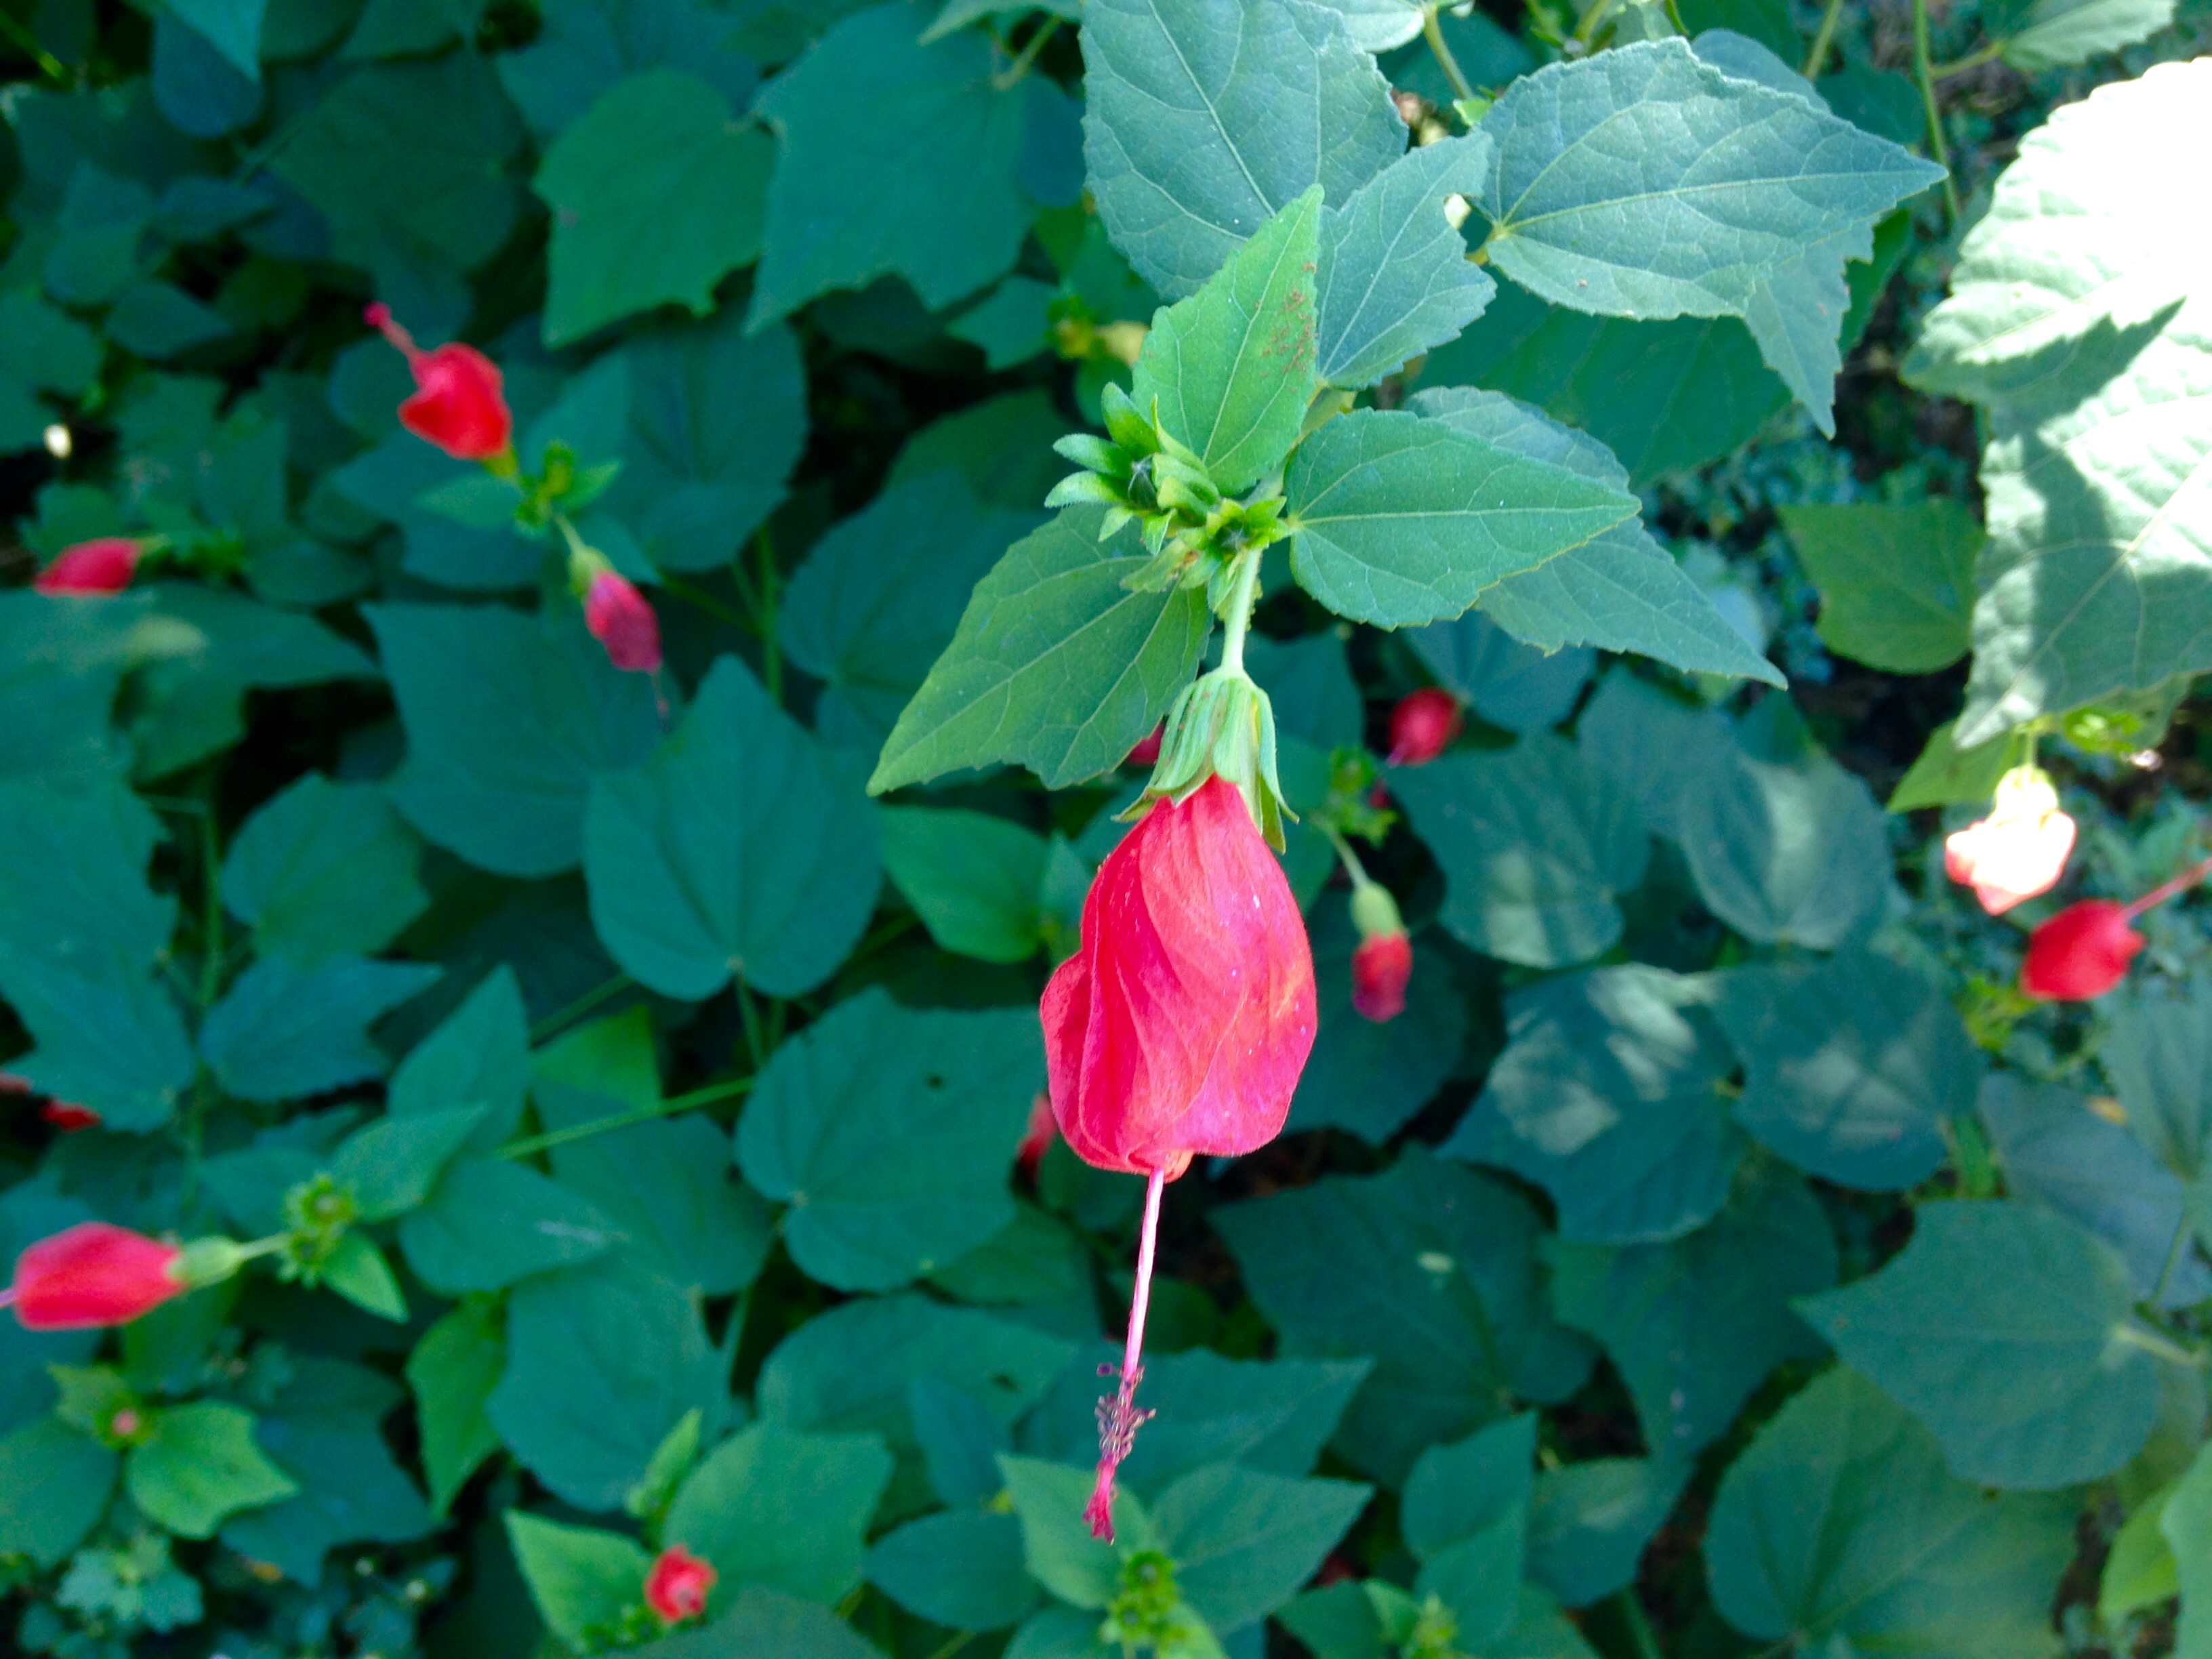
Turk’s Cap (Malvaviscus arboreus) – Turk’s cap can add a cheerful pop of color at a time when little else is blooming. This old-fashioned Florida-Friendly shrub like perennial is related to the hibiscus. It’s known for its bright red flowers that always seem ready to open, but never do. Turk’s cap starts blooming in summer and keeps going until through winter, unless hit by a hard frost. It can grow in full sun and reach up to ten feet tall and ten feet wide, so give it room to grow. This easy-care native perennial requires little maintenance once it’s established.

Turk’s cap showing off its unique blooms. Photo courtesy Taylor Vandiver
Coleus (Solenostemon scutellarioides) – When imagining fall color we often don’t consider coleus. However, the vibrant foliage can add interest to any landscape throughout the fall. Coleus is prized for its colorful foliage, which comes in shades of green, yellow, pink, red, and maroon. Coleus varieties can range from one to several feet in height. They can be used in hanging baskets, containers on patios, or in landscape beds. Coleus prefers partial shade and you can pinch the growing stems of young plants frequently to encourage dense foliage. Keep an eye out for mealybugs on coleus and use insecticidal soap if problems develop
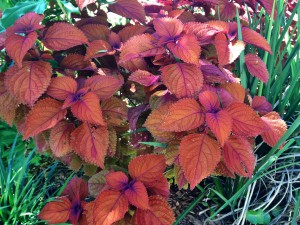
Burnt orange foliage standing out amongst the neutral green of the landscape. Photo courtesy Taylor Vandiver.
Fore more information contact your local extension agent. Also you can visit us at gardeningsolutions.ifas.ufl.edu or edis.ifas.ufl.edu.

by Taylor Vandiver | Jun 3, 2014
In a world of limited time and space, container gardens seem to make more and more sense. Poor soil and no place to put plants in the ground are no longer good excuses for not being able to enjoy the simple pleasures of gardening. Container gardening allows the individual to create gardens to fit any situation. Gardening in containers can be just as rewarding as having a full-size garden.
There are a few items to consider when you are planning your container garden. The first is the plants you intend to use. If you are planting more than one plant in the same pot be sure that all your plants meet the same requirements. The requirements you should consider are amount of light, amount of water, climate and fertilizing needs. Some other things you might want to think about when planning your container garden are height, color, and texture. A nice variation of these elements will make your container gardens more attractive and increasingly more interesting to look at.
The next step in container gardening is choosing your container. A good rule of thumb is: “Anything that holds soil and has drainage holes in the bottom may be transformed into a container garden.” It can be a pot you purchased from the local gardening center or an old bathtub you picked up off the side of the road. However, be sure that the size of the container matches the current and potential size of your plant. For vibrant plant growth, the containers must provide adequate space for roots and soil media, allowing the plant to thrive.

Colorful containers bring life to your small spaces.
Next on your list is choosing a soil for your container. Container soils need have good aeration and decent drainage, while still being able to retain enough moisture and nutrients for plant growth. When choosing what to use in containers, never use garden soil by itself. When garden soil is added to a container, both drainage and aeration are severely impeded, and the results are plants that grow poorly or not at all.
Container soils are often referred to as soilless or artificial media, because they literally contain no soil. They are commonly composed of various media such as peat moss, perlite, vermiculite, bark and coir fiber (ground coconut hulls) in a variety of mixes. When using soilless media remember t0 moisten it slightly before planting. Fill a tub with the media, add water and lightly fluff the media to dampen it. This will keep the mixture from becoming hydrophobic (unable to take up water) throughout its life in the container. When adding media to your containers, never fill the pot to the top. You should leave about a one-inch space between the top of the soil and rim of the pot. This will make watering the pot easier as it provides a place to “put water” and not have it run over the edge.
When watering your container gardens, the best time to do so is in the morning. Watering in the morning allows the leaves of your plants and soil to dry out, preventing diseases and viruses. Remember that overwatering is the most common reason for fatalities in container gardens. Check your soil by pushing your finger into the media; if the media is moist don’t water it. When it comes to fertilizing your container gardens, fertilize only as needed. Over-fertilization will result in a buildup of salts and may burn the roots of your plants. Try to fertilize your plants during the growing season, and only if needed during the dormant seasons.
The most important objective when container gardening is to be creative. Maybe, try a variety of plants in one container garden. While an nicely put together individual container can be quite impressive, think what might happen if you put several containers together in a group. Also, don’t limit your container gardens to flowers–many vegetables can be grown in a container and actually do quite well. There really is no limit to what can be done in a container!
by Julie McConnell | Nov 18, 2013
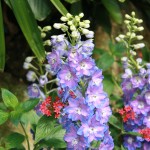
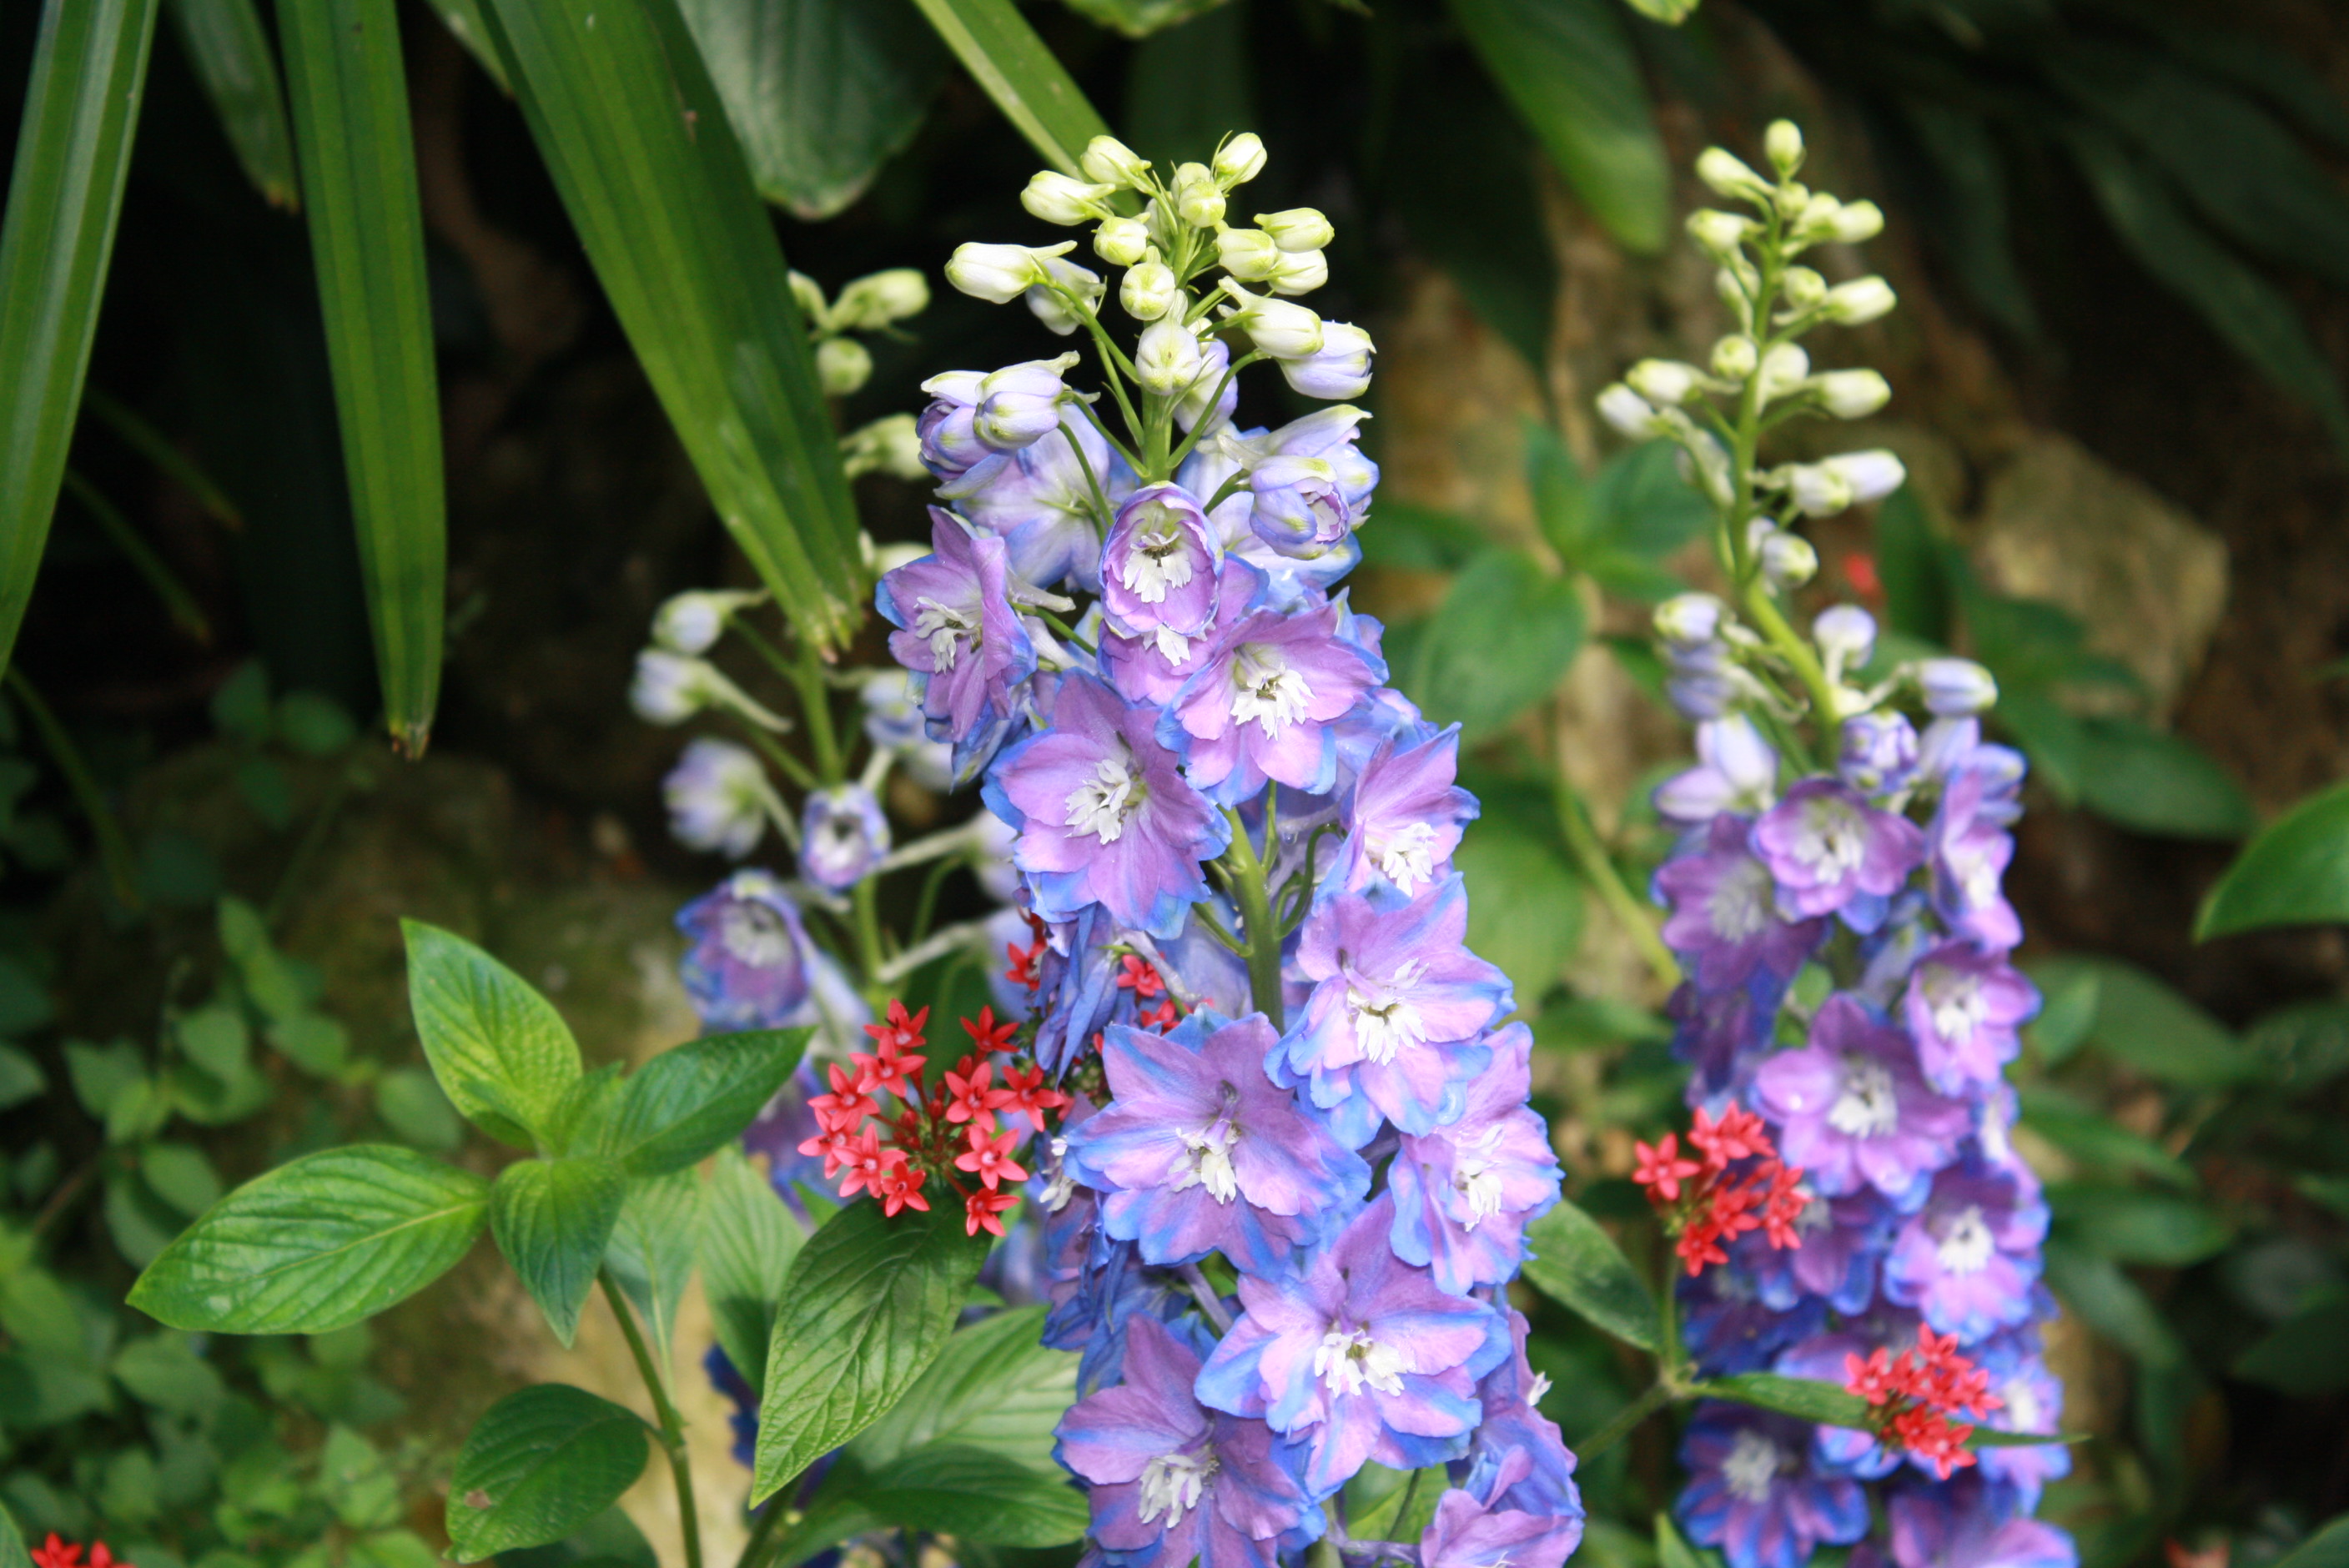
Delphiniums
As the weather changes, so should your flower bed. Annual flowers provide fantastic color to landscapes with months of flowers or attractive foliage, but the trade-off is that they give you all they’ve got over one growing season.
There are two main groups of annuals, summer (warm season) and winter (cool season). Summer annuals are considered “tender” and will not tolerate frosts, but winter annuals are “hardy” meaning they can stand cool temperatures and even hard frost if given time to establish before the coldest weather arrives. Most winter annuals actually prefer cooler temperatures and perform poorly during the hottest part of the year.
Some hardy winter annuals that can be planted after October are pansies, violas, snapdragons, dianthus,delphinium, petunia, alyssum, dusty miller, hollyhock, ornamental cabbage and kale, and verbena. With all the choices available, winter flower beds can be filled with all ranges of the color palate!
Plan to change flower beds to winter annuals from October to November, depending on the weather. Wait until cool weather trends arrive so that the new plants are not stressed by hot weather and high humidity. Most winter annuals will perform well until warm weather arrives, typically April or May in North Florida. Read more about “Gardening with Annuals in Florida.”
by | Oct 7, 2013
Gardeners may wonder why spring flowering bulbs are a timely topic now when fall is tip-toeing in, but as with most things in horticulture, there is a method to the madness. While many gardeners have become accustomed to running out to the local garden center and buying flats or pots of blooming bedding plants to create “instant gardens”, this last-minute approach simply does not and will not work when spring-flowering bulbs are desired in the landscape. So procrastinators beware! If beautiful beds of daffodils, tulips or Dutch irises are wanted next spring, now is the time to act, not next spring when everyone else’s are blooming.
Spring-flowering bulbs are generally defined as those that bloom here in north Florida between February and April. Information is available dividing these bulbs into categories based on when they bloom in the spring – such as very early, early, mid-season, late and very late. This will allow the garden to be in flower over a longer period during the season.
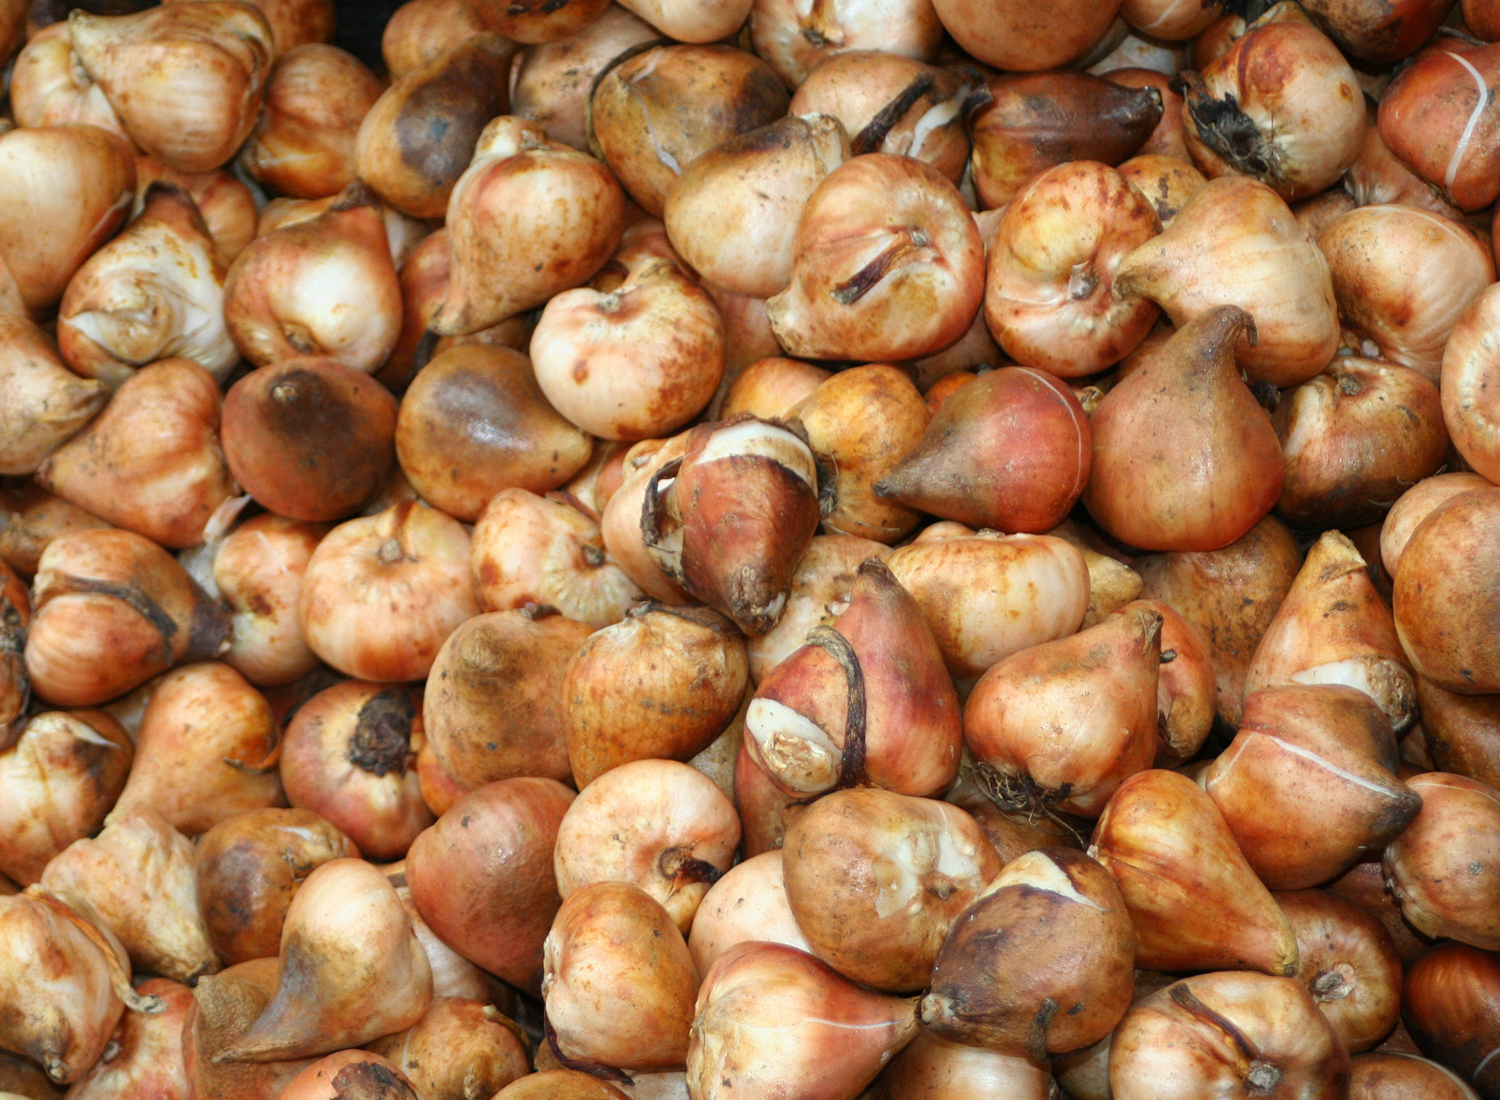
When buying bulbs, purchase the highest quality stock possible. The quality of the bulb correlates directly to the quality of the blooms. Selecting loose bulbs at a local garden center is like choosing produce at the supermarket. Pick the largest, plumpest bulbs that are firm with no obvious cuts, soft spots or rot. When ordering from a catalog, do it as soon as possible and generally choose the larger sizes when offered.
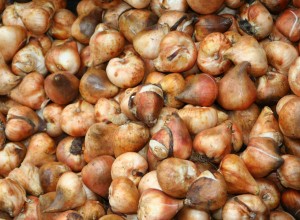
Be picky, look for high quality bulbs.
Choose selections wisely as the flowers of many bulbs do not last an especially long time. For example, while a tulip is a great bulb and an extremely attractive flower, it produces one flower that lasts about seven to ten days and then just like that, it’s done. Ranunculus, on the other hand, can bloom over a four- to six-week period. One thing to expect across the board, however, is the price for color from bulbs is going to be higher than for longer-flowering cool-season bedding plants like pansies and dianthus. If gardening budgets are limited, use spring bulbs more for embellishment and let cool season bedding plants provide the primary floral display.
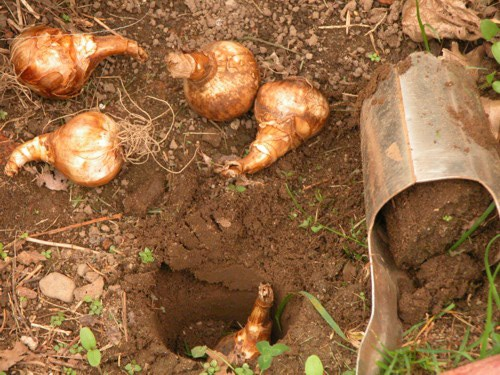
Obtaining a nice display of spring flowering bulbs depends upon where and how they are planted. Good drainage, part to full sun and moderately fertile soil are all that are needed for bulbs to do well. The average landscape bed generally provides adequate drainage, but avoid low spots that tend to stay moist as this will cause bulbs to rot in a hurry. If drainage is in doubt, plant in raised beds. Choose a spot where there is some shade from the afternoon sun, this allows the flowers to last a little longer, especially if the spring weather turns warm.
It is important to plant bulbs at the proper depth. A rule of thumb is to plant bulbs at a depth equal to twice their height. This far south we generally don’t plant bulbs quite as deep as standard recommendations. Smaller bulbs are planted about 1 or 2 inches deep while larger bulbs are planted about 5 inches deep. Dig individual holes the proper depth, or excavate out, the area to be planted, to the recommended depth and plant all of the bulbs at once.
Once the bulbs are in the ground, plant over them with low growing cool season annuals, such as alyssum, violas, lobelia or pansies. Be careful not to disturb the bulbs. The annuals cover the bare soil and provide color before, during and after the bulbs bloom. Make sure the bulbs will produce blooms that are taller than the annuals, and make sure the colors of the annual flowers contrast with or compliment the flowers of the bulbs in a pleasant way.
Although the proper time to plant most bulbs is October and November, there are a couple of notable exceptions. Tulips and hyacinths will perform much better if they are refrigerated at least six weeks in the vegetable bin of your refrigerator prior to planting (storing longer than six weeks is better) starting now. Store them in paper or net bags (well labeled.) The paper or net allows excellent air circulation that in turn will decrease rot. Avoid storing them near apples and other fruit as these fruit produce a plant hormone called ethylene that can severely alter everything from the time a bulb will bloom to shape, to survival. Plant them in late December or early January when the soil has had a chance to get cold.
Many of the spring bulbs available locally or in catalogs will only bloom reliably for us their first year. Some of the favorites include: tulip, grape hyacinth, crocus, hyacinth, ranunculus, anemone, scilla, freesia, ixia, sparaxis and ornithogalum.
The following are some of the spring bulbs that tend to be reliably long-lived in north Florida and should bloom for several years at least: Narcissus cultivars such as paperwhites, Chinese Sacred Lily, Soleil d’Or, Grand Primo, Cheerfulness, jonquils, Sweetness, Trevethian, Peeping Tom, February Gold, Thalia, Ice Wings, Petrel and larger flowered daffodil cultivars such as Ice Follies, Unsurpassable, Carlton and Fortune.
Other reliable re-blooming bulbs include snowflake (Leucojum aestivum), some flowering onions (Allium neapolitanum, Allium drummondii), ground orchid (Bletilla striata), amaryllis (Hippeastrum species and hybrids), Spanish bluebells (Hyacinthoides hispanica), spring star flower (Ipheion uniflorum), Dutch iris (Iris x hollandica) and Easter lily (Lilium longiflorum).
You can also find an excellent publication written by Dr. Gary Knox on low maintenance bulbs at UF IFAS Extension’s EDIS website.