Step-by-Step Instructions: Indirect Seeding Fall Veggies
Step-by-Step Instructions: Indirect Seeding Fall Veggies
While summer gardens offer a variety of intriguing fruiting crops, I have a special fondness for gardening during the fall season. This preference stems from the reduced pest pressure, decreased need for watering, fewer weeds, and the more favorable cooler temperatures for completing gardening tasks. Although it generally offers a more straightforward gardening experience, achieving success with your fall garden still hinges on applying the right techniques, with one crucial aspect being the care for seeds and young seedlings.
Indirect seeding allows you to nurture your seedlings before they establish their permanent residence in your garden, ensuring their growth into robust, mature plants. Below, you’ll discover a step-by-step guide to indirect seeding and planting for fall vegetables. By following these instructions, you’ll get a head start in cultivating a thriving fall garden that will delight your taste buds.
Seeding into Starter Cells:
While many crops can be started indirectly in starter cells, it’s important to note that root vegetables (such as beets, carrots, radishes, turnips, etc.), peas, and beans are exceptions due to their delicate root systems, which do not transplant well. These particular crops thrive when directly seeded into the garden. Conversely, fall crops that typically benefit from indoor seeding include Brussels sprouts, broccoli, cabbage, cauliflower, cilantro, kale, lettuce, mustards, parsley, spinach, and Swiss chard. For Florida planting dates, transplant ability, and other detailed planting information, see Table 1 in the UF/IFAS publication Florida Vegetable Gardening Guide.
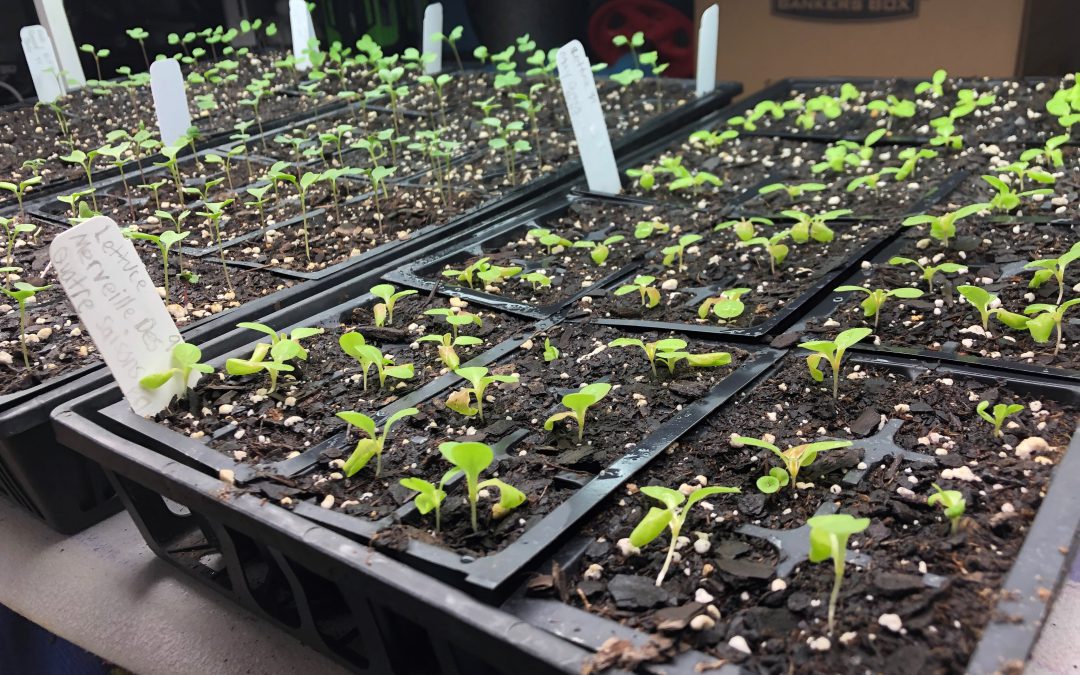
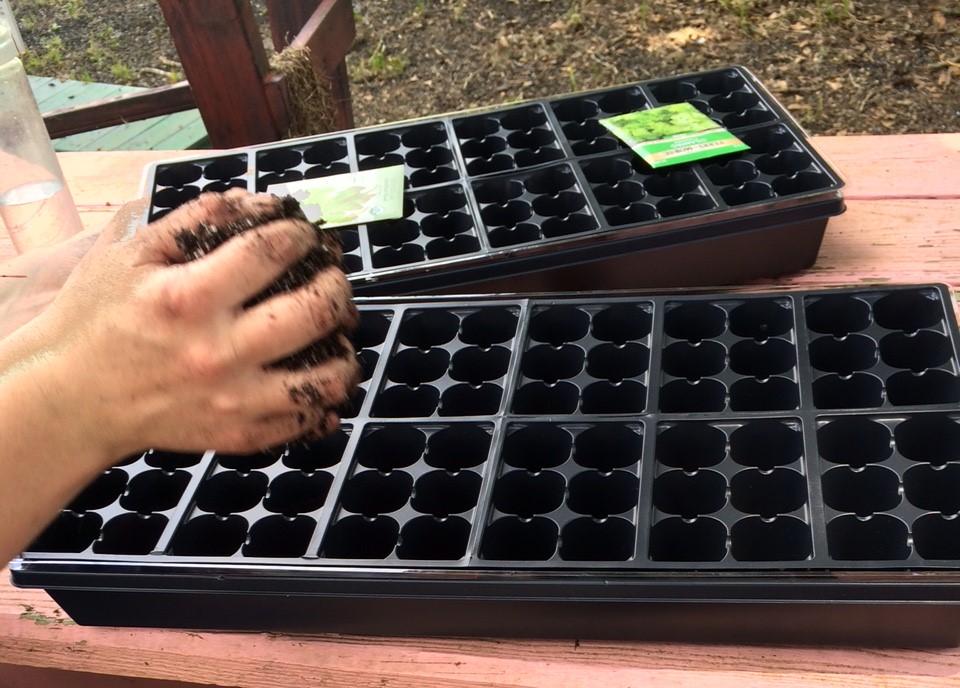
- Begin by moistening a starting mix, which is any fine-textured growing medium designed to support seed germination and early seedling development. Fill seed starter cells with this prepared mix, ensuring a level, flat surface.
- Create shallow indentations (2-3 times the diameter of the seed) in the starting mix in each starter cell using your finger and place 1-2 seeds in each cell. (Remove all but the strongest seedling if multiple seeds germinate in the same cell.)
- To ensure even coverage and prevent clumping, lightly sprinkle dry starting mix over the seeds.
- Label with the crop name, variety, and date.
- Mist the surface with water from a spray bottle, pump sprayer, or a hose spray nozzle. Maintain moisture levels, avoiding waterlogging.
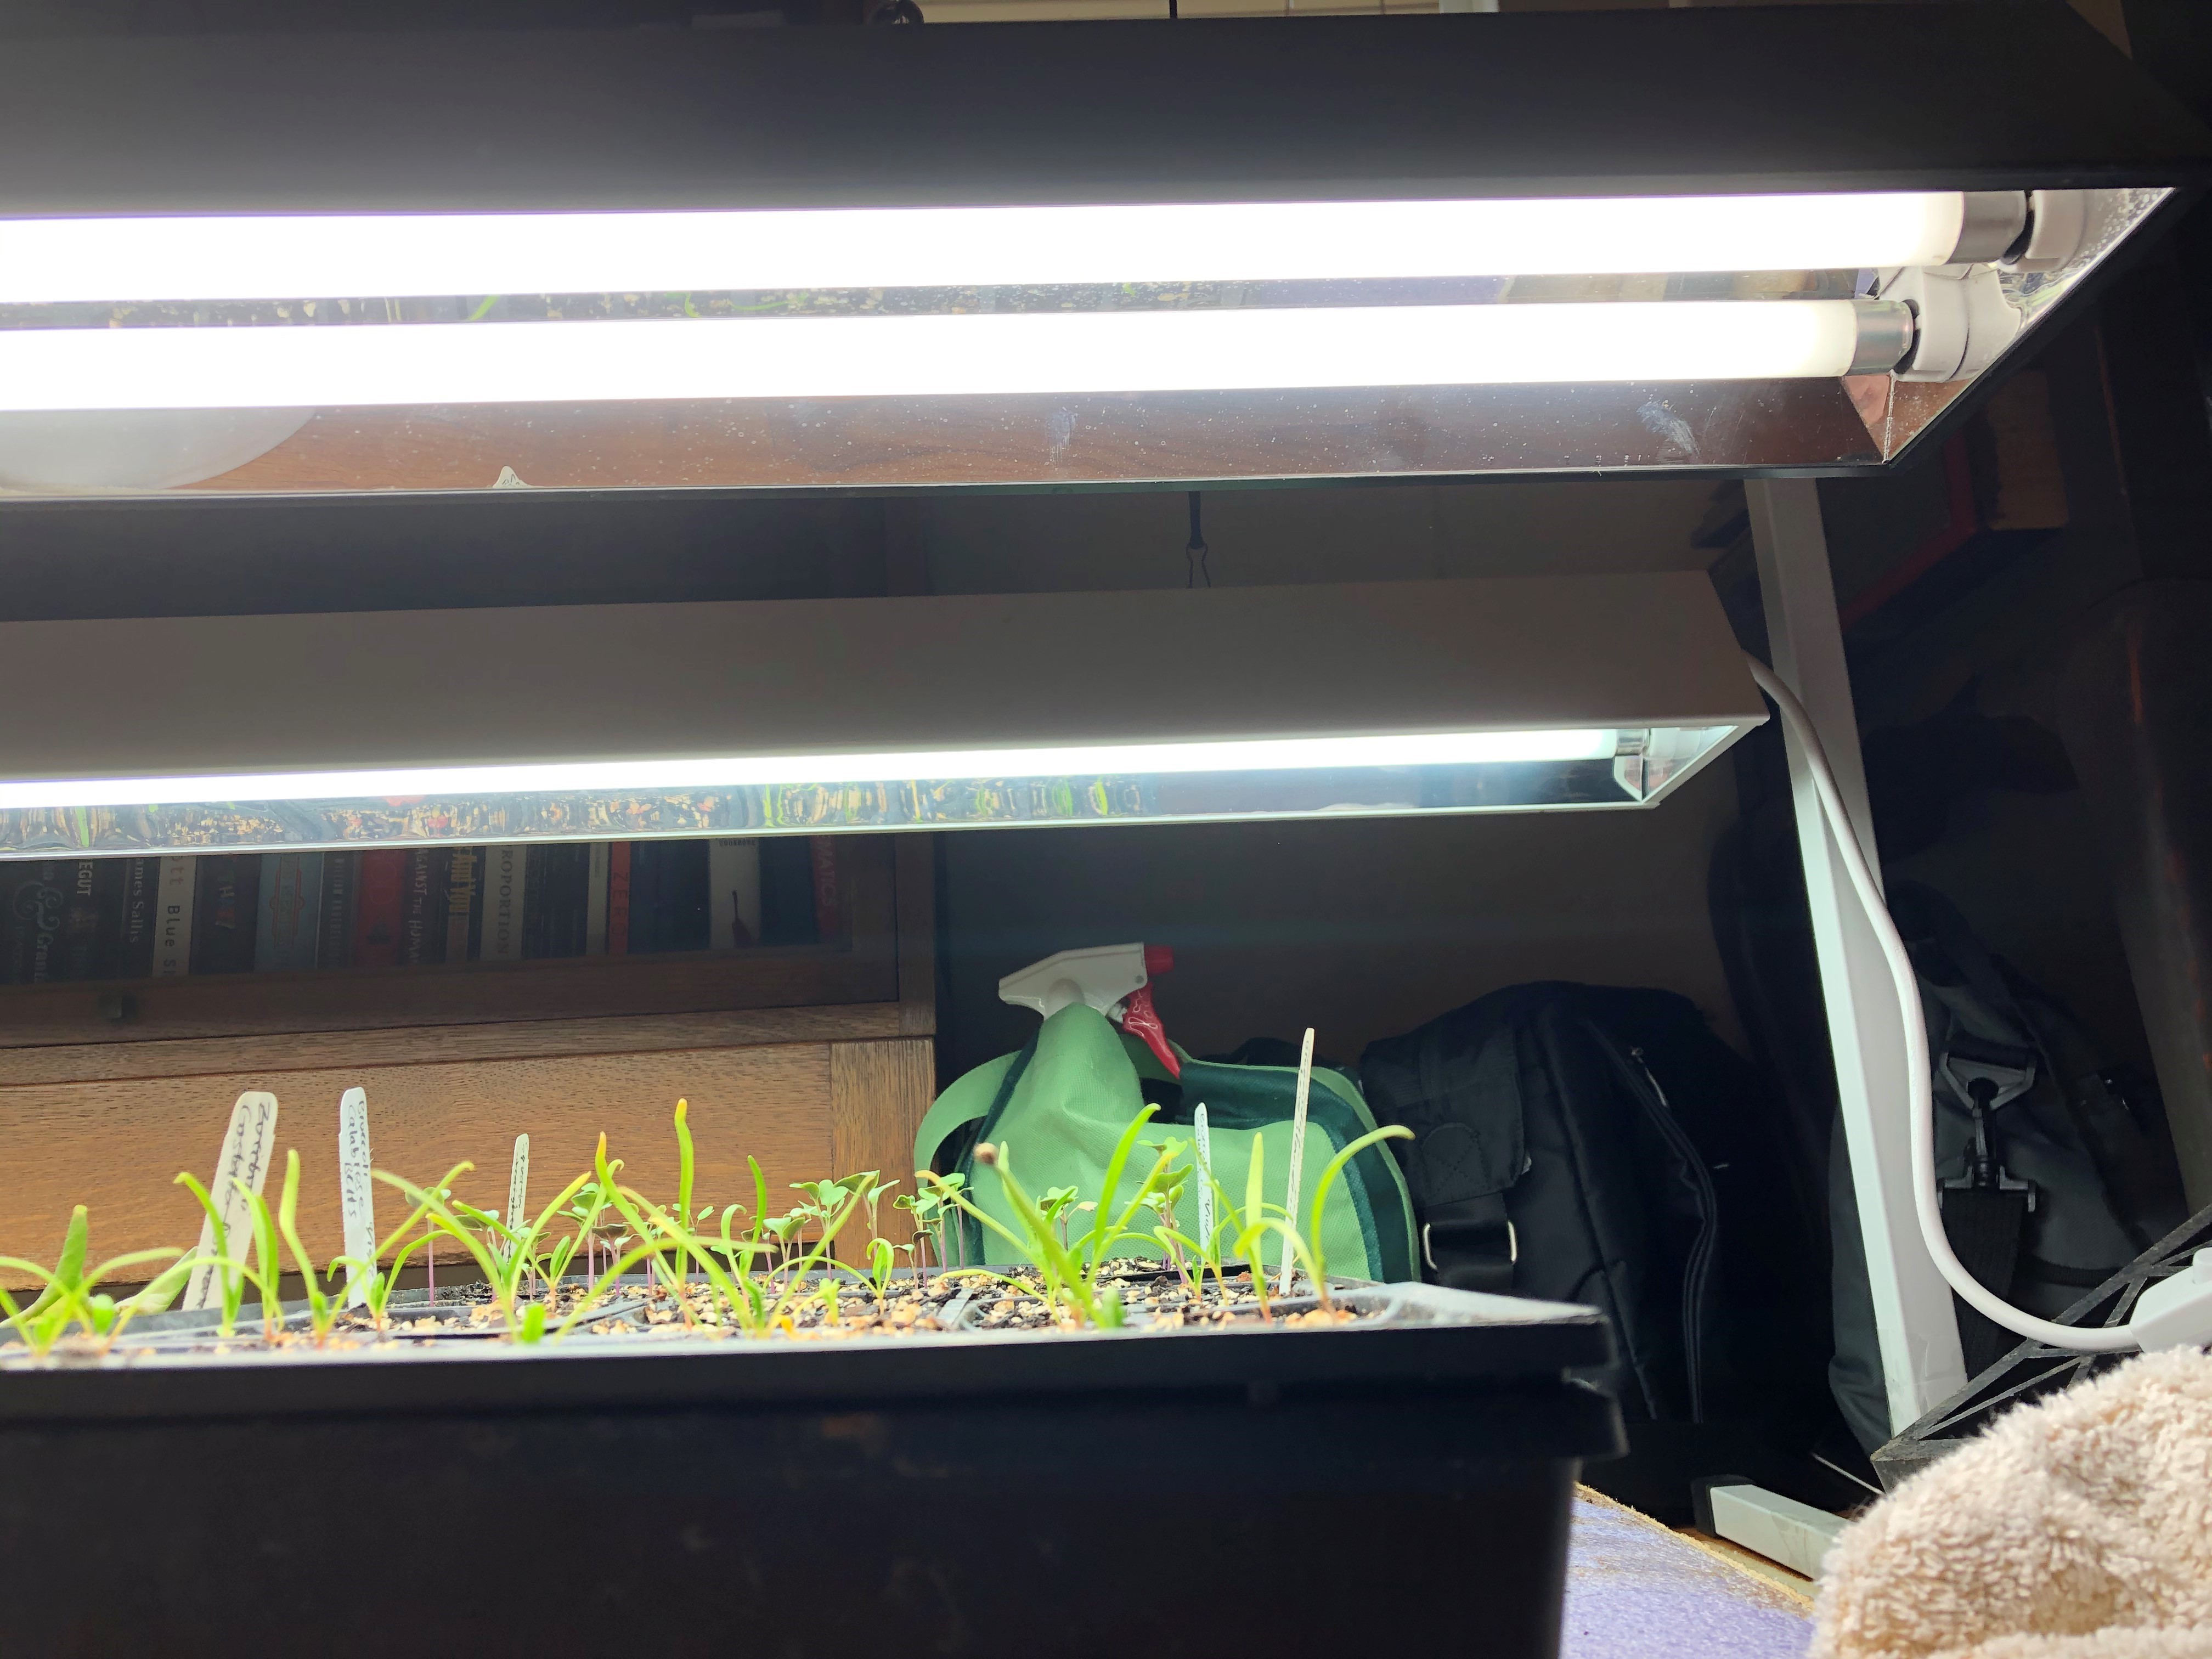
- Before the seeds germinate, keep them in a temperature-controlled room or out of direct sunlight. Germination time varies, but typically takes 5 to 14 days, depending on the crop, environmental conditions, and seed quality. (For fall varieties, germination is best between 50-80°F.)
- As soon as seedlings emerge, move them to a sunny location with more than 6 hours of direct sunlight. If temperatures exceed 85°F, provide afternoon shade to protect them from intense heat. If using full spectrum grow lights indoors (such as a T5 fluorescent light fixture), place seed starter cells at a distance of 2 to 4 inches between the top of the seedlings’ canopy and the fluorescent bulbs for 14 to 16 hours a day.
- Continue to keep the starting mix moist but not waterlogged.
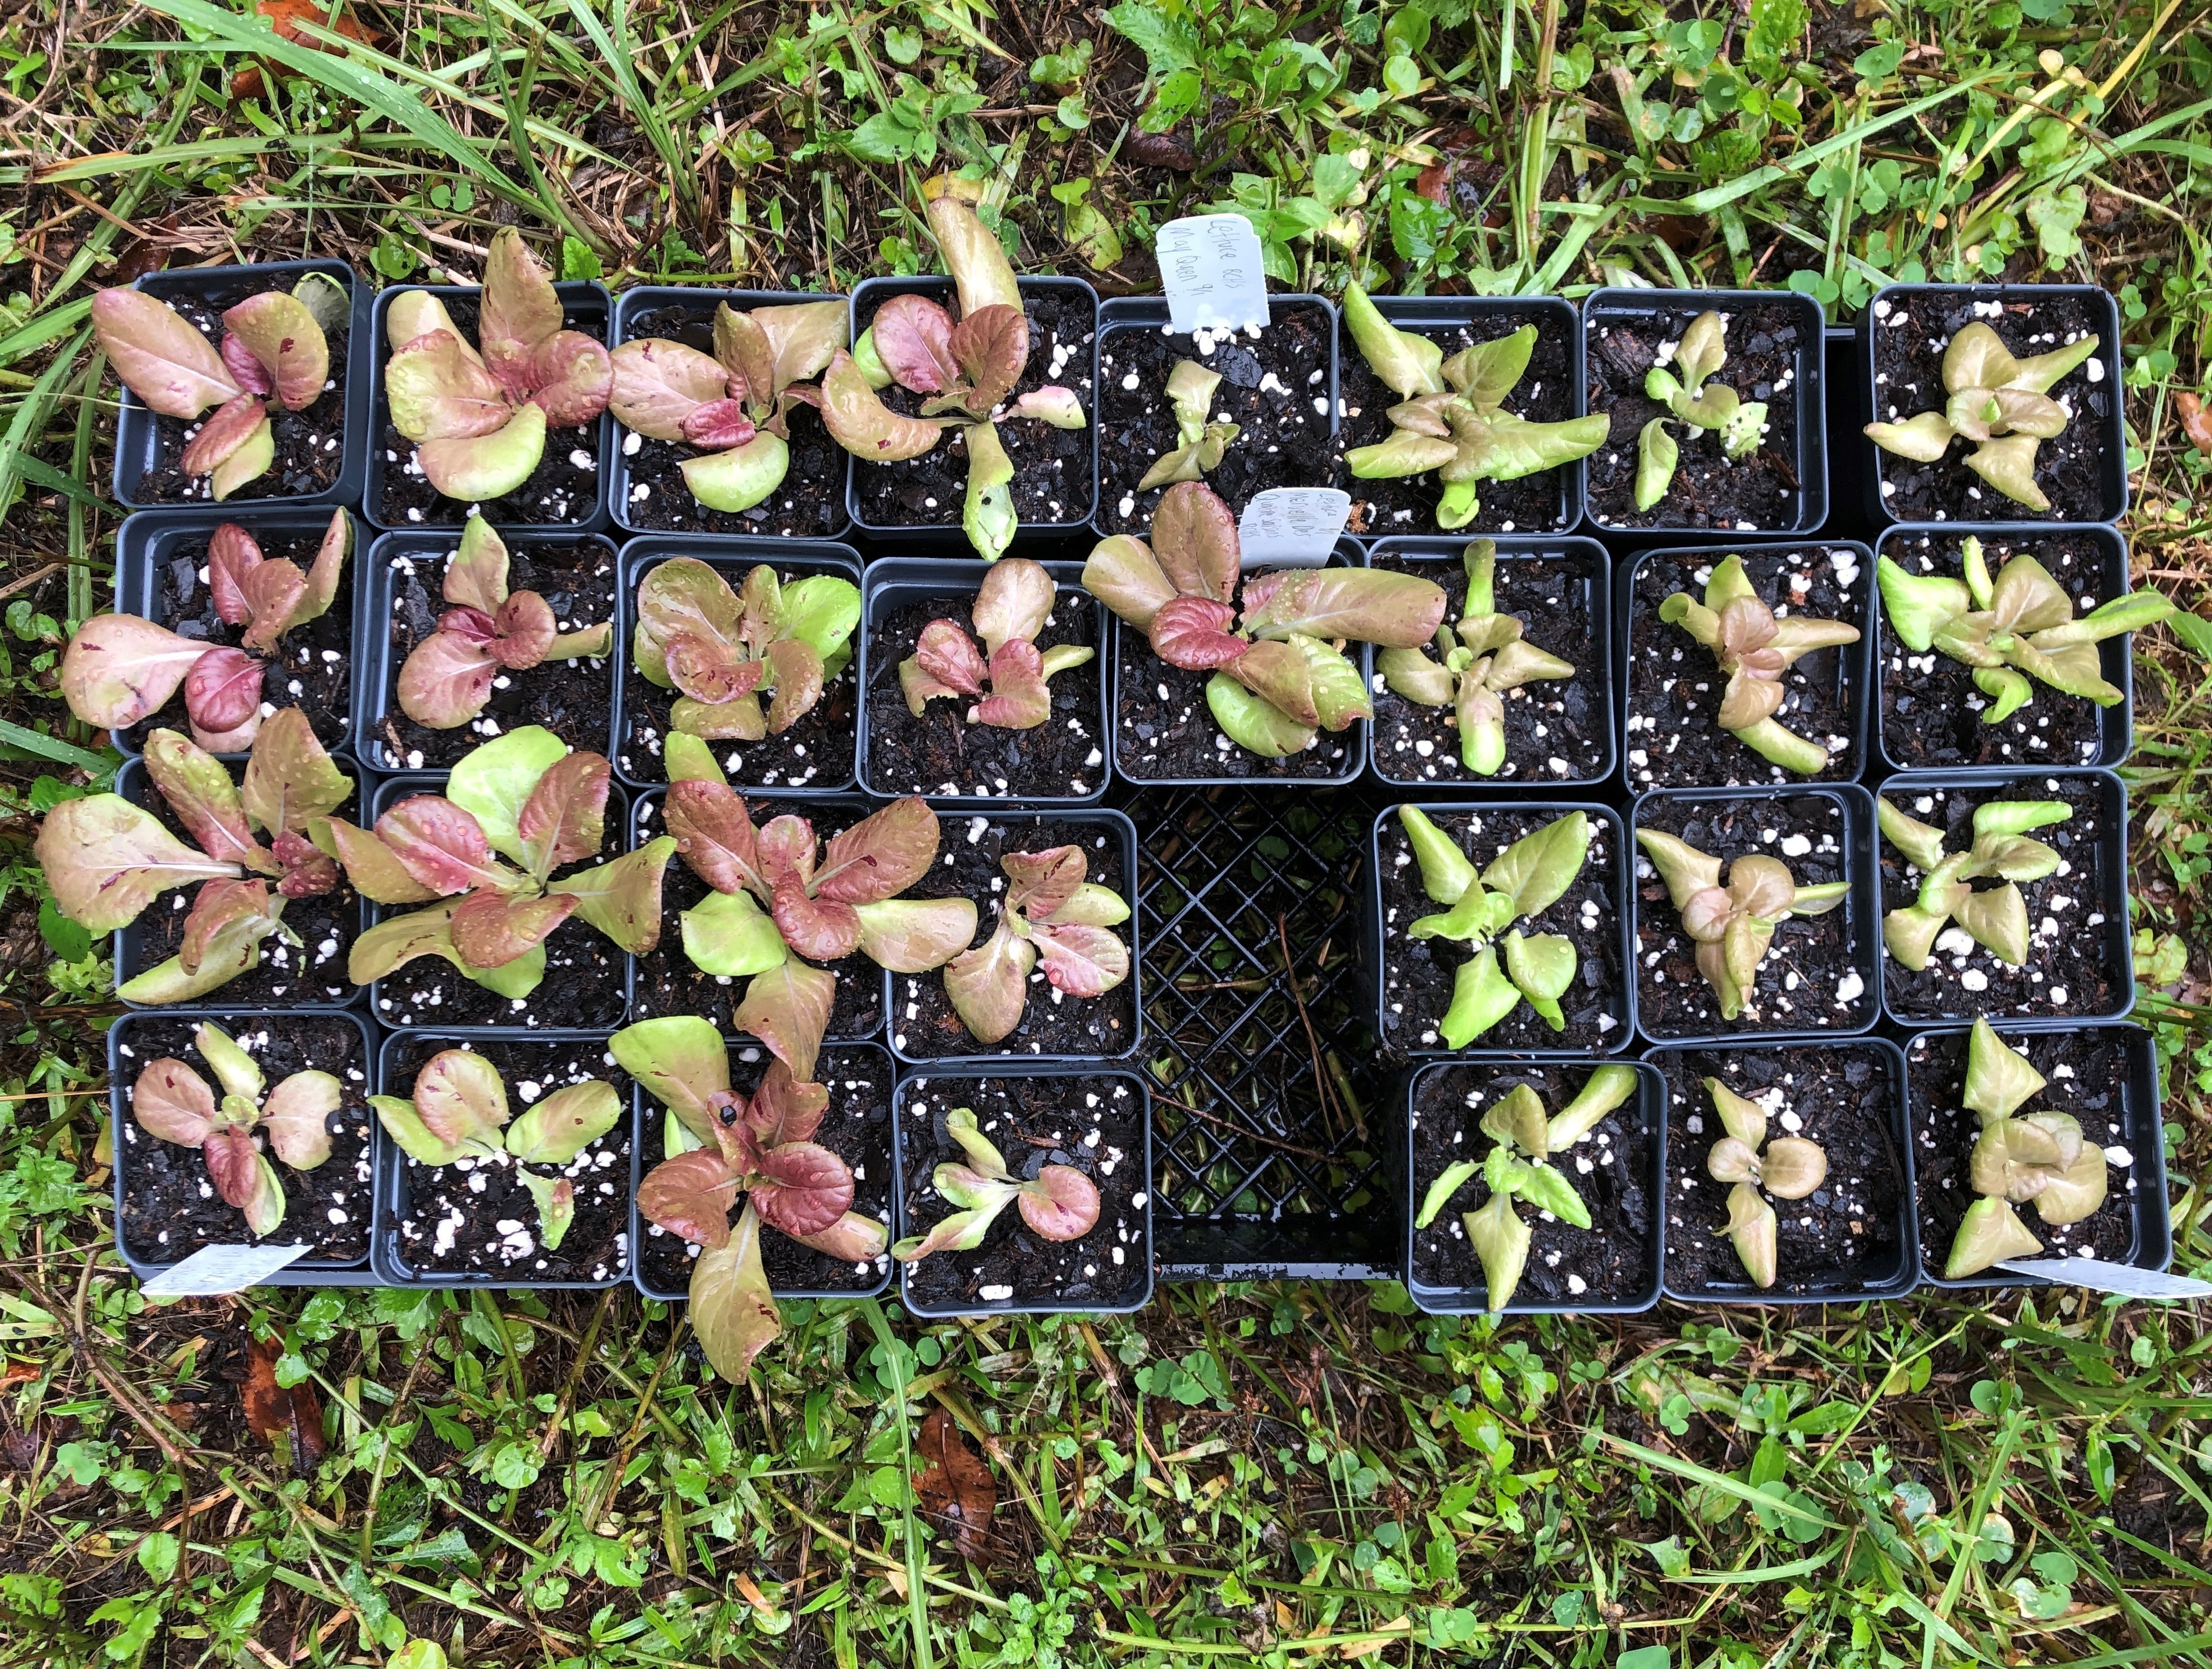
Up-potting into Larger Pots:
Up-potting refers to transplanting a young plant or seedling from a smaller container or pot into a larger one. While up-potting most seedling crop varieties into larger pots before transplanting into the garden is beneficial, you can skip this step and directly transplant seedlings from the starter cells into the garden if conditions are favorable (maximum air temperature is less than 86°F). However, keep in mind that young seedlings may be more vulnerable to rain, wind, insects, and animal disturbances. Up-potting into larger pots with nutrient-rich potting mix offers better protection and more time for root development.
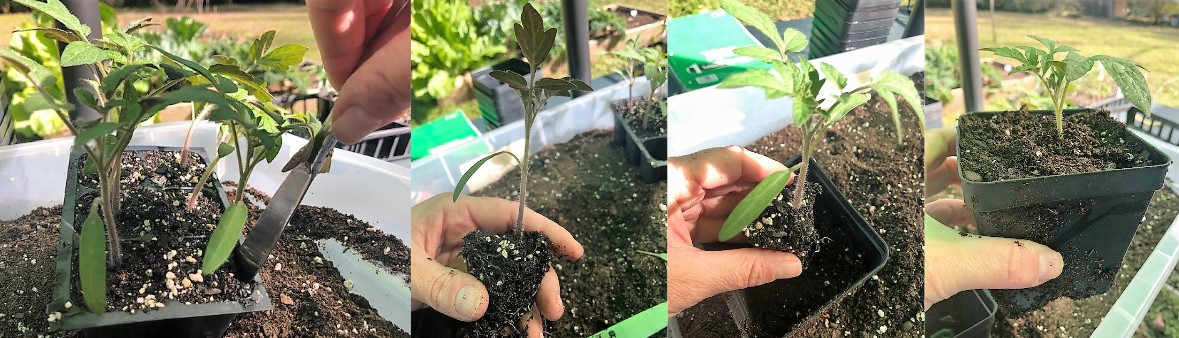
- When seedlings develop “true leaves” (the second set of leaves after the initial seedling leaves), it is time to transfer them into larger pots (2″-4″ wide).
- To start, fill the larger pots about halfway with pre-moistened, nutrient-rich potting mix designed for vegetables, ensuring good drainage.
- After thoroughly watering the small seedlings, carefully extract each from the starter cells, using a butter knife for gentle and precise removal to avoid disturbing the roots.
- Being careful not to disturb the roots, place each seedling gently into their halfway-filled pot and add more potting mix until the seedling is secure, standing upright, with all roots covered. There should only be one seedling per pot.
- Keep seedlings in a sunny location with more than 6 hours of direct sunlight. If temperatures exceed 85°F, provide afternoon shade to protect them from intense heat. If using full spectrum grow lights indoors (such as a T5 fluorescent light fixture), place seedlings at a distance of 4 to 6 inches between the top of the seedlings’ canopy and the fluorescent bulbs for 12 to 14 hours a day.
- Continue to keep the potting soil moist but not waterlogged.
Transplanting into the Garden:
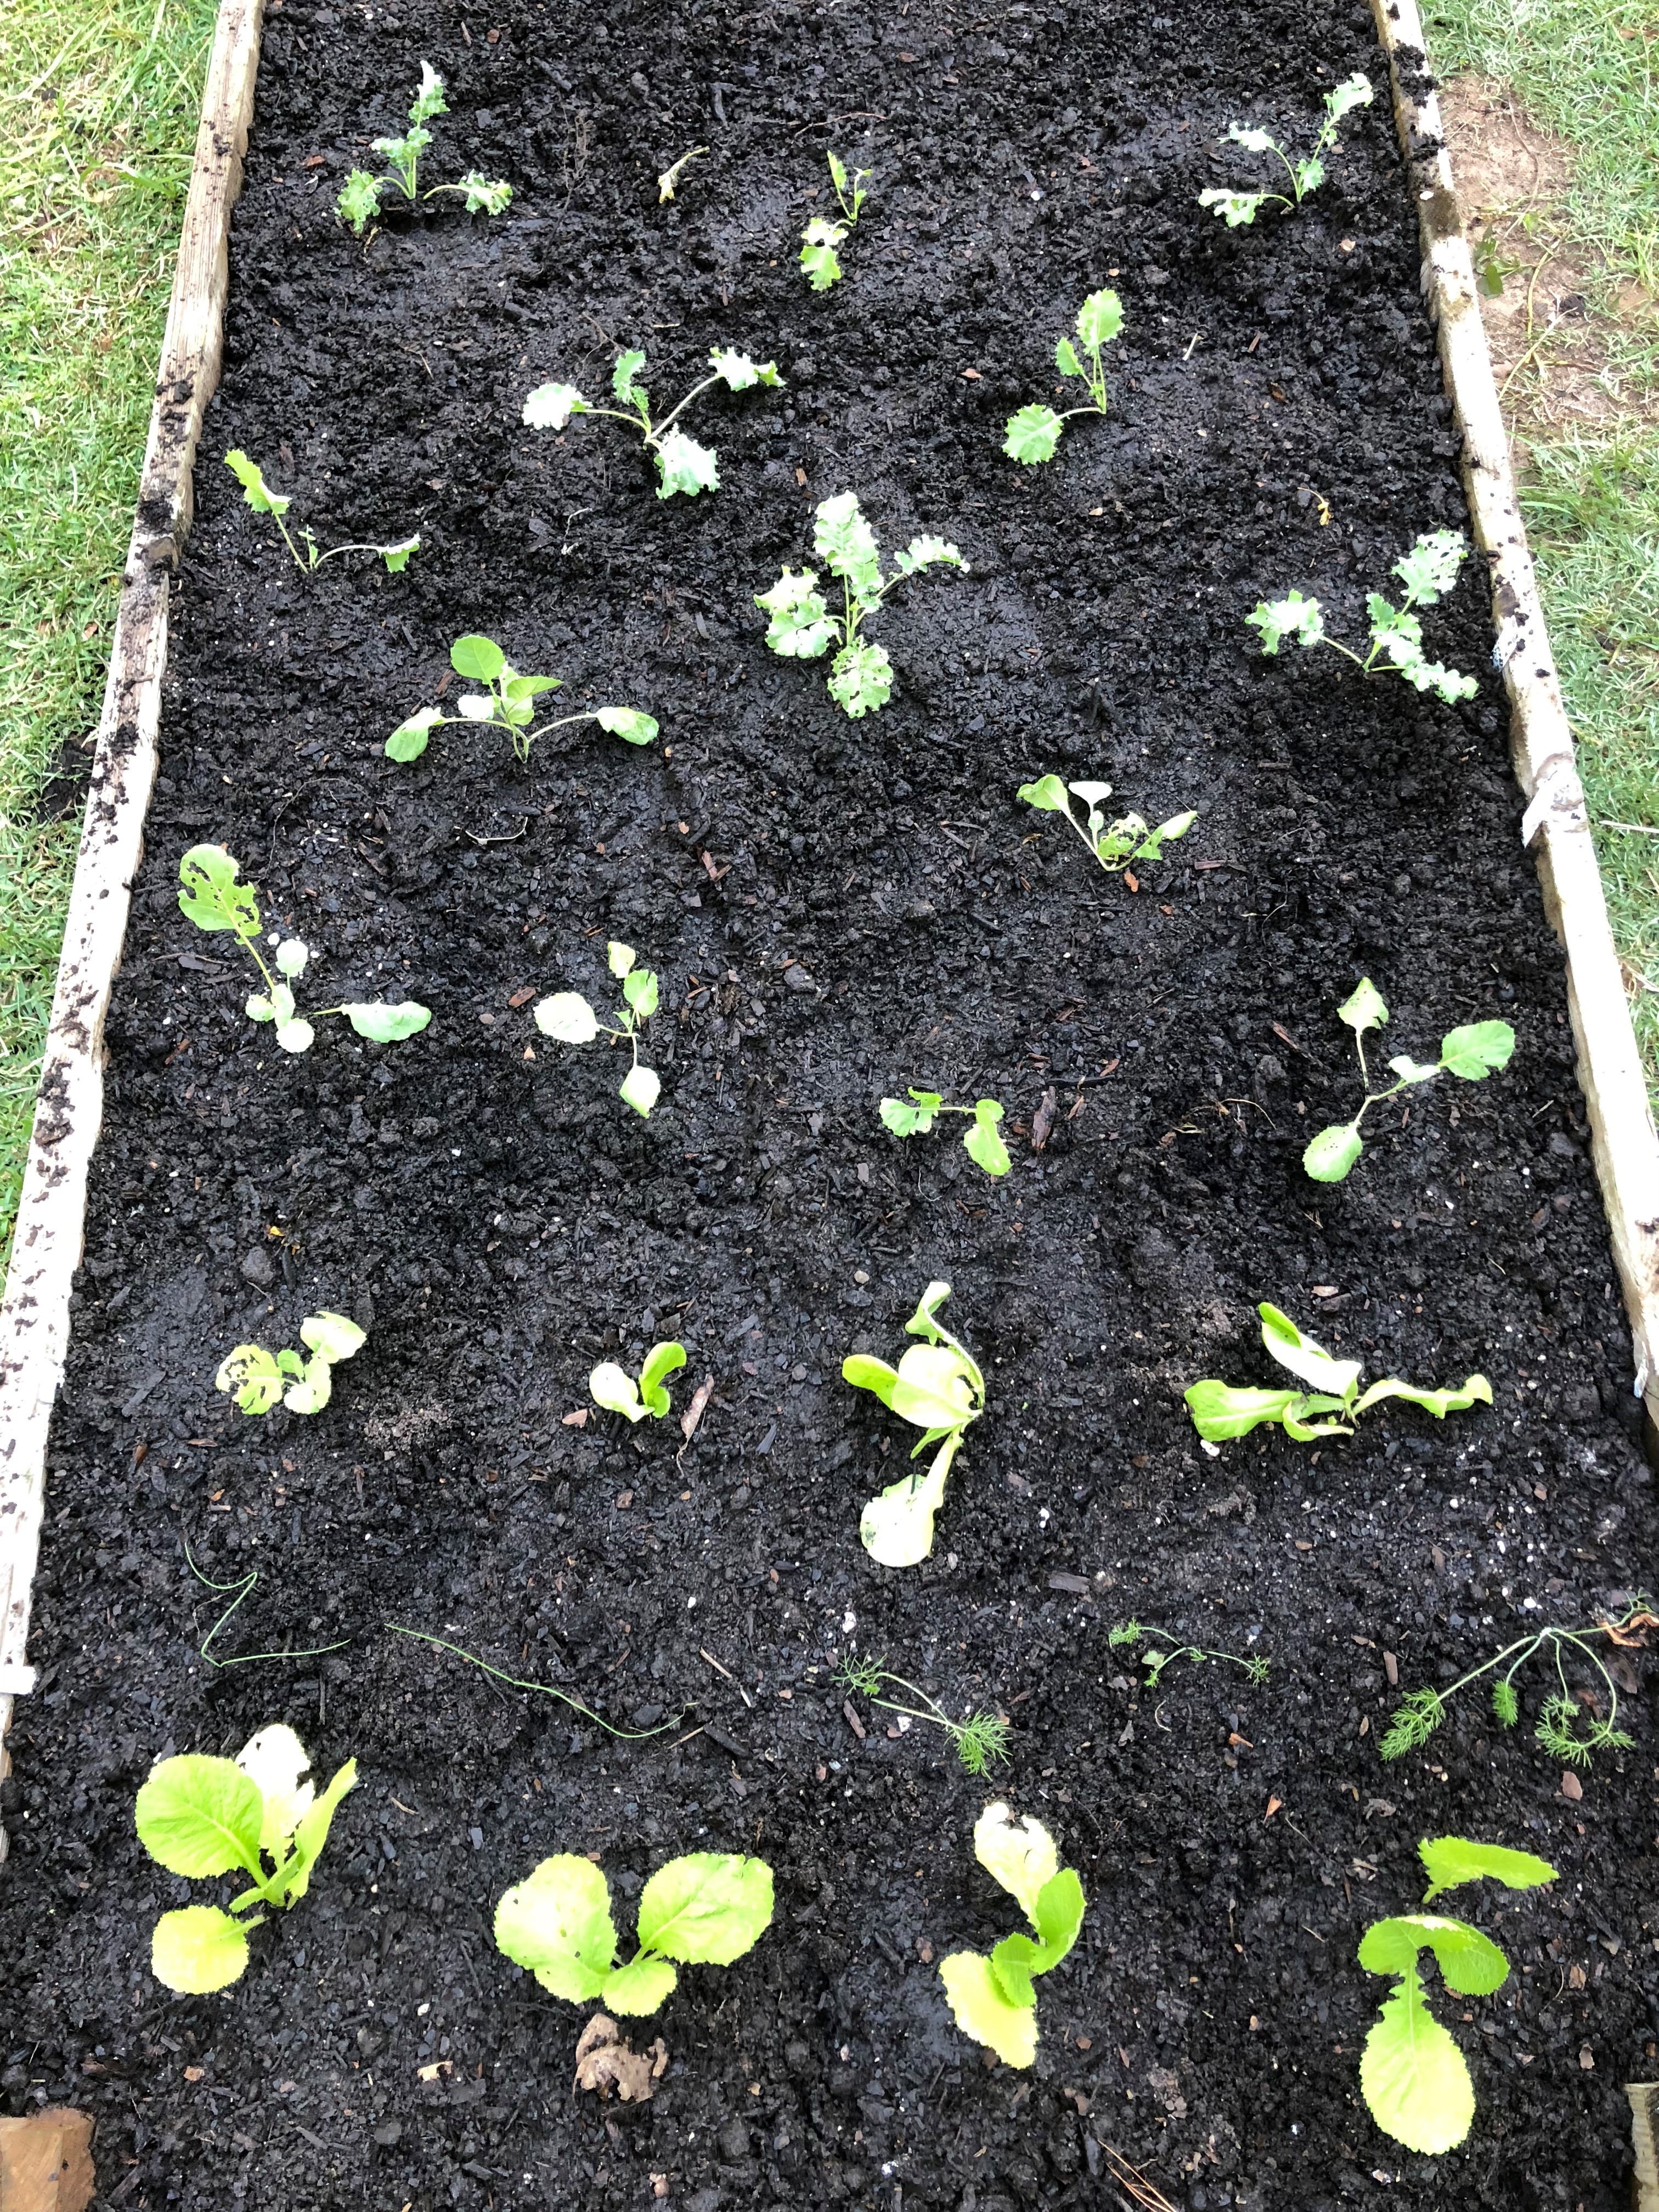
- Once the plants have developed strong roots and reach about the height of their pots, they are ready for transplantation into the garden.
- If the plants have been indoors under grow lights, allow them to “harden-off” by gradually exposing them to outdoor conditions for a week. This helps them adjust to wind, direct sunlight, and varying temperatures.
- Prepare the garden bed with compost and other soil amendments.
- Water the plants thoroughly before carefully removing them from their pots, ensuring minimal disruption to the roots.
- For each plant, dig a small hole in the garden bed and place the plant, along with the potting mix, in the hole, following the crop-specific spacing requirements (see Table 1 in the UF/IFAS publication Florida Vegetable Gardening Guide).
- Cover the roots and maintain consistent soil moisture, avoiding waterlogging.
In summary, mastering the art of indirect seeding and planting fall vegetables can greatly improve your chance of a successful harvest. From carefully sowing your seeds in starter cells to up-potting and ultimately transplanting into your garden, each step is a vital component of the process. So, roll up your sleeves, get your hands dirty, and witness your fall garden flourish. Happy gardening!