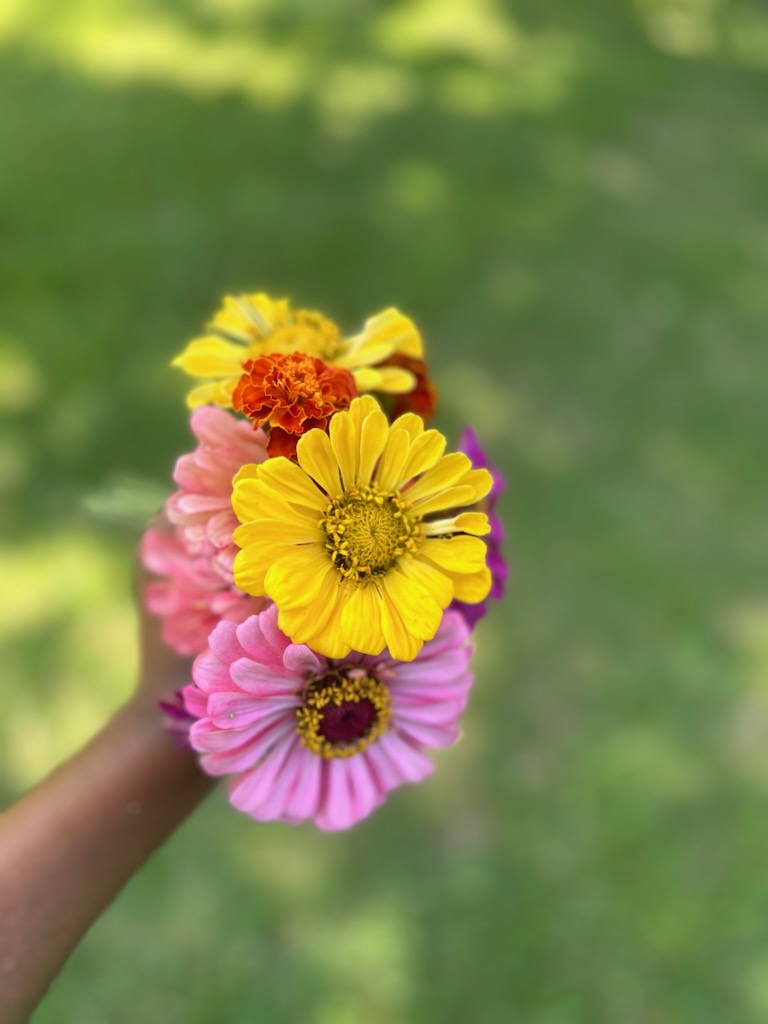
Zinnias are well-known annual flowers, primarily recognized for their easy and fast growth. Their wide range of growing habits contributes to their popularity, as they can range from short and bushy to tall with a singular stalk. Regardless of their growing habit, Zinnias are prolific bloomers. They belong to the aster family and are native to Mexico and Central America, thriving particularly well throughout the South.
Photo: De’Anthony Price
Zinnia Characteristics
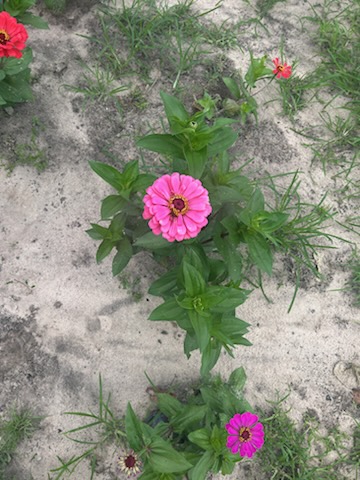
There are three distinct types of Zinnias based on floral structure: single, double, and semi-double. The different floral structures do not necessarily correlate with plant habits. ‘Single’ refers to flowers that have only a single row of petals, with the center of the flower clearly visible. ‘Double’ Zinnias have multiple rows of petals, and the center is not clearly visible. ‘Semi-double’ cultivars exhibit a combination of traits, with flowers having multiple rows of petals while still maintaining a clearly visible center.
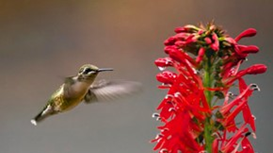
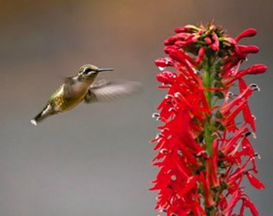
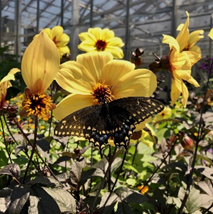
Pollinators and Zinnias
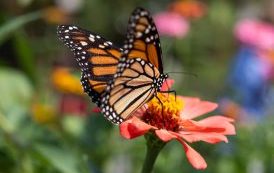
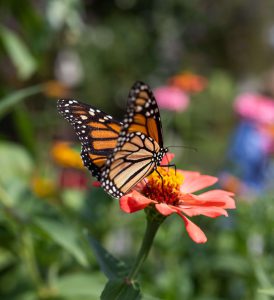
Zinnias are great for attracting pollinators, especially butterflies. Interplanting zinnias between rows of vegetables or as a border around vegetables is a great way to attract more pollinators to your garden. There are a few guidelines available for attracting butterflies to your yard using zinnias. The taller varieties are better than dwarf or compact cultivars, and those with wide, flat blooms provide a larger landing surface. Flowers should have prominent yellow centers (disc floret); double bloom varieties make it difficult for butterflies to access nectar. It is also possible that some varieties attractive to butterflies produce a larger quantity of and/or better-quality nectar than others.
Photo: UF/IFAS
Planting Zinnias
Zinnias perform better in garden beds than containers and, due to their ability to grow so quickly, can be direct seeded. To direct seed, the soil temp should be at least 70 degrees and plant the seeds at 1/4’” deep. Zinnias can also be planted as transplants and should be done once the soil warms to 60 degrees. Plant spacing can be anywhere from 8 to 12 inches depending on the plant’s habit. Singular stalk varieties can be planted closer together and bushier varieties should be given more space. Zinnias prefer full sun and well-drained soil. For longer flowering, remove the old blooms.
Zinnia Management
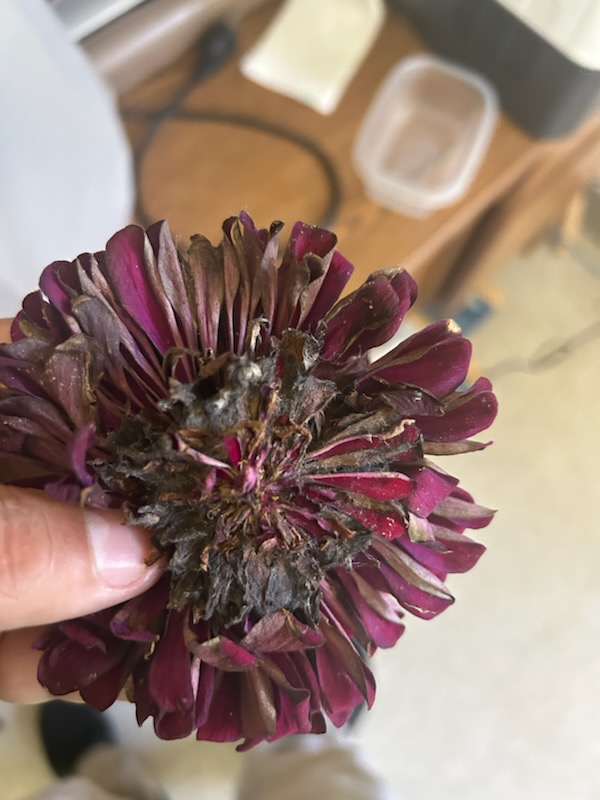
When planting zinnias, it’s recommended to incorporate a general-purpose fertilizer with equal parts nitrogen, phosphorus, and potassium into the soil. Following planting, monthly fertilization with a phosphorus-rich fertilizer is advisable to encourage continuous blooming. Maintaining adequate moisture is crucial for zinnias but avoid overwatering as they thrive in moderately dry conditions. To prevent fungal diseases, water only when the top 1-2 inches of soil are dry, focusing on watering the base of the plant rather than the foliage whenever possible. Powdery mildew is a common issue with zinnias, but it can be managed by applying a fungicide when necessary. However, it’s best to prevent this problem by ensuring good air circulation and avoiding wet foliage.
Photo: De’Anthony Price Diseased Zinnia
Zinnias as Cut Flowers
Zinnias, known for their vibrant charm, make delightful cut flowers that can brighten up indoor spaces for a week or longer. For optimal longevity, harvest the blooms when their centers are just beginning to unfurl fully. Trim away lower leaves and promptly place the cut ends into water-filled vases. Regularly refreshing the water helps prevent the growth of algae. When it comes to drying zinnias, double-flowered varieties are preferred as they tend to maintain their shape better than single forms. While all colors undergo slight changes during drying, cutting stems at their peak, removing leaves, and hanging them upside down in bundles away from direct sunlight facilitates the drying process effectively.
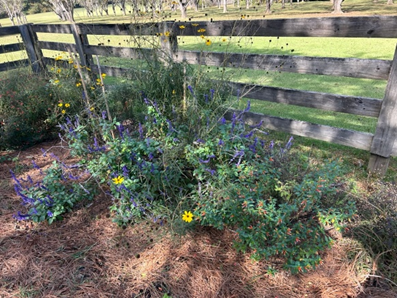
In March, the UF/IFAS extension office was awarded a grant from the Apalachee Audubon Society to install a pollinator garden at the Jefferson County Extension Office. The goal of the pollinator garden is to educate the community on the importance of pollinator and native pollinator plants. The pollinator garden is a demonstration site encouraging community members to plant more pollinator plants in their home landscape. A pollinator garden at home is fantastic because it attracts and supports essential pollinators like bees, butterflies, and hummingbirds. These pollinators help fertilize flowers, leading to better fruit and vegetable production in your garden. Plus, it’s great for the environment.
Pollinator Garden
UF/IFAS Jefferson County
Pollinators are essential for our ecosystem. Pollinators play a crucial role in the reproduction of plants by transferring pollen from the male parts of a flower to the female parts. This process allows plants to produce fruits, seeds, and new plants. Many plants would struggle to reproduce without pollinators. This can lead to a decline in biodiversity and the availability of food sources for other food sources. Pollinators are like nature’s superheroes.
Types of Pollinators
UF/IFAS
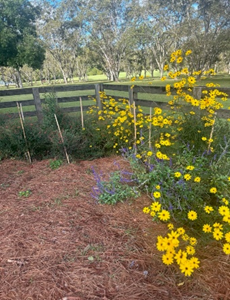
The garden consists of over 50 different pollinators and native plants. Planting more native pollinator gardens is super important. Native plants adapt well to the local environment, making them easier to grow and maintain. Pollinators and native plants have an extraordinary relationship. Native plants offer nectar, pollen, and shelter that are specifically suited to the needs of native pollinators. By Planting native flowers, one is creating a haven for these vital pollinators, increasing biodiversity, and ensuring the health of our ecosystems.
Pollinator Plants
UF/IFAS Jefferson County
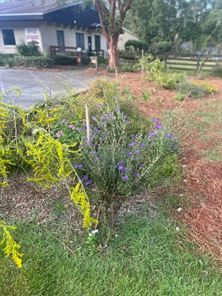
The pollinator garden includes an herb garden. The herb garden aims to educate community members about edible landscaping and pollinator herb plants. Edible landscaping can allow one to produce food using sustainable agricultural practices that conserve water, protect water quality, provide wildlife habitat, and reduce chemical inputs. Planting herbs in your garden is a great idea. Herbs like basil, rosemary, and mint can attract beneficial insects to your garden and repel pests. Herbs are easy to grow and can be used in cooking, teas, and even for natural remedies.
Pollinator Herb Section
UF/IFAS Jefferson County
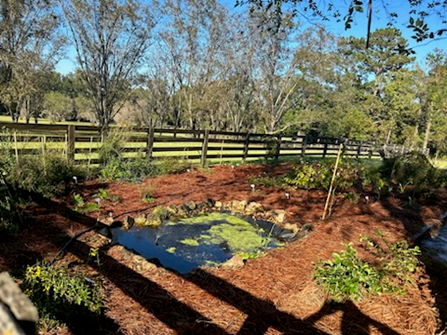
The garden includes a small pond demonstrating a healthy aquatic ecosystem in home landscapes. Creating a pond is an excellent addition to your pollinator landscape. They provide a water source for pollinators like bees and butterflies, which is essential for survival. Pollinators need water to stay hydrated, especially during hot and dry weather. Having a pond in your garden can attract various pollinators and create a habitat for them to thrive. A healthy aquatic ecosystem can help manage water by reducing runoff and filtering pollutants.
Pond in Pollinator Garden
UF/IFAS Jefferson County
If you are in the area, please feel free to stop by the Jefferson County extension office and visit the pollinator garden. Please visit UF/IFAS for more information regarding pollinator plants and Florida Friendly Landscaping.
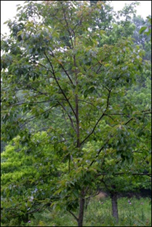
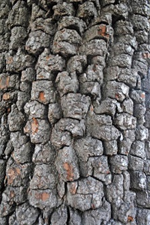
The Common Persimmon, Diospyros virginiana, is a southern native small to medium fruit tree that is becoming more popular for homegrown fruit. The bark is grey or black and forms chunks or blocks that give it a checkerboard look. Fall color can be a spectacular red in USDA hardiness zones 4 through 8b. It is well adapted to cities but requires fallen fruit maintenance and wildlife control. Its mature height can be 40 to 60 feet, with branches spreading from 20 to 35 feet and a trunk two feet thick, but it is commonly much shorter in landscapes. The trunk can be a single form or multiple trunks and the species tends to form colonies. The leaves are alternate, simple, and a rich green color. The leaf margins can be entire or somewhat serrated. The funnel-shaped flower has four petals and ranges in color from white to cream to gray.
Full Persimmon Tree, UFTree Bark, UF
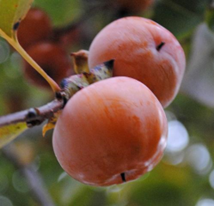
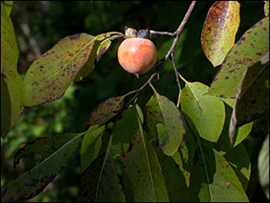
The Common Persimmon fruit is smaller than a ping-pong ball. This round fruit possesses an orange to reddish-purple color, with a size of 1 ¼ inches across. The flavor is more fermented and sugary-sweet. In Florida, the harvest season is from late August to early November. Fruit do not ripen at the same time. When ripe, the fruit turns from green to burnt orange. They also fall from the tree. The fruit is soft, sticky, and very delicious, but it needs to be separated from its skin and seeds before being used in recipes. They can be eaten when fully ripe and can also be pureed, dried, and used in preserves, chutneys, quick breads, puddings, pies, and sweet and savory dishes. The fruit is very favored by wildlife. Persimmon fruit is an essential food source for songbirds, turkeys, and small and large mammals.
Common Persimmon Fruit, UFCommon Persimmon Fruit, UF
Common persimmon prefers moist, well-drained, bottomland or sandy soils but is known to be very drought- and urban-tolerant. It is a fantastic tree in its adaptability to site conditions, including alkaline soil. It is commonly seen as a volunteer tree in old fields but grows slowly on dry sites. Its fruit is an edible berry that usually ripens after frost. Some cultivars do not require the frost treatment to ripen. Persimmon fruit is hard and astringent when unripe. Most American cultivars require both male and female trees for proper fruiting.
Besides fallen fruit maintenance, persimmon maintenance is easy and is suggested that it persimmon should be planted more often. Due to a coarsely branched root system, transplanting is difficult. The trees should be balled and burlapped when young or grown from containers. The wood from the tree is used for golf club heads because it is tough and almost black.
Common persimmon is troubled by a leaf-spot disease in the South. This disease causes black spots on the leaves and premature defoliation in August in the North and September in the South. The tree will not die from the disease. It is also susceptible to a vascular wilt, which can devastate established trees. There are no severe insect pests fort his native fruit tree, except occasional caterpillars.
For more information, please contact your local county extension Office.
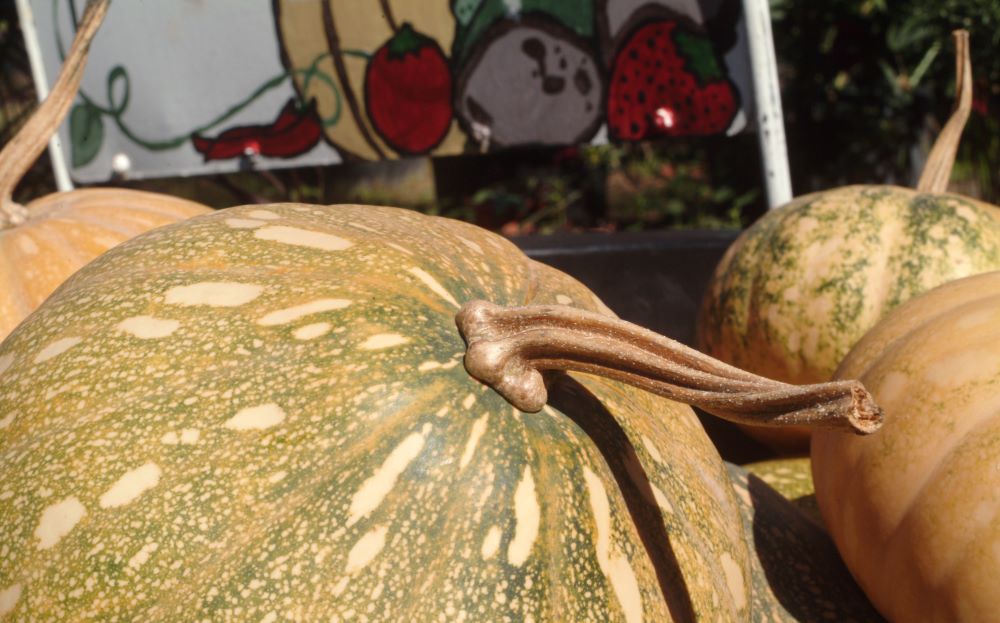
You’re in the right hands if you want to grow pumpkins in Florida. While growing pumpkins can be tricky in Florida’s hot and humid climate, you can successfully grow Sunshine State pumpkins with the proper planning and care. Pumpkin is a popular vegetable in the cucurbit family. It shares this family with members of summer and winter squash. The pumpkin varieties differ from those called squashes by having coarser, more intensely flavored flesh and rinds that are softer at maturity than the winter squashes but harder than the summer squashes. Pumpkins refers to certain varieties of C. pepo L., C. moschata Duch. ex Poir., C. mixta Pang., and C. maxima Duch. Local tradition and common usage may dictate that a particular variety is called a squash in one area of the country and a pumpkin in another.
Pumpkin Varieties Choosing the right pumpkin variety is a major decision when growing pumpkins in Florida. Not all pumpkin varieties are suited to Florida’s warm and humid climate. Seminole Pumpkin is a native pumpkin variety well-suited to the state’s warm and humid environment. Traditionally grown by the Calusa, Creek, and Miccosukee peoples, Seminole pumpkins remain one of the tastiest and most reliable for Florida gardens. Seminole pumpkins are known for their hardiness and resistance to disease and pests. The Big Max variety is known for producing giant pumpkins that can weigh up to 100 pounds or more. Big Max pumpkins do well in Florida’s warm climate but may require extra care to prevent pests and diseases. The Jack-o-Lantern variety is the classic Halloween pumpkin for carving and decorating. Look for types suited to warm climates, such as “Funny Face” and “Big Moon.” The Pie Pumpkin variety is best used for cooking. If you plan to use your pumpkins for cooking, look for pie pumpkin varieties such as “Small Sugar” and “Early July.” These pumpkins are smaller and sweeter than carving pumpkins and are ideal for making pies, bread, and other baked goods.
Planting
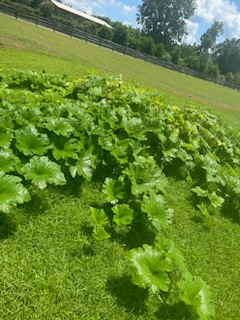
Most pumpkin varieties need around four months to reach maturity. Pumpkins should be seeded by early July to be ready for Halloween. Spring pumpkins planted in March or April can be stored for use in October and November (though long storage is difficult in Florida). Early August seeding provides a fall crop for late November. Choose a sunny spot with well-drained soil for your pumpkin patch. Pumpkins can be grown in small gardens or containers if you need more space. Plant your pumpkin seeds about 1 inch deep and should be placed 6 feet in either direction, except for the bush types. Plant 3-4 seeds per hill, then thin when the plants are 2-4 inches tall.
Seminole pumpkins planted in raised beds at UF/IFAS Extension Jefferson County Office
Photo: De’Anthony Price
Maintenance
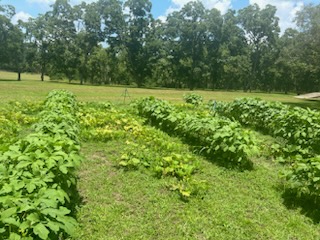
Once your pumpkin seeds have sprouted, it’s time to start caring for your plants. Pumpkins need consistent moisture to grow, so be sure to water them regularly. Aim to give your plants about 1-2 inches of water per week. Water thoroughly after planting to help the seeds settle in. Climbing varieties like Seminole can be trellised for more space while using slings to support larger fruits. Use a balanced fertilizer to help your pumpkins grow strong and healthy. Apply the fertilizer according to the package instructions. Pumpkins do well with large amounts of compost. Place compost under each hill before seeding. Side dress with a handful every three weeks or as needed. Keep an eye out for pests such as squash bugs and cucumber beetles, which can damage your plants. If you notice any signs of pests or disease, treat your plants with a pesticide or fungicide as needed.
Intercropping of okra and pumpkin (Jack-o-Lantern) planted at UF/IFAS Extension Jefferson County Office
Photo: De’Anthony Price
Fruiting
Like other cucurbits, pumpkins need bees for pollination to produce fruit. Bees are the primary pollinators for pumpkins, so make sure to plant flowers and other plants that attract bees to your garden. Each plant holds male and female flowers, and knowing the difference between them is essential. Male flowers have a long, thin stem and no fruit behind the flower. Female flowers have a swollen, bulbous base that will eventually become pumpkins. It’s essential to have a good balance of male and female flowers to ensure a proper fruit set. If large-size fruits are desired, keep only two fruits on the vine. Once two fruits are the size of baseballs, remove all others as they form.
Harvest and Storage
Pumpkins are ready to harvest when the skin is hard, and the stem is dry and brown. Cut the stem about 2 inches above the pumpkin. After harvesting, allow your pumpkins to cure in a cool, dry place for 10-14 days. Curing helps the skin to harden and protect the pumpkin from pests and diseases. Once your pumpkins are cured, store them in a cool, dry place with good air circulation. Avoid storing them on concrete or damp surfaces, which can cause them to rot. Pumpkins keep for a few weeks, but long-term storage of 1–4 months is challenging in Florida. Store them in a dry (70% RH) and cool (50–60°F) place where possible.
Written by: De’Anthony Price, Agriculture & Natural Resources Extension Agent, UF/IFAS Extension – Jefferson County
Florida is the perfect place to grow sweet potatoes (Ipomea batatas). Sweet potatoes are considered a long-season crop, and Florida’s long, hot summers allow them to grow and mature well here.
Sweet potatoes are native to America and known for their colorful and tasty tubers. Their flesh can be yellow, orange, or even purple. They are a great source of vitamins A and C. Sweet potatoes are an excellent warm-season crop for Florida. They require a long growing season but will reward you greatly for your patience. The leaves are edible as well. Not only are they nutritious, but the young leaves and shoots also provide a source of tender and mild-tasting leafy greens through the hot Florida summer. Sweet potatoes are a healthier alternative to white potatoes with a high glycemic index. The starch from a white potato is quickly metabolized, leading to a rapid increase in blood sugar. Sweet potato starches are metabolized at a slower rate.
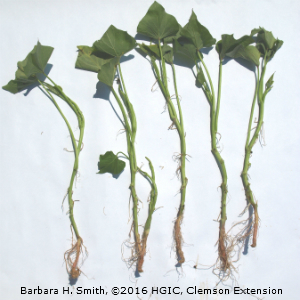
Sweet potatoes are ideal for filling the gap between summer and fall crops as they have a long growing season. Photo by Janis Piotrowski.
Planting and Care
Sweet potatoes can be planted in the spring through the end of June. Sweet potatoes grow in a well-drained loamy to sandy soil and do not require much fertilizing. If the soil contains clay, add some aged compost or other organic amendments to the planting bed to improve drainage. Sweet potatoes grown in unamended clay soils are usually small.
Sweet potatoes are generally planted from March through June in the Florida Panhandle. Sweet potatoes are typically started from transplants called “slips.” Sweet potato slips are six to eight-inch sweet potato vine cuttings with most of the leaves pulled off. You can purchase sweet potato slips from a local garden center or a seed catalog. Make sure you only buy certified, disease-free slips. One can also quickly start your sweet potato slips from a store-bought sweet potato. Sweet potato weevils can be a severe problem and starting with certified-free transplants can help you avoid issues.
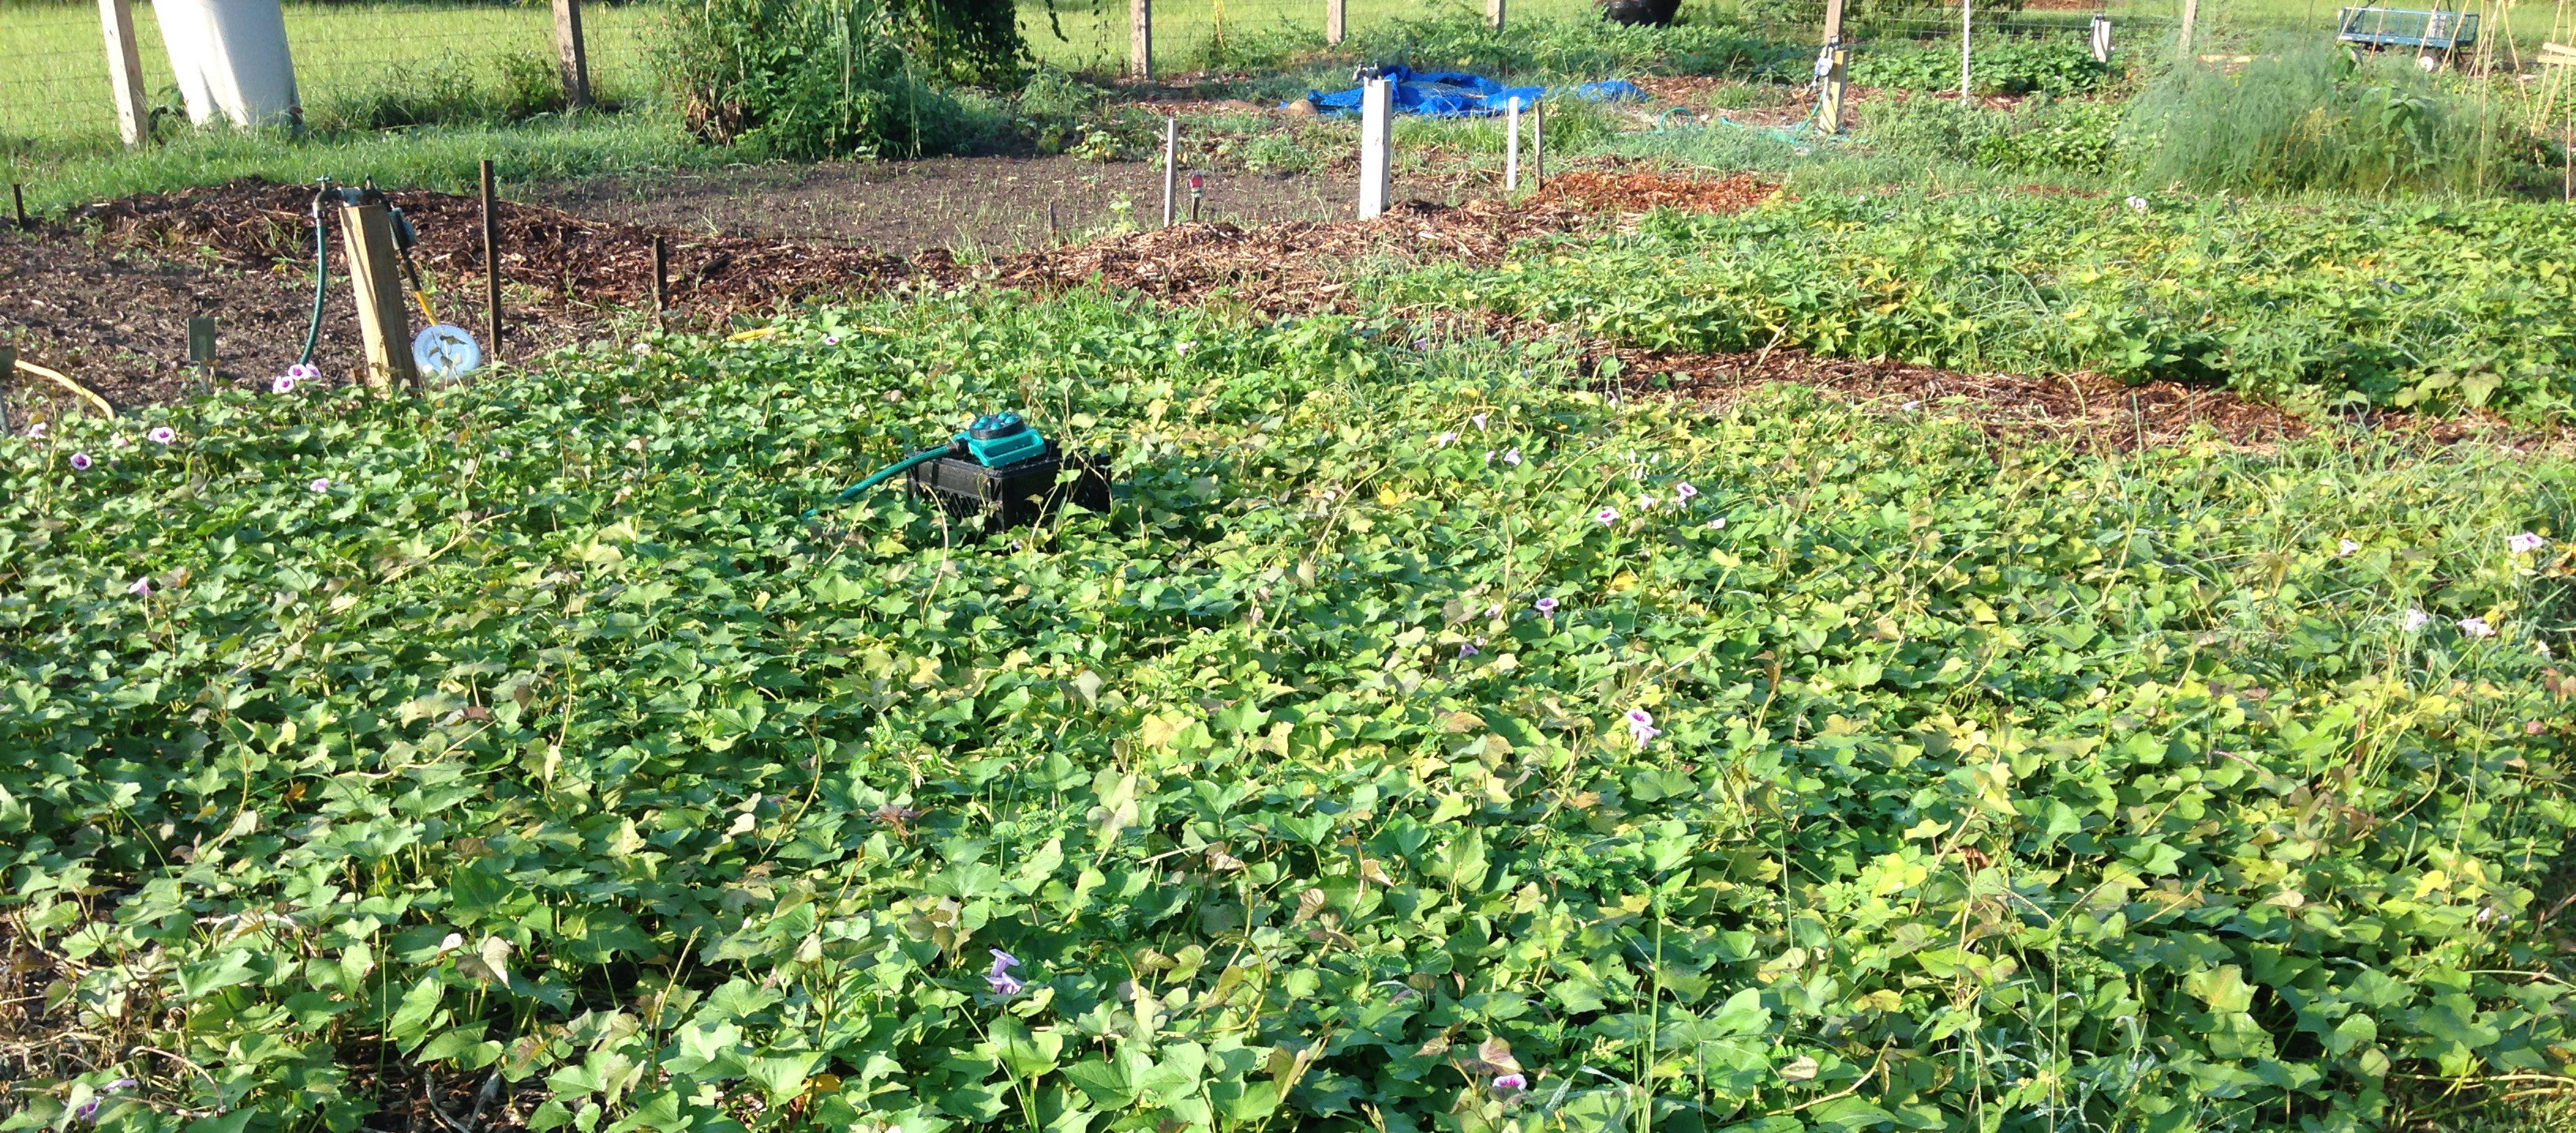
Plant sweet potatoes in rows spaced 48 to 54 inches apart, with 12 to 14 inches between each plant. Look for transplants that are about 6 to 9 inches long. Sweet potatoes will do best when they receive a consistent water supply; inconsistent watering can cause them to split while growing. Sweet potatoes can be kept throughout the season using vine cuttings to create new plants.
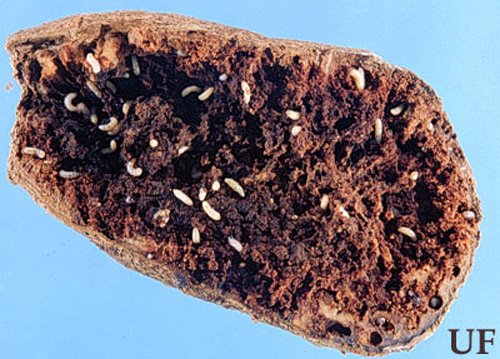
Wireworms and root-knot nematodes are the biggest problems for home gardeners. However, many insect and disease problems can be avoided by choosing disease-resistant varieties and using sound cultural gardening practices. Crop rotation with a vegetable in another family can help prevent nematode and soil disease. Rotating where you plant can help prevent problems with a major pest, the sweet-potato weevil (Cylas formicarius).
Damage to sweet potato tuber caused by larval feeding of the sweetpotato weevil, Cylas formicarius. Photo Credit: James Castner, University of Florida.
For the tastiest sweet potatoes, always dig up the previous crop and start a new planting. While sweet potatoes can be grown year-round in tropical regions, plants left to grow for too long can encourage pest populations. The sweet potatoes eventually become too large and tough for most people’s tastes.
Florida-friendly varieties
‘Centennial’ and ‘Beauregard’ are two varieties that grow well in Florida gardens. Beauregard is found quite often in garden centers. It shows some disease resistance and produces a high yield. It has light rose skin and a deep orange flesh that matures in 105 days. Centennial sweet potatoes tolerate clay soil, are disease resistant, and mature in 90 days.
Harvest and Storage
Sweet potatoes should be ready to harvest 90–120 days after planting. The tops will die back as it gets close to harvest time. Sweet potatoes should be harvested before the first frost. Cool soil reduces their quality and storage life. Sweet potato skin is fragile, so freshly dug roots need to be handled gently.
The ideal conditions for curing sweet potatoes are roughly 85°F with 90 percent humidity. To help increase their sweetness, place harvested sweet potatoes in a dark, warm room for at least two weeks before eating. Once your sweet potatoes are done curing, store them in a cool, dry pantry—not the refrigerator! Storing your sweet potatoes at temperatures below 50°F can cause them to have an off flavor or rot. Patience will pay off with delicious and healthy sweet potatoes that can be added to the dinner plate as a vegetable side or in a sweet pie served for dessert. While “yam” is sometimes used to describe the sweet potato, a true yam comes from a different plant.