by Daniel J. Leonard | Jun 5, 2025
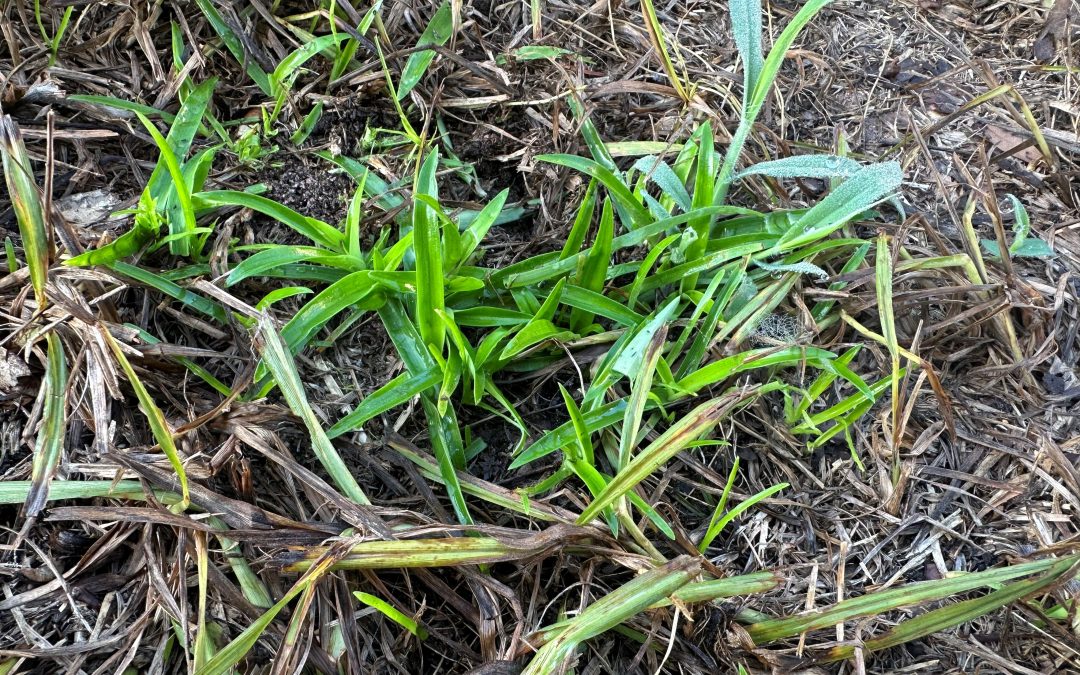
The Panhandle’s dreaded summer heat has finally arrived in force and has brought with it one of the most difficult to control lawn/landscape weeds, our annual enemy Doveweed (Murdannia nudiflora). Doveweed is characterized as one of the world’s worst weeds due to its broad range of growing conditions, ability to root along its stems, forming mats as it grows, massive seed production (each plant can produce up to 2,000 seeds per year), and inconspicuous nature – it looks like a grass to the untrained eye. So, what can gardeners do to control Doveweed that’s already up this year and prevent it next summer? Let’s find out.
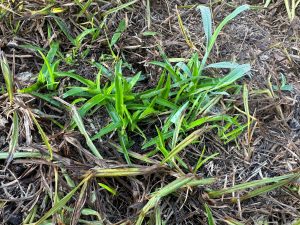
Doveweed emerging in a bare patch of a Centipedegrass lawn in late May 2025. Photo courtesy of Daniel Leonard.
First, the best prevention for all weeds, Doveweed included, is a healthy lawn/landscape. Ensuring healthy, thick Centipedegrass turf and landscaped beds that don’t allow light to hit bare soil goes a long way towards reducing the overall weed load lawns and landscapes can experience. For lawns, this can be achieved through mowing regularly at the proper height for your turfgrass (2.5” or so for Centipedegrass), irrigating no more than 0.75”-1” per week in the absence of rain, limiting stress from overfertilization, and removing excess thatch. In landscapes, preventative weed control focuses on limiting overwatering/fertilization and maintaining a 2-3” organic mulch layer of pinestraw, pine bark, leaves, wood chips, etc. Adopting these practices can greatly reduce the occurrence of weeds in your yard, however they will not eliminate weeds altogether and supplemental chemical weed control is often necessary.
Unlike Crabgrass, Florida Pusley, and other commonly encountered Panhandle annual weeds that emerge when the soil begins to warm in early spring (usually late February-March), Doveweed waits until mid-April-May (soil temperatures of 70-80 degrees F). All these annual weeds are best controlled by preemergent herbicides, like Indaziflam (Specticle G), before seeds germinate. For Doveweed, that means the first preemergent application should occur mid-April with a follow-up application 6-8 weeks later. However, for this year that opportunity is behind us and our only option is post emergent herbicides.
Which postemergent herbicide you choose depends on if your Doveweed issue is in turfgrass or in landscaped beds. In landscaped beds, the primary control option is either hand pulling or spot treating Doveweed with a 41% glyphosate product (Roundup and other generic products) at a rate of 3% (3-4oz glyphosate/gal). As glyphosate is a non-selective herbicide, be sure to not get any overspray on any ornamental plant foliage. In turfgrass, Doveweed control becomes a little more difficult. You essentially have three options – atrazine, a generic 3-way broadleaf product, or a commercial grade broadleaf product. Though it provides very good control of Doveweed and has pre-emergent properties to help discourage future weeds, I don’t prefer atrazine because it has a high potential to leach into groundwater following heavy rains in sandy soils, which describes much of the Panhandle. The generic 3-way products (usually a mix of Dicamba, Mecoprop, and 2,4-D) are fairly effective on Doveweed, however follow-up applications are usually required and the 2-4D component can be harsh on Centipedegrass at the higher label rates required for Doveweed control. Though somewhat expensive, the best post emergent option for most people is probably a commercial grade product like Celsius WG. Celsius WG is a very strong post emergent broadleaf herbicide that is very effective on Doveweed and is also very safe on Centipedegrass, even in hot weather. If the cost of the product (>$100) is off-putting, it is helpful to remember that even at the highest labelled rate, a 10 oz Celsius WG bottle goes a long way, enough to cover several acres of lawn.
* Regardless of what method you choose, be sure to get after emerged Doveweed seedlings early, before they mature and begin flowering – even the strongest post emergent herbicides work better on young weeds.
While Doveweed is a nasty little plant that is perfectly capable of taking over a lawn or landscaped bed, there are a variety of preventative and control options available. Using a combination of the above techniques should help achieve lasting Doveweed controls in future seasons! For more information about Doveweed and other summer annual weed control in lawns and landscapes, contact your local UF/IFAS Extension County office.
by Daniel J. Leonard | Apr 21, 2025
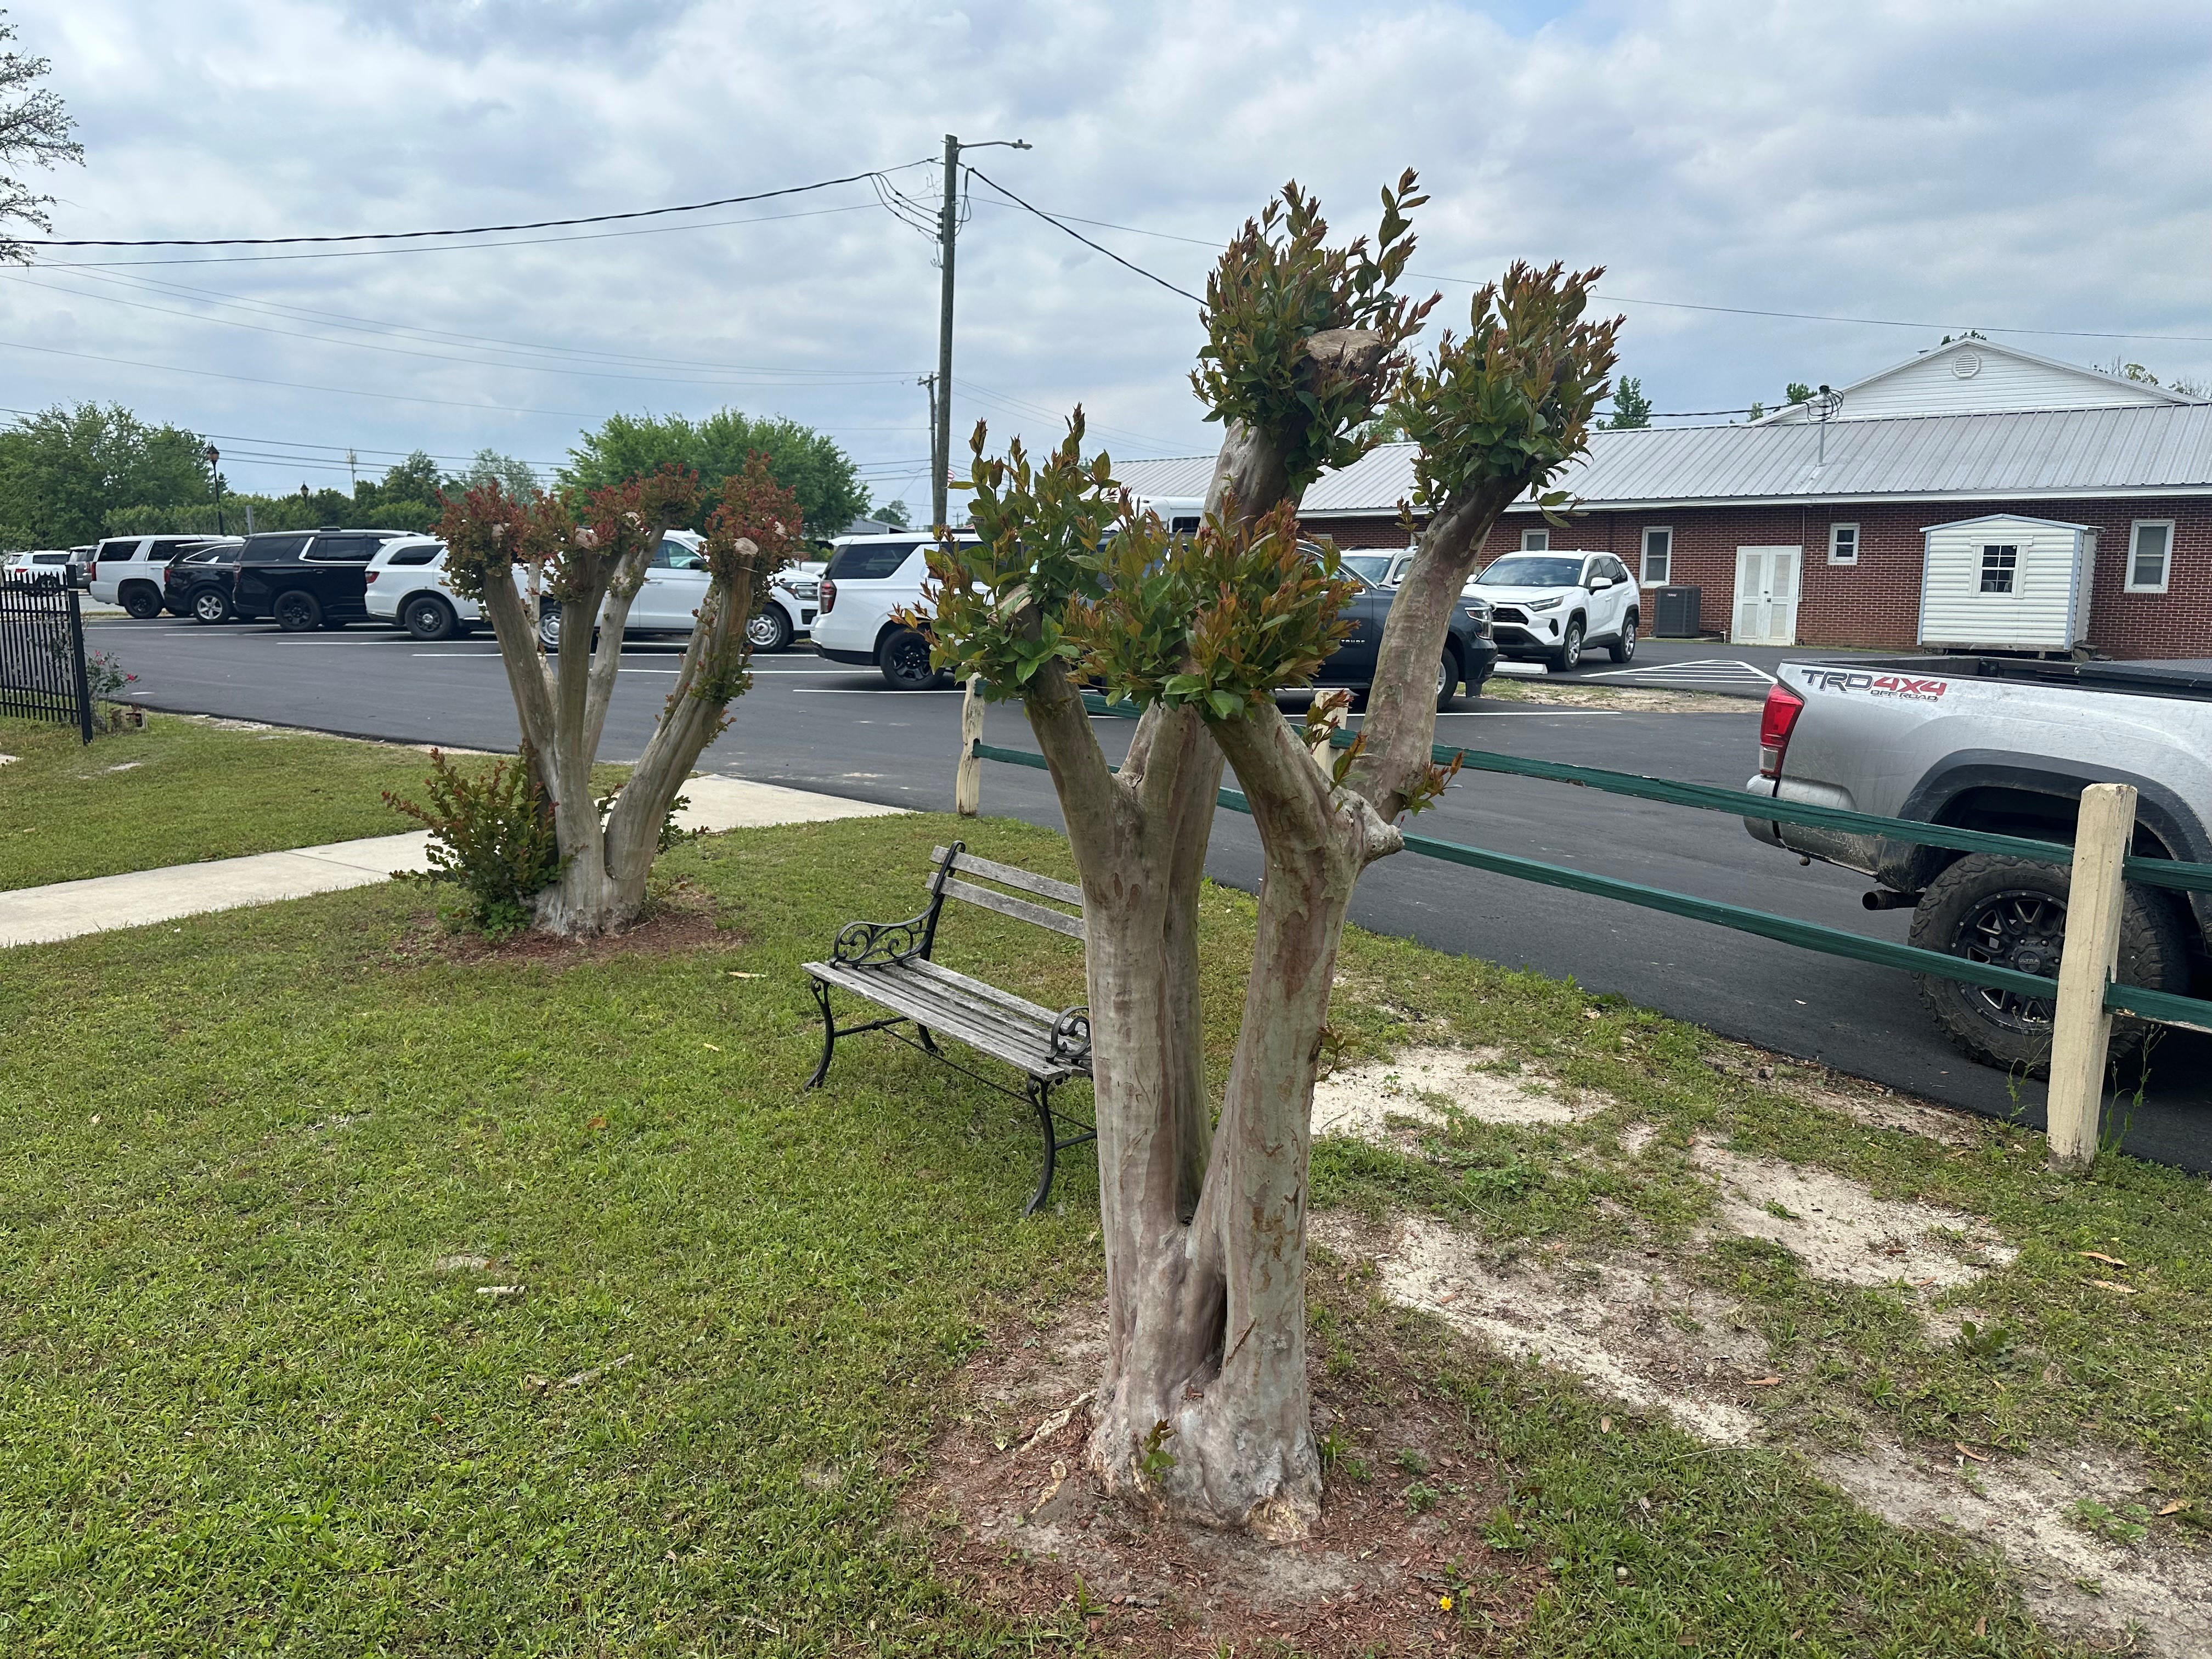
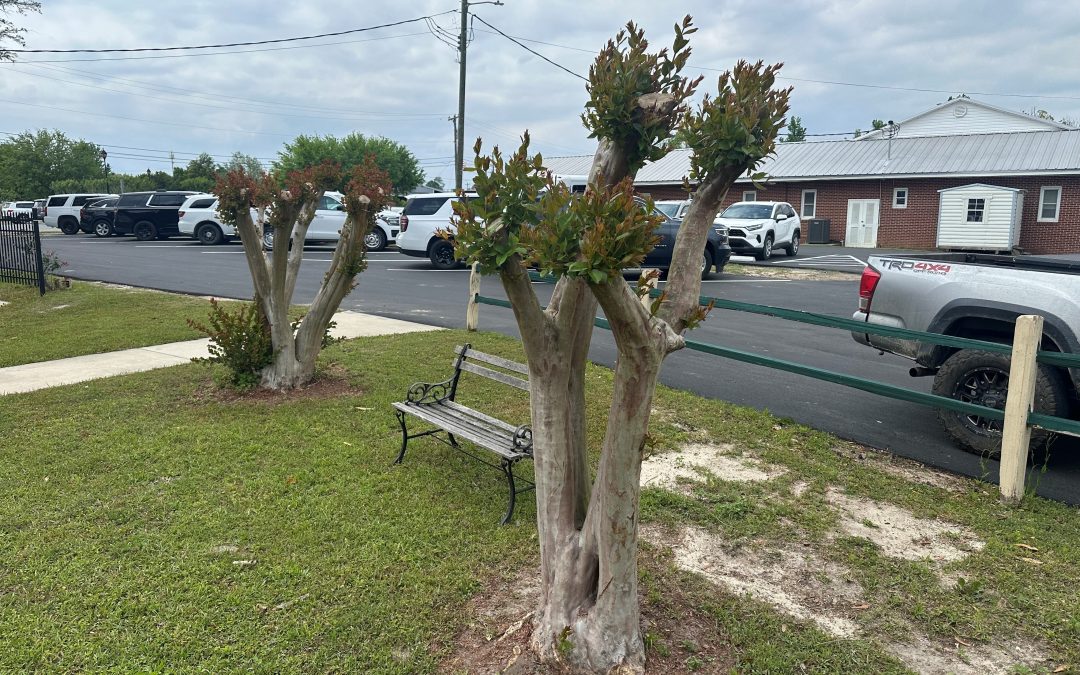
Crape Myrtle is likely the most popular landscape tree in the South, for good reason. This species, comprised of varieties in all sorts of shapes, sizes, and colors, is tough as nails, thriving from the most manicured landscape to neglected parking lot islands. Though they’re easy to grow, beautiful, resilient little trees, they aren’t invincible and only as pretty as gardeners allow them to be. In fact, one of the best ways to ensure a poorly formed, bizarre-looking, disease-prone, short-lived crape myrtle is to commit Crape Murder.
Crape Murder is the twisted art of “pruning” specimens back into horrid shapes. Once shapely trees with well-developed crowns and attractive branching structure are reduced to a ghastly, sawed-off, fence post-like appearance. The large, generally jagged wounds that result from crape murder are slow to heal, if they ever do, and are a prime spot for insect and disease entry. Making matters worse, crape murder is rarely a one-time offense, rather practiced for years on end, never giving the tree a chance to heal, and leading to an early demise.

Previously beautiful ‘Muskogee’ Crape Myrtle murdered in spring 2025. Photo courtesy Daniel Leonard.
So, if the process is so obviously harmful to trees and an affront to evidence-based landscaping, why is it still so widely practiced? There are two primary reasons. First, large crape myrtle varieties like ‘Natchez’, ‘Muskogee’, and others are planted in areas without considering their mature size. These large growing cultivars can reach 30-40’ in height over time and outgrow many landscapes. To prevent this from happening, simply pay attention to the plant tag and consider the mature height of the cultivar. There are many great Crape Myrtle options, like ‘Acoma’, ‘Catawba’, the entire ‘Magic’ Series, and others, that top out at 15-20’ or shorter and many newer dwarf varieties that are smaller still. Second is the common belief that crape murder promotes a heavier bloom. This rationale at least contains some truth. Heavy pruning does tend to stimulate vegetative growth and subsequent flowering in plants – crape myrtle is no exception. However, though you may get larger blooms, they will be fewer than a properly grown crape would have, and the larger blooms often cause the whippy shoots they rest upon to sag and break, especially in wet and windy weather – the juice isn’t worth the squeeze.
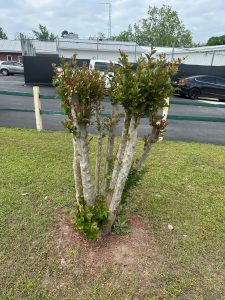
Crape murder ruins the aesthetics of Crape Myrtle trees, creates a weak branching structure, and shortens the trees’ lifespans. Photo courtesy Daniel Leonard.
So, if you or someone you know have fallen victim to the above reasoning and dabbled in dendrological decapitation with your own crapes, it may comfort you to know that the damage can be undone over time. The simplest method of fixing crape murder damage is to simply stop doing it and let the tree grow as is. The tree will slowly heal itself but will always be misshapen, with a large, low trunk or two below the scene of the crime and dozens of limbs emerging from the same spot above. It isn’t ideal but I have seen some crapes rehabbed in this manner and they enjoyed a nice, long life. The better method is to wait until the next winter dormant season, break out a chainsaw (the suspected murder weapon), and cut the entire tree back to the ground. The following summer, allow the crape to flush out from the stump (there will be dozens of new shoots) and grow as much as possible. Then, the following winter when the recovering tree sheds its leaves, select 3-5 evenly spaced canes to leave and remove all the rest at the stump. Those 3-5 canes will form the primary branching structure of the rejuvenated tree. From there, you’ll only have to prune lightly each year to remove dead or crossing branching. Then, put up the chainsaw, enjoy your status as an enlightened gardener, and resolve to never prune your crape myrtles ever again.
For more information on Crape Myrtles or any other horticultural topic, contact your local UF/IFAS Extension office. Happy gardening!
by Daniel J. Leonard | Mar 6, 2025
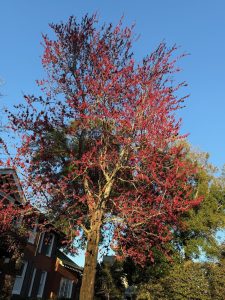
Red Maple in flower. Photo courtesy of Carrie Stevenson.
A month ago, when the Panhandle was covered in snow, it would have been hard to imagine that spring was just around the corner. But warm spring weather has arrived, and with it, the first of our native trees to bloom each year – the venerable Red Maple (Acer rubrum). Reliably heralding spring in Northwest Florida each February, Red Maples adorn our roadsides and low-lying natural areas with brilliant red blooms. Spotting a Red Maple blooming amongst the otherwise drab landscape means winter is on its way out and spring has sprung – or will shortly.
Beyond the blooms, Red Maple has much to offer as a landscape tree. For one, it is unbelievably adaptable. Across its native range – one of the most expansive of any species in the US, occurring naturally from Maine all the way down to the Everglades,* the tree can handle soils that range from periodically inundated along streams and other wet areas to more well-drained upland sites. Adding to its adaptability, in the Panhandle, Red Maple typically tops out around 40’ in height and around 20’ wide with a spreading vase shape, rarely growing out of scale with most landscapes.
*Since Red Maple occurs over a huge area of the US, it’s important to purchase seedlings or named varieties that hail from areas with like climate conditions to the Panhandle. Avoid varieties from northern states for best performance.
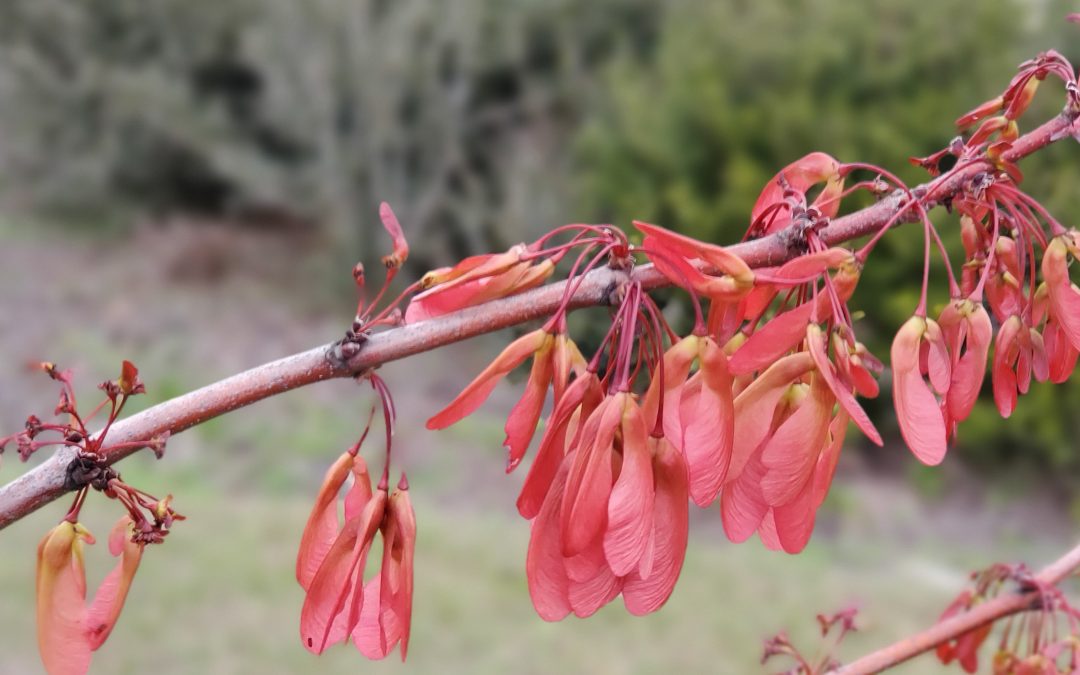
Red Maple is one of the few shade trees that has true four-season interest in our area. We’ve already talked about its spring flowers, but it also has attractive deep green foliage in the summer (some selections, like ‘Summer Red’ are even known for reddish purple new growth), famous fall color (though it is more muted in Florida than locales farther north), and unique ridged light gray bark in the winter. The seeds of Red Maple are even pretty. These two-winged seed structures, called a samara, follow the spring flower show, appear pinkish red, and are a favorite of squirrels and other critters.
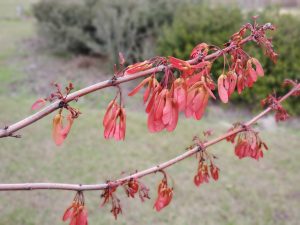
Red Maple samaras. Photo courtesy of Daniel Leonard.
Red Maple is a quick growing, low maintenance tree as well. If planted correctly and properly cared for, the species can grow several feet per year in its youth. Site the tree in a moist site that receives full sun, plant slightly higher than the soil level of the container the tree was purchased in to compensate for soil settling post-planting, and water regularly until established. After establishment, periodic fertilizing with a balanced fertilizer will help ensure Red Maple’s nutritional needs are met and maximum growth achieved.
If you’ve been looking for a medium-sized, native, flowering shade tree with four-season interest, Red Maple may be just the tree for your landscape. Plant one today! For more information on Red Maple, other recommended landscape plants, or any other horticultural topic, contact your local UF/IFAS Extension office.
by Daniel J. Leonard | Jan 9, 2025
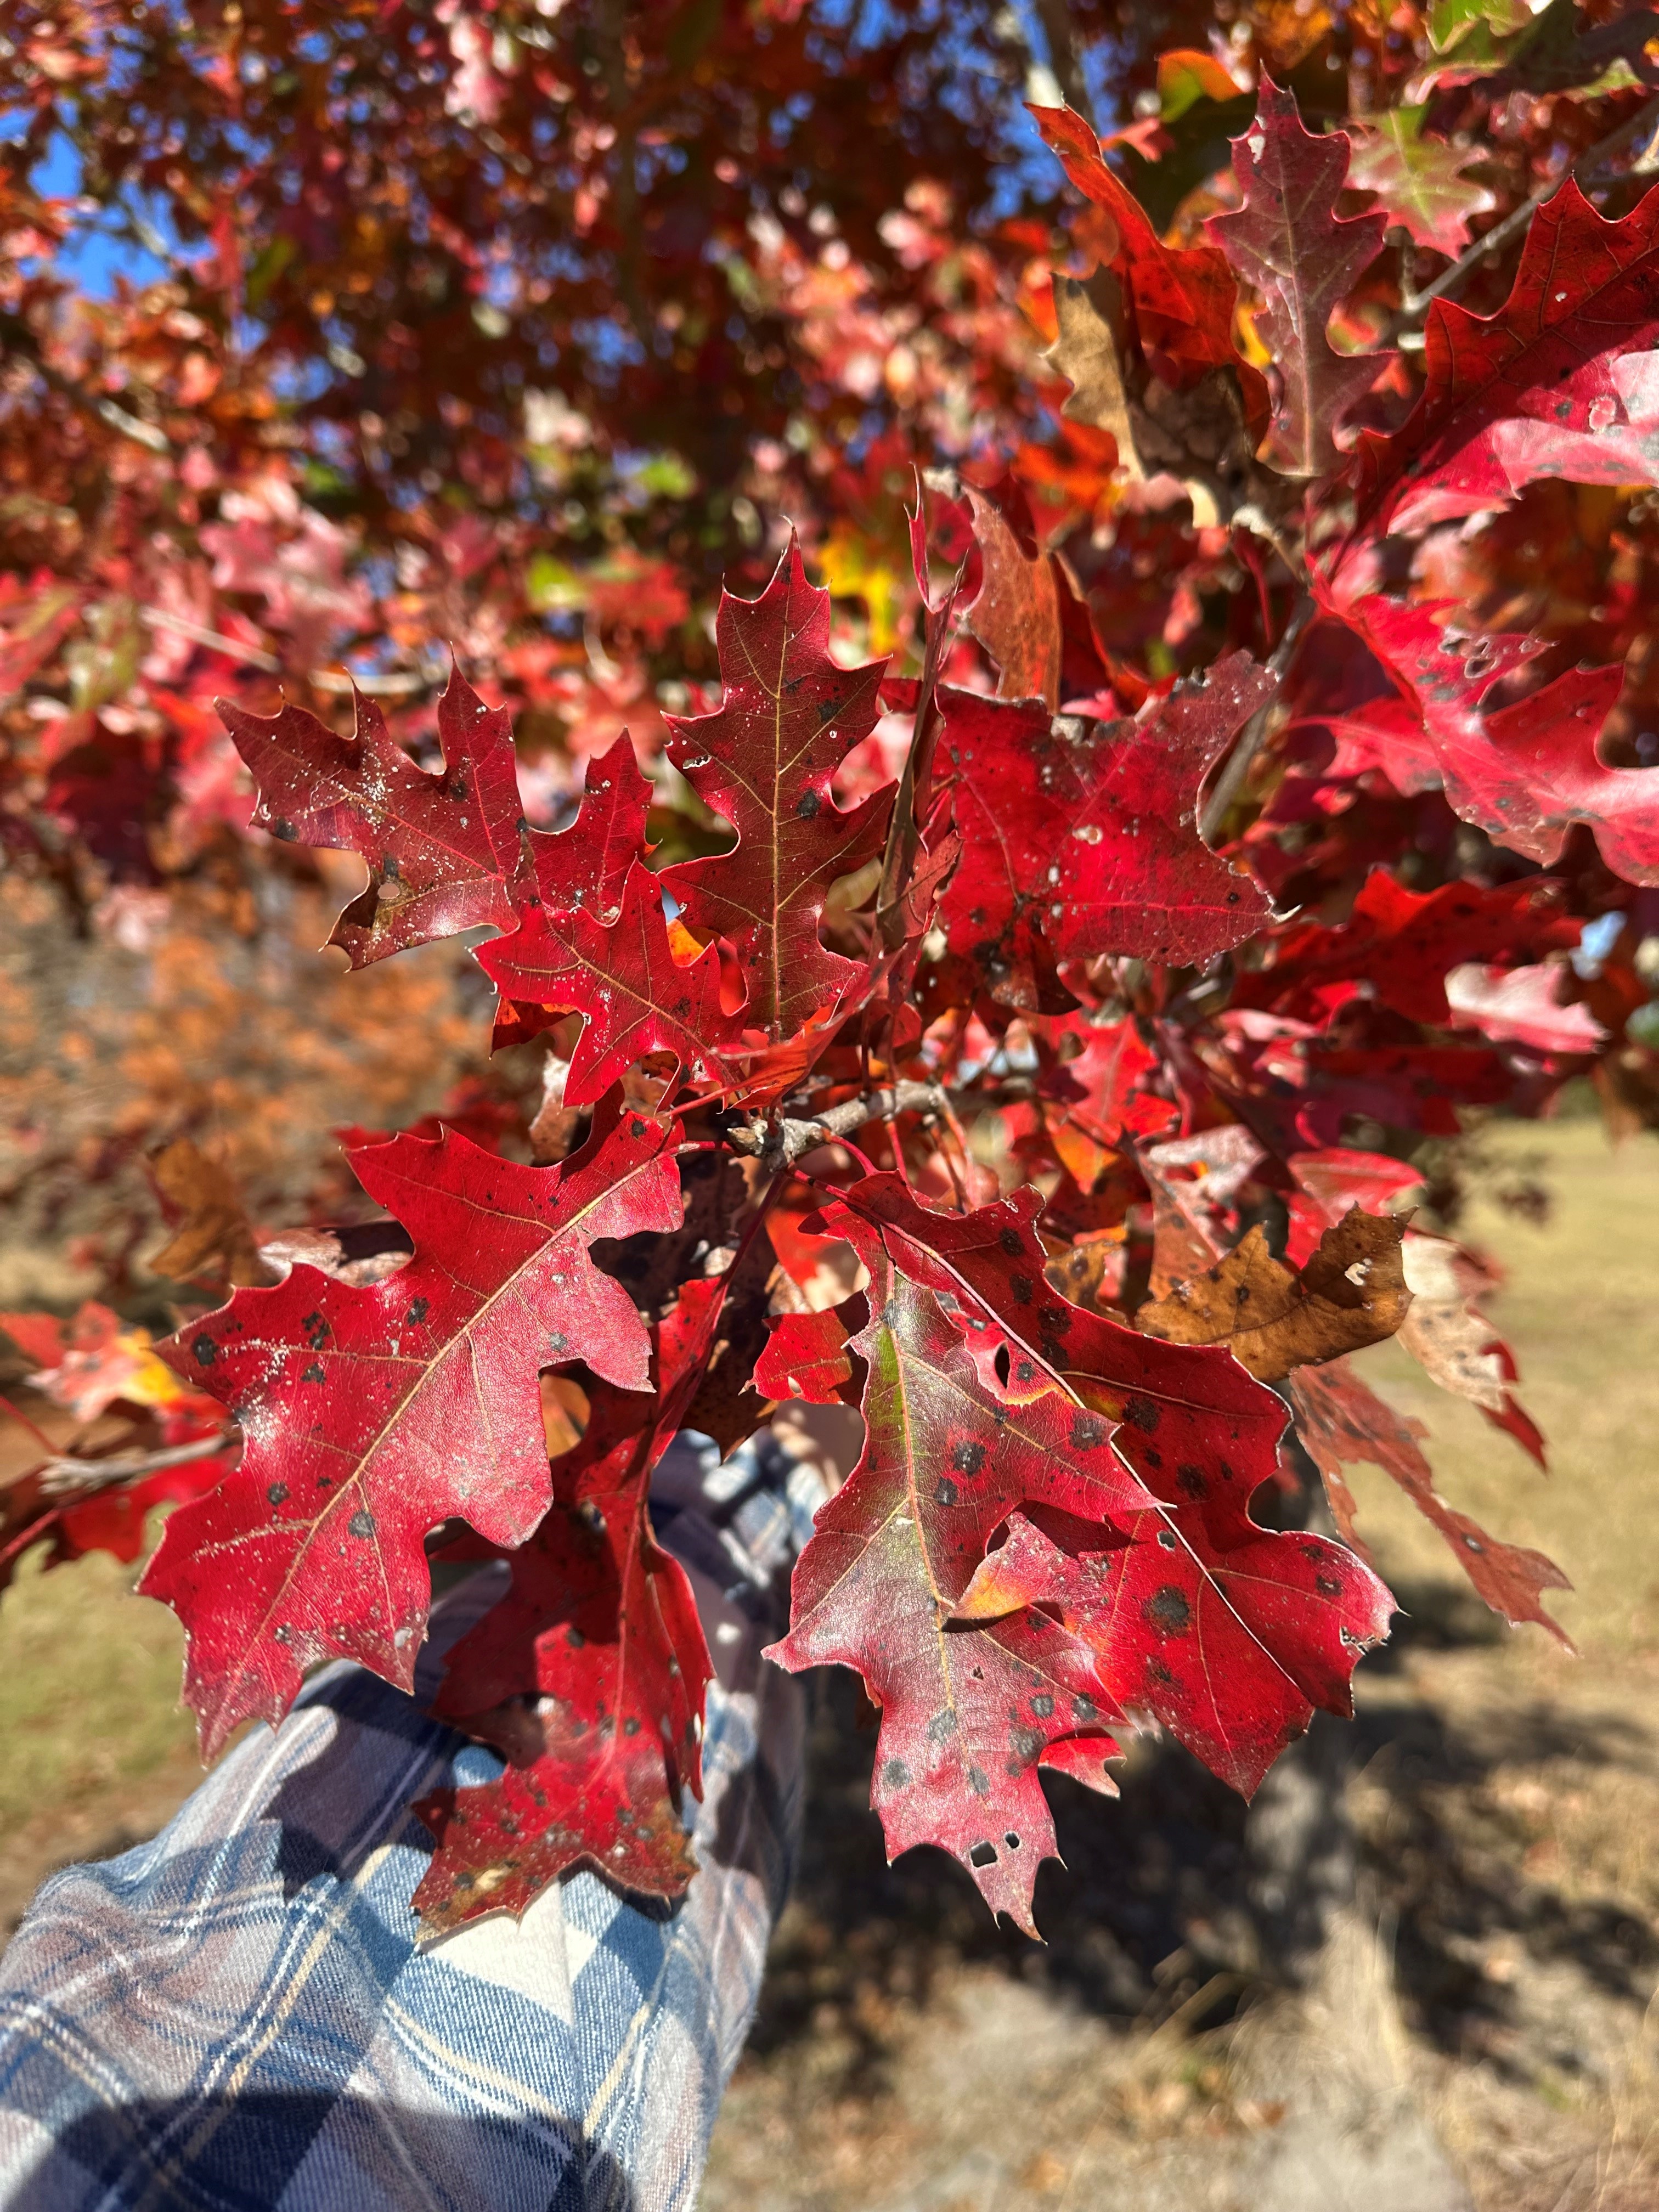
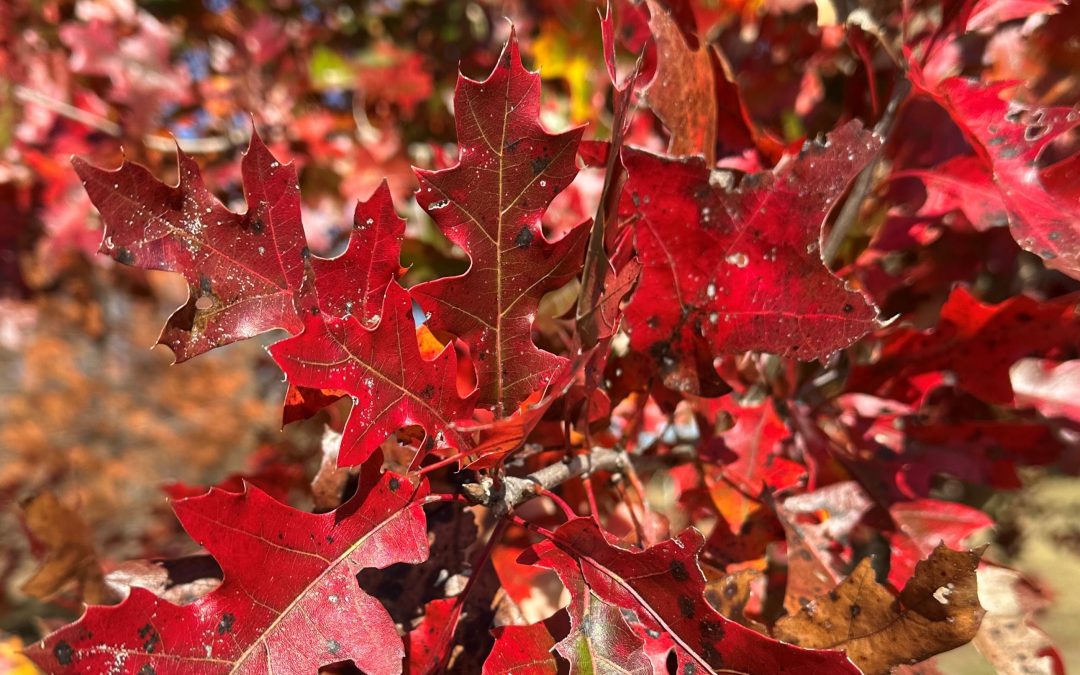
The Panhandle isn’t known for its fall foliage. The best we can normally hope for are splashes of pale yellow amidst a sea of green pine needles, drab brown leaves killed by the first frost, and invasive Chinese Tallow trees taunting us with vibrant colors we know we shouldn’t have. However, in 2024, you’d be forgiven if you forgot you were in Florida and had instead been transported to a more northern clime where leaves everywhere turned brilliant shades of yellow, orange, purple, and red. I’ve heard comments from many folks, and I agree, that this is the best fall color we’ve seen here in a long time – maybe ever. So, why were the leaves so pretty this past year? Let’s dive in.

Shumard Oak displaying brilliant red fall foliage. Photo courtesy of Daniel Leonard.
What causes leaves to change colors in the fall?
First, what makes leaves of deciduous trees/shrubs (plants that shed their leaves in the winter) change color in the first place? The primary driver of leaf color change is daylength. During the summer, leaves appear green due to the presence of chlorophyll, which reflects green light, absorbs red and blue light, and is responsible for photosynthesis. When days shorten in the fall, plants sense that winter is coming and produce hormones that signal leaves to shut down chlorophyll production. They then initiate construction of a “wall” of cells that seals leaves off from the rest of the plant. When this happens, existing chlorophyll is “used up”, sugars build up in the now sealed off leaves, and other compounds that give leaves color, anthocyanins and carotenoids, take center stage. These compounds allow leaves to exhibit the familiar autumnal hues of yellow, red, orange, purple, and brown. However, plants go through this physiological process of shutting down growth and shedding leaves every year and excellent fall color. What we experienced this year, doesn’t always result. There has to be more to the fall 2024 story.
Why were leaves so pretty this year?
A second factor is required for a great fall foliage show – weather. According to the U.S. Forest Service, ideal temperature and moisture conditions must be met for leaf color to be its most intense. Ideal autumn conditions include warm (but not hot) sunny days with cool (but not freezing) nights and adequate (but not excessive) moisture. Too hot and plants become stressed, lessening fall color potential. Too cold, and frost can kill foliage – turning it immediately brown and preventing color development. Too rainy or windy, and leaves can be blown off prematurely. 2024 brought neither extremely hot, extremely cold, or extremely wet conditions, and we were blessed to experience a Goldilocks fall color season.

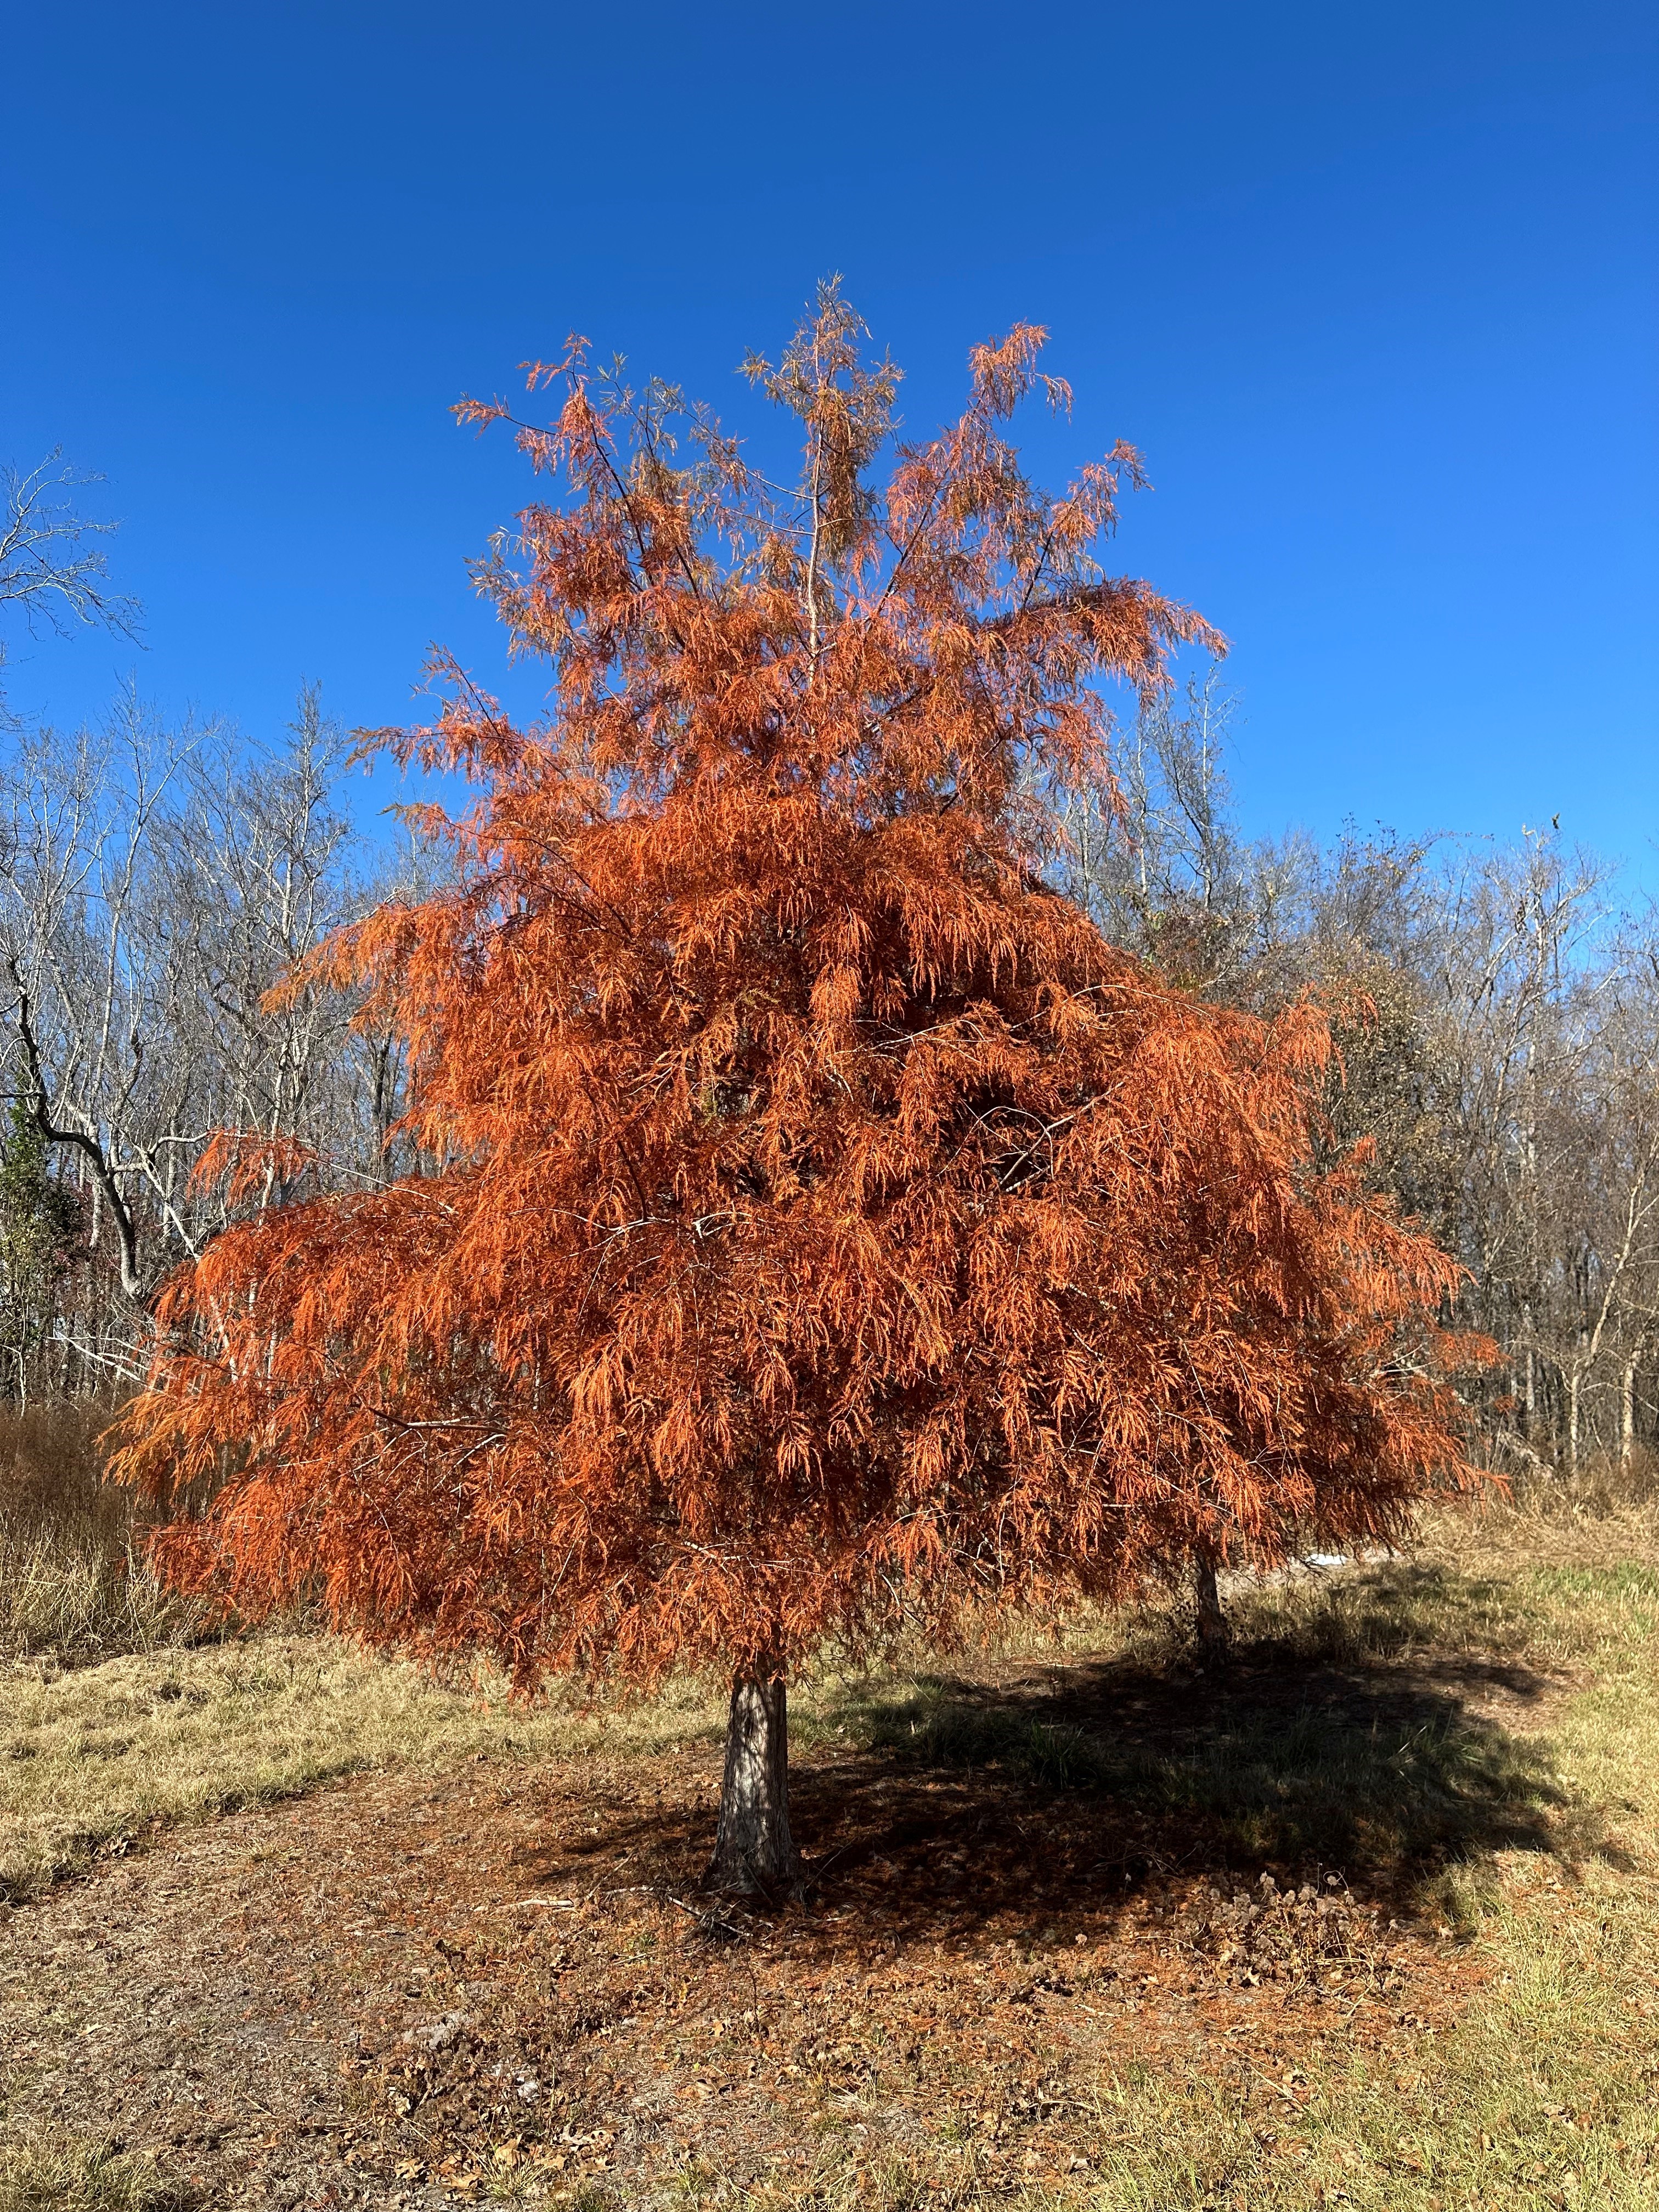
Bald Cypress with trademark burnt orange color. Photo courtesy of Daniel Leonard.
Did Some Trees Have Better Color than Others?
While pretty much all deciduous trees exhibited their peak color potential this year, there were definitely standouts! Fortunately, many of the prettiest trees this fall also make outstanding landscape trees. Be on the lookout for the following trees in nurseries this winter and consider adding a few to your yard to take advantage of the next Goldilocks fall color year:
- Red Maple (Acer rubrum) – brilliant red fall leaves.
- Florida Maple (Acer floridanum) – yellow/orange.
- Deciduous Oaks (Quercus spp) – generally red to purple. Some species like Sawtooth Oak ( acutissima) are yellow.
- Green Ash (Fraxinus pennsylvanica) – yellow.
- Swamp Tupelo (Nyssa sylvatica) – crimson to purple.
- Sweetgum (Liquidambar styraciflua) – highly variable but generally reds, oranges, and purples.
- Bald Cypress (Taxodium distichum) – burnt orange.
For more information about fall color, which trees and shrubs produce great fall color and perform well in landscapes, or any other horticultural topic, contact your local UF/IFAS County Extension office. Happy Gardening!
by Daniel J. Leonard | Nov 13, 2024
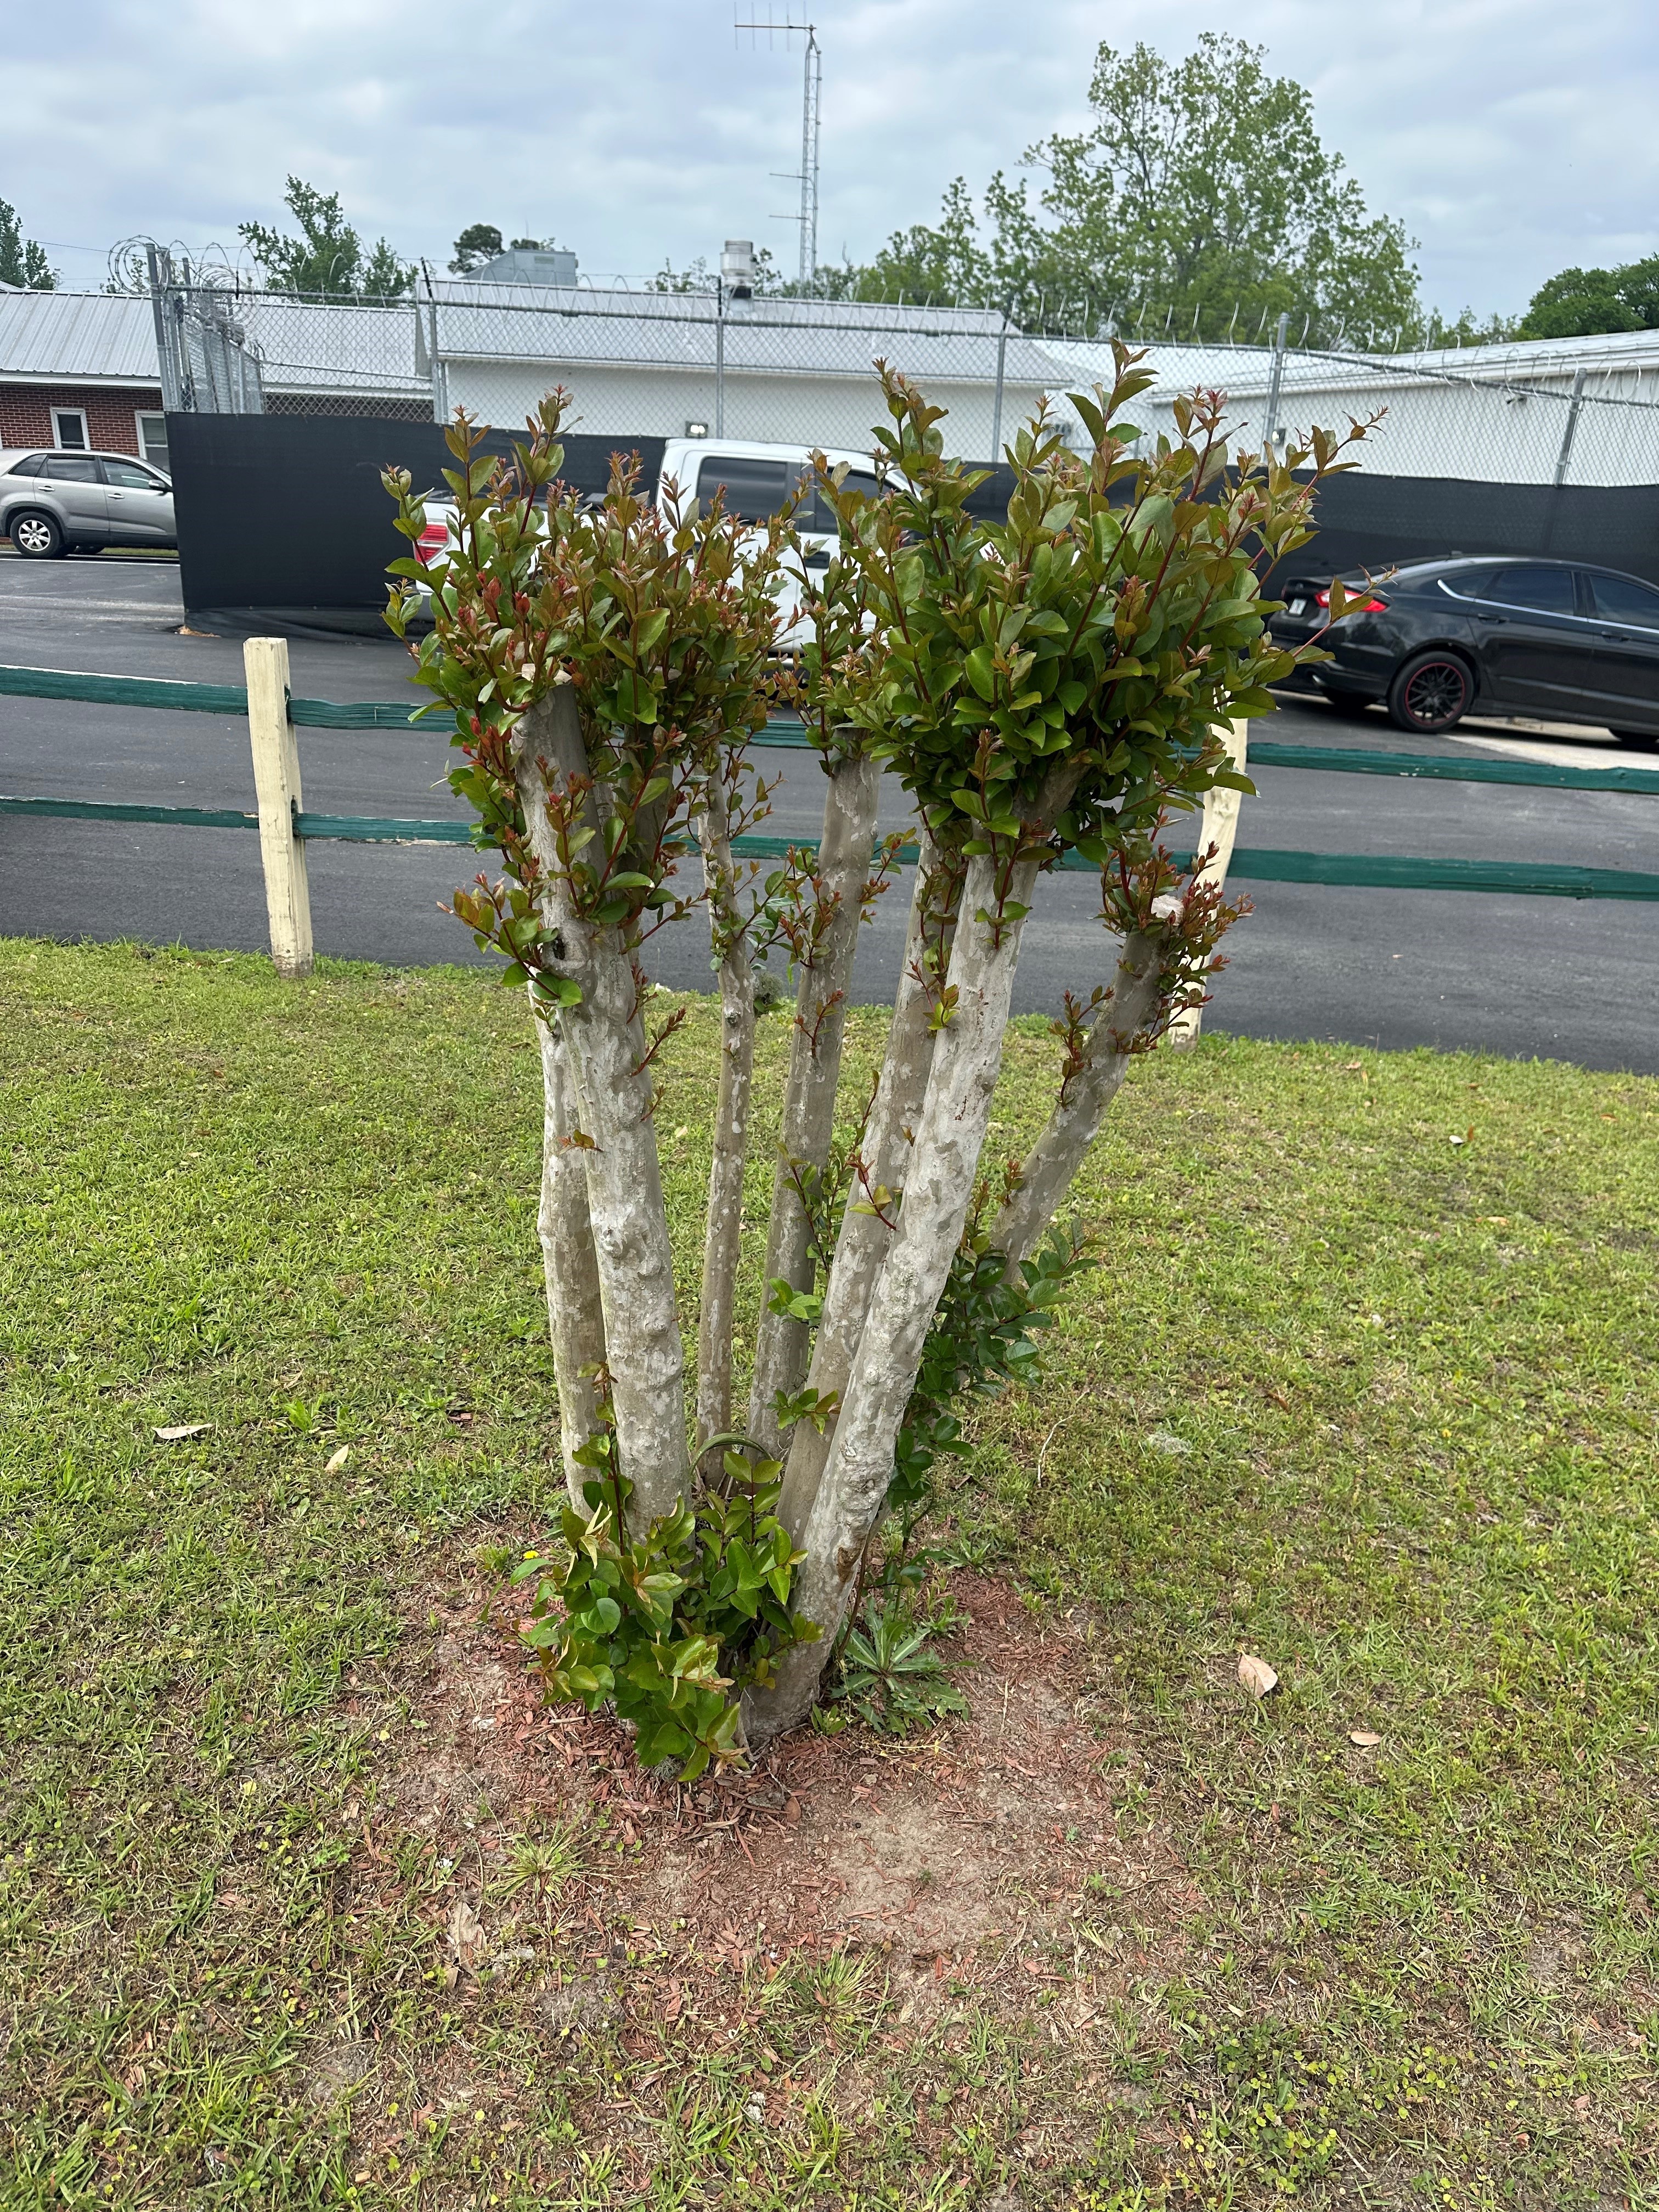
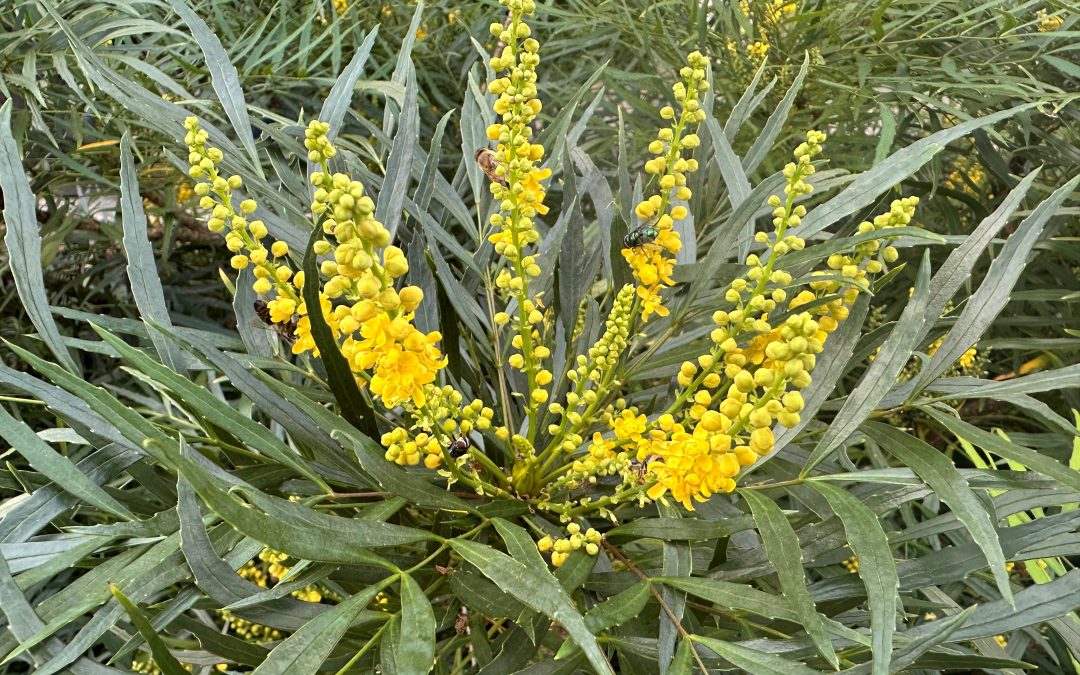
One of my favorite landscape plants is blooming right now in Panhandle landscapes – ‘Soft Caress’ Mahonia. ‘Soft Caress’ was first introduced into the commercial nursery trade in 2006 and included in the Southern Living Plant Collection, but didn’t achieve garden fame until 2013 when it won first place in the Royal Horticultural Society’s (RHS) prestigious Chelsea Flower Show. I first planted a group of ‘Soft Caress’ about ten years ago and as those plants have matured, so too has my appreciation for them. The following are a couple of my favorite outstanding aspects of these small shrubs.
Fall Flowers. Other than camellias, there isn’t a lot else in Panhandle landscapes blooming from mid-November to January and ‘Soft Caress’ Mahonia helps fill that flower void. Brilliant yellow flower spikes rise above the deep-green fernlike foliage and very welcome in this otherwise drab and dreary gardening season.

‘Soft Caress’ Mahonia’s winter flowers are excellent pollinator attractors. Photo courtesy Daniel Leonard.
Quick growing but small statured. If you’ve gardened very long, you’ll know this is a tough ask! Plants that reach mature size relatively rapidly but also don’t get very big are a rare breed. ‘Soft Caress’ Mahonia grows quickly but also maxes out in size rather quickly – mine are very easily maintained at 3-4’ in height with a single annual trim.

~10-year old ‘Soft Caress’ Mahonia Shrub. Photo courtesy Daniel Leonard.
Extremely tough and adaptable. My Mahonia plants have persisted through drought, hurricanes, floods, and freezes and have never looked better. These little plants are simply tough. They’ve had no disease issues and no pest problems (except for a little deer browsing one year, but that appears to be an isolated incident). While they prefer shade, they can also handle several hours of morning sun without incident.
‘Soft Caress’ Mahonia is a standout plant that fills a mostly flowerless period in landscapes, fills its designated landscape spot quickly but won’t outgrow it, and is truly tough. Add a couple to your landscape this winter!