by Daniel J. Leonard | Sep 30, 2021

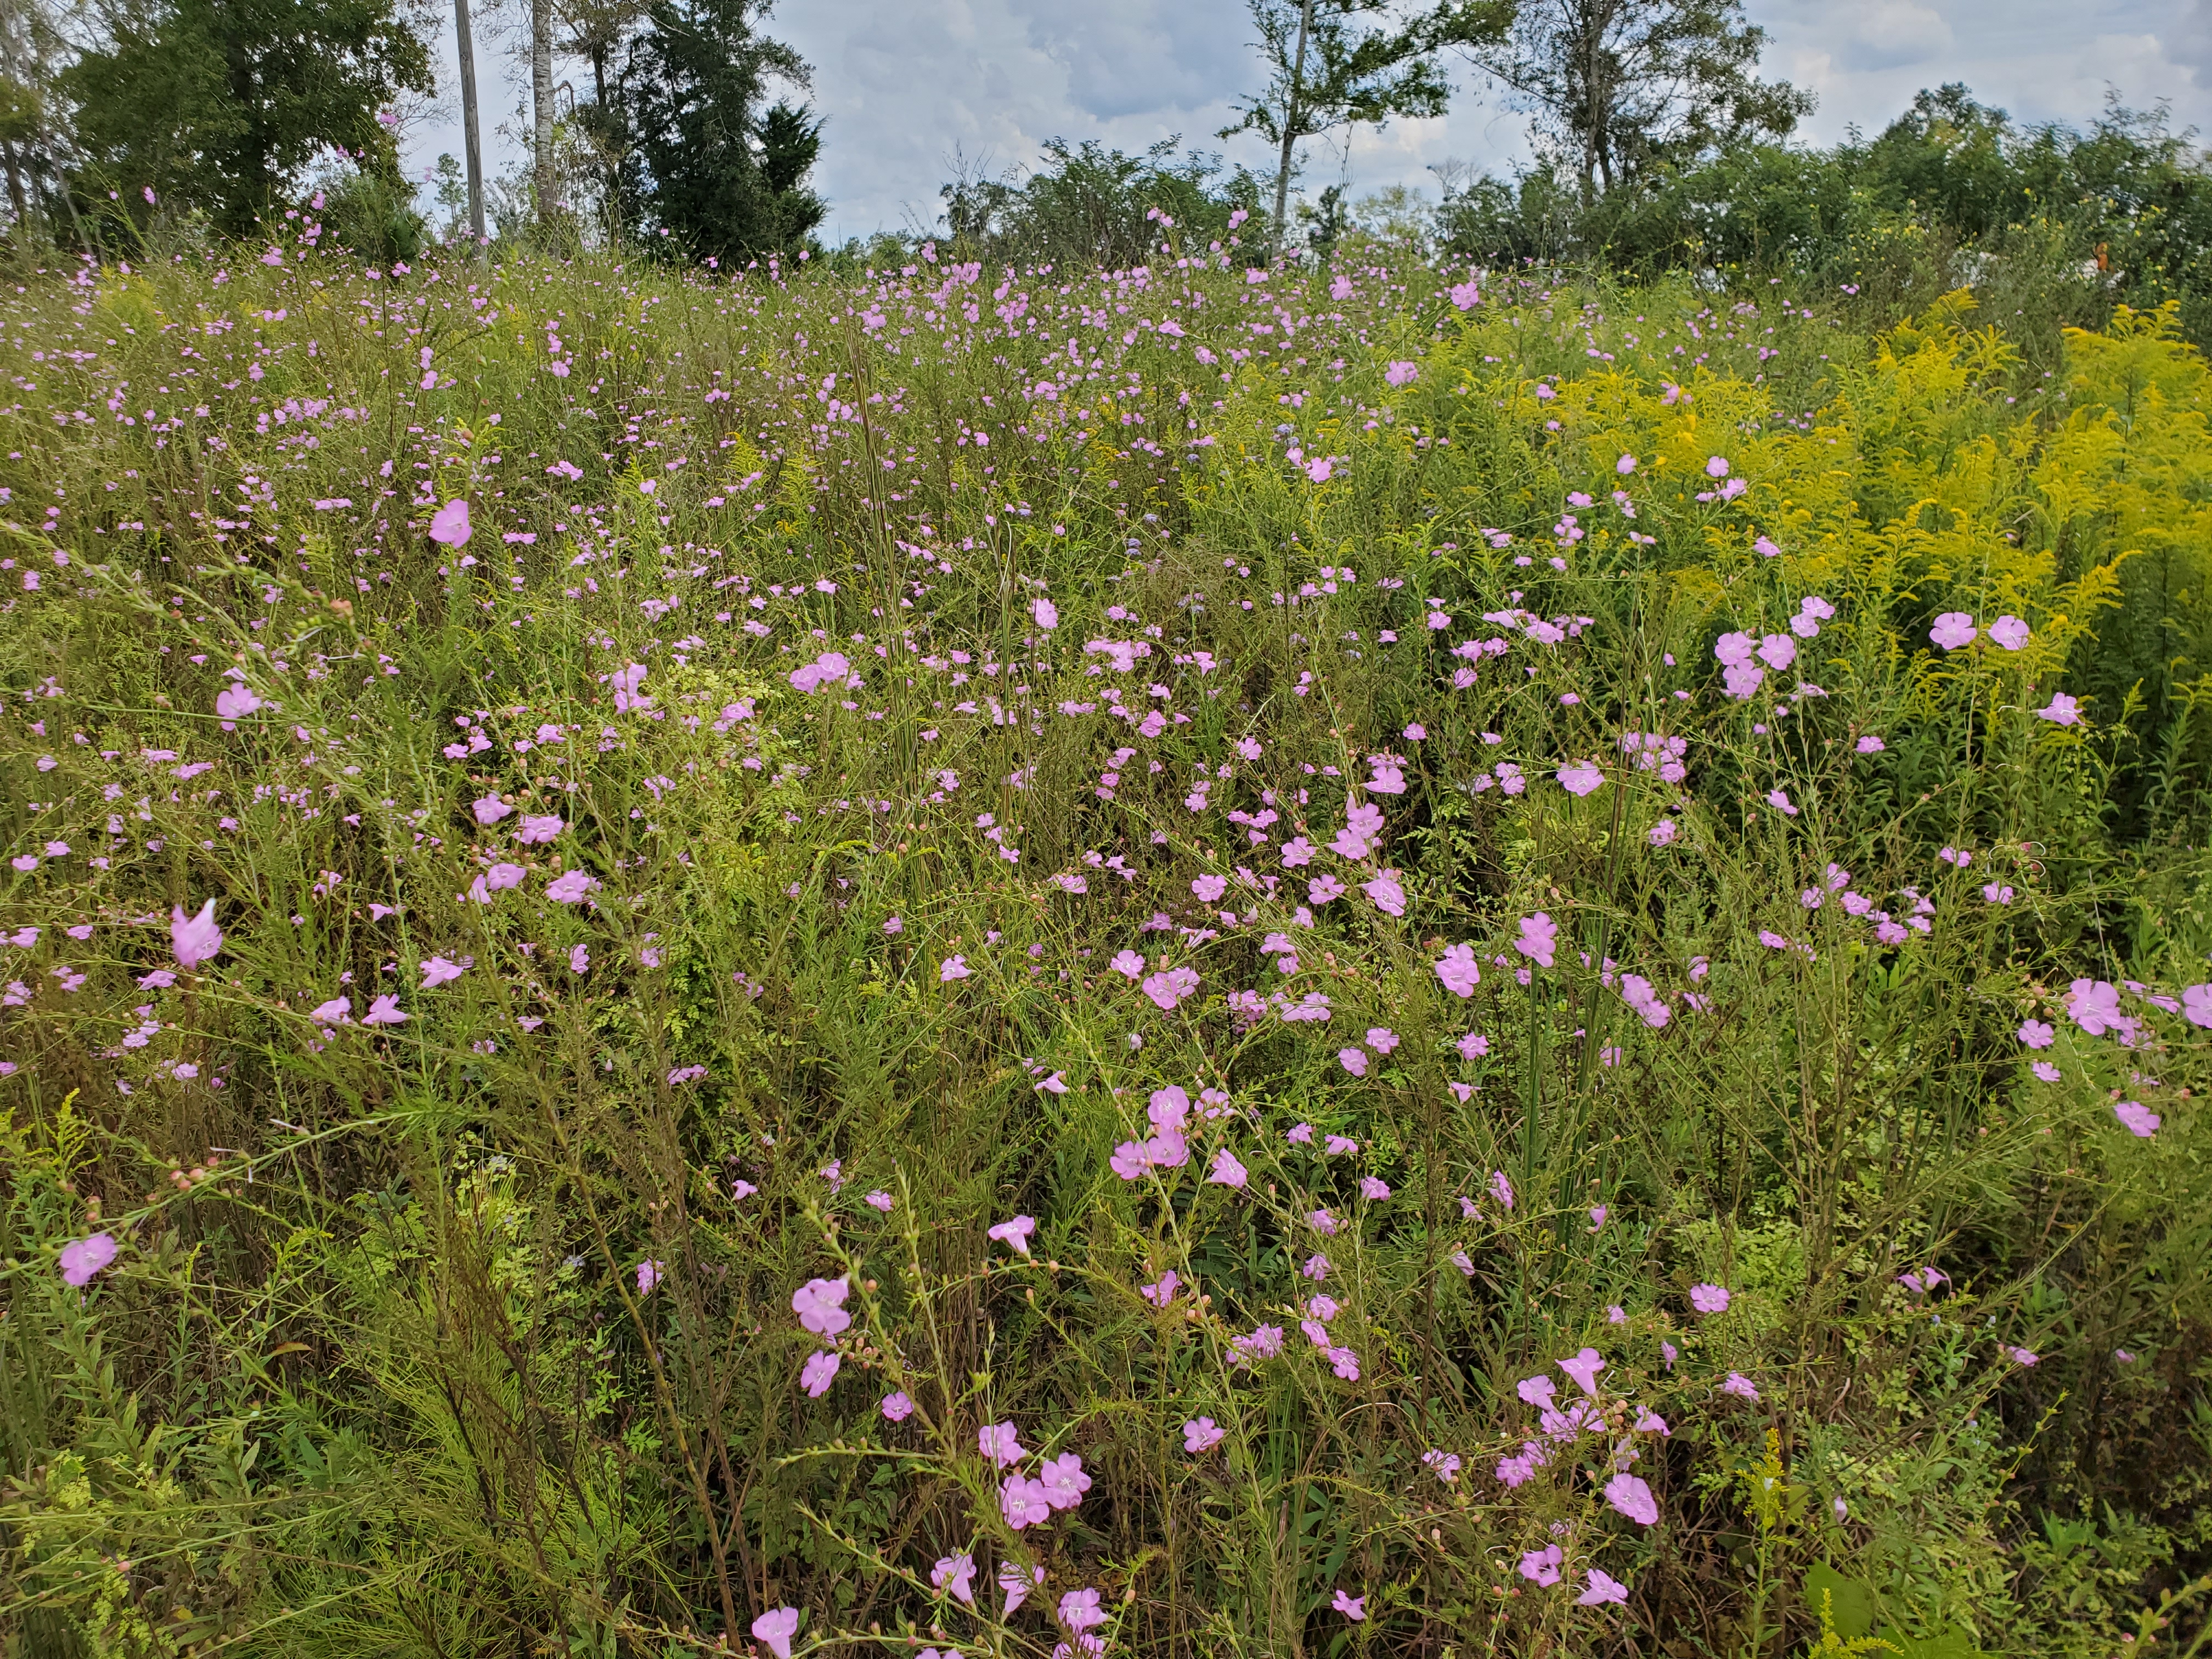
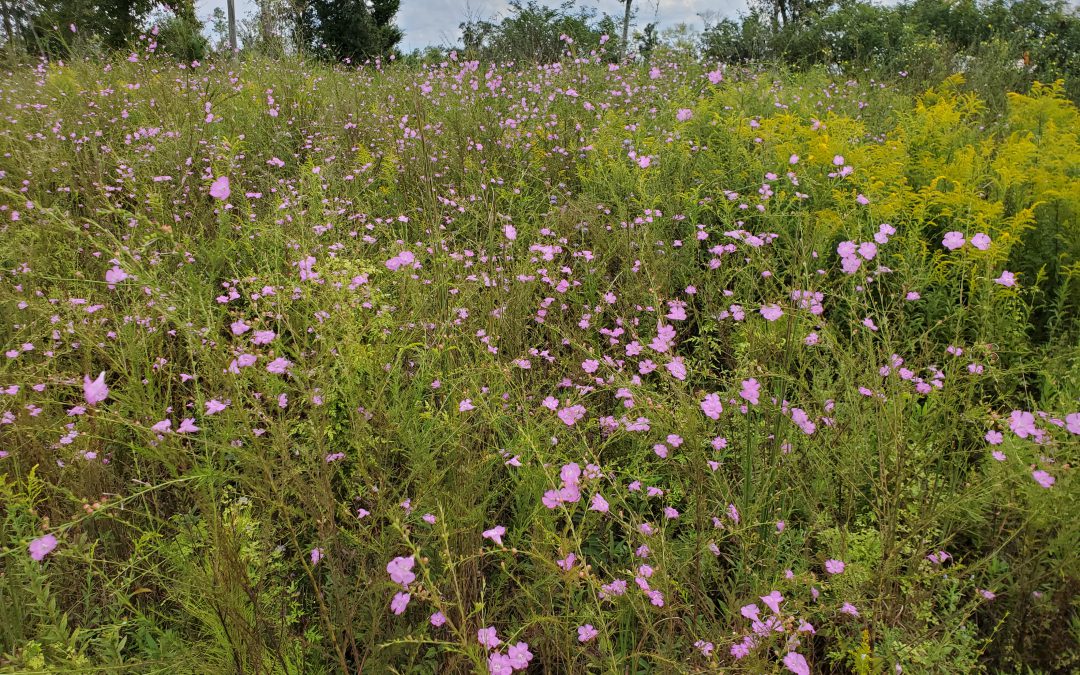
False Foxglove in a Calhoun County natural area. Photo courtesy of Daniel Leonard.
Fall is the absolute best season for wildflower watching in the Panhandle! When mid-September rolls around and the long days of summer finally shorten, giving way to drier air and cooler nights, northwest Florida experiences a wildflower color explosion. From the brilliant yellow of Swamp Sunflower and Goldenrod, to the soothing blue of Mistflower, and the white-on-gold of Spanish Needles, there is no shortage of sights to see from now until frost. But, in my opinion, the star of the fall show is the currently flowering False Foxglove (Agalinus spp.).
Named for the appearance of their brilliant pink flowers, which bear a resemblance to the northern favorite Foxglove (Digitalis spp.), “False Foxglove” is actually the common name of several closely related species of parasitic plants in the genus Agalinus that are difficult to distinguish by all but the keenest of botanists. Regardless of which species you may see, False Foxglove is an unusual and important Florida native plant. Emerging from seed each spring in the Panhandle, plants grow quickly through the summer to a mature height of 3-5’. During this time, False Foxglove is about as inconspicuous a plant as grows. Consisting of a wispy thin woody stem with very small, narrow leaves, plants remain hidden in the flatwoods and sand hill landscapes that they inhabit. However, when those aforementioned shorter September days arrive, False Foxglove explodes into flower sporting sprays of dozens of light purple to pink tubular-shaped flowers that remain until frost ends the season.
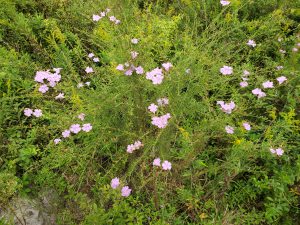
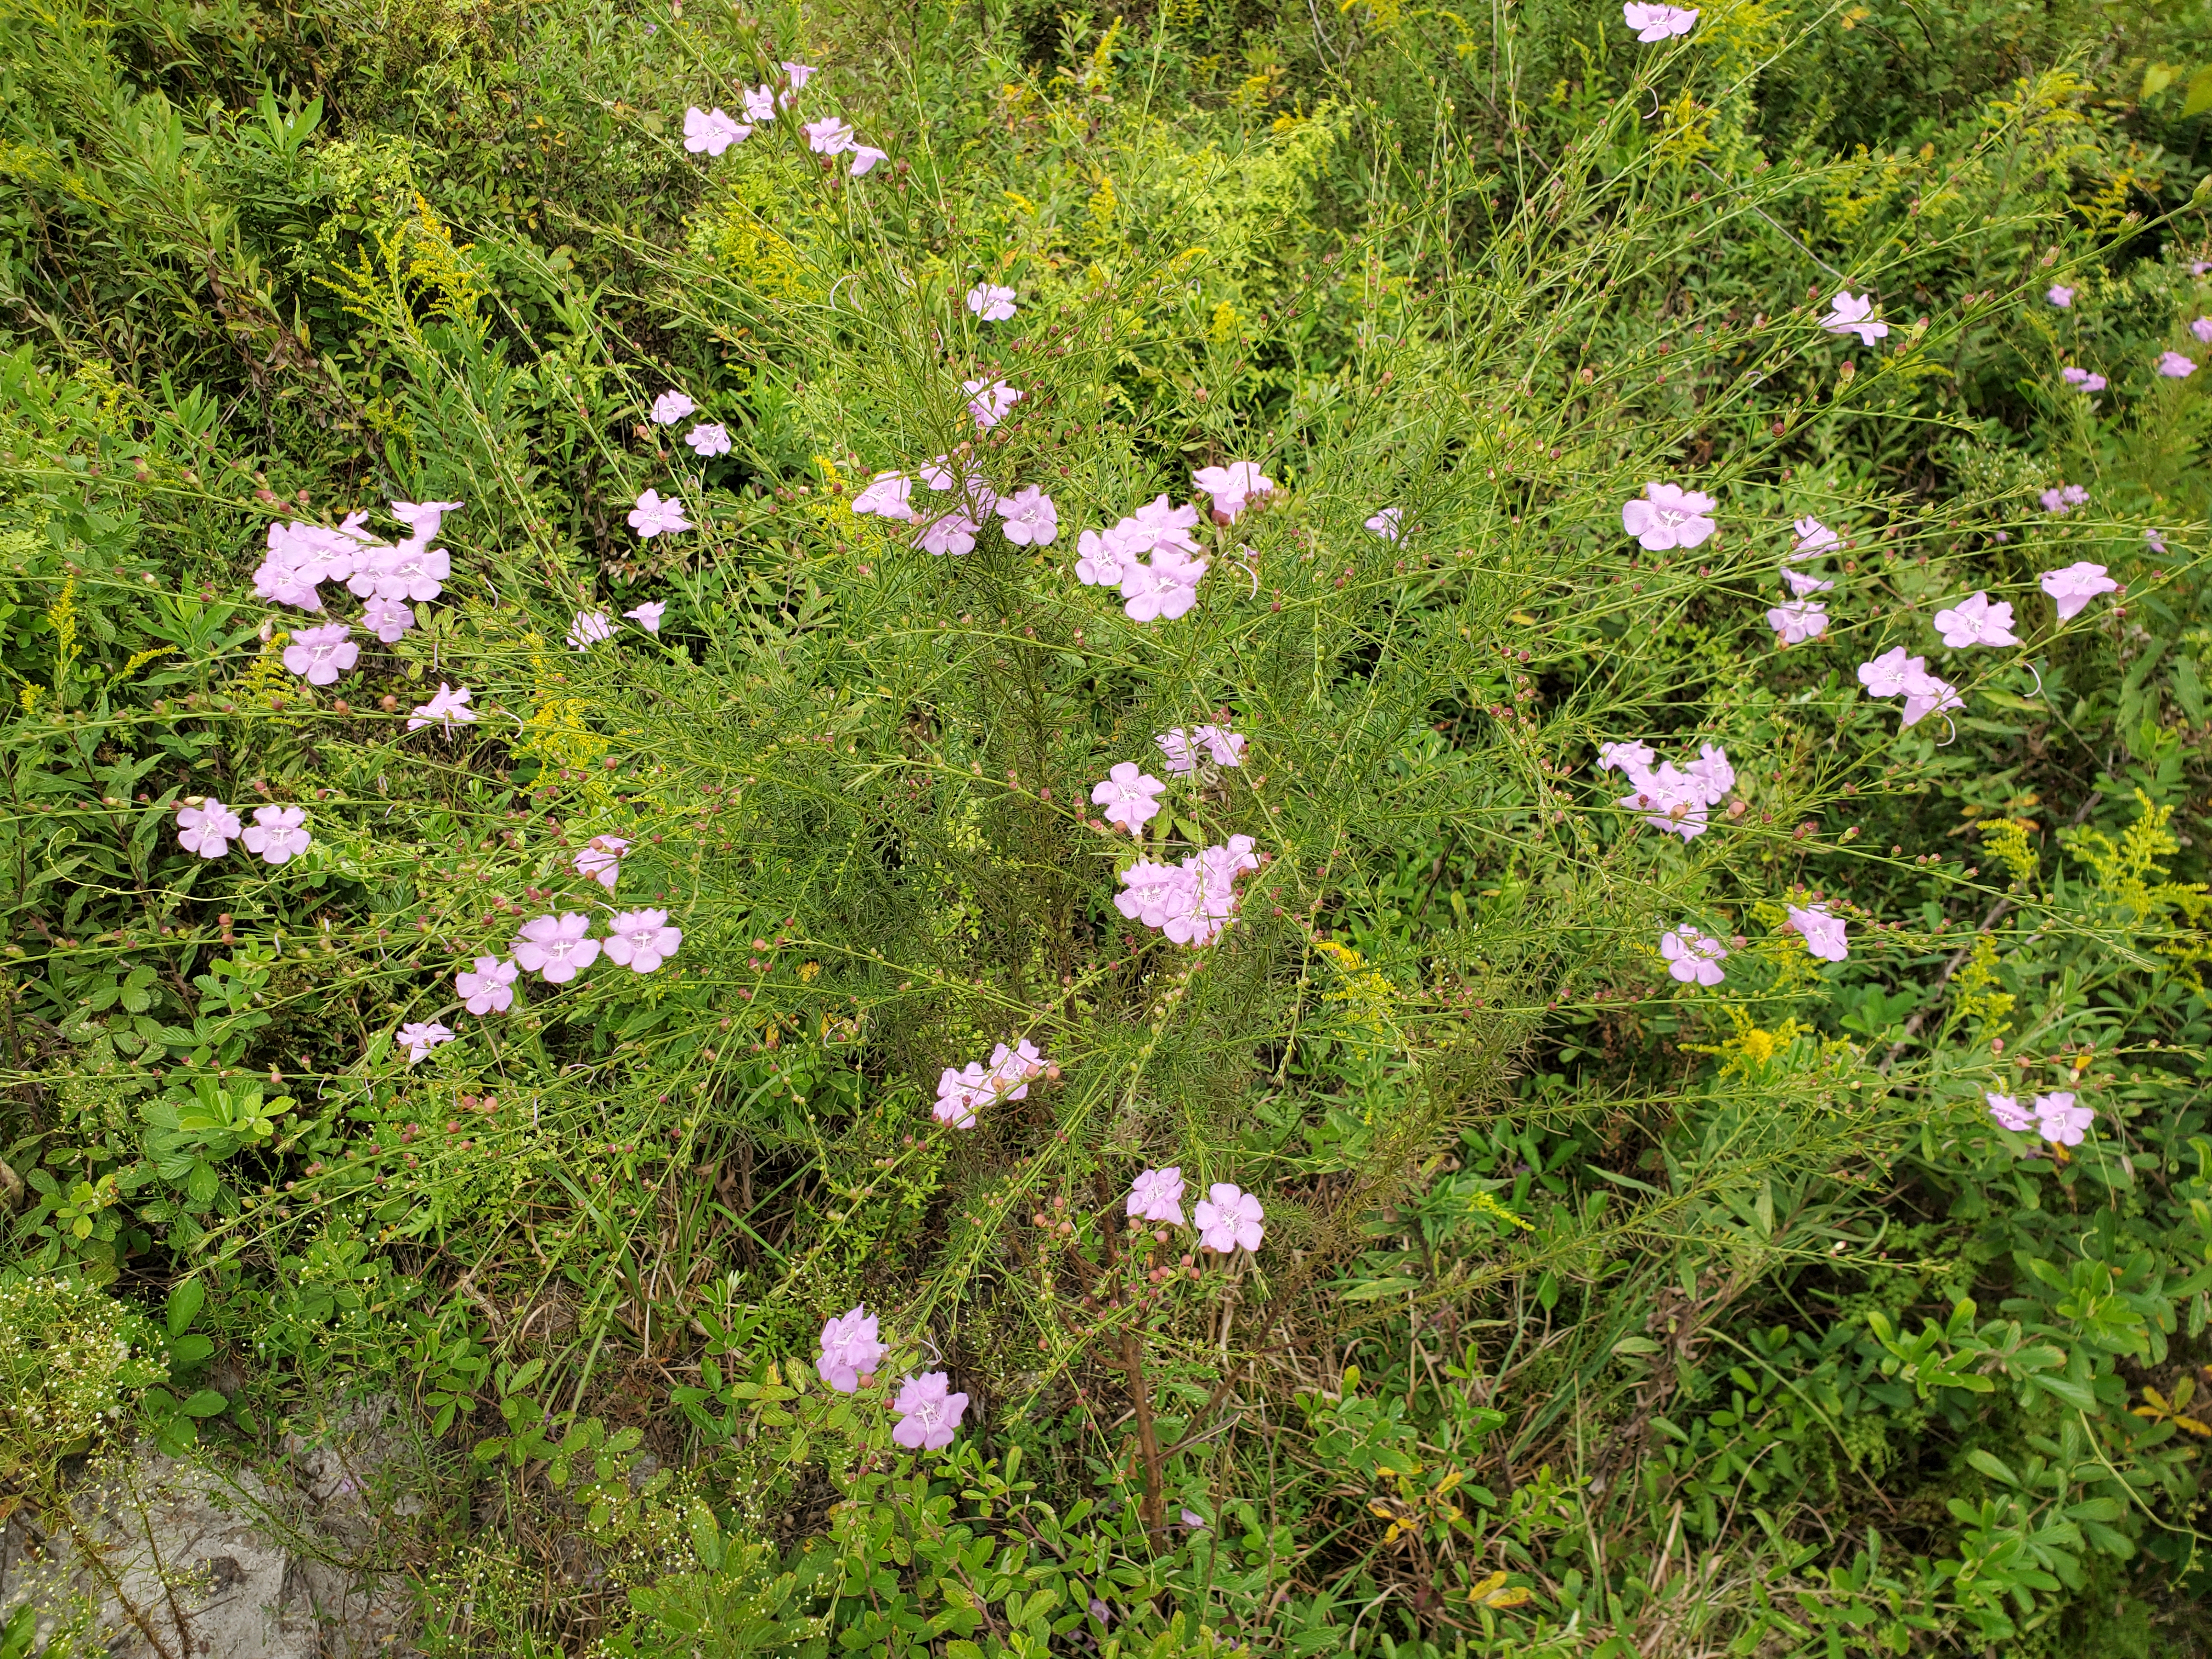
False Foxglove flowering in a Calhoun County natural area. Photo courtesy of Daniel Leonard.
In addition to being unmatched in flower, False Foxglove also plays several important ecological roles in Florida’s natural areas. First, False Foxglove’s relatively large, tubular-shaped flowers are the preferred nectar sources for the larger-sized native solitary and bumble bees present in the Panhandle, though all manner of generalist bees and butterflies will also visit for a quick sip. Second, False Foxglove is the primary host plant for the unique Common Buckeye butterfly. One of the most easily recognizable butterflies due to the large “eye” spots on their wings, Common Buckeye larvae (caterpillars), feed on False Foxglove foliage during the summer before emerging as adults and adding to the fall spectacle. Finally, False Foxglove is an important indicator of a healthy native ecosystem. As a parasitic plant, False Foxglove obtains nutrients and energy by photosynthesis AND by using specialized roots to tap into the roots of nearby suitable hosts (native grasses and other plants). As both False Foxglove and its parasitic host plants prefer to grow in the sunny, fire-exposed pine flatwoods and sand ridges that characterized pre-settlement Florida, you can be fairly confident that if you see a natural area with an abundance of False Foxglove in flower, that spot is in good ecological shape!
The Florida Panhandle is nearly unmatched in its fall wildflower diversity and False Foxglove plays a critical part in the show. From its stunning flowers to its important ecological roles, one would be hard-pressed to find a more unique native wildflower! For more information about False Foxglove and other Florida native wildflowers, contact your local UF/IFAS County Extension office.
by Daniel J. Leonard | Sep 9, 2021
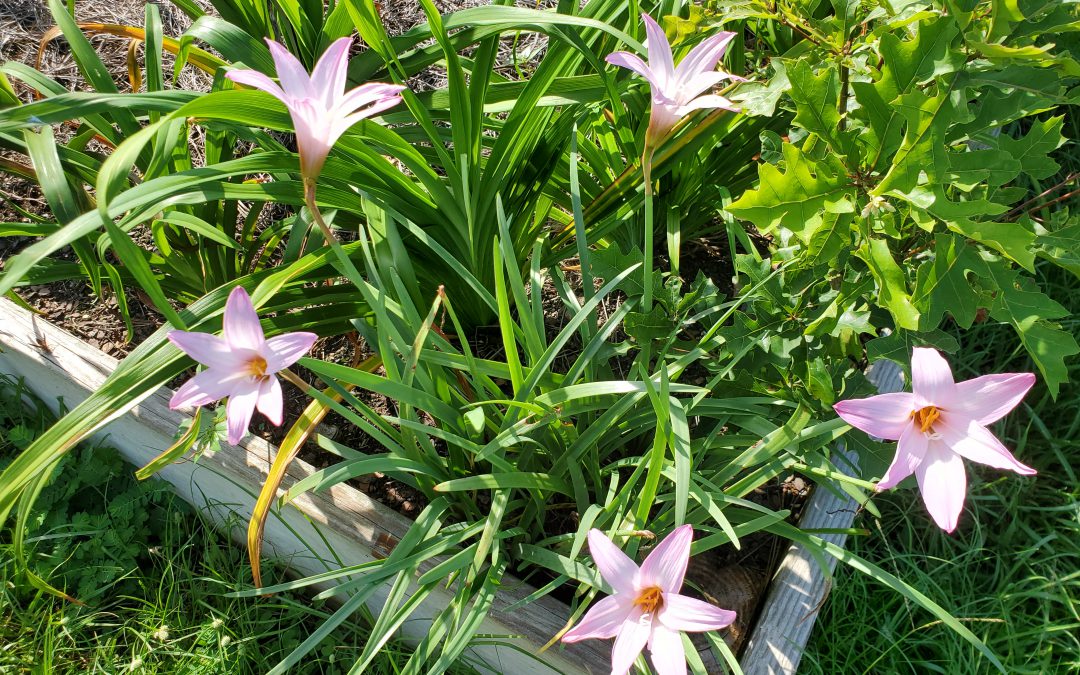
Bulbs are my favorite class of ornamental plants. They generally are low maintenance, come back reliably year after year, and sport the showiest flowers around. While many bulbs like Daylily, Crinum and Amaryllis are very common in Panhandle landscapes, there is a lesser-known genus of bulbs that is well worth your time and garden space, the Rainlily (Zephyranthes spp.).
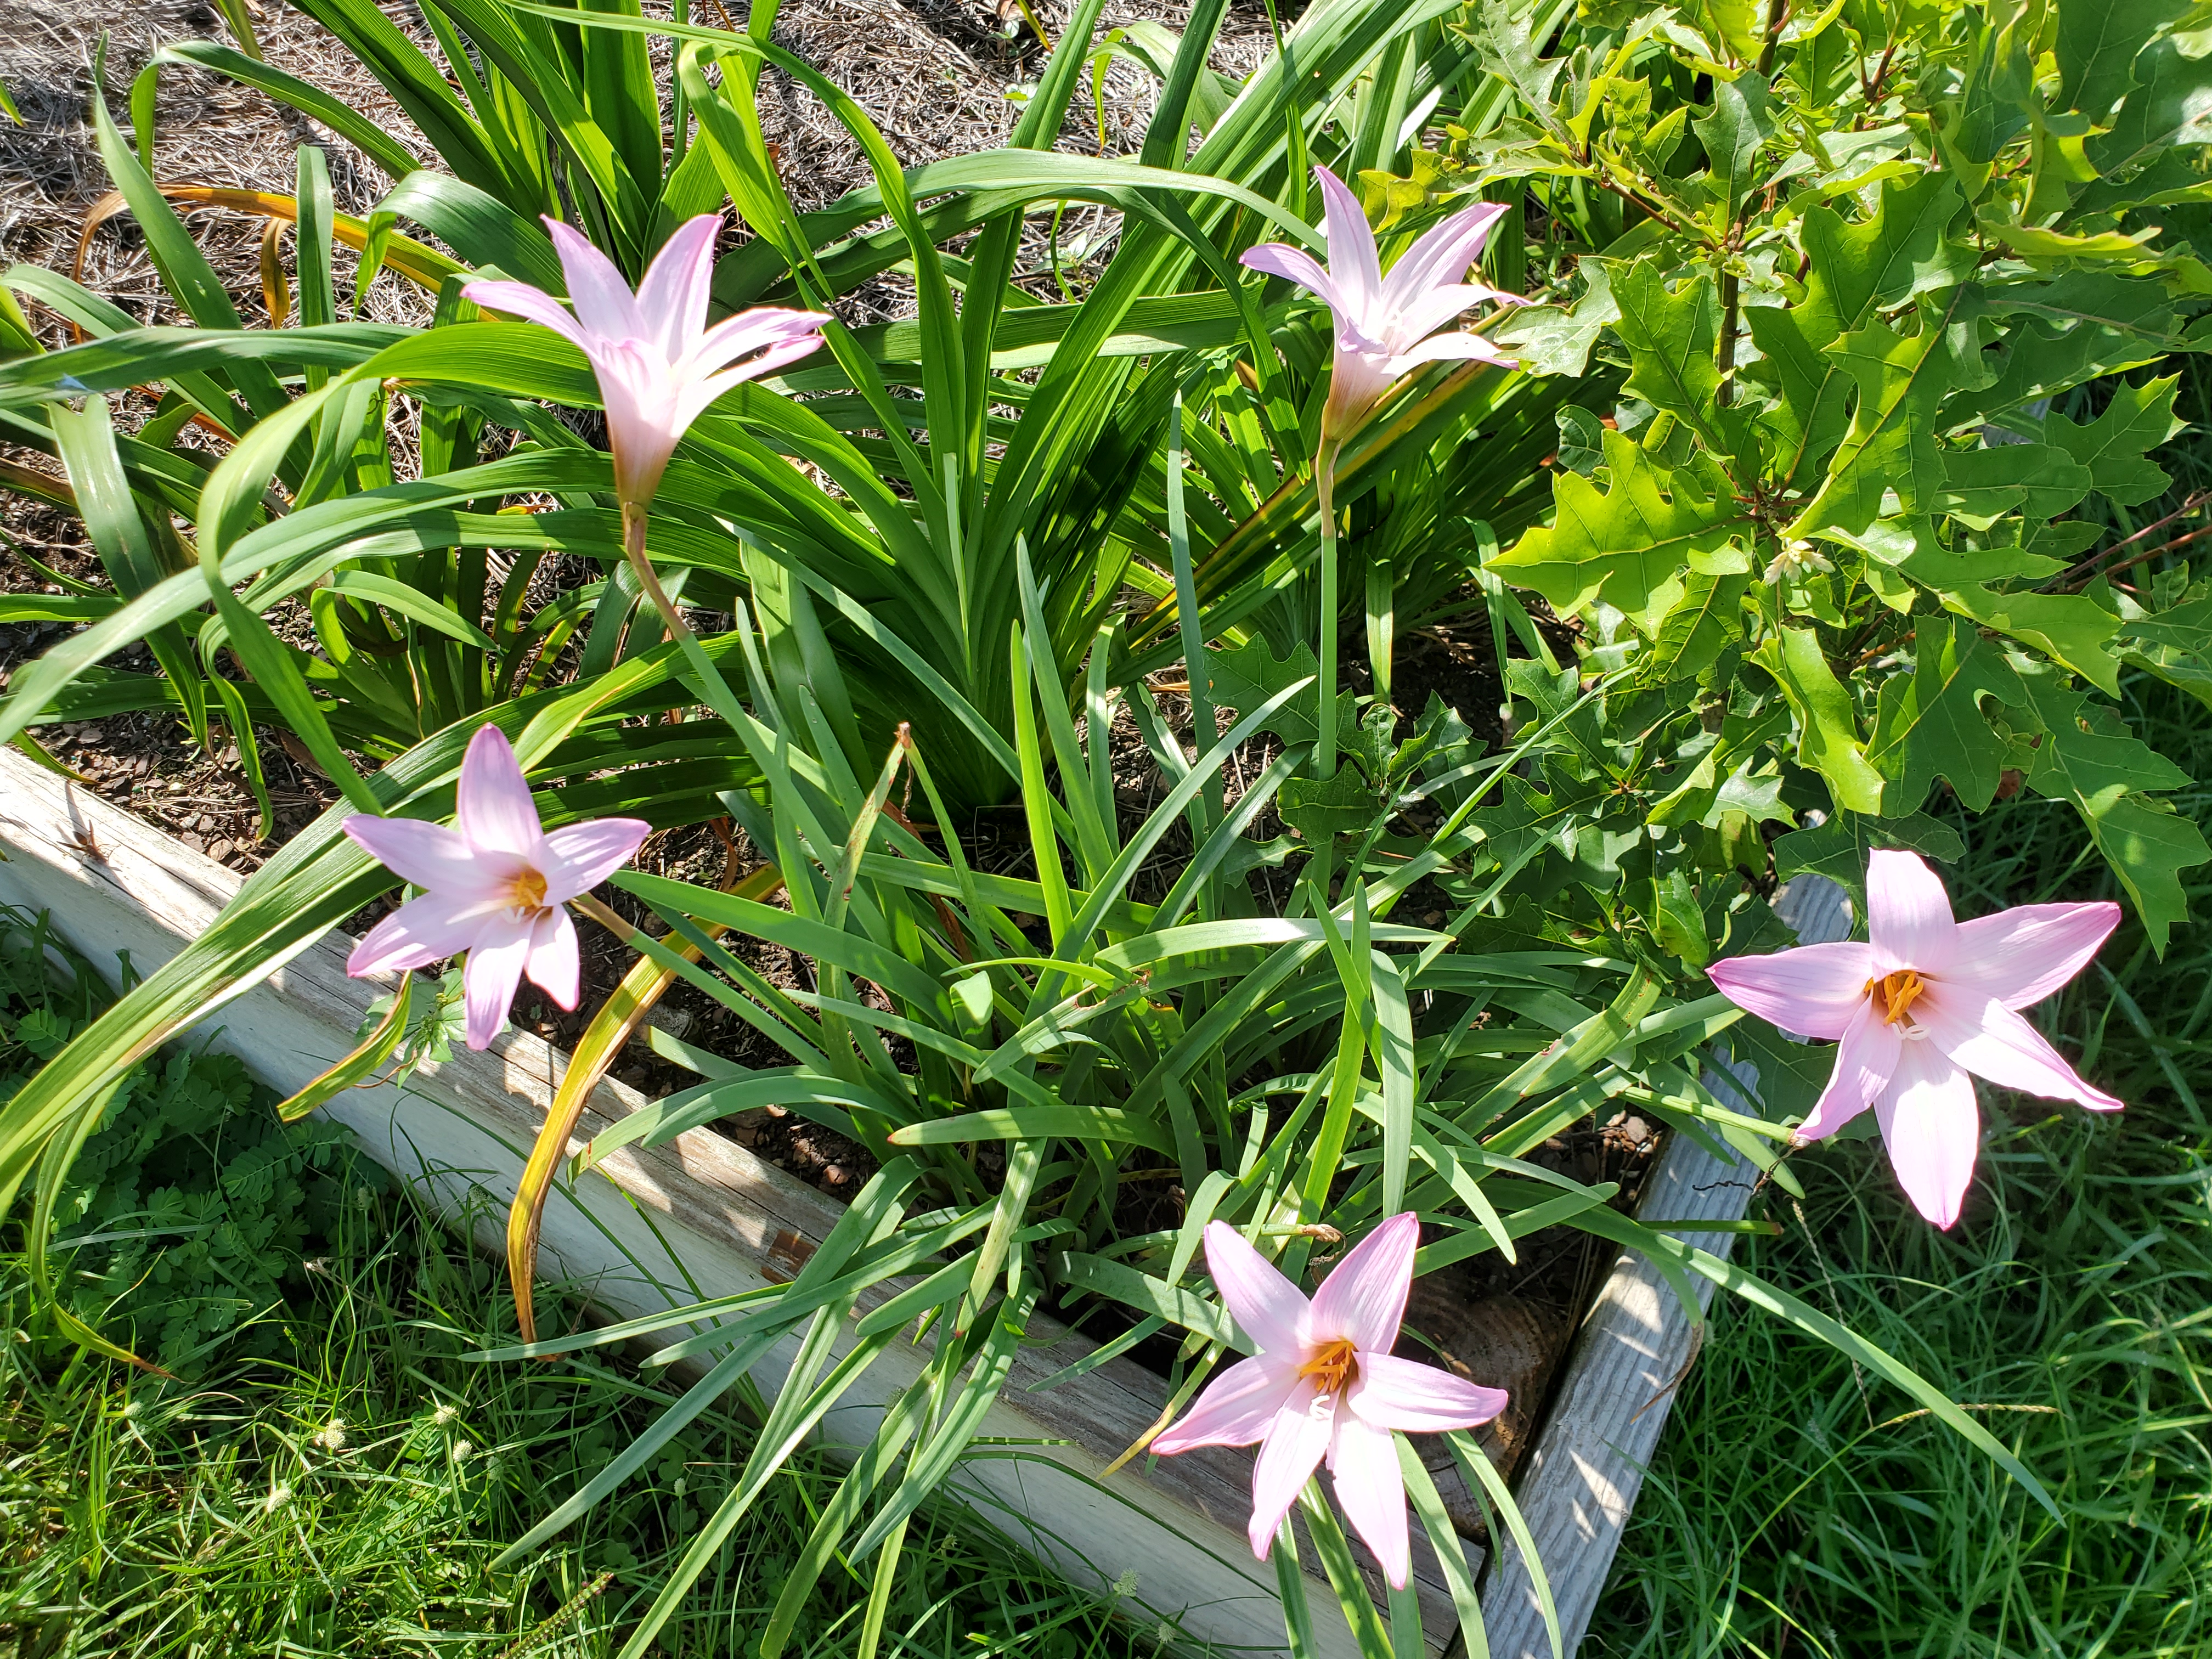
Rainlily, aptly named for its habit of blooming shortly after summer rainfall events and a member of the Amaryllis family of bulbs, is a perfect little plant for Panhandle yards for several reasons. The plant’s genus name, Zephyranthes – which translates to English as “flowers of the western winds”, hints at the beauty awaiting those who plant this lovely little bulb. From late spring until the frosts of fall, Rainlily rewards gardeners with flushes of trumpet-shaped flowers in shades of white, pink, and yellow, with some hybrids offering even more exotic colors. While these individual flowers typically only persist for a day or two, they are produced in “flushes” that last several days, extending the show. Though Rainlily flowers are the main event for the genus, beneath the blooms, plants also offer attractive, grass-like, evergreen foliage. These aesthetic attributes lend themselves to Rainlily being used in a variety of ways in landscapes, from massing for summer color ala Daylilies, to use around the edges of beds as a showy border like Liriope or other “border” type grassy plants.

Unknown Rainlily species blooming in a raised bed. Photo courtesy of Daniel Leonard.
Continuing along the list of Rainlily attributes, the genus doesn’t require much in the way of care from gardeners either. Most species of Rainlily, including the Florida native Z. atamasca, have no serious pests and are right at home in full sun to part shade. Once established, plants are exceedingly low-maintenance and won’t require any supplemental irrigation or fertilizer! Some Rainlily species like Z. candida even make excellent water or ditch garden plants, preferring to have their feet wet most of the year – putting them right at home in the Panhandle this year. And finally, all Zephyranthes spp. do very well in containers and raised beds also, adding versatility to their use in your landscape!
The one drawback of Rainlily is that they can be somewhat difficult to find for sale. As these bulbs are an uncommon sight in most garden centers, to source a specific Zephyranthes species or cultivar, one is probably going to need to purchase from a specialty internet or mail-order nursery. As with other passalong-type bulbs though, the absolute best and most rewarding way to obtain Rainlily is to get a dormant season bulb division from a friend or fellow gardener who grows them. There are many excellent unnamed or forgotten Zephyranthes cultivars and seedlings flourishing in gardens across the South, waiting to be passed around to the next generation of folks who will appreciate them!
Even if you must go to some lengths to get a Rainlily in your garden, I highly recommend doing so! You’ll be rewarded with years of low-maintenance summer color after the dreariest of rainy days and will be able to pass these “flowers of the western wind” on to the next gardening generation. For more information on growing, sourcing, or propagating Rainlilies, check out this EDIS publication by Dr. Gary Knox of the UF/IFAS North Florida Research and Education Center (NFREC) or contact your local UF/IFAS Extension office! Happy Gardening!
by Daniel J. Leonard | Aug 26, 2021
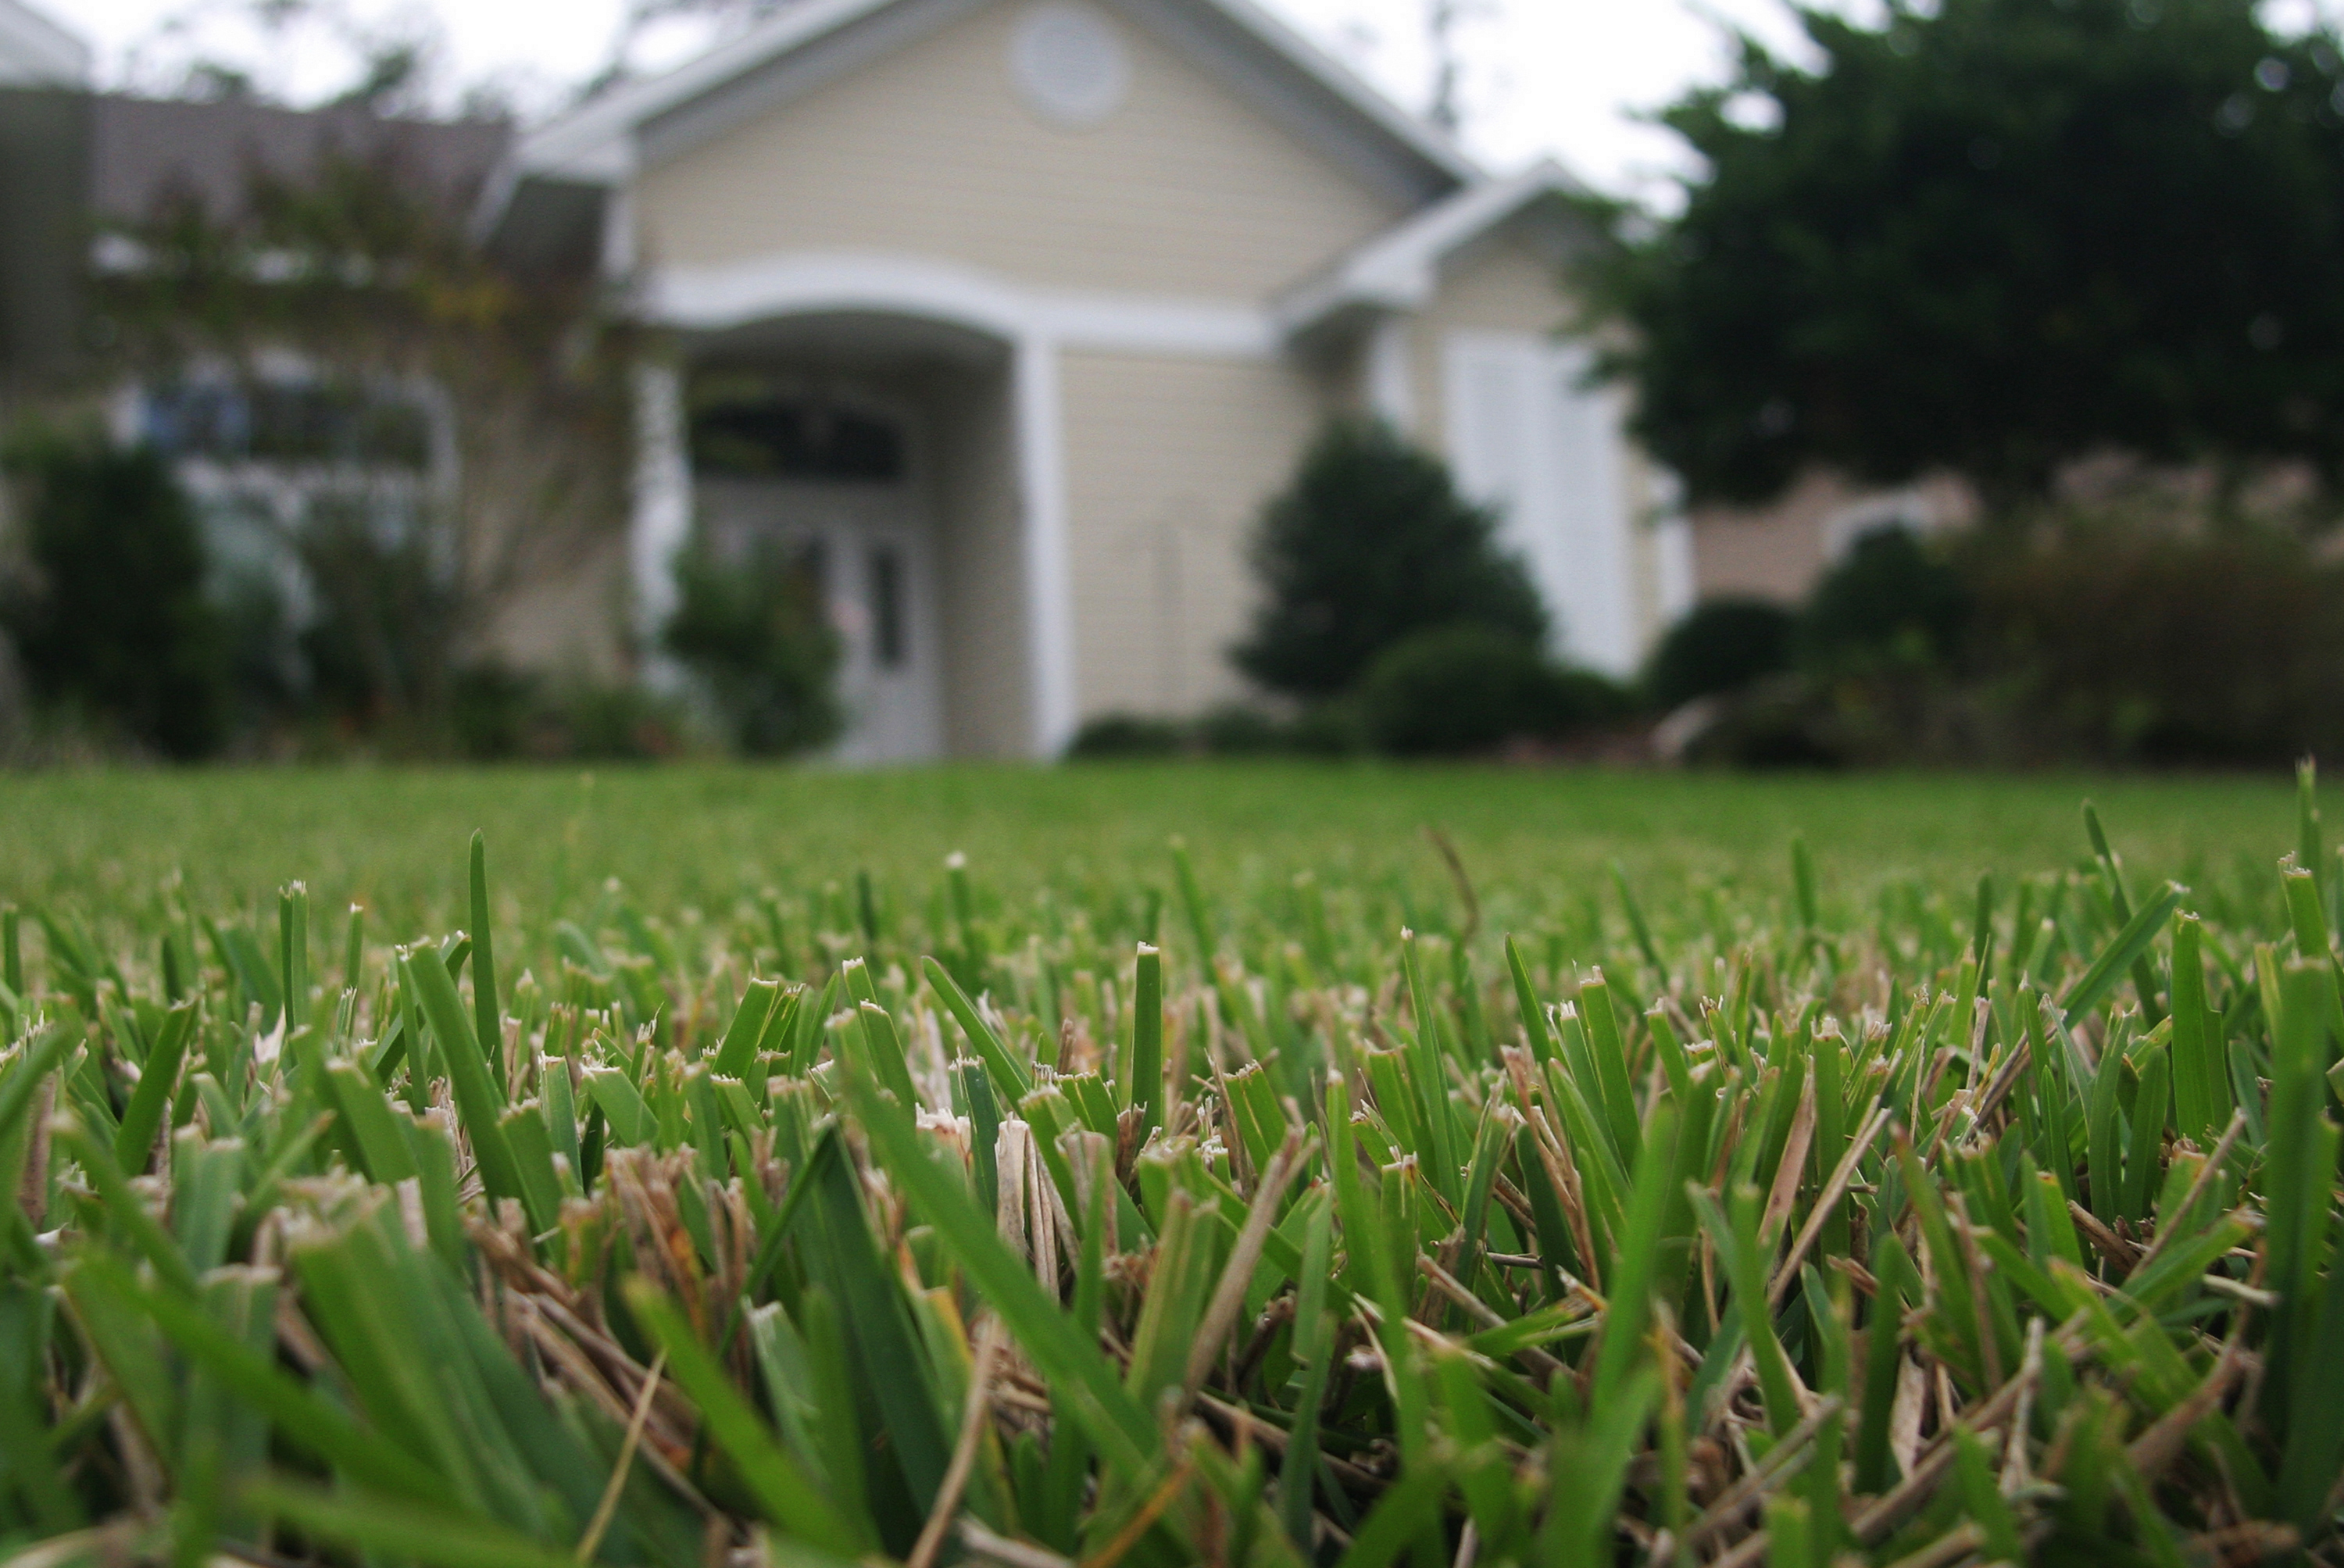
Nearly everyone likes turfgrass lawns. They’re pretty and green. They filter water, chemicals, and nutrients before they enter our groundwater systems. They provide a recreation spot for people and pets. But lawns also come with maintenance tasks, one of which is weed control. Fortunately, keeping our common Centipedegrass lawns relatively weed free is as simple as smart management and utilizing herbicides effectively. Though the number of herbicides available for purchase can be overwhelming, you only need three to keep weeds at bay – a selective grass herbicide, a strong broadleaf herbicide, and a sedge herbicide!

Dollarweed, one of the toughest broadleaf weeds for homeowners to control. Picture courtesy of Julie McConnell, UF/IFAS.
First up on the essential herbicide list is the selective grass herbicide Sethoxydim. While most folks’ weed focus is centered on broadleaf weeds, grassy weeds like Crabgrass, Bahiagrass, Goosegrass, and others can be just as problematic and make for a very unsightly lawn. Enter Sethoxydim. Cheap and easy to find, Sethoxydim is offered as the active ingredient in many branded products like Fertilome Over the Top Grass Killer, Hi-Yield Grass Killer, and many more. These products control weedy grass species without seriously harming Centipedegrass or broadleaf ornamental trees and shrubs (Centipedegrass may temporarily be yellowed after sethoxydim application but will recover). Not only will it kill out the unwanted grass growing in your Centipede, but it will also remove these weeds from your flower beds!
Second, having a strong broadleaf herbicide on hand is necessary. I say “strong” because many of the homeowner grade products available at garden centers simply don’t have the “juice” to control tough broadleaf weeds like Dollarweed, Doveweed, Virginia Buttonweed, and others. For this job, I prefer to use a commercial grade 3-way product like Celsius WG by Bayer. Celsius WG is a 3-way combination herbicide with a healthy dose of Dicamba as its primary ingredient. Though Dicamba is a notoriously volatile chemical known to cause damage to unintended plants through drift in hot weather, combining it with the two other products in Celsius WG makes it safe to use in lawns, even in the heat of summer. While strong broadleaf herbicides like Celsius WG are expensive on the front end, don’t let that deter you. These products wind up being very cost effective in the long run due to minute mixing rates (one bottle goes a very long way in most residential lawns) and effectiveness – you simply will not need to waste time and money spraying lawn weeds over and over to obtain control like is necessary with lesser products – one or two applications will solve the toughest broadleaf weed problems.
Finally, any good lawn weed control program will include a quality sedge control herbicide. Sedges (often called “nutgrass”) look like grasses but are a completely different category of plants and as such, require specialized herbicide chemistries to achieve control. Sedge weeds prefer wetter areas of lawns, though they can occur in pretty much any lawn site and are very unsightly. For this weed category, there are several options available to homeowners. The one that consistently provides the best control in lawns is Halosulfuron-methyl, the active ingredient in the aptly named product Sedgehammer. Conveniently coming in individually pre-mixed packets for small lawns or a larger bottle when more acreage is to be treated, Sedgehammer couldn’t be easier to mix and use. While Sedgehammer and similar products are extremely effective in controlling various sedge weeds, they tend to work very slowly, and patience is required. Weeds immediately stop growing following a Sedgehammer application, but it can take up to three weeks to notice the sedges dying.
While having and using the above three herbicides can control almost any weed homeowners may encounter in their lawns, it is important to remember that herbicides are not substitutes for proper lawn management. When good cultural practices in lawns are followed, such as mowing at the correct height, only watering when necessary, following UF/IFAS fertilizer recommendations, etc., chemical weed control may not even be necessary in many cases! Also, once the decision to purchase and use chemical herbicides has been made, it is critical that one always read the label before using any herbicide product. This ensures safe and effective use of the product; the label is literally the law!
For assistance in choosing the correct herbicide for your lawn and other lawn care concerns, contact your local UF/IFAS Extension Office! Happy Gardening!
by Daniel J. Leonard | Aug 18, 2021
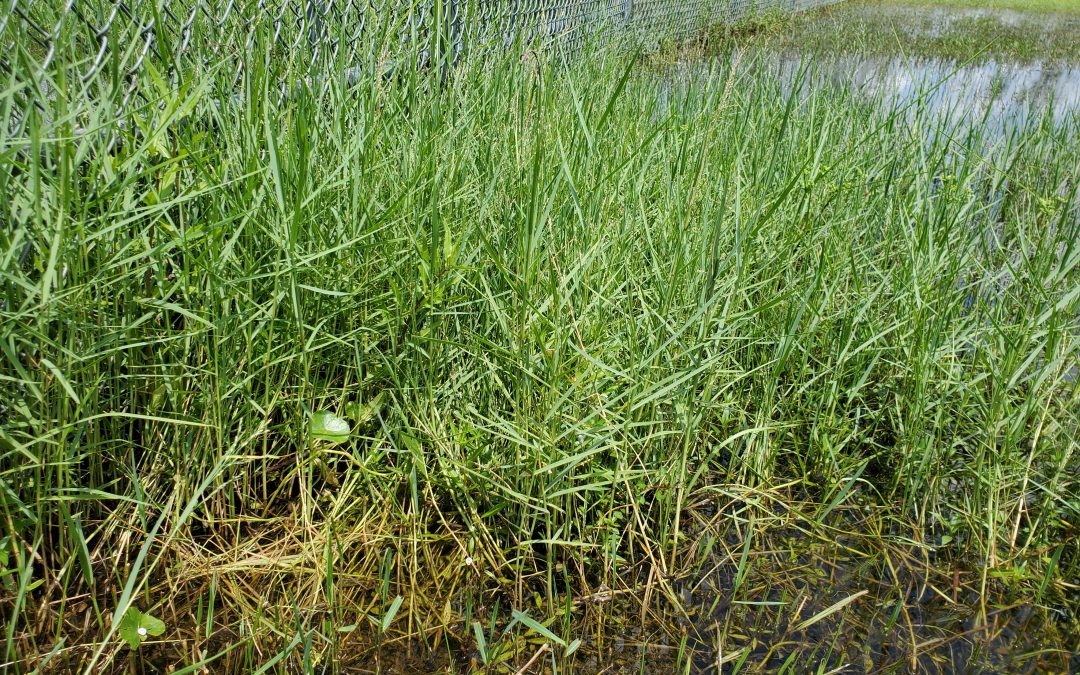
One of the most conspicuous outcomes from Hurricane Michael was the complete disruption of local lawns and landscapes. Giant holes where tree roots once existed, ruts and compacted ground from clean-up equipment, and formerly shaded acres flooded with fresh sunshine were three very common situations property owners suddenly found themselves faced with. An unforeseen consequence of all this newly bare ground ripe was the intrusion by a variety of very aggressive weeds. One invasive exotic weed that has made itself right at home in many county landscapes following Michael and that I’ve seen lots of lately is Torpedograss (Panicum repens).
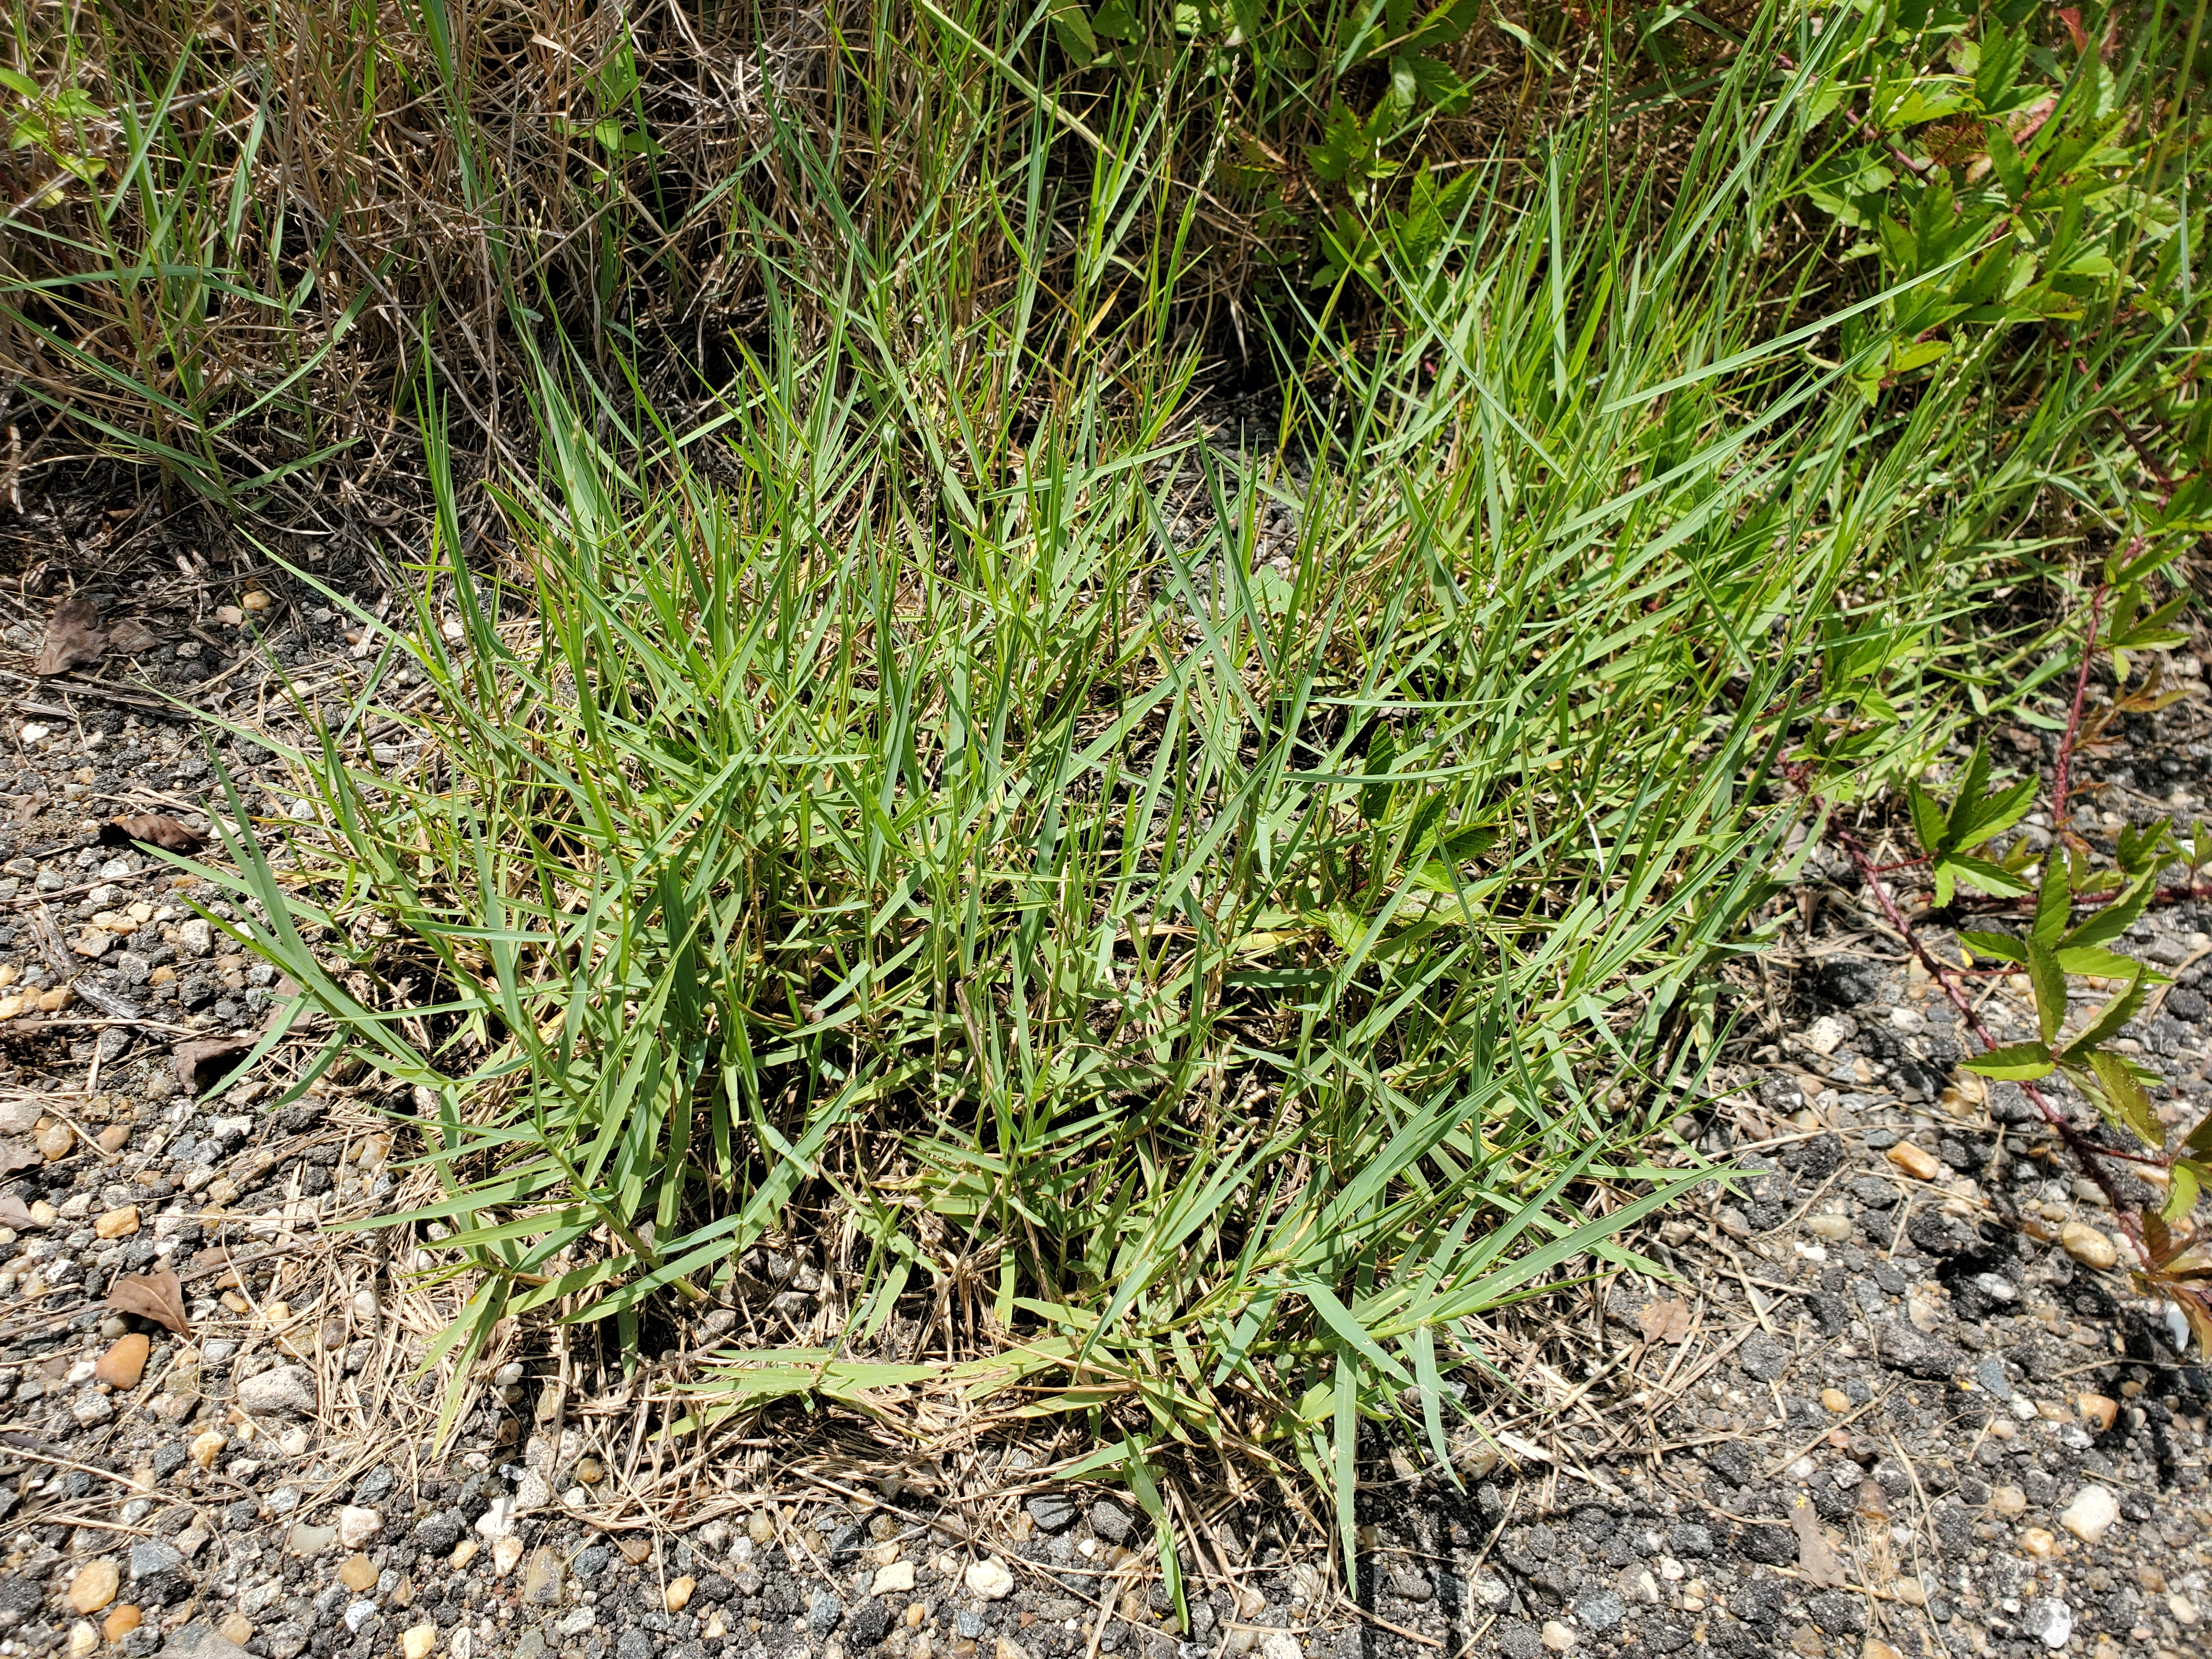
Often brought into landscapes with “fill-dirt” and “topsoil” applications or spread through mowing, Torpedograss is an aggressive perennial grass in the same plant family as Bermudagrass and Cogongrass. Like many invasive exotic species, Torpedograss was introduced into the United States in the late 1800’s from its native Africa and Asia as a potential forage crop. Unlike its cousin Cogongrass, the Torpedograss is highly palatable to cattle and so gained a quick following among the ranching community. Unfortunately, over the next century, Torpedograss had left the pasture and turned into one of the biggest pest plants in Florida, ruining many a lawn, taking over 70% of the state’s public waterways, disrupting native marshlands, and costing Florida over $2 million a year to control!
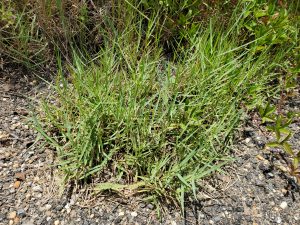
Torpedograss growing in a Calhoun County gravel driveway. Photo courtesy of Daniel Leonard.
Torpedograss spreads rapidly through underground, sharply pointed, white-colored, “torpedo-like” growing tips and can dominate wet or dry areas in short order. The species often hides in lawns when mixed in and mowed with other turfgrasses (especially Zoysiagrass, which it closely resembles), growing unnoticed until infestations are severe and control options are few. This makes scouting for the weed and accurate identification crucial! Torpedograss can be identified by its bluish-green leaf and stem color, hairy leaf edges, stiff overall appearance, distinctive panicle-type flowers, and can grow quickly to 3’ or so in height, spreading indefinitely. Though it initially can resemble other turf species, once you know what you’re looking for, Torpedograss stands out visually amongst its competitors.
After identifying Torpedograss, control methods can be chosen depending on the site it has infested. In lawns, options vary based on turf species. If infestation occurs in the common Centipedegrass and Bahiagrass lawns of the Panhandle, options are few. Products with the active ingredient Sethoxydim (Poast, Fertilome Over the Top, Southern Ag Grass Killer, etc.) can suppress Torpedograss growth in these situations but will not destroy it and are not permanent options. If the area infested is not large, killing the whole spot out with a non-selective herbicide like Glyphosate (Roundup and generics) and then resodding is probably a better option. In Bermudagrass or Zoysiagrass lawns, products with the active ingredient quinclorac (Drive and generics) are very effective at controlling Torpedograss without having to go the “nuclear” glyphosate route. Unfortunately, there are no effective controls for Torpedograss in St. Augustinegrass lawns.
In landscaped beds, Torpedograss is somewhat easier to control. Hand pulling in beds can be effective where new invasions occur but are impractical once the weeds gain a strong foothold. Once that occurs, chemical control is required. In bare or mulched areas away from plants, careful spot spraying in bare areas with a 2-3% glyphosate solution is extremely effective. Where the Torpedograss has grown into and through landscape plants, an “over-the-top” application of fluazifop (Fusilade) will take out the weed without harming most ornamental plant species! (Be sure to check the Fusilade label to make sure your ornamental plant species are safe to apply to!)
Torpedograss is one of the most serious, yet overlooked, invasive plants that occurs in Florida. However, through prevention and control techniques like cleaning mowers when mowing infested areas, accurate identification, and prompt, effective herbicide use, you can keep the weed from taking over your lawn and landscape! For assistance in identifying and controlling Torpedograss and other lawn weeds, contact your local UF/IFAS County Extension office! Happy gardening!
by Daniel J. Leonard | Aug 5, 2021
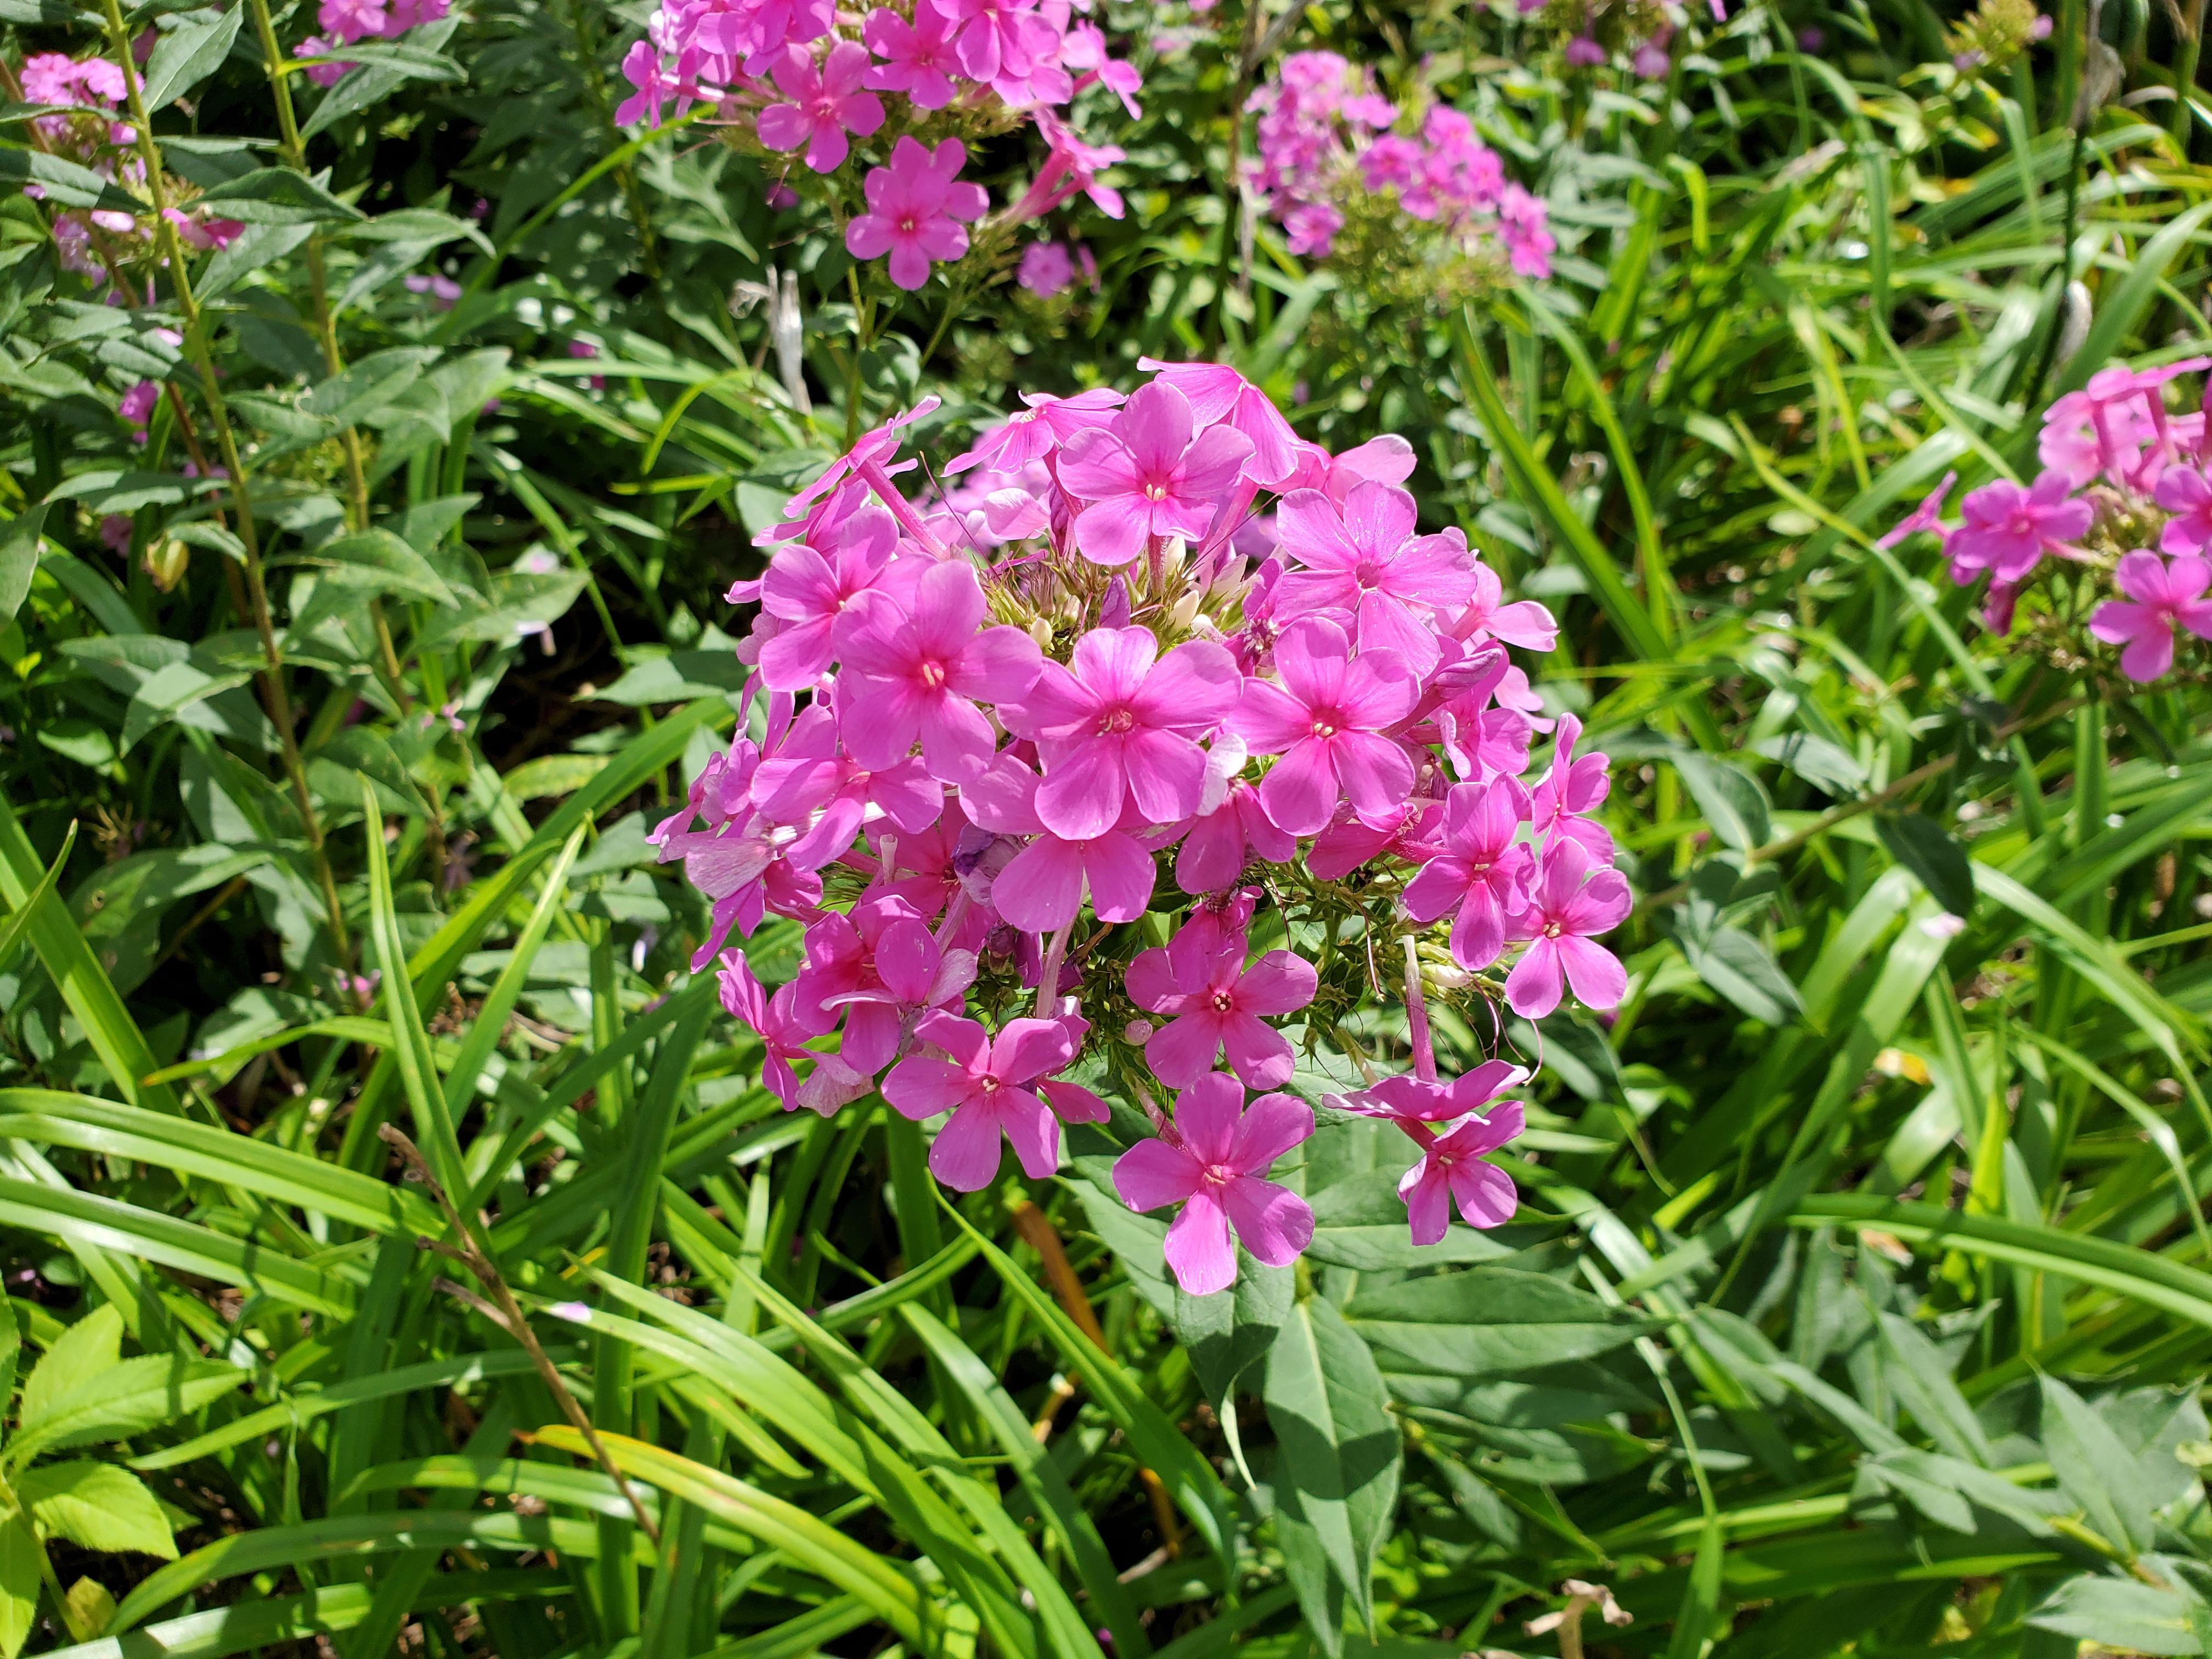
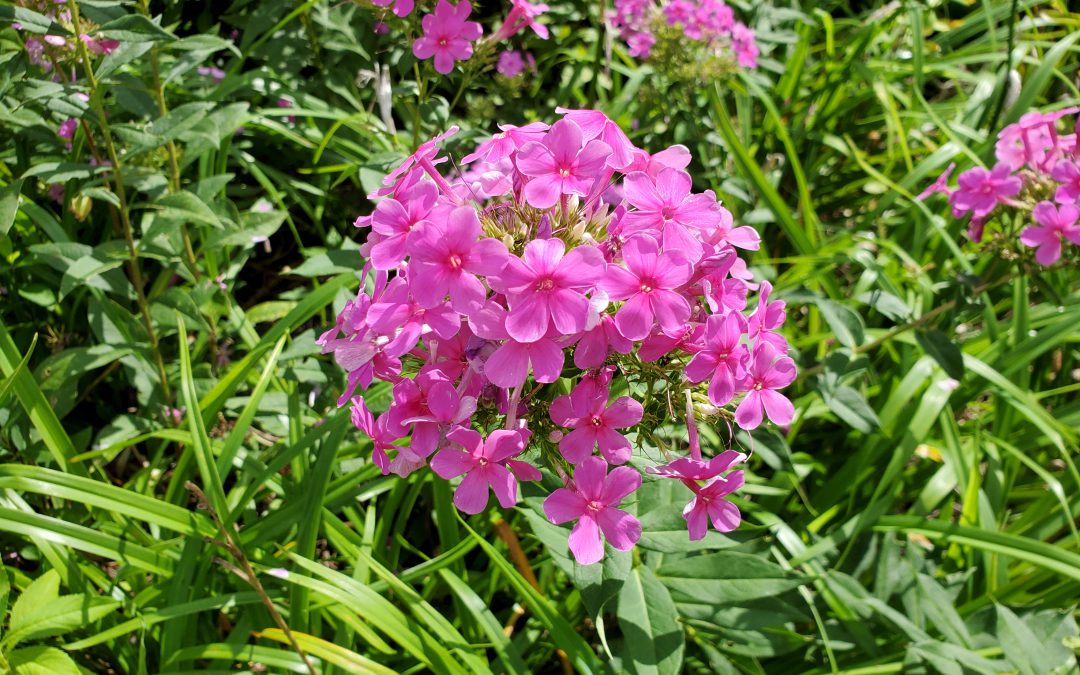
The number one request all would-be gardeners and budding landscape enthusiasts have is “I want something that I don’t have to take care of, tolerates the heat, blooms, and comes back every year”. That is a tall order in our climate but not an impossible one, especially if one is willing to take a step back in time and consider an old Southern passalong plant, Garden Phlox (Phlox paniculata)!

Garden Phlox (Phlox paniculata) in a Calhoun County landscape. Photo courtesy of Daniel Leonard.
This old heirloom perennial is an outstanding ornamental for Panhandle landscapes. Every spring, Garden Phlox emerges from a long winter sleep and shoots its attractive bright green foliage straight up, reaching 3-5’ in height. After hiding inconspicuously in the landscape all spring, Phlox then blasts into fiery magenta bloom during the heat of summer, beginning the show in late June. While individual Phlox flowers are only 1” wide or so, they are held prominently above the plant’s foliage in large clusters up to 8” in diameter and are about as eye-catching as flowers come. The flower show continues through July and August until finally fading out as fall rolls around. Plants then set seed and ready themselves for winter dormancy, repeating the cycle the following spring. A bonus, though individual Phlox plantings start off as small, solitary clumps, they slowly expand over the years, never over-aggressively or unwanted, into a mass of color that becomes the focal point of any landscape they occupy!
In addition to being gorgeous, Phlox is adaptable and demands very little from gardeners. The species prefers to be sited in full, blazing sun but can also handle partial shade. Just remember, the more shade Phlox is in, the fewer flowers it will produce. Site accordingly. Phlox is also extremely drought tolerant, thriving in most any semi-fertile well-drained soil. Though it can handle drought like a champ, Phlox will languish if planted in a frequently damp location. If water stands on the planting site for more than an hour or so after a big rain event, it is most likely too wet for Phlox to thrive. Once established, Phlox is not a heavy feeder either. A light application of a general-purpose fertilizer after spring emergence from winter dormancy will sustain the plants’ growth and flowering all summer long!

Clump of Garden Phlox in a Calhoun County landscape. Photo courtesy of Daniel Leonard.
Though the ornamental and low-maintenance attributes of plain Garden Phlox make it sound like a perfect landscape plant, it is uncommon in the modern nursery trade, having fallen out of favor as many old plants often do. The species is still a familiar site around old home places, cemeteries, abandoned buildings, and the like throughout the South, but is difficult to find in most commercial nurseries. The primary reason for this is that the commercially available modern Phlox hybrids sporting exotic flower colors and shapes are not tolerant of our growing conditions. These new Garden Phlox hybrids were bred to perform in the milder conditions of more norther climes and are extremely susceptible to the many fungal diseases brought on by Florida’s heat and humidity of summer, particularly Powdery Mildew. It’s best to avoid these newcomers and stick to the old variety with its pink flowers and ironclad constitution. Plain old Garden Phlox can be found in some independent and native plant nurseries, but the best and most rewarding method of acquisition is to make friends with someone that already has a clump and dig up a piece of theirs!
If you have been looking for a low-maintenance, high impact perennial to add to your landscape, old-fashioned Garden Phlox might be just the plant for you! For more information on Garden Phlox, other landscape perennials, passalong plants or any other horticultural topic, contact your local UF/IFAS County Extension Office. Happy Gardening!