by Daniel J. Leonard | Jul 23, 2020
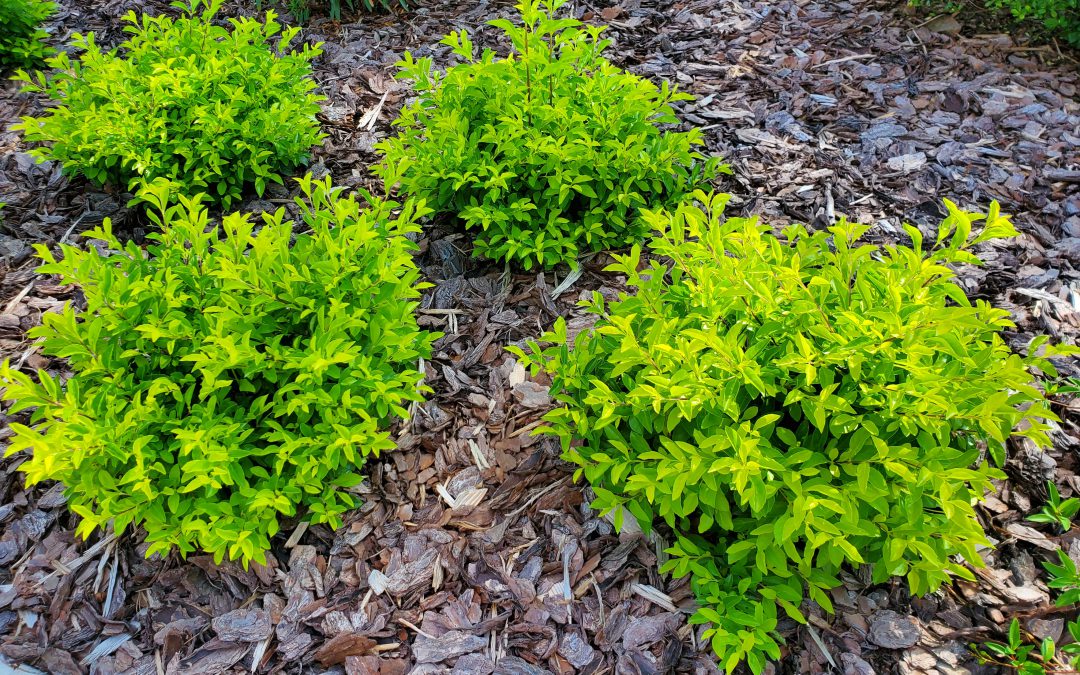
Flowers can often be fickle in the landscape, so, this year, I decided to add a shot of no-maintenance color to my landscape with foliage plants! The benefits of ornamentals that don’t need flowers to put on a show are many. Their water and fertility needs are often less because they don’t have to support the large energy and irrigation requirements the flowering process demands. They don’t need deadheading to look their best and they lend an awesome texture that is overlooked in many landscapes. My summertime foliage plant of choice provides all those things in a small, bright yellow package; it’s a widely sold selection of Duranta called ‘Gold Mound’.

Mass of ‘Gold Mound’ Duranta in the author’s landscape.
‘Gold Mound’ Duranta is a small shrub known for its chartreuse to bright yellow foliage and generally grows 24” or so tall and wide in the Panhandle, allowing it to fit in nearly any landscape. ‘Gold Mound’ has been around in the horticulture trade a long time and is a popular perennial shrub in the southern parts of Florida. It was recognized as the Florida Nursery, Growers, and Landscape Association’s (FNGLA) plant of the year in 2005 and regularly occupies a spot in the color displays of big box and local nurseries, even in the Panhandle, however, despite these attributes, ‘Gold Mound’ is a rare find in Northwest Florida landscapes. That needs to change!
In our neck of the woods, Duranta ‘Gold Mound’ is incredibly low maintenance. I planted a grouping of thirteen specimens near the end of my driveway to provide a consistent season long splash of color to complement the fleeting blooms of the spring flowering shrubs, the drab greenery of the neighbor’s lawn and the on-again, off-again ‘Drift’ Roses they share the bed with. The result has been awesome! I watered frequently until the small shrubs were established and on their own, with no irrigation since. I fertilized at planting with a slow release, polymer coated fertilizer and have not had to help them along with subsequent applications. Even better, despite our frequent rainfall and heat/humidity, no pests or diseases have come knocking. Just because I enjoy gardening doesn’t mean I need a landscape full of divas and I can count on ‘Gold Mound’ to not need pampering.
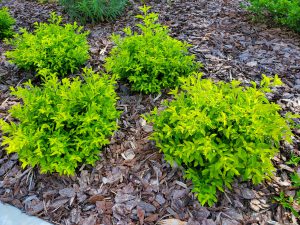
Incredible chartreuse foliage of ‘Gold Mound’.
Maybe my favorite part of ‘Gold Mound’ Duranta in the Panhandle is that it isn’t permanent. Duranta is a native of the Caribbean tropics and is not particularly cold hardy, most Northwest Florida winters knock it back hard, if not outright killing it. Therefore, ‘Gold Mound’ is best enjoyed here as an annual, planted when the weather warms in the spring, enjoyed until the first frost, then pulled up and discarded. Easy peasy. No long-term commitments required. My uncle, the chainsaw gardener, doesn’t even have to chop it back! Just compost the plants each winter or toss them in the trash, hit up your local nursery the next spring for some new plants and do it all over again. Though it has to be replanted each year, Duranta ‘Gold Mound’ won’t break the bank. The generic ‘Gold Mound’ is commonly sold in 4” containers for just a few dollars apiece in the annual section of plant nurseries, making it a very affordable option, especially compared to some of the new, designer perennials it competes with.
Though some landscape designers recommend just using a single specimen of ‘Gold Mound’ here and there for small pops of color, I prefer using groupings of the plant. I’ve seen successful plantings of ‘Gold Mound’ massed in large groups to create annual color beds at key points in landscapes and also planted across the front of a bed to complement darker foliaged backdrop or foundation plants, such as Boxwood or Loropetalum. Regardless of how you decide to use them in your yard, I don’t think you can go wrong with adding some color pizazz to your landscape with the inexpensive, low-maintenance, Florida-Friendly plant, ‘Gold Mound’ Duranta. Happy gardening!
by Daniel J. Leonard | Jun 2, 2020
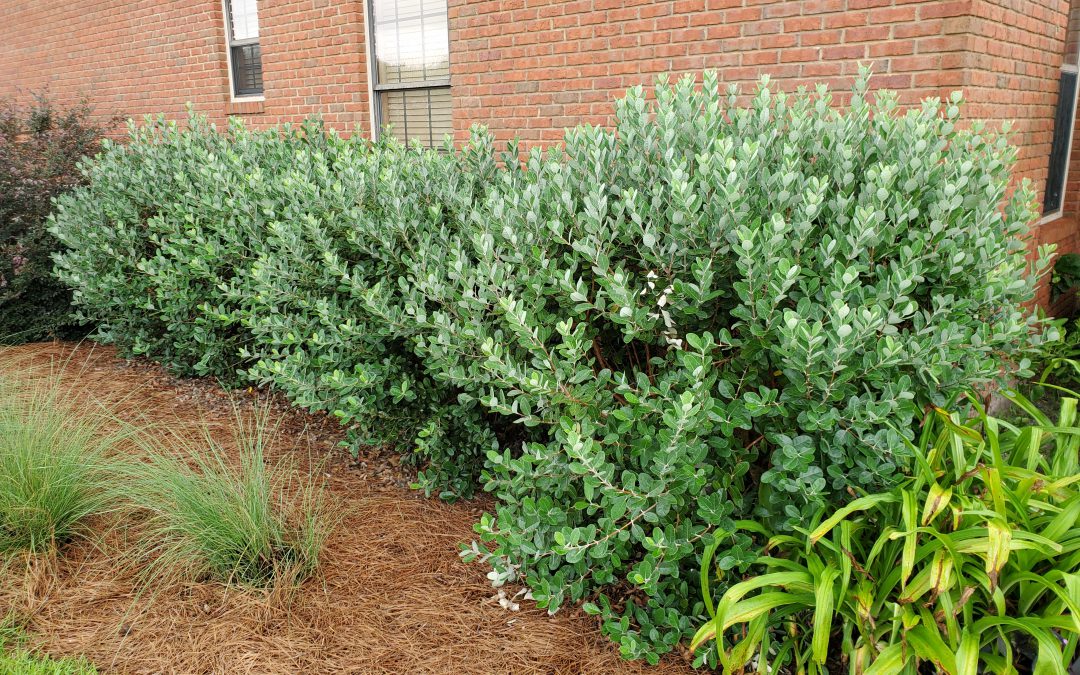
Pineapple Guava (Acca sellowiana) hedge. Photo courtesy of the author.
One of the most common questions I’ve gotten across the Panhandle over the last several years is “What can I plant to screen my house and property?” I surmise this has a lot to do with Hurricane Michael wiping properties clean and an explosion of new construction, but whatever the reason, people want privacy, they want it quickly, and they often want something a little more natural looking and aesthetically pleasing than a fence. Like everything else, the answer to the question is nuanced depending on the site situation. However, if the situation is right, I almost always recommend that clientele at least consider a woefully underutilized plant in the Panhandle, Pineapple Guava (Acca sellowiana).
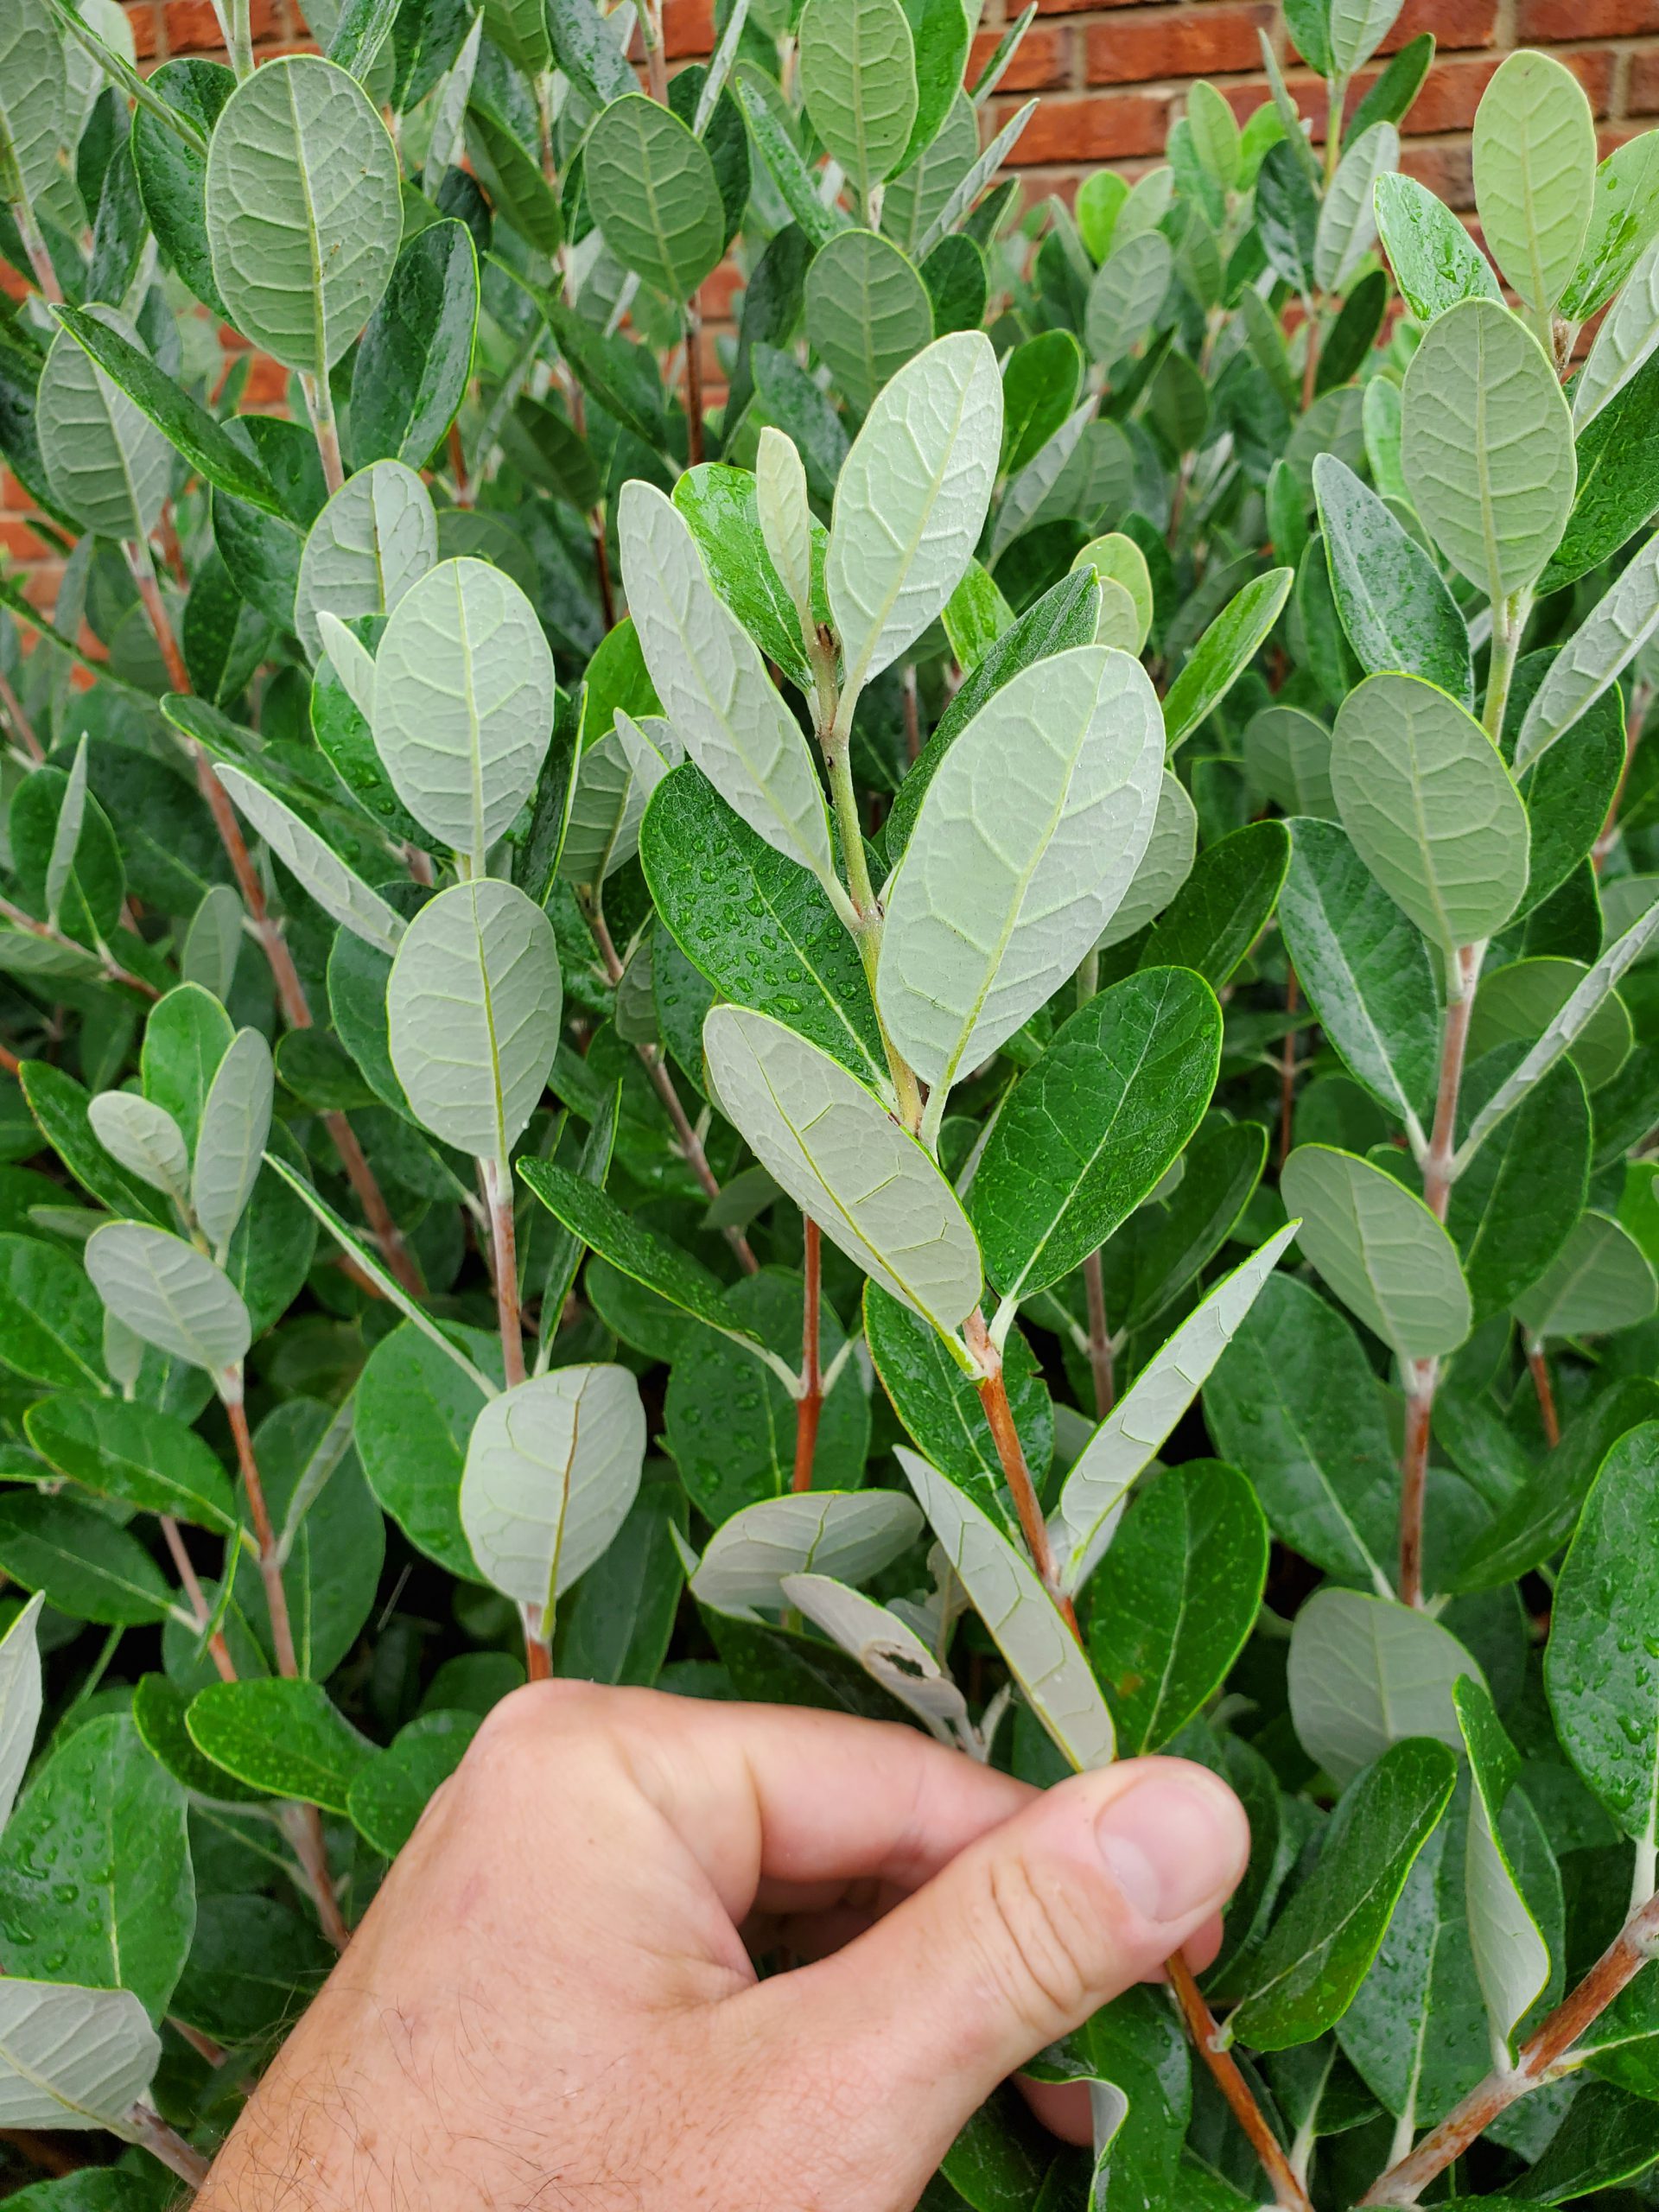
Named a Florida Garden Select Plant by the Florida Nursery Growers and Landscape Association (FNGLA) in 2009, Pineapple Guava is a standout screening and specimen plant, passing all the usual tests homeowners demand from shrubs. Growing 15’x15’ or so if never pruned or sheared, these quick-growing evergreen shrubs sport pretty, leathery green leaves with gray to white undersides. This leaf underside coloring causes the plants to emit a striking silvery blue hue from a distance, a very unusual feature in the screening shrub world.

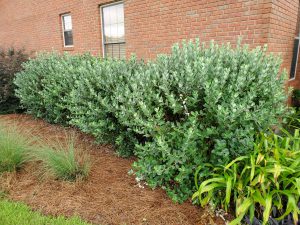
Pineapple Guava (Acca sellowiana) silvery blue leaf undersides. Photo courtesy of the author.
Look past the leaves and you’ll notice that Pineapple Guava also possesses attractive brownish, orange bark when young that fades to a pretty, peely gray with age. To complete the aesthetic trifecta, in late spring/early summer (generally May in the Panhandle), the plants, if not heavily sheared, develop gorgeous edible, pollinator-friendly flowers. These flowers, comprised of white petals with bright red to burgundy stamens in the center, then develop over the summer into tasty fruit that may be harvested in the fall.
In addition to being a superbly attractive species, Pineapple Guava is extremely easy to grow. They like full, all-day, blazing sunshine but will tolerate some shading if they receive at least six hours of direct sun. Well-drained soil is also a must. Pineapple Guava, like many of us, is not a fan of wet feet! Site them where excessive water from rain will drain relatively quickly. Adding to its merits, the species is not plagued by any serious pests or diseases and is also drought-tolerant, needing no supplemental irrigation once plants are established. A once a year application of a general-purpose fertilizer, if indicated by a soil test, may be useful in getting plants going in their first couple of years following planting, but is rarely necessary in subsequent years. To maintain Pineapple Guava as a formal hedge or screen, a simple shear or two each growing season is normally enough. The species also makes an outstanding small specimen tree when allowed to grow to its mature height and “limbed-up” to expose the interesting bark and limb structure.
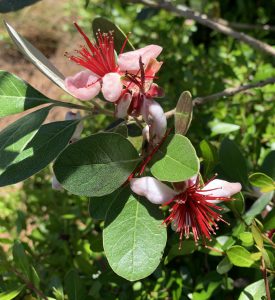
Edible, pollinator-friendly Pineapple Guava flowers in bloom. Photo credit: Larry Williams
If you’ve been looking for a quick-growing, low-maintenance screen or a specimen plant for a large landscape bed, you could do a lot worse than the Florida-Friendly Pineapple Guava! As always, if you have any questions about Pineapple Guava or any other horticulture, agriculture or natural resource related issue, contact your local UF/IFAS County Extension Office!

by Daniel J. Leonard | May 20, 2020
Nearly everyone dreams of having a perfectly lush, green turfgrass lawn in the backyard. Indeed, lawns provide many benefits to homeowners! A well-managed lawn is an excellent filter of chemical and nutrient runoff, builds soil through the breakdown of clippings, thatch and organisms that exist in turf systems, is aesthetically pleasing and increases property values, reduces ambient air temperatures and provides a durable surface for pets and play! However, none of these turf benefits can be realized if you don’t install and establish sod correctly. Remember these ten tips when planning, installing, and establishing sod to realize your perfect lawn dream!
Choose the Correct Species for Your Site. Not every site is equal. Is irrigation present, or will the turf be on its own? Are you willing and able to provide a higher level of care or will you sacrifice some aesthetic appeal for a lower maintenance turf? These and other questions need to be answered before you buy! Do some homework before settling on a particular grass species and cultivar; they all have merits and drawbacks.
Prepare the Site. Ensure the area you’ll be installing your new sod is weed-free, not compacted, and smooth. Several weeks before installation, apply a non-selective herbicide to “clean” the site of weeds. After existing weeds die, it’s a good idea to till the area or at least “rough it up” with a heavy rake. This helps alleviate site soil compaction which allows easier root initiation from sod to soil. Finally, smooth the site to ensure good root to soil contact and prevent a bumpy surface later.
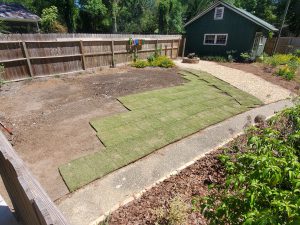
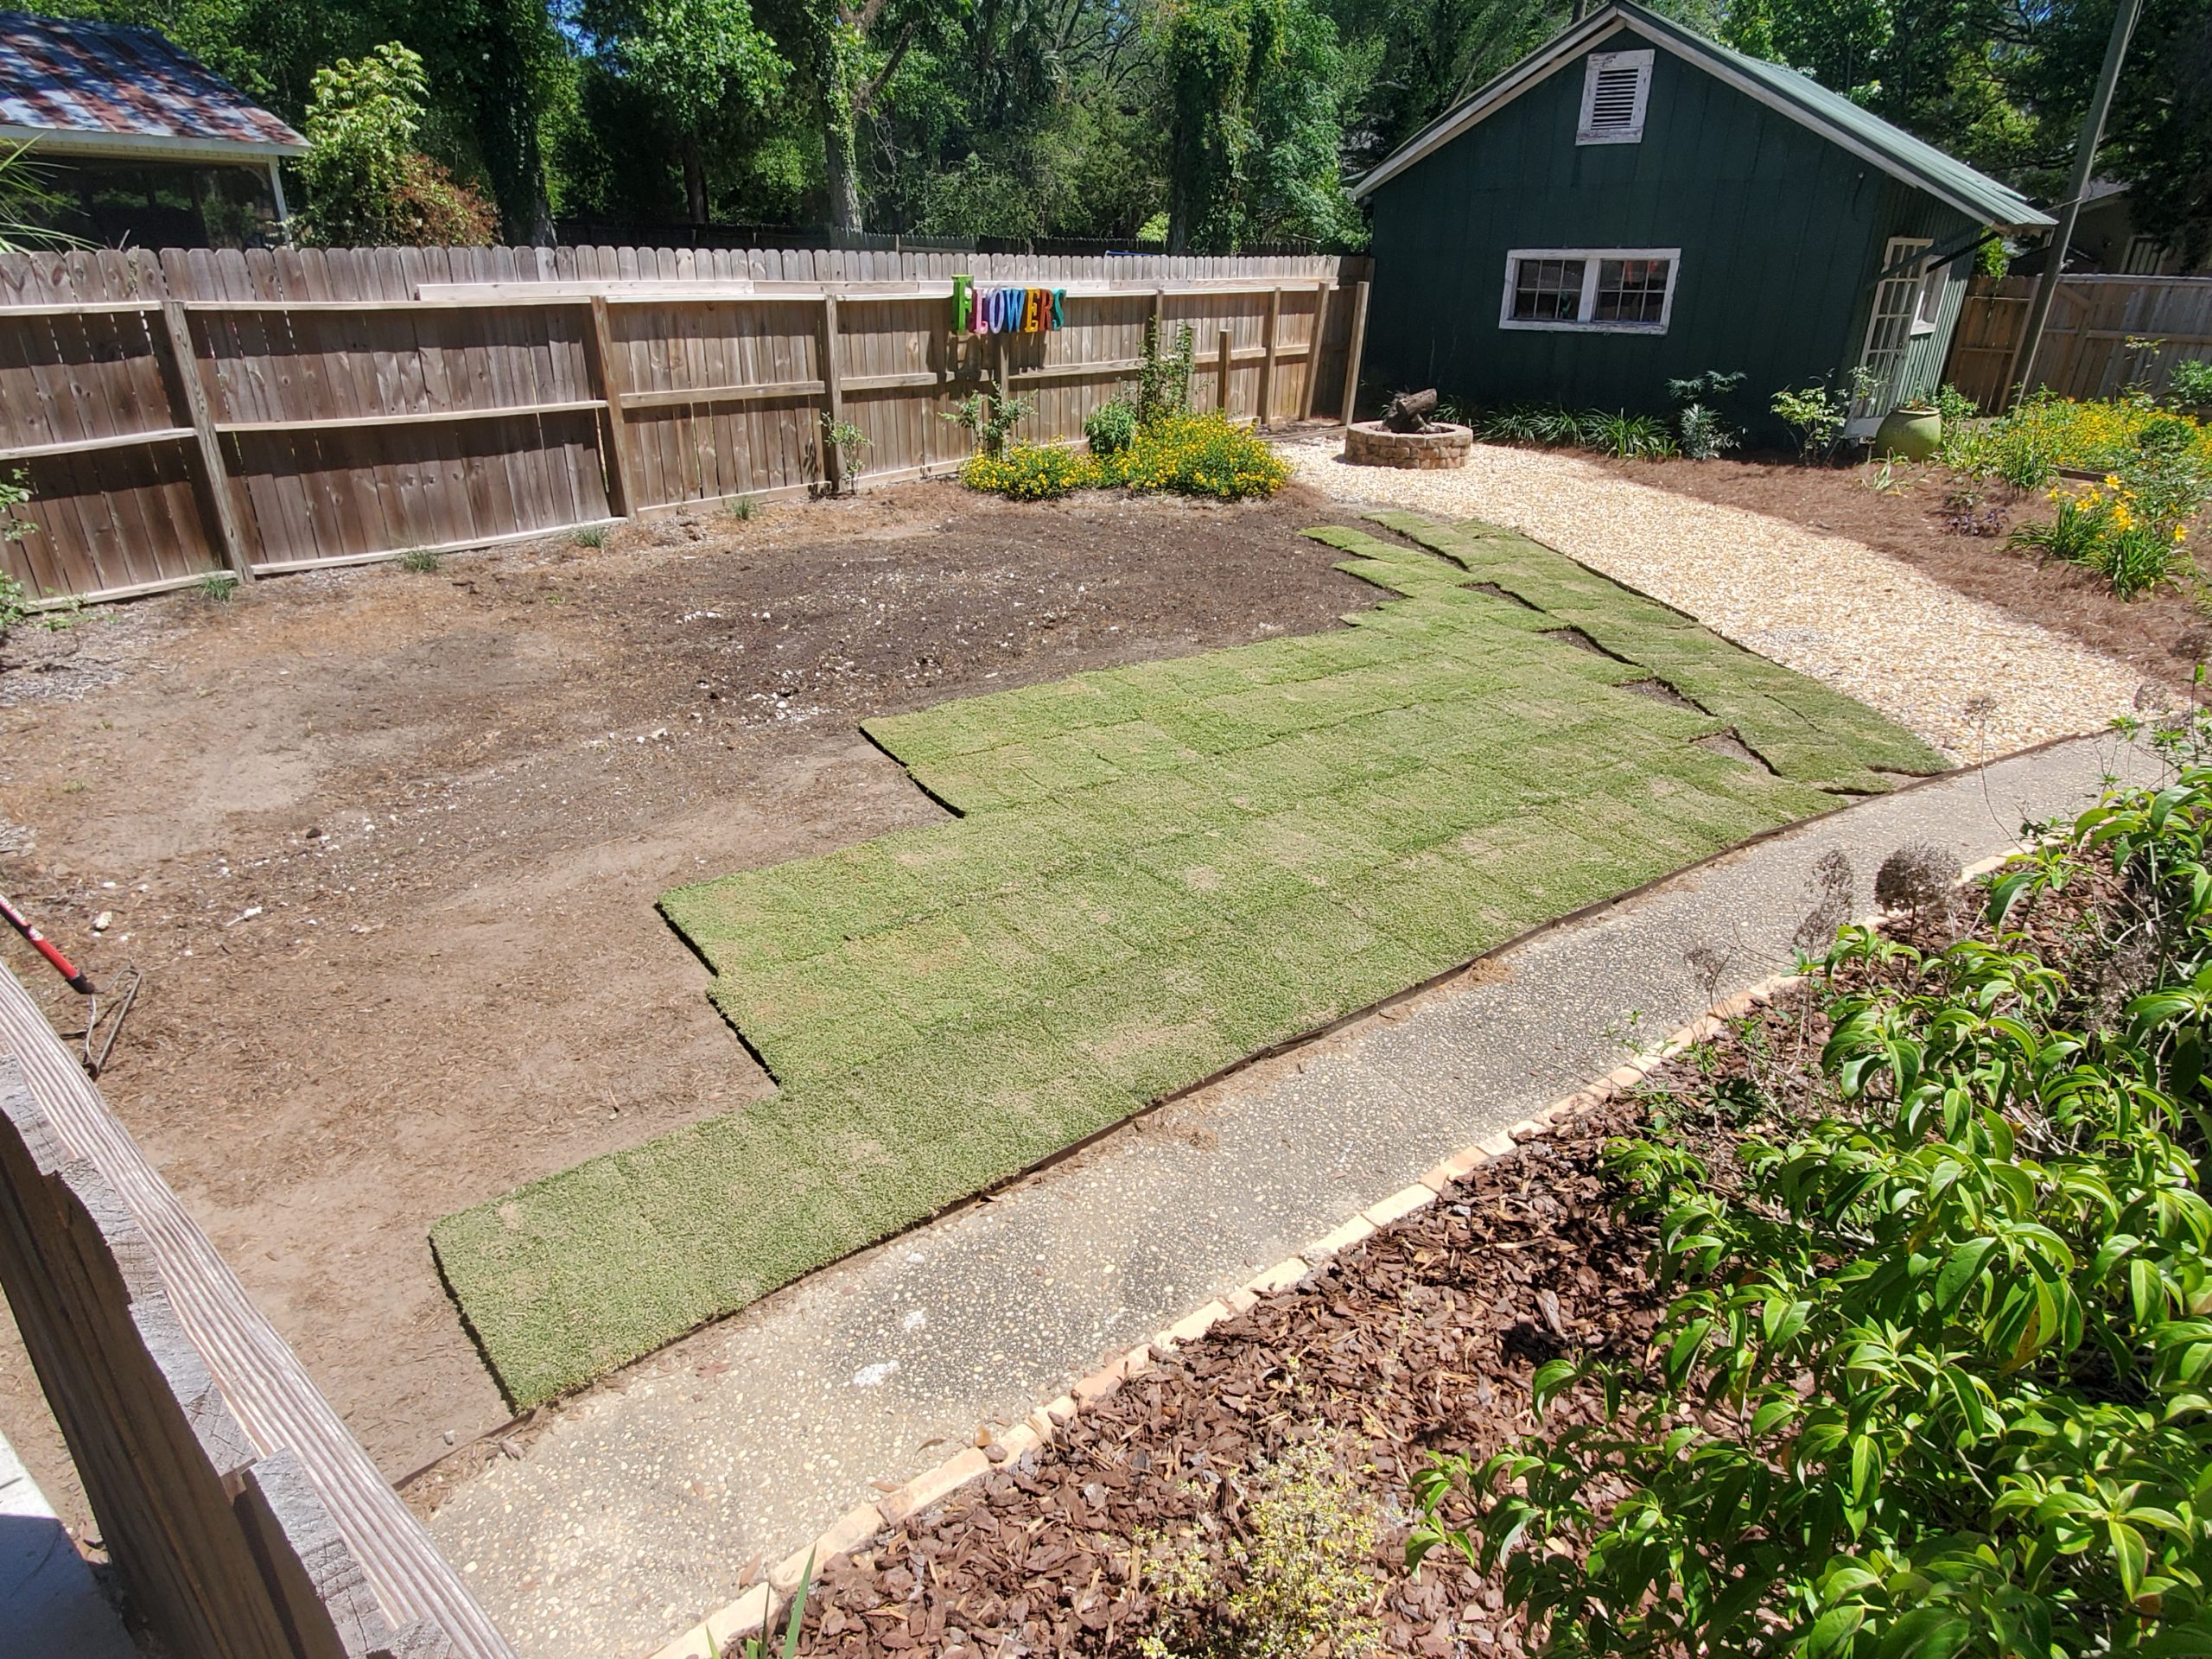
Time for some water! ‘Tiftuf’ Bermuda sod ready for a mid-lay watering. Hot and dry conditions demand sod be kept moist. Photo courtesy of the author.
Buy Quality Sod. Research where the dealer you purchase sod from sources their grass. Ensure you’re buying turf from a respected operation that follows Sod Production Best Management Practices. Not all farms are equal.
Lay it Quickly. If buying from a retail dealer, make sure their sod is fresh. Sod quality declines rapidly after 48 hours from cutting. Ideally, sod is installed the same day it’s cut on the farm, but not later than the next day.
Water periodically during installation. If installing a large area of turf, periodically wet sod you’ve already laid. Think about the day the sod you’ve laid has had. It was ripped from its home soil, windblown on a trailer en route to your site, laid onto a warm, bare soil surface and is currently baking in the sun waiting on you to finish laying the rest. That’s stressful and a good way to have a crispy brown patch in the new lawn! Ease the sod’s stress by periodically wetting as you lay it. It’s also not a bad idea to lightly moisten the site prior to laying the new sod. Avoid making it muddy.
Mound Soil Around Edges. This prevents the edges of freshly laid turf from drying quicker than the rest of the grass and browning out. It doesn’t have to be a lot, just take a heavy rake and fill in the gap between the soil surface and the leaf blades. Think of it as hiding exposed roots from the sun and wind. Trust me, this step keeps you from having a nice brown ring circumventing your new green lawn!
Pack it Down. You can be fancy with a drum roller partially filled with water or simply use a rake or tamping tool to lightly tamp the grass down. This helps ensure good root contact with the soil, prevents dry patches in the establishing sod, and quickens rooting time.
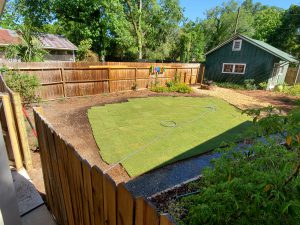
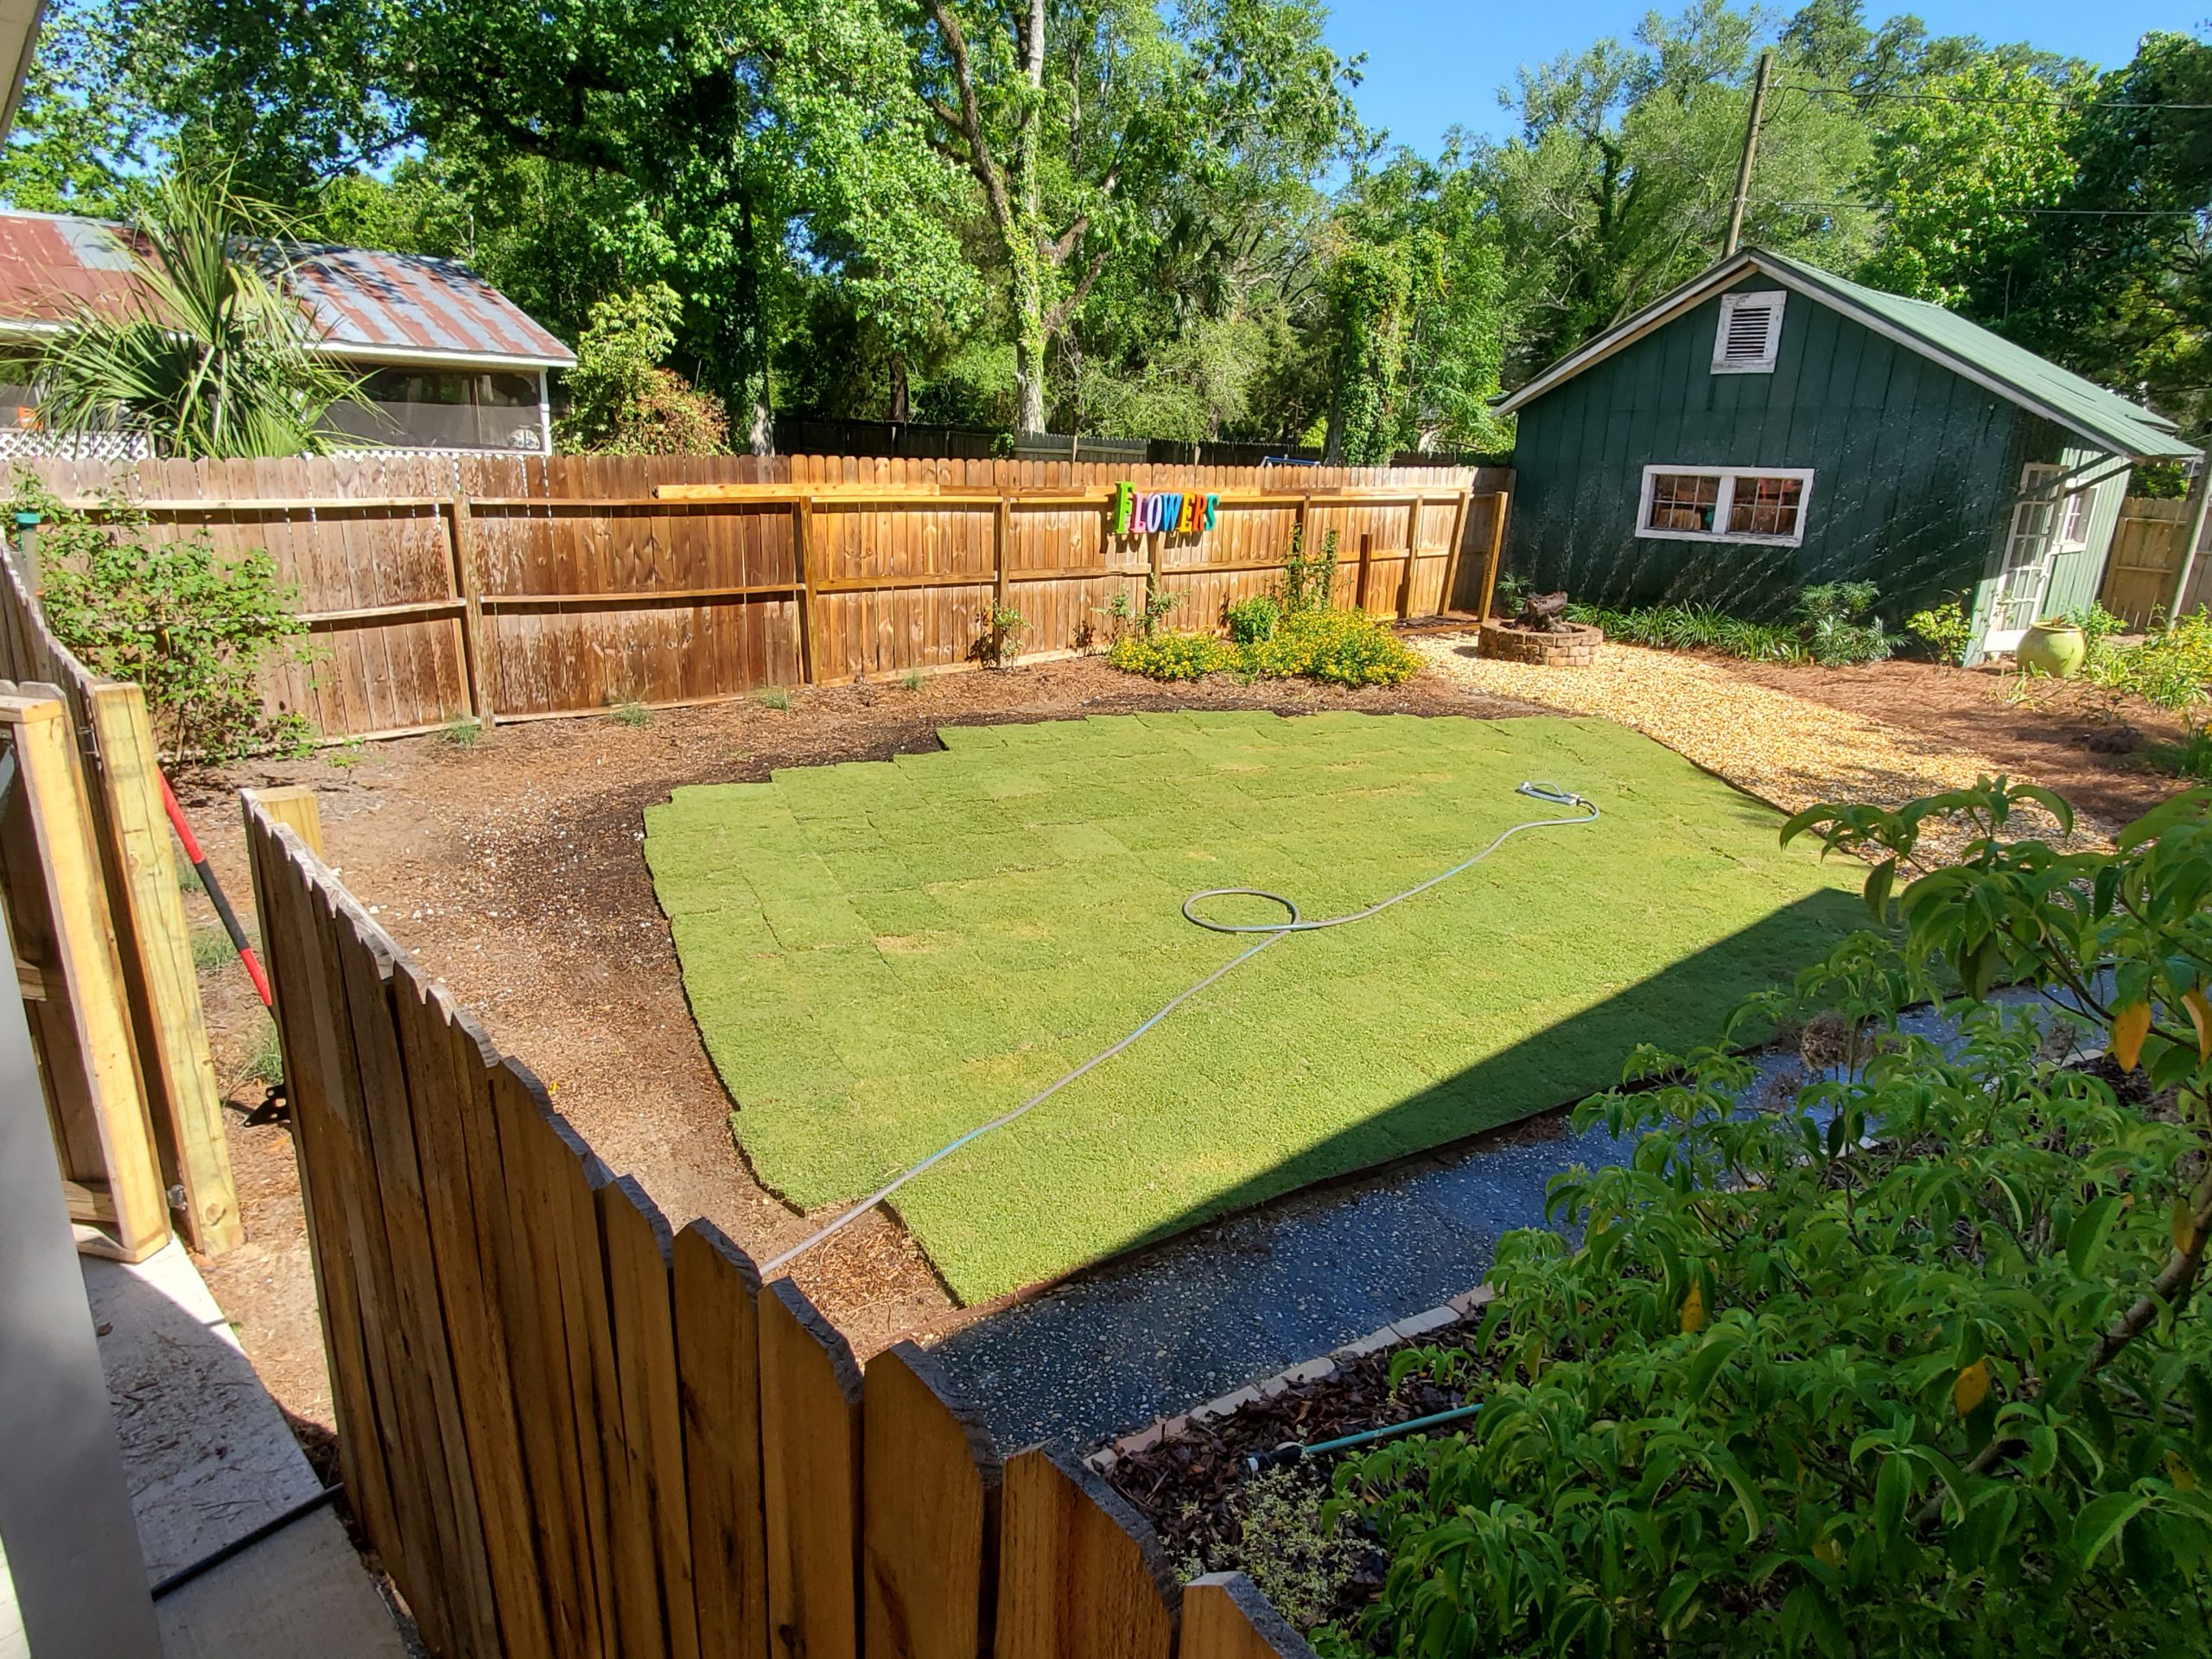
Almost finished! Remember to tamp down and mound soil around the roots of the edge pieces. Photo courtesy of the author.
Water Correctly. Your new sod needs to be thoroughly watered daily for the first 10-14 days after installation. Remember how stressful the sod laying process is to turf. It takes a little while for sod to recover and initiate rooting into its new home. Don’t miss a day! Following this initial 10-14 day period, back off to once every couple of days for another two weeks or so. After that, the sod should be rooted in nicely and be able to rely on regular, as needed, lawn irrigation intervals.
Stay Off It! Minimize traffic on new sod for several weeks after installation. Roots are establishing during this time and are extremely vulnerable to disturbance until anchored. I know you’re ready to enjoy your new lawn, but you’ve come too far now to mess it up!
No Fertilizer for 30-60 days! Plants without roots have a hard time taking up nutrients. Therefore, it makes sense that until sod has firmly anchored into place and established a new root system, fertilizer application should be withheld. Fertilizer applied during the initial establishment period will likely be wasted and leach through the soon-to-be rootzone and could even burn fragile new roots. Also, avoid using a starter fertilizer for the same reason – there aren’t any roots to take up the nutrients.
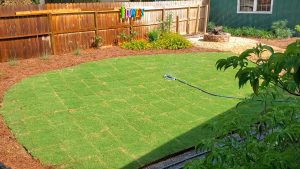
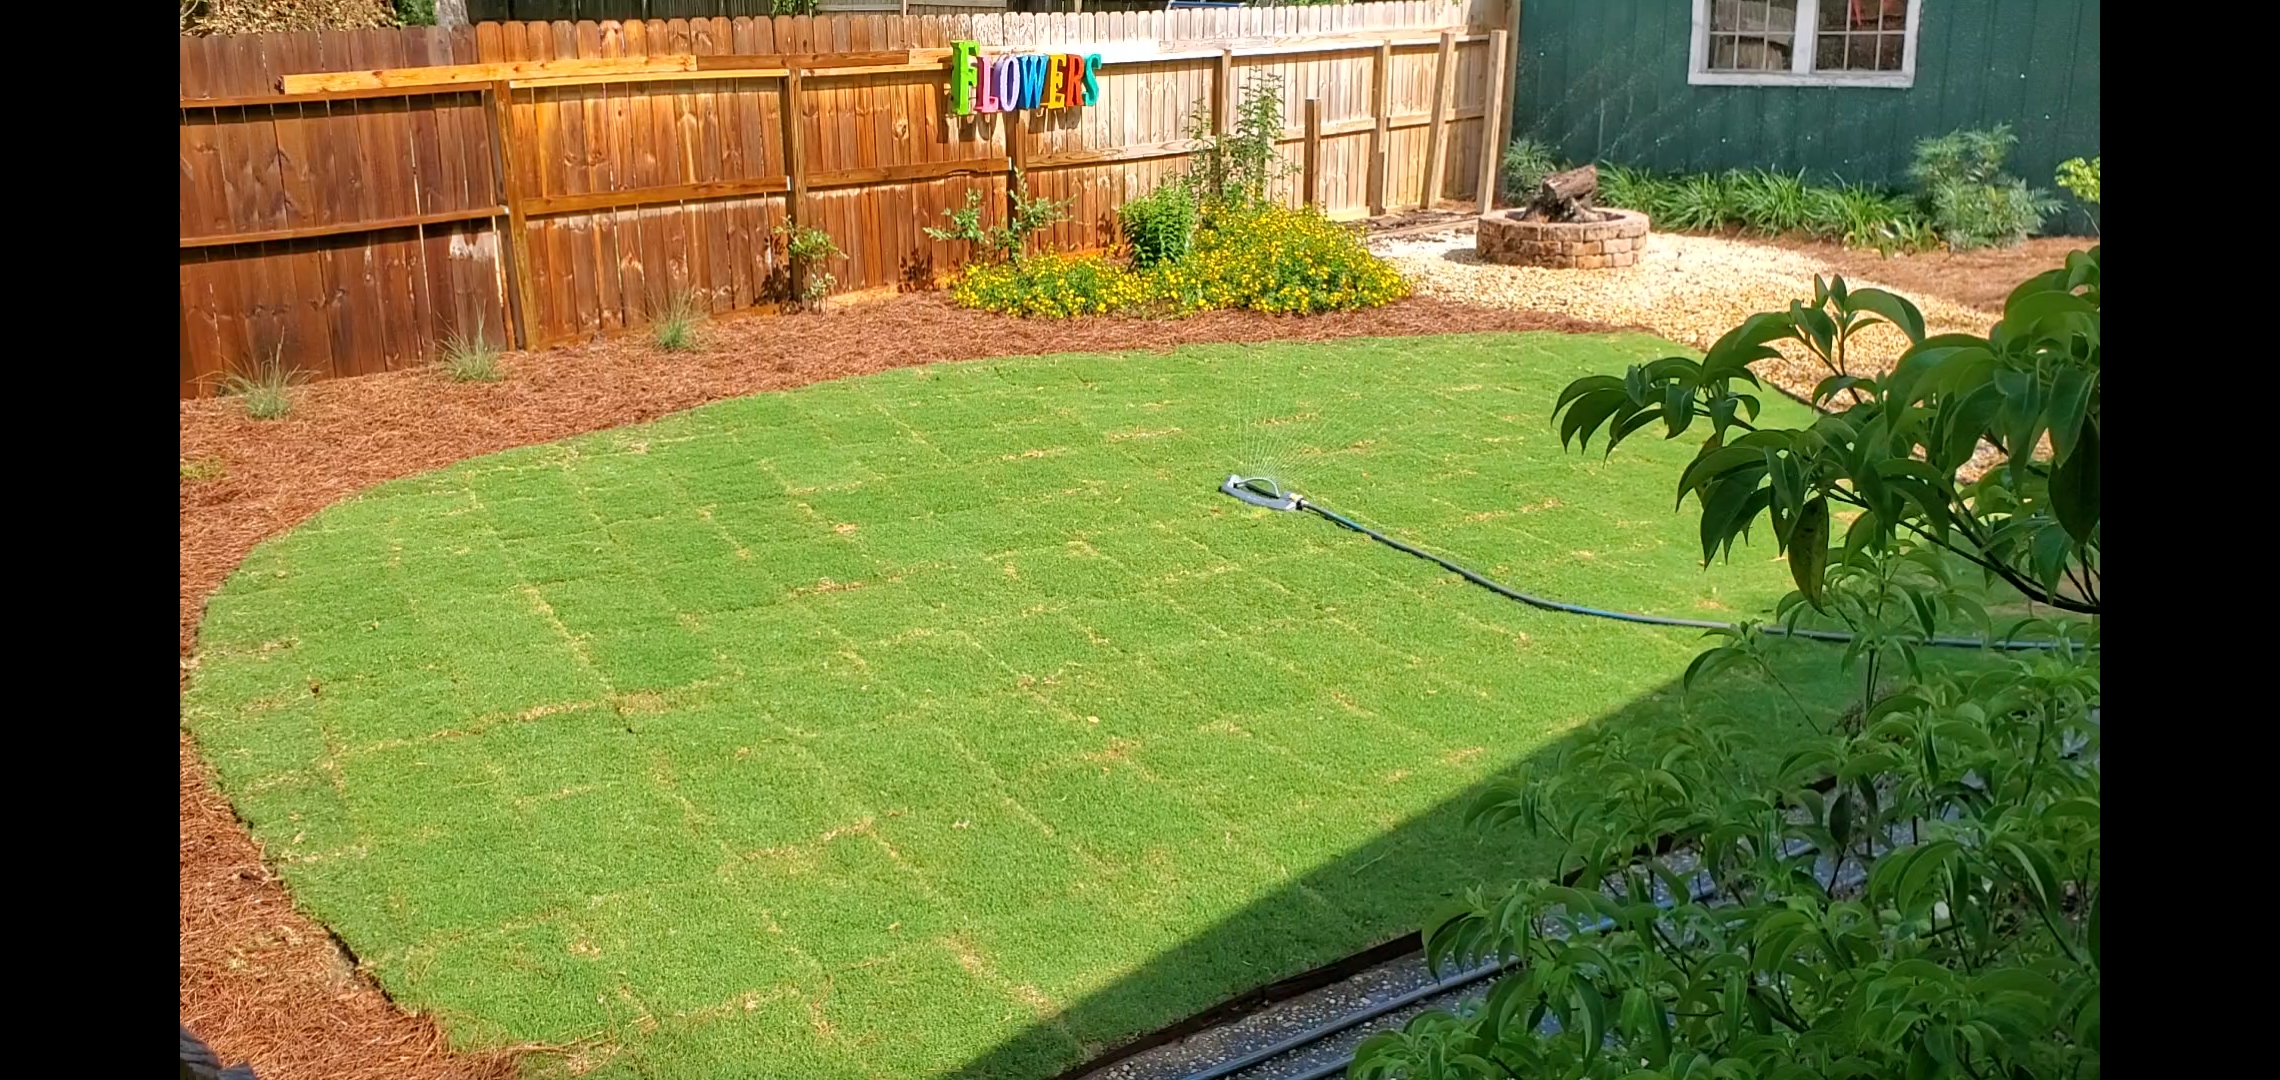
‘Tiftuf’ Bermudagrass sod being watered after installation is finished. Do this daily for 10-14 days following installation. Photo courtesy of the author.
By following these ten tips, you’ll be well on your way to a perfect lawn! For more information on these and other lawn care topics, contact your local UF/IFAS Extension Agent and consult The Florida Lawn Handbook, a research-based publication written by UF/IFAS Extension specialists.
by Daniel J. Leonard | May 13, 2020
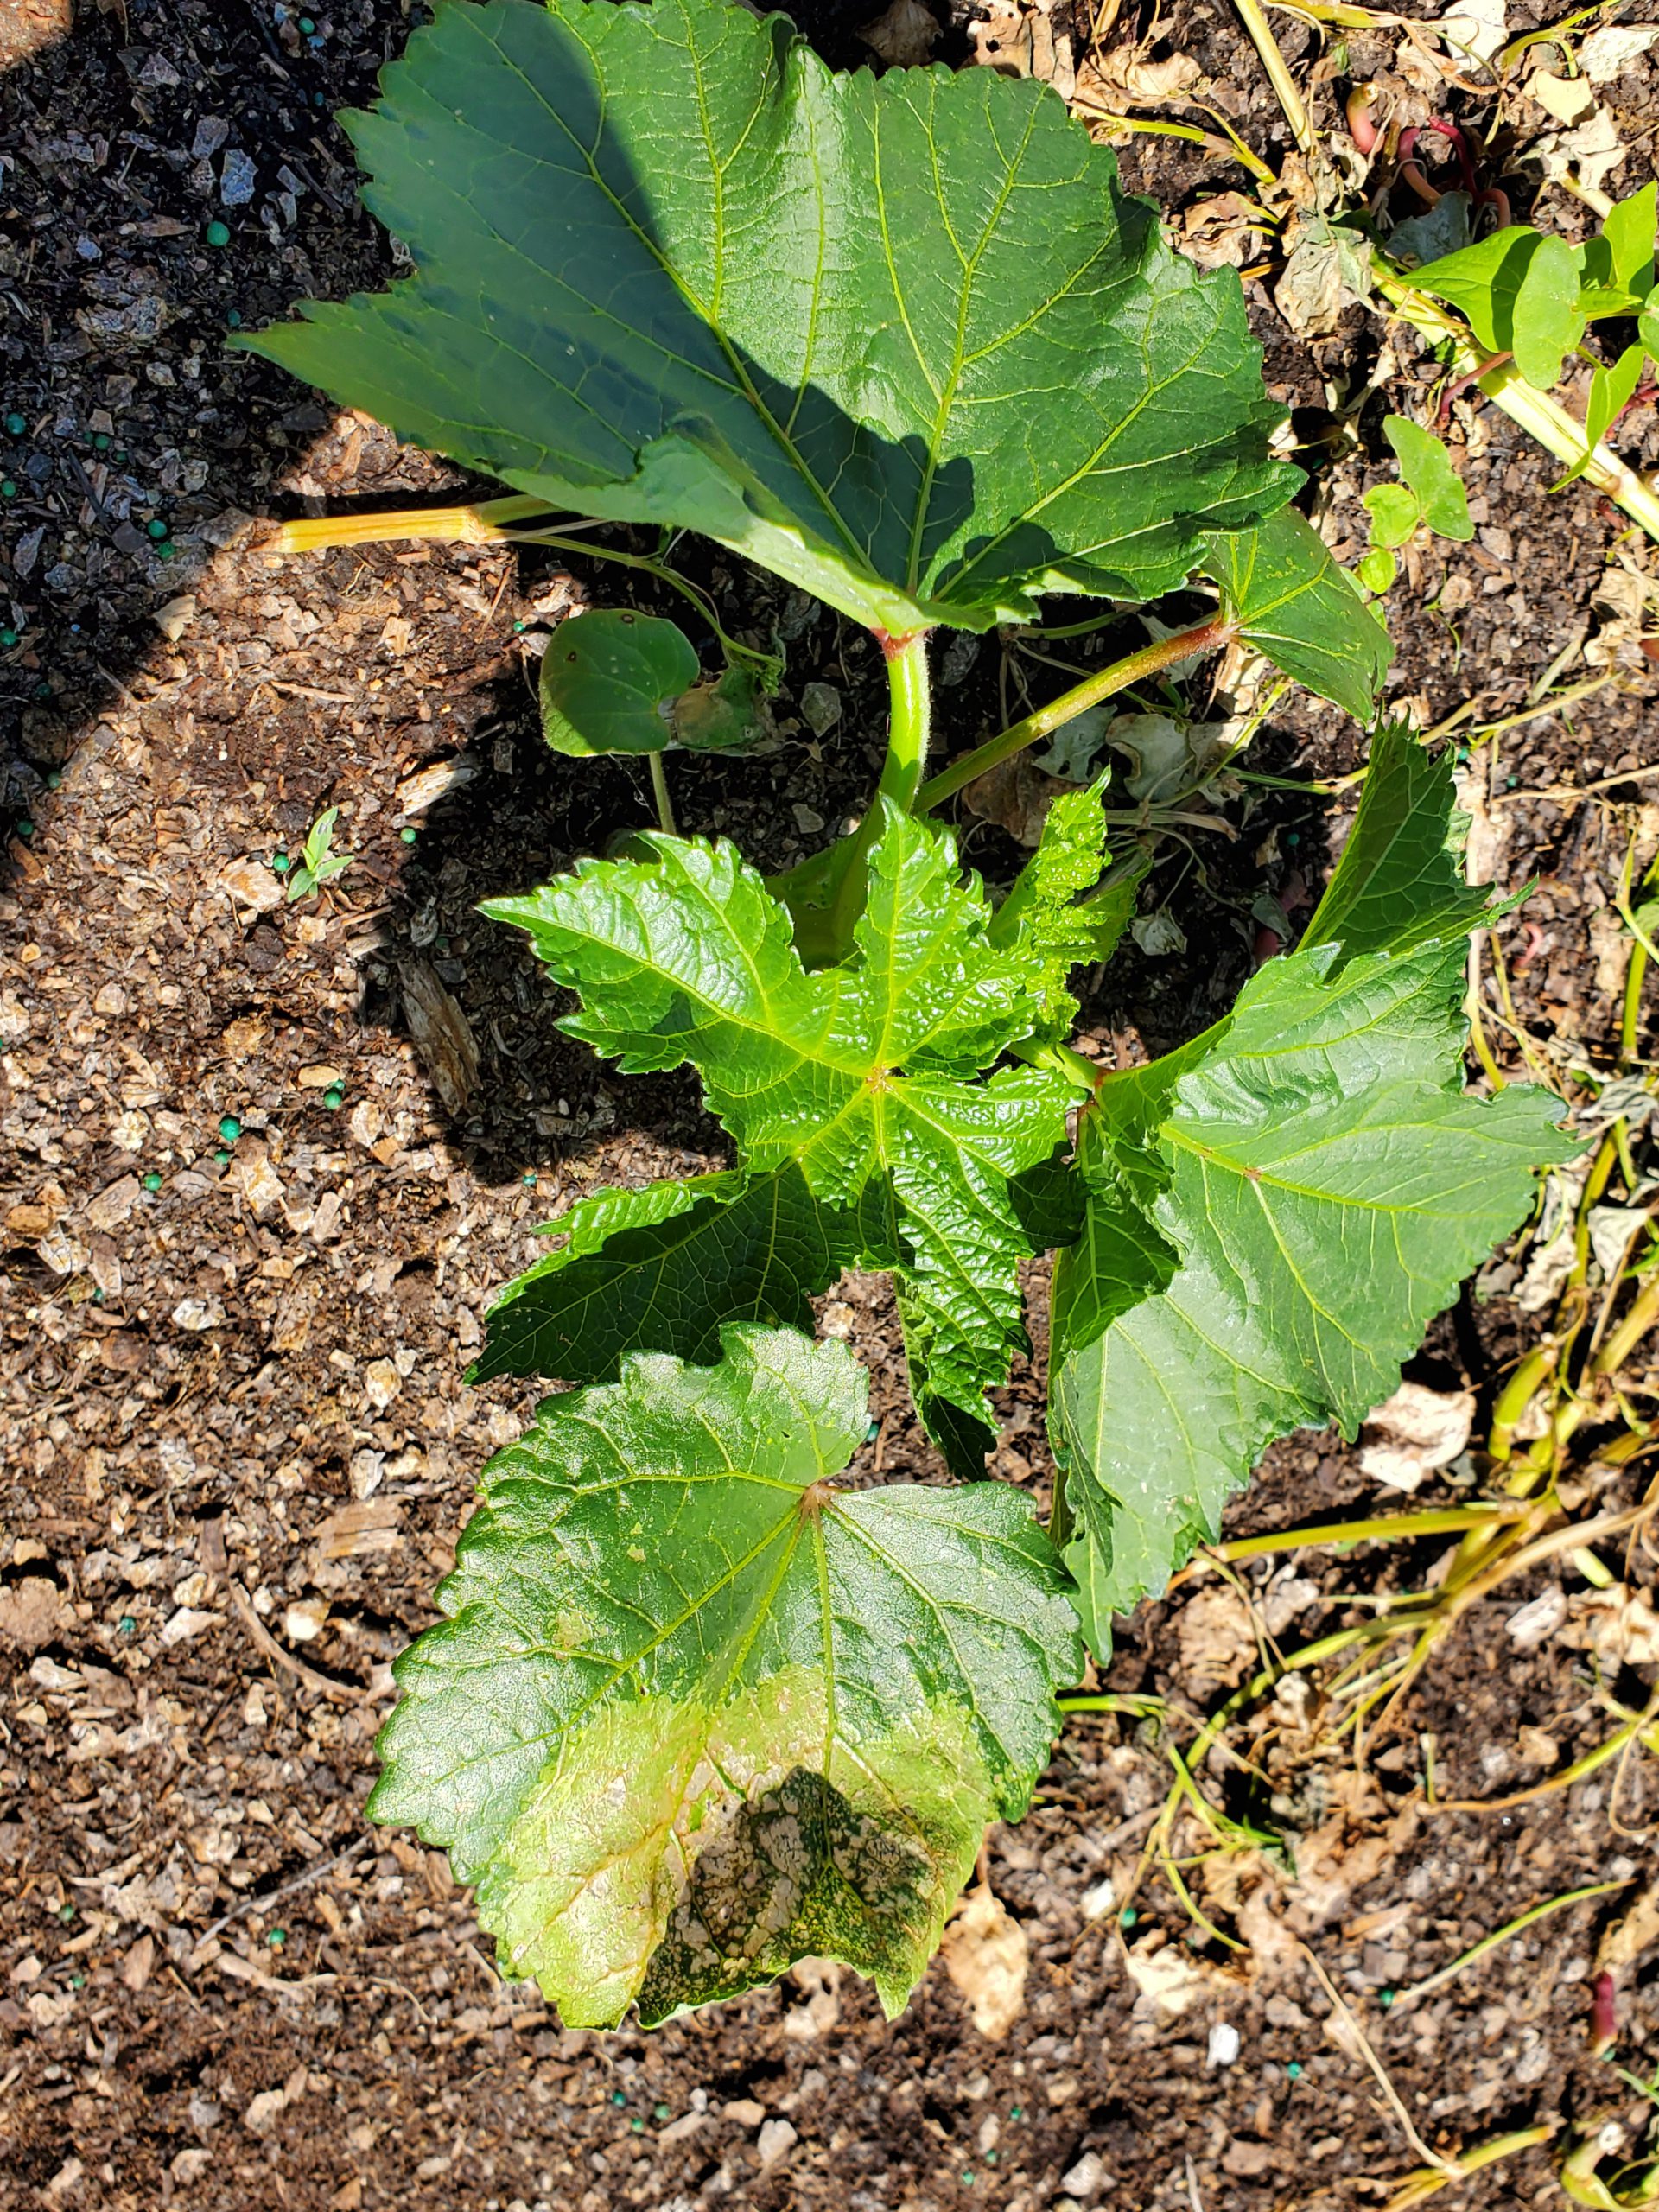
It’s been a challenging spring in this guy’s garden! Despite getting the normal early start required for successful gardening in Florida, I’ve been affected by Bacterial Leaf Spot stunting my tomatoes, cutworms that reduced my watermelon plantings by half, and an eternal test of my patience in the form of a dog that seems to think my raised beds are merely a shortcut to a destination further out in the yard. My latest adversary is the most potentially destructive yet, an outbreak of Southern Armyworm (Spodoptera eridania).
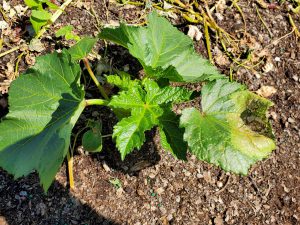
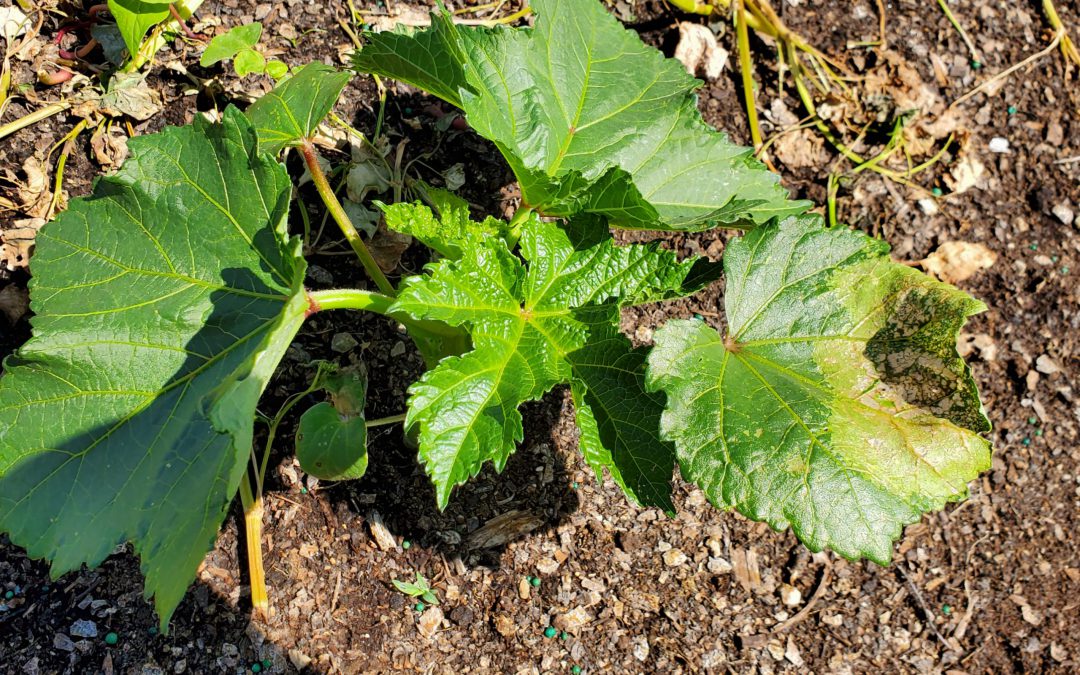
Early Southern Armyworm damage on Okra seedlings. Photo courtesy of the author.
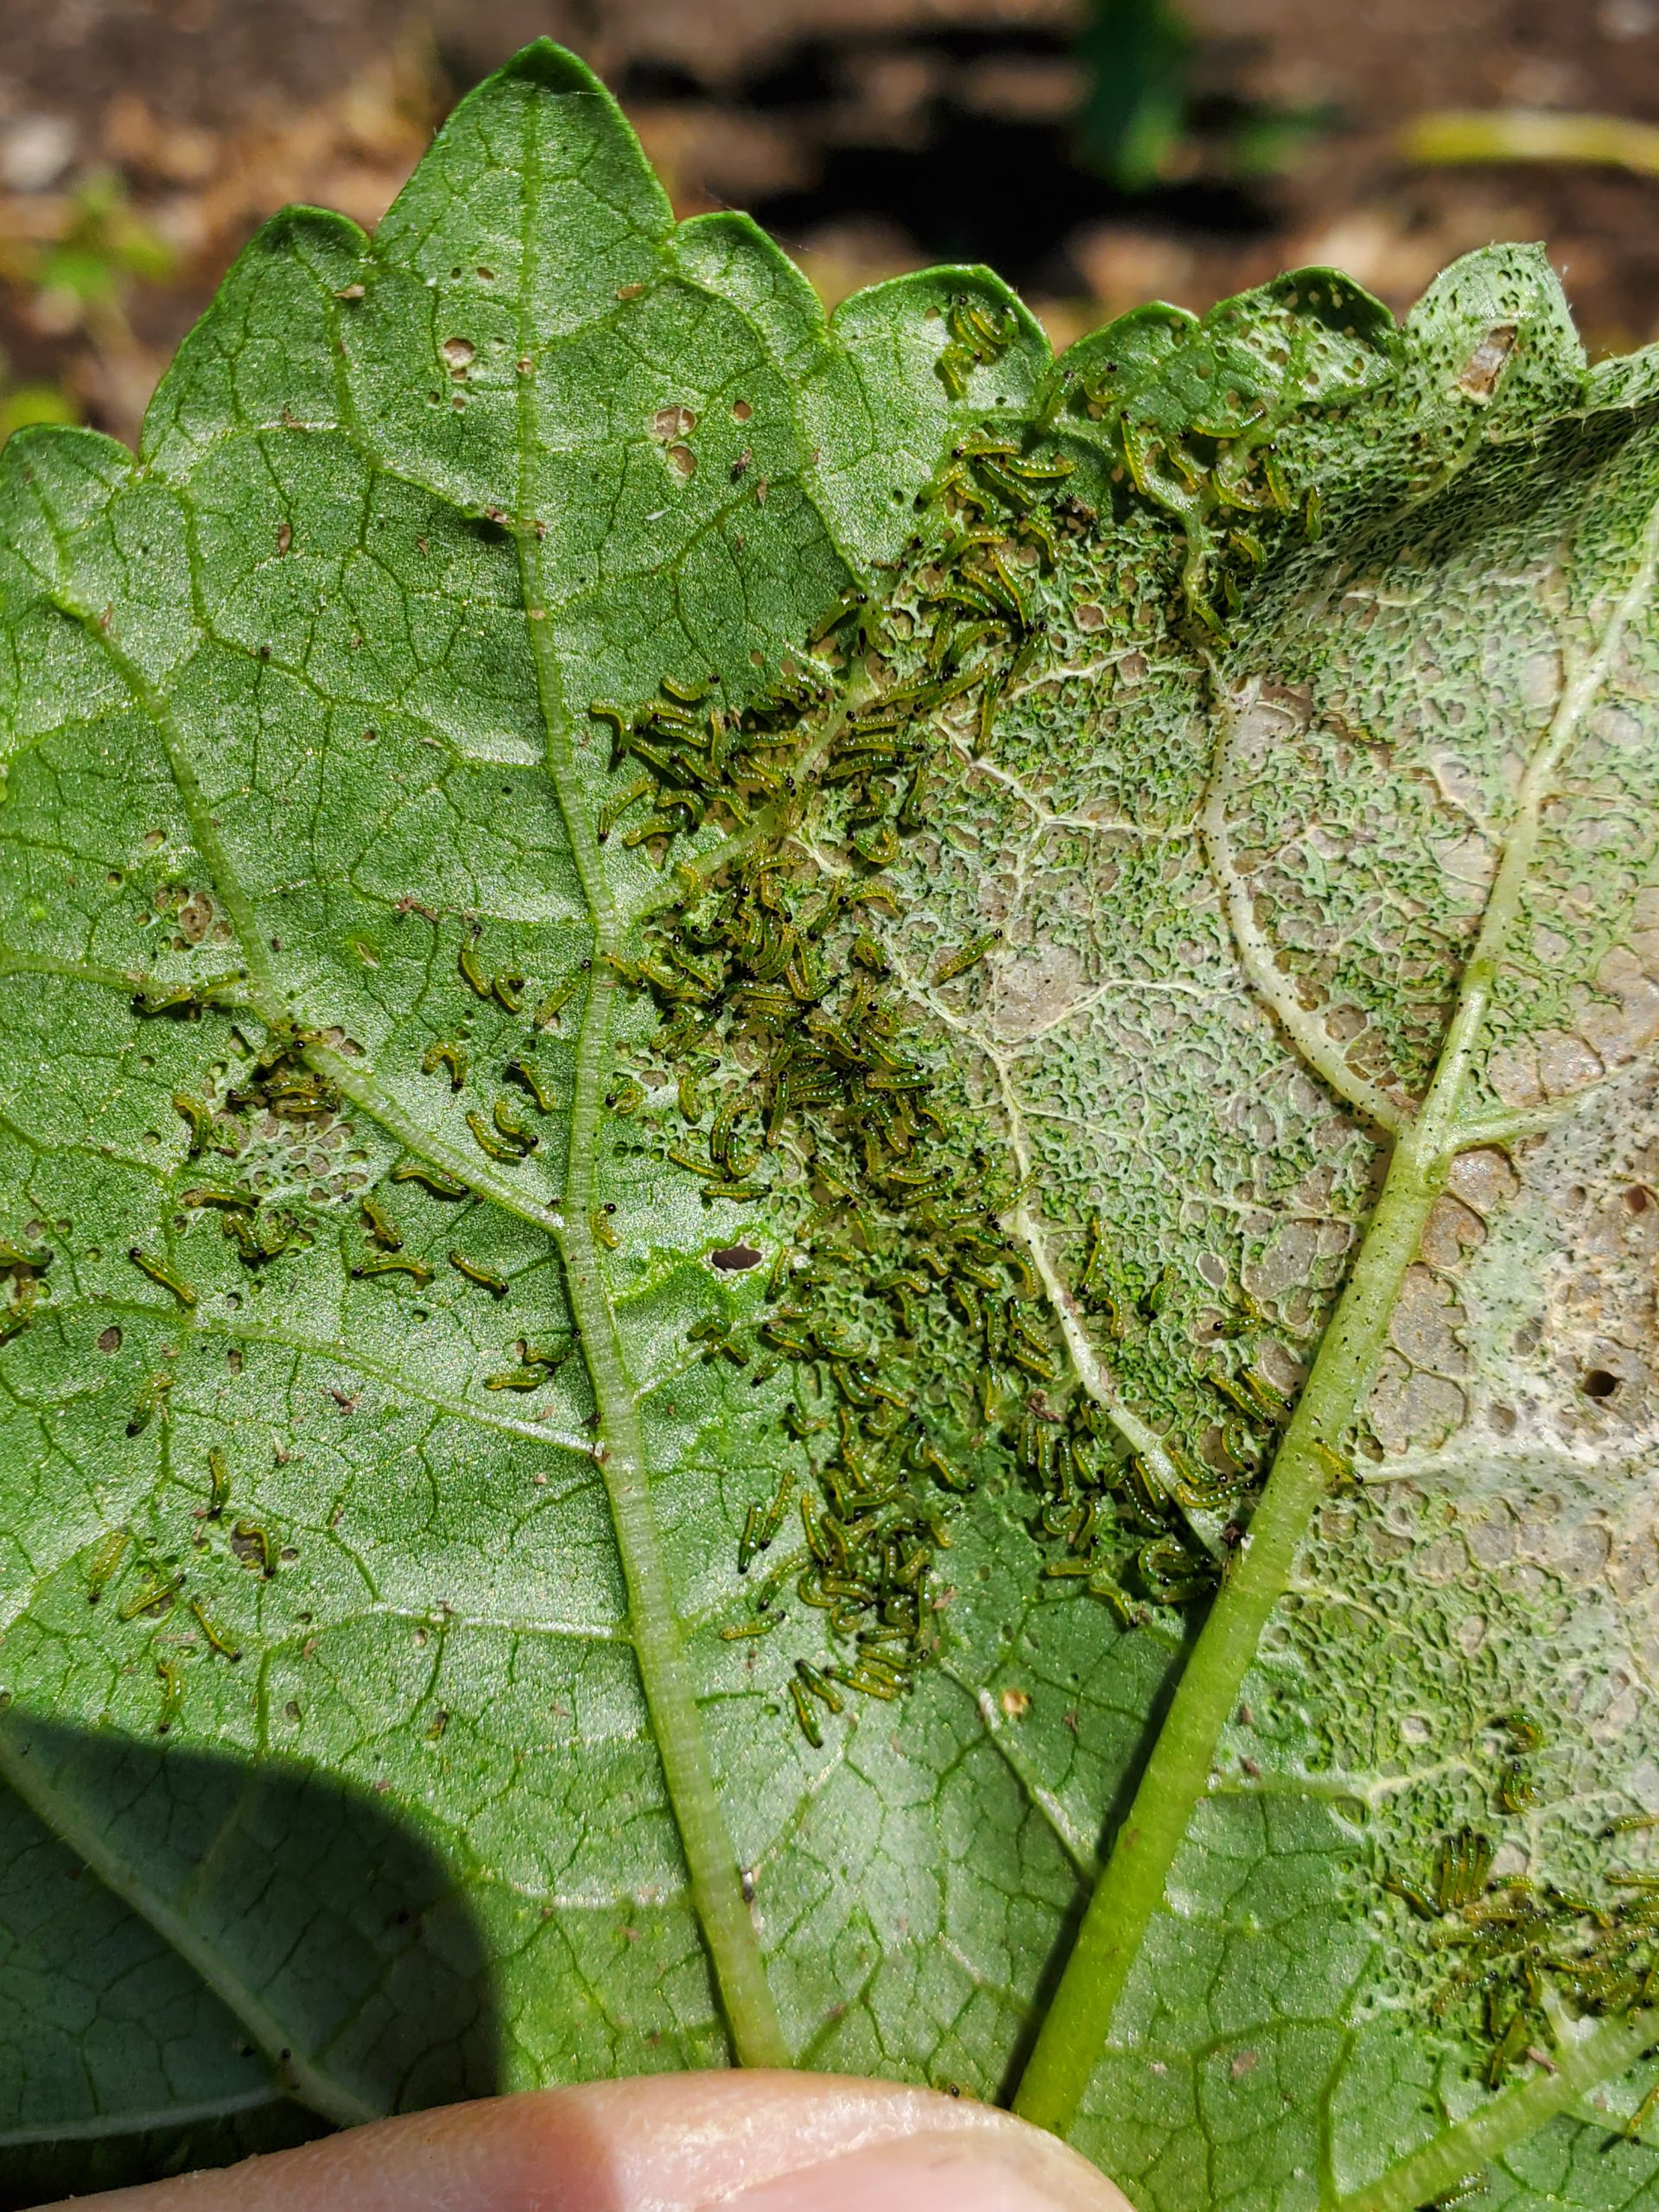
Unlike some serious garden pests that wait until the heat of summer to emerge, Southern Armyworms begin appearing in spring gardens around the end of April. Adult moths can survive mildly cold weather and venture into the Panhandle as soon as warmer spring weather arrives. Once the adult moths arrive, egg masses are then laid on the undersides of leaves and hatch in a little under a week. Once loosed upon the world, Southern Armyworm larvae (caterpillars) become indiscriminate, voracious feeders and congregate in extremely large numbers, allowing them to destroy small, developing garden vegetable plants in a manner of days. Young larvae feed on the undersides of leaves and leave little but a skeleton. As larvae grow larger, they become solitary and begin to bore into fruit. Once they’ve eaten the good stuff (leaves and fruit), large larvae turn to branches and even plant stems!

Southern Armyworm larvae feeding on Okra leaves. Photo courtesy of the author.
The good news for gardeners is that Southern Armyworm, and most other caterpillar pests, are easily controlled if outbreaks are caught early. Scouting is critical for early detection and good control. Armyworm damage generally appears from above as brownish-gray sections of affected leaves with a yellowish ring surrounding these sections, this ring indicates the current feeding zone. Affected areas will appear transparent and “lacy” due to the skeletonizing effects of larval feeding. If you see leaves that look “off” in the manner just described, check underneath for the presence of a horde of tiny greenish worms.
If found in this early stage, an application of Bacillus thuringiensis (Bt), a biological pesticide utilizing a bacterium destructive to caterpillars, is extremely effective. Bt has to be ingested by caterpillars with leaf tissue to work; thorough coverage of leaf surfaces is critical for maximum control. I generally follow up with a sequential application of Bt a day later to ensure that I achieved good coverage of the plant surfaces and, therefore, good control. Unfortunately, Bt is much less effective on older larvae. Infestations not caught early require harsher chemistries like carbamates, pyrethroids and organophosphates for adequate control.
Don’t let armyworms or other caterpillar pests destroy your garden, get out there daily and scout! You have a short window for easy caterpillar control with a harmless to people, natural product, Bt. Don’t waste it!
For more information about Southern Armyworm, other caterpillar pests, Bt, or any other horticultural topic, please consult your local UF/IFAS Extension Agent. Happy Gardening!
by Daniel J. Leonard | May 7, 2020

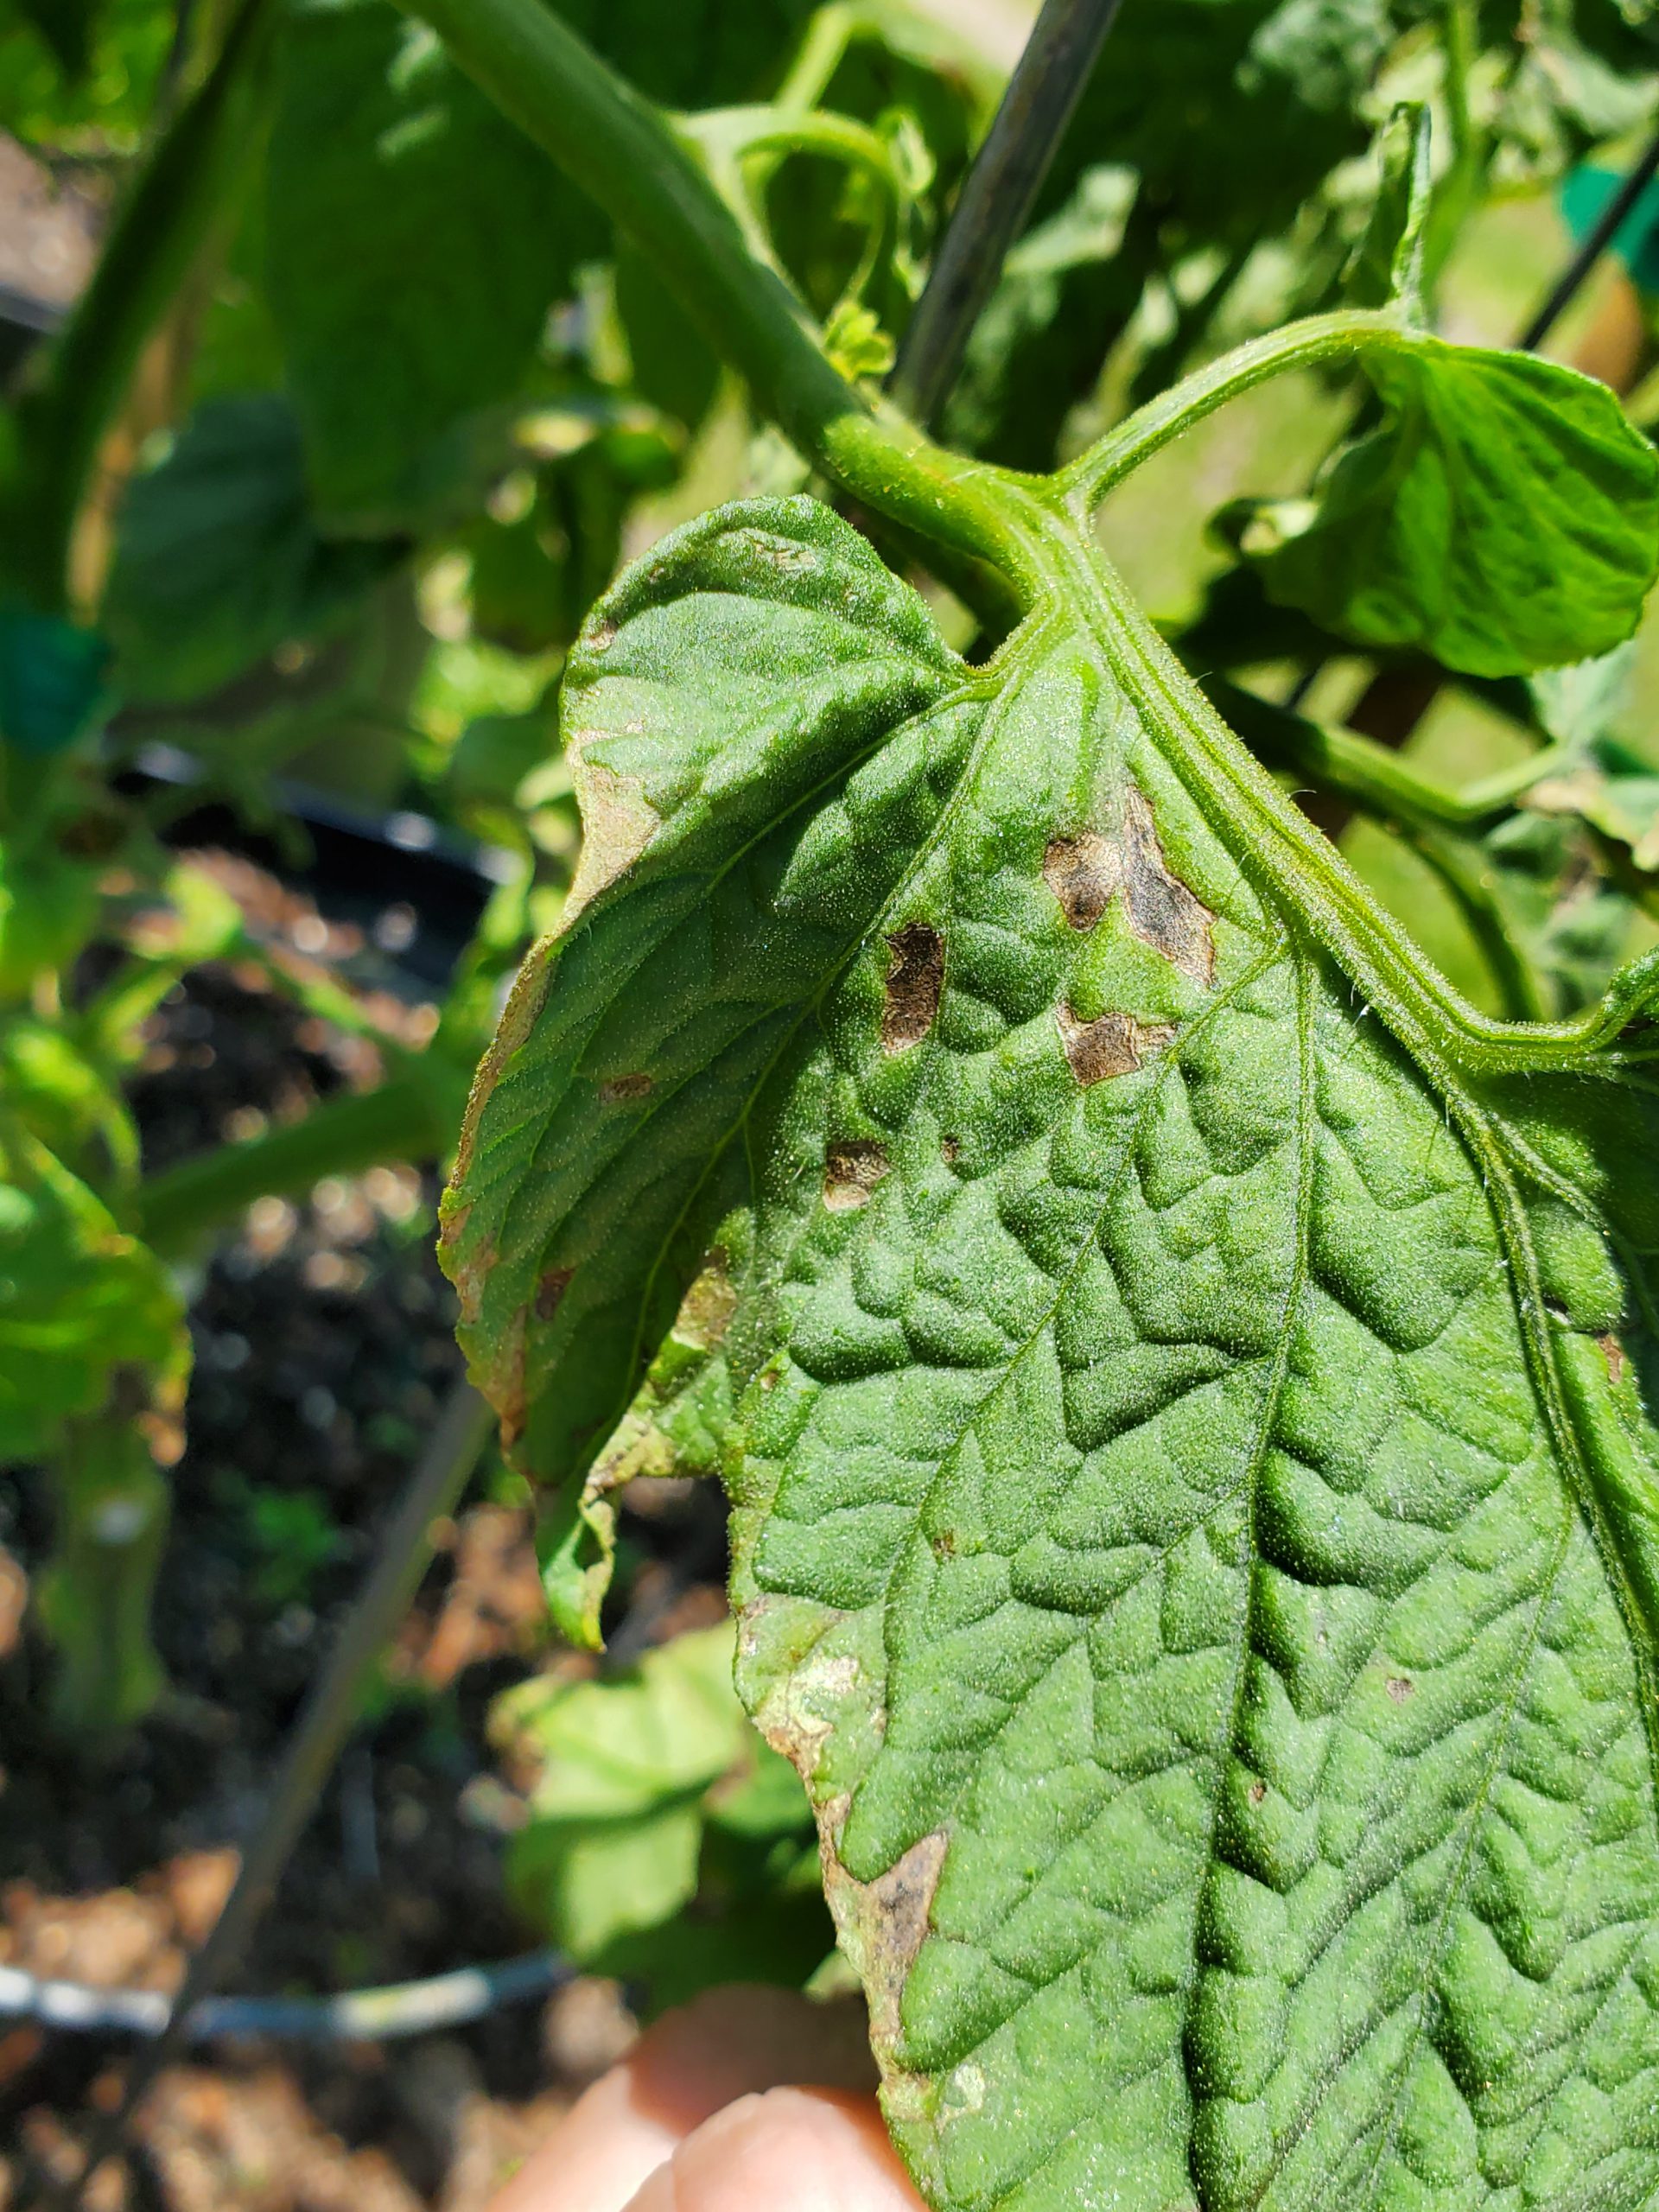
Early BLS symptoms appear on lower leaves. Photo courtesy of the author.
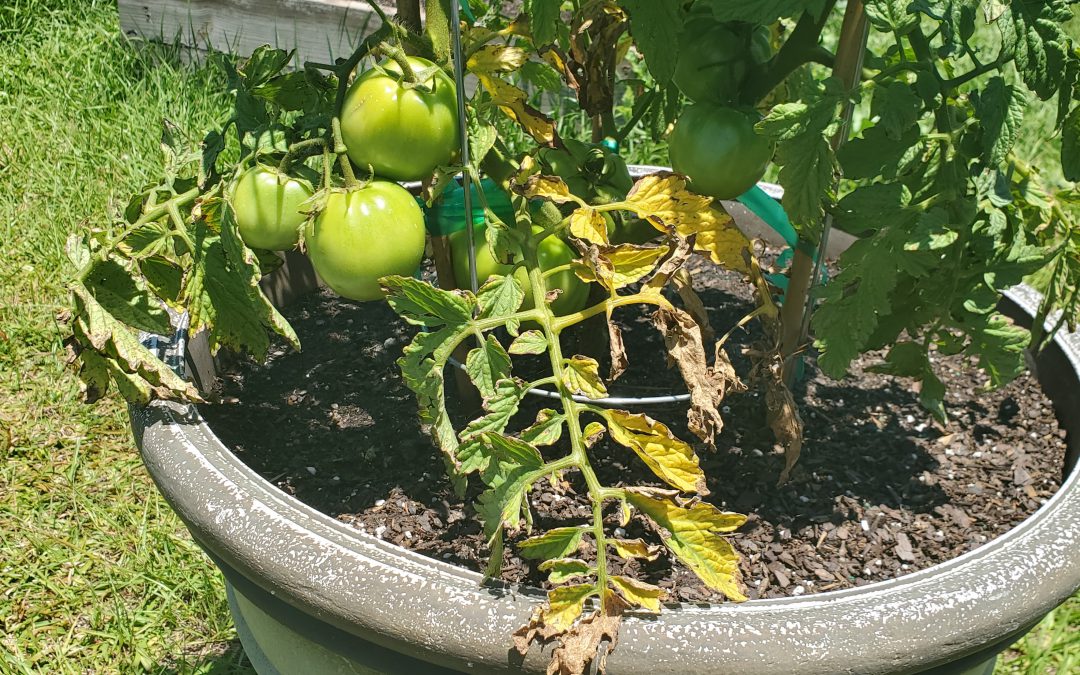
Tomatoes are among the most notoriously difficult vegetable species to grow in Florida. Even when you do everything right (choose disease resistant varieties, buy clean seed/healthy transplants, plant early, rotate crops, scout for insects, prune and support vines, etc), things can go wrong in a hurry. Bacterial Leaf Spot (BLS) caused by the pathogen Xanthomomas perforans, is one of those things. BLS often hitches a ride into gardens undetected on seed and transplants and presents itself as warm and humid weather arrives in late April/early May. Outbreaks typically happen in concurrence with the frequent heavy rainstorms that accompany these months and quickly wreak havoc on tomato plants.
BLS occurrence, much worse in some springs than others, has exploded this year in home gardens. First noticed on the plant’s lower leaves, BLS pathogens enter through natural openings in leaves called stomata, manifest as small, “water-soaked” leaf lesions and then develop within days into dark circular spots, sometimes surrounded by a yellow halo. As conditions worsen, all these individual infections cause a general yellowing or “blighting” of entire leaves. Though the issue begins on tomato leaves, BLS can affect all parts of the plant, including stems, flowers and fruit too! It’s at this point, when blighted leaves become obvious and lesion developing on flower stalks cause both flowers and small fruit to drop, that most home gardeners notice that something is up.

Advancing progression of BLS with “blighted” leaves. Photo courtesy of the author.
Unlike with many other pathogens, gardeners don’t have an abundance of options to control BLS. However, taking the following preventative measures can reduce the pathogen’s impact and stave off disease progression until ripe fruit can be harvested.
- Don’t irrigate overhead. Utilize drip/microirrigation or hand water beds and containers at soil level. This prevents the leaves from becoming wet; wet leaves become a perfect host for BLS.
- Never work tomato plants when leaves are wet. No staking, pruning, tying, or anything else until plant tissue is dry. Working wet tomato plants is an excellent way to spread bacteria!
- Sanitize pruning tools often and wash hands after working infected plants.
- Maintain airflow in plants by planting at correct spacing and thinning interior leaves as necessary to facilitate quicker drying of the plant.
- Prune lower leaves to at least 12” from the soil’s surface to prevent disease transmission from soil to leaves through splashing water.
- Remove infected leaves (when plants are dry!) to slow disease progression.
- Rotate crops and destroy infected plants to prevent buildup of BLS organisms in soil.
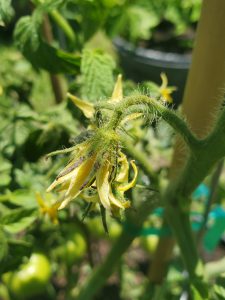
BLS lesions on tomato flowers. Photo courtesy of the author.
- Preventative measures are best, but if your garden has a history of BLS and local weather forecasts call for warm/wet/humid weather, it is best to spray fungicides proactively to protect your crop. A weekly spray with a tank mixture of copper and mancozeb is effective at keeping BLS at bay. This is the only chemical spray combination proven to be effective in controlling BLS.
- Unlike many common tomato pathogens that can be reliably avoided through planting resistant cultivars like ‘Big Beef’, ‘Celebrity’ and others, no varieties are resistant to BLS.
While BLS is an extremely destructive pathogen of both home and commercially grown tomatoes, growers can lessen the disease’s effects by following the preventative measures outlined above and spraying with a copper/mancozeb mix if necessary. Growing tomatoes this year hasn’t been easy, but it’s worth it to fight back and realize a harvest despite difficulties like BLS!
If bacteria have given you the blues or other garden issues are bringing you down, give your local UF/IFAS County Extension Agent a call! We’re here to help you be successful in all your horticultural endeavors. Happy gardening!