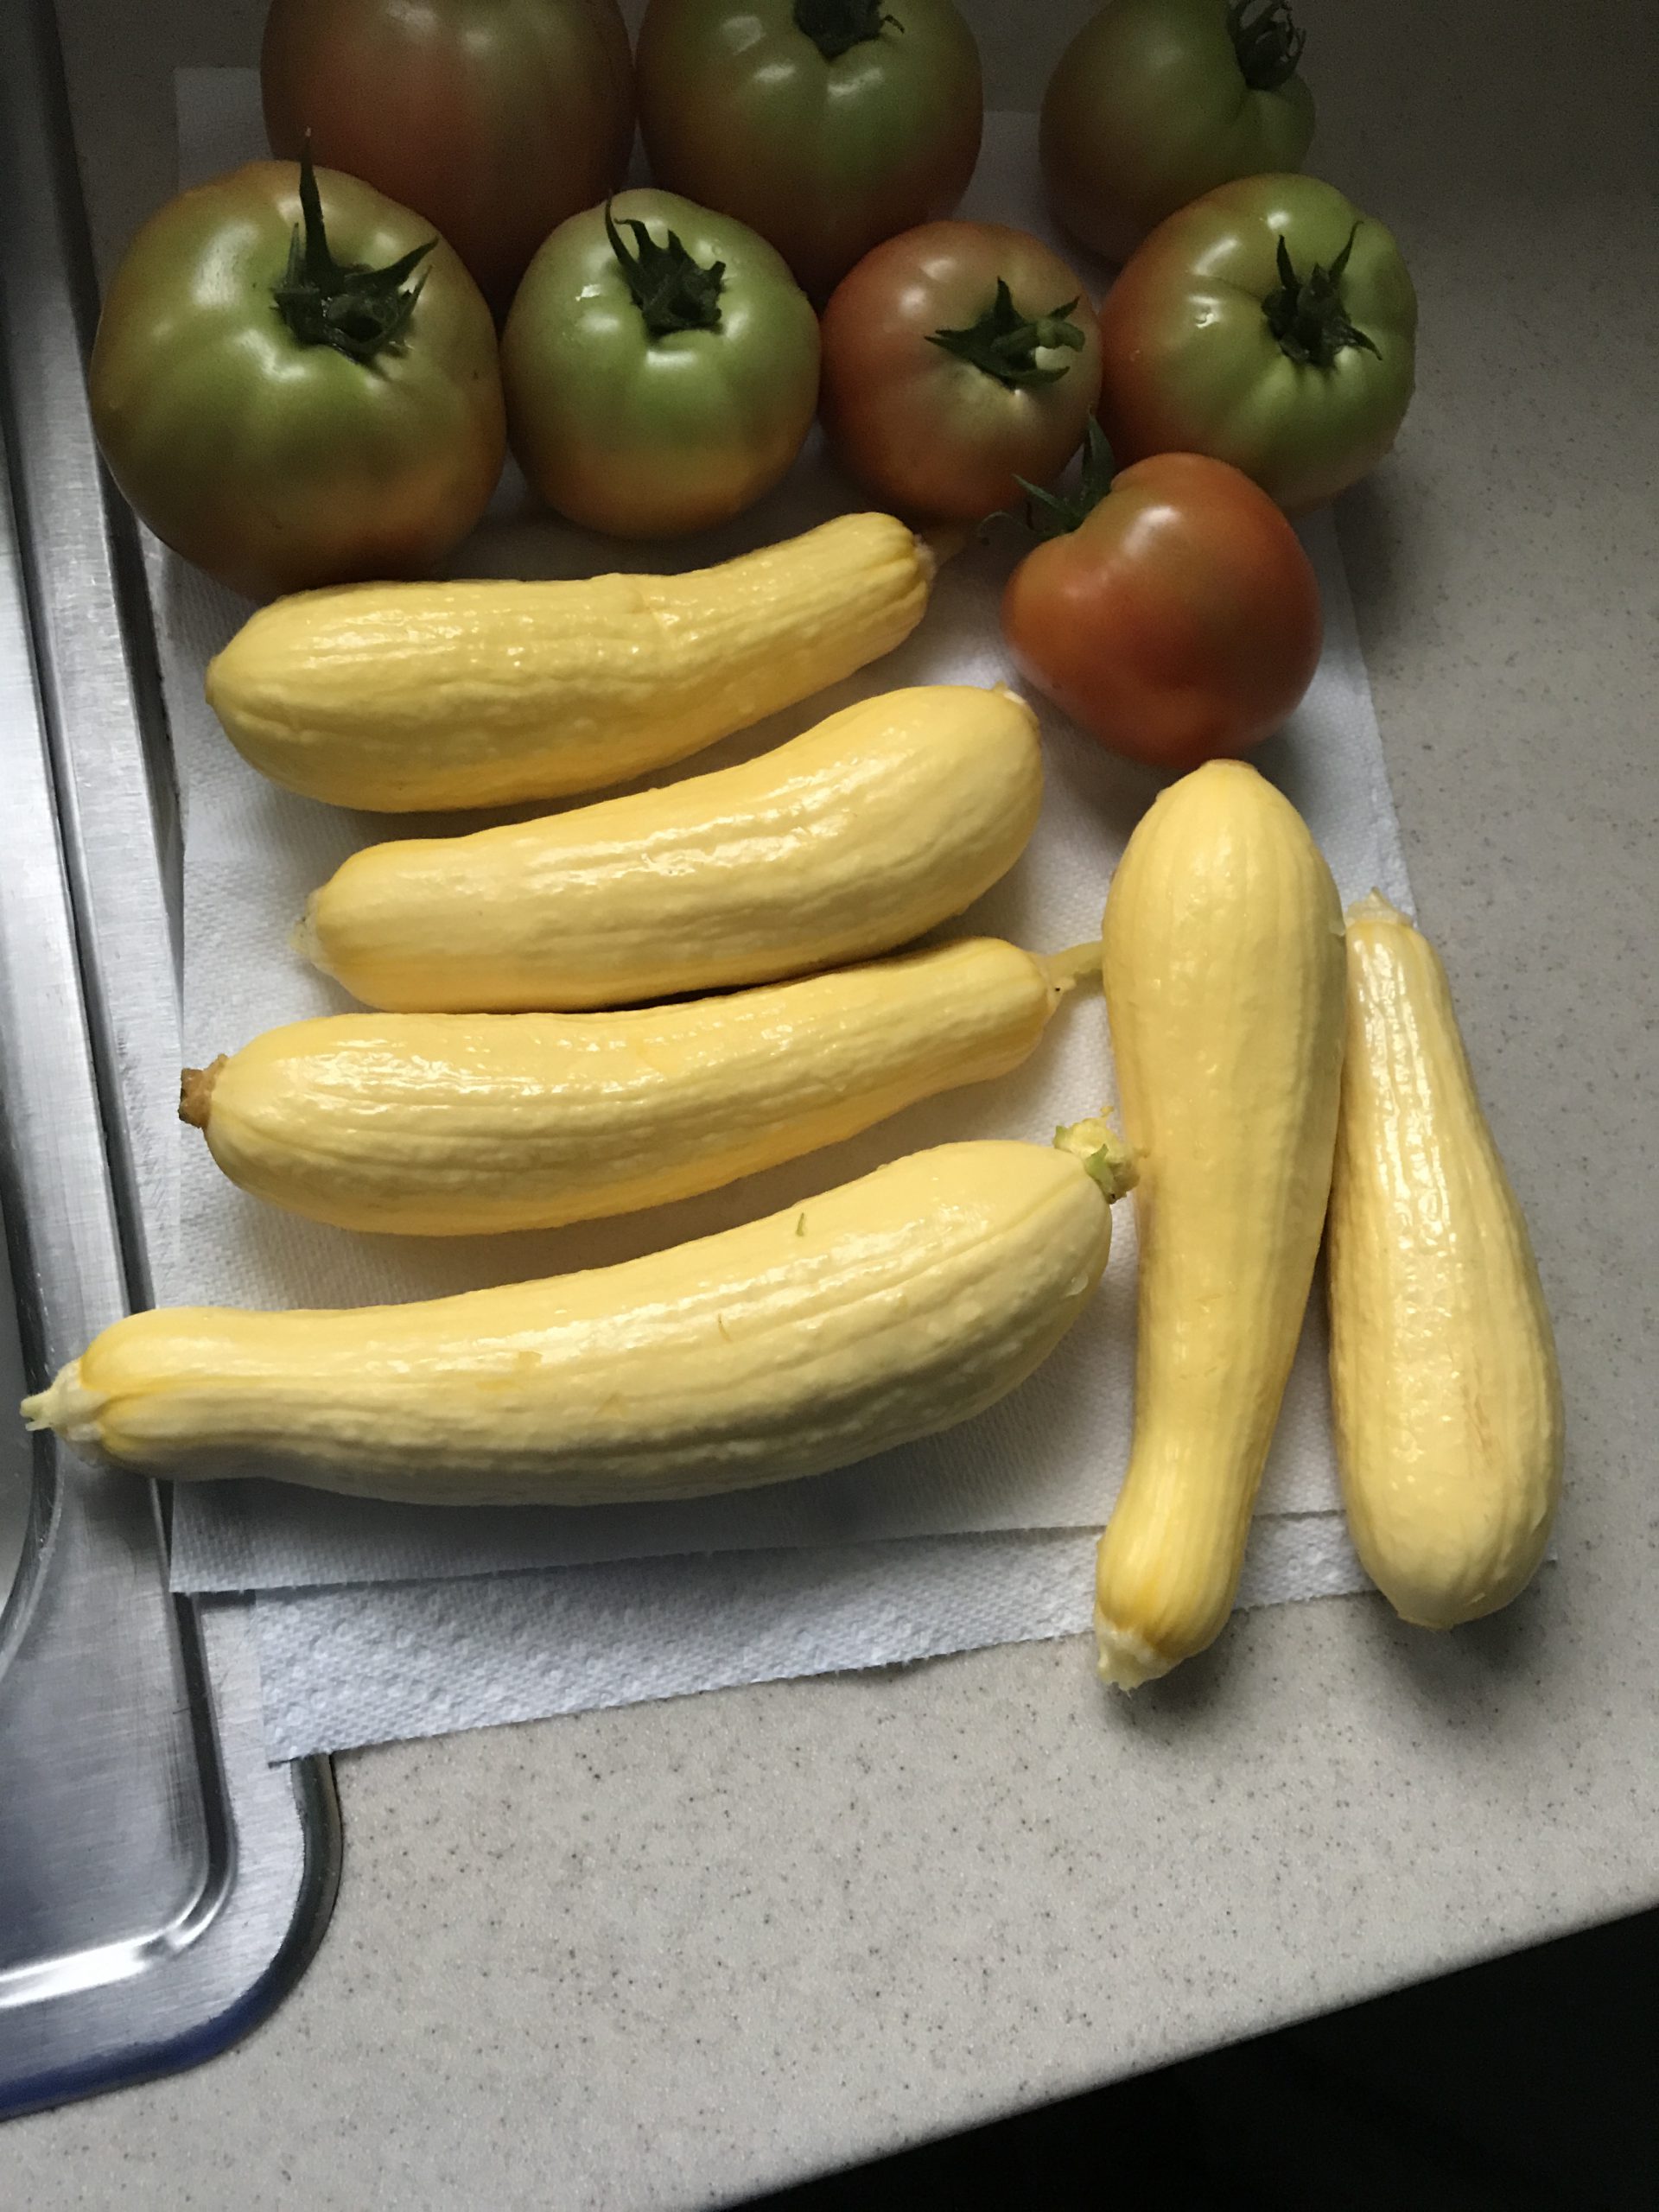
Never one to be satisfied growing “standard” vegetable varieties, last year I decided to peruse various seed sources in search of a superior yellow summer squash selection. Plain ‘Yellow Crookneck’ just wasn’t doing it for me anymore. After doing a little research and consulting a friend who works for Johnny’s Selected Seeds, I settled on a straightneck variety called ‘Multipik’.
Developed in the 1980’s by Harris Seed and now sold by many seed purveyors, ‘Multipik’ enjoyed immediate popularity with commercial squash growers due to its many outstanding qualities but curiously, is just making inroads with the home garden market. Even as it is set to celebrate its 30th anniversary next year, two years of personal experience with ‘Multipik’ verify several important characteristics making it a superior choice to many other traditional summer squash varieties: earliness/heavy yields and a precocious gene.
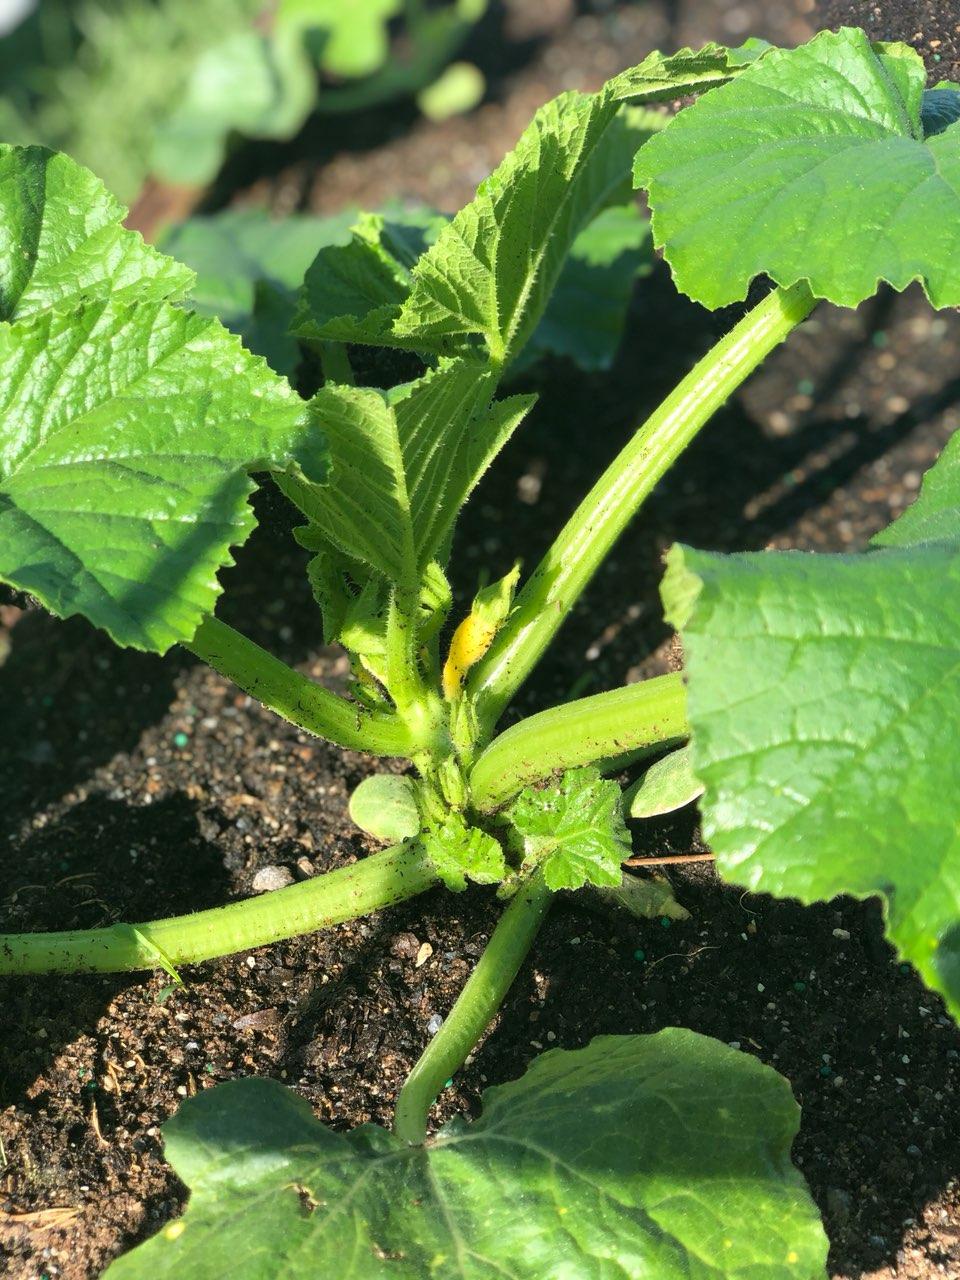
Newly developing ‘Multipik’ fruit. 4 weeks after planting. Photo courtesy the author.
The longer I garden, the more I’m convinced that earliness to maturity is directly related to yield potential in home gardens, especially in the Panhandle. Lots of varieties have high yield potential but that potential is often at least partially wasted here due to the length of time from seed to harvest. Ideally, you could plant, grow a crop and be done by mid-late June, before intense heat, humidity and all the wonderful garden pests and diseases arrive to destroy spring gardens. Maturing just 50 days from planting, ‘Multipik’ beats that deadline (when planted on time in late March) and yields heavily for at least a month before succumbing to the harsh Panhandle summer. Many traditional summer squash varieties, including ‘Yellow Crookneck’ mature 8-14 days later. While 8-14 days doesn’t sound like much, it can mean a major yield difference when factoring in the almost certain late season pests, diseases, and adverse weather conditions.
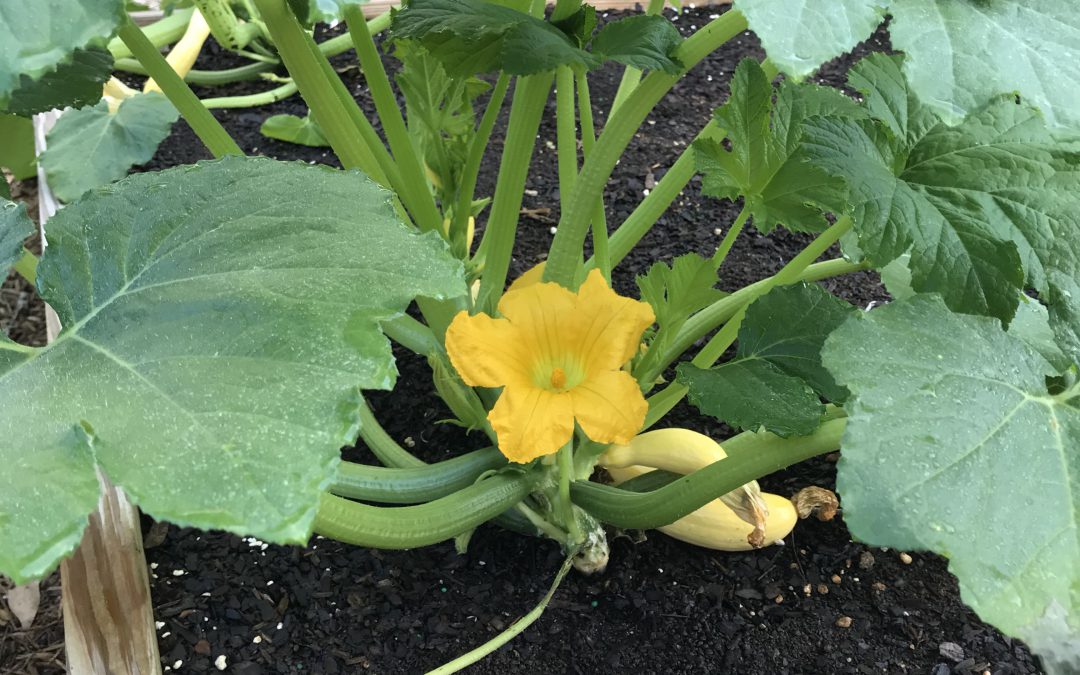
The next major advantage ‘Multipik’ offers is a precocious gene, meaning that it will mask symptoms and maintain its yellow color if infected with either Watermelon Mosaic Virus (WMV) or Cucumber Mosaic Virus (CMV), two destructive pathogens commonly affecting squash by discoloring fruit and reducing yield. This trait is critical to commercial growers because yellow squash that isn’t yellow isn’t marketable and is important to home gardeners too as a means to eke out higher yields under virus pressure. While the precocious gene isn’t a cure for either virus, it can help hold them at bay while you harvest! Another quirk caused by the precocious gene is the all-yellow appearance of the fruit, from the peduncle (the stalk holding the fruit to the plant) to the apex! From one end of the fruit to the other, Multipik ensures that when you plant yellow squash, you harvest yellow squash.
‘Multipik’ just days from harvest. Photo courtesy the author.
Whether you are trying to avoid yield loss from late season insect and disease pressure plaguing your traditional squash plantings or just want to try something a little different, I highly recommend planting ‘Multipik’ Squash. This early, disease-resistant cultivar with delicious medium sized, light yellow fruit is sure to be a hit in both in the garden and on the table. As always, if you have any questions about vegetable gardening or any other horticultural topic, give your local UF/IFAS County Extension Office a call! Happy gardening!
There aren’t a lot of quality landscape plant options that fit the description nearly every homeowner desires: native, low-maintenance, slow-growing, pest free, drought tolerant while tolerating wet soils, loving both sun or shade, and green year-round. Needle Palm (Rhapidophyllum hystrix) is the rare plant that checks all those boxes and deserves consideration when adding plants to your landscape!
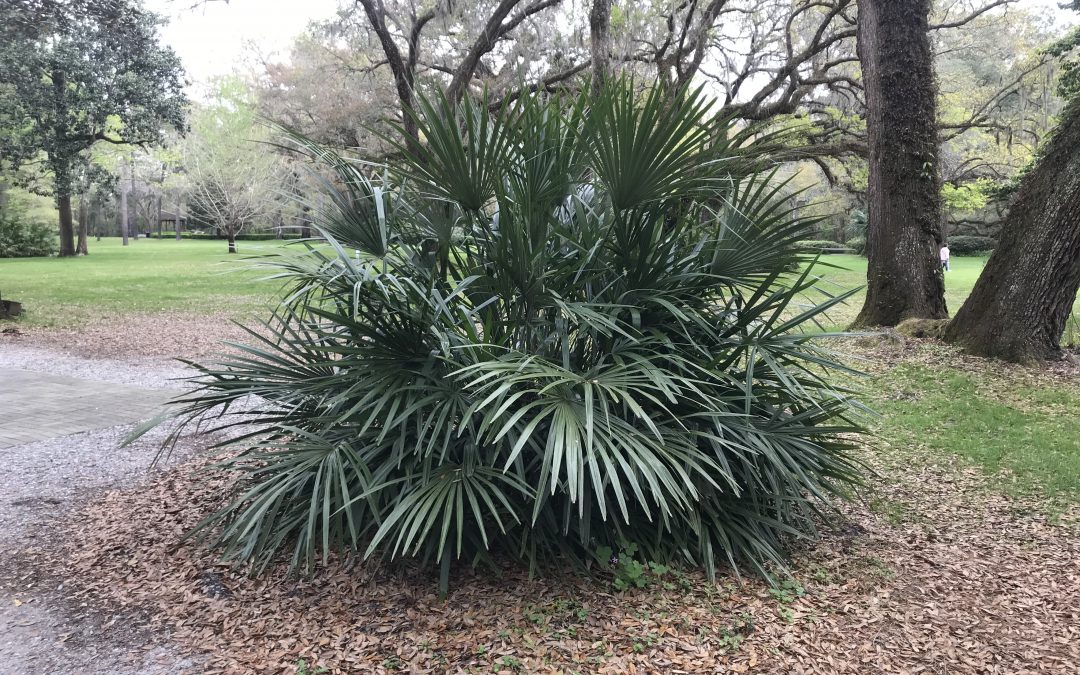
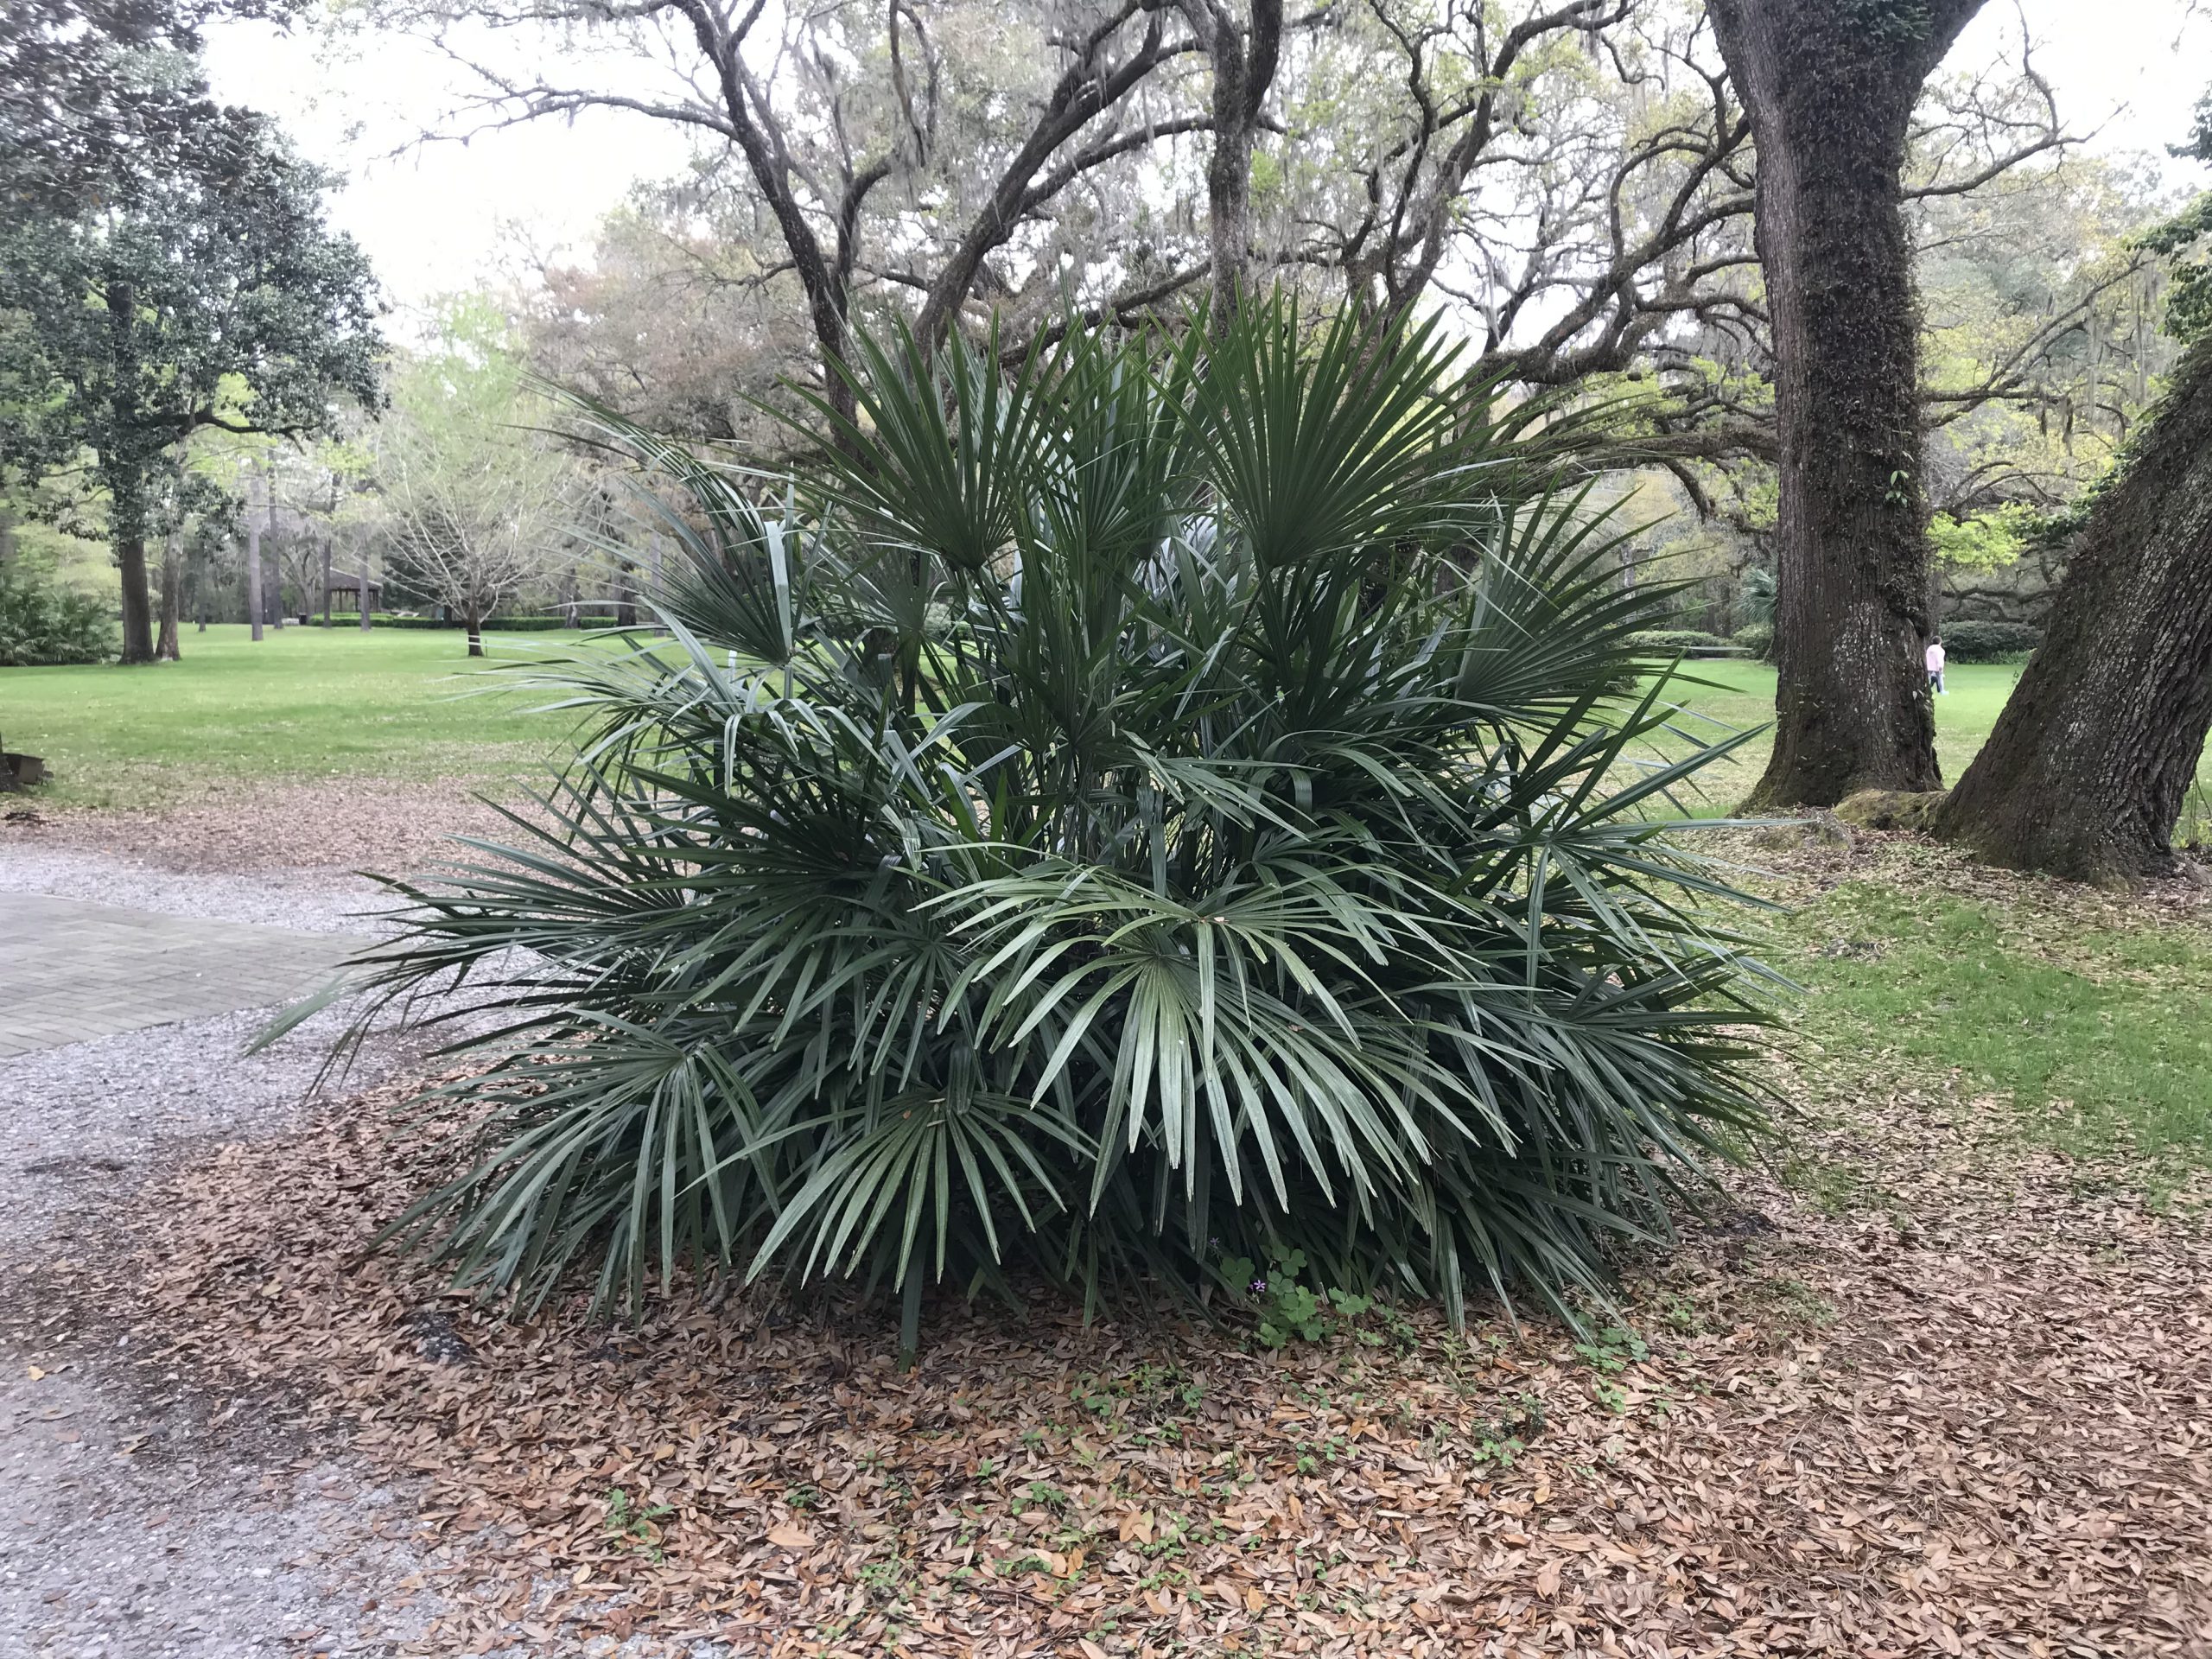
6 year old Needle Palm in a local landscape. Photo courtesy the author
Needle Palm is an endangered native, growing in a narrow range in the coastal Southeastern US, Calhoun and Liberty counties included. It is primarily found in the understories of wet wooded areas along slopes, ravines, and bottoms; if you’ve ever hiked the Apalachicola Ravines or Torreya State Park trails, you’ve likely encountered Needle Palm in the wild! Being native is nice, but what makes Needle Palm an outstanding landscape option?
Needle Palm is the prettier, more refined cousin of Saw Palmetto (Serenoa repens), which it is sometimes confused with. Unlike the rambling, aggressive, stiff-leaved palmetto, Needle palm possesses “softer”, finely cut, lustrous evergreen leaves, allowing it to add amazing texture to any landscape. Also, unlike palmetto, it doesn’t need a yearly “cleaning” to prune out brown, dead leaves, rather its leaves persist green and clean for many years! You might not want to reach into the interior of a Needle Palm plant anyway, as generally unseen 6-8” namesake “needles” surround the base of its trunk. Needle Palm grows very slowly, eventually reaching 8’ tall or so, but is more often seen in the 4-6’ range in landscapes. This is absolutely a shrub that will never outgrow its welcome. It is a nearly trunkless palm, almost always appearing as a shrub, though with extreme old age it can begin to look a bit like a small tree with a muted trunk. With outstanding aesthetics and a low-maintenance growth habit, Needle Palm has a place in nearly any landscape.
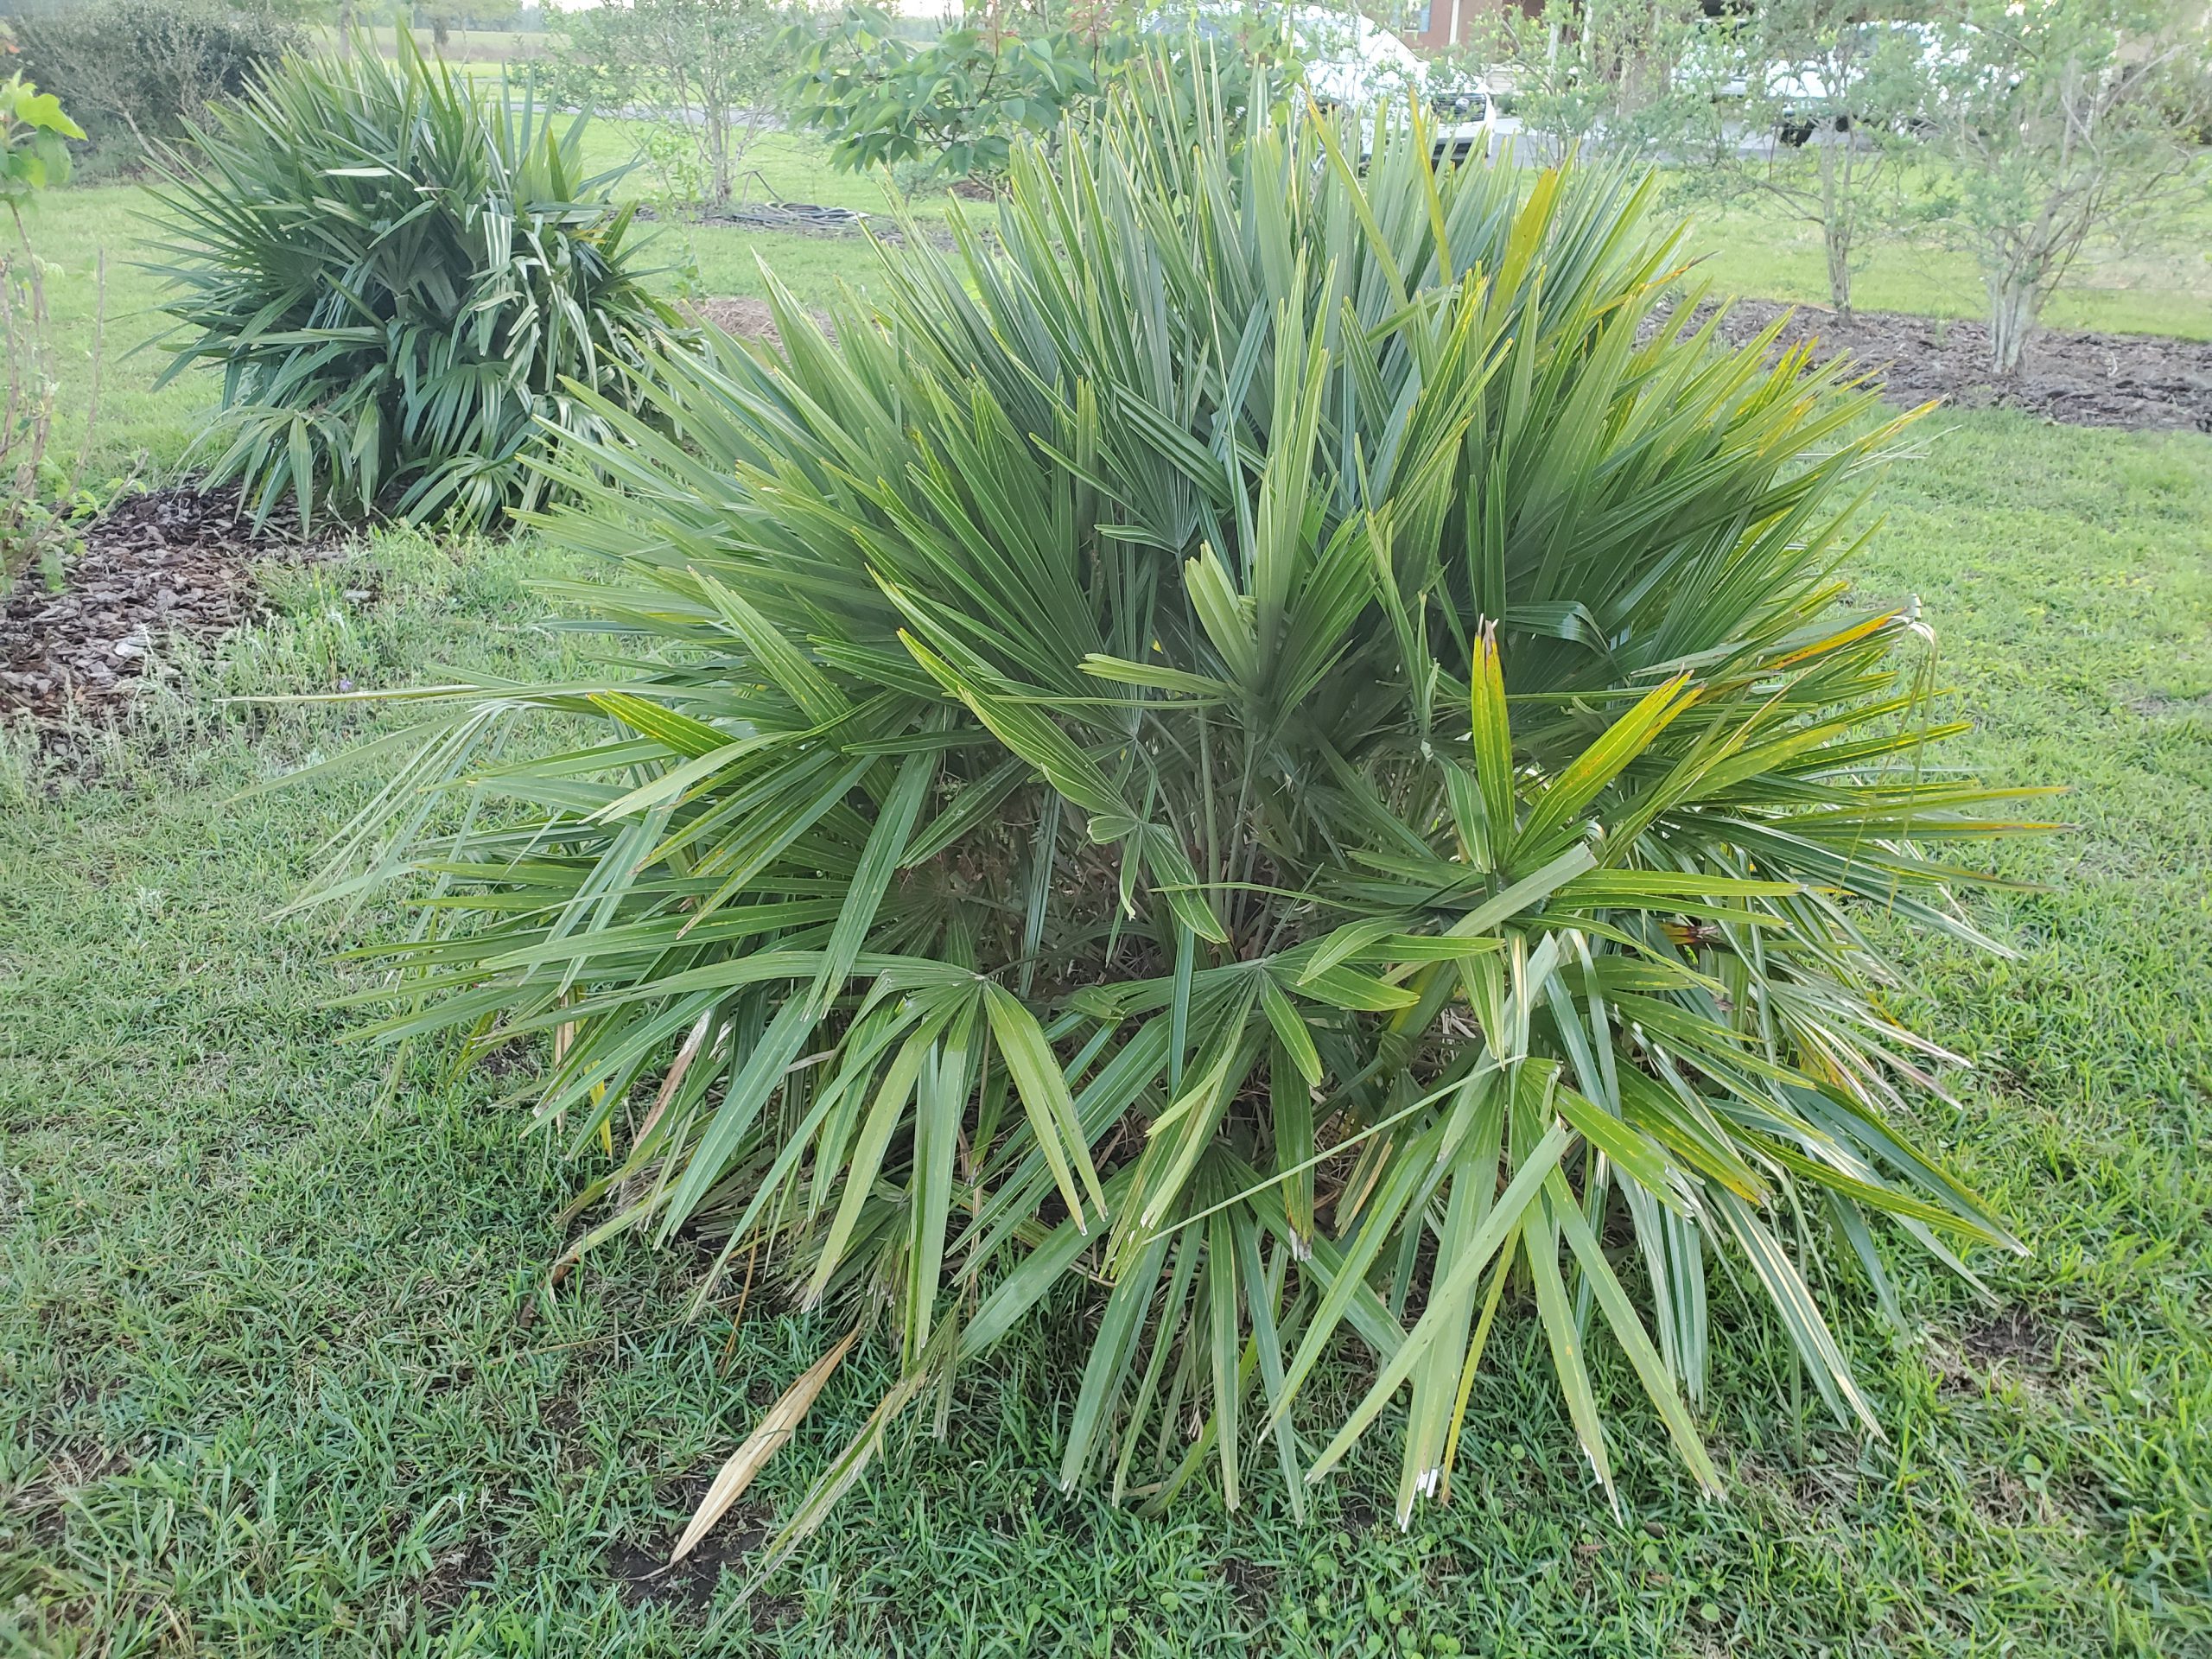
Mature needle palm, 6′ tall and wide. Photo courtesy the author.
In the landscape, Needle Palm does best when sited with some shade in the afternoon but also thrives in full sun. They appreciate regular water during establishment but survive on their own without any extra irrigation after! Needle Palm also doesn’t need much in the way of supplemental fertilization. They do look their best with a light spring application of a general purpose, slow-release fertilizer, but this is not required. Needle Palms are not afflicted with the pest and pathogen problems the much more commonly used non-native Sago Palms (Cycas revlolutas) attracts. I’ve grown Needle Palm for 6 years in the landscape and have never noticed any pest or disease issues. With Needle Palms becoming more common in the nursery trade, I don’t see a place in most landscapes for the inferior, high-maintenance, insect infested Sagos. If you want the tropical, textured look of Sagos, plant Needle Palm instead.
Needle Palm is an extremely attractive, low-maintenance Northwest Florida native plant that you should absolutely seek out and add to your landscape! If you want more information or have any questions about Needle Palm or any other landscape/garden topic, please give your local UF/IFAS County Extension Office a call. Happy Gardening!
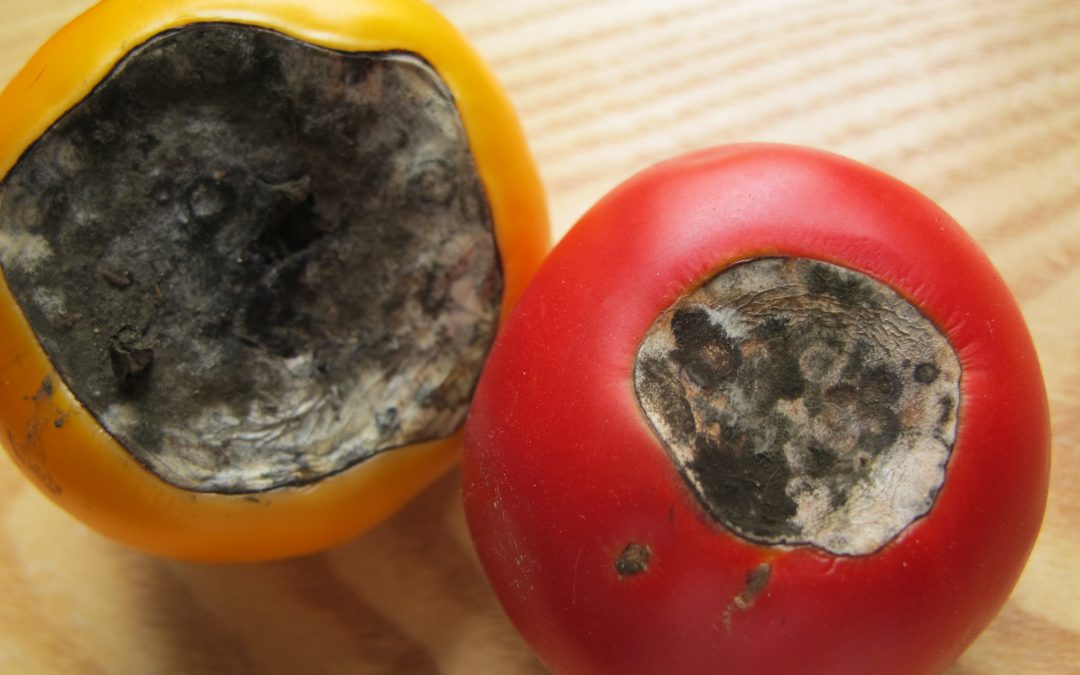
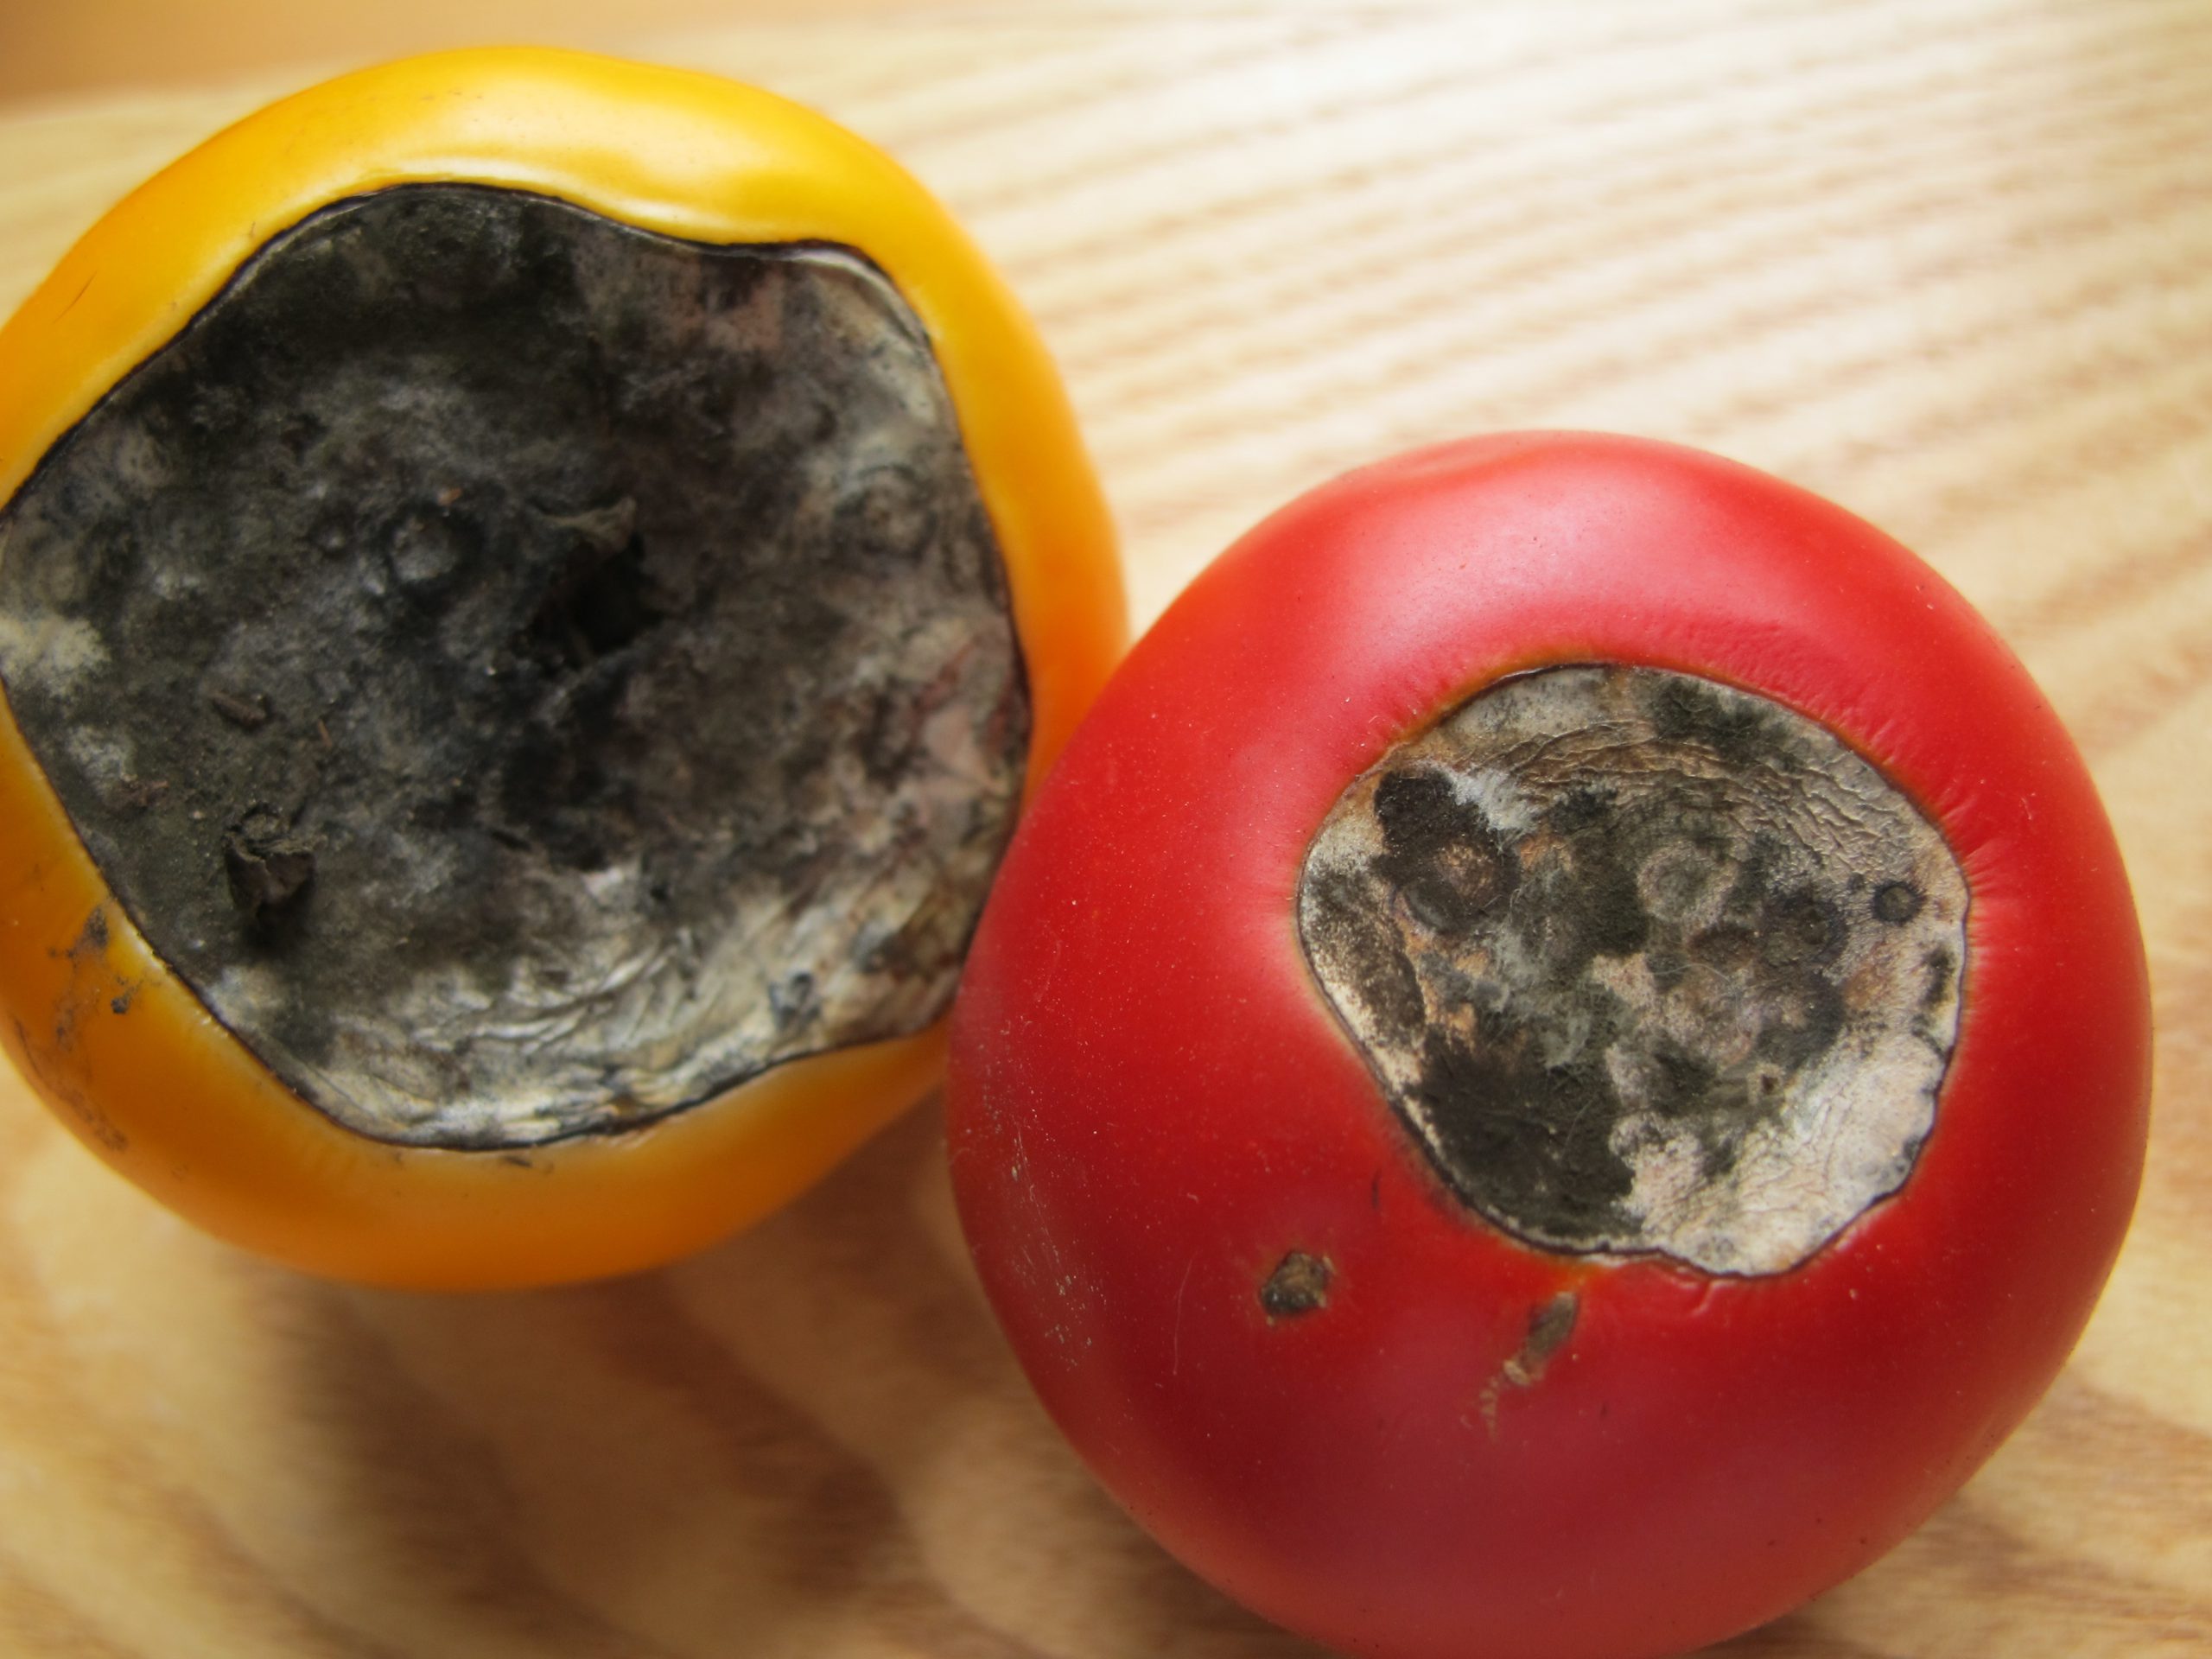
There aren’t many more frustrating things than growing seemingly healthy tomatoes, those plants setting an abundance of flower and fruit, and then, once your tomatoes get about the size of a golf ball, having the fruit rot away from the base. This very common condition, called Blossom End Rot (BER), is caused one of two ways: by either a soil calcium deficiency or disruption of soil calcium uptake by the plant. Fortunately, preventing BER from occurring and then realizing an awesome crop of tasty tomato fruit is relatively simple and home gardeners have a couple of possible preventative solution!
Blossom End Rot damage. Photo Courtesy Larry Williams, Okaloosa County Extension.
Soil Test & Lime if Needed. The only way to really know if your soil calcium level is sufficient is through a soil test. A complete soil test through the UF Soil Lab or other lab measures both raw nutrient levels and pH. Testing for pH is especially critical. For calcium, either already in the soil or in a supplement you apply, to be available to tomato plants, soil pH needs to be between 6.0-7. In more “acidic” soil pH below 6, nutrients like iron and aluminum become more available to your tomato plants, outcompeting calcium for uptake into the roots. We don’t want that. If your soil test indicates a pH below 6, it will give a lime recommendation somewhere between 3-5 lbs/100 ft sq of garden area to raise the pH to the sweet spot between 6.0-7.0 where your tomatoes will thrive.
Use a Non-Lime Calcium Supplement. If you’ve had your soil tested and your pH is fine, adding more lime as a calcium supplement isn’t helpful. Using lime as an additional calcium source can actually lift pH above that 6.0-7.0 zone and cause other problems. At this point, once pH is where we want it, I like to add a non-lime calcium supplement. There are lots of options here. Traditional fertilizers labeled for tomatoes and veggies tend to have a good calcium content in the 6-10% range and work great. However, if you’re into organic gardening or just don’t need the extra nutrient value of a complete fertilizer, Gypsum is a good calcium supplement and is widely available. Regardless of which non-lime source you choose, apply at planting or shortly after and follow label rates for best results.
Water Properly. Consistent watering is key in helping ward off BER. Though we know BER is generally
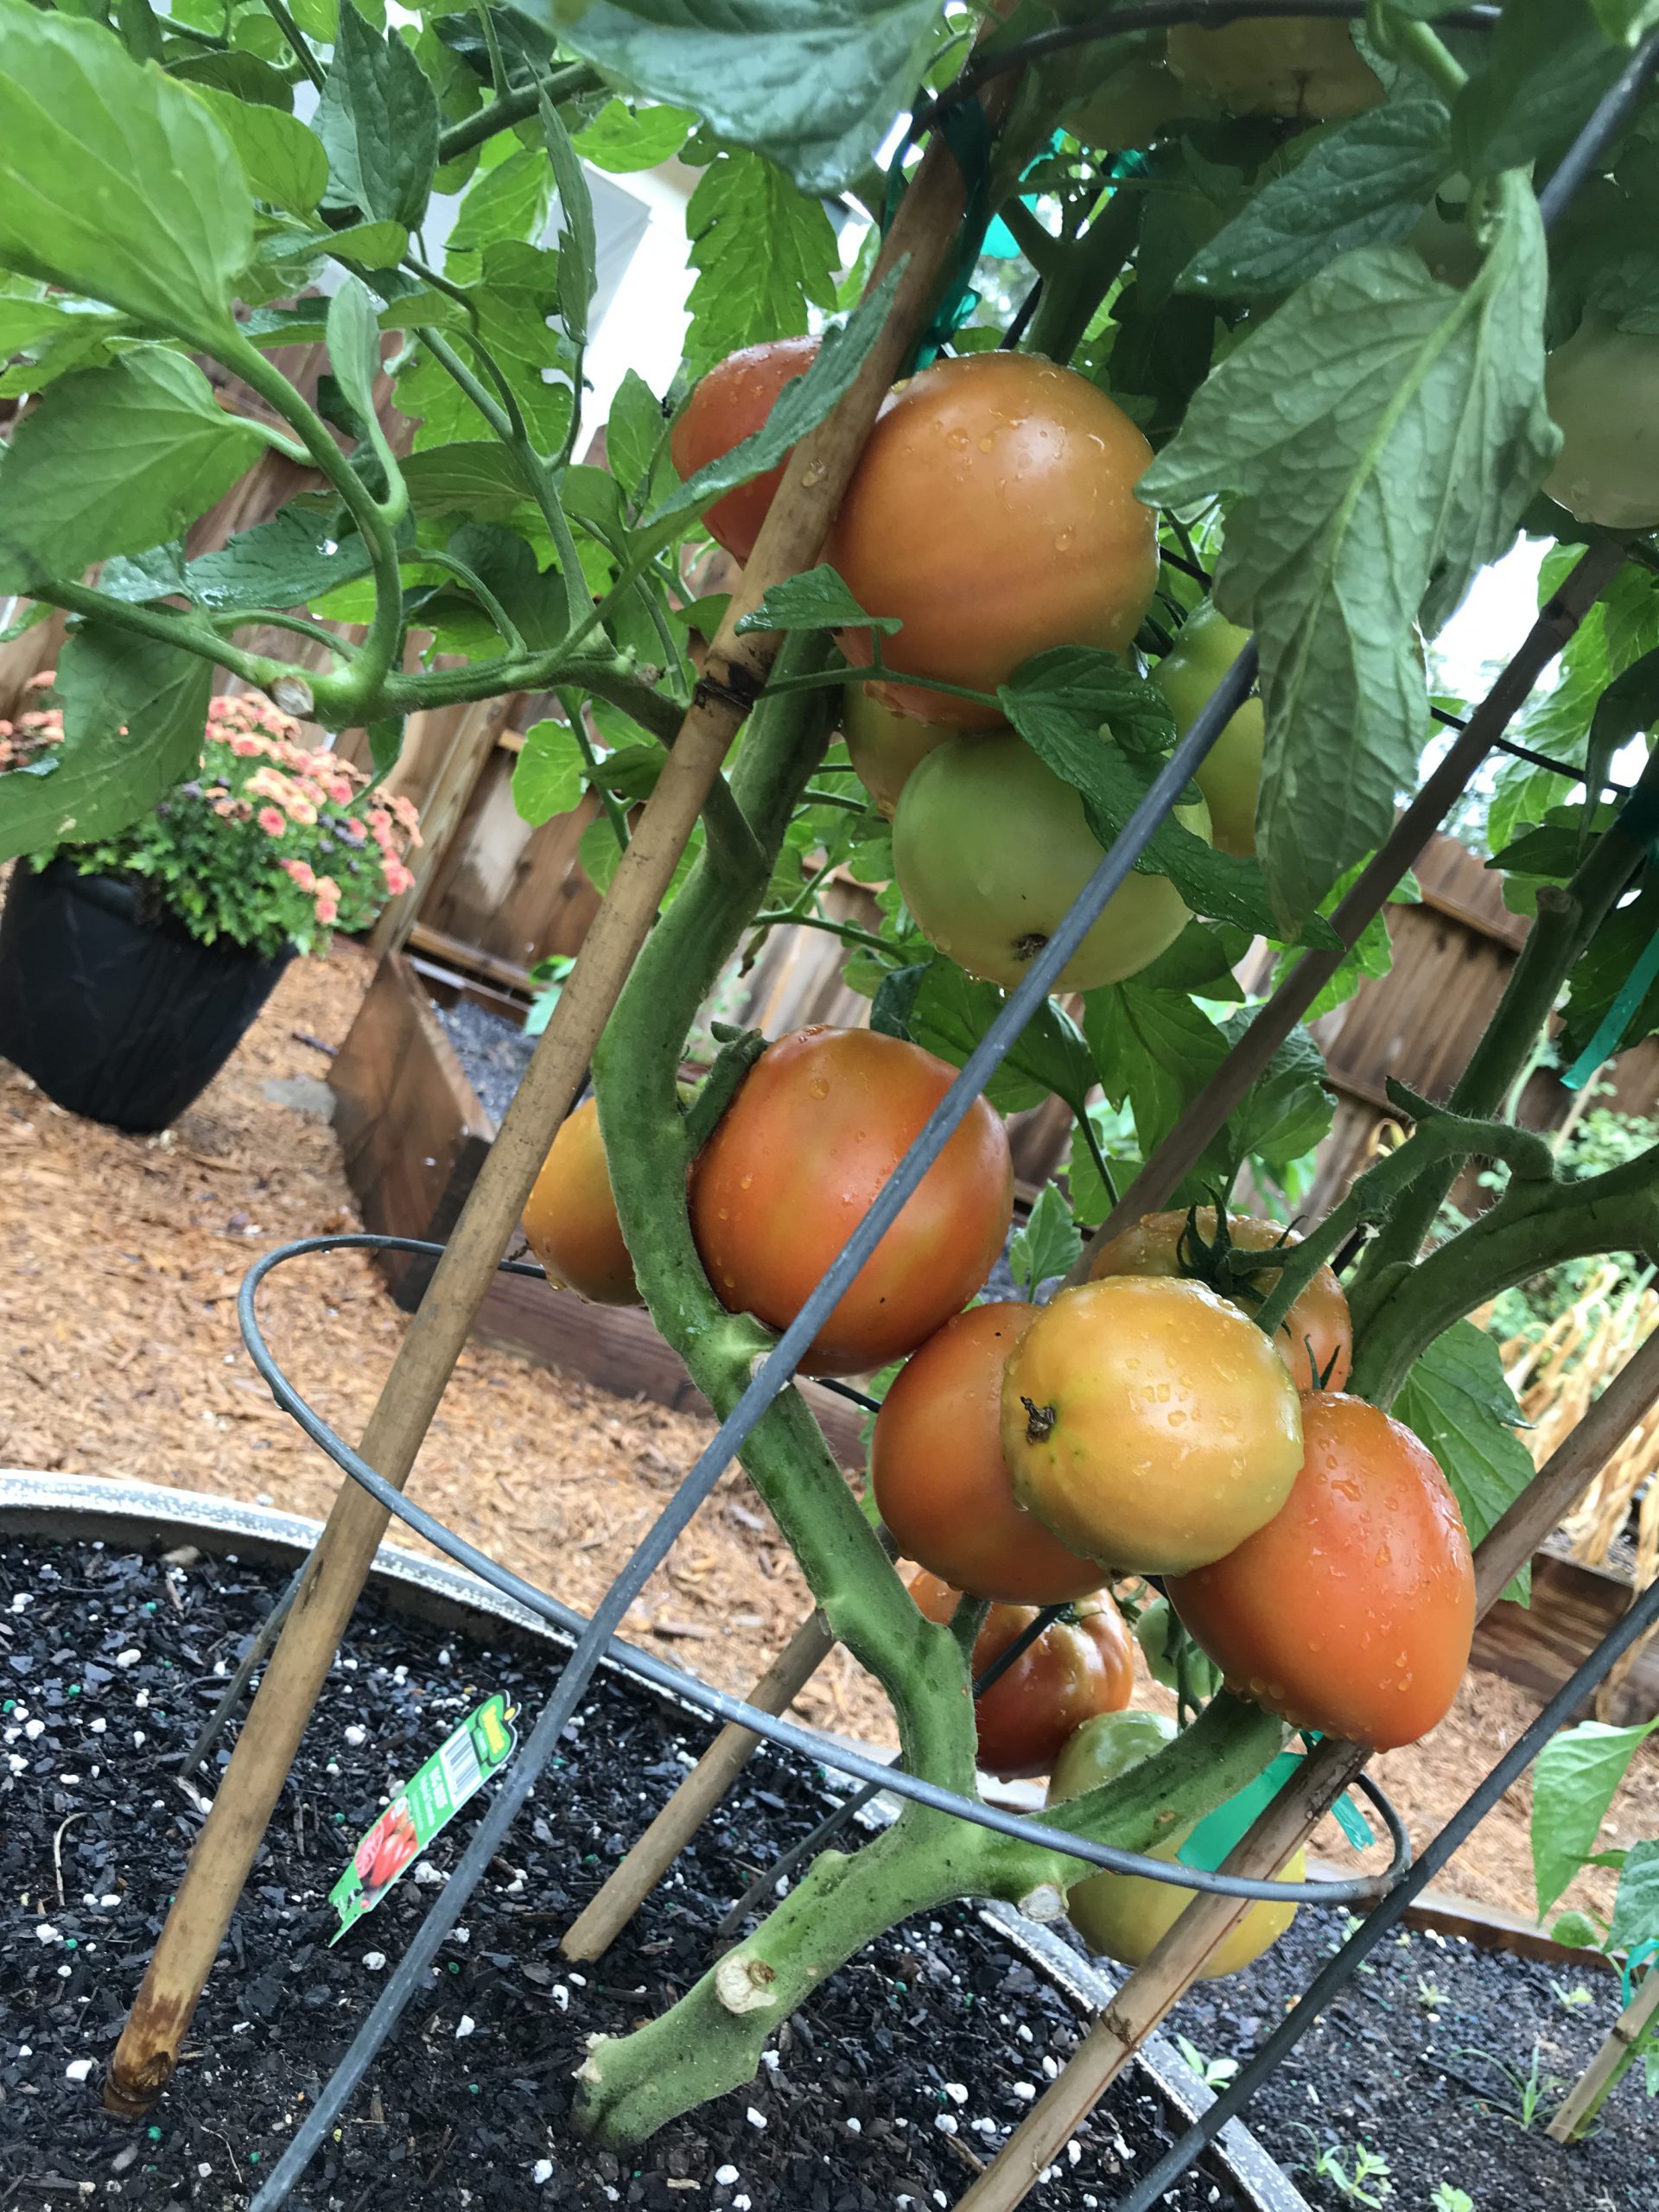
Healthy ‘Big Beef’ tomatoes grown in 2019 with a pH of 6.5, amended with Gypsum at planting, and watered regularly each day! Notice no BER. Photo courtesy the author.
caused by calcium deficiency, it can be induced by creation of distinct wet and dry periods from non-regular watering, interfering with calcium uptake and availability to the plant. So, while you may have adequate soil calcium, if you don’t water correctly, the condition will happen anyway! It’s also good to keep in mind that mature tomato plants use large quantities of water daily, so during the heat of summer, plants in containers may need to be watered multiple times daily to maintain consistently moist soil. Think about it, you don’t drink 8 glasses of water when you wake up and then never drink again throughout a hot day. A tomato is no different. Allowing your plants to wilt down before providing additional water ruins productivity and can induce BER.
Blossom End Rot, while one of the more destructive fates of tomatoes, is totally preventable by a little legwork early in the growing game from you! Soil test and change pH with lime if needed, add a shot of calcium through a tomato blend fertilizer or non-lime supplement like gypsum, and water regularly! Do these three things and you’ll be well on your way to a great crop of early summer tomatoes. If you have any questions about tomato blossom end rot or any other horticulture or agricultural topic, please don’t hesitate to reach out to us at the UF/IFAS Calhoun County Extension Office. Take advantage of this beautiful spring weather and get in the garden today! Happy gardening.
Cruciferous vegetables, mostly cool-season annuals in the Brassicaceae (formerly Cruciferae) family, are part of a healthy diet, prized for their high fiber content and unique sulfur-containing compounds known as glucosinolates. This vegetable family includes things many of us love (or love to hate) like Brussels sprouts, cabbage, cauliflower, collards, kale, mustard, turnips, bok choy, and Chinese cabbage. They’re also commonly grown in Panhandle gardens. However, as anyone who has grown these species knows, some are easier than others. For example, kale and radish are among the easiest of all plants to grow. But get beyond the basics and folks often run into difficulty with species like broccoli and cabbage. The high rainfall/humidity and frequent warm spells experienced here during the growing season often lead to serious pathogen problems, dooming my garden in years past. However, this winter, thanks to a couple of new cultivars, ‘Capture’ Cabbage and ‘Burgundy’ Sprouting Broccoli, I’ve enjoyed a plentiful supply of tasty crucifers!
4’x 8′ raised bed planted with ‘Capture’ on 24″ centers.
‘Capture’ Cabbage, developed by Bejo Seeds of California as a mid-season “white” fresh market cabbage for the South, has been an outstanding performer in my garden this year. Touted as highly resistant to Black Rot and Fusarium Yellows (by far the two most devastating pathogens of Cabbage), I had to try it for myself. I planted seeds 24” apart in my standard 4’ wide x 8’ long x 12” deep raised beds filled with mushroom compost and aged pine bark. Seedlings were fertilized once about three weeks after germination with a general purpose 10-10-10 fertilizer. The plants that developed have been extremely vigorous (I’m glad I paid attention to plant spacing guidelines on the seed packet!) and have not shown ANY evidence of disease, even through an unusually warm and wet winter that would have hammered older susceptible varieties. My plants have begun to develop heads and should be ready for harvest and the kitchen in just a couple more weeks! If you’ve had problems getting a cabbage from germination to head formation and harvest without serious disease pressure, give ‘Capture’ a try next fall!
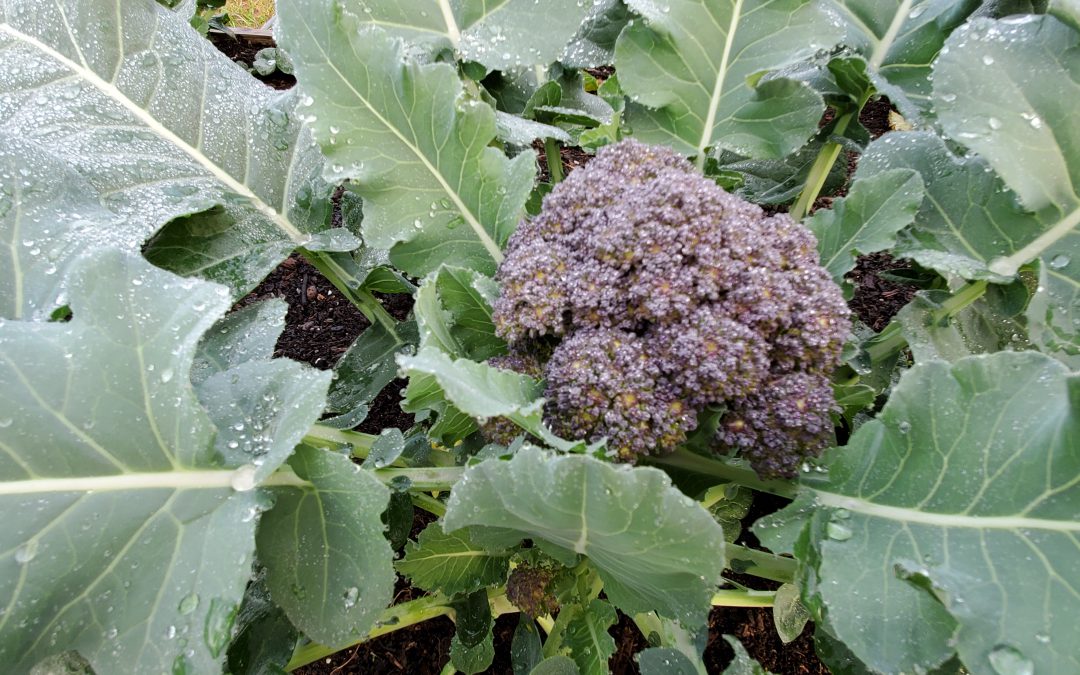
‘Burgundy’ Broccoli in the author’s raised bed garden.
‘Burgundy’ Broccoli, developed by Elsom Seeds in the United Kingdom, is a unique variety sure to turn heads in your garden. True to its name, the prolific florets are a deep, purple color. Though the central “head” on ‘Burgundy’ is quite small, that’s not the primary feature anyway. Considered a “sprouting” broccoli, this cultivar puts out an abundance of side shoots that make ‘Burgundy’ sort of a cut-and-come-again broccoli, allowing for a long harvest window. Another advantage from a disease avoidance perspective is the short maturity time (the time from planting seeds to having harvestable shoots) of around 40 days! For perspective, a “regular” heading broccoli has a maturity of around 60 day, lots more time for problems to happen. In the same growing conditions described above for cabbage, ‘Burgundy’ performed amazingly well for me, growing strong, healthy stalks, large, unblemished leaves and an abundance of purple shoots with a nice flavor profile!
If you want to enjoy homegrown broccoli and cabbage but disease pressures have made your previous efforts unproductive, give ‘Capture’ Cabbage and ‘Burgundy’ Broccoli a try! These two selections have made it easier than ever to enjoy unique, homegrown, healthy cruciferous veggies. Keep these and other quality, disease-resistant cultivars in mind when planning your winter garden in 2020!