by Daniel J. Leonard | Nov 8, 2019
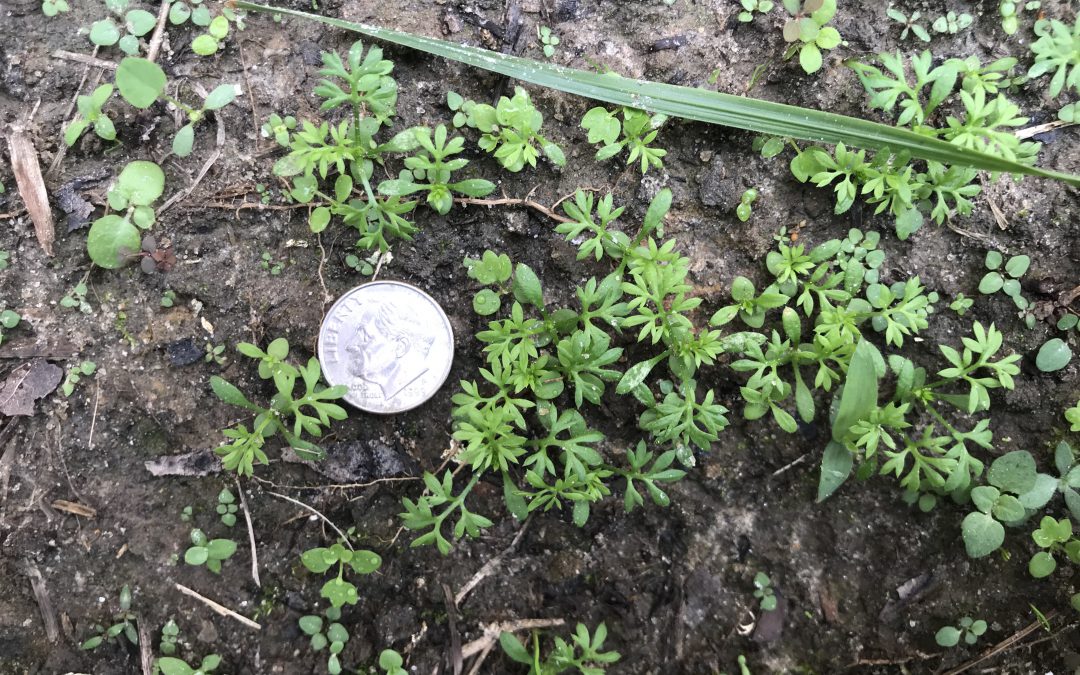
Most lawn weeds are annoying, appearing in unwanted places and numbers, but few actually cause physical harm like the pest plant Lawn Burweed (Soliva sessilis)! This infamous small, spreading winter weed’s seeds generally germinate when temperatures begin to cool in the fall (late October-November). Burweed then grows mostly unnoticed through the winter until spring, when it then produces the hard, spiny burs that contain the plant’s seeds and the plants finally die. Once the burs have formed, Burweed’s presence makes walking on newly greened-up spring turf extremely painful for pets and people (barefoot of course, the burs aren’t large enough to puncture shoe soles). At this point of the plant’s life, once it has made its unwanted presence known, control is not feasible as the Burweed plants have set seed, ensuring a new crop next year, and killing the remaining foliage doesn’t remove the burs. What is a homeowner to do?
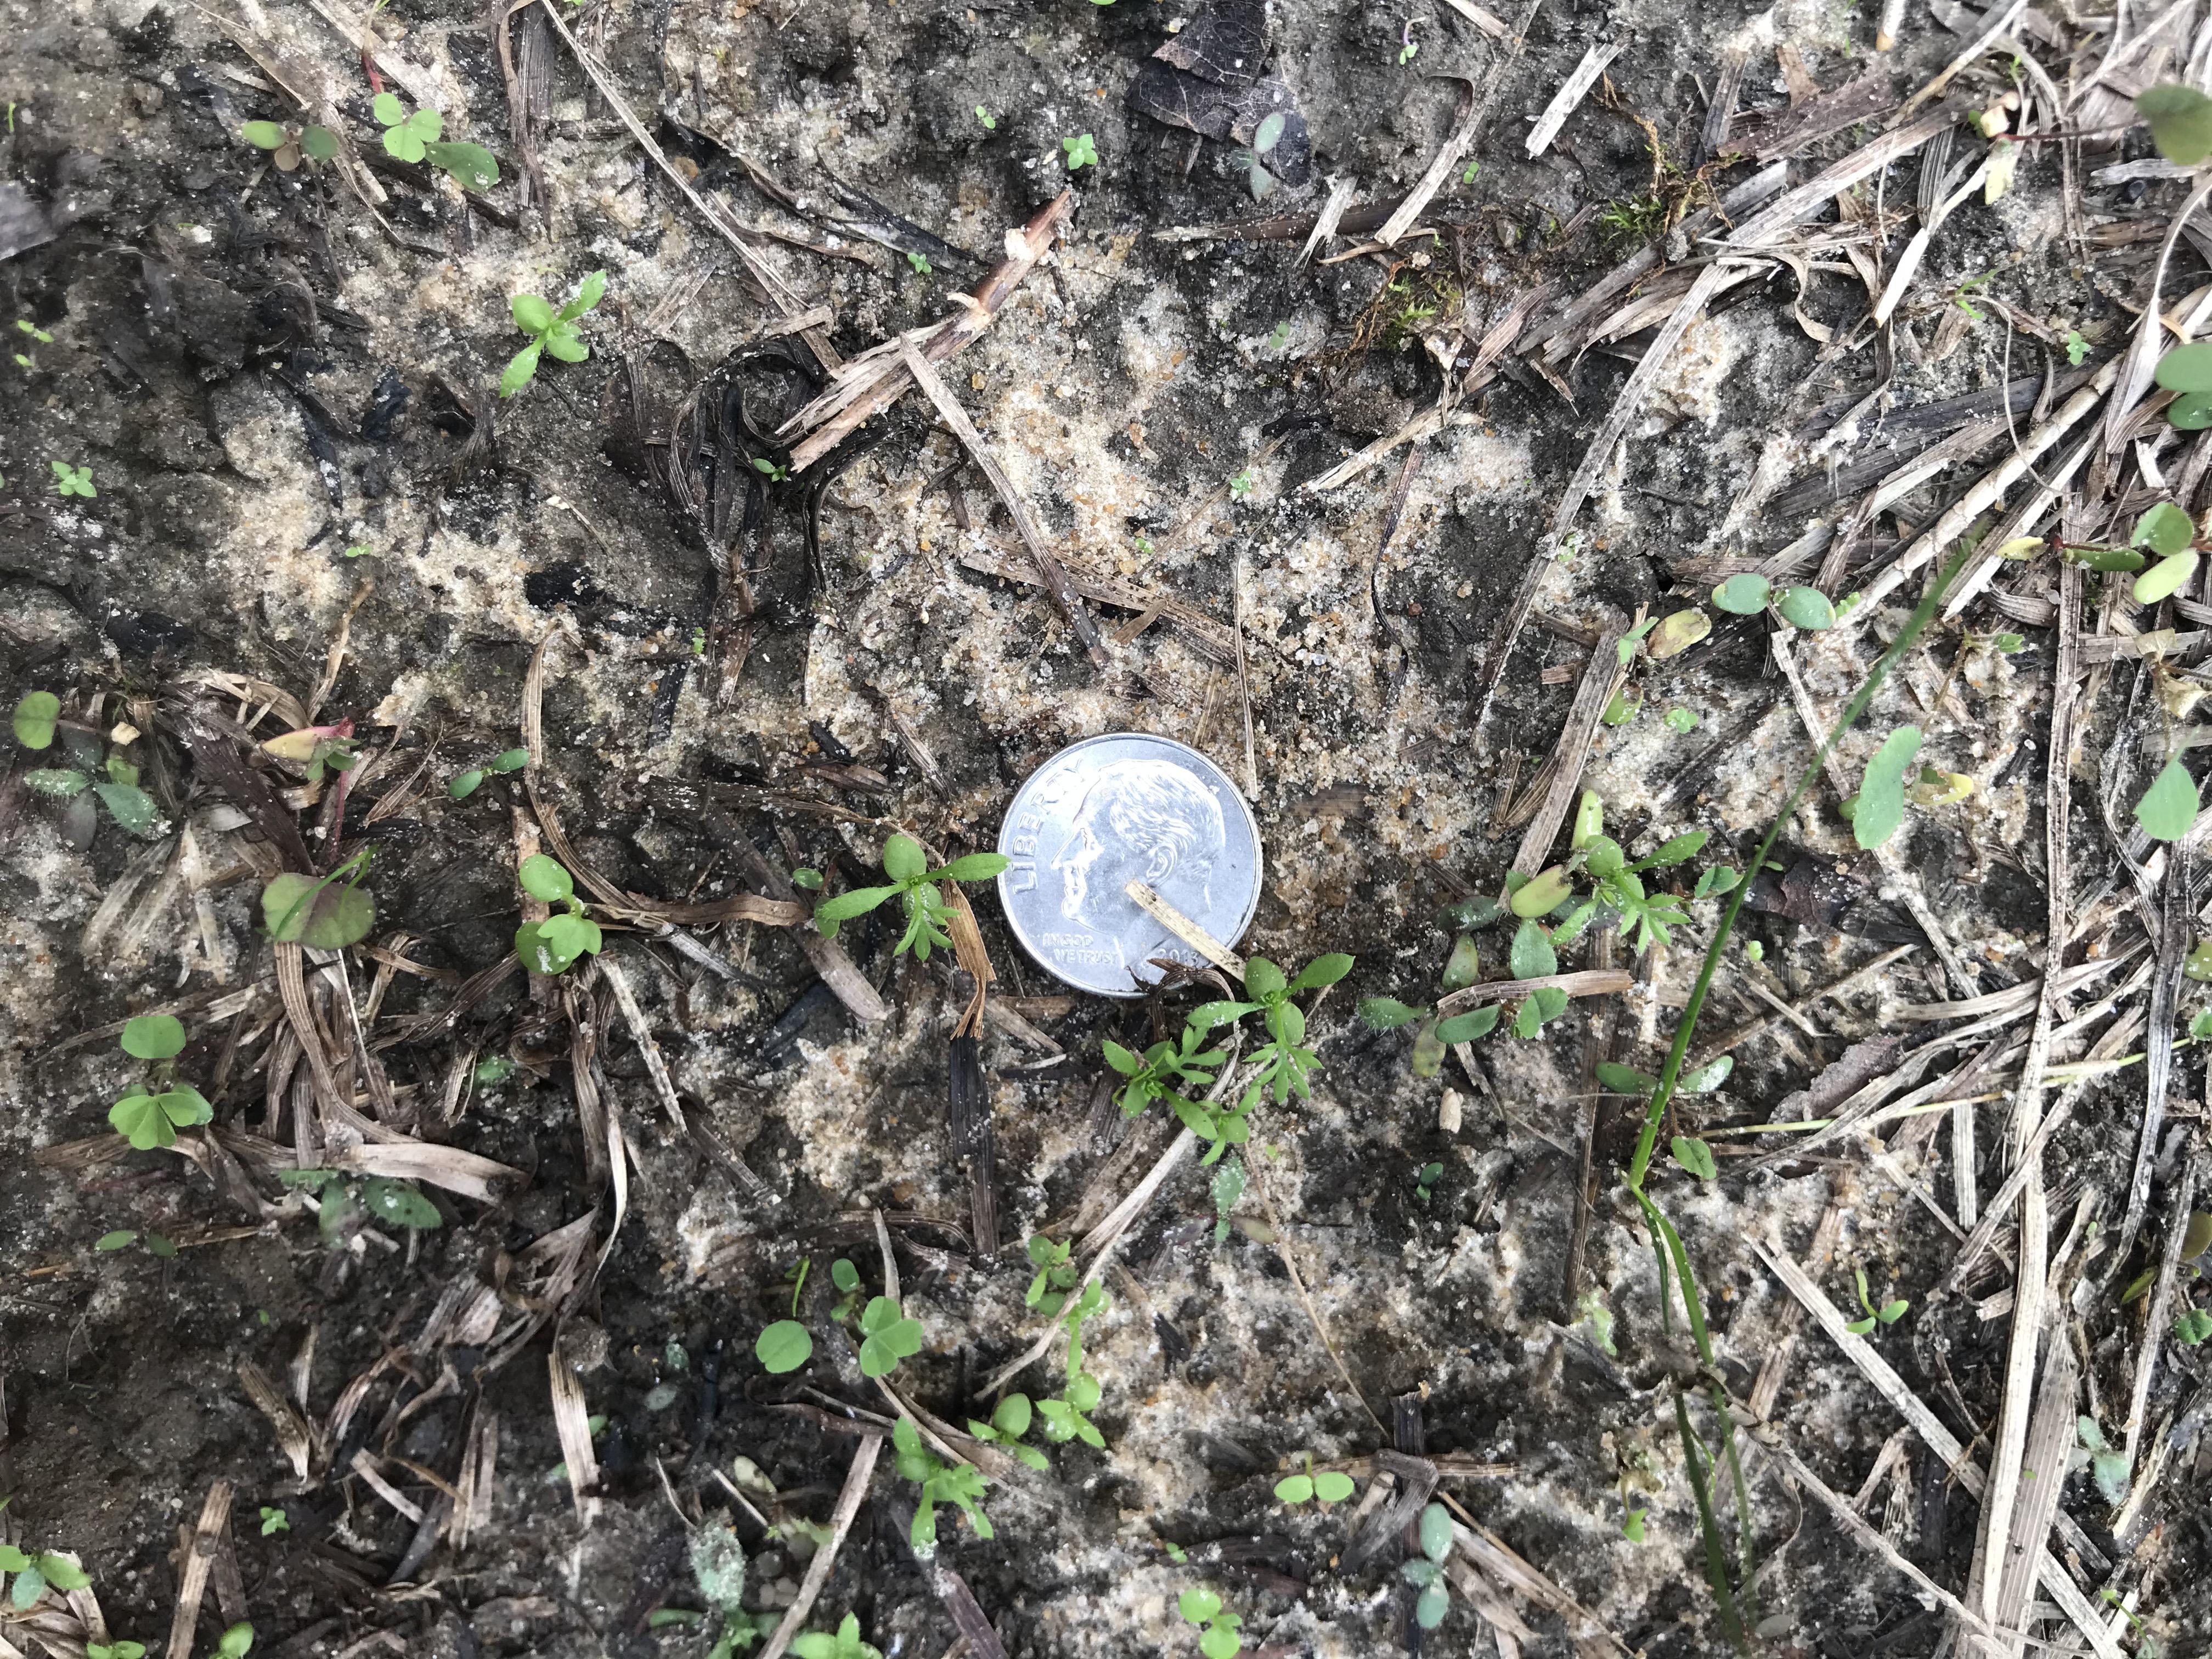
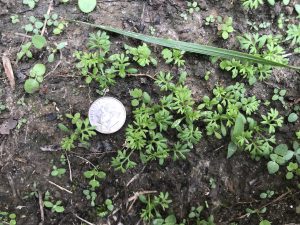
Newly germinated Lawn Burweed. Photo courtesy of the author.
Fortunately, Lawn Burweed is relatively easy to control chemically if one pays close attention to seasonal changes and uses herbicides (either pre-emergent or post-emergent herbicides) effectively.
Pre-emergent Herbicide Options: The first chemical control option for Lawn Burweed is a timely application of the pre-emergent herbicide Isoxaben (sold under various brand names at most farm or garden stores) to prevent Burweed seeds from germinating, greatly reducing plant populations. However, pre-emergent Isoxaben applications must be made before the plants sprout and begin to grow to be effective. For Burweed, this generally means application in October, once nighttime temperatures dip into the 55-60 degrees F range for several nights in a row, as consistent temperatures in this range give Burweed seeds the signal to germinate. Though we’re already past the point of pre-emergent herbicides being an option for control this year, homeowners should plan to include this method in their Lawn Burweed control plan for fall 2020!
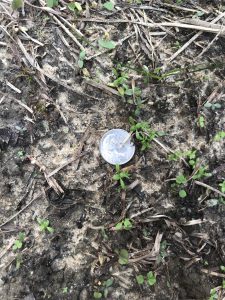
Post-Emergent Herbicide Options: If you haven’t already used a pre-emergent herbicide this fall for Burweed control, you must turn to post-emergent options. Like pre-emergent herbicides, timing is critical if you want your post-emergent applications to work! These herbicides are most effective when Burweed plants are young, small, vigorously growing, and haven’t set burs yet. Successful post-emergent applications may be made from December-early February before burs harden. Unlike pre-emergents, where there is only one strong option for Burweed control, many post-emergent herbicides exist that are extremely effective! When shopping, look for products containing the following active ingredients:
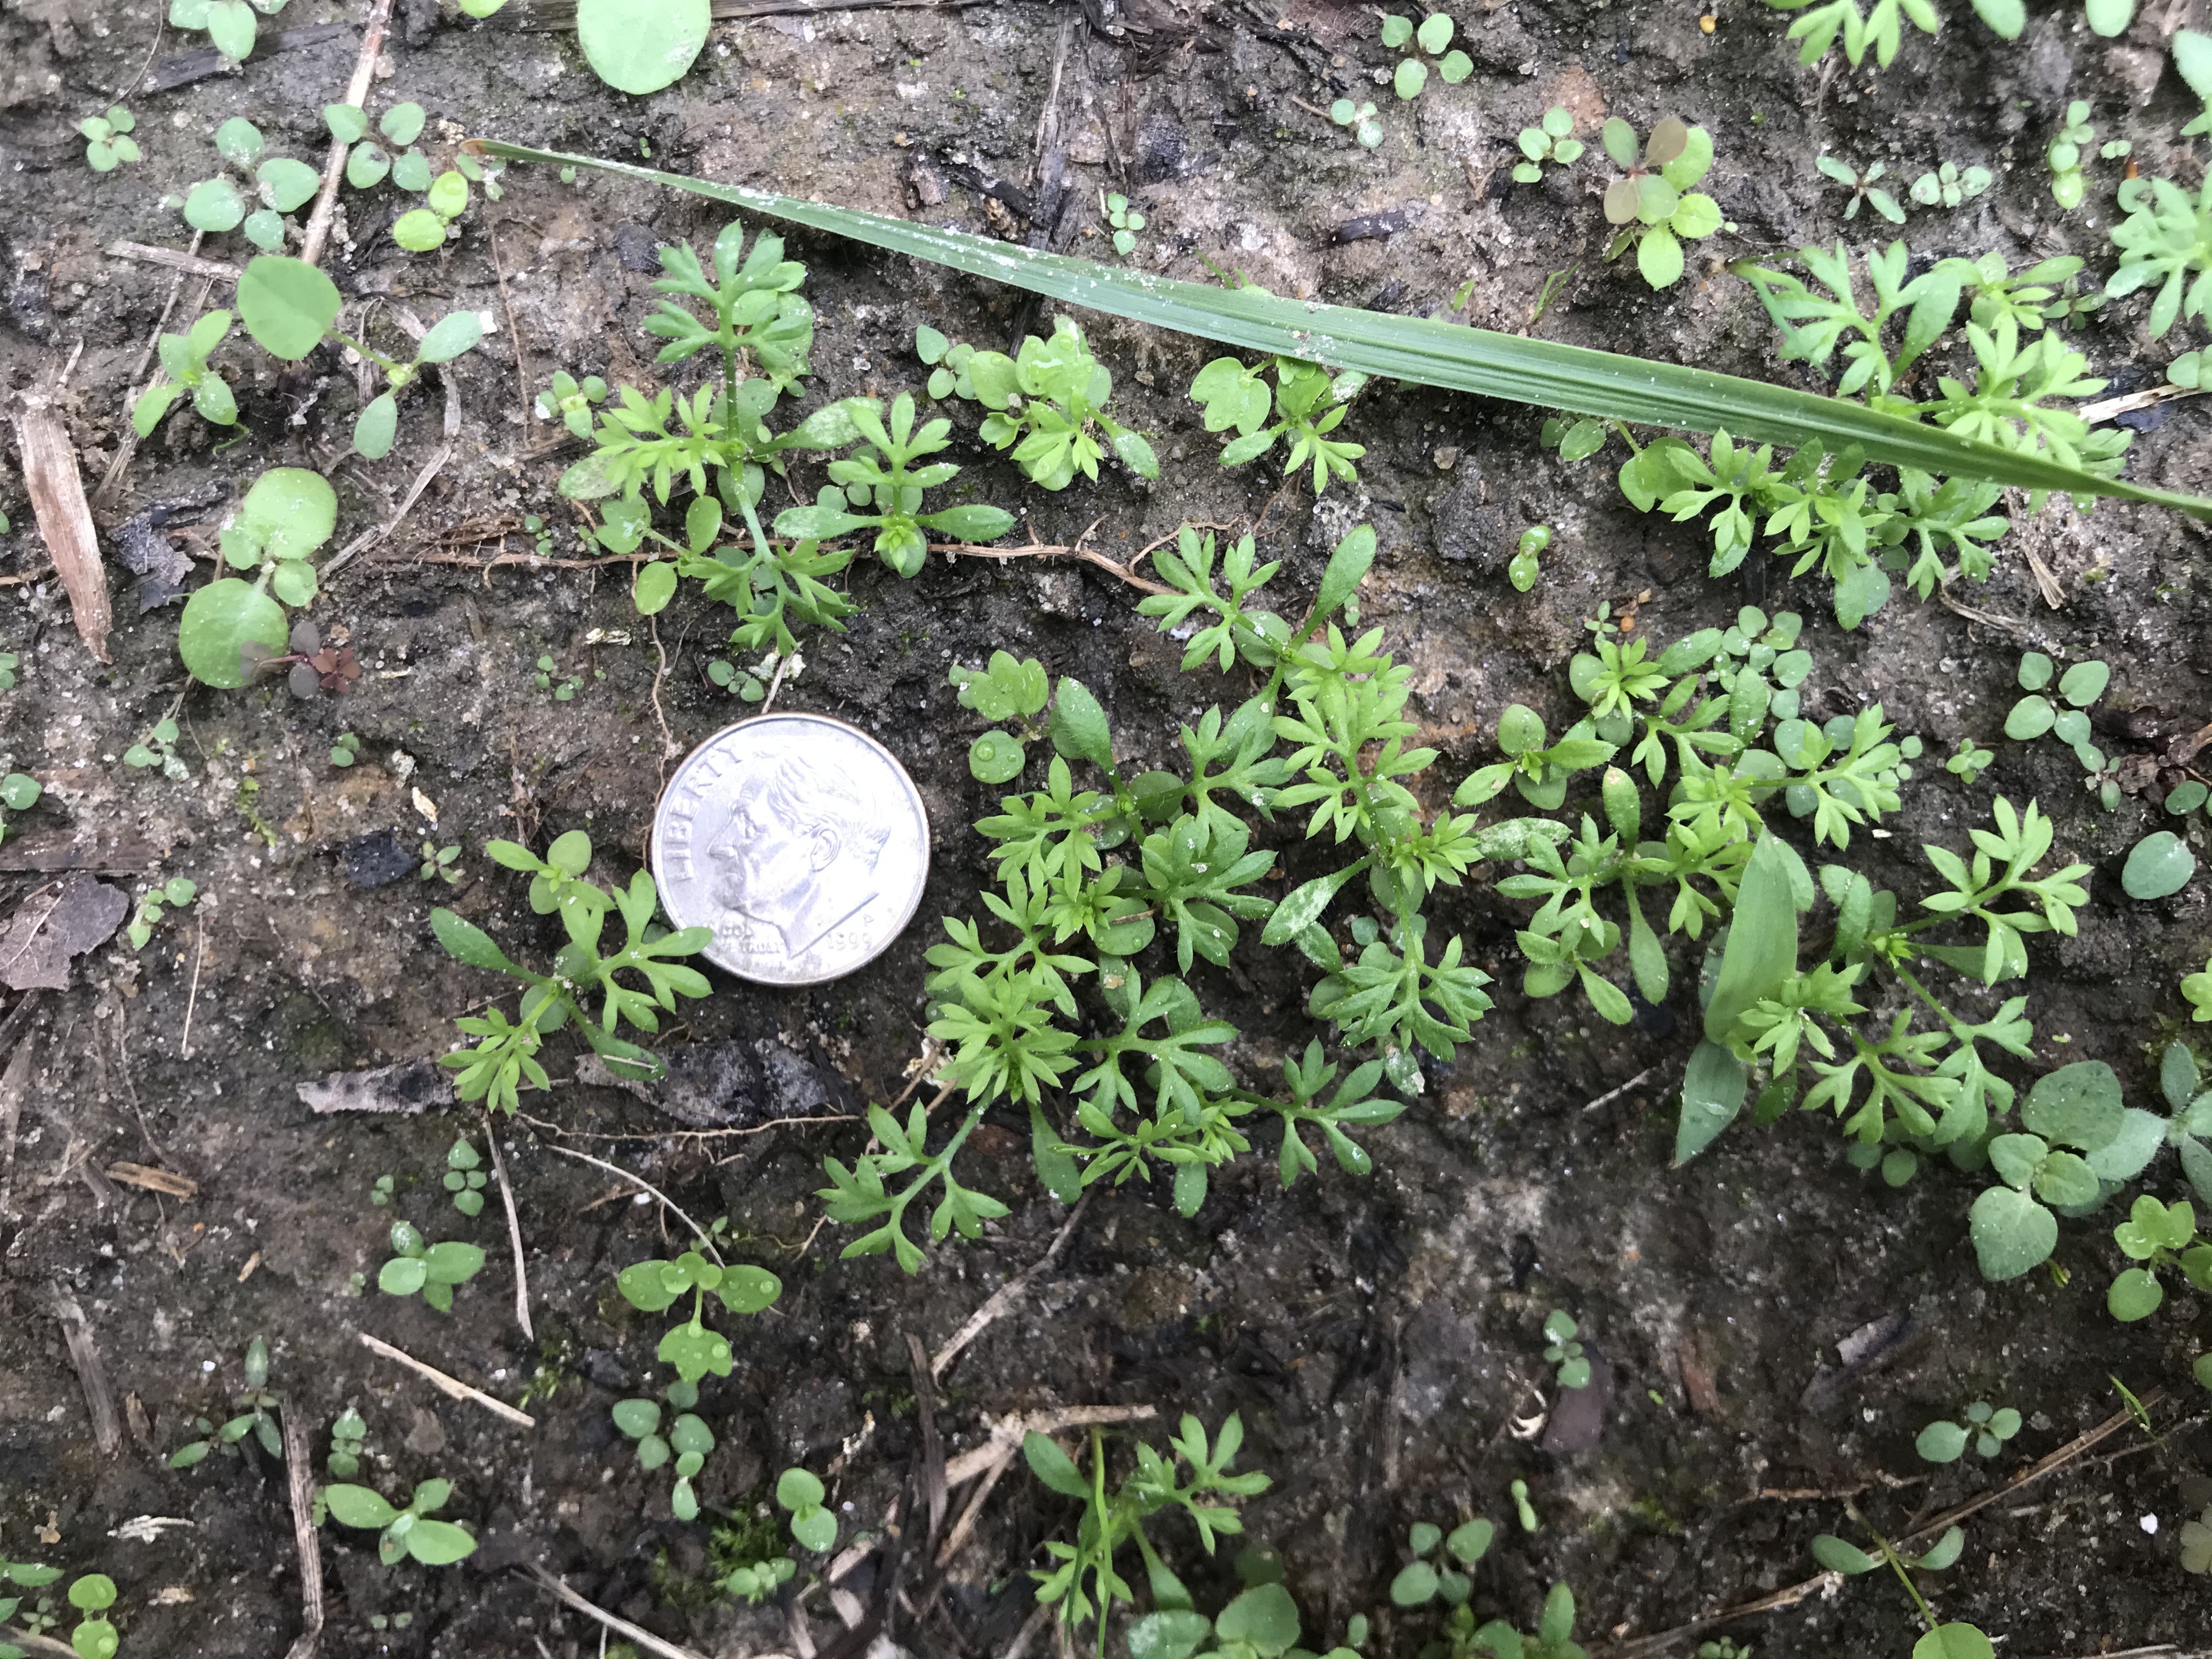
Lawn Burweed around 10 days after emergence. Photo courtesy of author.
- Atrazine – sold under many brand names and safe in Centipede, St. Augustine, & Bermudagrass. Do not use in Zoysia or Bahiagrass lawns.
- Dicamba, Mecoprop, 2,4-D – commonly sold in three-way formulations through many brand names. Generally safe in Centipede, St. Augustine, Bermuda, Zoysia, & Bahiagrass lawns.
- Metsulfuron – sold under several brand names and safe in Centipede, St. Augustine, Zoysia & Bermudagrass. Do not use in Bahiagrass. Be careful if used around ornamentals.
- Thiencarbazone, iodosulfuron, dicamba – sold as Celsius WG from Bayer. Safe in Centipedegrass, Zoysiagrass, Bermudagrass, and St. Augustinegrass. Do not use in Bahiagrass.
Lawn Burweed control with of all the above-listed herbicides will be most effective with a follow-up application 10-14 days later.
Note: With the exception of the Thiencarbazone, iodosulfuron & dicamba mixture (Celsius), do not apply any of these post-emergent herbicides during spring turf green up.
As always, if you have questions about Lawn Burweed control or any other horticulture or agriculture related questions, please contact your local UF/IFAS County Extension office or consult any of the following related articles: https://nwdistrict.ifas.ufl.edu/hort/2015/10/06/lawn-burweed-prevention-is-easier-than-cure/ and http://blogs.ifas.ufl.edu/washingtonco/2017/10/11/prepare-now-to-avoid-lawn-burweed-infestation-later/
Happy gardening!
by Daniel J. Leonard | Oct 8, 2019
For a state that receives around 60” of rainfall a year, it is sure dry in Florida right now! In the Panhandle, the majority of our annual rainfall occurs in in bunches during winter and early spring via near-weekly cold fronts, in the mid-summer as a result of afternoon thunderstorms, and periodically in late summer/early fall if a tropical system crosses our path. Mixed in, however, are two distinct, historically dry periods: the first one in April through mid-May (contrary to popular myth, if we have May flowers, they’re gonna have to make it without April showers) and the second right now in September and October. The prolonged second dry period that we’re experiencing now makes it difficult to manage the mostly unirrigated, low-input turfgrass common in rural Panhandle lawns and pastures. It is critical to enter these expected droughts with healthy turf and remembering to employ 3 simple management tips when it quits raining (although you should follow them year-round ideally) can greatly increase your turf’s resiliency!
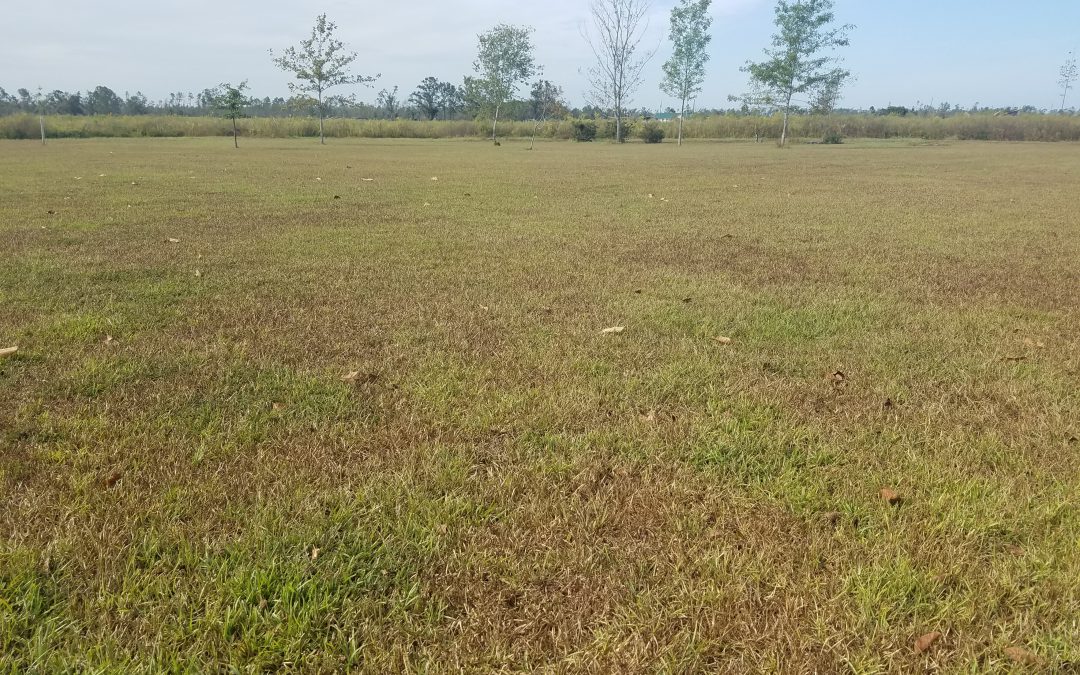
Unirrigated Centipdedegrass turf showing drought stress- Photo courtesy of the author.
Water Wisely – The average Florida turfgrass requires ¾-1” of water per week and we generally achieve that through rainfall. However, in our droughty months, supplemental irrigation can be a lawn saver, particularly in high traffic or more stressed areas of the yard. I realize that many of you, myself included, maintain large lawns without irrigation systems and it’s impossible to keep all your lawn well-watered during drought, but you can maintain the areas around your home, hardscapes and landscaped beds with the highest impact/visibility nicely! In these areas, put down no more than ¾” of water per irrigation event, a ballpark number that ordinarily allows the turf root zone to become saturated. Measuring your sprinkler’s water output is easily done by setting several straight-sided cans (tuna or cat food containers work great) under the sprinkler and timing how long it takes to achieve 3/4”. You might be surprised how much water you waste by leaving a sprinkler running for an hour or more!
Apply Herbicides Appropriately – Herbicides are a great item to have in the turf care toolbox, but if used incorrectly can be a waste of time and money at best, harmful to your turf at worst! Once turf and associated weeds become drought stressed (turning bluish gray, obvious wilting, leaves curling, etc.), it is too late for weed control with herbicides. There are a couple of reasons for this. First, when plants get stressed, they slow or stop their growth and focus on survival. This survival response prevents herbicides from being taken up properly and ultimately causes ineffectual weed control. Also, many herbicides specifically state on the product label that they should not be applied during certain conditions (drought, temperatures above 85-90 degrees, etc.). It is critical that one adhere to these label directions as applying the incorrect product in hot and dry conditions can cause volatility, drift to non-target plants, and in some cases, toxicity to turf you’re treating in. When it’s droughty like it is now, leave the herbicides in the chemical shed to prevent wasting your time and money and potentially damaging non-target plants!
Unirrigated Centipedegrass turf showing drought stress – photo courtesy of the author
Raise that Deck – Finally, one of the most important turf management strategies during an extended drought is to reduce mowing and raise your mower’s cutting height when/if you do mow. As mentioned above, plants are already stressed during a drought and physically chopping off a chunk of the turf plant stresses it further, causing an energy-intensive wound response when the plant is actively conserving resources for survival. Therefore, if you just HAVE to mow, raise the cutting height as high as possible to make the smallest injury possible on the grass and keep your mower blades sharp to ensure a clean cut, which will heal easier and require a smaller energy response from the plant.
During droughts like the one we’re currently in, there isn’t one silver bullet to keep your non-irrigated turf looking good. However, there are several strategies you can use throughout the year to get your lawn through dry times. Remember to water ¾”-1” per week when you can, where you can. Before you water, calibrate your sprinkler to ensure you put out enough water and don’t waste your time and inflate your utility bill by putting out too much! Reduce or eliminate use of herbicides as they are ineffective during stress periods and can harm your turfgrass. Finally, reduce or eliminate mowing and if you must mow, raise the deck! If you have any questions about getting your turf through the drought or other horticultural or agronomic topics, please contact your local UF/IFAS Extension Office!
by Daniel J. Leonard | Aug 20, 2019
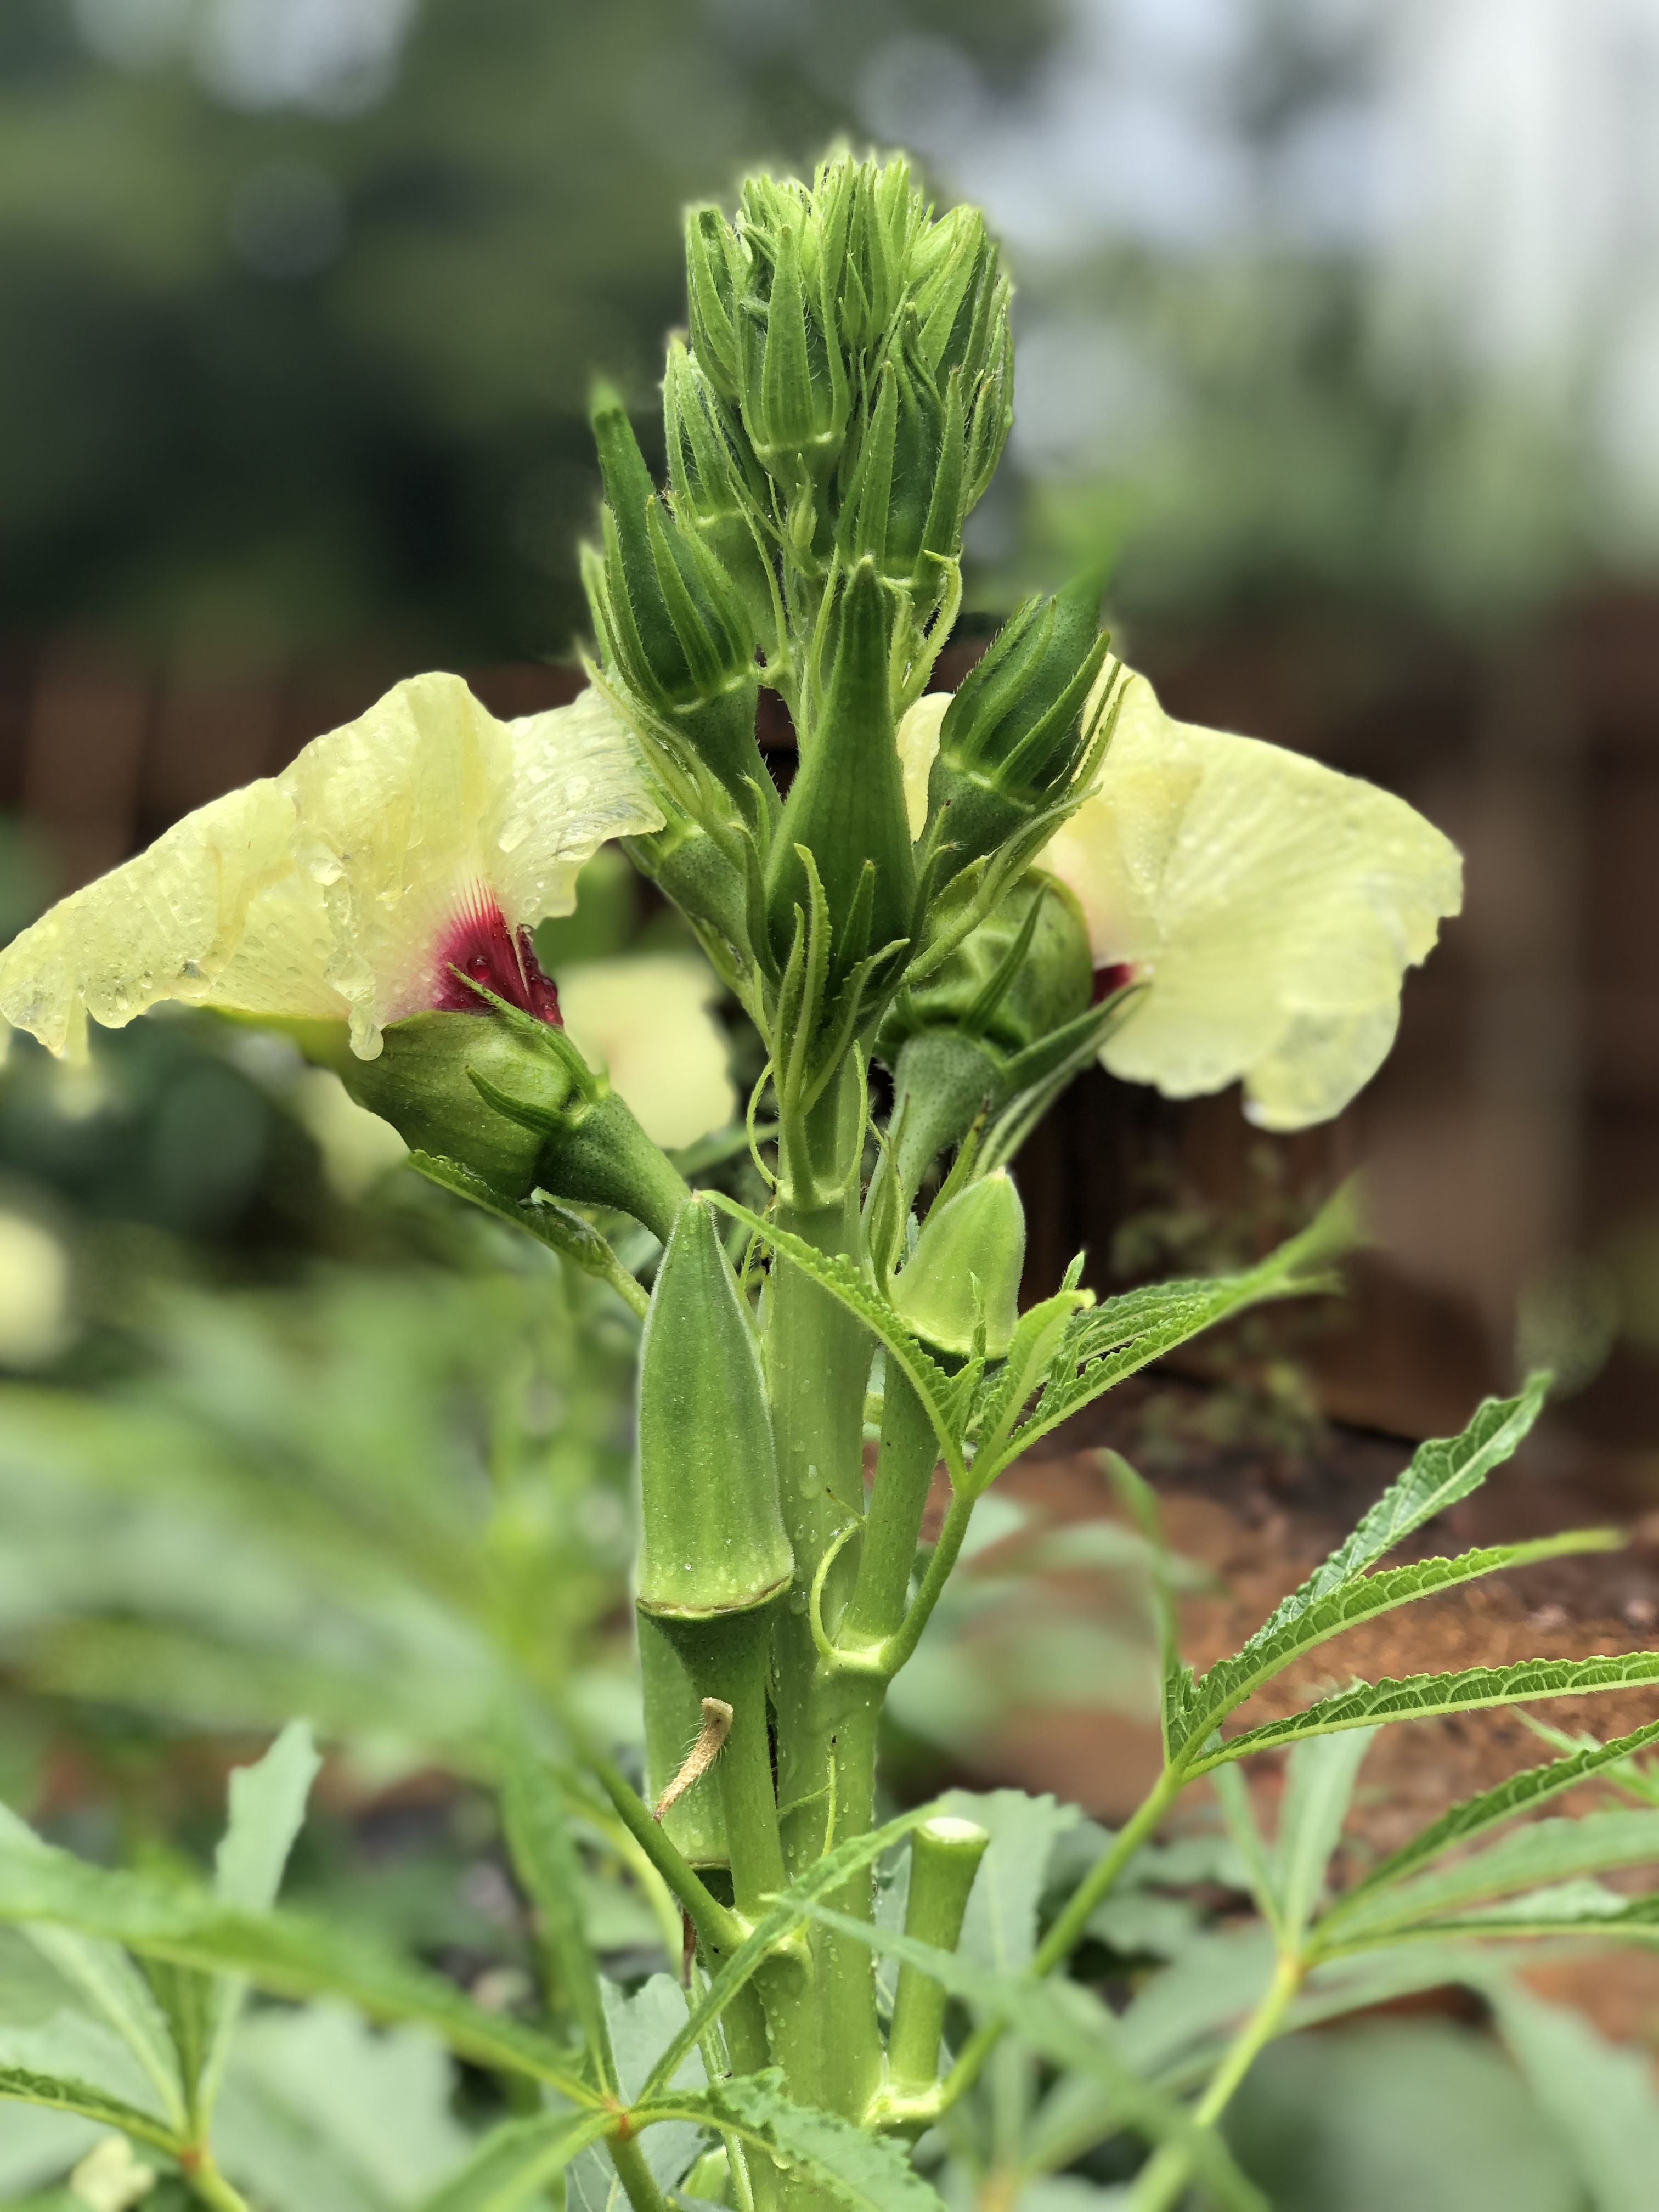
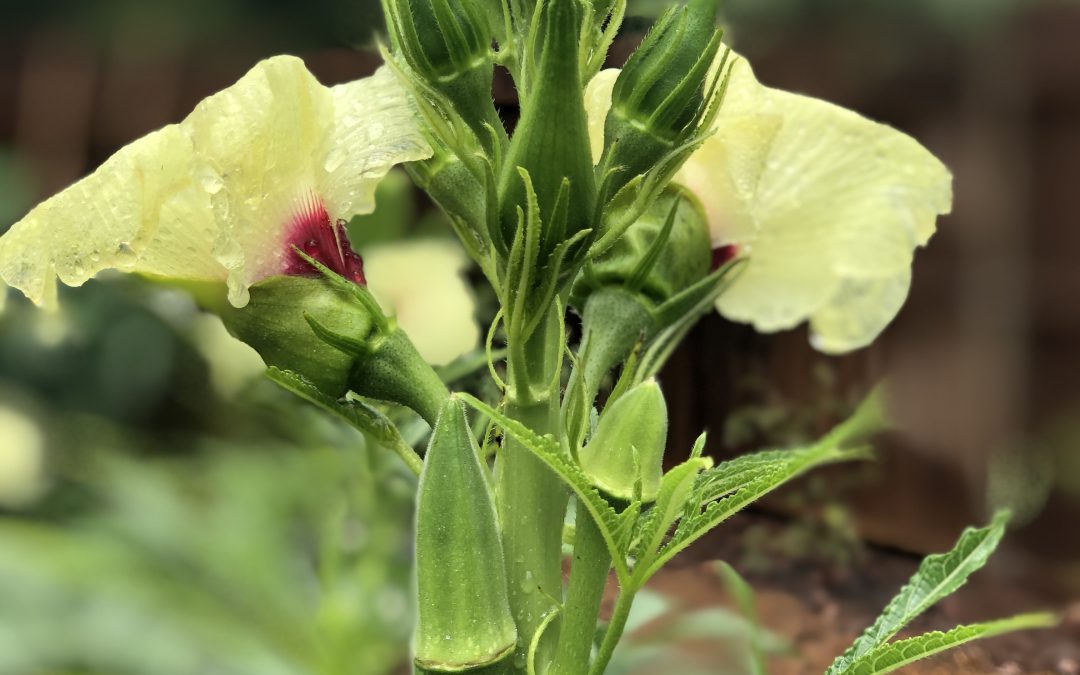
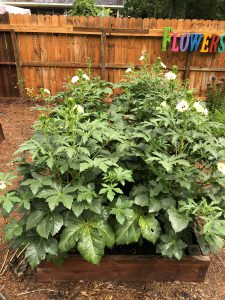
Though Okra (Abelmoschus esculentus) fruit isn’t much more than a thick green hull, slime and seeds and the plant itself is impossibly irritating to the skin, few plants are as integral to Southern heritage. In my mind, okra is among the best vegetables Panhandle gardeners can grow. Not only is it a gorgeous plant – Okra belongs to the Mallow family which also includes beauties like Hibiscus and Cotton – but it’s exceedingly versatile in the kitchen, excellent fried, grilled, roasted, boiled (though you have to acquire a taste for slimy textures to enjoy this method) and most famously, as a thickening agent in Cajun gumbo. Because of this exalted status in Southern culture, whether you enjoy eating okra or not, it’s almost mandatory here to include the plant in one’s garden. Most gardeners stick with the old standard varieties such as ‘Clemson Spineless’ or ‘Cowhorn’ and there is nothing wrong with them, however, these plants are almost too prolific for most gardens (growing upwards of 6-7’), especially for those of us growing in the close confines of raised beds. In the search for a less rambunctious but still ultra-productive cultivar, this summer I trialed ‘Jambalaya’, an F1 hybrid developed by Sakata Seed in 2012, with impressive results!
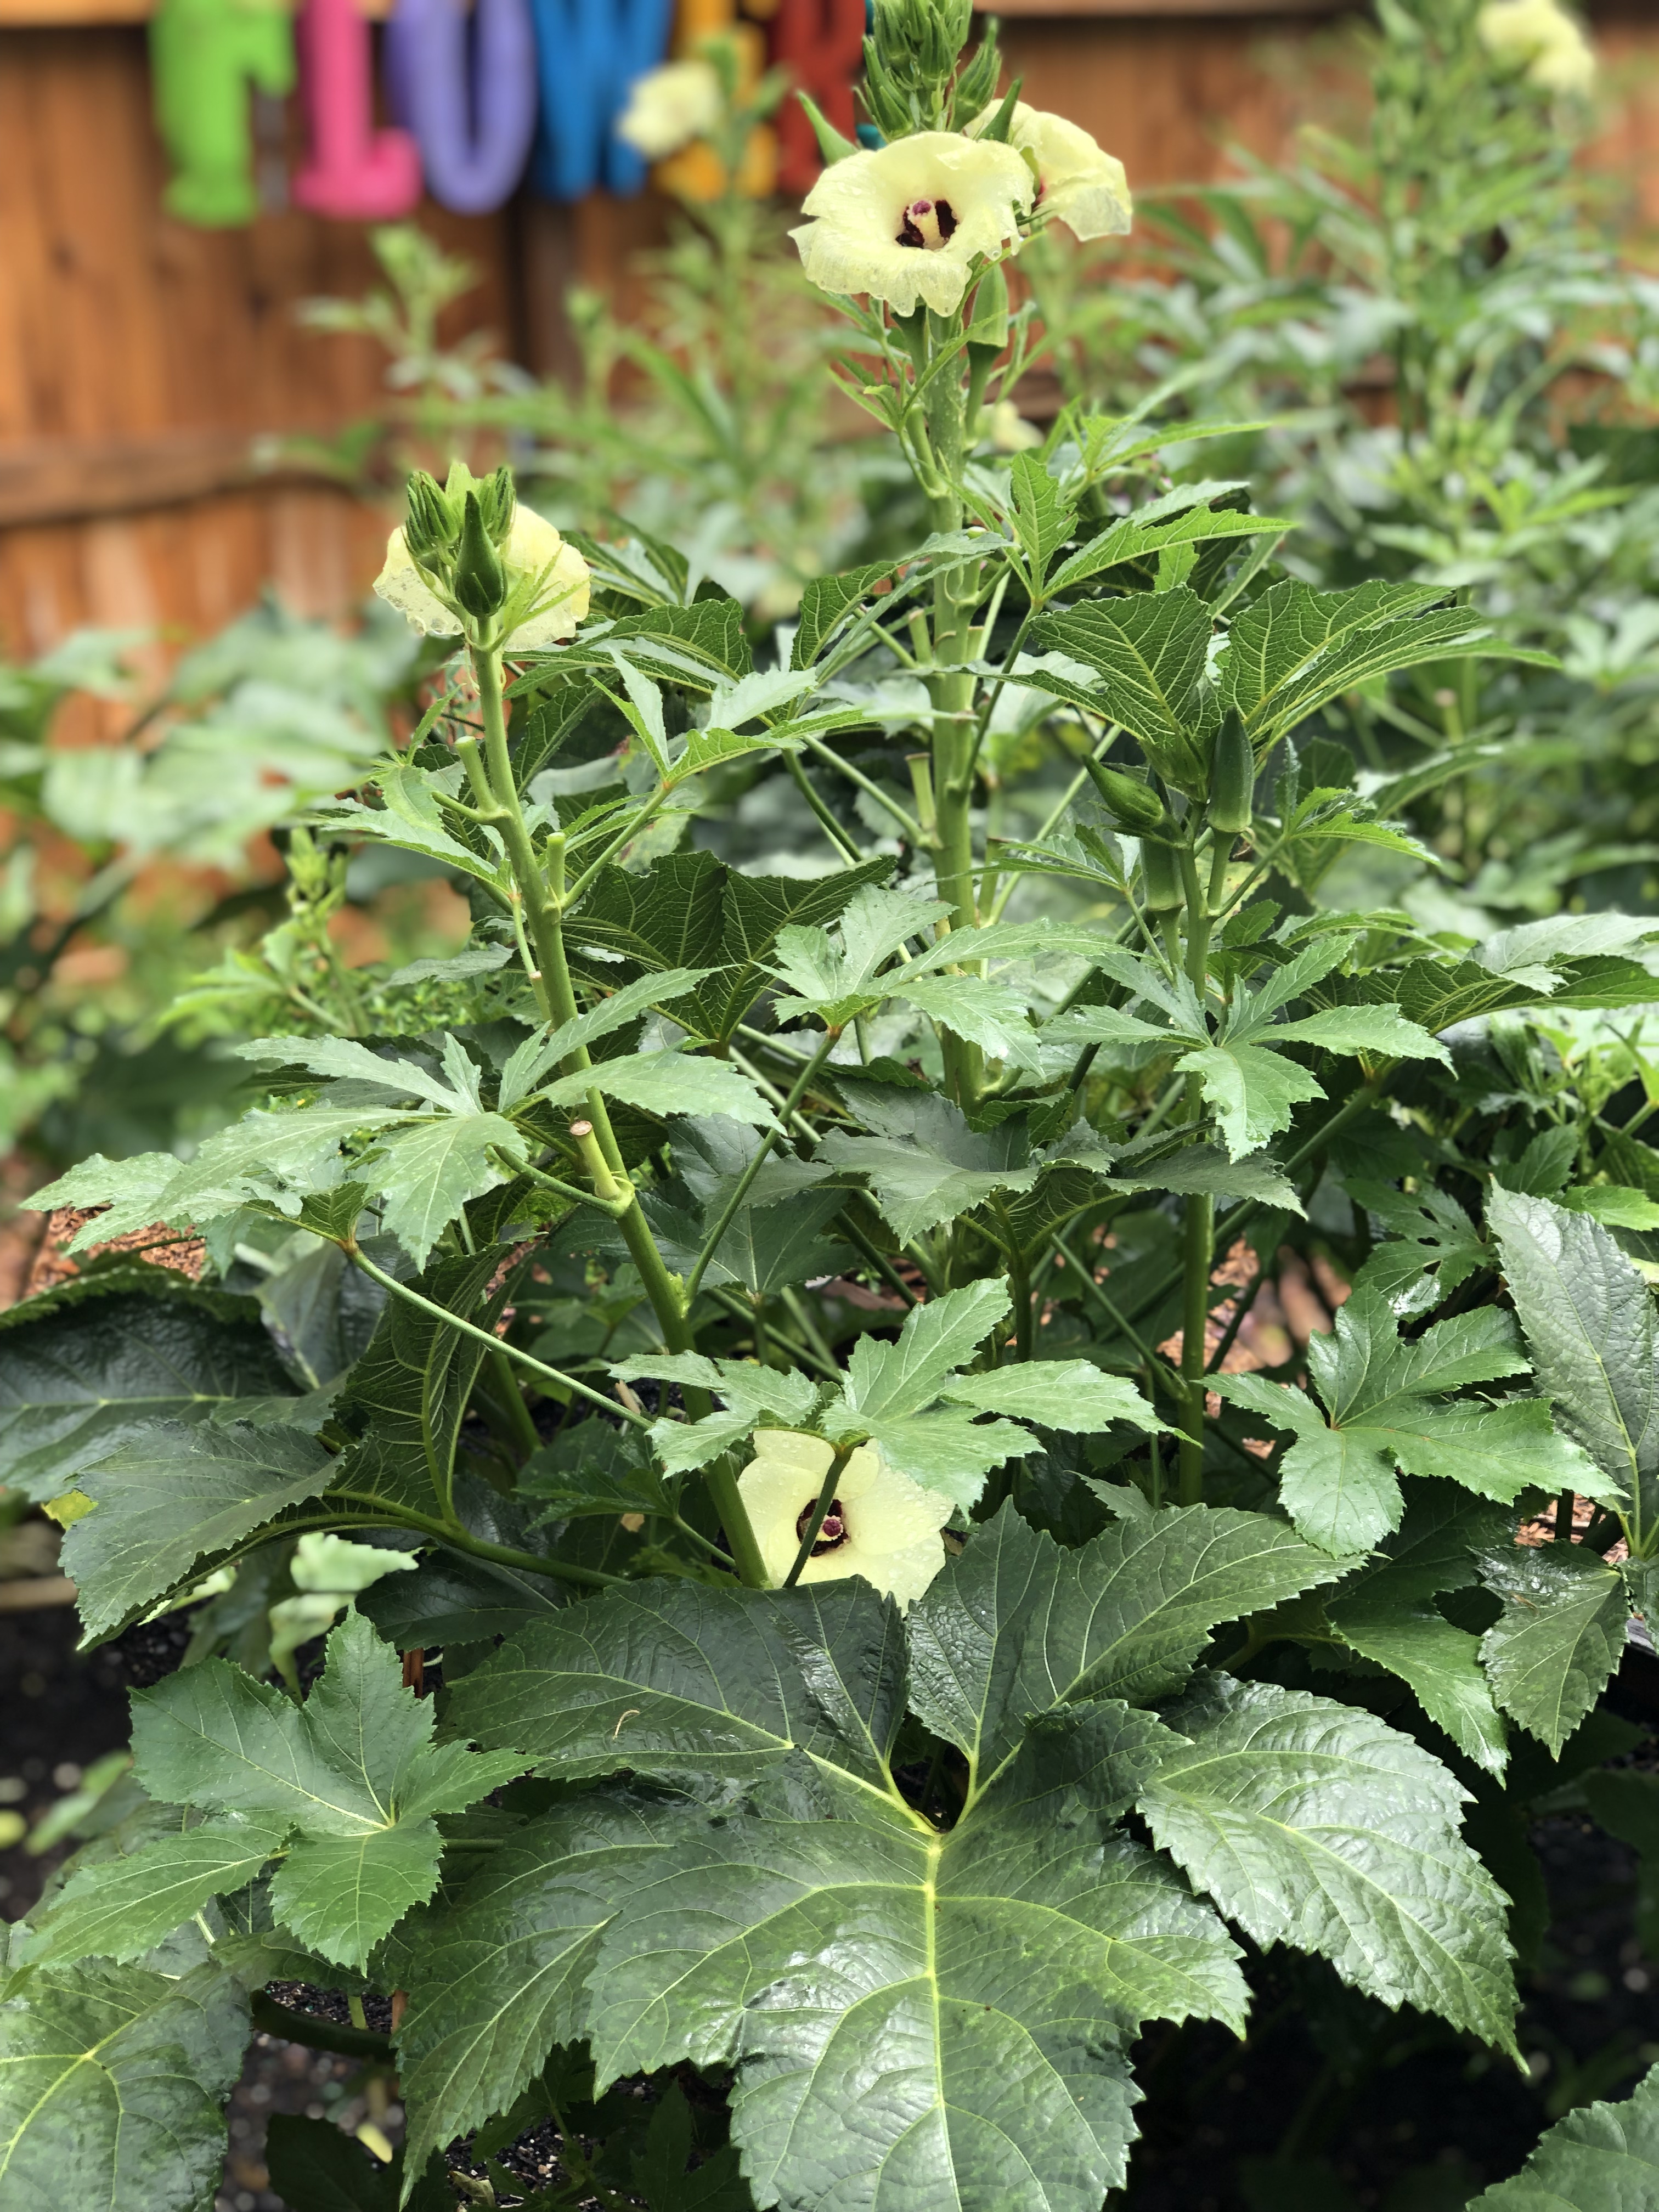
‘Jambalaya’ Okra in the author’s garden.
From my experience growing the cultivar this summer, ‘Jambalaya’ merits consideration in the garden, and is a must for raised bed gardeners, for two primary reasons. First, it was bred to be compact and is considered a dwarf cultivar. This is an awesome attribute, as I typically end the growing season picking okra from a small ladder! Most seed purveyors tout the plant as reaching a maximum height of 3-4’ and while this estimate might be a little conservative, I can attest that ‘Jambalaya’ is greatly reduced in height compared to the standard cultivars. The second advantage of growing this variety is that it begins producing very early relative to its peers and bears heavily. ‘Jambalaya’ fruit begin to ripen in about 50 days, about ten days to two weeks earlier than ‘Clemson Spineless’, a definite advantage if rotating behind a late maturing spring crop like potatoes as I typically do. Though ‘Jambalaya’ is a dwarf plant, in no way are yields reduced. My specimens have produced continuously since late-July and will continue to do so as long as adequate fertility and consistent harvesting are provided.

‘Jambalaya’ flower & fruit production.
Like any other okra cultivar, ‘Jambalaya’ has a couple of basic requirements that must be met for plants to thrive. In general, all okra cultivars love Southern summers and patience sowing seed is recommended, allow the soil to warm to at least 70 degrees before planting. Okra also prefers full sun, at least 6 hours per day, any less and yields will be reduced and plants will stretch towards the light. Belonging to the Mallow family, okra requires consistent moisture, particularly when in the flowering and fruiting phase. Finally, it is critical to keep up with your okra harvest as the plants produce! Okra pods grow quickly and should be harvested when they are no more than 3-4” long and still tender, larger pods are tough to the point of being inedible!

‘Jambalaya’ in the author’s garden.
Whether you’re new to the okra growing game or you’re a seasoned gumbo gardener, I highly encourage you to give ‘Jambalaya’ Okra a look next summer. While ‘Jambalaya’ is available through many seed sources, Johnny’s Selected Seeds sells a conveniently small package perfect for backyard gardeners, though they’ll be happy to provide larger quantities as well. In ‘Jambalaya’ you’ll find a nice compact plant that won’t outgrow your space, provide you a summer long harvest of tender green pods, and will rival the ornamentals in your landscape for the title of prettiest plant on your property! Happy gardening and as always, if you have questions about vegetable gardening or any other horticultural or agronomic topic, please contact your local UF/IFAS County Extension office!
by Daniel J. Leonard | Aug 15, 2019
By Evan Anderson, Walton County Agriculture Agent:
Gardening is an attractive pastime, not only for homeowners but also, it seems, for every critter out there that wants a free meal. If a gardener isn’t trying to keep deer, rabbits, or moles out of their crops, they’re fighting against insects of many
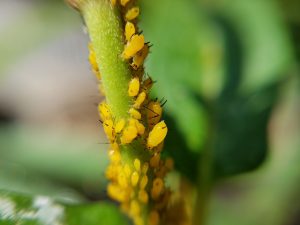
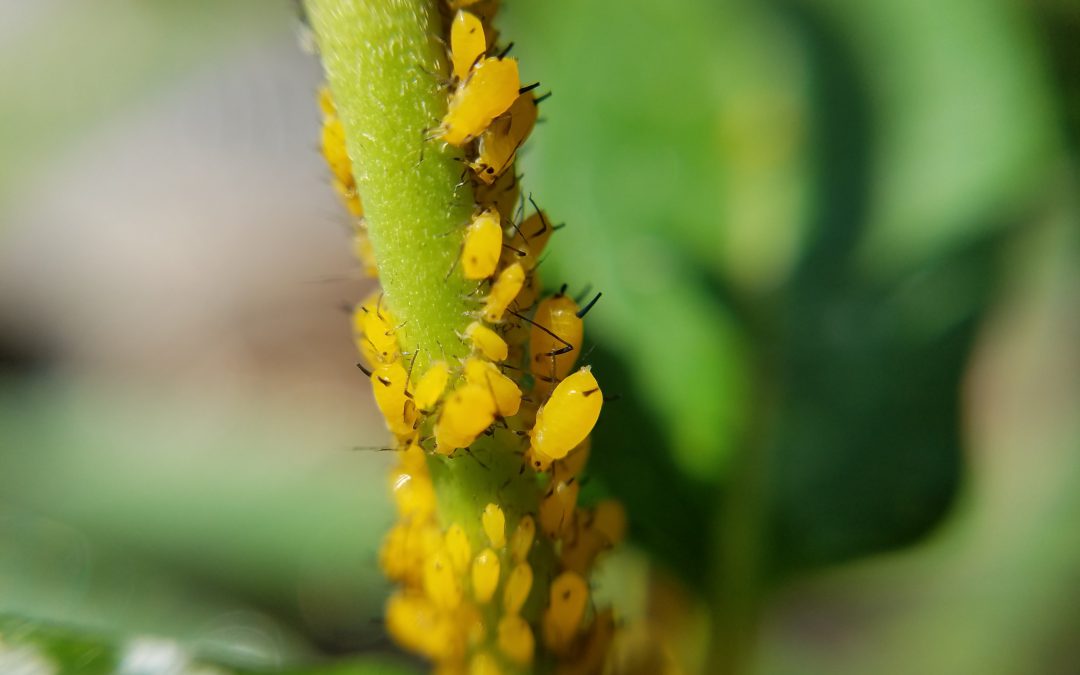
Aphids come in many colors, but are a common (and unwelcome) sight on garden plants. Photo courtesy Evan Anderson.
different sorts. With as many different sorts as there are, it can be dizzying to try and keep track of them and to figure out what’s doing damage to which vegetables.
Just because you see an insect in your garden doesn’t mean it’s a bad one. There are many that can be friends to a gardener, patrolling the plants to snack on pests. It’s important to know what you’re looking at before you try to control them; you might end up killing off a helpful bug instead of one that’s a problem!
It can be helpful to look at the damage done by the insects that are plaguing your garden to figure out what kind they are. Piercing / sucking insects drink the fluids from inside plant tissues, and leave small dots or stippling marks, and may exude honeydew, a stick fluid that sometimes grows sooty mold on

Honeybees are an example of a good bug to find in your garden. They help pollinate crops. Photo courtesy Evan Anderson.
it. These bugs include aphids, scales, mealybugs, spider mites, stink bugs, and thrips.
Chewing insects are those that usually go after plant leaves. They chew holes, and if an infestation is bad, they might defoliate a plant very quickly! Caterpillars, grasshoppers, and some beetles are the worst offenders of this sort.
If you need help identifying or figuring out how to control an insect in your garden or any other horticultural topic, feel free to contact your local UF/IFAS Extension office!
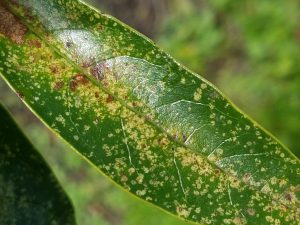
An example of damage from piercing/sucking insects. Photo courtesy Evan Anderson.
by Daniel J. Leonard | Aug 12, 2019
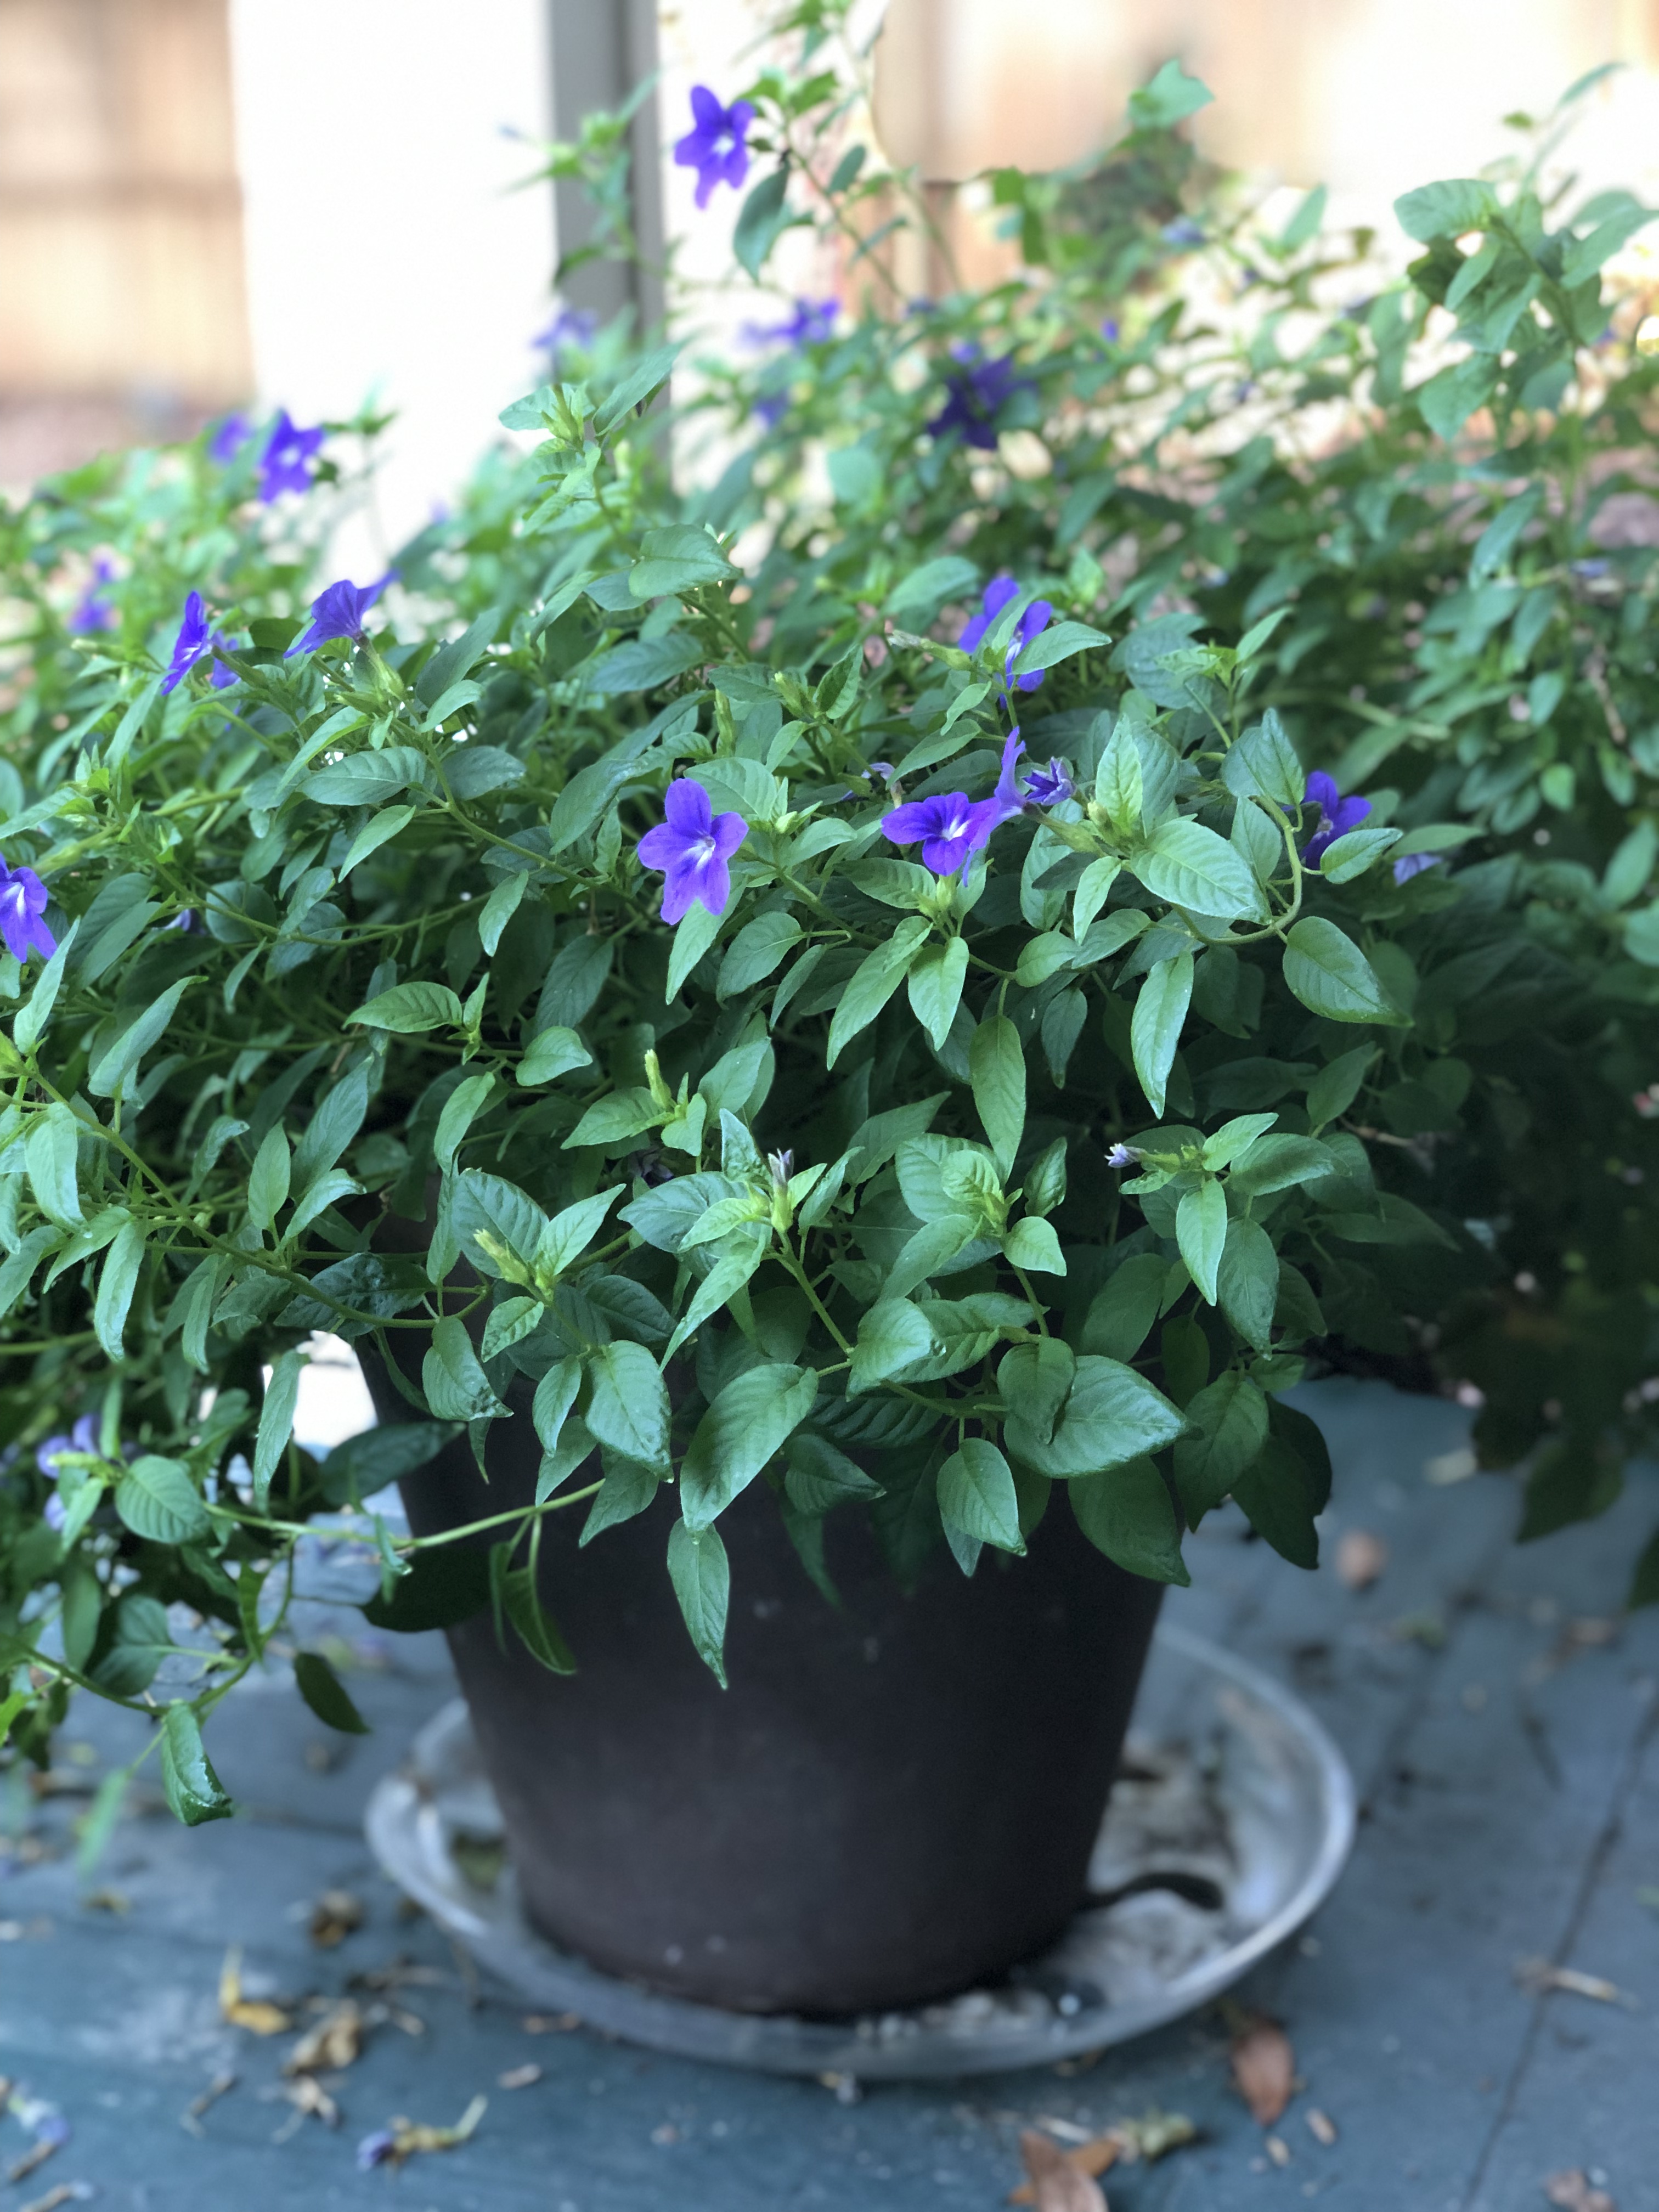
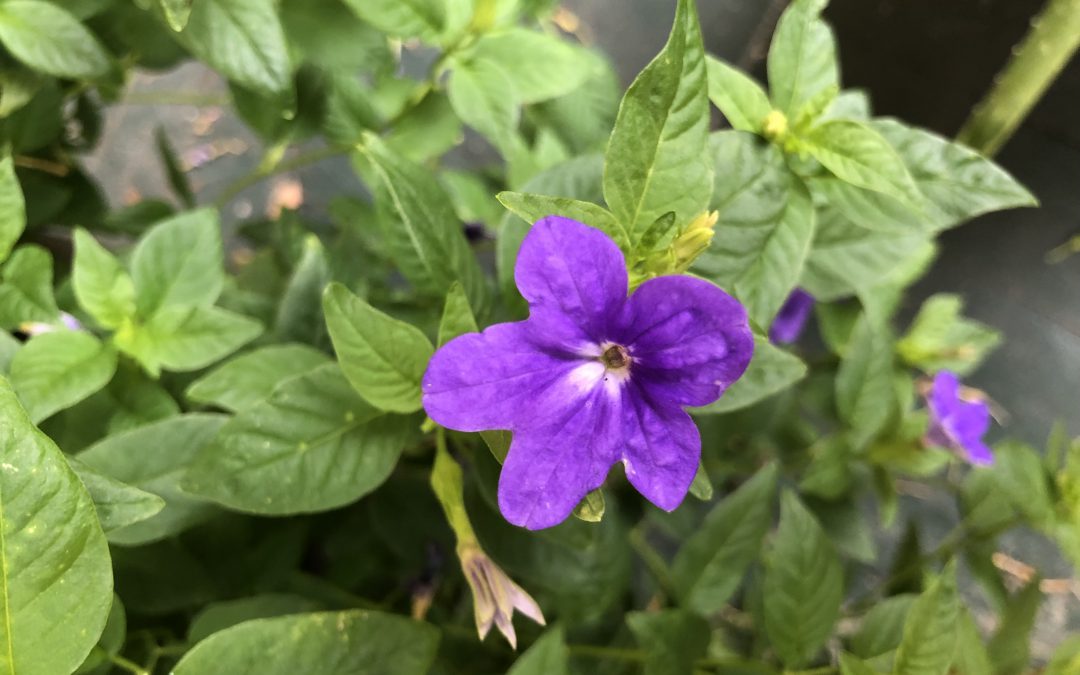
As an unabashed plant enthusiast who’s been experimenting with new plant introductions (some not really “new”, just new to me) in his own landscape, and his parent’s yard before that (sorry guys for the ‘Charmed Wine’ Oxalis that now pops up unwanted every spring) for nearly two decades now, at this point I’m pretty hard to impress. However, last year Andrea Schnapp, a UF/IFAS Walton County Master Gardener, introduced me to a newish plant that has since changed the way I choose plants to color shady pots and planting beds, a little native of tropical South America called Bush Violet (Browallia spp.), specifically the hybrid ‘Endless Illumination’.

Browallia ‘Endless Illumination’ on the author’s back porch.
For decades, the standard bedding plant for color in the shade in the Deep South has been Impatiens walleriana. However, in the last few years, a new disease called Impatiens Downy Mildew has wreaked habit on the bedding plant species, virtually eliminating it as a serious player in the horticulture industry. Fortunately, the fine folks at Proven Winners introduced ‘Endless Illumination’ a couple of years ago to fill the niche formerly occupied by old-fashioned Impatiens. And boy, is ‘Endless Illumination’ aptly named. The unending masses of star shaped flowers are an absolutely brilliant purple hue that does indeed light up shady areas in the landscape. I’ve encountered few plants put forth such a proliferous display of flowers for as long of a time as this Browallia selection has, and it doesn’t even require deadheading!
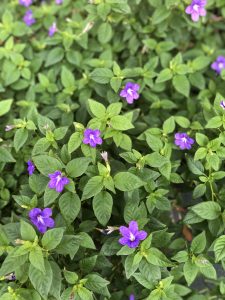
Browallia ‘Endless Illumination’ flowers.
In addition to having one of the more striking color displays of any bedding plant, Browallia happens to be a vigorous grower with an extremely hardy constitution. I’ve found ‘Endless Illumination’s mature size as listed on the sales tag as being a little conservative, instead of the 16” tall x 14” wide stated, my samples have consistently grown more than the 16” listed in height and doubled the width, no complaints here as this just means more flowers! And though my experience with Browallia has strictly been in containers so far, it has weathered heat and bounced back from drought like a champ. It’s not super important to know that the container it occupies is sited under my back porch roof and therefore is subjected to human induced drought by my forgetting to water it, good performance in droughty conditions is good performance in droughty conditions! Finally, Browallia requires the bare minimum of fertilizer to thrive. A good topdressing of a slow-release fertilizer (rates according to the product’s label, of course) at planting and an identical refresher dose mid-summer have induced great performance and no noticeable nutrient deficiencies.
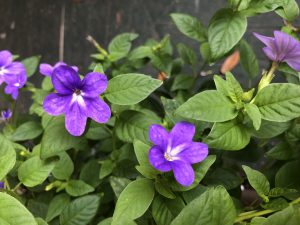
Browallia ‘Endless Illumination’ flowers
A quick note before we adjourn, when perusing nurseries next spring for Browallia, you’ll likely encounter the sister cultivar of ‘Endless Illumination’ with white flowers, named ‘Endless Flirtation’. I’d encourage you to stick with the purple flowers of ‘Endless Illumination’ as I’ve found, through personal growing experience and anecdotes from other growers, ‘Endless Flirtation’ to be noticeably fussier than and not nearly as attractive as its sister plant.
Sometimes, the misfortunes of one plant are a merely an opportunity for another plant to claim its place in the flower bed. Browallia ‘Endless Illumination’ has taken the spot occupied by Impatiens walleriana and quickly become a garden favorite. Look for this awesome little annual in garden centers next spring! And remember, if you have any questions about this newly introduced plant or any other horticultural topic, please contact your local UF/IFAS Extension office! Happy gardening!