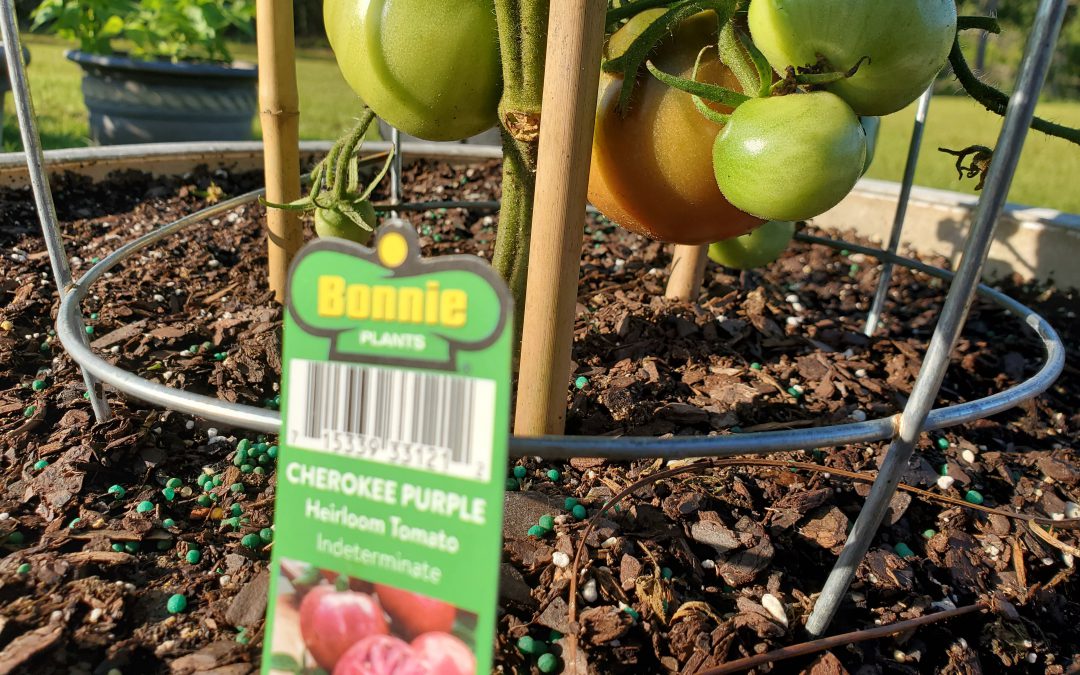
With the arrival of spring weather in the Panhandle, many people have begun planning a vegetable garden. However, many gardeners that I talk to tell me more of their gardening frustrations than successes. I surmise the main reason for their frustration is simply doing what gardeners have done across centuries and all over the world, planting in the ground. That’s a great strategy in many places; unfortunately, in the Panhandle, we are not often blessed with great soil. We can overcome our poor soil conditions and be more successful by going above ground with raised beds!
Gardening in raised beds has three primary benefits for area gardeners: the ability to control soil conditions, reduce disease problems, and be space efficient. The first raised bed benefit is the most critical. Soil in and around much of the Panhandle is sandy in nature with little rich organic matter. To make matters worse, much of our native soil is either too well-drained and dries out rapidly or is the opposite and frequently stands in water – neither is conducive to garden success. We can alleviate all the above issues by creating our own perfectly draining, nutrient-rich soil environment inside a raised bed. One can either make their own soil concoction by experimenting with different ratios of compost, aged pine bark, peat moss, perlite, etc. or simply purchase bagged garden soil. I use either 100% mushroom compost or a 1:1 mix of mushroom compost & aged pine bark, but many soil component combinations work well.
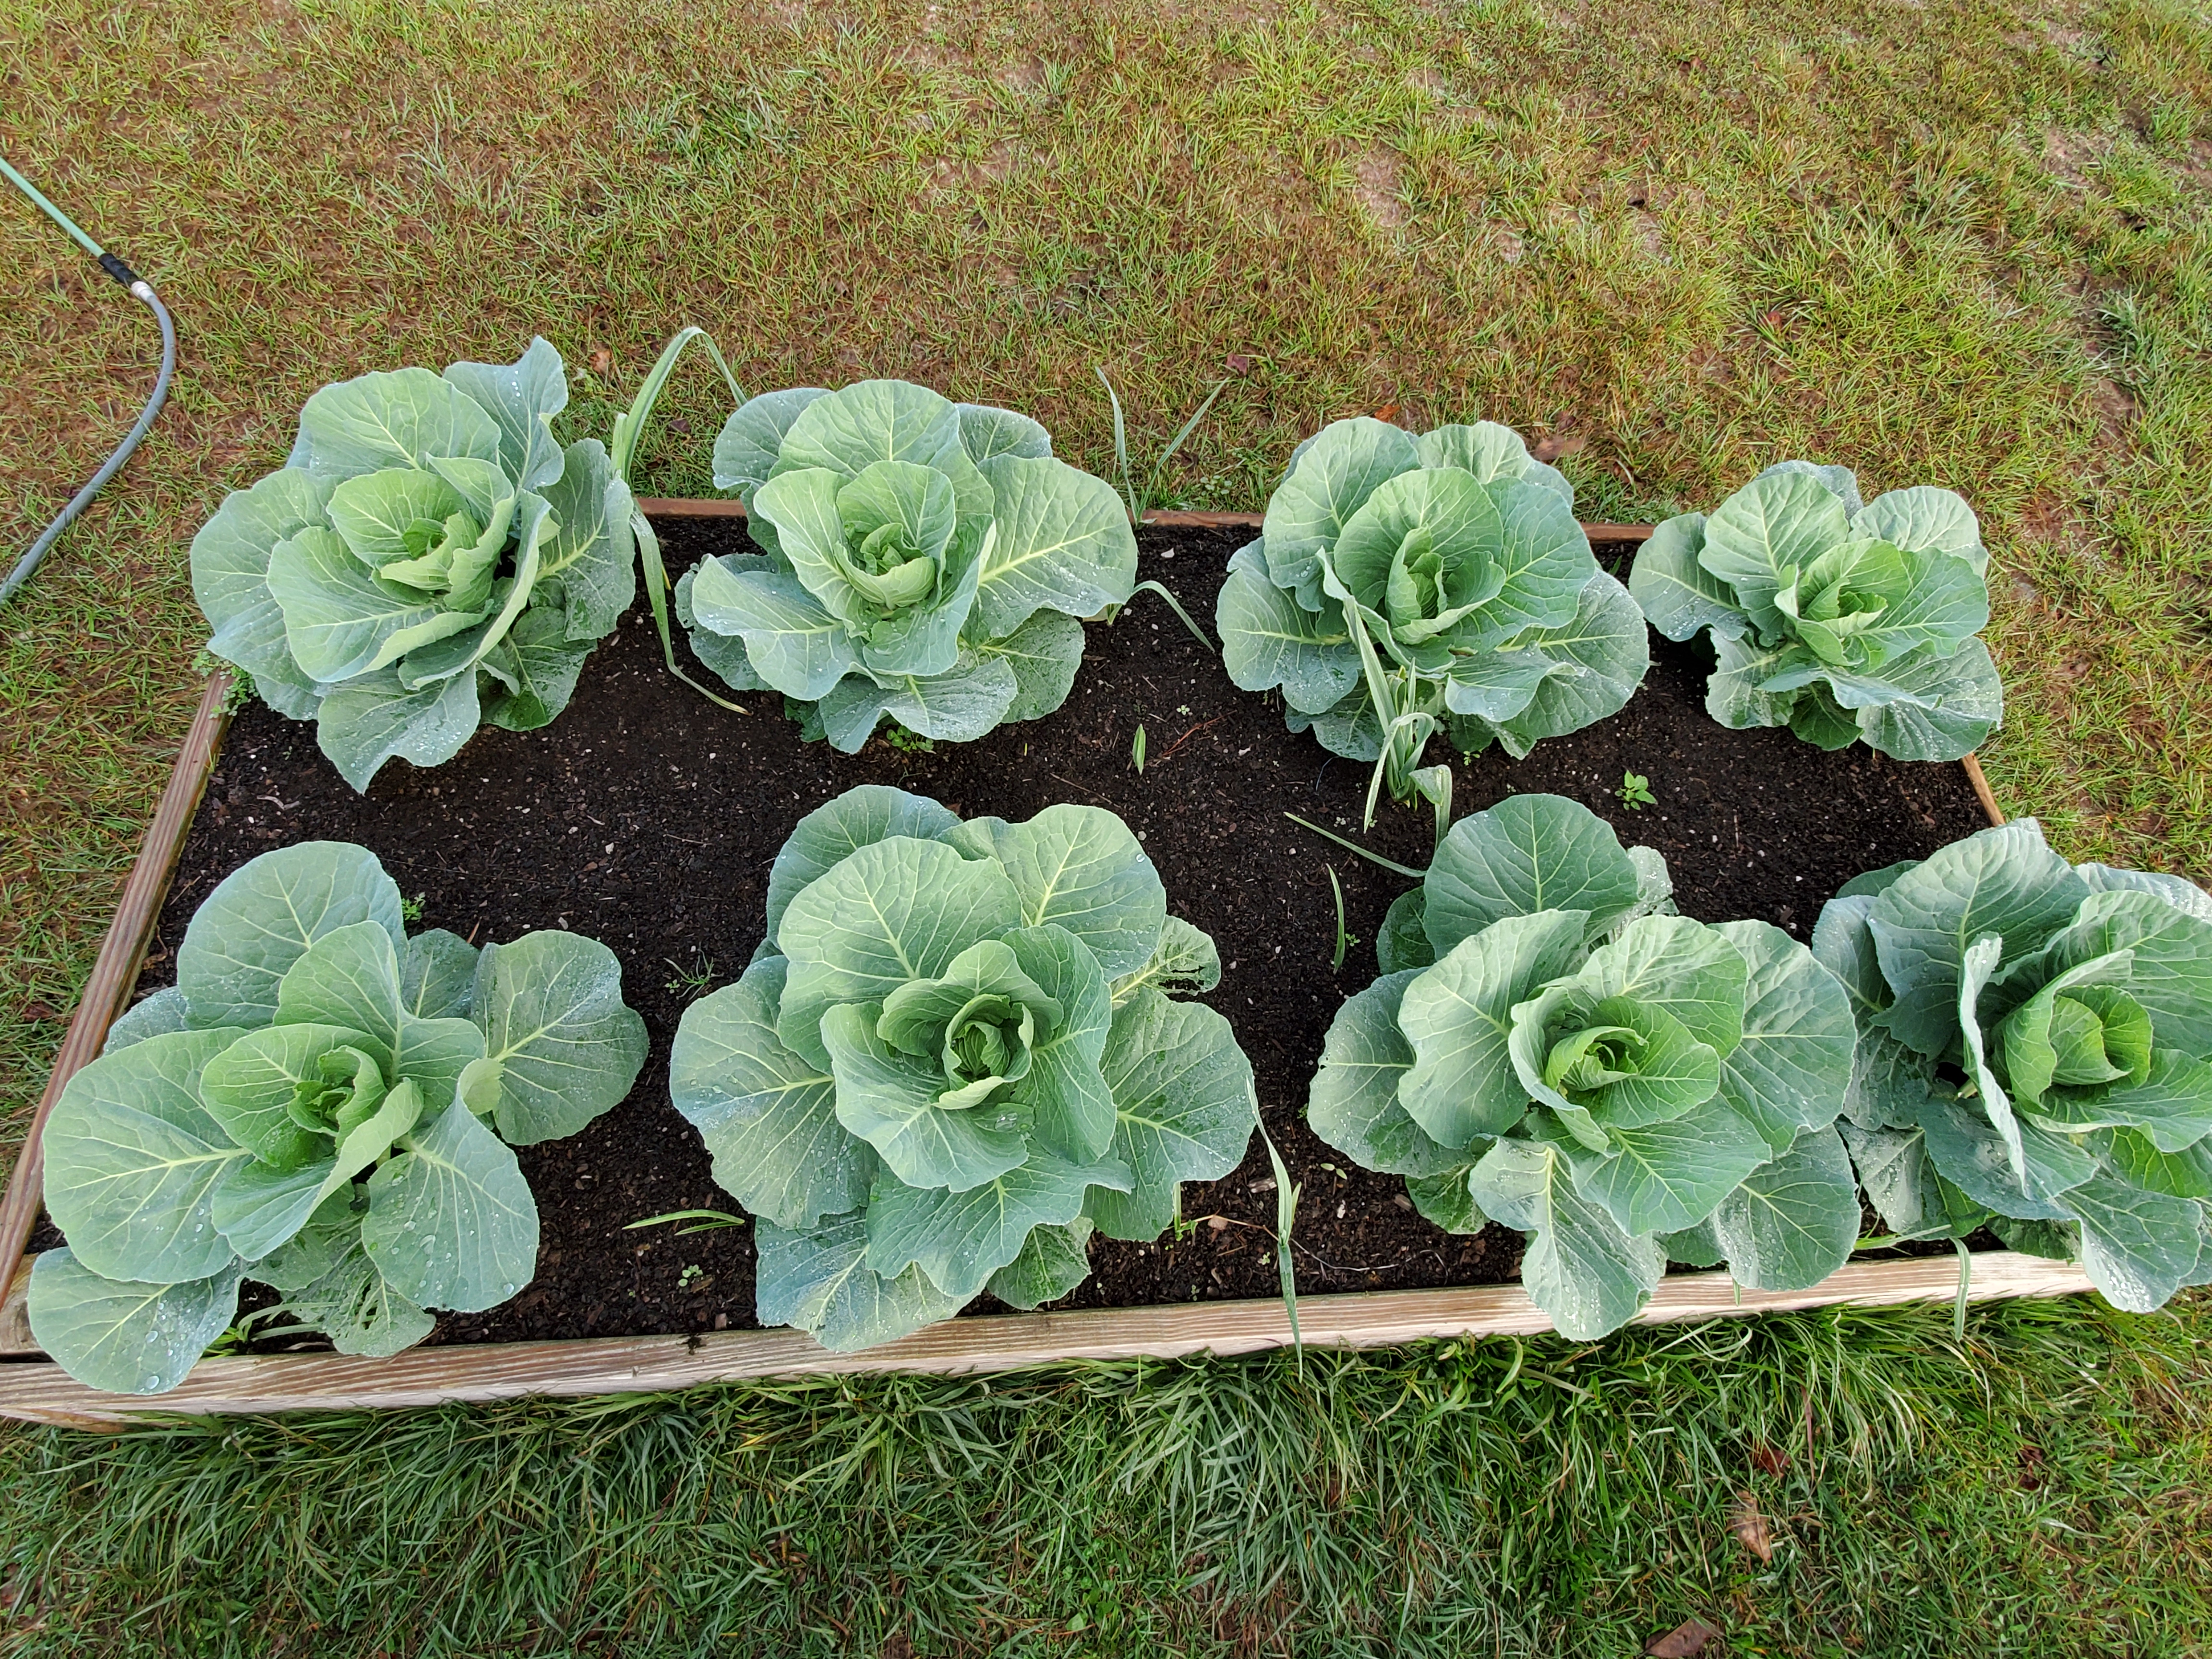
Cabbage grown in a 4’x8′ raised bed. The soil media is mostly mushroom compost. Photo courtesy of Daniel Leonard.
Gardening in raised beds can also dramatically reduce the incidence of disease. Many of the most serious vegetable garden diseases like Bacterial Wilt and Late Blight in tomato are soilborne, surviving for years in the ground and only needing a splash of rainwater to transfer them onto your vegetable plants. Growing in beds with curated soil mostly alleviates this issue. Our sandy soils also tend to have damaging levels of difficult to control nematodes (microscopic round worms that feed on plant roots). Because nematodes prefer porous sandy ground, switching to raised beds with rich organic soils also removes that concern.
Finally, growing in raised bed gardens allows for a very efficient use of space. A typical raised bed is 4’x8’ in diameter, meaning you can site one nearly anywhere, regardless of how big or small your yard is. You don’t even need a yard space in some cases! If you have only a sunny porch or driveway, you can certainly mimic raised bed conditions with large containers. Most people are surprised by the amount of produce that you can pack into one or several 32 square foot raised garden beds, especially when you pay attention to plant mature size and group accordingly. The square foot gardening method is a great way to maximize raised bed produce yield.
If you have struggled in past years to produce a fruitful, high-yielding, mostly disease-free garden, your problem might be below your feet in the soil. As you plan your vegetable gardening activities this year, try gardening in raised beds and get ready for your best gardening season yet! For more information about vegetable gardening, raised bed construction, or any other horticultural topic, contact your local UF/IFAS County Extension office. Happy Gardening!
We gardeners in the Panhandle have been spoiled by several very mild winters recently. However, it appears that this pattern will change, at least for a few days, beginning Thursday night. While forecasts vary depending upon your preferred media outlet, all agree that Calhoun County is going to experience several freezing nights (temperatures in the low 20’s to high teens for hours at a time). That’s plenty cold to kill many cold-sensitive plants, so here are a few tips to keep your treasured plants alive until warmer conditions arrive next week.
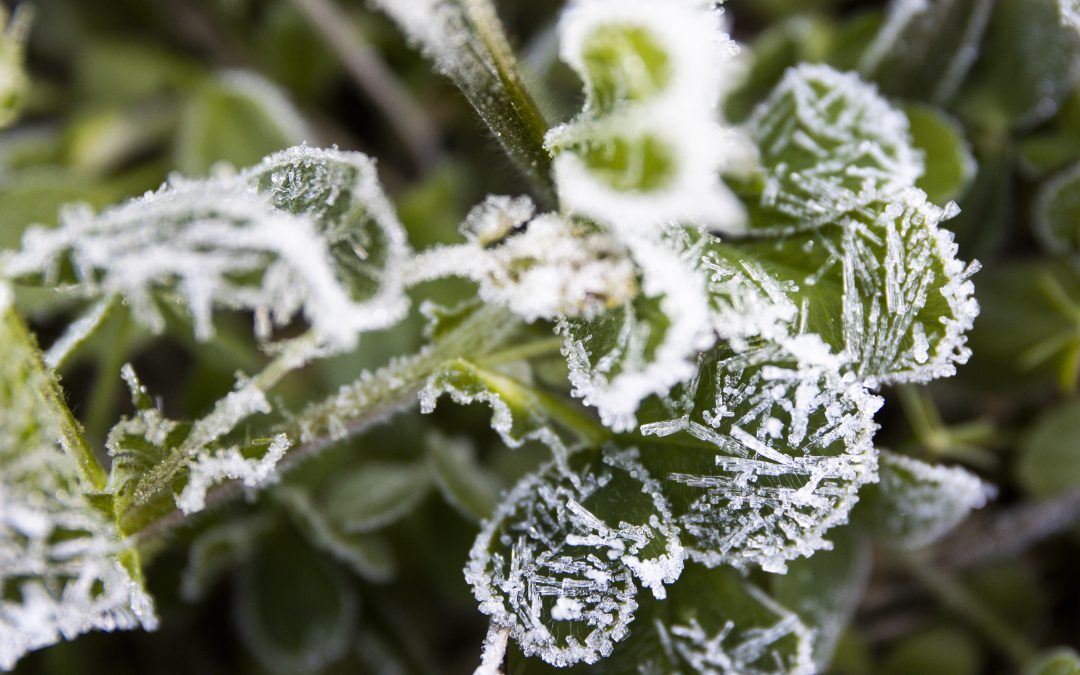
Covering plants to protect from frost, cold snap, blanketing, potted plants, horticulture. UF/IFAS Photo: Sally Lanigan.
Bring cold-sensitive potted plants inside. You can’t dig up your citrus trees and bring them in the living room but bringing cold-sensitive potted plants inside for a couple of nights is a fail-proof freeze protection method.
Water outside plants the day before extreme cold hits. It’s natural, even good, for many tender plants (perennials, bulbs, etc.) to “die” back in cold weather. This encourages dormancy and reduces pest/disease populations. However, this week could get cold enough to kill “tops” of sensitive plants AND freeze root systems. To help prevent this, water the day before a freeze as moist soil loses heat less rapidly than dry. A few degrees can make all the difference!
Apply mulch around the base of plants. Mulch helps insulate the soil and reduces radiant heat losses. For plants with a graft – like most citrus, pile mulch up around the grafted area. If the top of the plant dies back, at least it will be able to recover from above the graft (the desirable part of a grafted plant).
Cover citrus and other plants that recover slowly from cold damage. Draping a non-plastic cloth or blanket mostly helps keep frost off and freezing wind off plants but can also insulate from freezing temperatures if it covers the entire plant to the ground. It’s better than nothing.
Build a “greenhouse” around plants. You can create a simple greenhouse structure of wooden stakes, pipe, or posts and cover with plastic (making sure the plastic doesn’t touch leaf or stem tissue). Be sure to get this structure up while the sun is still shining before the freeze event to capture as much solar heat as possible. For even better results, install a lightbulb, non-LED Christmas lights, or some other heat source inside the plastic structure.
Last ditch method –turn on the sprinkler. Continuouslyrunning a sprinkler over sensitive plants can help protect them. By running water, you “insulate” the plant to the water’s temperature (above 32 F). This method requires that the sprinkler begin running before the thermometer drops below 32 degrees and must continue uninterrupted until after the freeze event is over. If you stop before the freeze is over, the water left on the plant will freeze to whatever temperature the air is, injuring or killing the plant.
We don’t have many freeze events so take a little time this week to bring sensitive plants indoors and implement one or more of the above precautionary measures in your landscape! Don’t let a few hours of very cold weather set your plants back years! For more information about cold protection in the lawn and garden, contact your local UF/IFAS County Extension Office. Stay warm and Merry Christmas!
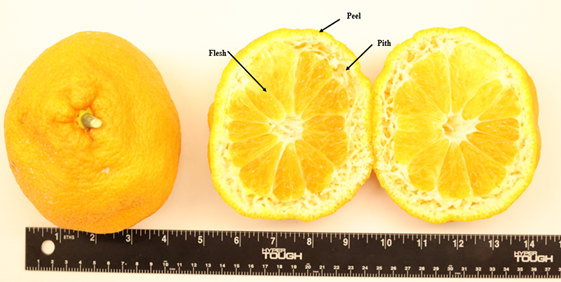
Taste and size of citrus fruits are important attributes that determine profit. Since, consumers prefer firm citrus fruit, packing houses only accept fruits of specific size without softness. Therefore, fruit that grow too large and don’t fill out properly are unmarketable and growers discard all these types of fruits. This condition is called puffiness. As fruit diameter becomes ever larger, fruit pith (the area between flesh and the peel of fruits) becomes thick and causes the fruit to shrink inward and lose its normal spherical shape. So far, this problem has been observed in both backyard and commercial Satsuma groves in North Florida, South Georgia, and Southeast Alabama. Citrus puffiness is a threat for all growers from an economic and overall yield point of view, because puffed fruits are unmarketable resulting reduced profit margins.
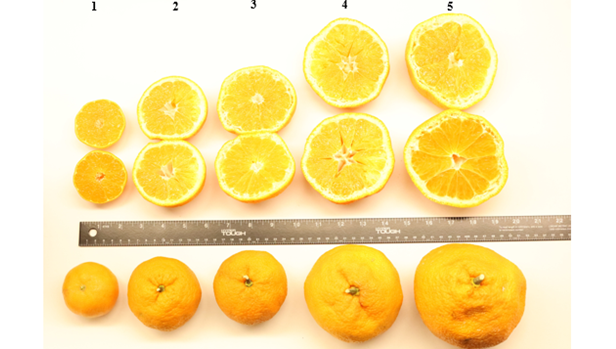
With increasing puffiness, the pith of the citrus fruit increases that makes it soft and fruits lose its usual round appearance.
Possible causes
A few scientific reports suggest that low fruit loads on citrus trees can cause puffiness, but the actual mechanism of puffiness still need to be explored. Based on observations, the team from our lab (Fruit Physiology lab, NFREC, Quincy) and collaborators lead by Dr. Muhammad Shahid has concluded that there are three possible causes of puffiness in citrus i.e., genetic, environmental, or nutritional. In our next phase of research, we will dig deep into this issue and try to determine what is the actual cause of puffiness. Fruit puffiness is observed more in young (4-6 years) satsuma groves than in mature groves. Puffiness on old trees could be due to fruit setting on late blooms during hot conditions. Overall, fruit puffiness is less of a concern in sweet oranges, limes and lemons as compared to satsumas.
Satsuma (Owari) tree with lots of puffy fruits (PC: Muhammad Shahid)Various levels of puffiness in citrus fruits.
Puffiness study by Fruit Physiology Lab, NFREC, Quincy
In our preliminary study, we divided puffiness into five different grades based on fruit size. Grade one is marketable fruits (firm without puffiness). Fruit diameter and puffiness increase gradually in grades 2, 3, 4, and 5, respectively. We have collected fruits from different groves in north Florida and the common denominator among these fruit was decreased Brix value (a common measure of sweetness) with increased puffiness. Average fruit diameter with maximum puffiness was around 40cm and these puffy fruit weighed around 475g. With increasing puffiness, peel weight was increased while juice contents were reduced – not great!
Most satsuma groves in North Florida have some degree of puffiness. However, amount and grade of puffiness varies by grove. In our observations, citrus groves in South Georgia also have puffy fruit, which clearly indicates that puffiness is not geographically specific and can develop in any citrus growing region. After visiting a number of farms in North Florida, we concluded that puffiness is mostly an issue with the Satsuma cultivar ‘Owari’ regardless of different rootstocks. Having said this, we can’t say with confidence that puffiness couldn’t appear on other varieties of citrus without further study. We are carefully monitoring all our variety evaluation trials at the UF/IFAS North Florida Research and Education Center (NFREC), Quincy, in collaboration with citrus breeding and postharvest experts from Citrus Research and Education Center (CREC) and Indian River Research and Education Center (IRREC). We are working on different aspects of citrus production including nutrition, crop load, and pruning to identify the actual cause of puffiness and how to effectively mitigate it in Satsuma groves in north Florida.
Camellia japonica may be the quintessential Southern flowering plant, as it has decorated Southern landscapes with its giant winter flowers for over two centuries at this point. It wasn’t always that way though. The species took a long, winding road to the southern US, where it now enjoys its iconic garden status.
Camellia japonica is a native of the mountainous regions of east Asia. It was from there that “japonicas” were accidentally introduced to Europe in the late 1600s by British tea merchants, who mistook Camellia japonica for its very close cousin, the Tea Plant (Camellia sinensis). After a century-long stay in England, Camellias then made their way to America around 1800. As in England, Camellias were mostly grown as greenhouse flowering plants in the northern United States. However, in 1843, Reverend John Drayton of South Carolina, brought camellias to his home, Magnolia Plantation, and popularized them outdoors in the Charleston area. Many cultivars that are grown today trace their roots back to Rev. Drayton and Magnolia Plantation!
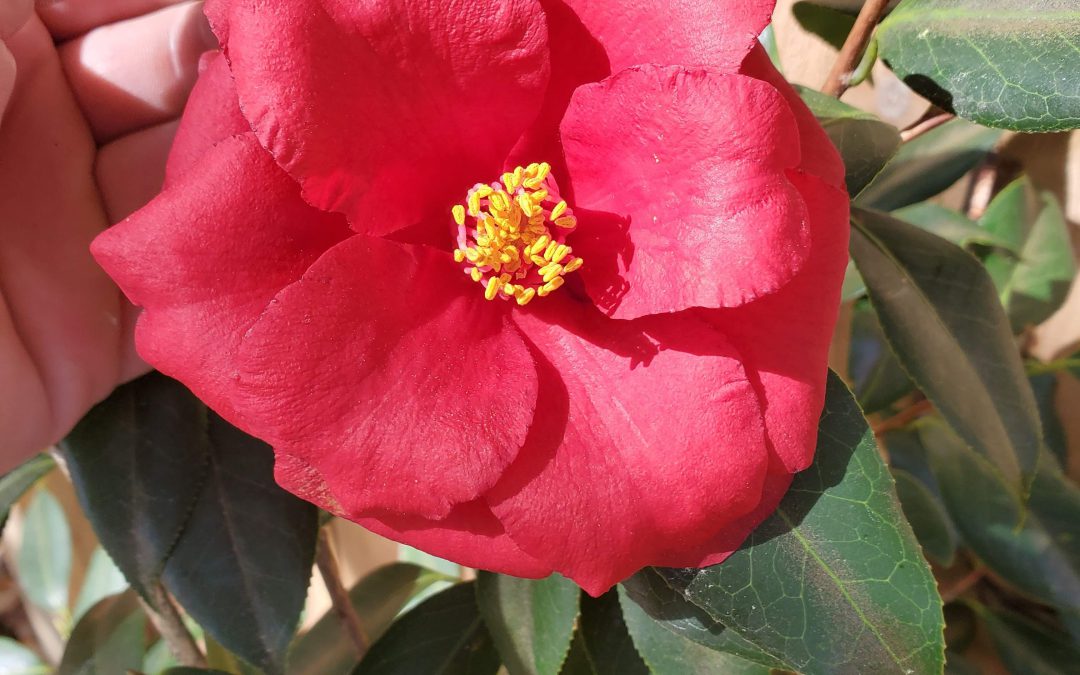
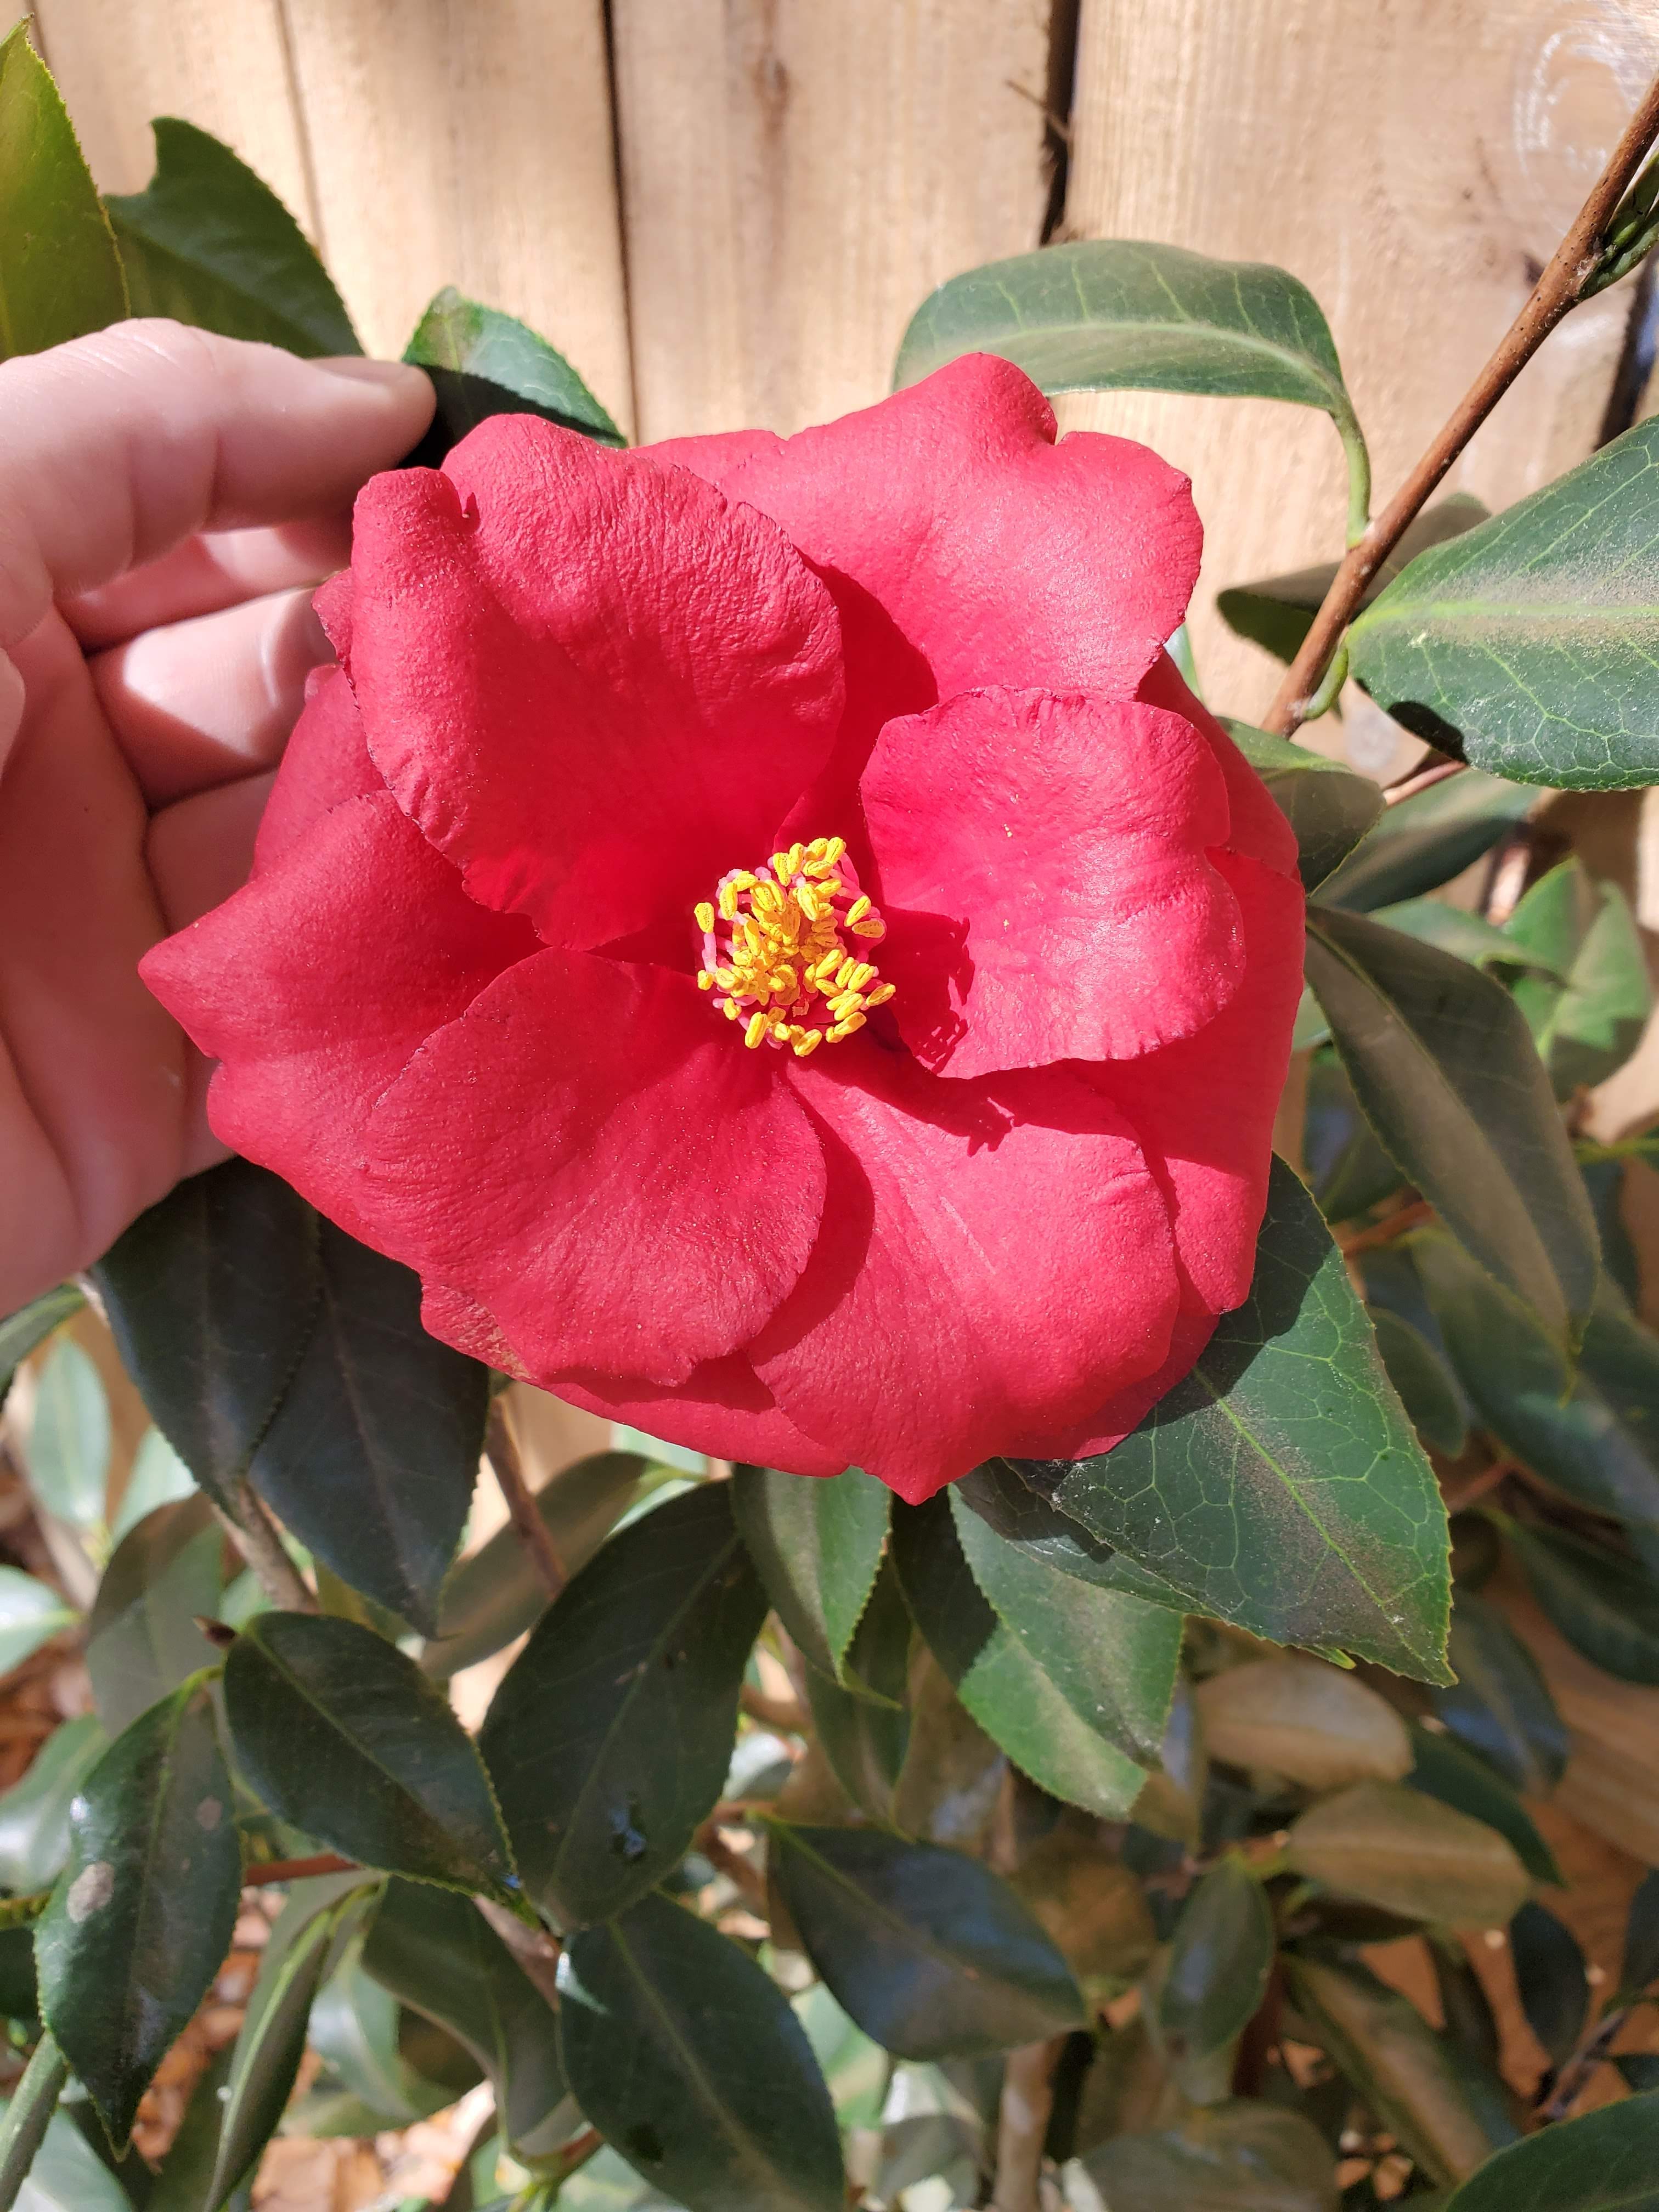
Camellia japonica ‘RL Wheeler’. Photo courtesy of Daniel Leonard.
Surviving every gardening fad and landscaping trend, Camellia’s popularity endures today for a couple of reasons. First is their winter flower display. Camellias provide a giant splash of color in an otherwise drab time of the year and there are literally thousands of japonica varieties in nearly every conceivable size, form, and color (provided you like white, pink, purple, and red) – there’s a camellia for everyone! Camellias are also about as low maintenance a plant as can be found in landscapes. It is not uncommon for camellias to persist in yards for generations without any help from gardeners. After the establishment phase, camellias can go decades without supplemental water, fertilizer, or pesticide applications in many cases – especially if they are sited in an ideal spot. Just plant these treasured passalong plants in a spot where water does not stand and that will receive some filtered or afternoon shade and enjoy the annual flowering show!
For more information on growing camellias, sourcing camellia plants for sale, or any other gardening topic, contact your local UF/IFAS County Extension Office. Happy gardening!
By: Khadejah Scott Extension Agent, Horticulture/Agriculture/Natural Resources UF/IFAS Extension Wakulla County
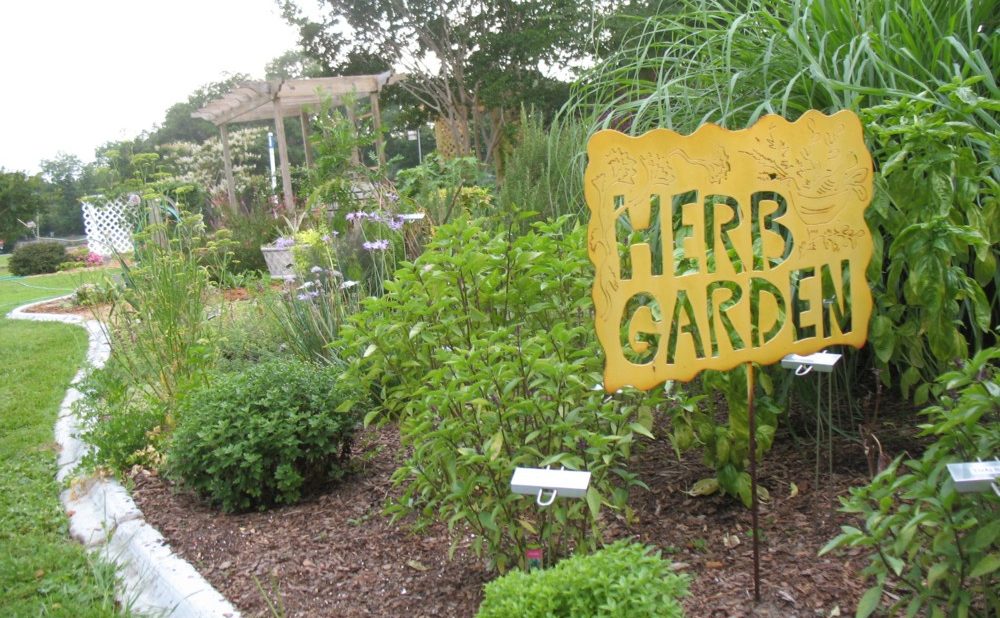
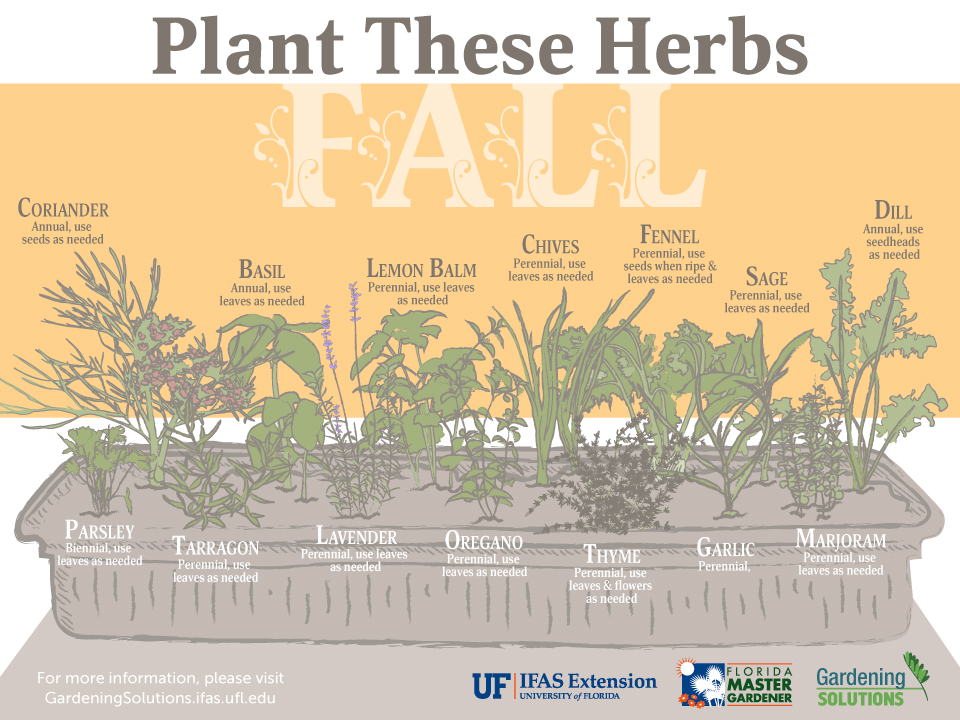
It is common for homeowners to have to pick between design and function when planning their fall landscape. However, combining the two can result in a stunning display in the yard. In North Florida, several herbs do well in the cool weather of the fall. While herb gardens will always be famous, there are other understated, yet successful ways to incorporate herbs into the fall landscape this year. Herb gardening in the fall is not difficult; with a bit of forethought and creativity, you can use herbs to revamp an existing bed or create a brand-new one.
Herbs can be more than culinary specimens in the fall landscape. Herbs give a wide range of hues that enhance the landscape’s color, giving depth and contrast to your current garden. Fill the gaps around, between, and beneath your existing flowers to frame them without taking away from their beauty. The variety of herb foliage textures adds interest to your landscape; you can alternate between glossy, velvety, soft, and hairy surfaces. Many herbs also have insect-repelling qualities that aid in pest management. Meanwhile, the herbs also attract beneficial insects and pollinators to the garden, which are vital for the well-being and growth of other landscape plants.
One of the first stages of enjoying your garden is deciding its function. What and how you grow will be influenced by an end-use. For example, simple access to fresh herbs while you cook could mean planting them next to your back door. You want those vibrant flavors near your hand if you need a sprig. Space also needs to be considered while planning because plants will mature swiftly and flush out nicely, taking up more space. Each plant’s height and spread affects how much light it receives. Plant your more striking, upright herbs further back, giving plenty of room for low-lying, creeping herbs to be planted closer to the front where they may still receive sufficient light. At least six hours of direct sunlight each day are required for cool-season herbs. They will also need well-drained soil and adequate watering. Knowing each plant’s unique requirements can help homeowners care for herbs and identify unforeseen problems. Reinvent the way herbs have been grown in the past and incorporate their colors, textures, and blooms. For more information about planning your fall garden, contact your local UF/IFAS Extension Office.
Here are 5 ways to add cool season herbs to your fall landscape.
Containers: Growing herbs in containers offers the flexibility of moving them. Potted herb gardens may be a perfect solution for small spaces like patios and balconies. Dill and fennel are great options for large containers.
Groundcovers: Herbs that grow slowly and crawl, such as thyme, complement walkways and do nicely between paving stones.
Borders: Herbs that form low mounds, such as oregano, make good borders, paths, and driveways.
Low Hedges: Garden sage and other taller herbs create great low hedges that can aid in defining the boundaries of outdoor spaces.
Softening Hardscapes: The billowing nature of cilantro and parsley herbs makes them perfect candidates for softening the hard edges of stone and concrete.