by Daniel J. Leonard | Feb 10, 2022
For being in a place known as the Sunshine State, the Panhandle has been mighty cold and dreary to start 2022! With all the recent bitterly cold weather that’s rolled through our neck of the woods over the last month or so, you may be asking yourself “Is this just a typical Panhandle winter or has it been colder than normal and what is the impact of freezing weather on my fruit trees?” The answer might surprise you!
The easiest way to measure cold and its impact on plants is through a unit of measurement known as a “chill hour”. In its simplest iteration, a chill hour is an hour of time during which the thermometer dips below 45 degrees F. These “chilling hours” are vital to agriculture and our native ecosystems because many plants, especially those that produce fruit like pears, blueberries, peaches, and even citrus, require a certain amount of chill to enter dormancy and develop flower buds for the following spring. All fruit trees have a minimum chilling requirement to initiate flowering depending on variety and too few chilling hours equals poor to no fruit the following year. Too little cold can be just as harmful as too much!
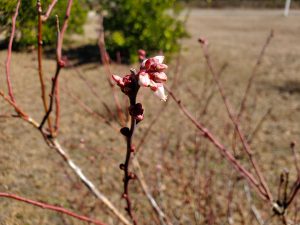
Blueberry beginning to flower after receiving adequate chill hours. Photo courtesy of Daniel Leonard.
Now that we know about chilling hours, the question remains, is this a normal winter or has it been colder than normal? The answer is neither. Based on historical average data from the UF/IFAS weather station in Marianna (a central location in the Panhandle and a good proxy for your local temperatures), as cold as we’ve been in January and early February, we’re still lagging the historical average with respect to chilling hours, and therefore to total cold temperatures. As of February 6th, 512 chill hours had been recorded this winter. This seems like a lot until you check and see that we had 554 chill hours on the same day last year and the historic average is more than 750! Though January and February have indeed been cold this year, the chill hour graph indicates that over the last few years it’s taken longer into the calendar to achieve our first chill hour and that cold weather isn’t pushing as far into spring as it historically has.
There are many potential explanations for the warming trend in the Panhandle but regardless of your preferred theory, backyard fruit growers need to adapt to deal with the change in chill. The primary way to combat fewer chill hours is to evaluate your current fruiting plants and think about replacing high-chill varieties that no longer produce well with lower-chill varieties. If you know the variety you have, look up the number of chill hours that variety requires. If it’s an older variety that requires near the historical chill average or more, you may consider replacing it with a newer variety that requires fewer chilling hours. For example, the popular old blueberry variety ‘TifBlue’ requires 600-700 chilling hours. For most of the previous decade, we have either just barely or not reached that many chill hours, leading to a low fruit set. Replacing ‘TifBlue’ with a newer, lower chill variety like ‘Powderblue’ will probably increase your blueberry production. If you don’t know what variety of fruit tree or shrub you have, just observe the flowering period over the next spring or two. If it doesn’t flower at all or flowers sporadically and you don’t make a good fruit yield, a high chill requirement very likely could be to blame and replacing it could enhance production!
Though we’ve had an intensely cold start to 2022, if current trends continue, this wintry weather will most likely play out before we reach historic averages. That doesn’t mean you can’t grow plenty of backyard fruit, it just requires adapting to the times with lower chill varieties! To keep up with chill hour accumulation, visit http://agroclimate.org/tools/chill-hours-calculator and if you have any questions about fruiting plant variety selection, chilling hours and their effect on plants, or any other horticultural topic, contact your local UF/IFAS County Extension office! Stay warm and happy gardening!
by Daniel J. Leonard | Jan 20, 2022
One of the major recent movements in production agriculture has been the widespread adoption of cover crops. This practice gives farmers a host of benefits, from erosion prevention to nutrient retention and recycling. However, using cover crops isn’t just for large scale farming operations. Hobby vegetable gardeners can absolutely employ similar systems on a smaller scale to reap the same benefits. For the past two years, I’ve used Buckwheat to provide a soil building cover during the heat of summer between spring and fall gardens. This winter, after my fall greens garden succumbed to frost, I decided to employ the same tactic with a mix of Red Clover (Trifolium pratense), White Clover (Trifolium Repens), and Crimson Clover (Trifolium incarnatum) to enhance my soil during the coldest months until spring tomato planting arrives!
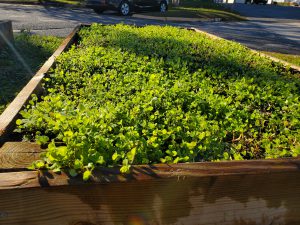
Clover mix used as a cool season cover crop in raised beds. Photo courtesy Daniel Leonard.
While there are many different species of plants (rye, oats, wheat, various brassicas, etc.) that can be planted in November or December as cool season covers to deliver benefits like winter weed suppression, enhance soil organic matter, retain and harvest leftover nutrients, and provide habitat for beneficial insects, I chose Clover for an additional reason. In addition to the above benefits, Clover is a legume and also fixes atmospheric nitrogen, making it available for subsequent plantings! Not only is Clover an excellent soil cover, but it also provides some nitrogen fertilizer to the following vegetable garden!
Growing Clover, while not quite as simple as Buckwheat or small grain covers like oats and rye, is relatively easy for most gardeners. The first step is selecting which clover species and/or variety to grow. I chose a mix of Crimson, White, and Red Clover simply because I had several pounds of each left over from a previous field planting. However, any one of the three may be used by themselves or in various combinations. All are excellent choices for garden cover crops and have similar growing requirements. Crimson Clover is the most readily available, but all three species can be found at most farm and garden supply stores.
The next step is to prep your garden beds for clover seeding. I thoroughly remove weeds from my raised beds, lightly till the top couple of inches of soil, and rake to provide a level surface. Since clover seed is tiny, a smooth, clean seedbed is a must for excellent germination. Once this is done, your next should determine how much seed to plant. Recommended clover seeding rates are usually given on a per acre basis and range from 3-4 lbs/acre (White Clover) to 20-25 lbs/acre (Crimson Clover). Given these seeding rates, planting in a 4’x8’ (32 ft2) raised bed is only going to require a miniscule amount of seed.
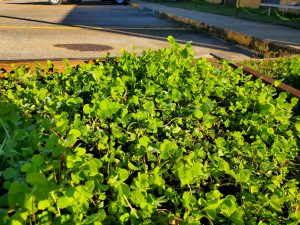
Clover mix used as a cool season cover crop in raised beds. Photo courtesy of Daniel Leonard.
To ensure a good stand while minimizing risk of overplanting, I mix equal parts clover seed and either sand, vermiculite, or other media similar in size to clover seed and hand scatter over the surface of my beds, making sure to uniformly cover the entire bed. If you think the stand is too thick, you can always hand-thin after emergence.
As a group, clovers prefer moist soil that is not allowed to dry out completely. This isn’t usually a problem given the Panhandle’s frequent rainy cold fronts in winter, but if rainfall is inconsistent, some irrigation will be required. Supplemental fertilizer isn’t normally necessary when planting a clover cover in vegetable gardens because nutrients remaining from the previous veggie crops are usually sufficient for growth and development (N especially is not needed as legumes produce their own through N fixation). 2-3 weeks before you’re ready to plant your spring veggies, chop the clover cover into the top few inches of your bed to terminate it and release its nutrients back into the garden. It’s that easy!
Planting a winter legume cover crop like clover is a great way to harness the benefits of cover crops for your spring veggies and enhance the aesthetics of your otherwise barren and drab garden beds! For more information about growing winter cover crops or any other horticultural topic, contact your local UF/IFAS County Extension office. Happy Gardening!
by Daniel J. Leonard | Dec 31, 2021
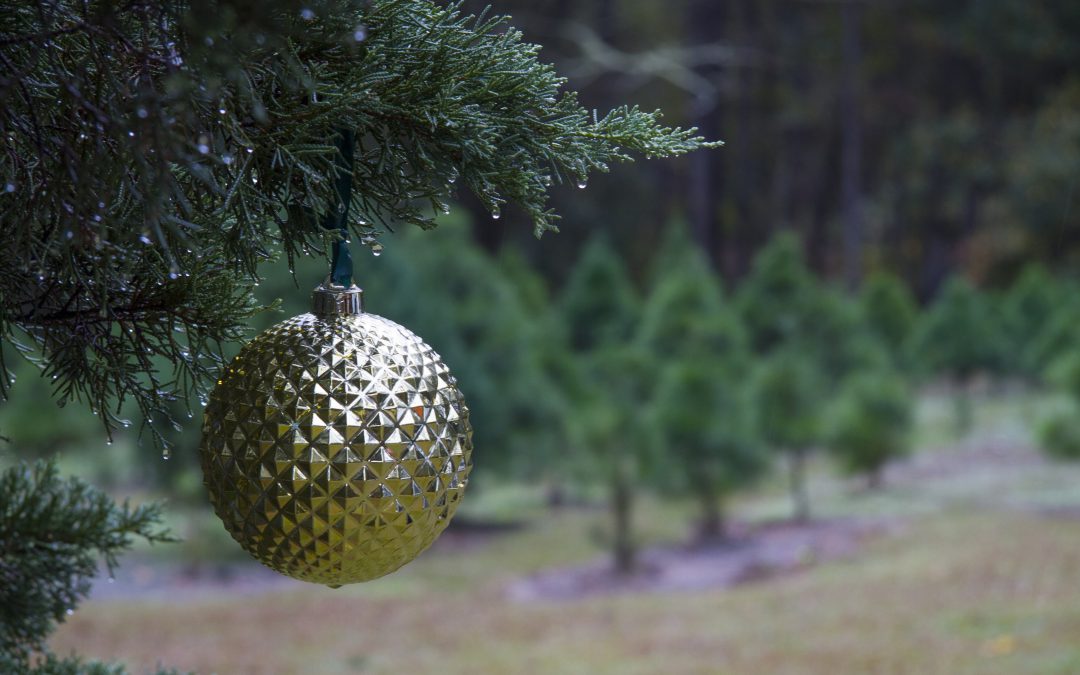
Christmas is among my favorite holidays. The religious significance, music, lights, amazing food, fellowship with family, and giving and receiving gifts all lend something special to the season. However, the tradition that arguably gets the most attention is selecting and putting up a Christmas tree! Those that participate in the festivities and put up a Christmas tree have three options: purchasing an artificial tree, purchasing a real tree, or growing your own.
While I like the convenience of a pre-lit tree as much as anyone, artificial trees don’t do a whole lot for the environment or sustainable US agriculture. They are almost exclusively produced overseas and contain non-biodegradable plastics. Not the best. If you select option two and choose to purchase a real tree, you’ll help support a sustainable US agriculture industry! According to the National Christmas Tree Association, there are ~25-30 million Christmas trees sold annually in the US and 350 million more currently growing on Christmas tree farms waiting their turn! Purchasing real Christmas trees also ensures that the over 100,000 Christmas tree farm workers remain employed, and the 1/3 million acres US Christmas tree farms comprise will remain non-developed “green spaces”!
But for the green-thumbed Christmas enthusiast that’s willing to put in a little time and effort, there is a third choice – growing your very own Christmas tree right at home! In the Panhandle, there are several species, Florida natives and not, that make wonderful Christmas trees and are easy to grow!
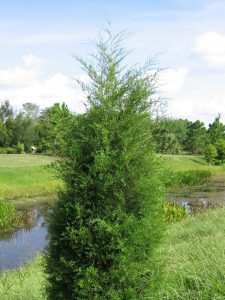
Red Cedar makes a fine Florida Christmas tree!
Red Cedar (Juniperus virginiana) – This Florida native is the classic southern evergreen. Growing quickly to the desired heights of 4’-10’, emitting a “Christmas tree smell”, and possessing dark, dense foliage, Red Cedar makes an excellent Christmas tree! Red Cedar performs very well in most soils but does not like wet feet and will not tolerate continuously saturated areas.
Leyland Cypress (x Cupressocyparis leylandii) – A hybrid of Alaskan Cedar and Monterrey Cypress, Leyland Cypress is recognized as one of the most popular Deep South grown Christmas trees for good reason. Leylands grow exceptionally fast, are a desirable forest green color, and have a naturally conical shape! Though not recommended as long-term landscape trees in Florida due to disease susceptibility, Leylands do very well in short Christmas tree rotations.
Thuja ‘Green Giant’ – ‘Green Giant’ is a cultivar of Thuja and is similar in appearance to Leyland Cypress. Though not quite as deep green in color as Leyland, ‘Green Giant’ also grows rapidly (up to 3’-4’ annually), tolerates many soil conditions, and has no serious insect/disease issues.
Arizona Cypress (Cupressus arizonica var. arizonica) – Arizona Cypress is the Christmas tree for those who would normally choose to be different by purchasing a blue, silver, or white artificial tree! Famous for its striking blue/silver foliage, Arizona Cypress is native to the American Southwest but thrives in the drier sandy soils found in many parts of the Panhandle.
Sand Pine (Pinus clausa) – The quintessential “Cracker Christmas Tree”, Sand Pine is native to the deep sandy ridges of Florida. Normally thought of as a scrubby, low-value tree, when shaped a little, the short-needled Sand Pine makes an excellent Christmas tree! Obviously preferring a dry, sandy site but capable of growing nearly anywhere, Sand Pine has no pest or disease issues and grows fast! If you want a true, old-school Florida Christmas tree, Sand Pine is it.
Regardless of the species you choose, implementing the following few maintenance tips and expectations will lend best results:
- Cut/remove J or circling roots before planting.
- Plant just higher than ground level.
- Refill the hole with native soil from the site.
- Regular irrigation for the first several months of their lives is necessary and trees will benefit from supplemental fertilizer applications twice a year (spring and mid-summer).
- Shaping trees each summer with hedge shears to achieve the desired dense, compact shape will allow for a uniform tree with no “holes”.
- Plant several trees per year to ensure a nice tree come December, just in case.
- Florida grown Christmas trees will NOT have the exact look of fir or spruce. Adjust expectations accordingly.
- Most Florida grown Christmas trees do NOT have rigid branches and cannot support heavy ornaments. Again, adjust expectations accordingly.
While Christmas tree species that perform well in the Panhandle will not have the exact look of a classic fir or spruce sourced from the Carolinas, they certainly mimic the look and there is something to be said for walking outside and harvesting your own tree to put presents under! For more information on growing your own Christmas trees or other horticultural topics, contact your local UF/IFAS County Extension office! Happy New Year!
by Daniel J. Leonard | Dec 15, 2021
For many people in the Panhandle, gardening season begins when the weather warms in spring and nurseries start setting out tomato transplants. While I understand the allure of the yummy summer veggies and spring/early summer are the most traditional times to garden, cultivating a winter garden in the Panhandle unlocks many tasty options. Among these cool-season garden veggies is a classic southern staple that is among the easiest and most rewarding of all vegetables to grow, sweet onions!
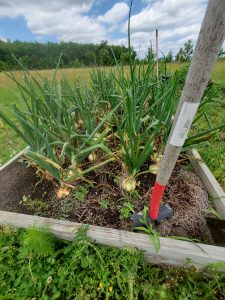
‘Texas Super Sweet’ Onions almost ready for harvest in a Calhoun County garden. Photo courtesy of Joe Leonard.
Sweet onions are very popular in the culinary world for their mild flavor and soft texture and are among the most widely grown group of onions across the world, but the most famous of them, Vidalia’s, hail from Georgia! Despite its fame, the “Vidalia” onion is actually nothing more than a trademarked name for a specific variety of sweet onion that was bred in Texas (‘Yellow Granex’ and its derivatives), grown in a 20-county region in South Georgia with excellent onion-growing soil, and made famous by excellent marketing from the Vidalia Onion Committee. While they can’t be called Vidalias legally, you can absolutely grow your very own Vidalia type sweet onions at home here in the Florida Panhandle!
Sweet Onions are most easily grown at home if purchased in the fall as “sets”. Sets are small bulbs that have been started, harvested, dried to prevent rotting during storage, and shipped to garden centers ready to be “set” out in home gardens. Sweet onions may also be grown from seed but take much longer and have a lower success rate. When browsing onion set varieties for purchase at garden centers or in seed catalogues, make sure to purchase a short-day “Granex” type like “Texas Super Sweet” or similar. It is critical to remember that sweet onions are classified by how many hours of daylength they require to produce bulbs. The three classifications are Short, Mid, and Long-Day. Since sweet onions require cool weather to develop properly, Floridians must grow short-day varieties to compensate for decreased daylight hours in the winter. In the less hot Northern states, long-day sweet onions are grown in the summer, where they’ll be able to soak up 15-16 hours of daylight. Therefore, for best results in the Panhandle, select ONLY short-day onion varieties.
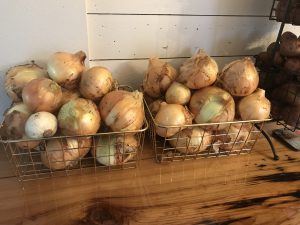
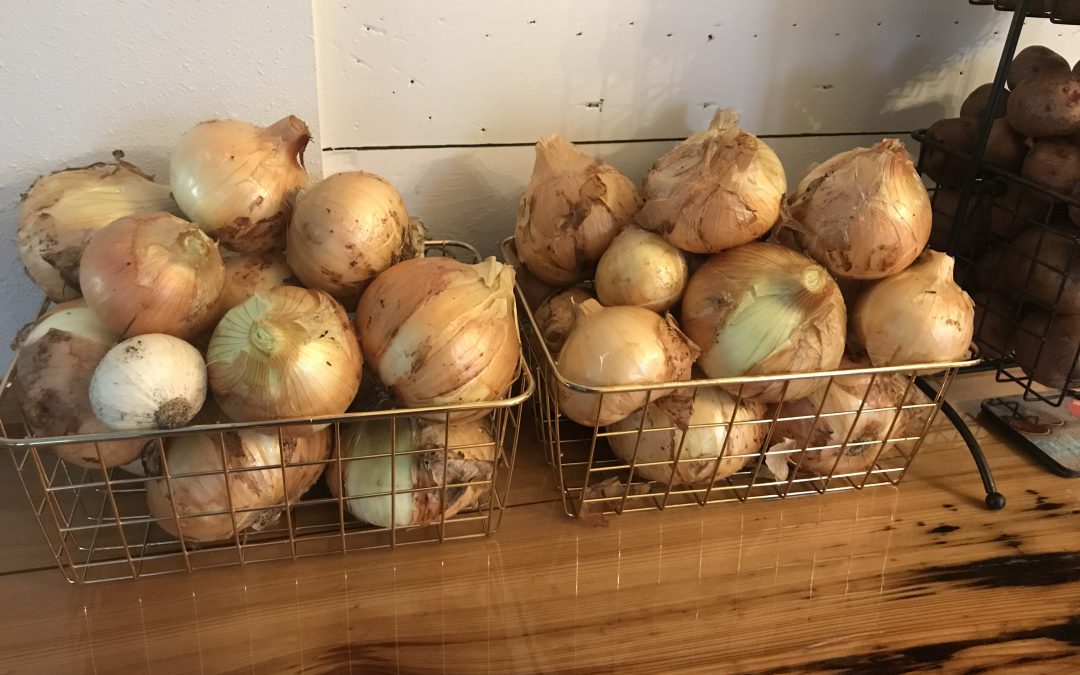
‘Texas Super Sweet’ Onions that have been harvested and are ready for use! Photo courtesy of Daniel Leonard.
Once you’ve selected your onion sets in the fall, they can be planted in the garden anytime from early October to mid-December. Individual bulbs should be planted about an inch deep in well-drained garden soil with high organic matter content (mushroom compost, composted manure, or other rich organic matter works) and spaced 4-6” between plants and about a foot between rows. Onions in general, and sweet onions in particular, are heavy feeders and require ample nutrition to meet their potential! To meet these fertility needs, I apply a slow-release fertilizer like Osmocote or a Harrell’s product at planting and supplement that with either a quick release granular or liquid fertilizer monthly during the bulb enlargement phase. Sweet onions also have a shallow root system and require frequent watering to develop properly and avoid splits, doubles, and small bulbs. Don’t let your onion bed dry out!
Finally, sweet onions planted in late fall/early winter are normally ready to harvest in April and May. However, rather than relying on a calendar, begin harvesting your onions when the tops start to turn yellow and fall over, this indicates maturity. After harvesting, allow your onions to “cure” with tops and roots still attached for a couple of weeks outside in a shaded, protected area. Once they’ve had an opportunity to “cure”, remove tops and roots and store the cured bulbs in a cool, dry place (a dark pantry in an air-conditioned room or the refrigerator crisper drawer work fine) and use at your convenience!
While they can’t be called Vidalias, sweet onions grown at home are oh so rewarding and very tasty! Provided they are planted in quality soil, receive plenty of water and fertilizer, and are harvested/stored correctly, sweet onions will provide a delicious, home-grown culinary treat throughout the year! For more information about growing onions in the home garden or any other horticultural/agricultural topic, contact us at the UF/IFAS Calhoun County Extension Office. Happy Gardening!
by Daniel J. Leonard | Oct 8, 2021
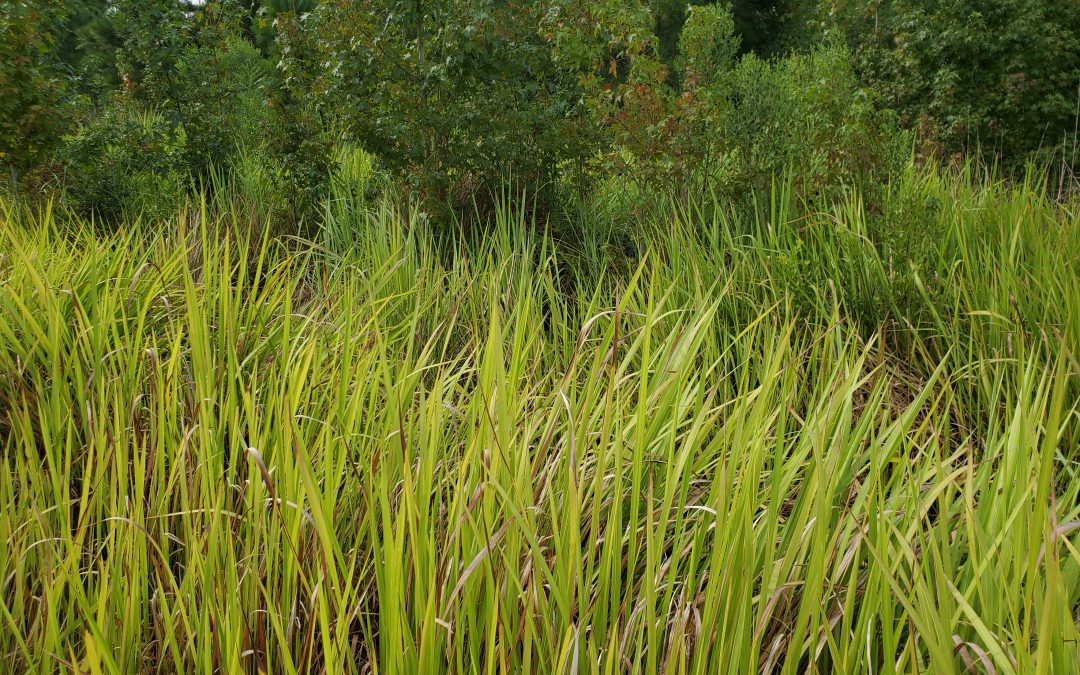
Over the last decade or so, the Panhandle has been overrun, and I don’t just mean by the summer beach traffic. Rather, by an aggressive, exotic perennial grass that quickly displaces all native species, is not useful as a forage to wildlife or livestock, can spread by roots or seeds, and has no natural enemies. If you own property in the Panhandle or spend any amount of time on its roads, chances are you have become acquainted with this worst of invasive species, Cogongrass (Imperata cylindrica).
A native of Southeast Asia, cogongrass was introduced into the US in 1912 around Mobile, AL as a hitchhiker in orange crate packing. Then the 1920s, 30s, and 40s, it was intentionally introduced from the Philippines into other Gulf Coast states, including Florida, as a potential pasture forage for livestock. Since then, cogongrass has become one of the most economically and ecologically important invasive species in the US and worldwide, infesting nearly 500 million acres and is now found on every continent.
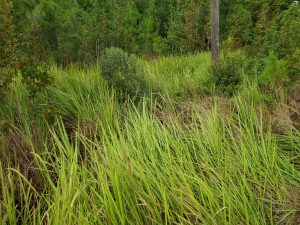
Cogongrass in Calhoun County, FL. Photo courtesy of Daniel Leonard.
Cogongrass is easily identified in late spring, when the grass throws easily spotted fluffy, white-colored seedheads above the mats of grass beneath. Additionally, patches of cogongrass are almost always noticeably circular in nature, radiating out indefinitely from the initial infestation. A closer inspection of the grass will reveal light green leaves up to 4’ in length, with an off-center, silvery colored midrib (the primary leaf vein that runs from the base of the leaf to the tip) and serrated leaf edges. Underground, cogongrass exhibits a dense underground root system that can reach as deep as 4’. This feature is the primary reason cogongrass outcompetes other plants, withstands any drought, fire, or soil condition thrown at it, aids in its resistance to herbicide activity, and generally makes it very difficult to manage.
The first step in managing cogongrass is prevention. If your property or the property you manage doesn’t have cogongrass, do everything you can to keep it that way. While the species can spread distances through seed dispersal, it is much more frequently moved around by fragmented rhizomes hitching a ride on equipment. If you or a contractor you’ve hired are working in or around an area with cogongrass present, avoid disturbing it with equipment and be diligent in monitoring the site for outbreaks following the job’s completion.
If you find cogongrass on your property, effectively eradicating it requires patience, persistence, and several years’ worth of herbicide applications. Currently, of the hundreds of herbicides available for purchase, only two chemistries have been proven to be very effective in destroying cogongrass, impazapyr (Arsenal, Stalker, etc.) and glyphosate (Roundup, Cornerstone, etc.).
- Imazapyr is an extremely effective non-selective, residual herbicide that controls a wide variety of weed species, including cogongrass. Just one or two applications of imazapyr can provide 18-24 months of effective cogongrass control, with follow up treatments required as needed after that. However, Imazapyr has a major downside that limits its use in many settings. Because it is a non-selective herbicide with significant soil residual activity, it cannot be used around the root zones of desirable plants. Oaks, other hardwood trees, and most landscape plants are especially sensitive to imazapyr. This herbicide is best limited to use in fields, waste/fallow areas, natural areas, and monoculture pine plantations – it is not appropriate in most residential and commercial landscapes.
- The other option, glyphosate is a non-selective herbicide with no soil residual activity. It is often a better option where severe injury or death of desirable hardwood trees and ornamental plants cannot be tolerated. However, due to its lack of residual soil activity, glyphosate applications on cogongrass patches will need to be repeated on an annual or biannual basis for up to five years for eradication of the infestation.
*Regardless of which herbicide you choose, controlling cogongrass is a multi-year affair requiring diligence and patience.
For more information on cogongrass and for specific herbicide recommendations and application rates/timing for your site, please contact your local UF/IFAS County Extension Office.


