by Julie McConnell | Jun 8, 2016
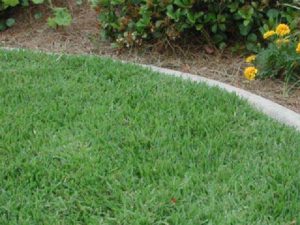
Properly Mowed Empire Zoysiagrass – Image Credit Laurie E. Trenholm
Mowing is an important and often overlooked landscape best management practices that can increase lawn health.
Most of us mowed lawns to earn some spending money as kids. As long as it was shorter when we finished than when we started our customers were happy. Although mowing seems like a simple chore that anyone can do, it turns out that improper mowing can cause a lot of damage to lawns and can increase pest and disease issues.
Make sure your lawn mower in good working order. Ensure the blades are sharp and the engine is not leaking any oil or gas products that may damage your lawn. Dull or damaged blades will give a ragged cut to grass blades that make it easier for disease and insects to attack your lawn. Leaking fuel products can damage or kill turf. Keep your mower clean by blowing or rinsing it after use, this simple step will also reduce the spread of weeds, insects, and disease.
Know the recommended mowing height for your type of turf (see table below) and follow it! Cutting turf below the recommended height places stress on the grass and encourages shallow roots. Deep roots help turf handle stresses such as drought, shade, insects, disease, or traffic. If any of these circumstances are occurring, the mowing height should be increased and fertilization should be decreased.
Mowing Height Table
| Turfgrass Type |
Recommended Mowing Height |
| Bahiagrass |
3.0-4.0 inches |
| Bermudagrass |
0.75-1.5 inches |
| Centipedegrass |
1.5-2.5 inches |
| St. Augustinegrass |
3.5-4.0 inches, Dwarf Cultivars 2.0-2.5 inches |
| Zoysiagrass |
1.5-2.5 inches, cultivar dependent |
When mowing, never remove more than 1/3 of the leaf blade per cutting. If the grass is overgrown, plan to mow in stages to avoid scalping or removing too much of the leaf blade. Just like shrubs, turf needs leaf surface area for photosynthesis. Allow clippings to fall onto lawns rather than catching them or discharging onto hard surfaces. The grass will decompose rapidly and provide nutrients to the lawn. Clippings that are blown onto sidewalks, streets, or other hard surfaces may be washed into storm drains and get into water systems. Just as decomposed clippings provide helpful nitrogen and phosphorus to our lawns, these same nutrients are harmful to our water bodies. Keeping them in lawns is a great way to recycle and to keep our water clean.
To learn more about caring for your turf click on the link below.
Bahiagrass for Florida Lawns
Bermudagrass for Florida Lawns
Centipedegrass for Florida Lawns
St. Augustinegrass for Florida Lawns
Zoysiagrass for Florida Lawns
by Julie McConnell | May 5, 2016
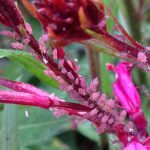
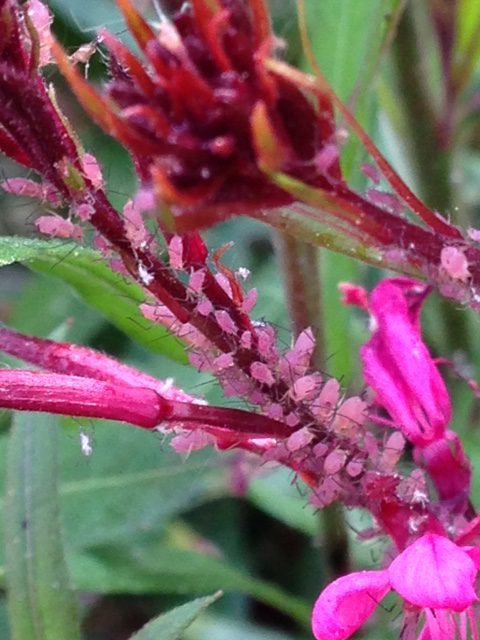
Aphids (Macrosiphum gaurae) feeding on gaura. Photo: Julie McConnell, UF/IFAS
Every day, if I get home before the sun goes down, I like to walk around my garden and see how things are growing. At this time of year there are always new surprises in the garden – plants leafing out after a winter break, new flower buds and blooms, and of course sometimes garden pests.
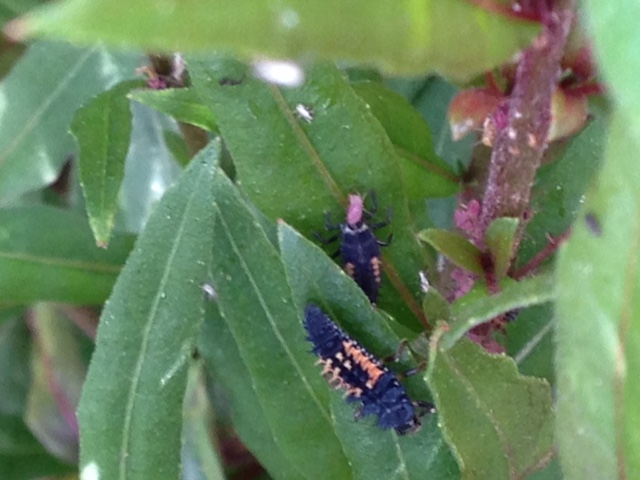
My daughter and I collected some flowers last weekend and after they sat on the table for a few minutes I noticed pink bugs crawling around on the gaura stems. On further inspection I realized the stem was covered in aphids which made me go out to look at the entire plant. I found a prolific population
of aphids on the gaura and also lady beetle larvae hunting and eating the aphids! Instead of mixing up a bottle of insecticidal soap I decided to let the lady beetles do their job and just monitor the situation.
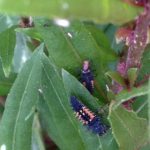
Multicolored Asian Lady Beetle Larvae feeding on aphids. Photo: Julie McConnell, UF/IFAS
Five days later I went to show my example of natural biological control to a visiting friend and we could not find a single aphid on my plant. This may not be the typical response, usually I see some level of both predator and prey but in this instance the lady beetle did a fantastic job of controlling the aphids.
So, did they eat every last one? Probably not, they likely ate many of them and the others left the plant because the predator pressure was too great. However, either scenario saved my plant from severe damage which was the overall goal.
by Julie McConnell | Mar 28, 2016
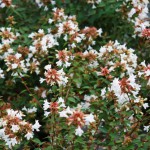
Clusters of tiny white flowers on abelia. Photo: Julie McConnell, UF/IFAS
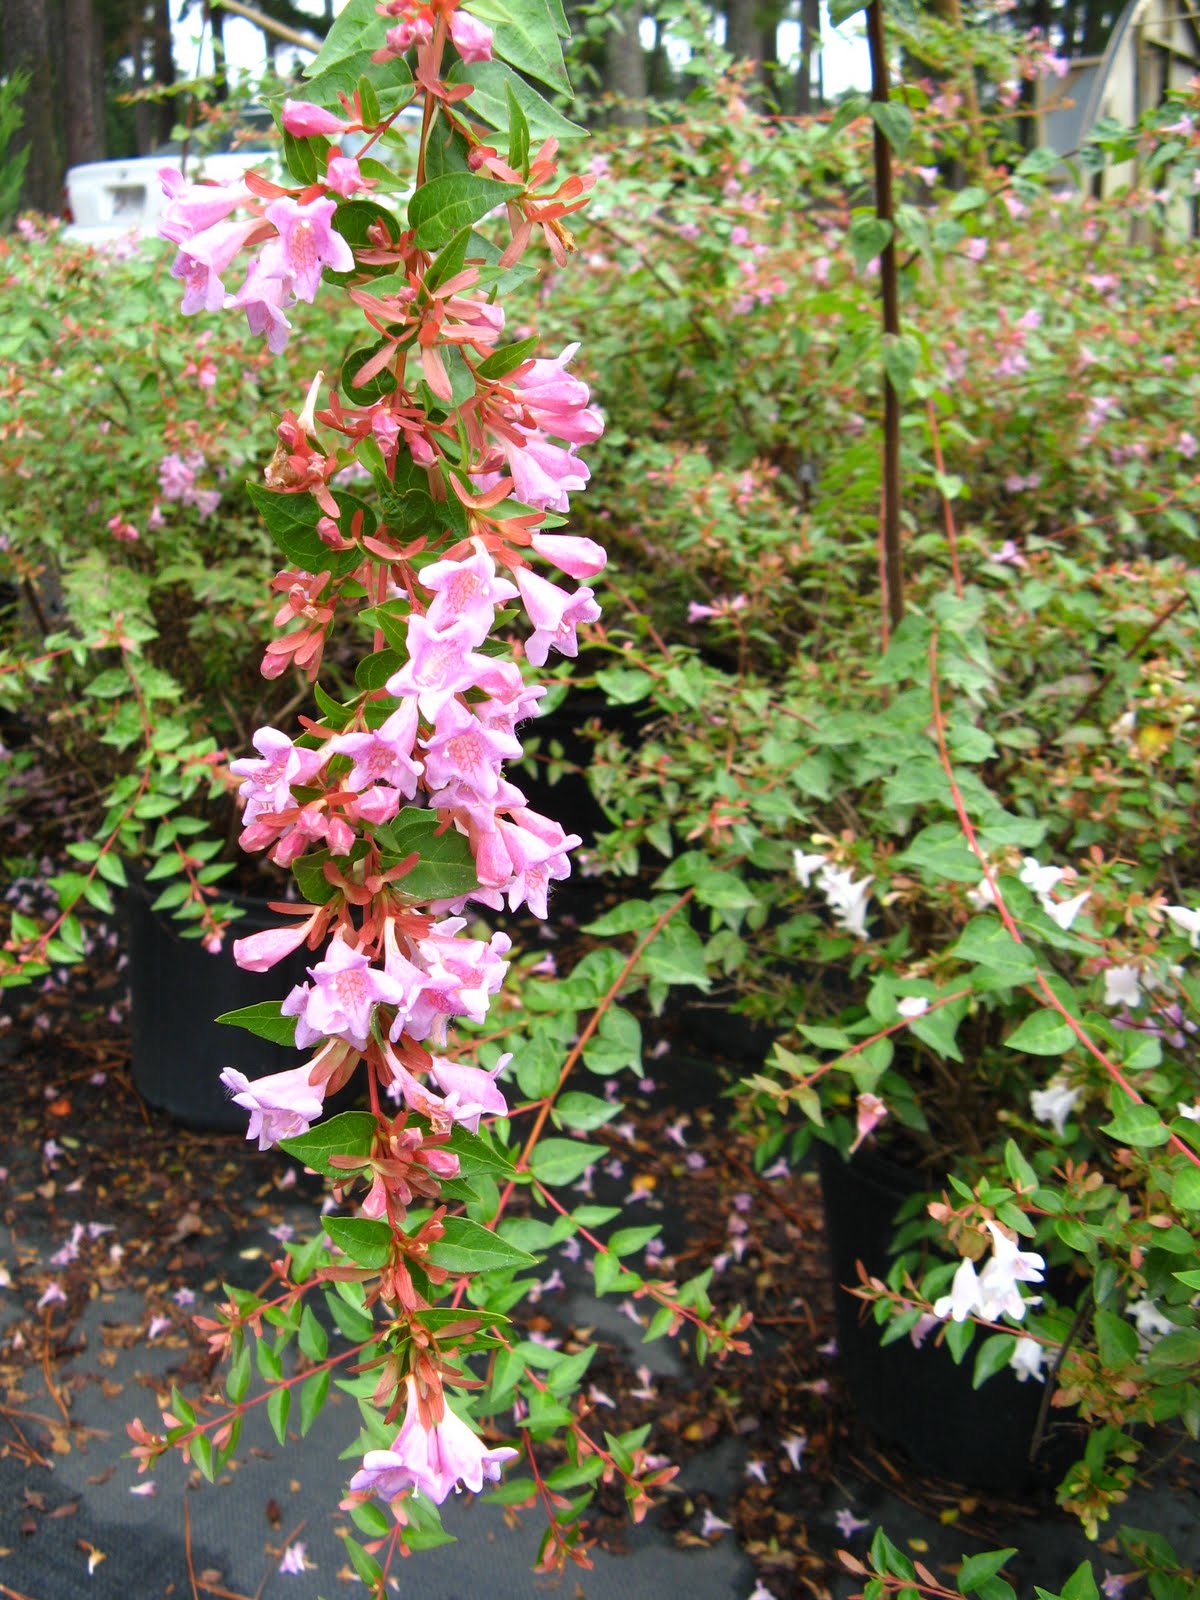
Abelias have been a landscape staple in the Southeastern United States for over a century. Numerous types have been used over the years, but two of the oldest forms still used in landscapes are Glossy Abelia Abelia x grandiflora and Abelia ‘Edward Goucher’, dating back to the early 1900s.
Glossy Abelia is a large informal shaped shrub with ½ – 1 inch glossy green leaves and large clusters of tiny white flowers. It can grow to 8 feet wide and tall and tolerates tough landscape sites such as full sun, low moisture (once established), acidic or slightly alkaline soils. It blooms prolifically and is attractive to butterflies and pollinators. New stems are reddish colored which contrasts nicely with dark green foliage which may be evergreen if winters are mild. After blooms are spent the pink sepals remain on the plants carrying more color through the season.
‘Edward Goucher’ Abelia does not grow quite as large and is a good performer with pink flowers. It is smaller than Glossy Abelia, but can still reach 5’x5’ when mature. It is also tolerant of hot, dry spots in the landscape.
Over the past few decades there have been many new introductions of abelia cultivars to the market. A major goal of breeders was to offer abelias that would fit into smaller landscapes and there has also been a trend towards variegated foliage color. There are dozens of abelias in production, but a few listed below are usually easy to find in local garden centers and have proven reliable in Florida landscapes.
- Abelia x ‘Rose Creek’ Rose Creek Abelia, low mounding growth habit reaching 2-3’ tall and 3-4’ wide, green foliage, new reddish stems, large clusters of white flowers
- Abelia x grandiflora ‘Hopley’s Lemon Zest™’ Lemon Zest Abelia or Miss Lemon™ Abelia grows 3-4’ tall and wide, has yellow and green variegated foliage, light pink flowers
- Abelia x grandiflora ‘Confetti’ Confetti® Abelia, matures at 3’ tall and wide, new foliage has pink, white, and green variegation and mature foliage is green and white variegated, pink and white flowers
- Abelia x grandiflora ‘Kaleidoscope’ P.P.#16,988 Kaleidoscope Abelia, compact growth 2-3’ tall by 3-3.5’ wide, gold and pink new foliage that matures into gold and green variegation, white flowers
All abelias perform best in full sun to part shade and have low water requirements once established. They are not salt tolerant, so avoid planting in coastal landscapes or in areas where salts are an issue. Abelias have few pest problems, but aphids have been known to feed on new growth – avoid over fertilization.
by Julie McConnell | Mar 2, 2016
Those familiar with the Florida-Friendly Landscaping™ Principles know that the number one rule is Right Plant, Right Place. But proper timing is important and should not be discounted! Experienced gardeners recognize that certain flowering and annual vegetable plants have distinctive seasons, but may not realize that turfgrass is seasonal, too.
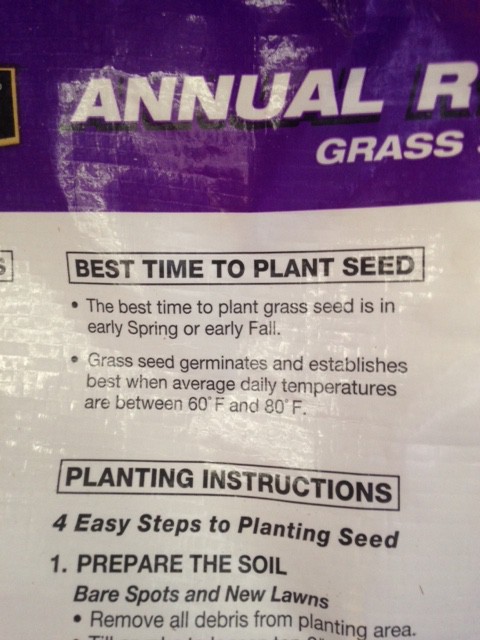
Warm season and cool season turfgrasses fall into the classes of either annuals and perennials. In North Florida, the most commonly grown turfgrasses are warm season perennials such as Zoysiagrass, Bermudagrass, Centipedegrass, and St. Augustinegrass. These grasses thrive in warm weather and, although they may slow down or even turn brown in the winter, are still very much alive and resume growth readily in the spring. Because they are warm weather lovers, plan to seed one of these species when soil temperatures are warm enough for successful seed germination and when young new grass has enough time to become established without danger of frost damage.
Annual ryegrass label says to plant early spring – but that is too late in North Florida. Photo: Julie McConnell, UF/IFAS
On the flip side there are cool season grasses such as fescue, ryegrass, and bluegrass. These grasses prefer cool weather and do poorly and may go dormant or die when subjected to hot weather. These grasses may be perennials in other areas of the country, but should be treated as cool season annuals if grown in Florida. Cool season grasses may be used as a groundcover in bare spots or to overseed warm season grass from fall through early spring.
When purchasing turfgrass seed, be sure to check with your local extension office to verify that the timing is right for that particular grass. Seed products sold locally may have recommendations that are more relevant to northern climates and performance will differ.
For more information about seeding lawns please read Establishing Your Florida Lawn
by Julie McConnell | Feb 3, 2016
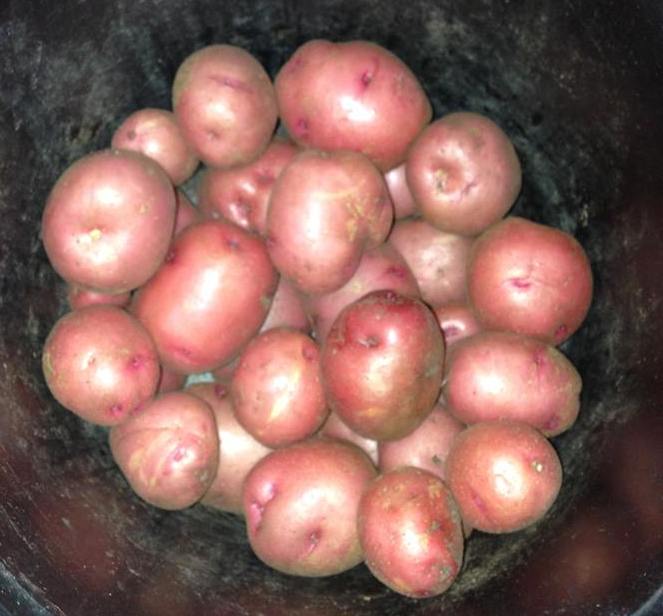
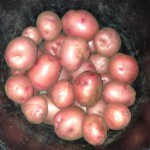
Potatoes planted in mid-February were ready to harvest in mid-May in Panama City. Photo: Vicki Evans, UF/IFAS Master Gardener
A common misconception is that all potatoes come from the Midwest. However, select Irish potato varieties are produced commercially in Florida on over 20,000 acres. Potatoes can also be grown in Florida home gardens if care is taken to select the correct type and recognize proper timing.
Potatoes are a cool season crop and the ideal time to plant in the Florida Panhandle is in January and February. Valentine’s Day is a good target planting date for home gardeners with plants producing tubers after about three months (variety and weather dependent).
The ideal site for potatoes has well-drained soils with a pH range of 5-6. To increase drainage, beds can be formed into hills that are 10-12 inches above the soil. Another option is to grow potatoes in raised beds or containers to ensure the plants will not sit in water during heavy rains.
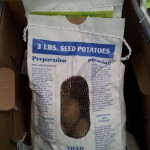
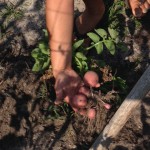
Certified seed potatoes are available in garden centers. Photo: Julie McConnell, UF/IFAS
Use certified “seed” potatoes to ensure you are starting with healthy tubers. Cut seed potatoes into egg sized pieces that contain at least one eye each. Allow the cut seed pieces to heal for a couple of days in a cool, dark spot with good ventilation. After healing they can be planted about four inches deep 6-8 inches apart with three feet between rows.
Sometimes potatoes will push to the surface of the soil and will need to be covered with more soil (hilling). If the potatoes are not covered, they can become damaged by the sun and inedible.
Keep your garden weed free to minimize competition with your crop and to also reduce the likelihood of weeds harboring insects or disease that can be harmful to potato plants.
A few weeks after planting seed potatoes, you should begin to see some vegetative (leaves and stems) growth above the soil. Potato plants can grow over a foot tall and are bushy. Small new tubers start to form underground before blooming, but they need more time to bulk up before harvesting. The entire growing process takes between 80 and 115 days from planting to harvest.
 If you plan to store your potatoes, allow them to remain in the ground for 2-3 weeks after the top of the plant has died to fully mature. If the vegetative portion of the plant does not die on its own the top can be cut to induce maturation of the tubers.
For recommended varieties and more information on care and harvesting please see “Growing Potatoes in the Florida Home Garden.”