by Molly Jameson | Nov 29, 2016

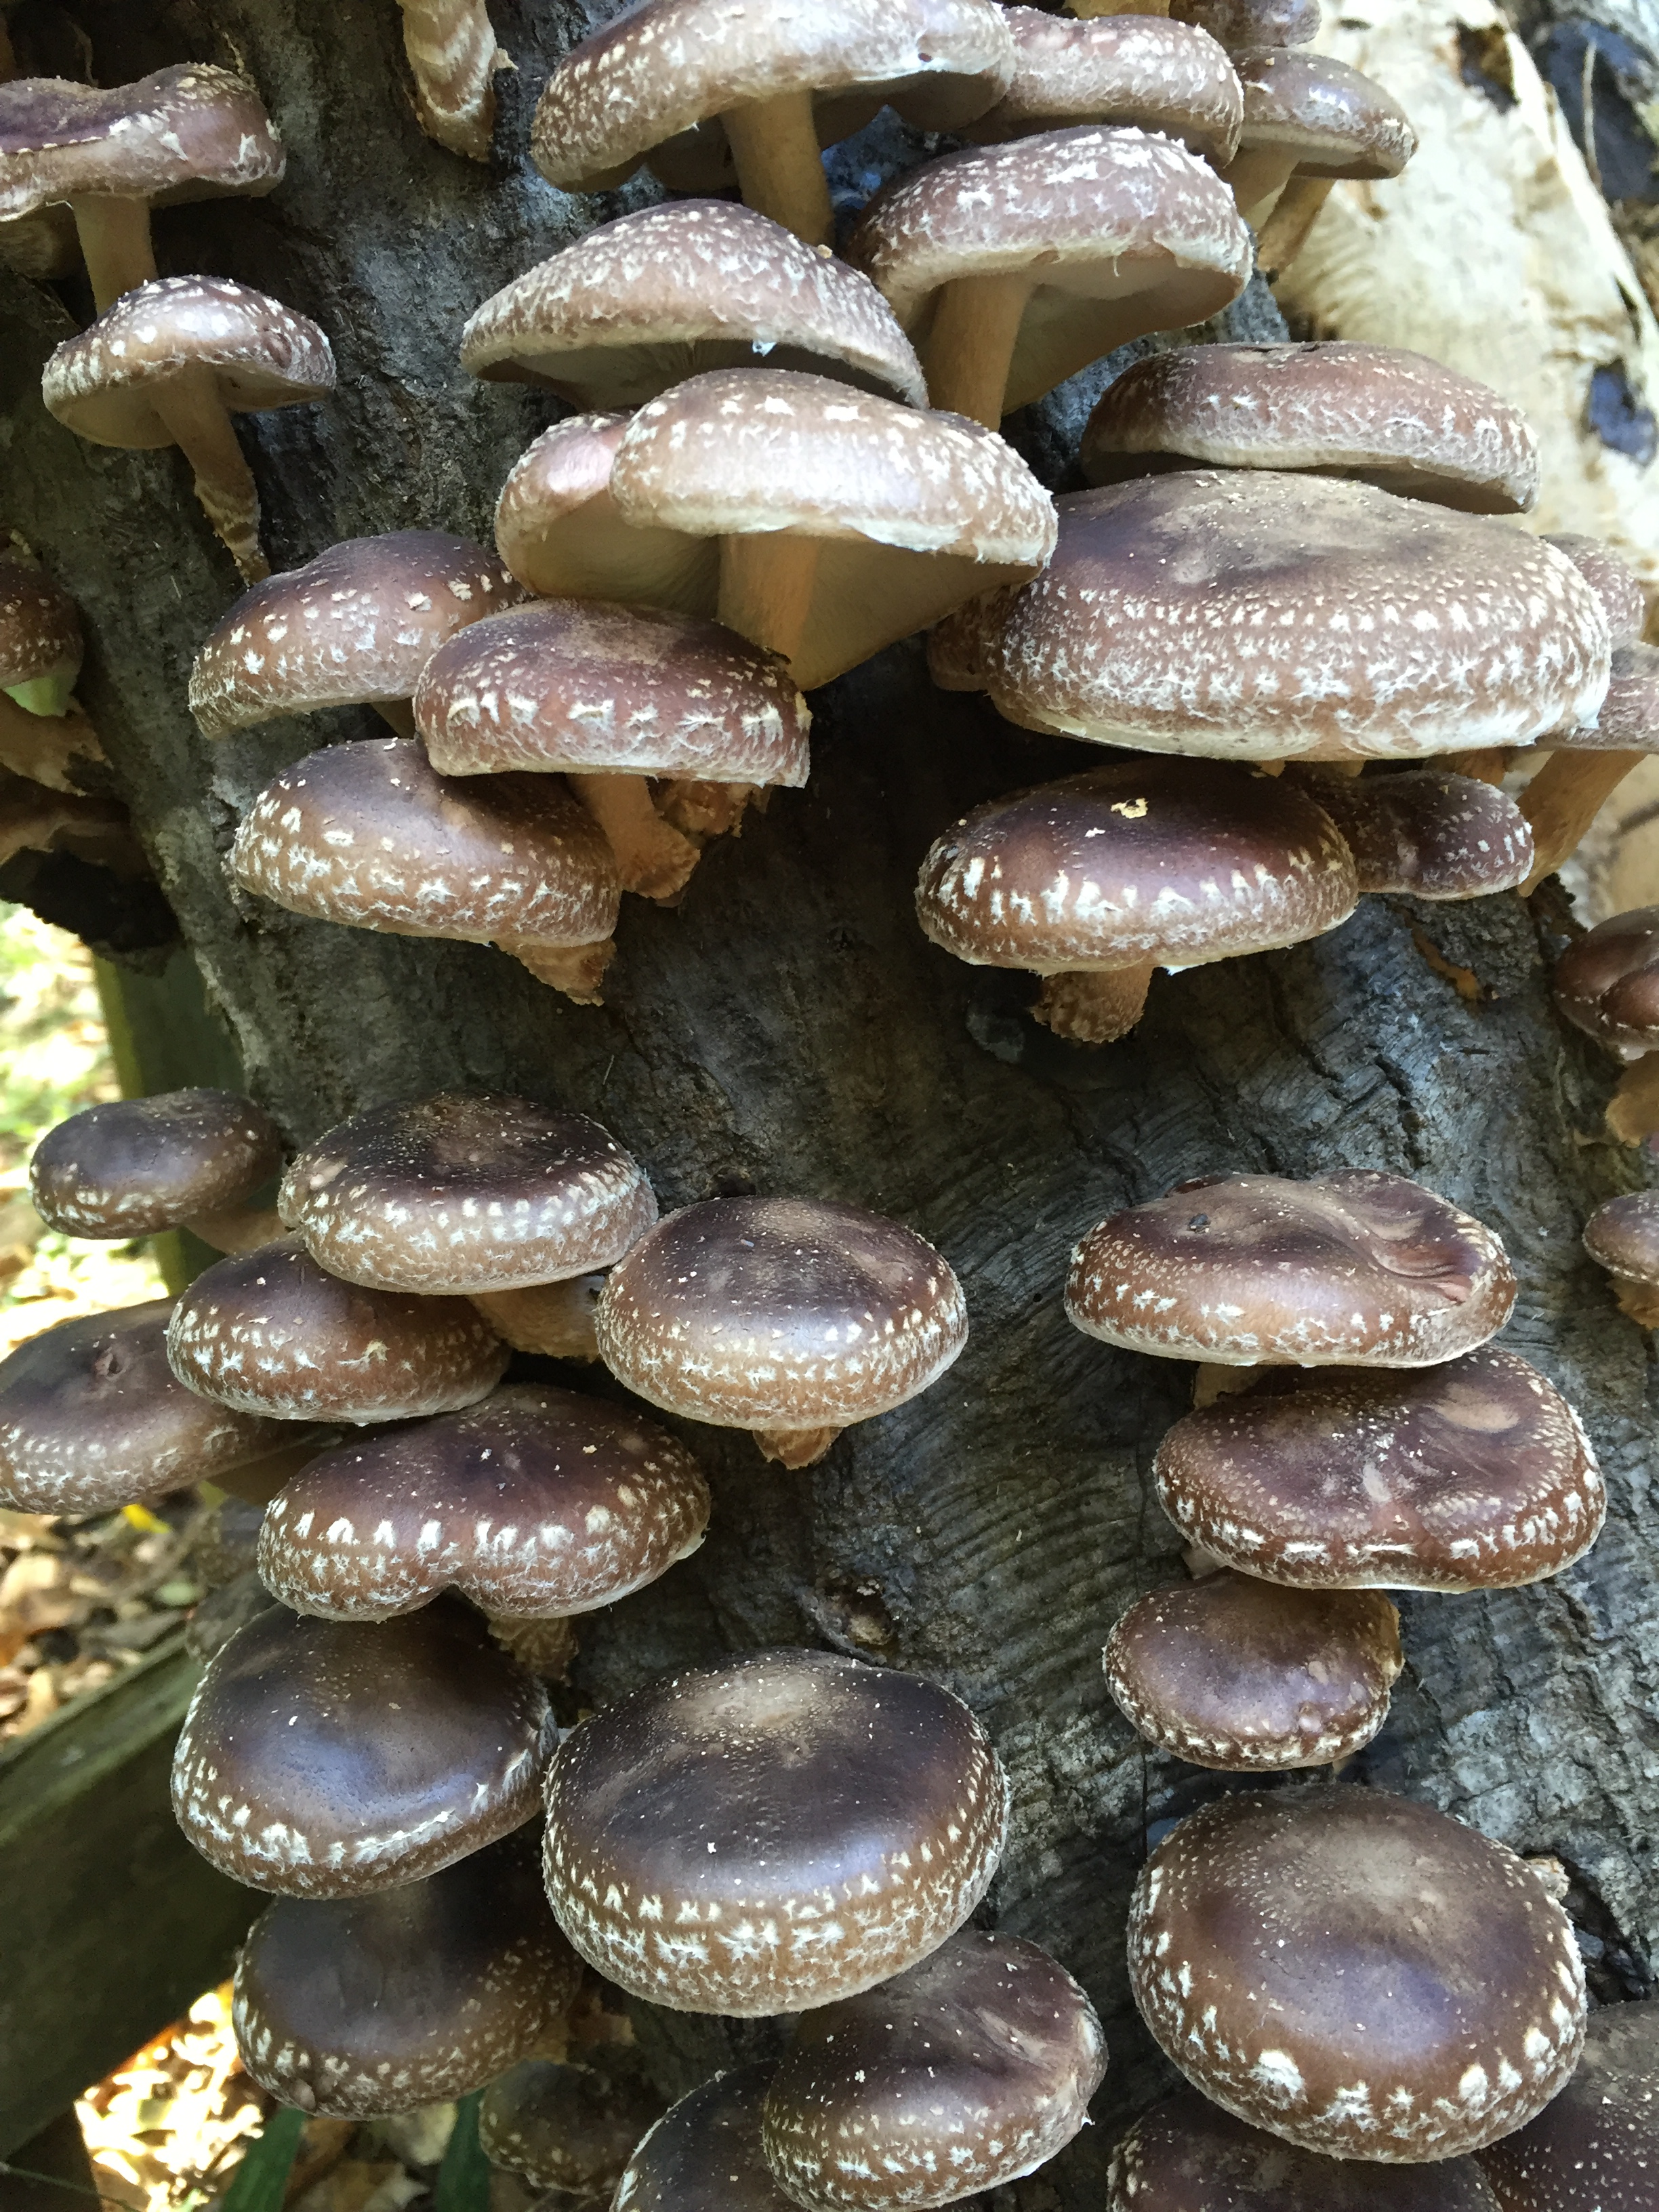
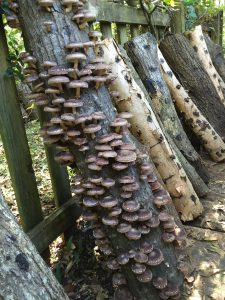
Shiitake mushrooms growing from an oak log. Photo by Stephen Hight, USDA
Growing up, I was never too fond of mushrooms. To me, their only purpose was to ruin a perfectly good pizza. As I got older, I started to warm up slightly toward raw button mushrooms in salads – with enough dressing, that is. But it wasn’t until I experienced my first taste of fresh shiitake mushrooms (Lentinula edodes) – introduced to me sautéed in butter – that I truly began to understand their intrigue. Their rich, almost smoky flavor, could transform any dish into something spectacular.
It was with the shiitakes, locally grown on a small Panhandle farm, that I finally developed my love for mushrooms. They could be added to so many dishes – simmered alongside chopped garlic, or in broth, a reduction of wine, or cream. Toss shiitakes with pasta, add in lieu of meat in a creamy risotto, or use them to enrich a soup or quiche.
I learned that shiitake mushrooms are not only delicious, but they are packed with nutrition, including fiber, protein, multiple vitamins, calcium, as well as an excellent source of antioxidants. But what I really found fascinating is how shiitake mushrooms are cultivated.
When the shiitakes are ready to fruit, arrange the logs so that the mushrooms can easily be harvested. Photo by Stephen Hight, USDA
To understand their production, you must first understand that mushrooms are merely the fruiting body, or sexual organs, of the fungi. Mycelia, which is the vegetative portion of the fungi, colonize logs and only form spore containing mushrooms when they are ready to reproduce. The Florida Panhandle is an excellent location to grow shiitake mushrooms, as they strongly prefer to grow on oak tree logs, such as laurel oaks, which is a hardwood species native to our area.
The logs must be fresh to avoid colonization by unwanted fungi, so producers must first cut down oak trees during fall or winter, when the trees have large amounts of stored carbohydrates. It is important to do this sustainably, ideally as part of a forest thinning. The trees should be about three to eight inches in diameter and should be cut to about four-foot lengths.
The next step is to inoculate the logs with shiitake spawn. You can purchase shiitake spawn as either plugs or sawdust form. It is important to get a strain that does well in our climate, so make sure to do some research, such as learning about strains through the North American Mycological Association.
To inoculate, drill holes into the logs and insert the spawn with a plunger, a hammer, or a turkey baster, depending on the form of spawn. The holes should then be coated with hot wax to protect the spawn from drying out and from becoming contaminated. The logs then incubate under shade with proper moisture and aeration for about six to 18 months, giving the mycelia time to colonize the log, which includes digesting decomposing organic material to absorb nutrients.
The mycelia will fruit for about a week, and will then need a rest period of eight to 12 weeks before fruiting again. Logs fruit for about four years, but are typically more productive in the second and third year during the spring or fall. Harvest the mushrooms daily by cutting them at the base, and place in a box and refrigerate until use. By immersing the logs in cold water or chilling in cold storage, you can encourage the logs to fruit, but this process may make your logs less productive over time. When the bark begins to slough off, production will slow down and eventually stop.
For more information on growing shiitake mushrooms, visit the UF/IFAS Small Farms Mushroom Production website.
by Molly Jameson | Oct 26, 2016
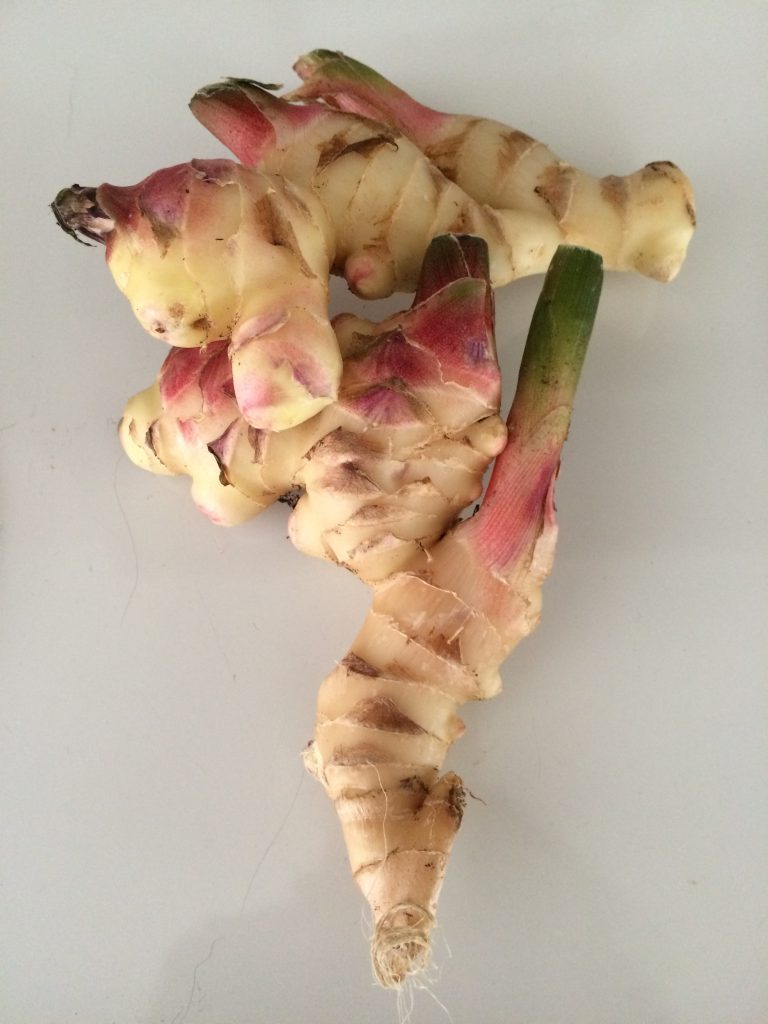
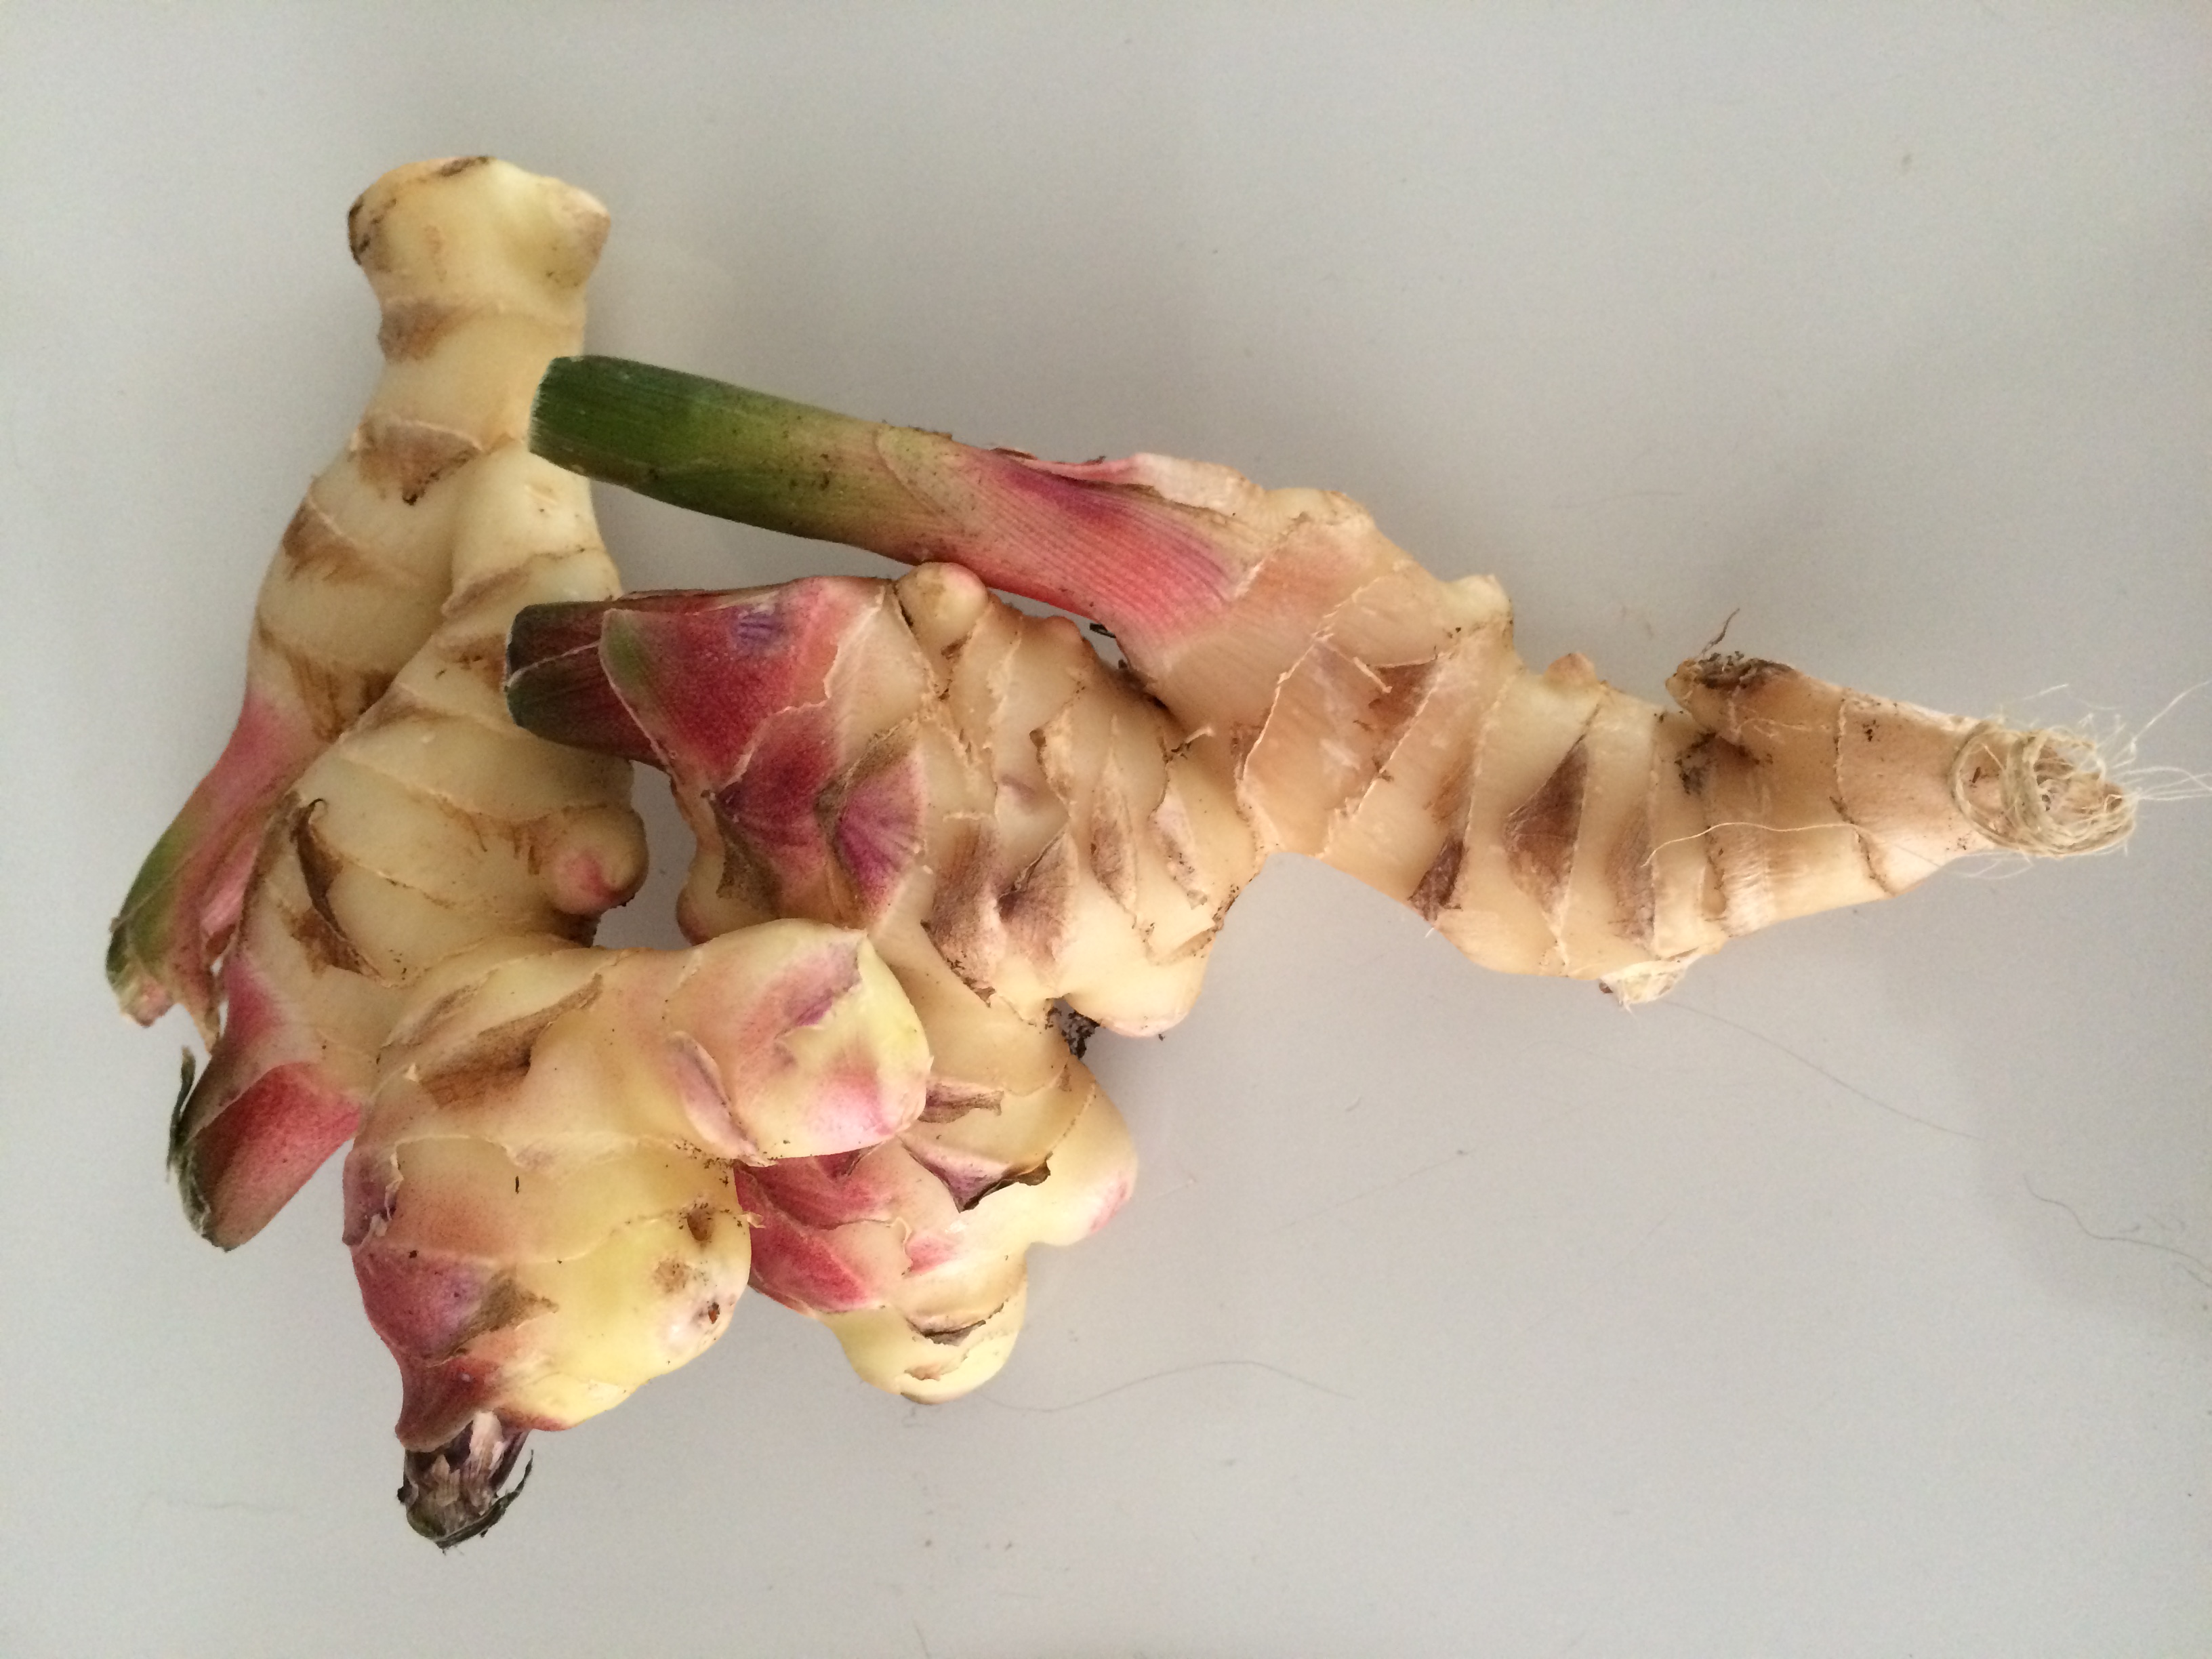
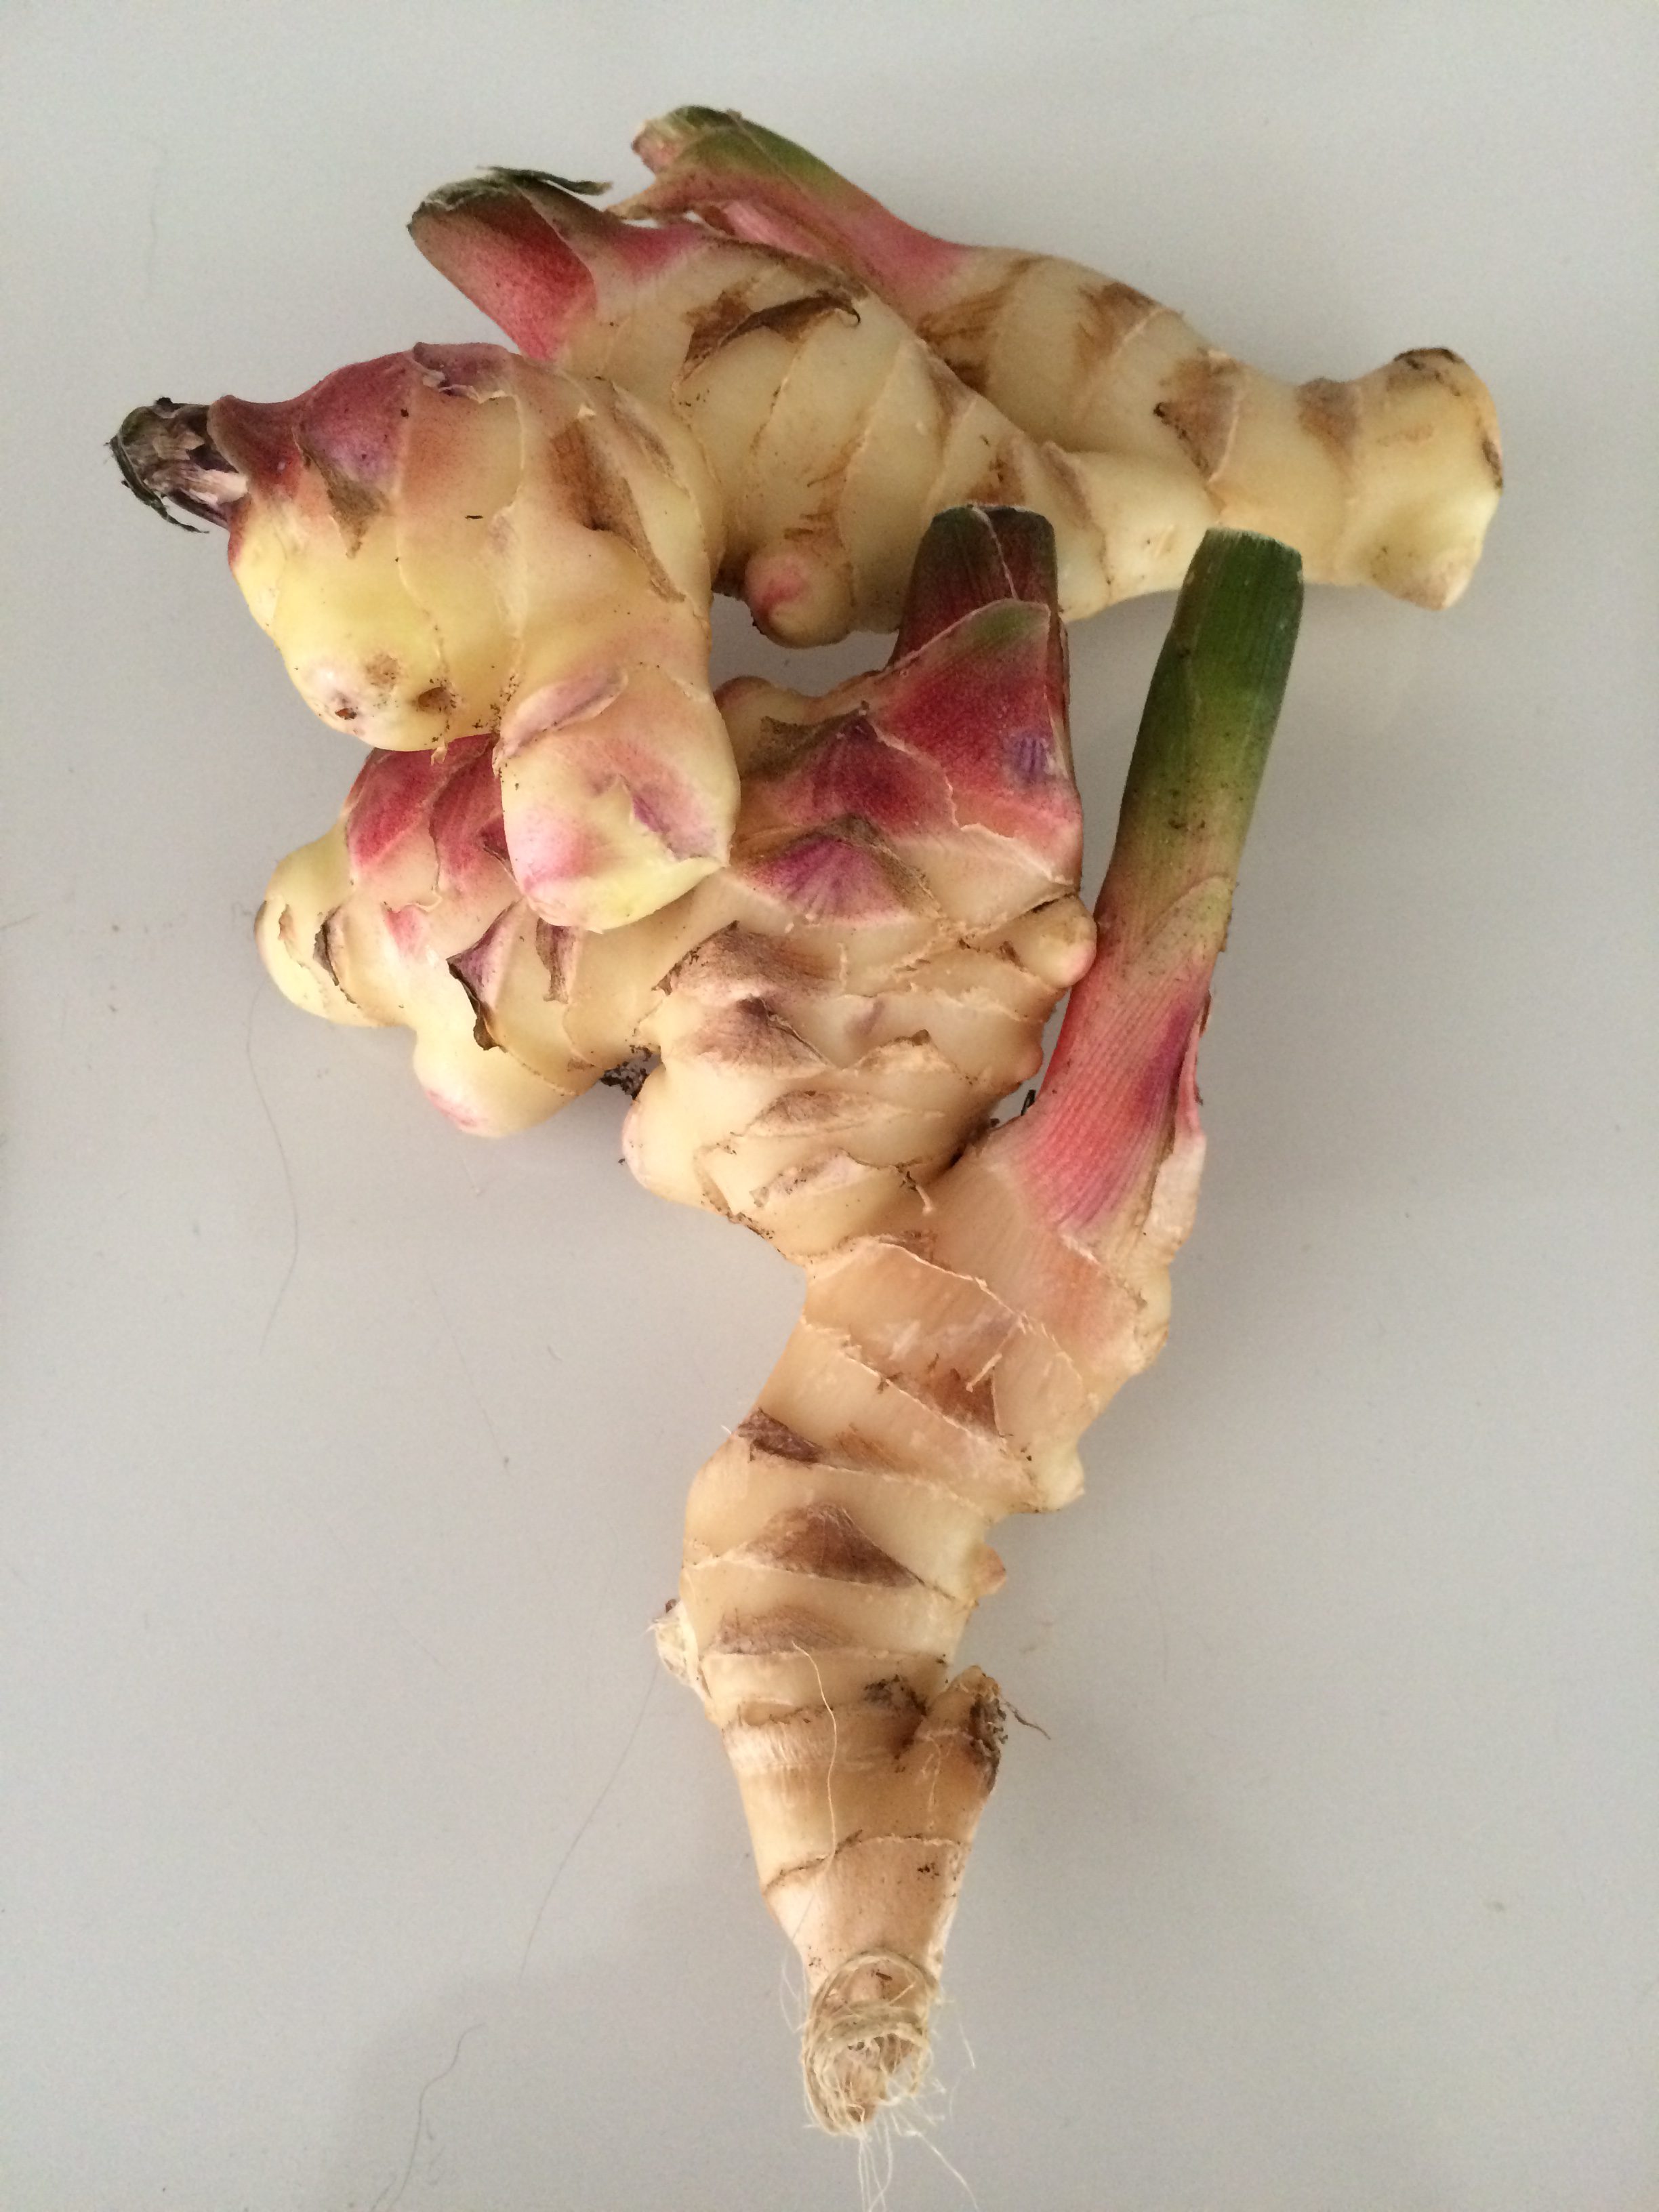
Freshly harvested ginger rhizomes. Photo by Molly Jameson.
Fall is finally here and we are beginning to enjoy our first few bursts of cold air coming in from the northwest. For many, this inspires us to prepare dishes with all of our favorite seasonal spices – nutmeg, cinnamon, cloves, and ginger come to mind. While all of these spices can be grown, did you know that edible ginger, Zingiber officinale, is one of the easiest roots to grow in North Florida?
It is as simple as planting a piece of fresh ginger root, or rhizome, in the spring and keeping the root moist for a few weeks while they sprout. Ginger prefers soil rich with organic matter and partial shade. Therefore, it is often an excellent choice for yards with many trees, as is common among our many oaks and pines. It also has very few pests and can be largely ignored as it grows throughout the year.
During the warm seasons, you will enjoy this perennial’s dark green narrow leaf blades, and although not as showy as ornamental gingers, it will occasionally produce green oblong stalks with white and dark red fragrant flowers. When our cool nights return and the tops die back, it is the signal to dig up the roots, which will have multiplied, and take some in for eating and place some back in the ground for next year’s harvest.
After digging up the rhizomes, allow them to air dry in the shade. To make your ginger root last, place in a sealed bag, and store in your freezer, peeled or unpeeled. You can then take out pieces as you need them throughout the year, and it can easily be grated frozen.
So get ready to make ginger bread, gingersnaps, ginger muffins, ginger ale, ginger-based sauces, ginger spiced soup, and so much more, all with your fresh, spicy, pungent homegrown ginger root!
by Molly Jameson | Sep 16, 2016
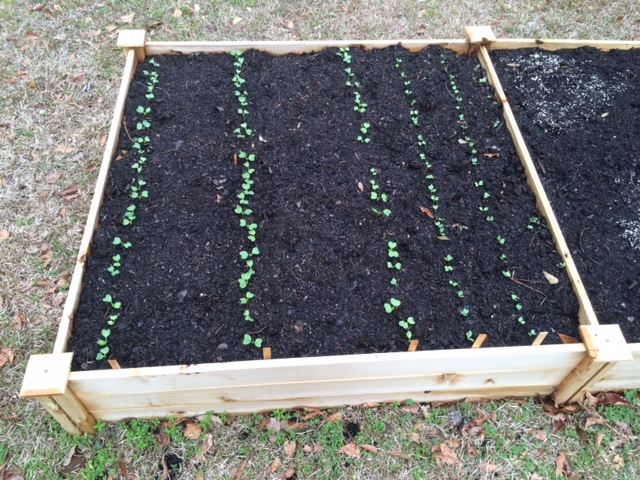
Direct seed root crops and many leafy greens, such as arugula and spinach. Photo by Molly Jameson.
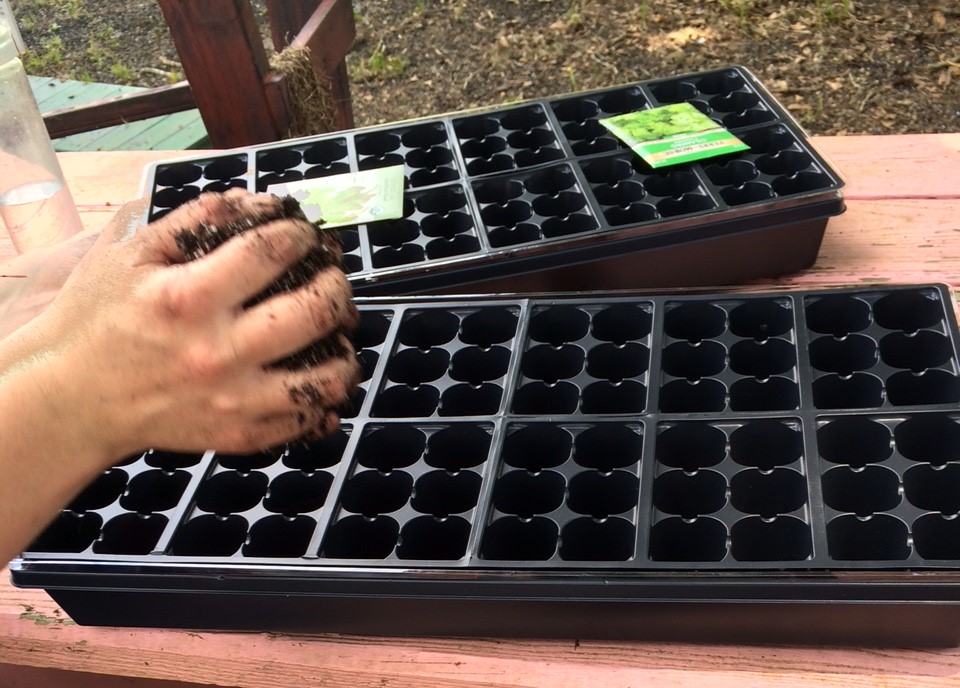
Fall is fast approaching, and that means my favorite season for gardening has arrived! September is the month we get to start all of our fall favorites. For me, this means starting lettuce, kale, broccoli, and collards by seed in flats indoors. I use full-spectrum fluorescent bulbs, which mimics natural sunlight. In a couple of weeks, I will direct seed arugula, carrots, mustards, spinach, Swiss chard, and turnips into my raised beds.
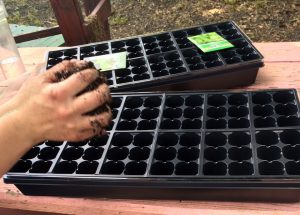
Seed brassicas and lettuce into flats. Photo by Molly Jameson.
But before I get started direct seeding, I will first need to do some garden cleanup. Sadly, this means I will need to say goodbye to my basil and okra, which are still hanging on despite the heat (and despite the hurricane!). Then it will be time to add a fresh layer of compost. Additionally, I will be adding worm castings, which I have been creating for my fall garden in my home worm bin all summer. There is no better feeling then growing brassicas and lettuce from seed, digging small holes, adding homemade fresh worm castings to each, and planting the eager seedlings.
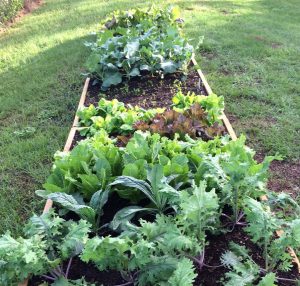
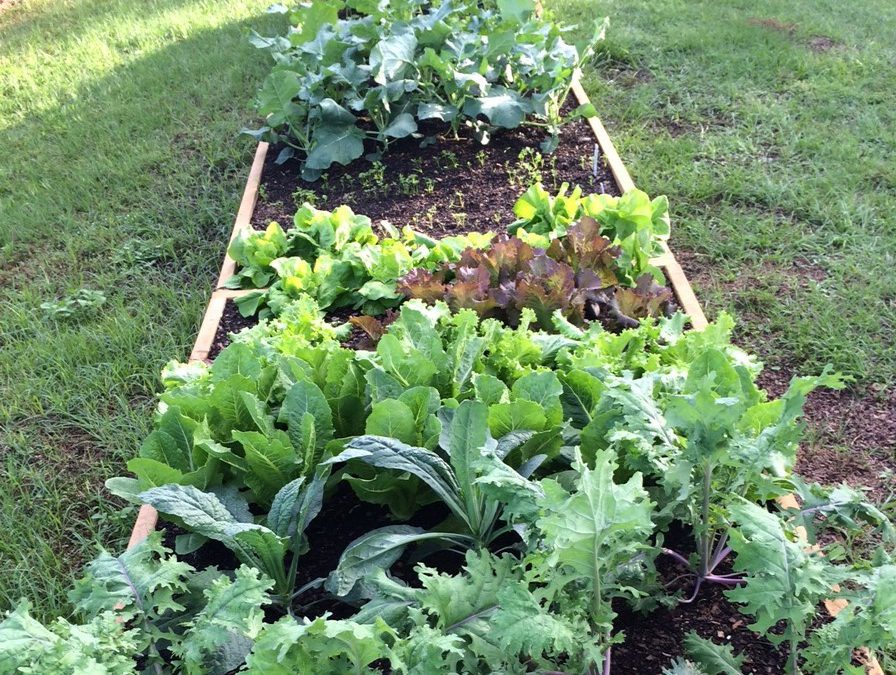
Grow a variety of greens for the fall season. Photo by Molly Jameson.
Fall is a wonderful time to garden in zone 8b – generally less pest pressure and a chance to plant hardy leafy greens that can be harvested all the way into spring. Of course, I always keep frost cloth around, in case temperatures dip below freezing for extended periods of time. In which case I will be sure to carefully cover my lettuce and Swiss chard, making sure the cloth is well secured.
I love my tomatoes, peppers, beans, and squash, but they usually involve staking and the ever imminent threat of caterpillars and intense heat. In the fall, most crops hold themselves off the ground, and I certainly cannot wait to pull on a jacket in the crisp early morning, come out to harvest kale and spinach leaves, and add them to my breakfast smoothie and veggie omelet.
For more information:
Florida Vegetable Gardening Guide
by Molly Jameson | Aug 12, 2016
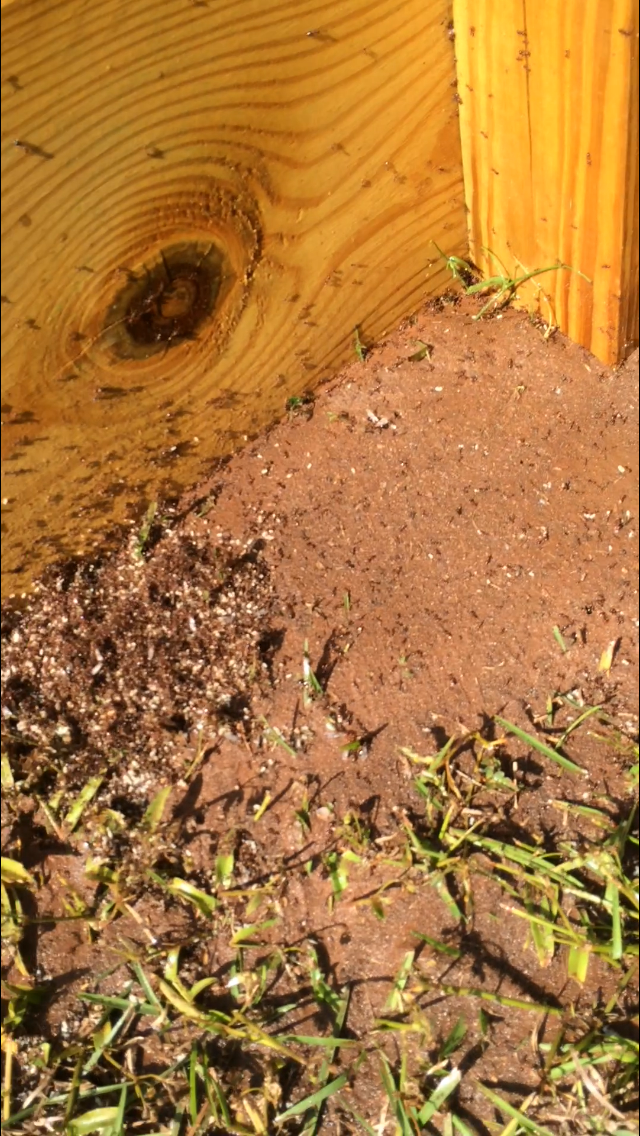
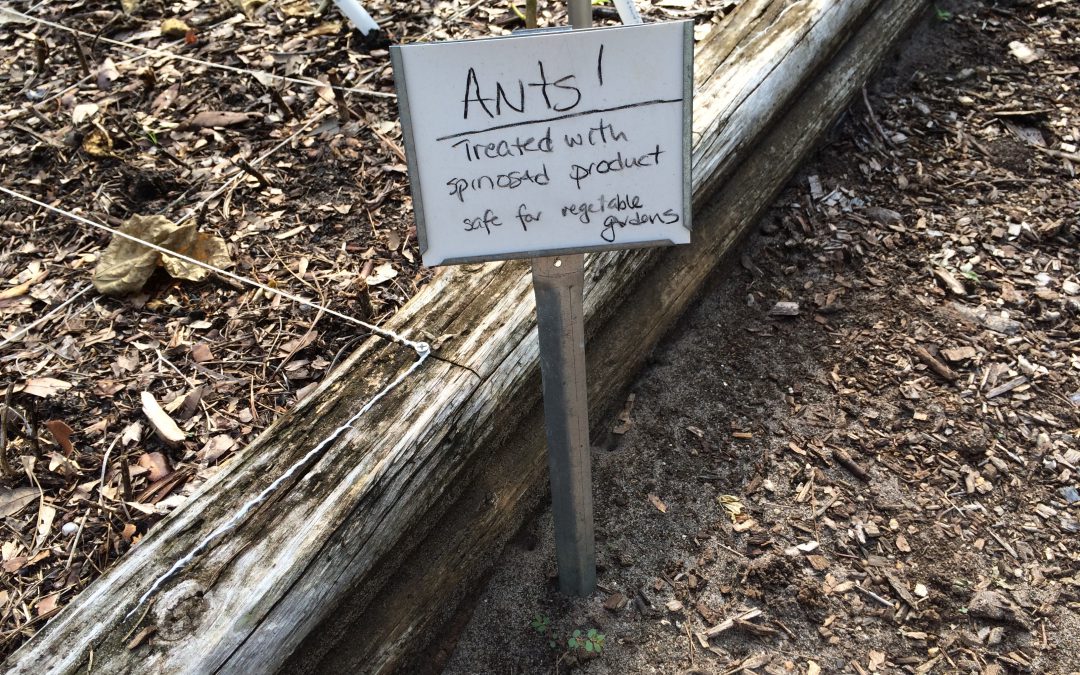
Ants can be treated with spinosad in vegetable gardens. Photo by Molly Jameson.
There’s nothing worse than sinking your fingers into your garden soil to dig up a potato, plant a seedling, or pull up a radish, and be met with a sharp, painful sting, and little red critters rocketing up your arms. If you are a gardener in the panhandle, my bet is that you know exactly to what I refer: fire ants!
Fire ants are certainly not native to our area. These guys are an invasive species from South America that are very resilient, and many are territorial, with the potential to drive out any native ant populations. Fire ants arrived in the 1930s, and can now be found throughout most of the southeastern United States.
So when you end up with fire ant mounds engulfing your carrot patch, what can be done? Since fire ants in your garden mean fire ants in your food, the least toxic control methods are of high importance and conventional broadcast bait treatments and mound treatments should be avoided. Even in your lawn, be careful when using strong insecticidal bait treatments, as these can harm the native ant populations that help control the spread of fire ants. This can then lead to a strong resurgence of fire ant populations that can outcompete the native ants.
Although completely controlling fire ants in an area is not possible, there are sustainable management techniques that can help. Some fire ant colonies have a single queen while others have multiple queens. Either way, in order to eliminate a fire ant colony, all queens in the colony must be killed. Fire ants are omnivorous, in that they eat plants, insects, sugars, and oils. The catch is that they are only able to ingest liquids, so solid food must be brought into the colony, where larvae regurgitate digestive enzymes onto the food, breaking it down into liquids. Therefore, any method of control by ingestion will need to be in liquid form, or the ants must be able to bring the material into the colony, without first being exterminated.

Fire ants can become a problem around and in raised vegetable gardens. Photo by Molly Jameson.
There are some commercially available products that contain boric acid or diatomaceous earth. These products may reduce populations, but eliminating whole colonies with these products can be a challenge.
The use of a nervous system toxin called spinosad is effective on fire ant populations and is considered safe to use in vegetable gardens. This toxin comes from a bacterial fermentation process, and is therefore considered organic. But be aware, even though there are organic products with ingredients derived from botanical sources such as rotenone and nicotine sulfate, they should not be used in vegetable gardens. When using chemical methods of control, always follow the directions on the label carefully.
One physical method of control is the use of hot water. Three gallons of scalding water, which is between 190 to 212ºF, has been used on colonies with a success rate of 20 to 60 percent, when applied in several treatments. You will want to slowly pour the water on the colony, being extra careful not to get burned, and avoid injuring any surrounding plants. If you are like I am, and you often leave your garden hose in the hot sun, you can spray the ant colonies with the hot water, as you wait for the water to cool off enough to water the garden. Hot water control takes persistence, but you can eventually drive the ants out.
Another method of physical control is excavation. This requires digging up the mound, putting it in a bucket, and taking it to another location. Apply talcum or baby powder to your shovel handle and bucket to help prevent the ants from escaping and crawling up to sting you.
One reason fire ants are so rampant in the United States is that they have little competition or natural enemies. Scientists have released multiple species of phorid flies, natural parasites of fire ants in South America, and a few species have become established. Scientists at UF/IFAS are currently researching additional fire ant biological control methods, such as the use of a fungi, which has shown promise.
Remember, not all ants in the garden are bad guys! Many species act as roto-tillers, aerating and redistributing nutrients in the soil. They also play a role as decomposers as they assist in turning dead insects into soil nutrients. Ants can disturb garden pests by attacking them or interrupting their feeding, mating, and egg laying processes. Additionally, ants are a food source for wildlife, such as other insects, frogs, lizards, birds, spiders, and even some mammals.

by Molly Jameson | Jul 19, 2016
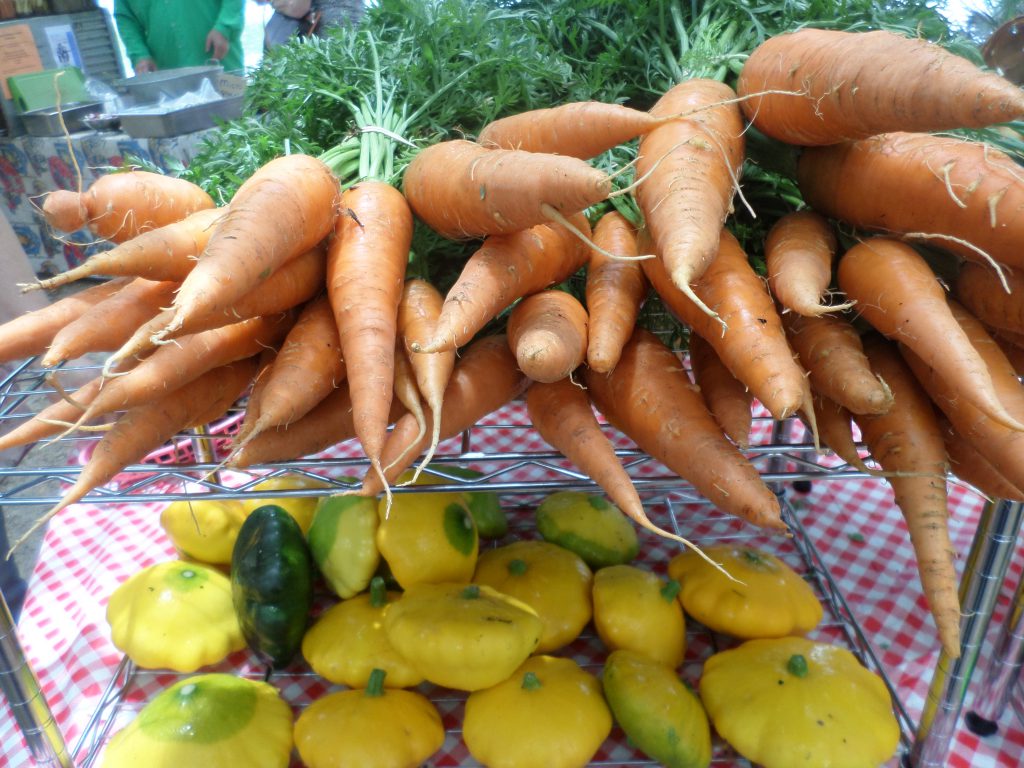
Carrots and squash at the Lake Ella Growers’ Market. Photo by Jennifer Taylor.
When you think of farmers’ markets, what is that comes to mind? Is it the customers perusing the tables, the vendors organizing their displays, the variety of colors of the fruits and vegetables, the aromas of many types of baked breads, the pop-up tents forming a loose circle…? Or is it all of these things wrapped up in a sense of community?
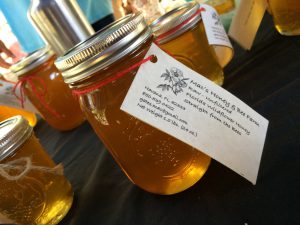
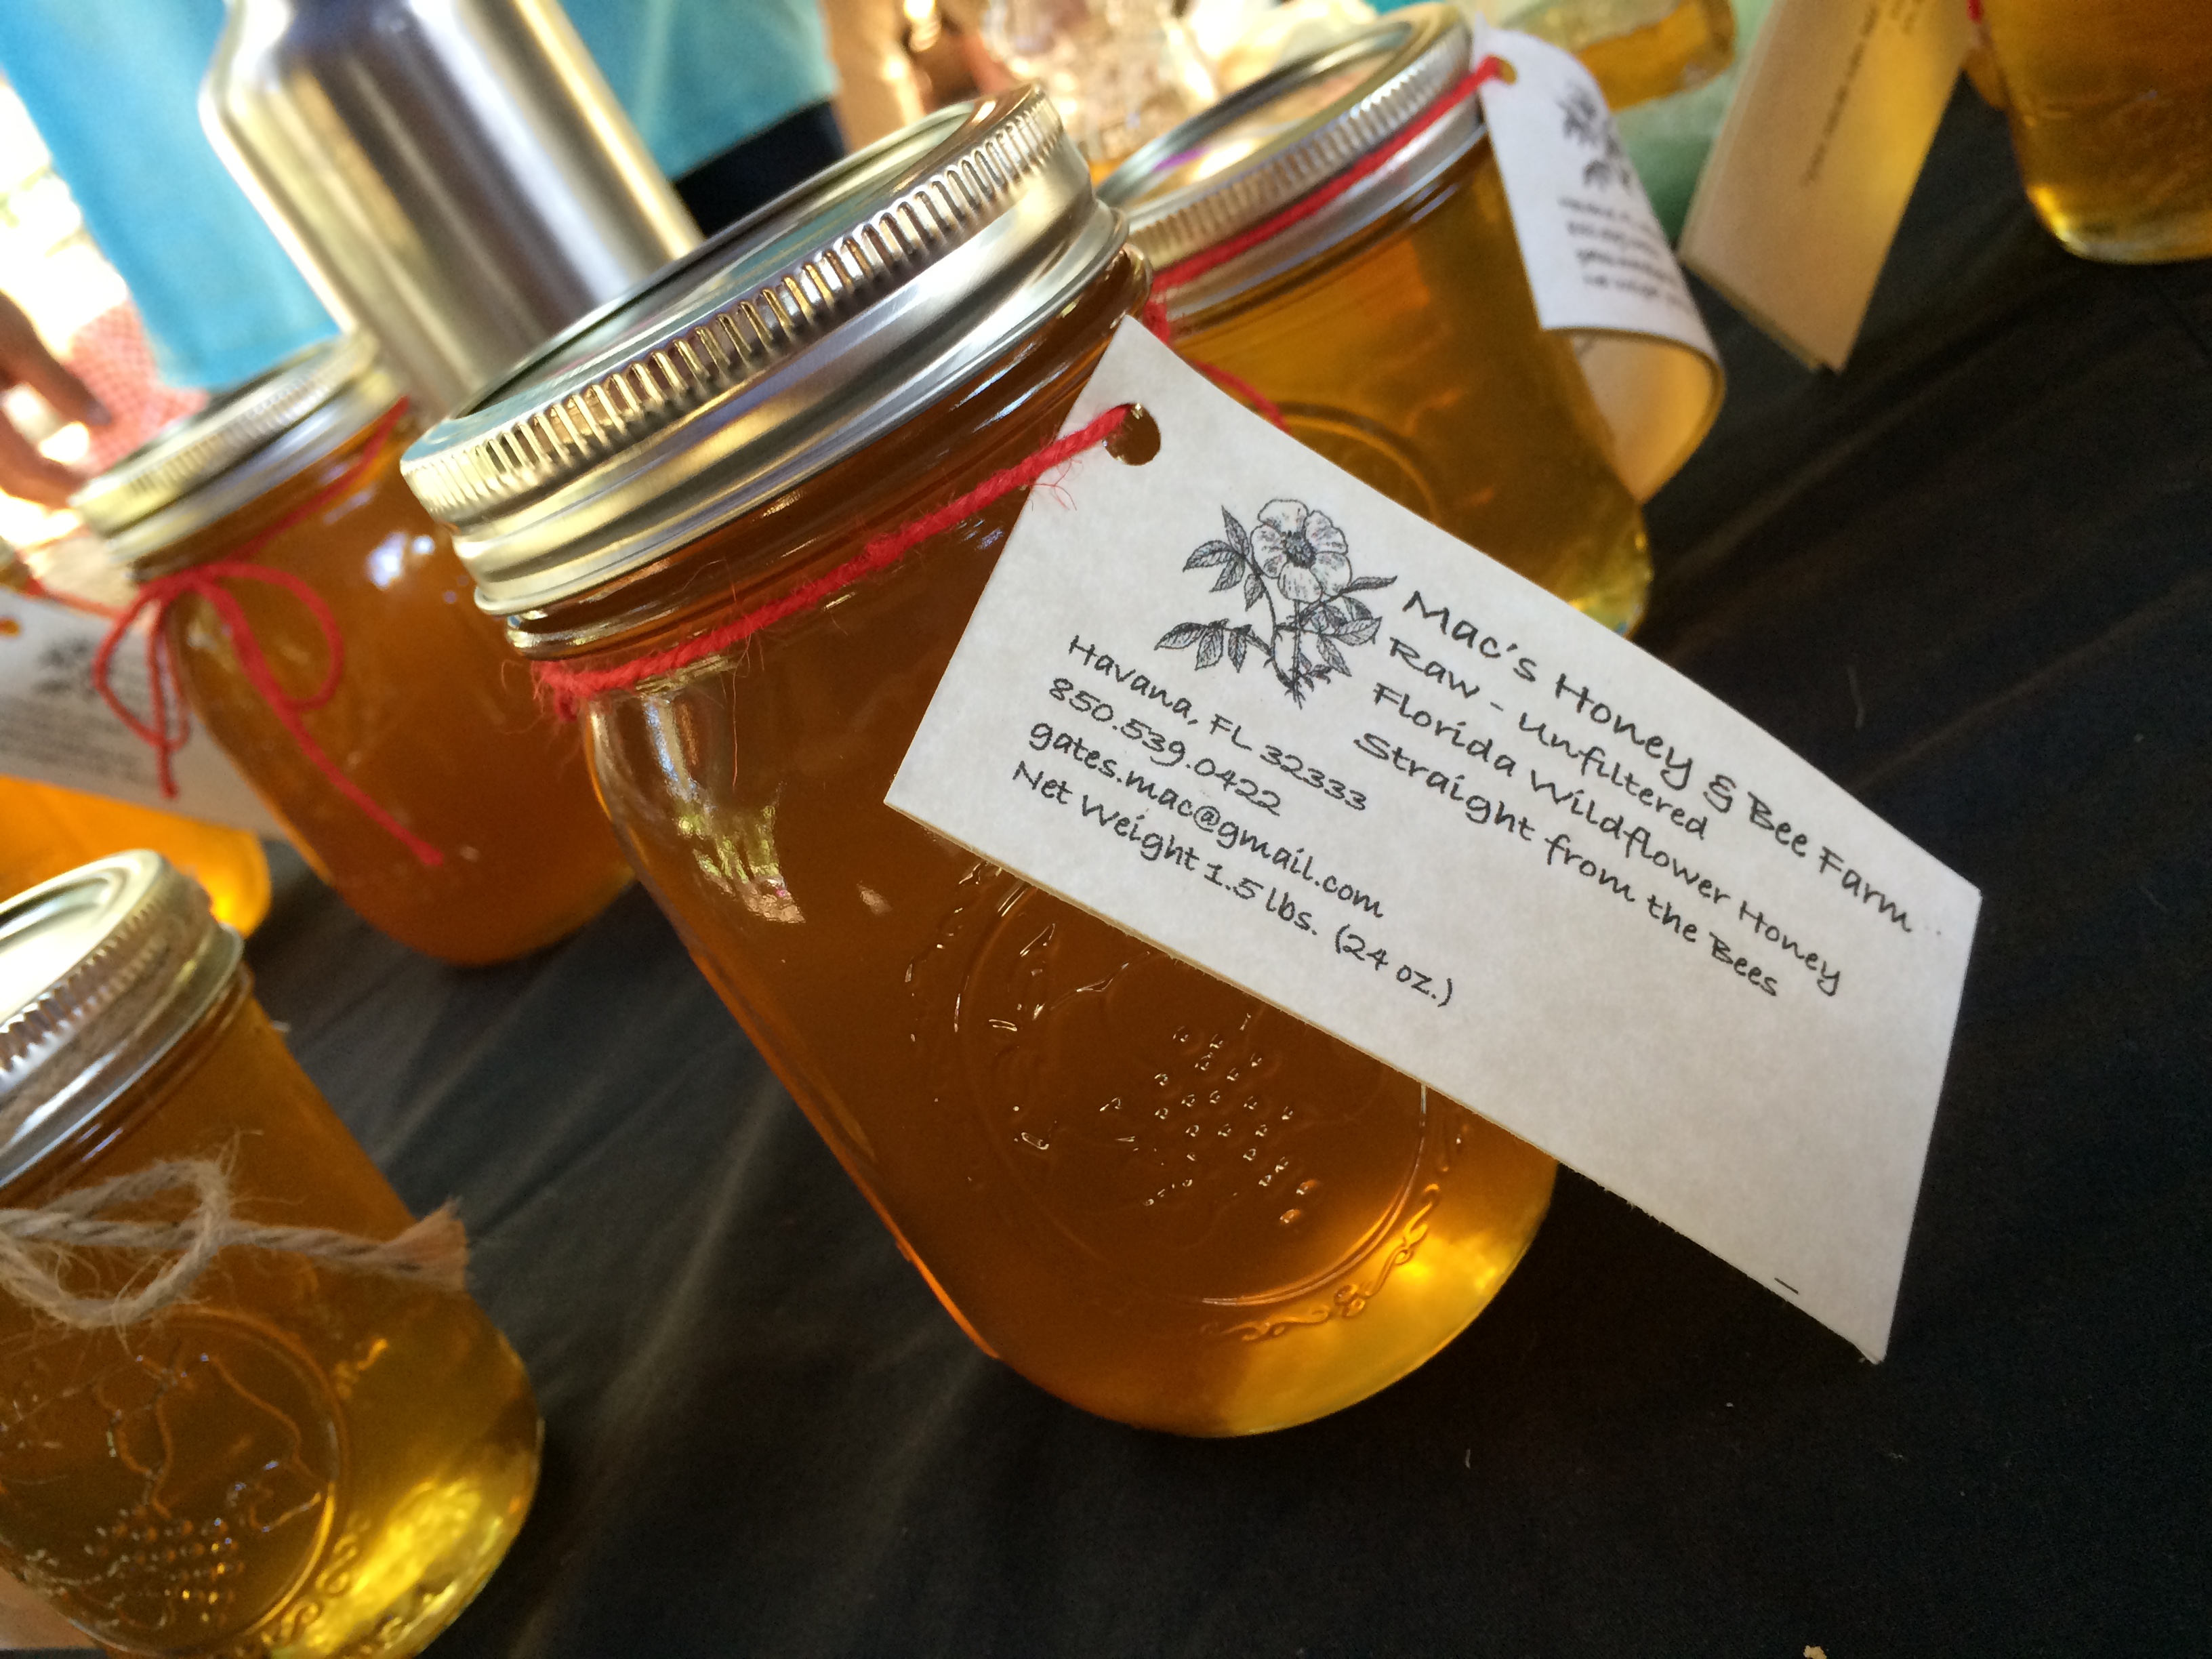
Honey from Mac’s Honey and Bee Farm. Photo by Molly Jameson.
If you have not experienced a farmers’ market that evokes such senses, then you should stop by one of the farmers’ markets where vendors selling the produce actually grew it themselves. These markets are often referred to as growers’ markets.
Still not convinced? What is it that you are looking for? Liven up your summer dinner table with fresh blueberries grown in Monticello, sweet corn that hardly needs cooking, flavorful heirloom tomatoes, freshly dug potatoes, lime-green field peas, cucumbers with a crunch, sweet yellow onions, multi-colored oblong peppers, juicy garlic, yellow crook-neck squash, dark green zucchini, shitake mushrooms harvested off oak logs, herbs just picked that morning, edible flowers….
The adjectives used to describe the produce may seem like an exaggeration until you really dive into these flavors and learn about how they were grown, where they were grown, and why the farmer decided to concentrate his or her efforts on the particular varieties. And when you are at a growers’ market, don’t be shy! Ask the farmers what they are growing and the methods they use for farming. What has gone well, what has not. They very well may tell you it’s all in building the soil, conserving the water, and supporting diversity.

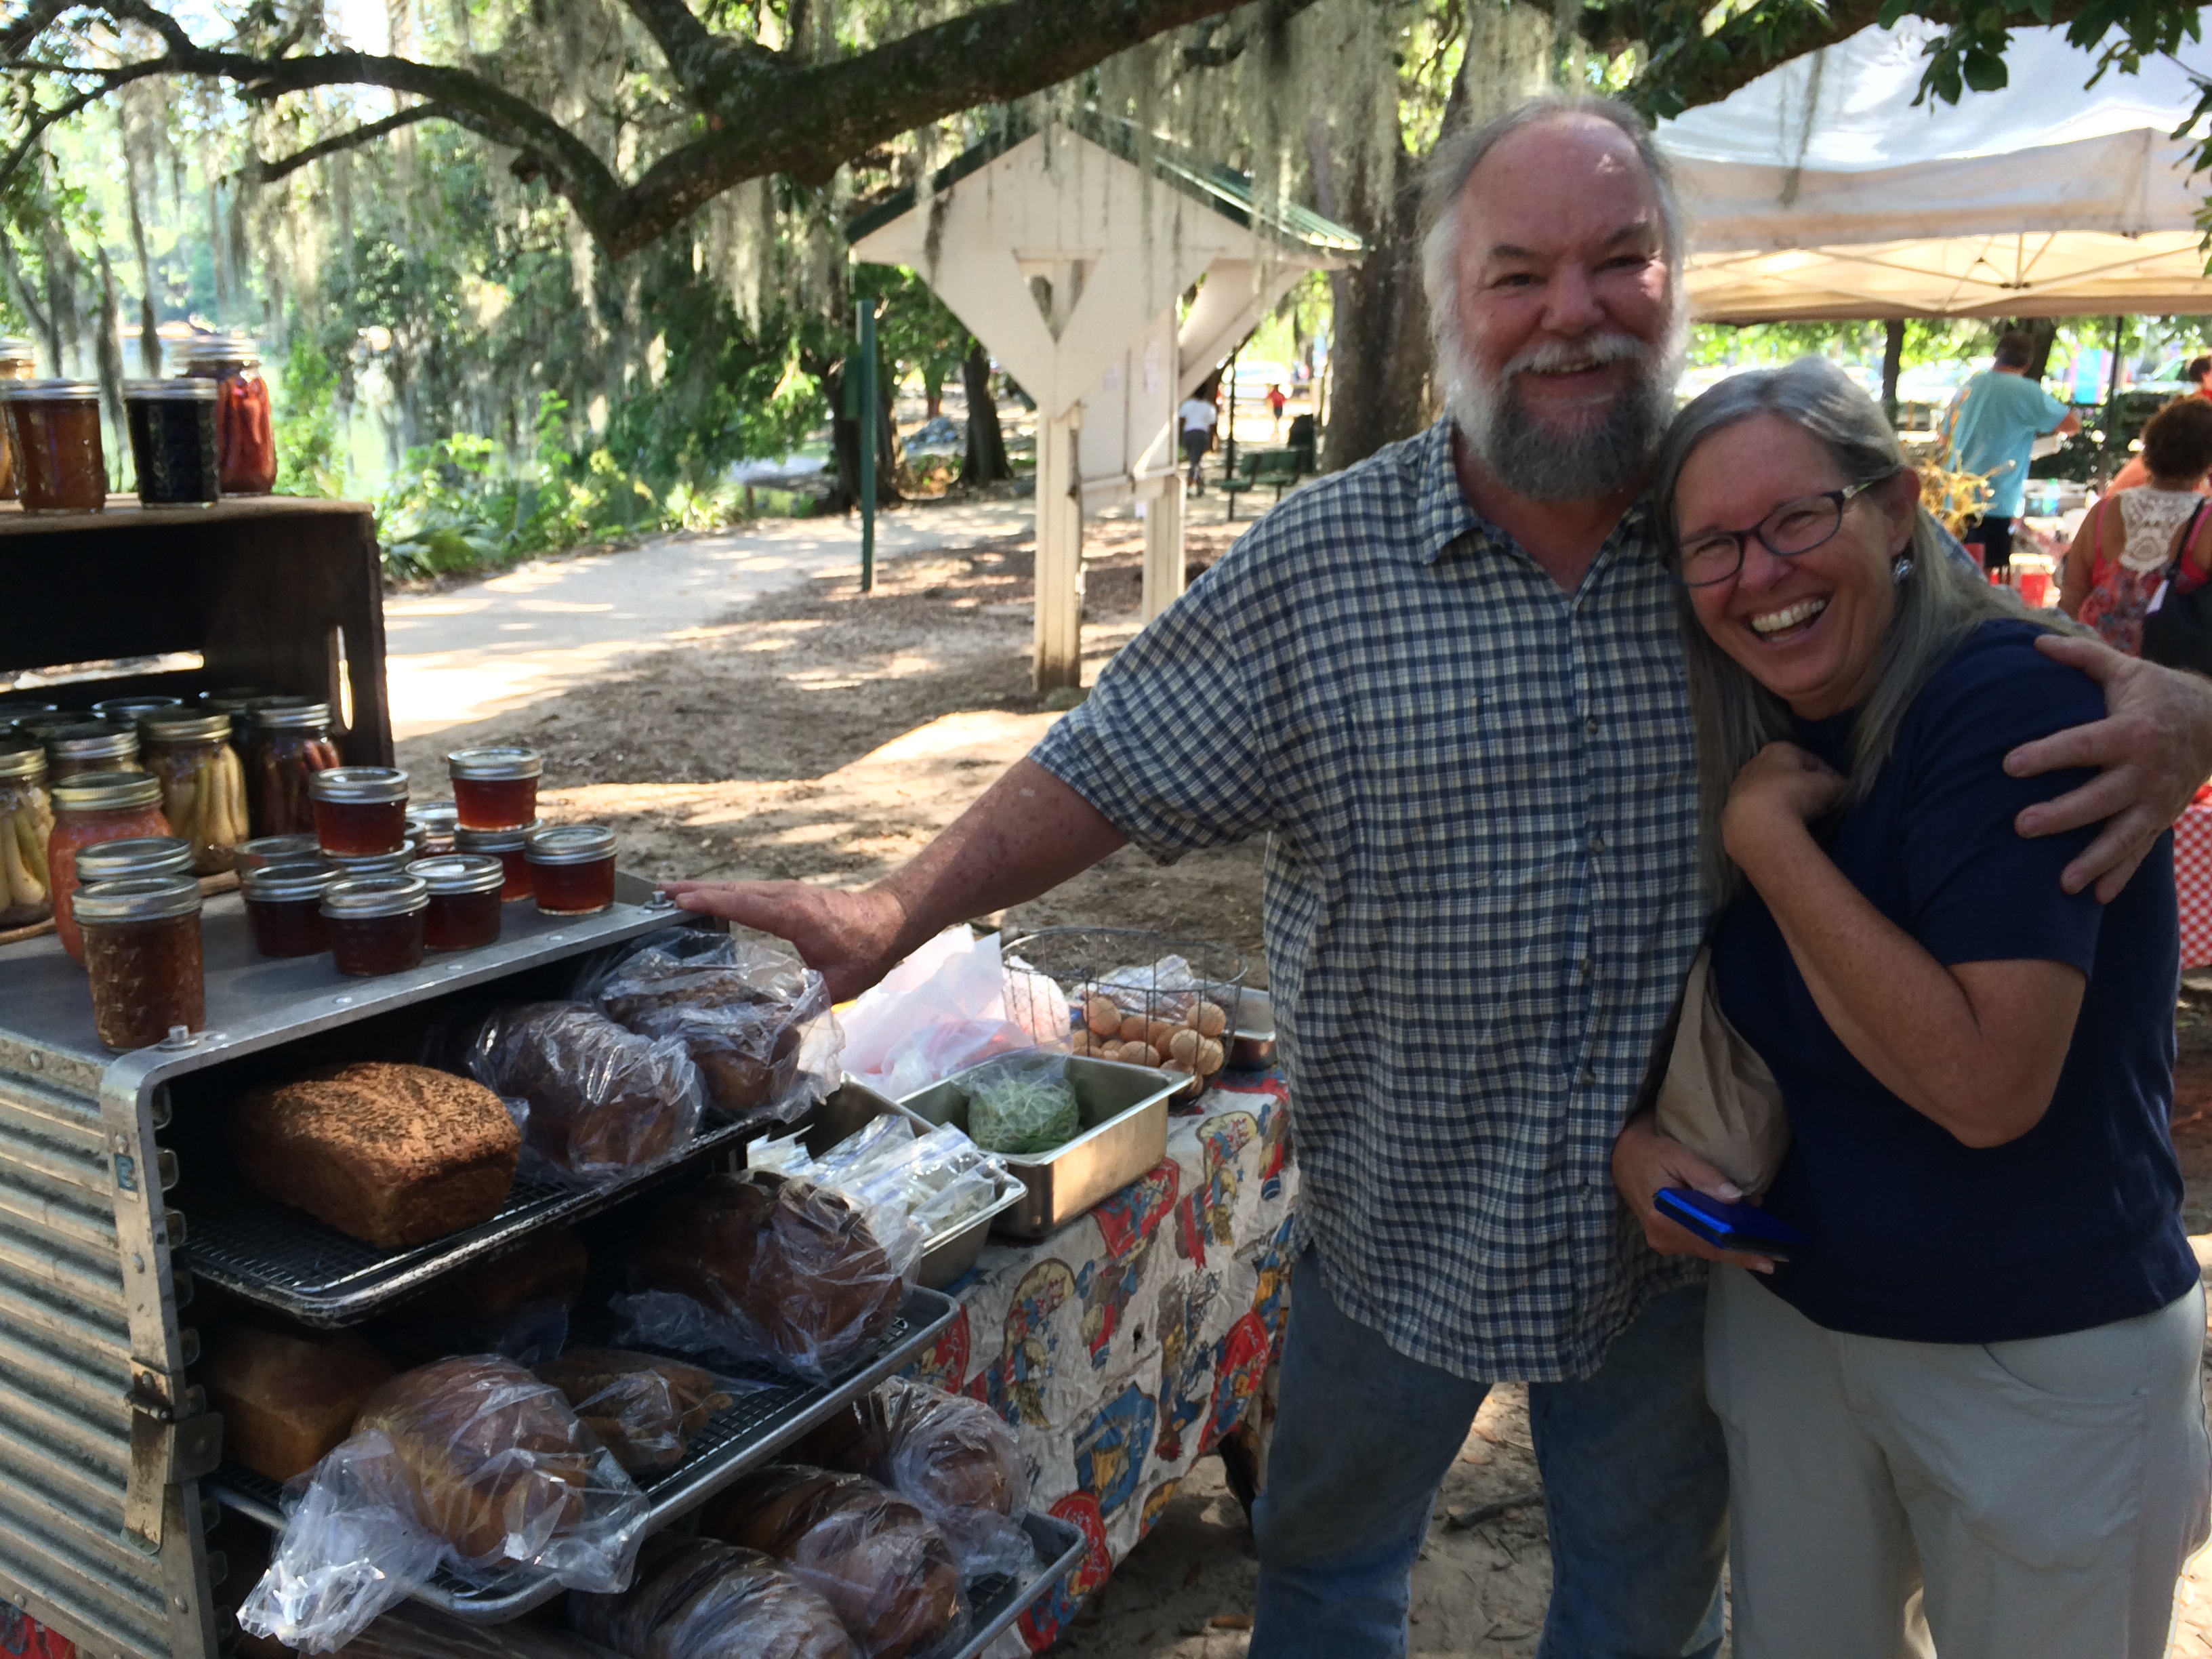
Jack from Crescent Moon, selling fresh baked bread. Photo by Molly Jameson.
And don’t just come for the produce. At many growers’ markets, there are so many types of fresh-baked breads and cookies, local wildflower honey, local eggs, grass-fed meats, fruit preserves, hand-made soaps, and dried vegetables and powders.
Some growers’ markets in the Tallahassee area include the Lake Ella Growers’ Market, the Red Hills Online Market, the Frenchtown Heritage Marketplace, and the Sunshine Growers’ Market. If you do not live in the Tallahassee area, visit the Florida Department of Agriculture and Consumer Services Community Farmers Markets locator to find farmers’ markets near you. Take some time to explore your farmers’ markets to see who is growing their own and what markets are growers’ markets. In this way, you can help support local farmers!