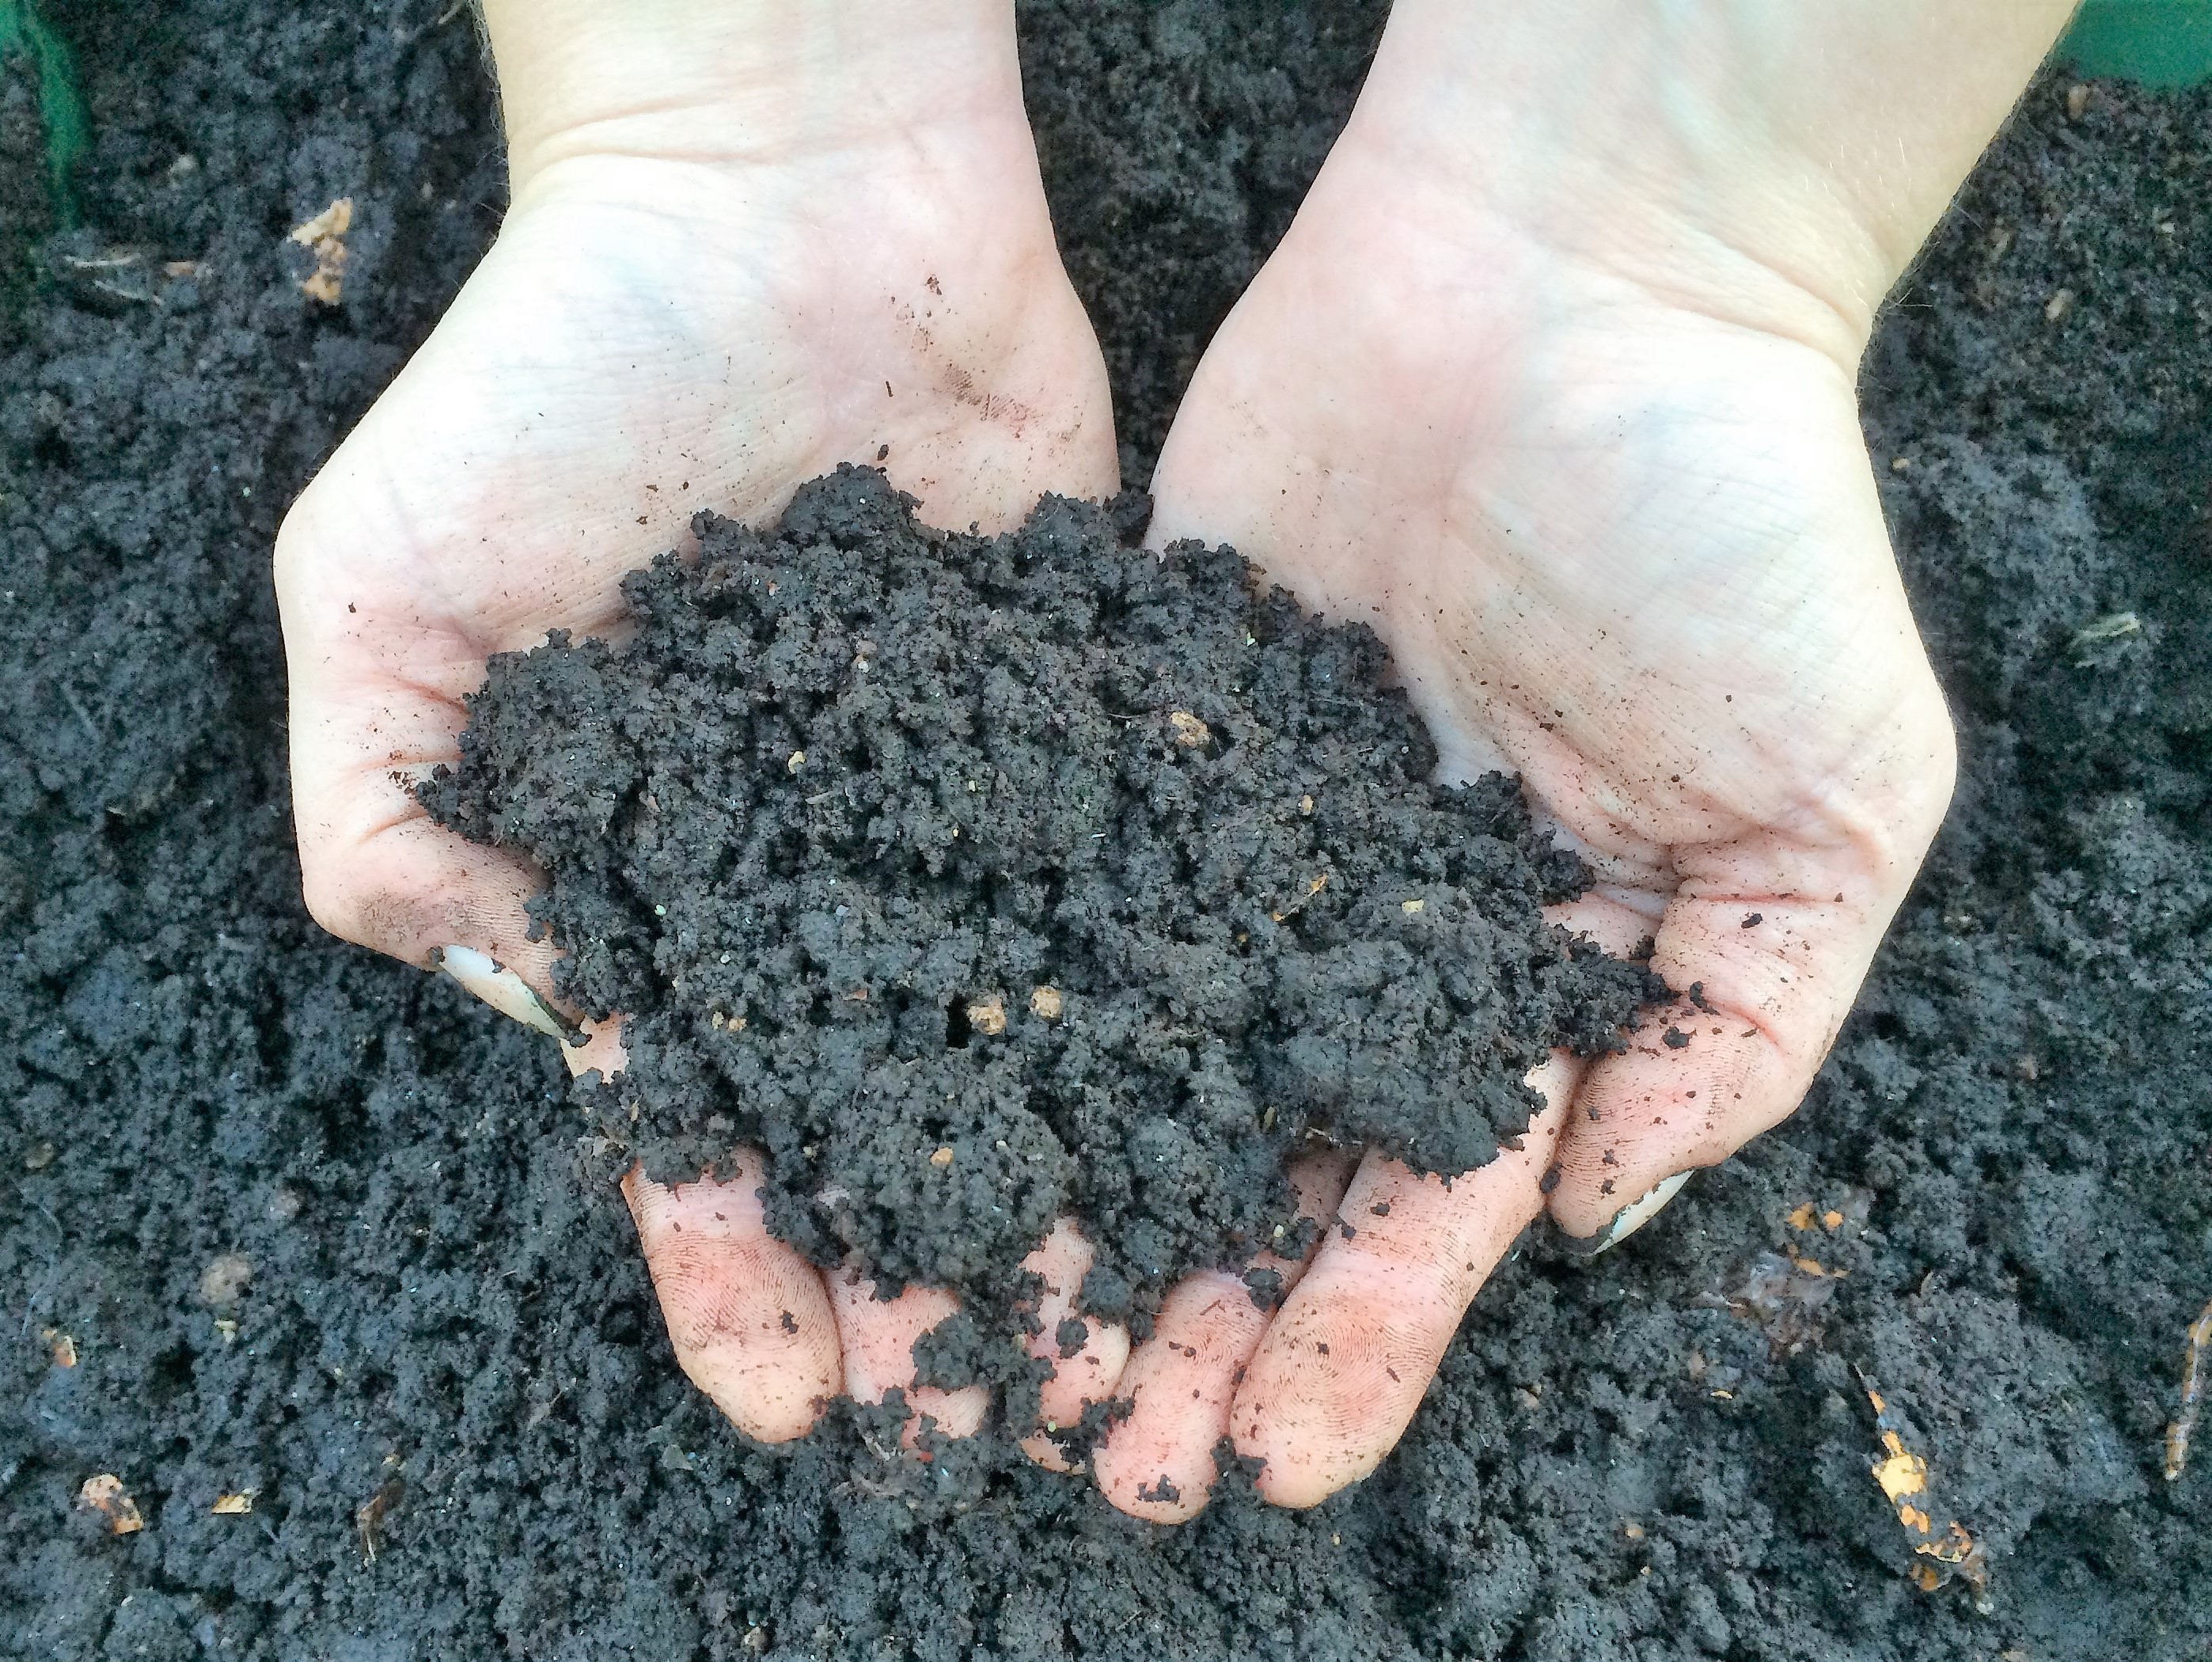
Vermicomposting is an eco-friendly method for recycling organic waste, improving soil fertility, and boosting plant health. Photo by UF/IFAS.
In a world increasingly focused on sustainability, vermicomposting has quietly emerged as a simple, eco-friendly method to reduce waste and enhance garden soil health. This natural process involves specialized earthworms that convert kitchen and garden waste into nutrient-rich vermicompost, often dubbed “black gold.”
Beyond the environmental benefits, vermicomposting brings tangible advantages to your garden. When integrated into your garden soil, vermicompost enhances soil structure, improving water retention and reducing soil compaction. Moreover, it serves as a slow-release fertilizer, converting nutrients into readily available forms for plant roots. Vermicompost also enriches your soil ecosystem by introducing beneficial microorganisms that help suppress soil-borne pathogens, fostering a healthy environment for your garden and landscape plants.
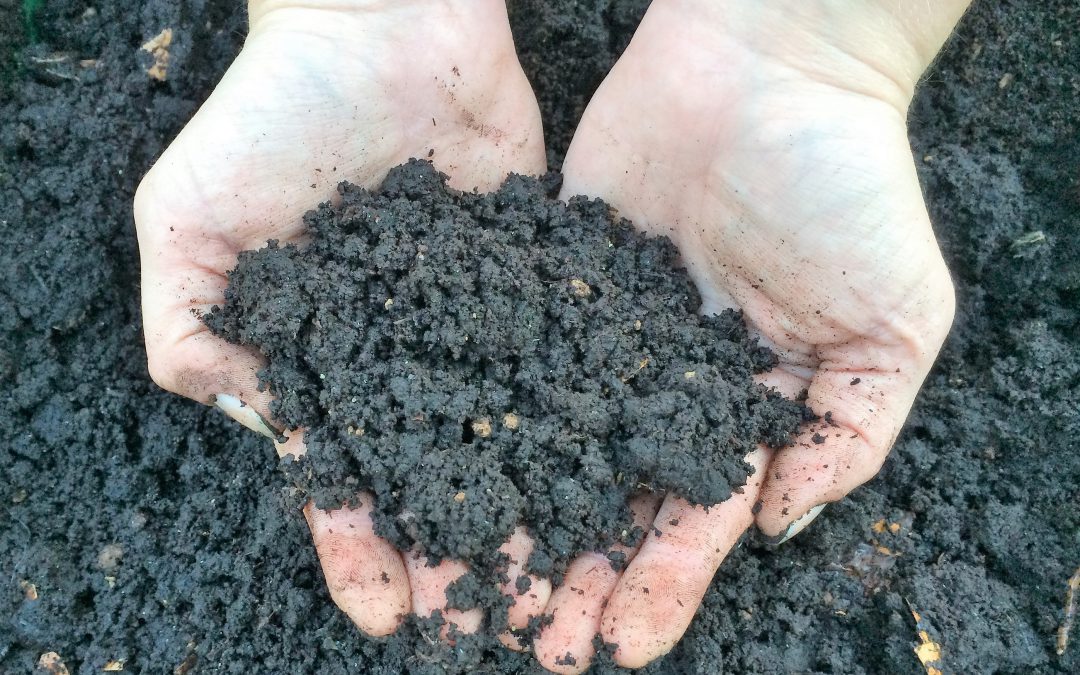
Finished vermicompost has a crumbly, earthy texture that enhances soil structure, improving its water retention and aeration properties for healthier, more resilient plants. Photo by UF/IFAS.
Below is a summary of the components needed to successfully vermicompost at home.
Worm Bin: Choose a dark-colored, breathable bin that is no deeper than 20 inches. The size of your bin should align with the amount of food waste you produce weekly. As a general guideline, you’ll need approximately 1 sq. ft. of surface area for every pound of weekly food waste. If you’re building a vertical system, consider using three 10-gallon bins, which work well for this purpose.
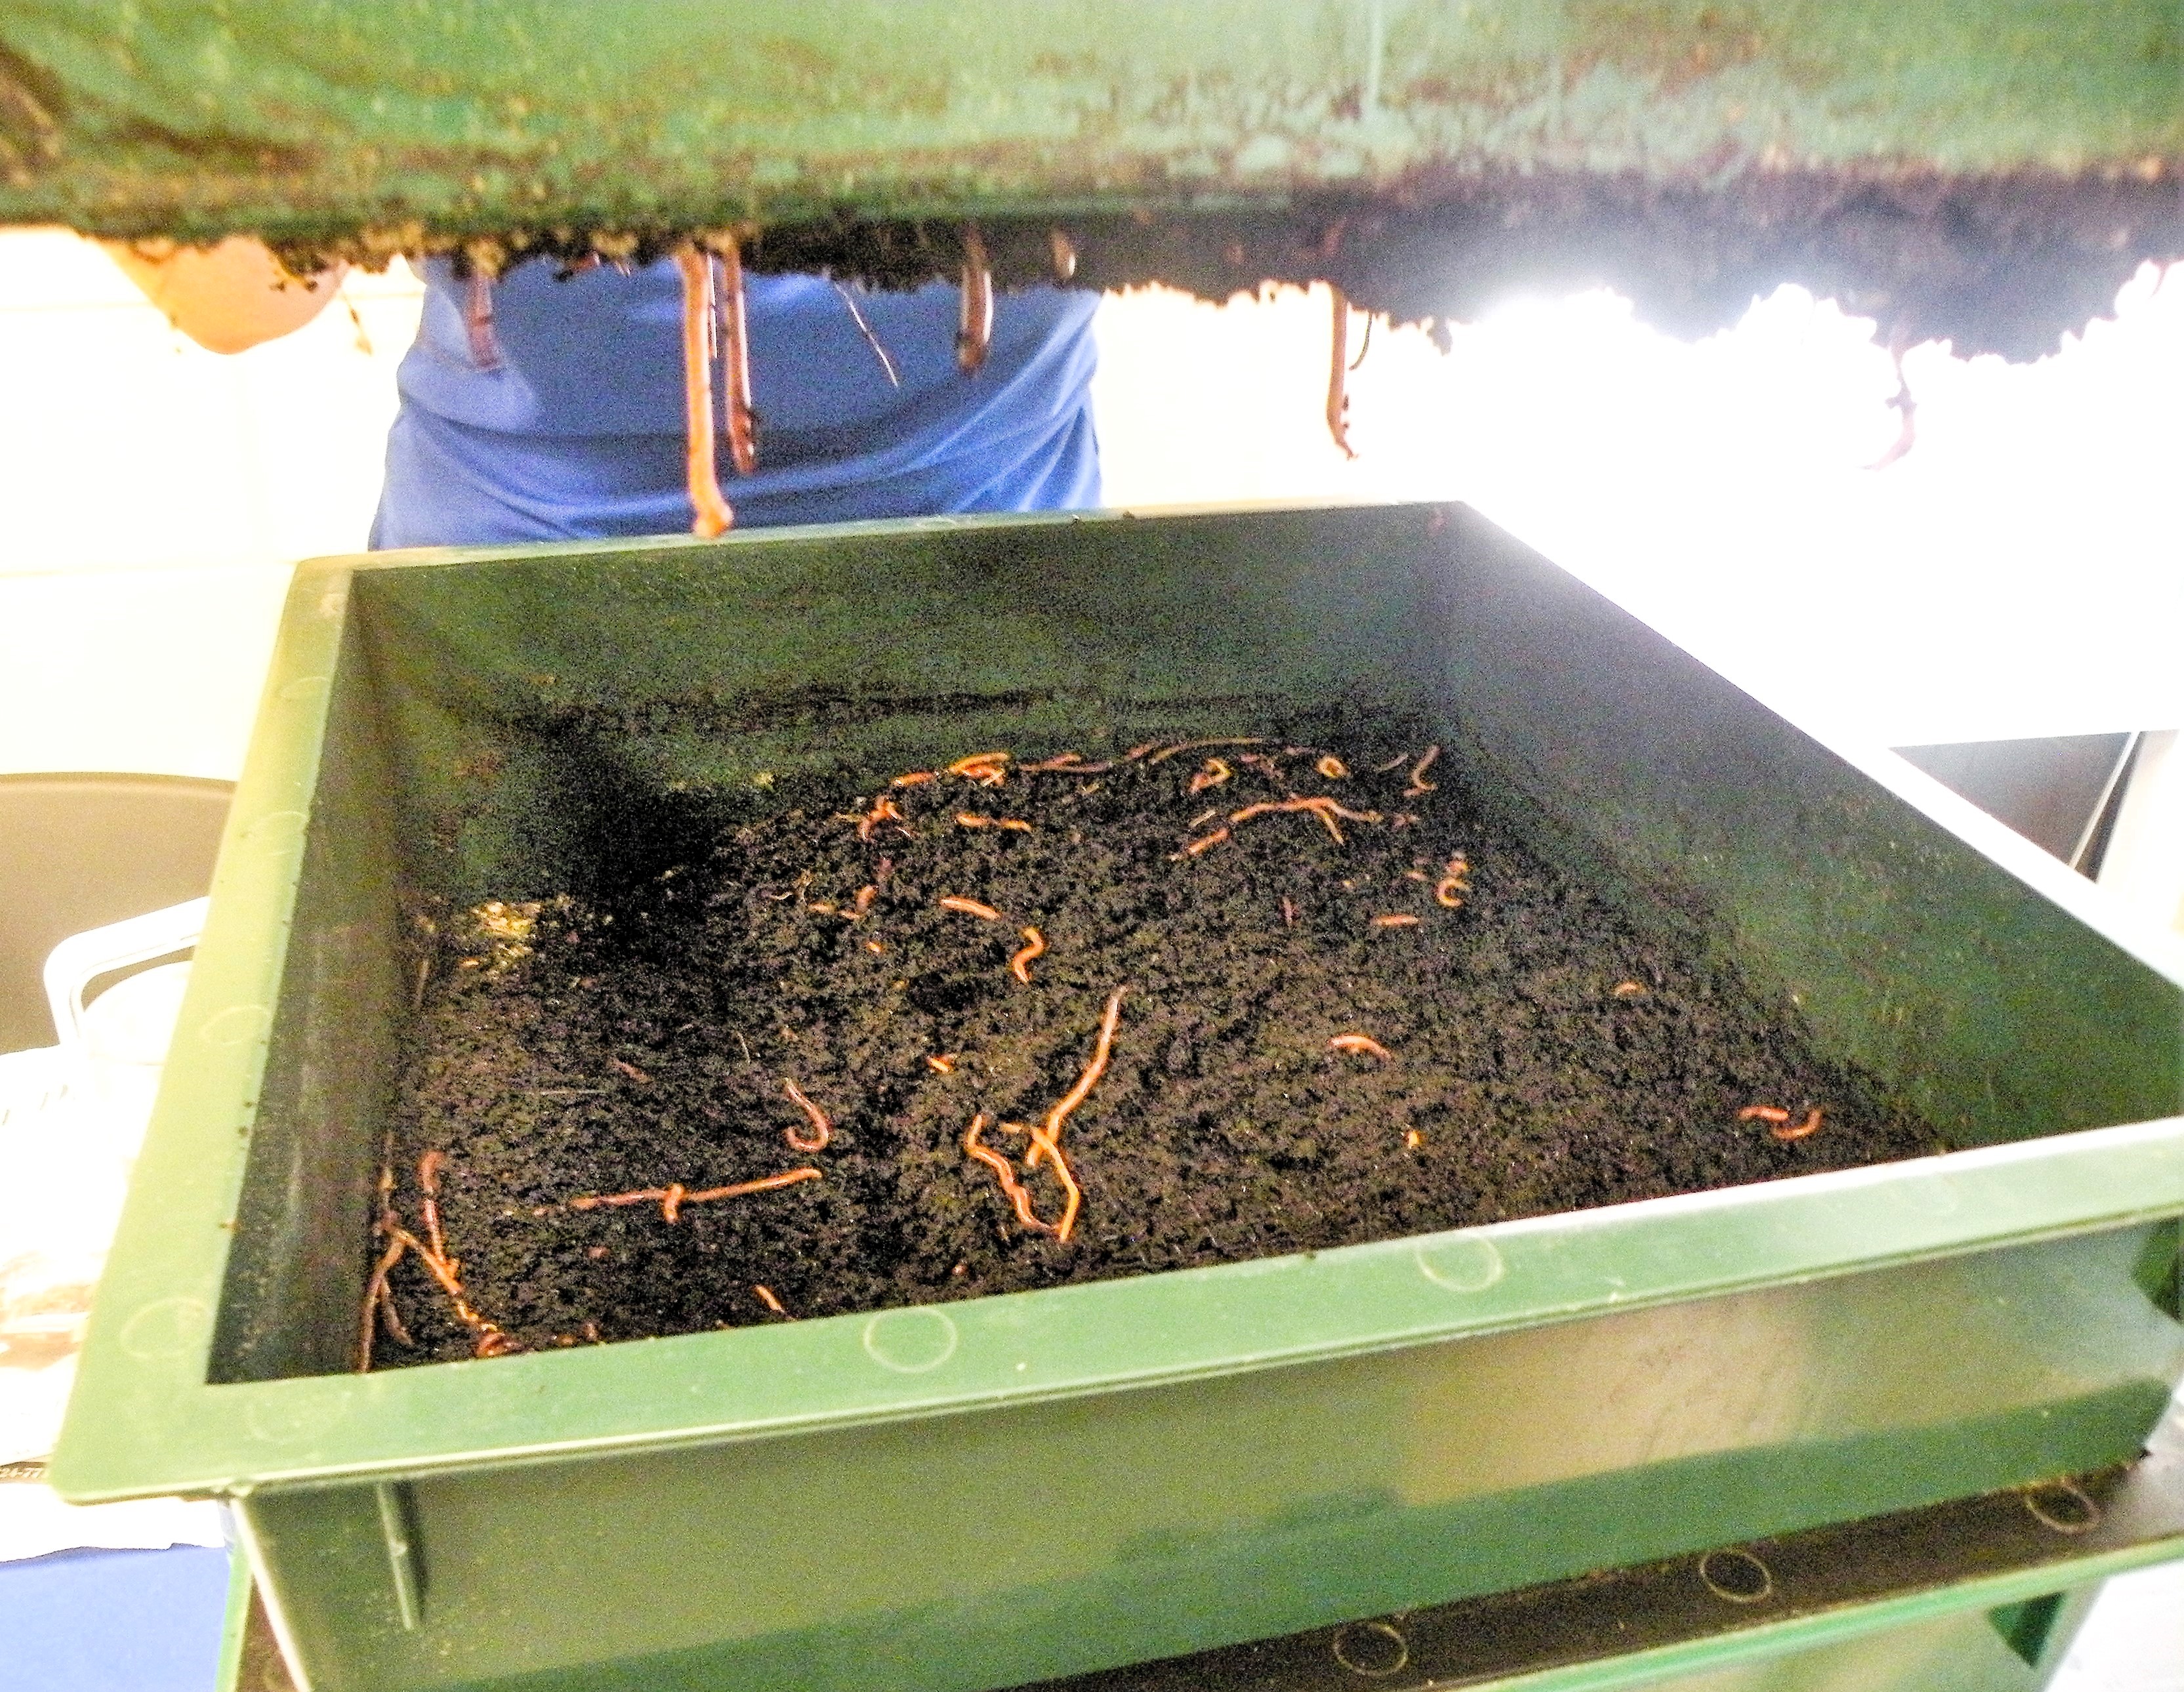
Worms: You’ll need approximately 1 lb. of Eisenia fetida worm species, which equates to about 1,000 worms, for every 1 sq. ft. of surface area in your bin.
Bedding: Choose moistened carbon-rich organic materials such as newspaper strips with plant-based ink, leaf litter, shredded corrugated cardboard, or coir for bedding. Fill the bin about one-third full of bedding or create a layer no thicker than 6 inches.
Grit: To aid in digestion, mix in one handful of regular soil when you’re starting a new bin.
Food: Worms have a taste for chopped vegetable scraps and most fruits, as well as coffee filters/grounds, leaves, crushed eggshells, and plain grains. As your worm population becomes established, begin feeding them slowly and ensure the food is being consumed before adding more. Smaller food pieces, with greater surface area, are easier for worms to digest. In general, 1 lb. of worms can consume roughly 1/3 lb. of food per day once they are well-established.
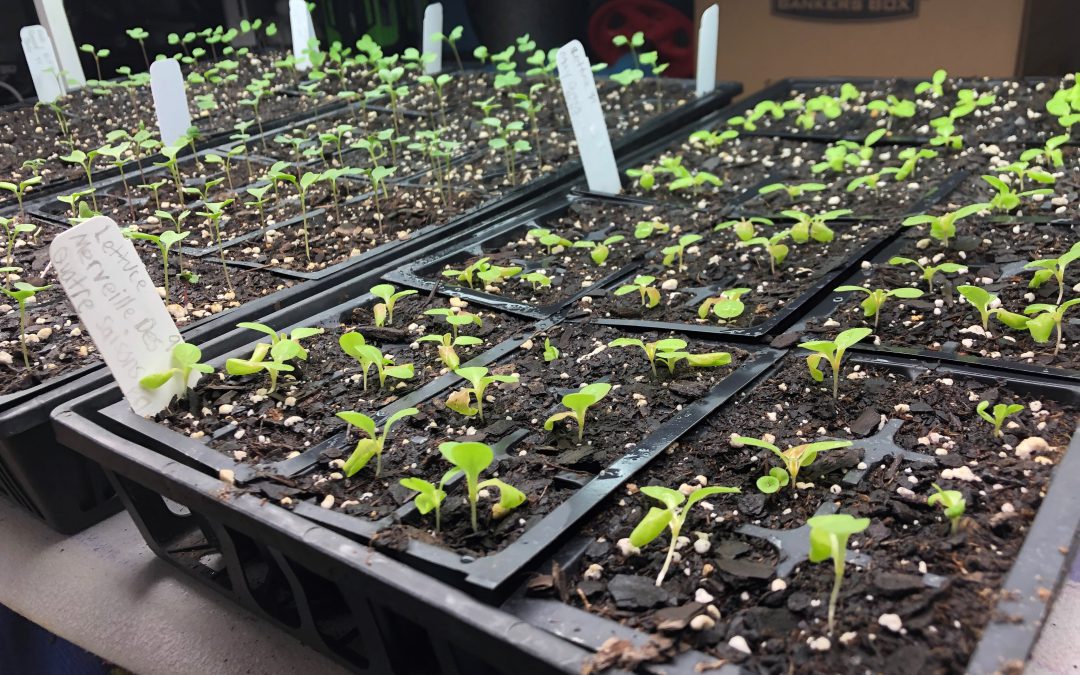
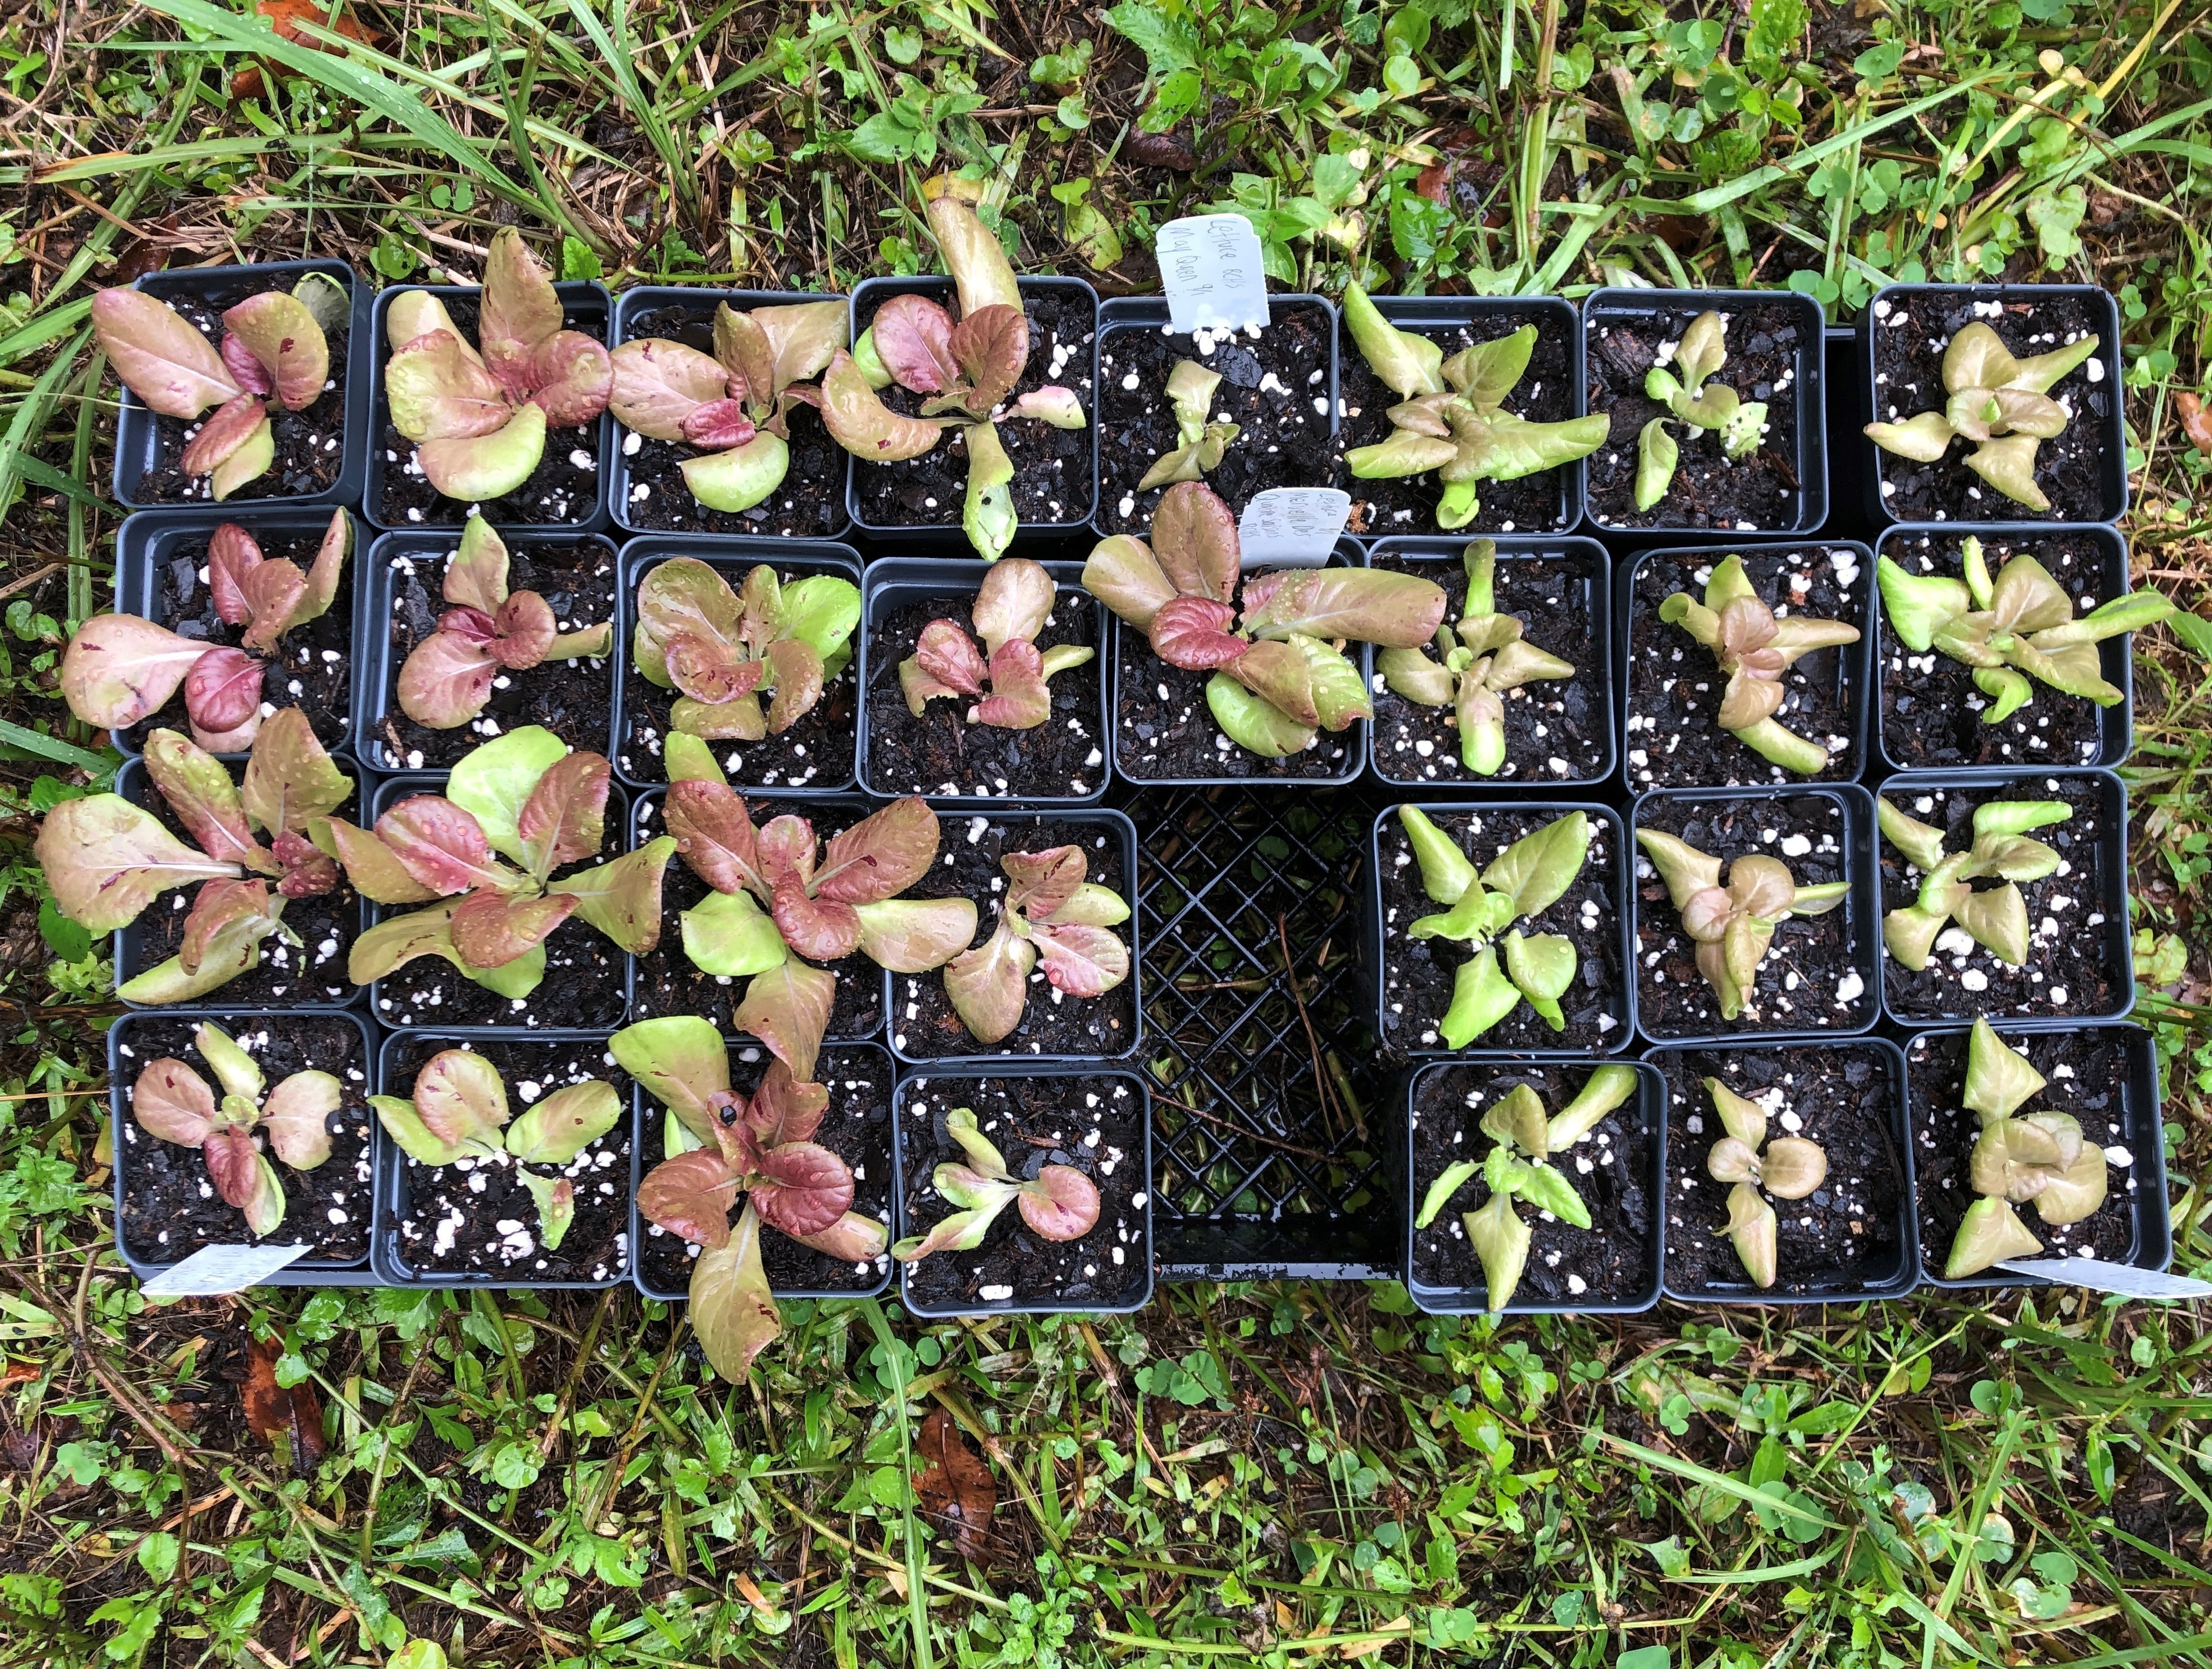
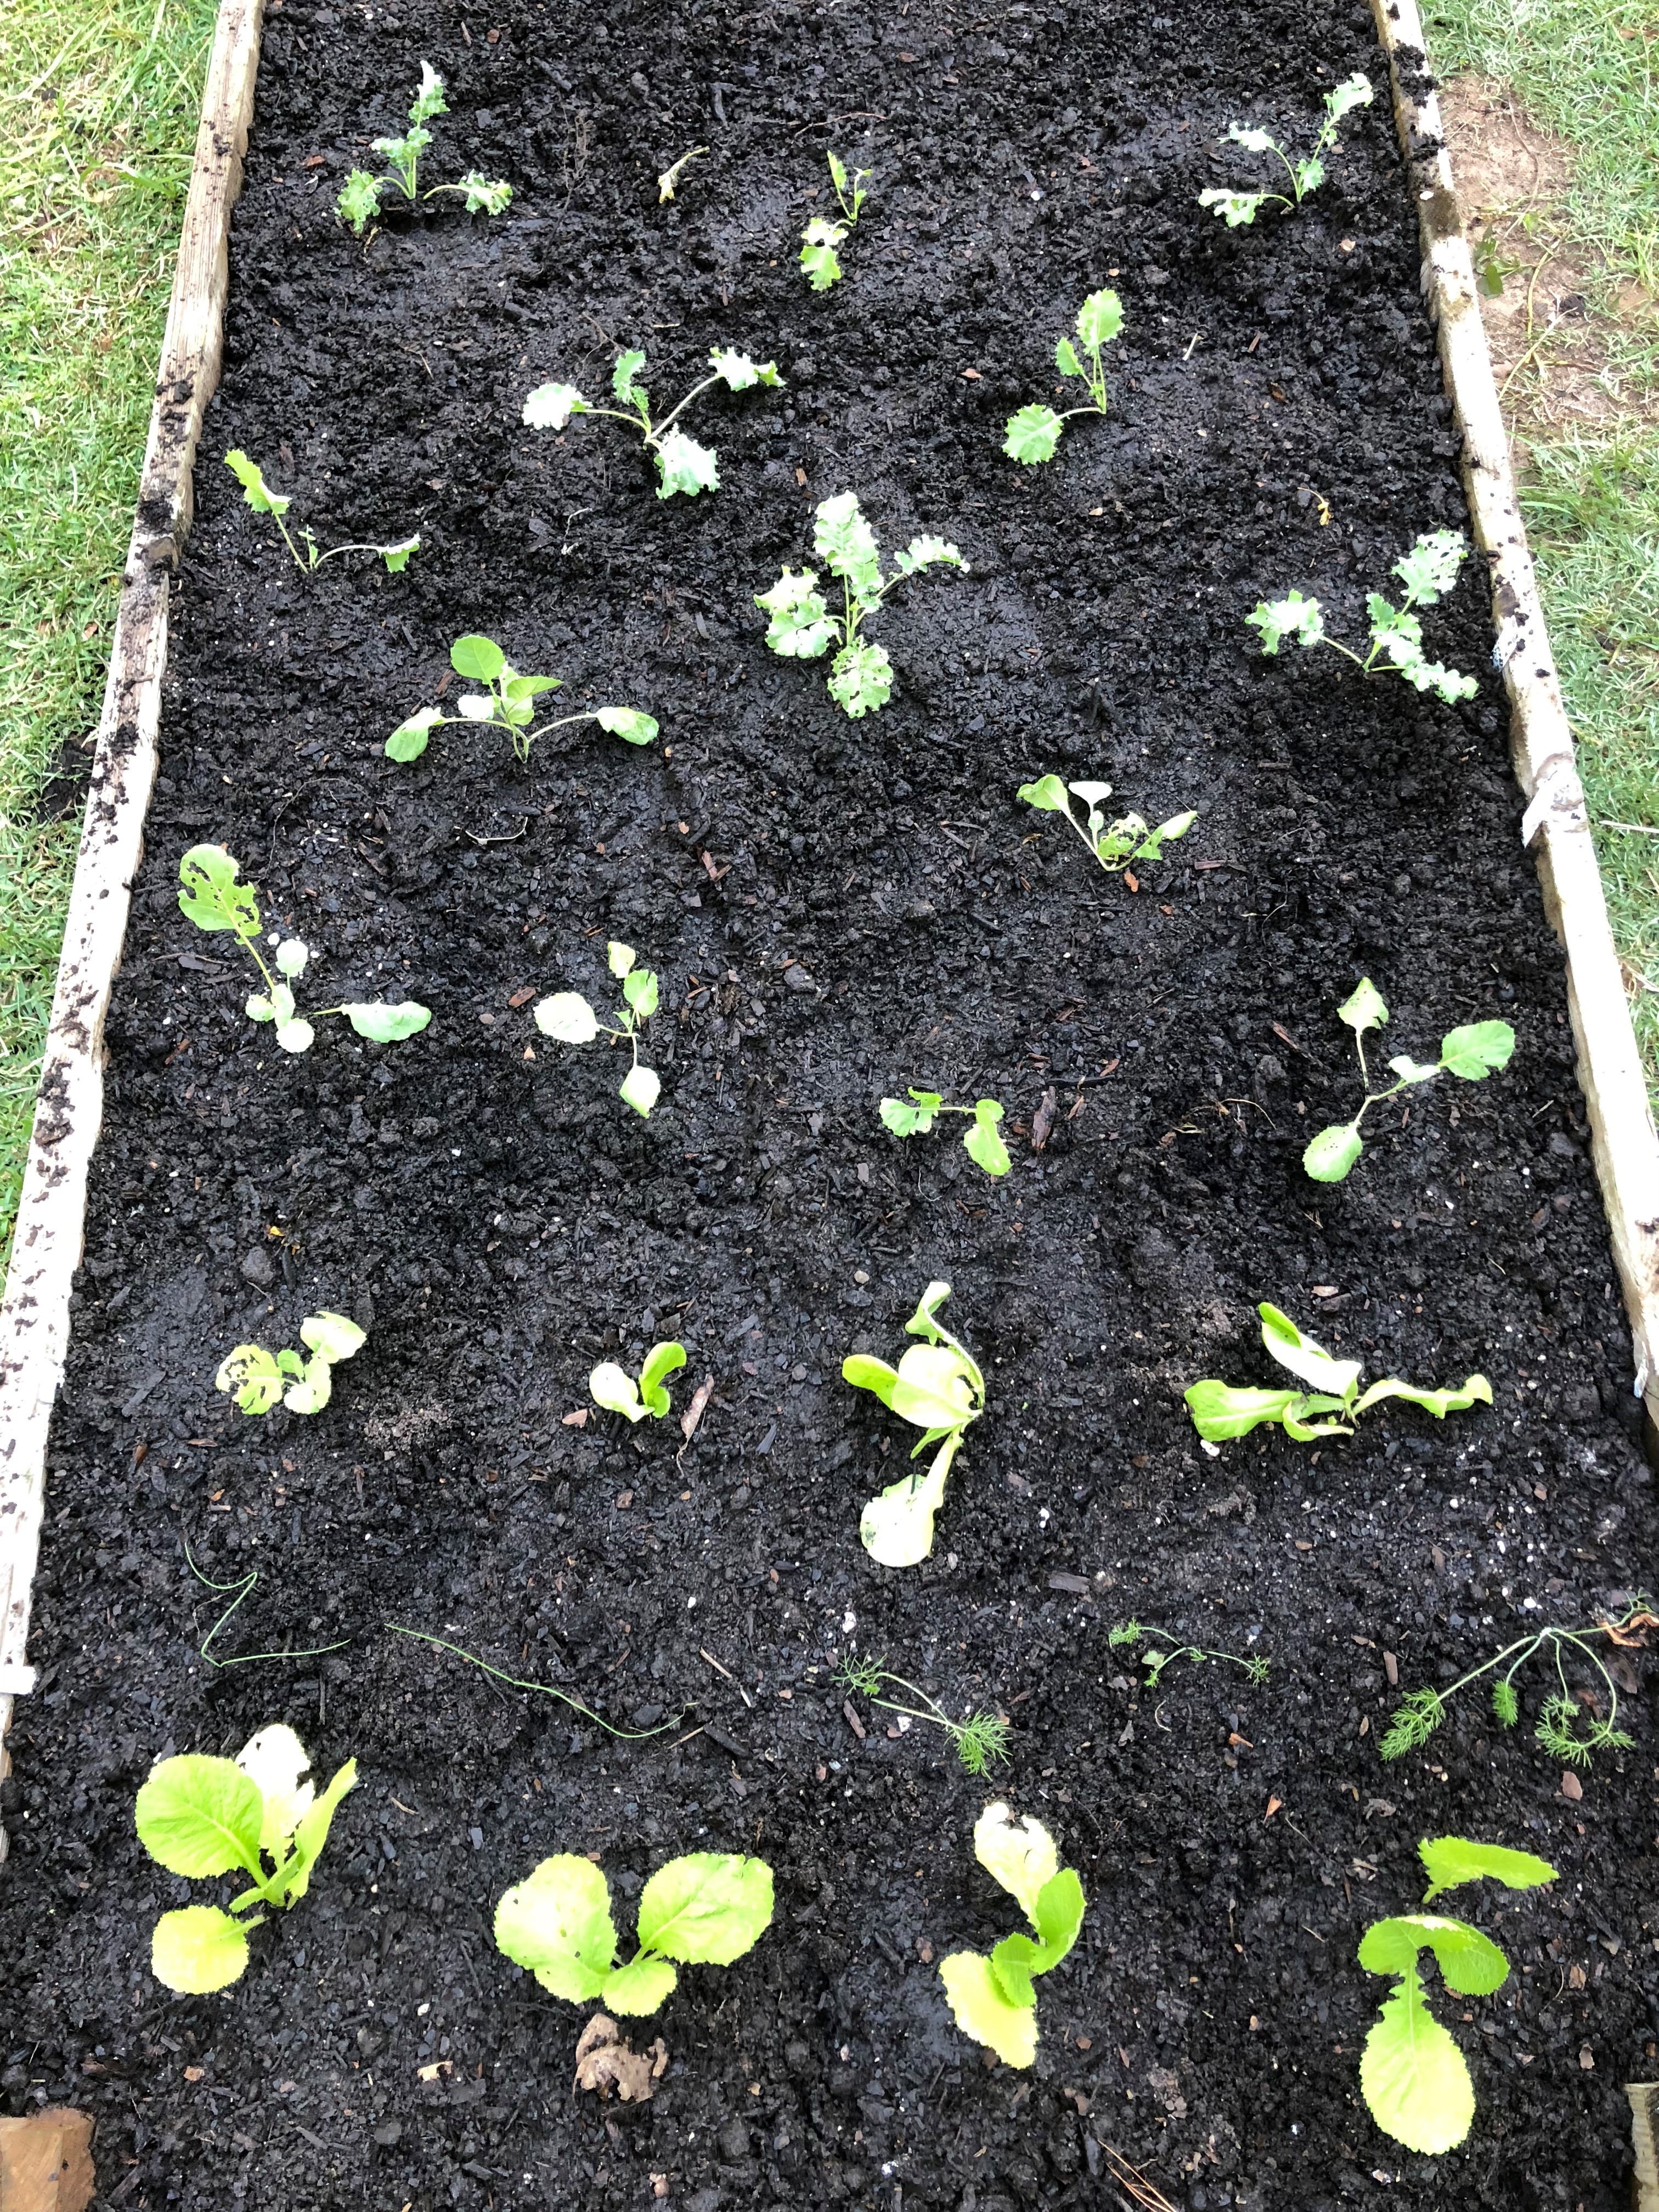
Start your fall garden seeds in containers to give them a healthy head start. Photo by Molly Jameson.Seed veggies into starter cell flats using a fine-textured growing medium designed to support seed germination and early seedling development. Photo by Molly Jameson.
Step-by-Step Instructions: Indirect Seeding Fall Veggies
While summer gardens offer a variety of intriguing fruiting crops, I have a special fondness for gardening during the fall season. This preference stems from the reduced pest pressure, decreased need for watering, fewer weeds, and the more favorable cooler temperatures for completing gardening tasks. Although it generally offers a more straightforward gardening experience, achieving success with your fall garden still hinges on applying the right techniques, with one crucial aspect being the care for seeds and young seedlings.
Indirect seeding allows you to nurture your seedlings before they establish their permanent residence in your garden, ensuring their growth into robust, mature plants. Below, you’ll discover a step-by-step guide to indirect seeding and planting for fall vegetables. By following these instructions, you’ll get a head start in cultivating a thriving fall garden that will delight your taste buds.
Seeding into Starter Cells:
While many crops can be started indirectly in starter cells, it’s important to note that root vegetables (such as beets, carrots, radishes, turnips, etc.), peas, and beans are exceptions due to their delicate root systems, which do not transplant well. These particular crops thrive when directly seeded into the garden. Conversely, fall crops that typically benefit from indoor seeding include Brussels sprouts, broccoli, cabbage, cauliflower, cilantro, kale, lettuce, mustards, parsley, spinach, and Swiss chard. For Florida planting dates, transplant ability, and other detailed planting information, see Table 1 in the UF/IFAS publication Florida Vegetable Gardening Guide.
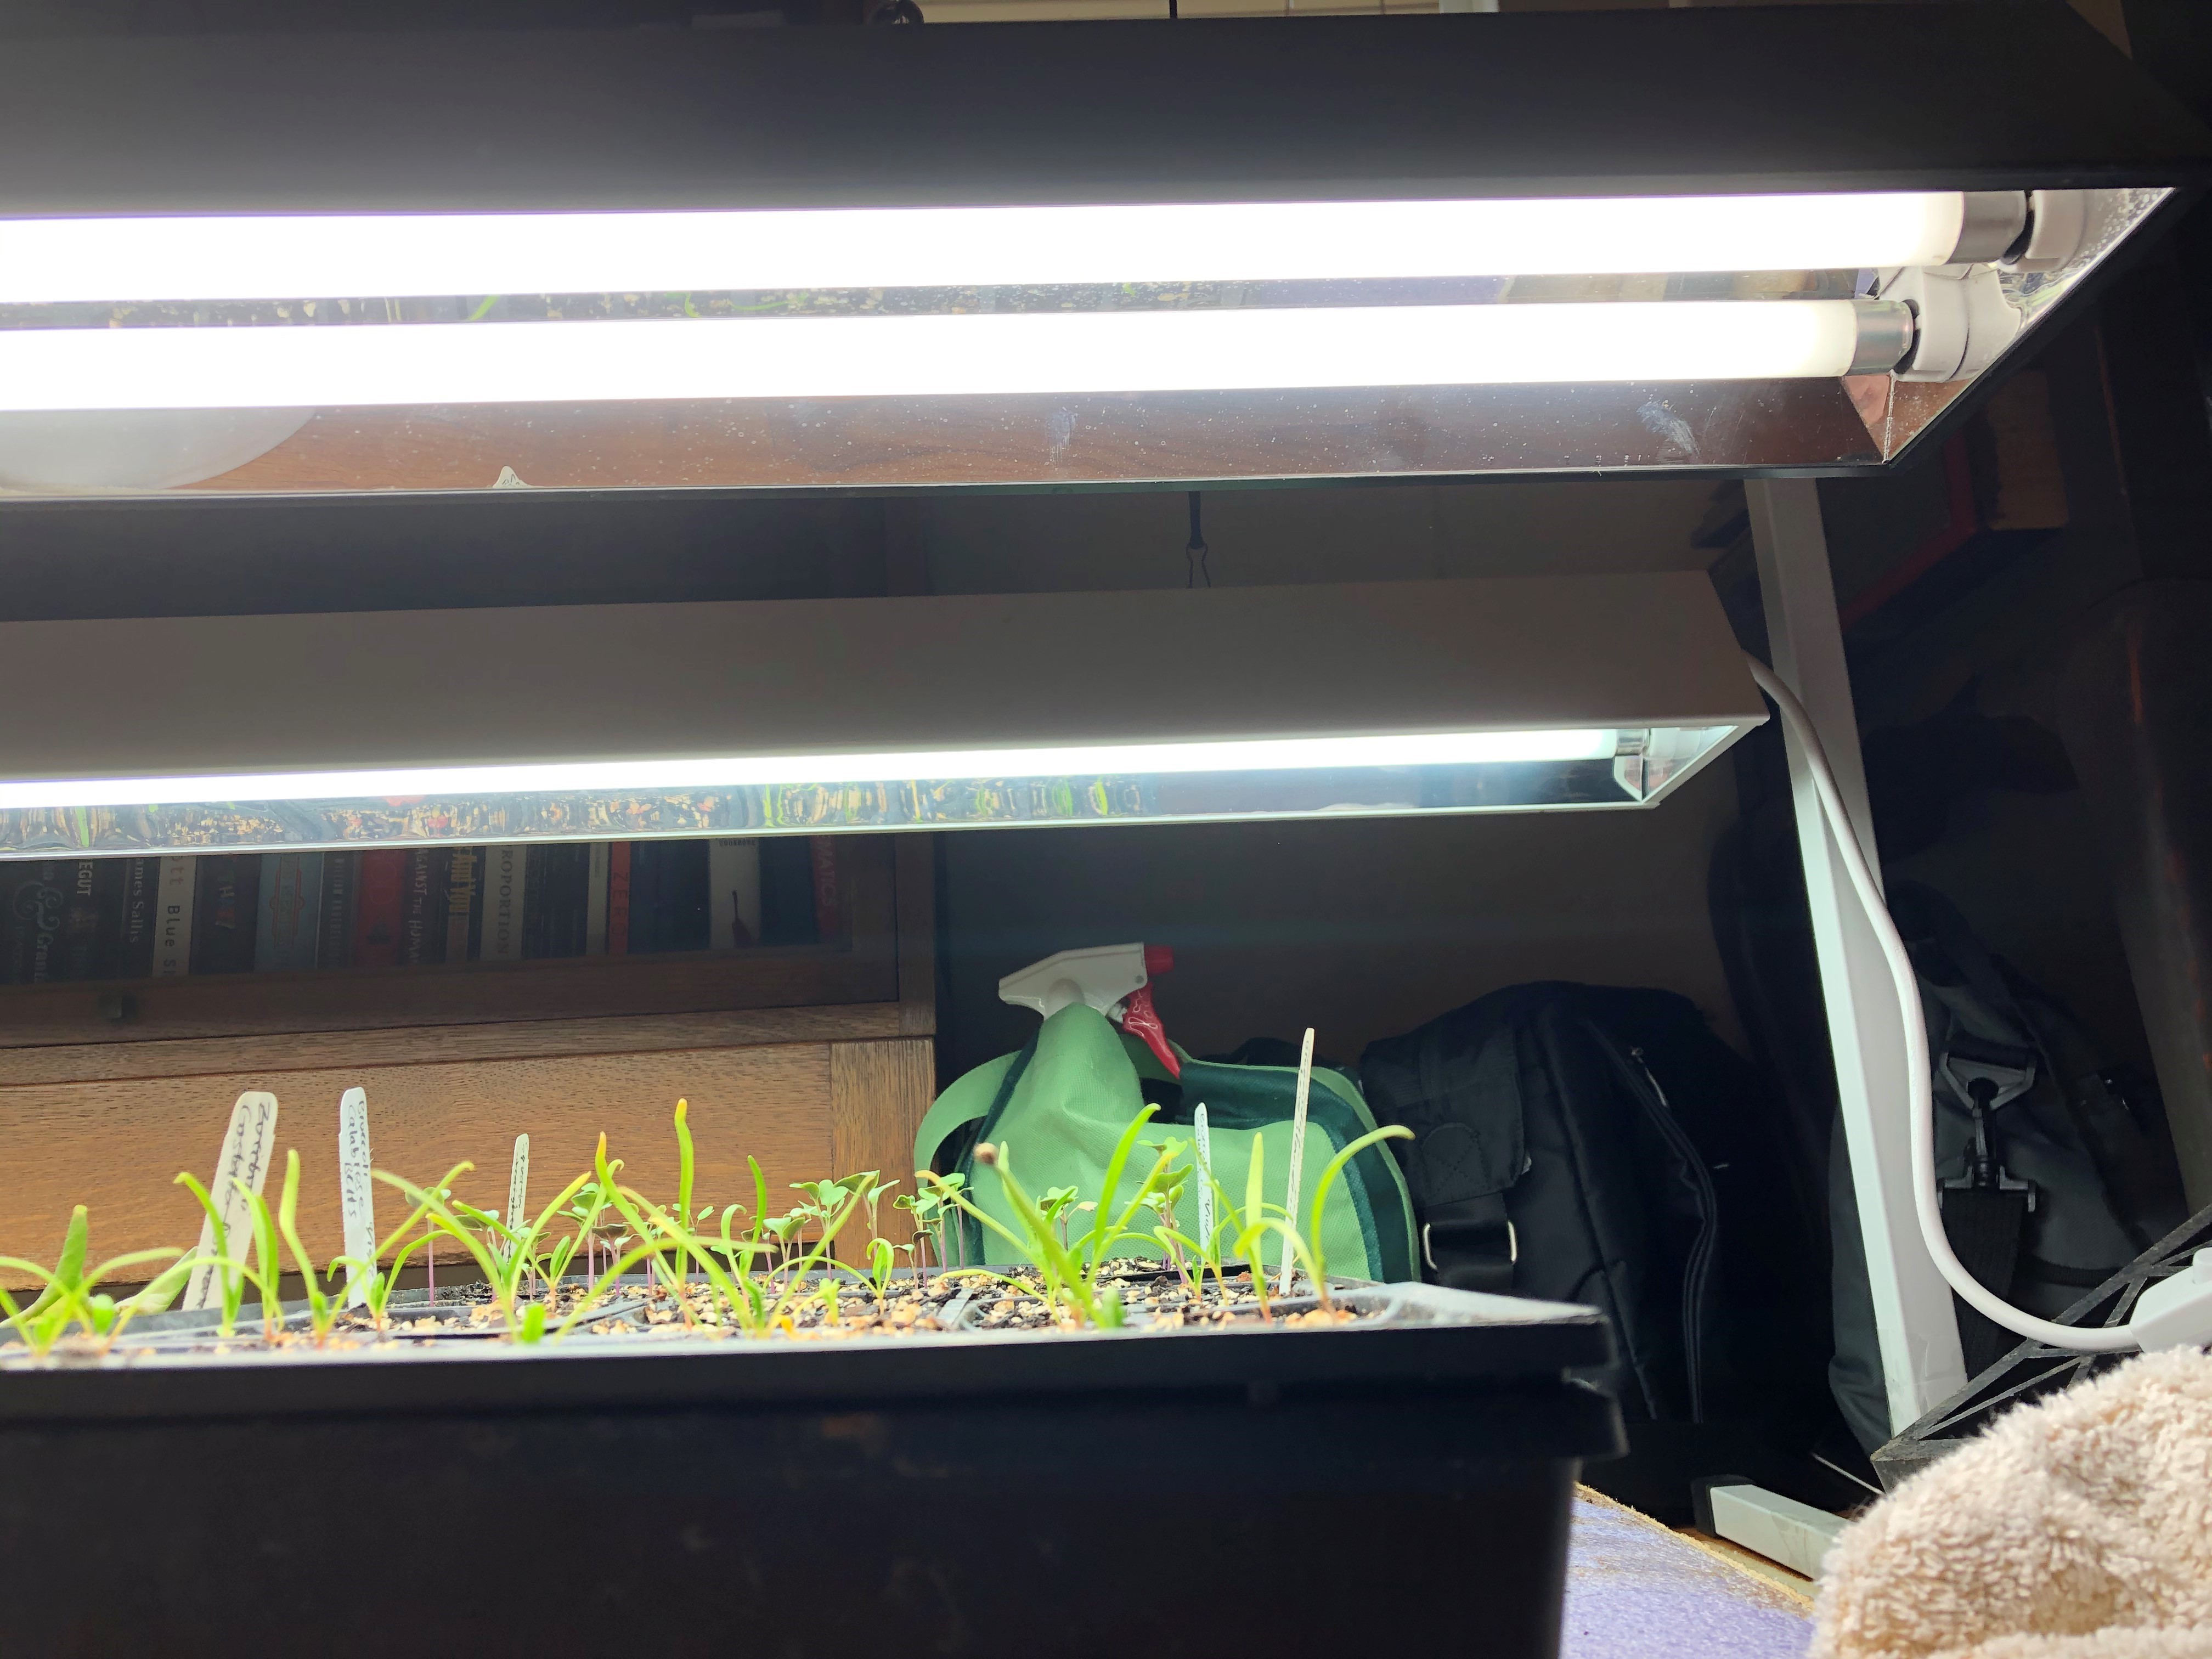
If you use fluorescent grow lights, maintain 2 to 4 inches between the top of the seedlings’ canopy and the fluorescent bulbs. Photo by Molly Jameson.
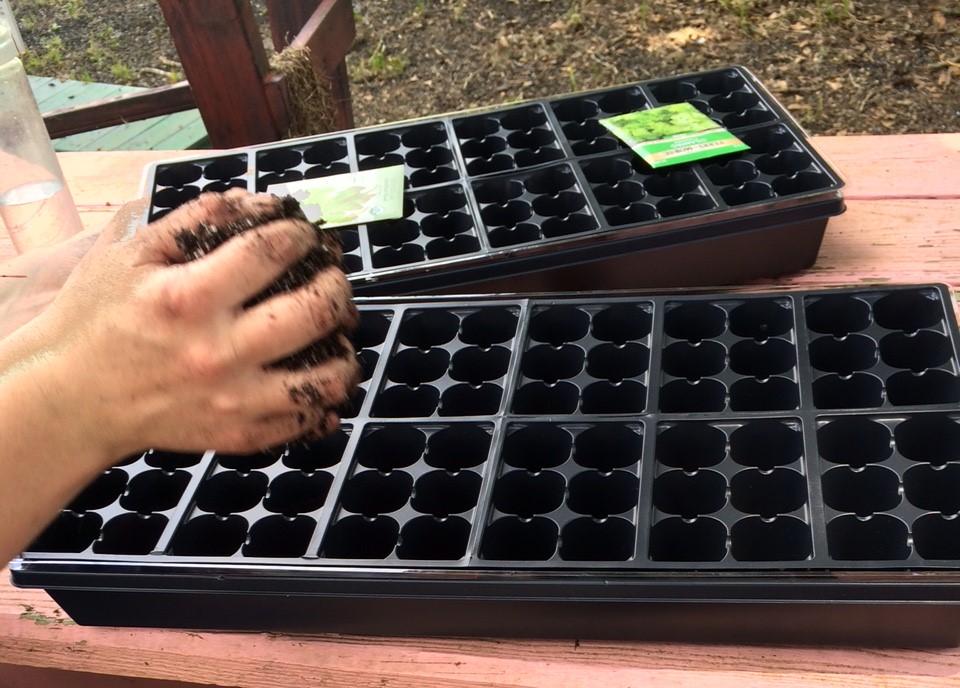
Begin by moistening a starting mix, which is any fine-textured growing medium designed to support seed germination and early seedling development. Fill seed starter cells with this prepared mix, ensuring a level, flat surface.
Create shallow indentations (2-3 times the diameter of the seed) in the starting mix in each starter cell using your finger and place 1-2 seeds in each cell. (Remove all but the strongest seedling if multiple seeds germinate in the same cell.)
To ensure even coverage and prevent clumping, lightly sprinkle dry starting mix over the seeds.
Label with the crop name, variety, and date.
Mist the surface with water from a spray bottle, pump sprayer, or a hose spray nozzle. Maintain moisture levels, avoiding waterlogging.
Before the seeds germinate, keep them in a temperature-controlled room or out of direct sunlight. Germination time varies, but typically takes 5 to 14 days, depending on the crop, environmental conditions, and seed quality. (For fall varieties, germination is best between 50-80°F.)
As soon as seedlings emerge, move them to a sunny location with more than 6 hours of direct sunlight. If temperatures exceed 85°F, provide afternoon shade to protect them from intense heat. If using full spectrum grow lights indoors (such as a T5 fluorescent light fixture), place seed starter cells at a distance of 2 to 4 inches between the top of the seedlings’ canopy and the fluorescent bulbs for 14 to 16 hours a day.
Continue to keep the starting mix moist but not waterlogged.
Up-potting into Larger Pots:
Up-potting refers to transplanting a young plant or seedling from a smaller container or pot into a larger one. While up-potting most seedling crop varieties into larger pots before transplanting into the garden is beneficial, you can skip this step and directly transplant seedlings from the starter cells into the garden if conditions are favorable (maximum air temperature is less than 86°F). However, keep in mind that young seedlings may be more vulnerable to rain, wind, insects, and animal disturbances. Up-potting into larger pots with nutrient-rich potting mix offers better protection and more time for root development.
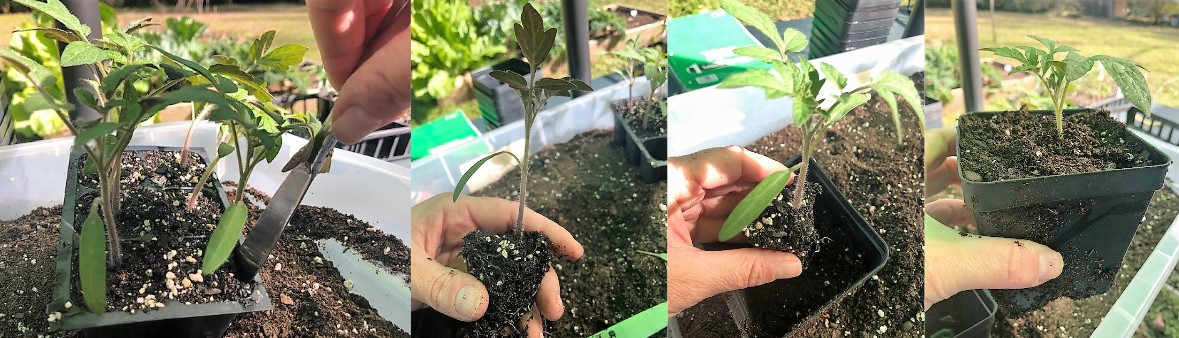
When up-potting, carefully extract each seedling using a butter knife to avoid disturbing the roots. Photos by Molly Jameson.
When seedlings develop “true leaves” (the second set of leaves after the initial seedling leaves), it is time to transfer them into larger pots (2″-4″ wide).
To start, fill the larger pots about halfway with pre-moistened, nutrient-rich potting mix designed for vegetables, ensuring good drainage.
After thoroughly watering the small seedlings, carefully extract each from the starter cells, using a butter knife for gentle and precise removal to avoid disturbing the roots.
Being careful not to disturb the roots, place each seedling gently into their halfway-filled pot and add more potting mix until the seedling is secure, standing upright, with all roots covered. There should only be one seedling per pot.
Keep seedlings in a sunny location with more than 6 hours of direct sunlight. If temperatures exceed 85°F, provide afternoon shade to protect them from intense heat. If using full spectrum grow lights indoors (such as a T5 fluorescent light fixture), place seedlings at a distance of 4 to 6 inches between the top of the seedlings’ canopy and the fluorescent bulbs for 12 to 14 hours a day.
Continue to keep the potting soil moist but not waterlogged.
Transplanting into the Garden:
When the time is right, dig a small hole in the garden bed and place the plant, along with the potting mix, in the hole, following the crop-specific spacing requirements. Photo by Molly Jameson.
Once the plants have developed strong roots and reach about the height of their pots, they are ready for transplantation into the garden.
If the plants have been indoors under grow lights, allow them to “harden-off” by gradually exposing them to outdoor conditions for a week. This helps them adjust to wind, direct sunlight, and varying temperatures.
Prepare the garden bed with compost and other soil amendments.
Water the plants thoroughly before carefully removing them from their pots, ensuring minimal disruption to the roots.
For each plant, dig a small hole in the garden bed and place the plant, along with the potting mix, in the hole, following the crop-specific spacing requirements (see Table 1 in the UF/IFAS publication Florida Vegetable Gardening Guide).
Cover the roots and maintain consistent soil moisture, avoiding waterlogging.
In summary, mastering the art of indirect seeding and planting fall vegetables can greatly improve your chance of a successful harvest. From carefully sowing your seeds in starter cells to up-potting and ultimately transplanting into your garden, each step is a vital component of the process. So, roll up your sleeves, get your hands dirty, and witness your fall garden flourish. Happy gardening!
Fall is just around the corner, and that means it is time to start kale and collards, root vegetables, and salad greens. Photo by Rachel Mathes.
In spite of this record-breaking hot summer, it might be surprising to realize that we are just a month away from the onset of fall. As the sun-soaked dog days gradually relinquish their hold to the inviting coolness of autumn, the allure of the new season comes into view.
If your thoughts are already conjuring images of vibrant leaves and the anticipation of robust greens and earthy root vegetables in your garden, we extend an invitation to explore our newly revamped edition of the North Florida Vegetable Gardening Guide.
We’ve transformed the guide from a static PDF into a user-friendly website, making it easier than ever for you to tap into its wealth of gardening insights. Crafted by the adept hands of the UF/IFAS Leon County Extension, this guide serves as an invaluable resource catering to both seasoned horticulturists and aspiring gardeners.
Dive into an array of articles, planting schedules, images, and informative UF/IFAS EDIS publications – all thoughtfully designed to address your gardening questions. From the basics of getting started to the finer points of site selection, pest management, fostering biodiversity, soil testing, composting, harnessing cover crops, and mastering irrigation techniques – the North Florida Vegetable Gardening Guide website has it all covered.
For those who prefer a tactile experience, physical copies are available upon request at the UF/IFAS Leon County Extension Office, located at 615 Paul Russell Rd., Tallahassee, FL 32301. A quick call ahead will help you ensure availability.
We’re also excited to announce our upcoming Fall 2023 Backyard Gardening Series, set for September 6 and 13, from 6:00 to 8:00 p.m. on both evenings at the Leon County Extension Office (615 Paul Russell Road).
If you’re eager to explore the art of fall gardening in depth, this series will cover topics like site selection, soil enrichment, effective fall planting techniques, and more, including a hands-on planting activity.
Individual tickets are available for $10 per person if pre-paid online or $15 in cash or check at the door. For families of three to four, pre-paid online family tickets are $20 per family or $30 in cash or check at the door. This registration fee includes both evenings on September 6 and 13 and light refreshments will be provided.
For any further inquiries, please contact Molly Jameson at mjameson@ufl.edu or via phone at 850-606-5200.
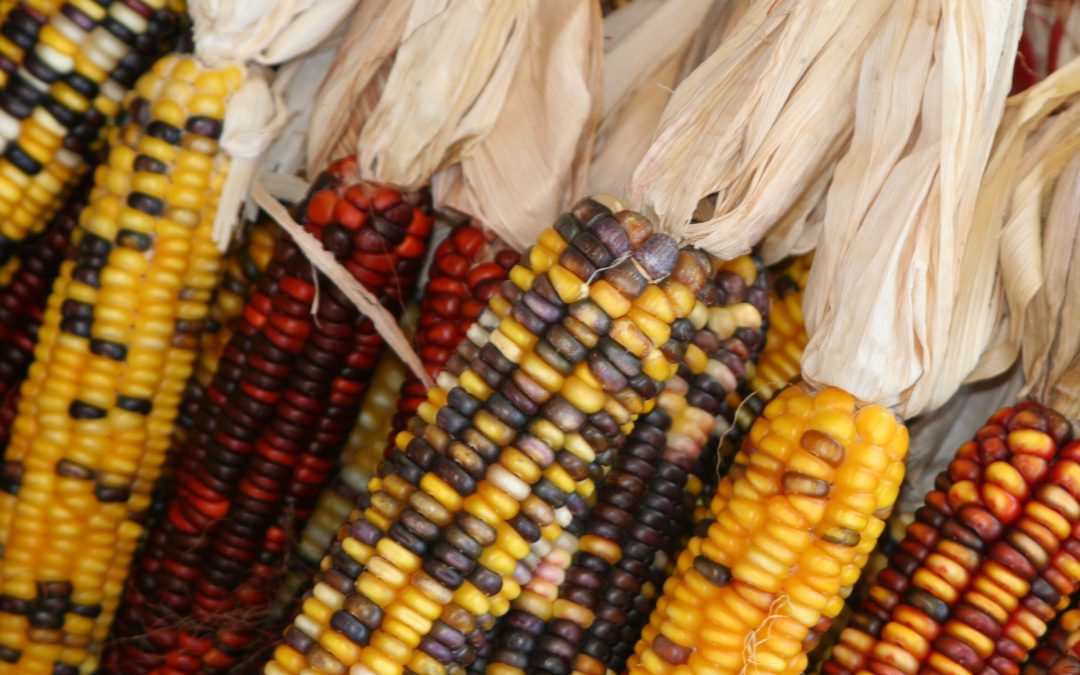
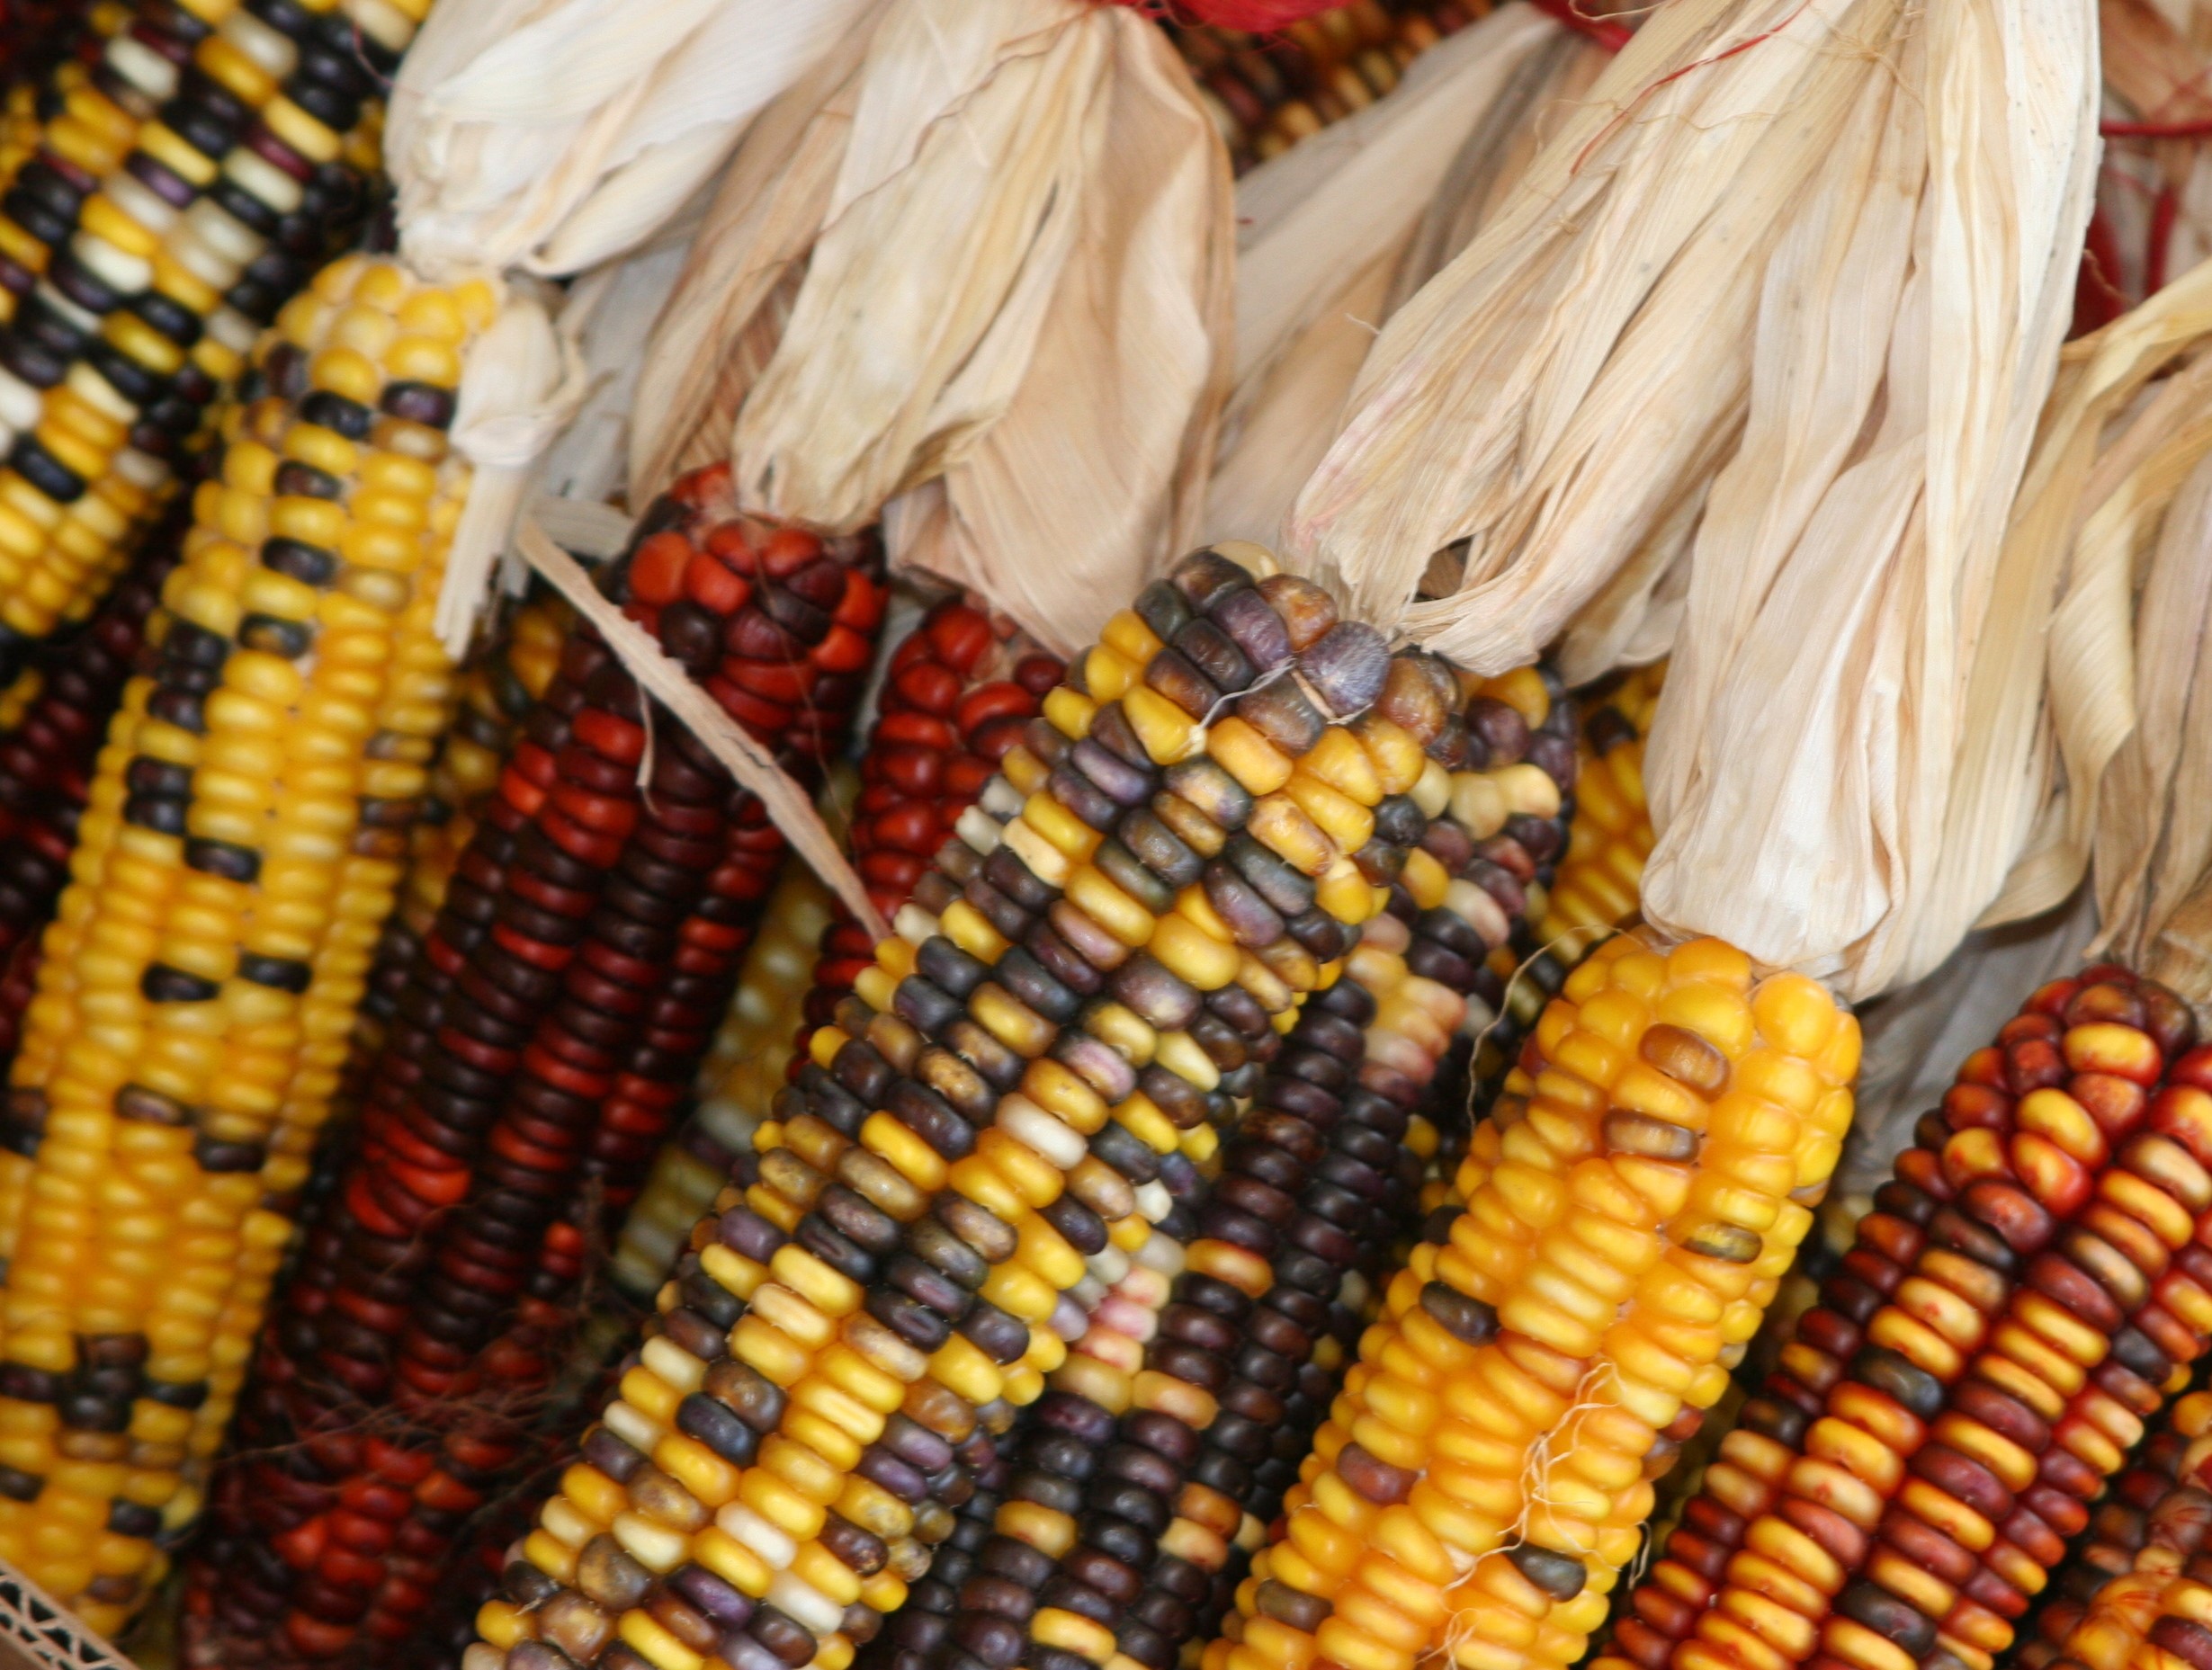
Flint corn is one of the oldest varieties of corn and has been cultivated by Native American tribes for thousands of years. Photo by Gerald Holmes, Strawberry Center, Cal Poly San Luis Obispo, Bugwood.org.
The Ancient Journey of Native Vegetables
The Americas are not only a land of beautiful landscapes and diverse cultures but also the birthplace of a remarkable array of indigenous plant species. Native vegetables have played a significant role in shaping the culinary traditions, cultural practices, and biodiversity of the region. To truly appreciate their significance, it is important to delve into their fascinating history and observe how they have evolved over time.
The cultivation of vegetables in North America, Central America, South America, and the Caribbean dates back thousands of years, with evidence of early farming practices emerging in Mesoamerica (central Mexico southward through Belize, Guatemala, El Salvador, Honduras, Nicaragua, and Costa Rica) around 9,000 BCE (Before Common Era), or about 11,000 years ago. Native peoples, including indigenous tribes, recognized the value of native plant species and skillfully cultivated them to meet their nutritional needs. Through trial and error, they learned to adapt and enhance the growth of these vegetables, setting the foundation for the crops we know today.
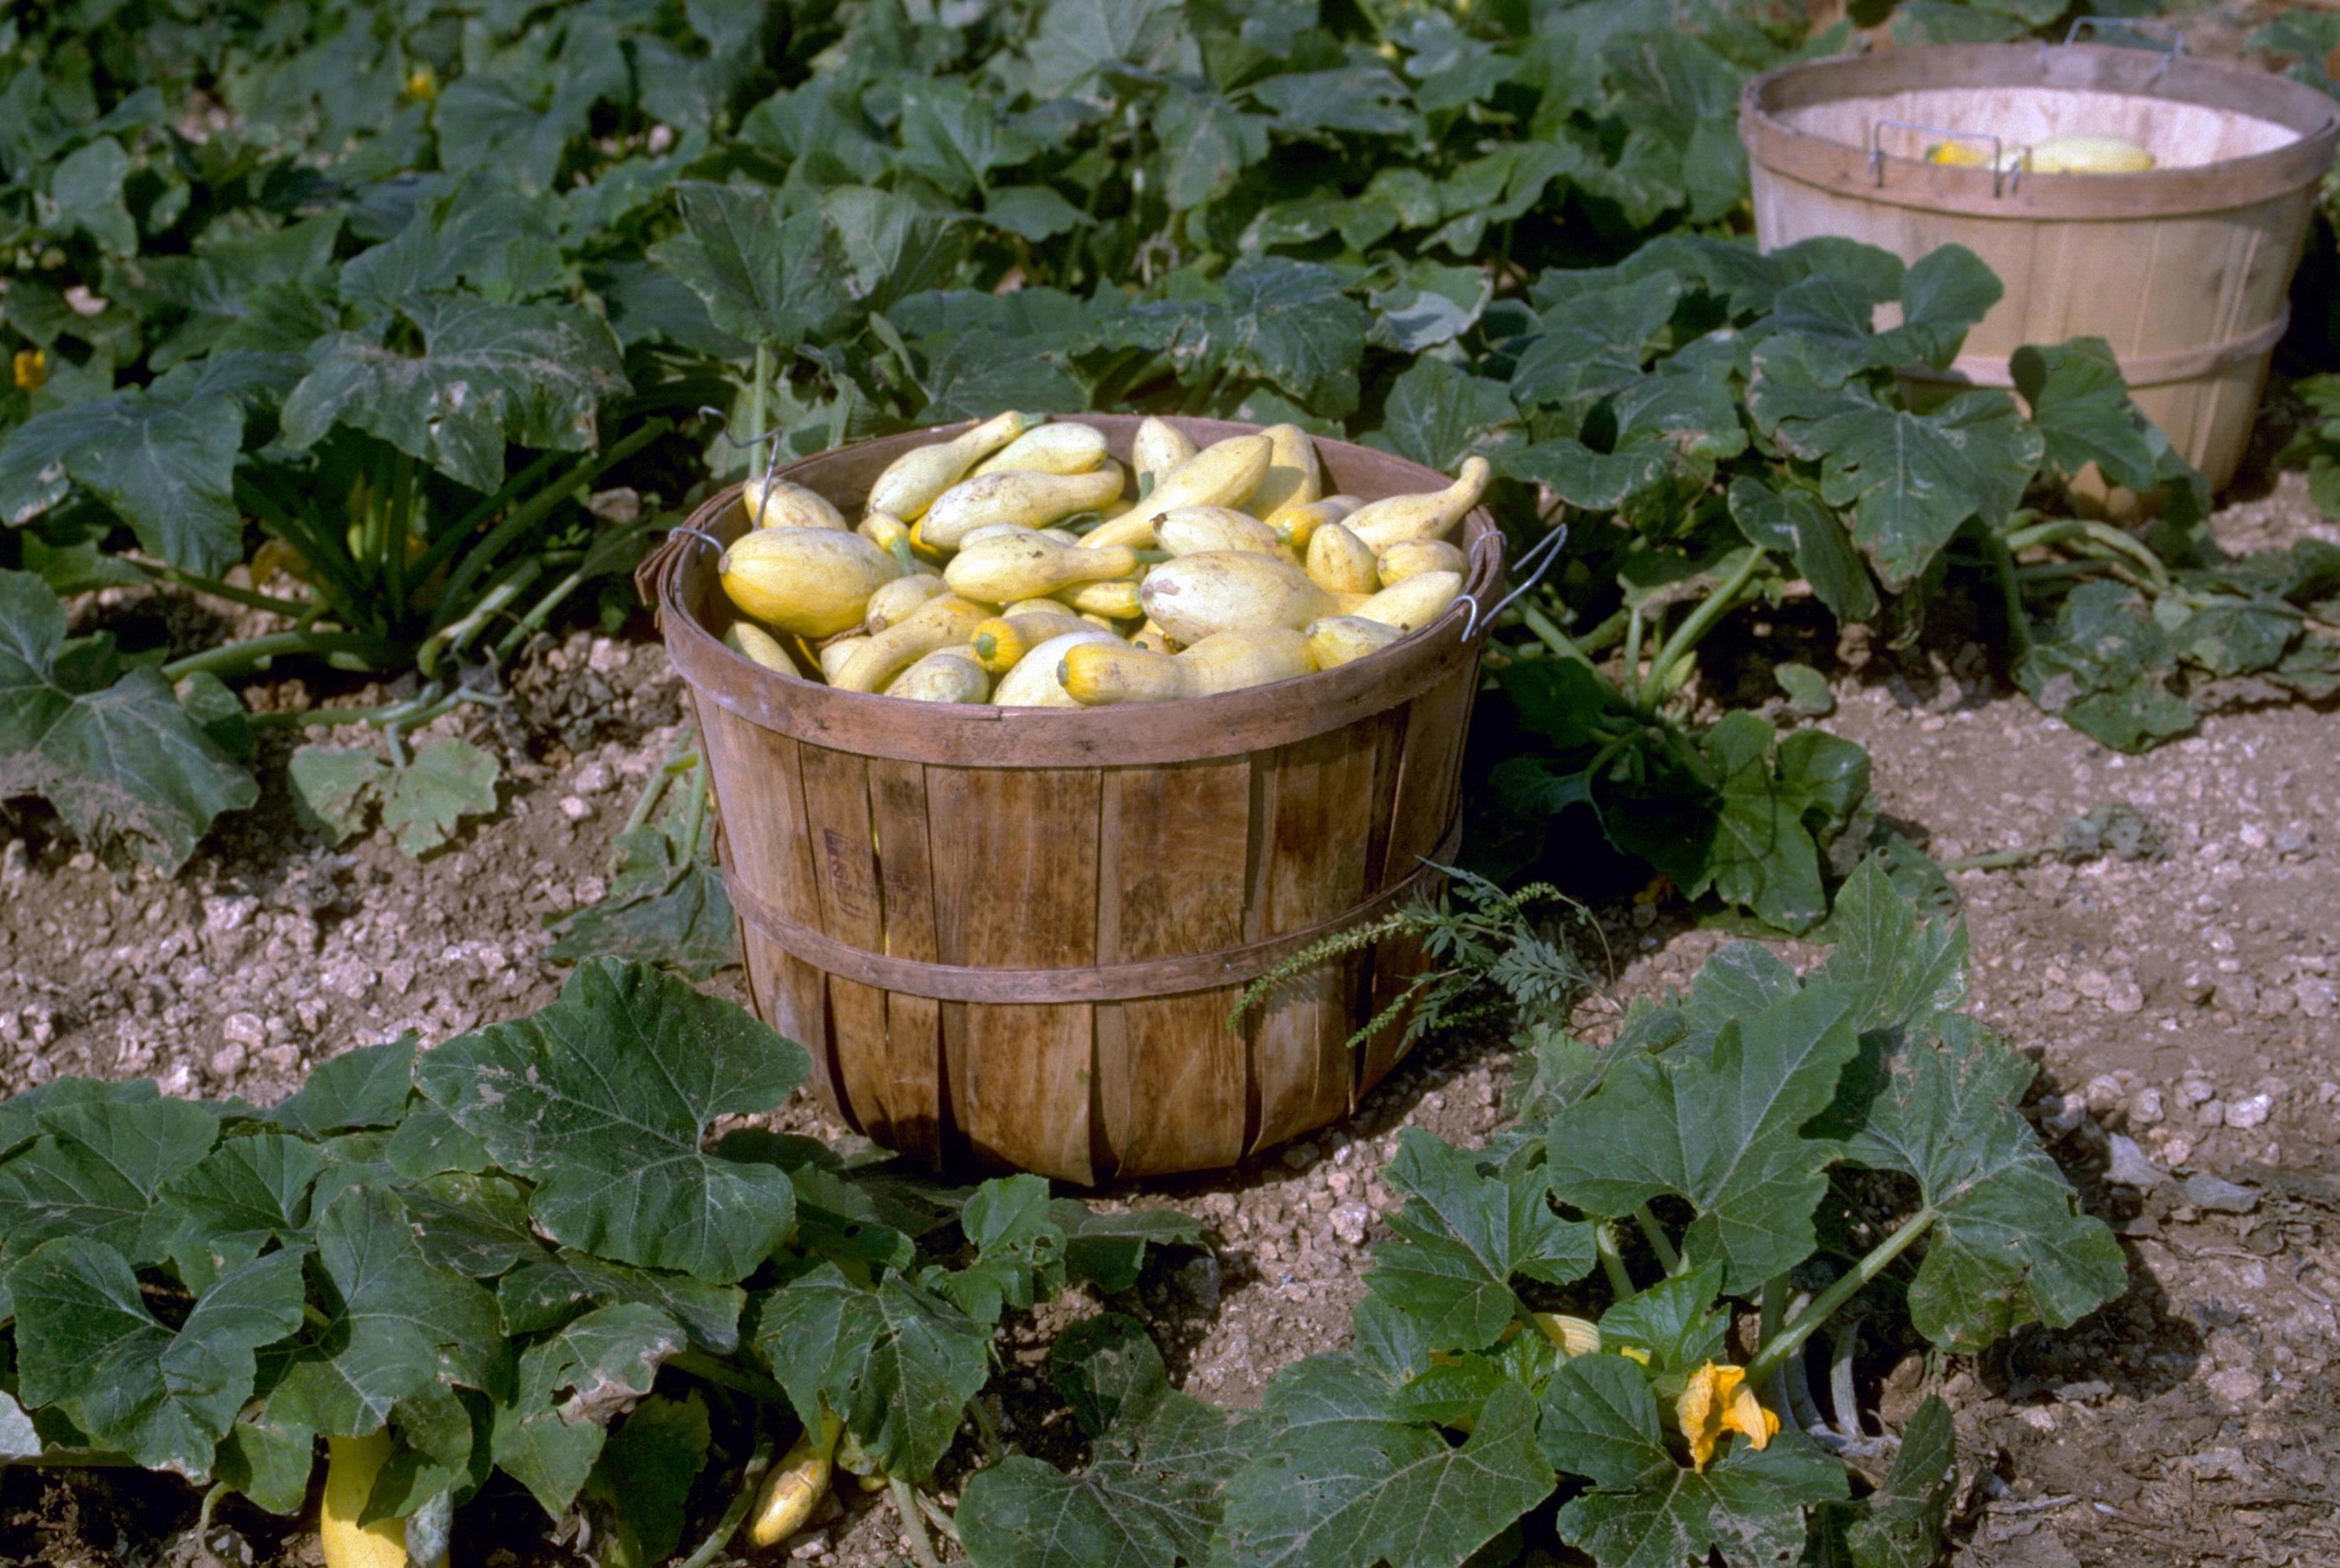
Squash has been an important agricultural crop for thousands of years. Photo by Howard F. Schwartz, Colorado State University, Bugwood.org.
Maize. Maize (Zea mays), or corn, holds a central place in the history of American agriculture. It is believed to have originated from a wild grass called teosinte, which had few small, hard kernels enclosed in a tough husk. It was much smaller than the corn we know today and was barely edible, tasting more like a raw dried potato, with only a few hard kernels per ear. Ancient societies in present-day Mexico began domesticating maize 9,000 to 10,000 years ago, selectively breeding it to produce a variety of colors, sizes, and textures. Maize quickly became a staple crop, providing sustenance and shaping the cultural and economic practices of many indigenous civilizations, such as the Mayans and the Aztecs. Over time, its cultivation gradually spread northward, reaching present-day United States and Canada.
Squash. Squash (Cucurbita spp.) holds a significant place in the ancient history of the Americas, with evidence of its domestication dating back approximately 8,000 to 10,000 years ago. Native peoples in various regions, including Mesoamerica and North America, recognized the value of the flesh and seeds of squash as versatile and nutritious food sources. Domestication involved selecting and cultivating wild squash varieties with desirable traits, leading to the development of different cultivated squash varieties such as acorn, delicata, butternut, and zucchini.
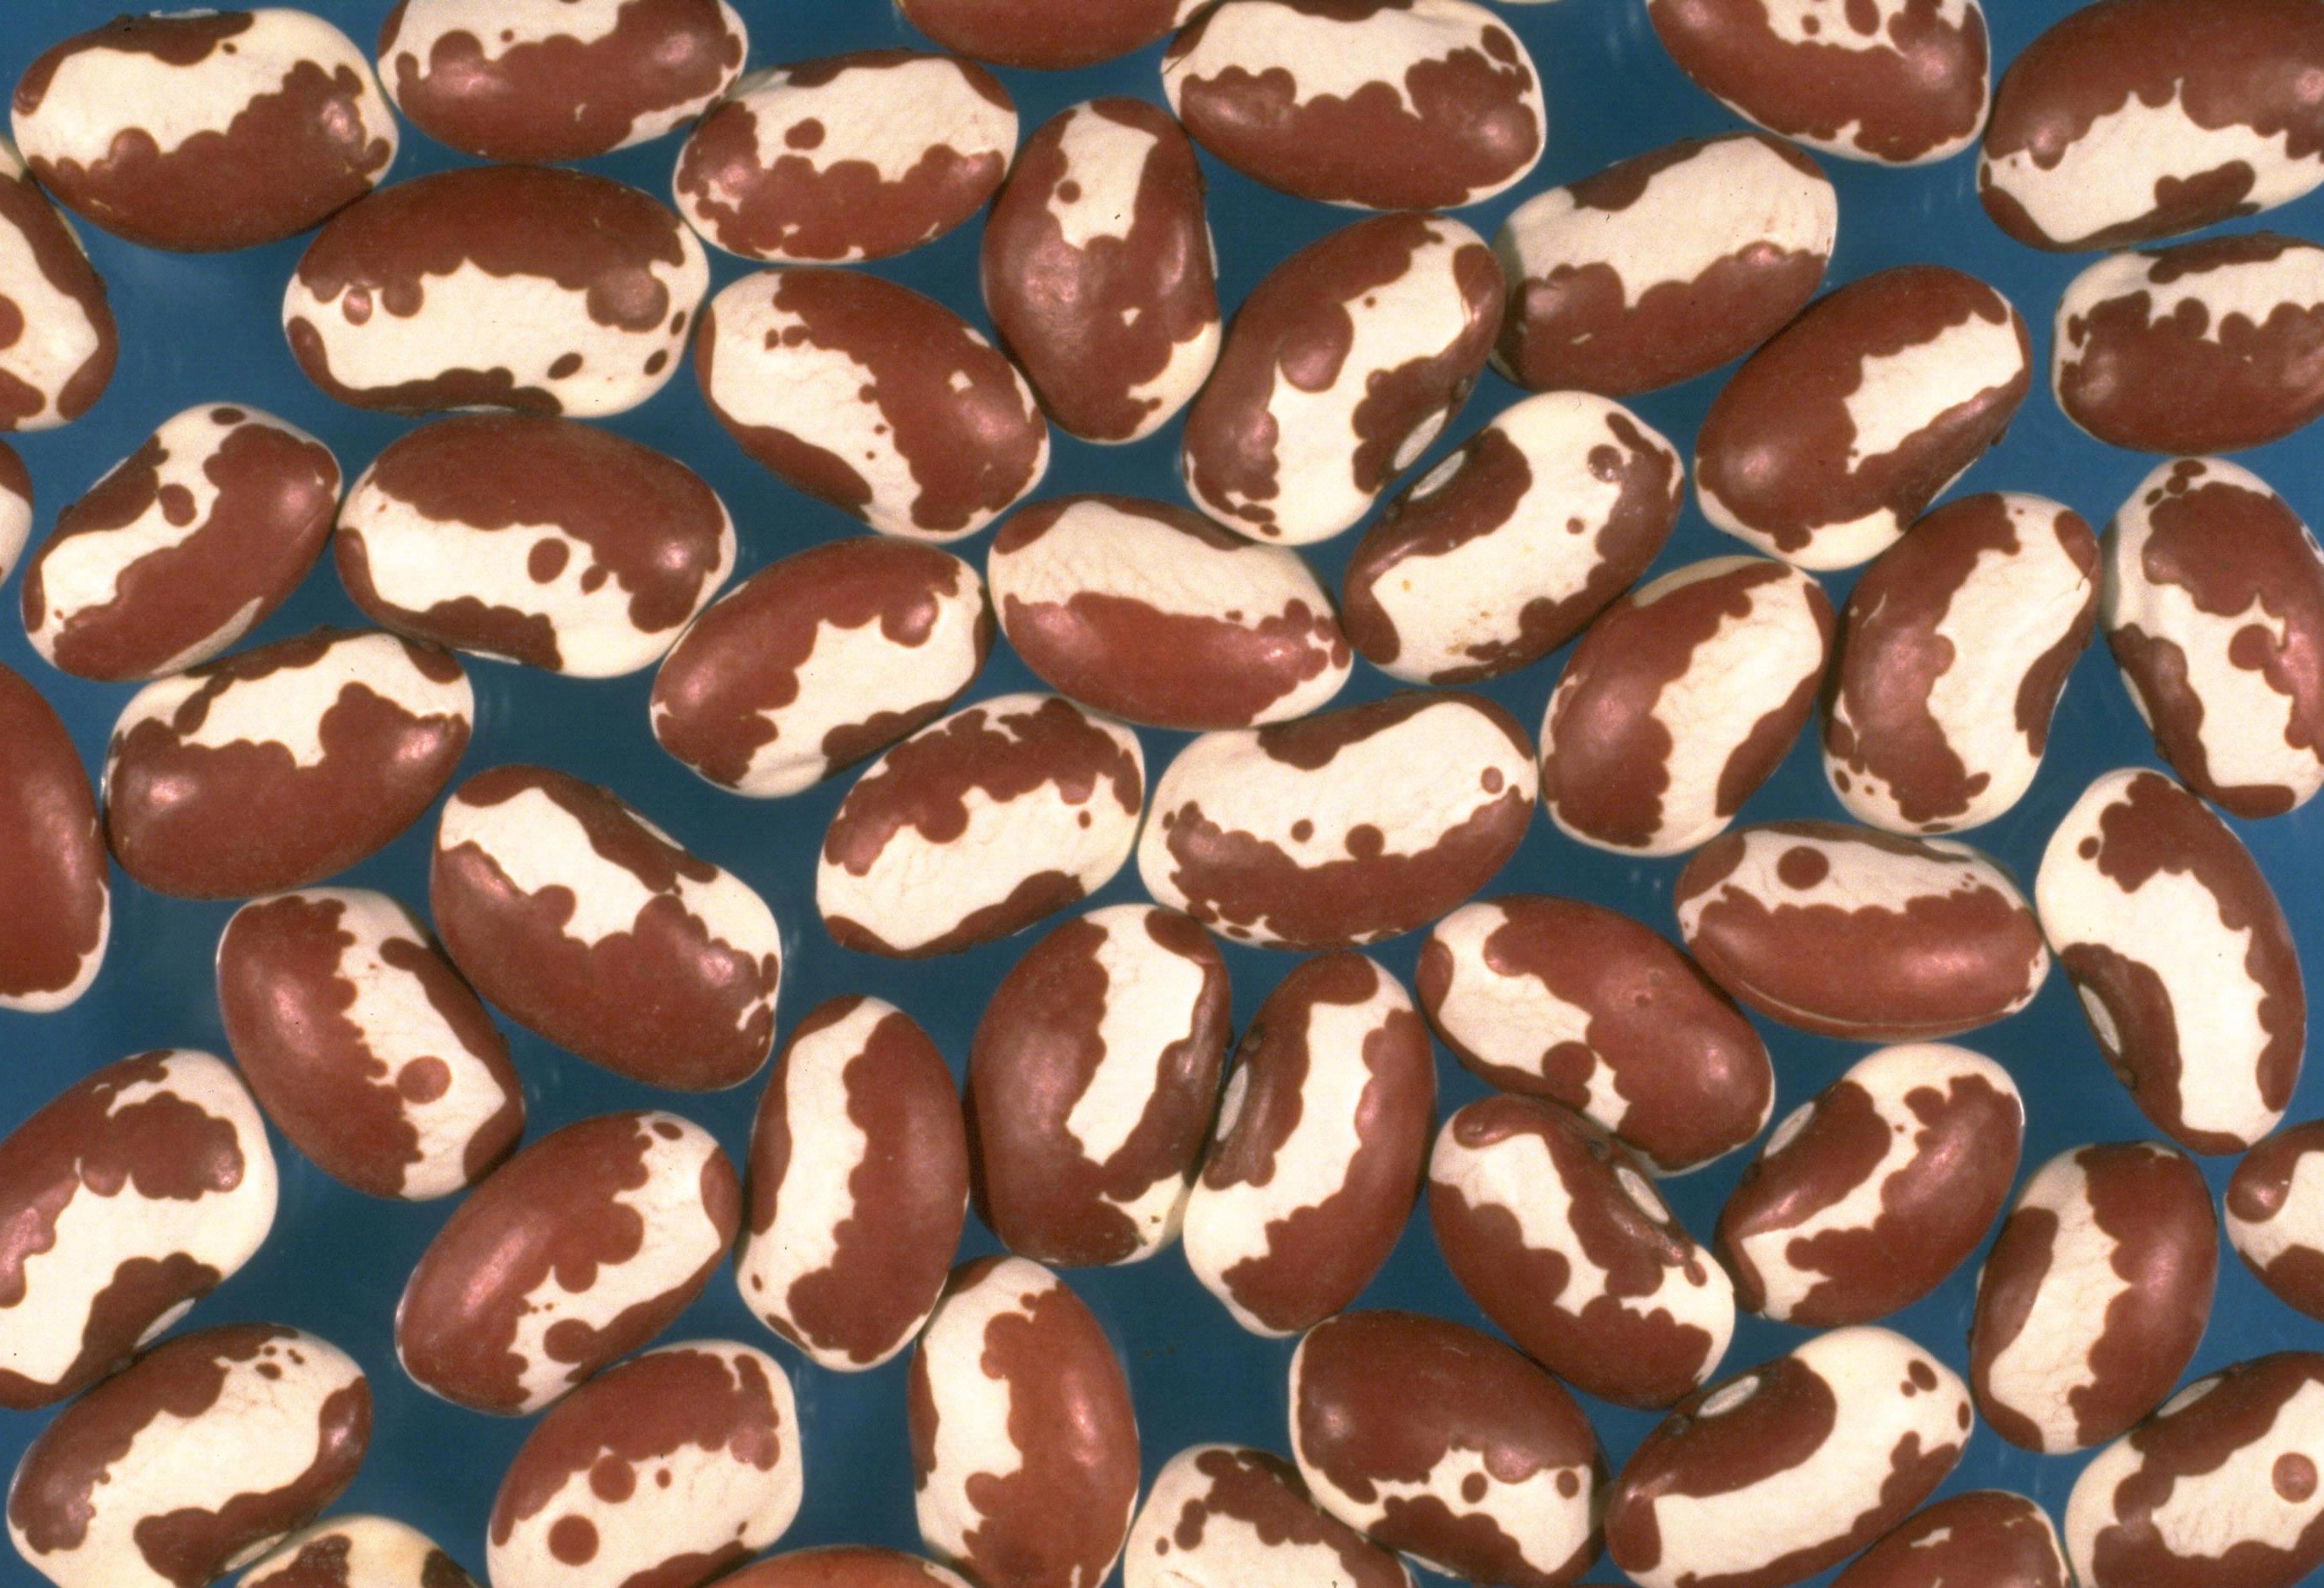
The colorful seeds of Anasazi beans, named after the Anasazi Native American tribe who inhabited the Four Corners region of the United States from about 200 BCE to 1300 CE. Photo by Howard F. Schwartz, Colorado State University, Bugwood.org.
Beans. Common beans (Phaseolus spp.) have a rich and ancient history in the Americas, with evidence of their domestication dating back around 7,000 to 8,000 years in the region that is now Peru. Native peoples in Mesoamerica and the Andean region recognized the nutritional value and versatility of beans, incorporating them into their agricultural practices. Cultivated by civilizations such as the Maya, Aztecs, and Inca, beans were an essential staple crop alongside maize and squash. The domestication of beans allowed for the cultivation of various species, including kidney, lima, and black beans.
The Three Sisters. The “Three Sisters” have deep historical roots in ancient American agriculture, with evidence of their use over 7,000 years ago. This system, practiced by various indigenous civilizations, especially in Mesoamerica and North America, involved the intercropping of three key crops: maize, beans, and squash. Maize served as the central component, providing a tall stalk for the beans to climb. Beans enriched the soil with nitrogen through their symbiotic relationship with bacteria, allowing them to convert atmospheric nitrogen into a form that the plants can utilize. Squash, with its broad leaves, acted as a living mulch, reducing weeds and retaining soil moisture.
The Three Sisters synergistic trio enhanced soil fertility, prevented erosion, and yielded a nutritionally balanced diet for generations of indigenous communities. It also fostered a deep connection between humans and the land, emphasizing a holistic approach to farming that honored the interdependence of crops and the environment.
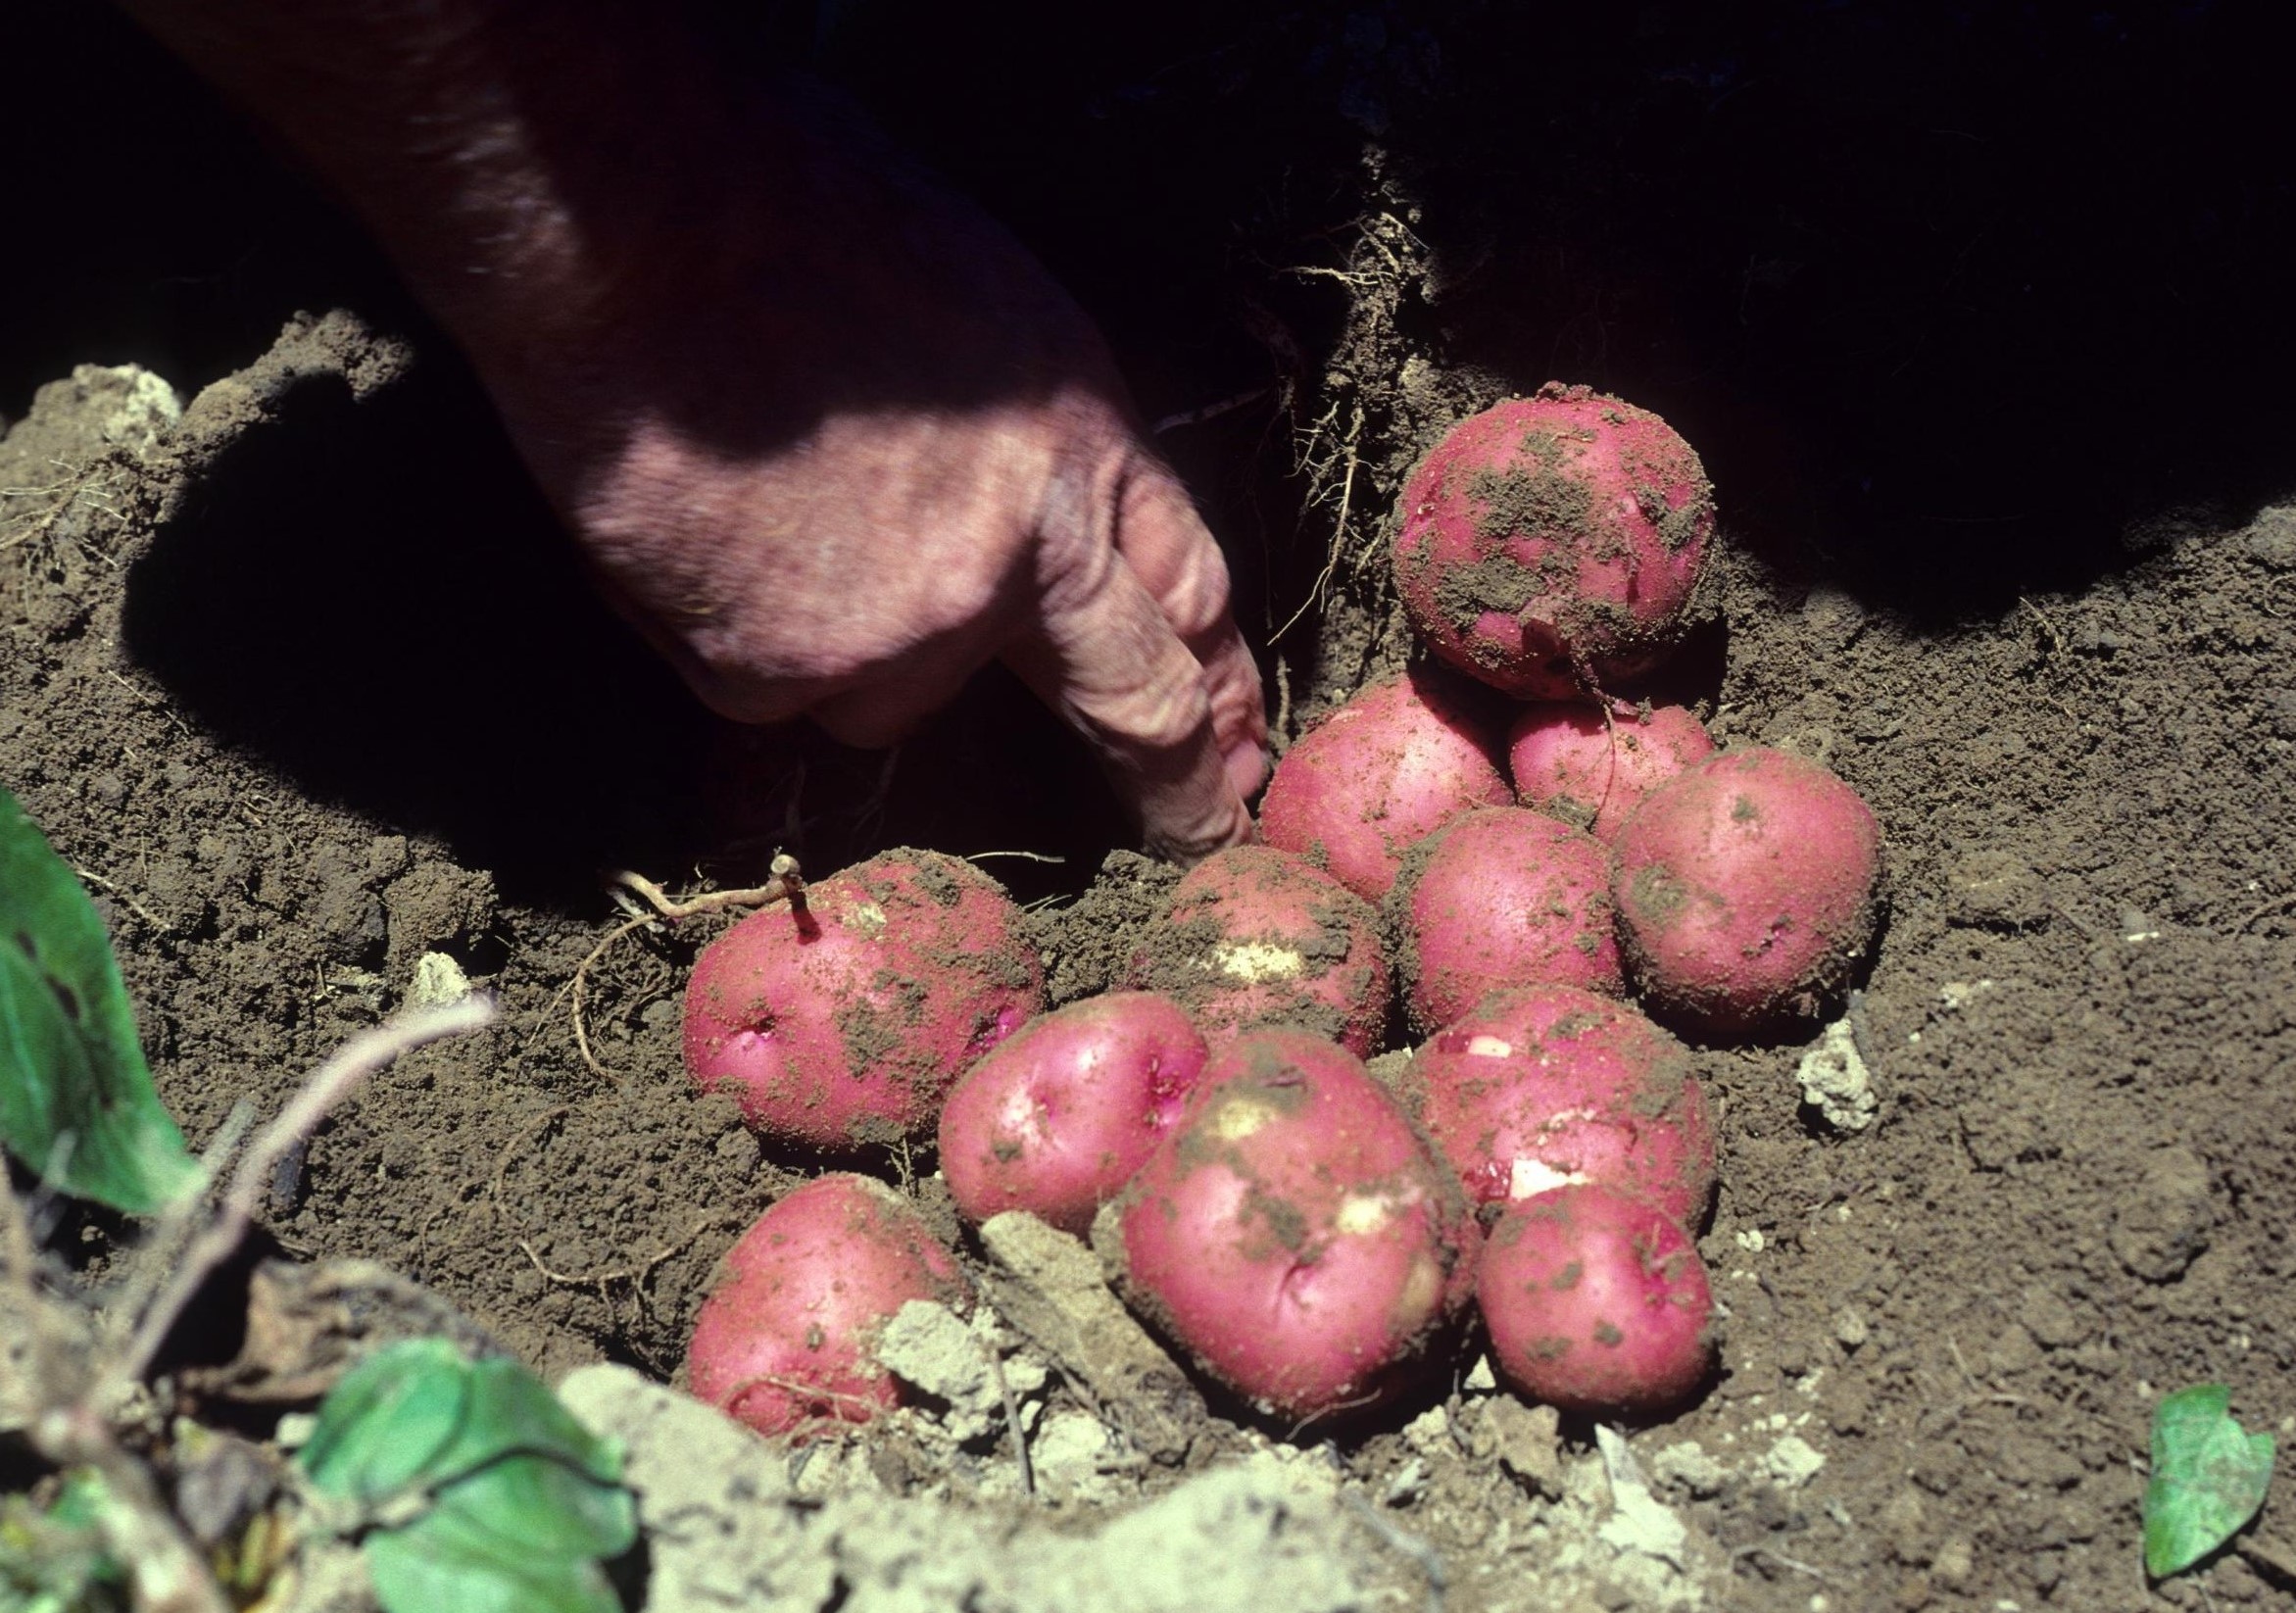
Despite their notoriety in Ireland, potatoes originated in the Andean region of South America. Photo by Edward Sikora, Auburn University, Bugwood.org.
Potatoes. While potatoes (Solanum tuberosum) are commonly associated with Ireland, they actually originated in the Andean region of South America, what is now Peru and Bolivia, between 7,000 to 10,000 years ago. Long before European arrival, Native Americans were cultivating potatoes. Over time, they developed different varieties of potatoes, adapting them to suit various climates and growing conditions. It wasn’t until the exploration and colonization of the New World in the 16th century that potatoes were introduced to Europe, eventually becoming a staple food crop there.
Tomatoes. Similar to the association of potatoes with Ireland, tomatoes (Solanum lycopersicum) are often associated with Italian cuisine, including pasta sauces and pizza. And like potatoes, tomatoes also have an ancient history in the Americas, with evidence of their domestication dating back about 7,000 years. Native to western South America, particularly in the region that is now Peru and Ecuador, wild tomato species were cultivated by indigenous civilizations. Initially, tomatoes were smaller and had a more varied range of colors beyond red, including yellow and purple. Through years of selective breeding and cultivation, larger red varieties became more prevalent. Over time, the ancient Mesoamerican civilizations to the north, such as the Maya and Aztecs, adopted tomatoes into their agriculture and diet. Following the European colonization of the Americas, tomatoes were introduced to other parts of the world in the 16th and 17th centuries, where their popularity and cultivation spread widely.
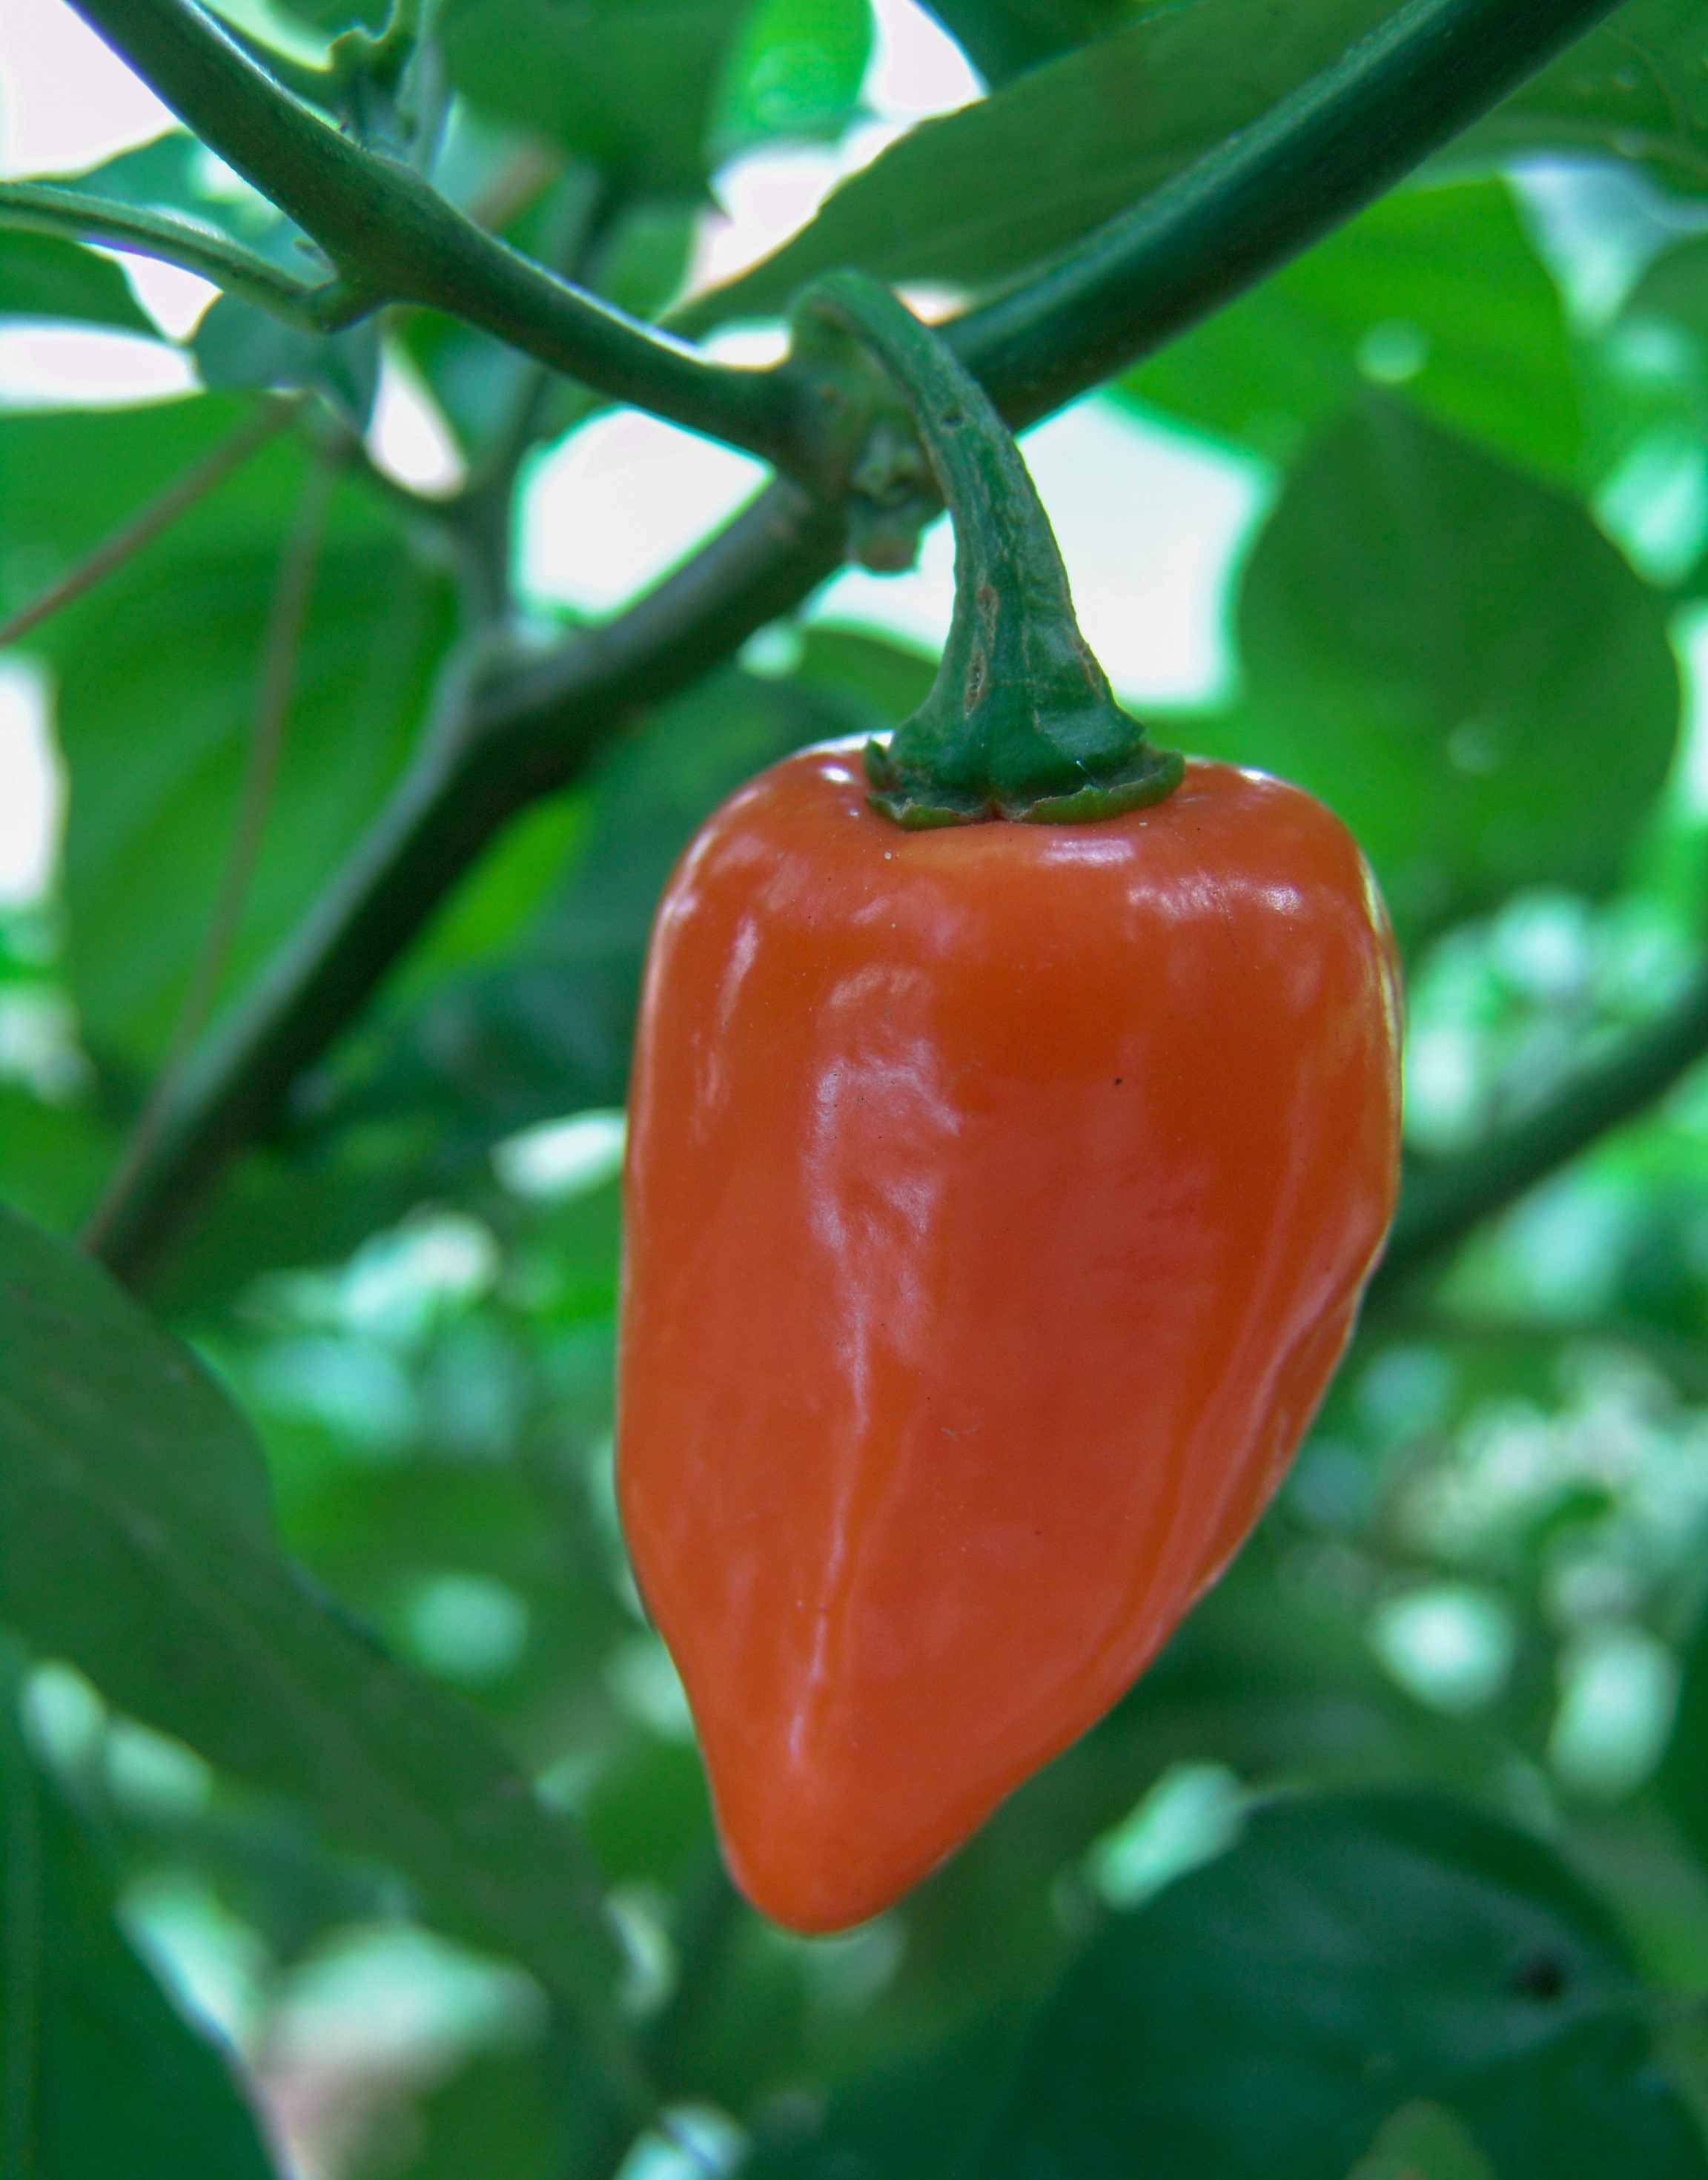
Habanero peppers are believed to have originated in the Yucatan Peninsula of Mexico and have been cultivated for centuries. Photo by Gerald Holmes, Strawberry Center, Cal Poly San Luis Obispo, Bugwood.org.
Peppers. Peppers (Capsicum spp.), or chili peppers, also originated in the Americas, specifically in regions that now belong to Mexico, Peru, and Bolivia. They were domesticated around 6,000 years ago and played significant roles in the cultures and diets of ancient civilizations like the Aztecs and Mayans. Peppers were introduced to other parts of the world through the exploration and trade routes of Spanish and Portuguese explorers. They played a significant role in spreading peppers to Europe, Asia, and Africa during the 15th and 16th centuries.
Some Other American Crops. There is a rich variety of lesser-known crops that originated in the Americas as well. Amaranth and quinoa, originating from the Andean region, are highly nutritious, rich in protein and essential amino acids. Chia seeds, native to Central and South America, have many culinary uses. Yucca, a traditional starchy root vegetable, has been cultivated in tropical regions for centuries. Fruits such as guava, papaya, and passion fruit originated from the Americas and have unique flavor profiles. Finally, the sunchoke, also known as Jerusalem artichoke, is a North American root vegetable known for its nutty taste and abundant dietary fiber.
The ancient journey of native vegetables in the Americas highlights their significance in shaping agriculture, culture, and nutrition. By embracing this ancient journey, we not only honor the wisdom and traditions of indigenous communities but also ensure a sustainable and inclusive future where diverse crops and food systems thrive, preserving the rich biodiversity and cultural legacy for generations to come.
Sweet potatoes are ideal for filling the gap between summer and fall crops as they have a long growing season. Photo by Janis Piotrowski.
Take the Summer Off, Grow a Cover Crop
As gardeners in the northern states plant and harvest crops until fall, those in the south know that summers can be brutal. In Florida and other areas in the deep south, temperatures can reach triple digits by the summer solstice, and humidity can make it feel like you’re swimming through the air. Pests, from mosquitos to stink bugs, descend quickly, making it no fun to spend hours weeding and watering in the sweltering heat, only to watch your plants struggle to survive. This is why we take advantage of the summer swelter by relaxing with some ice-cold lemonade and enjoying a well-deserved break.
However, while we take a summer gardening hiatus, it’s essential not to leave our soil bare. Fallow soil can become compacted and lose its structure, as there are no roots to create air channels that allow water from frequent summer storms to penetrate the soil. This makes it more challenging for plants to grow in upcoming seasons and can lead to erosion, nutrient depletion, and weed growth. By planting cover crops during the off-season, gardeners can prevent these issues and improve the health of their soil for fall planting. Cover crops offer a multitude of benefits, such as adding nitrogen to the soil, increasing organic matter content, suppressing weeds, breaking pest and disease cycles, and even providing a crop to harvest in the fall.
Fix Nitrogen with Legumes
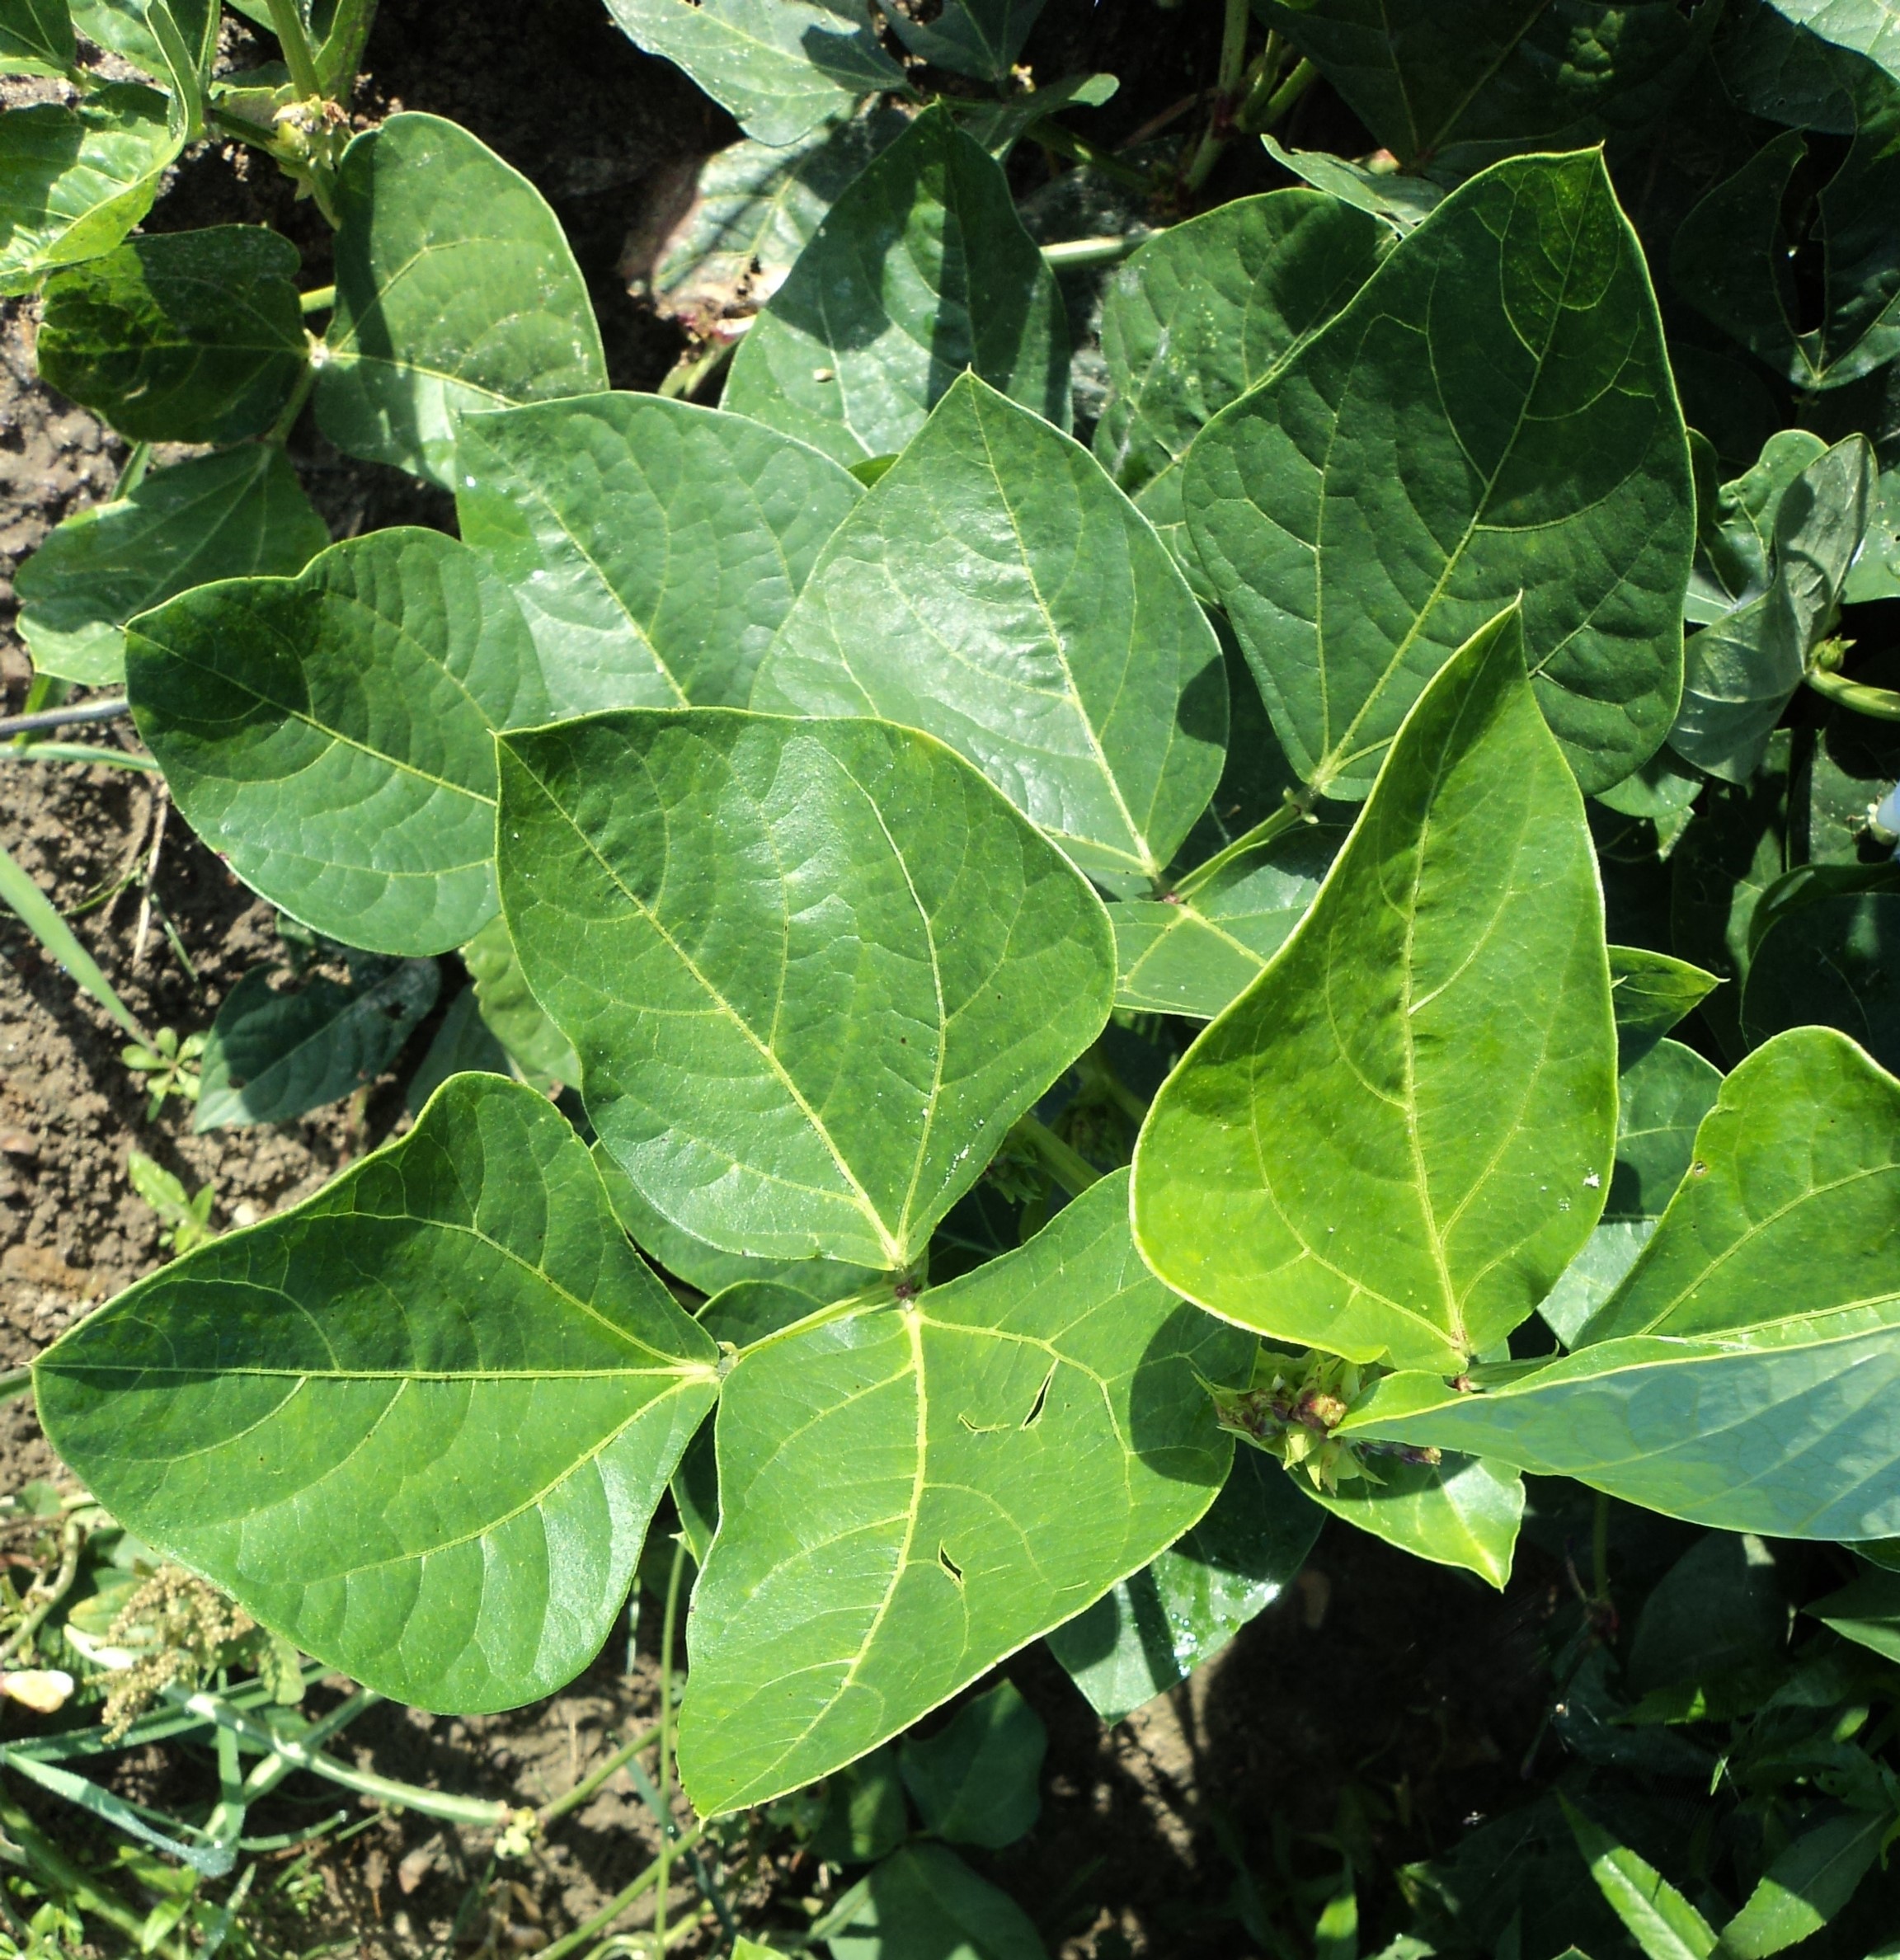
Cowpea is a summer annual legume that can fix nitrogen, improving soil fertility for fall crops. Photo by Michasia Dowdy, University of Georgia, Bugwood.org.
Summer cover crops are a great way to keep your garden healthy and productive during the off-season, and leguminous crops like cowpeas, soybeans, and sunn hemp can add an extra boost to your soil’s fertility. These legumes have a unique ability to form a symbiotic relationship with nitrogen-fixing bacteria in the soil, allowing them to convert atmospheric nitrogen into a form that plants can use for growth.
Apart from their nitrogen-fixing properties, leguminous cover crops also have deep taproots that can help to break up compacted soil, improve water infiltration, and reduce soil erosion. When planted in dense stands, they can even suppress weed growth, making it easier to maintain your garden’s health.
It’s important to remember to terminate your leguminous cover crops at the bloom stage, as this is when the nitrogen-fixing nodules on the roots are at their peak. By cutting them down at this point, you can help to release the fixed nitrogen back into the soil, where it will be available for future crop use.
Increase Organic Matter with Buckwheat
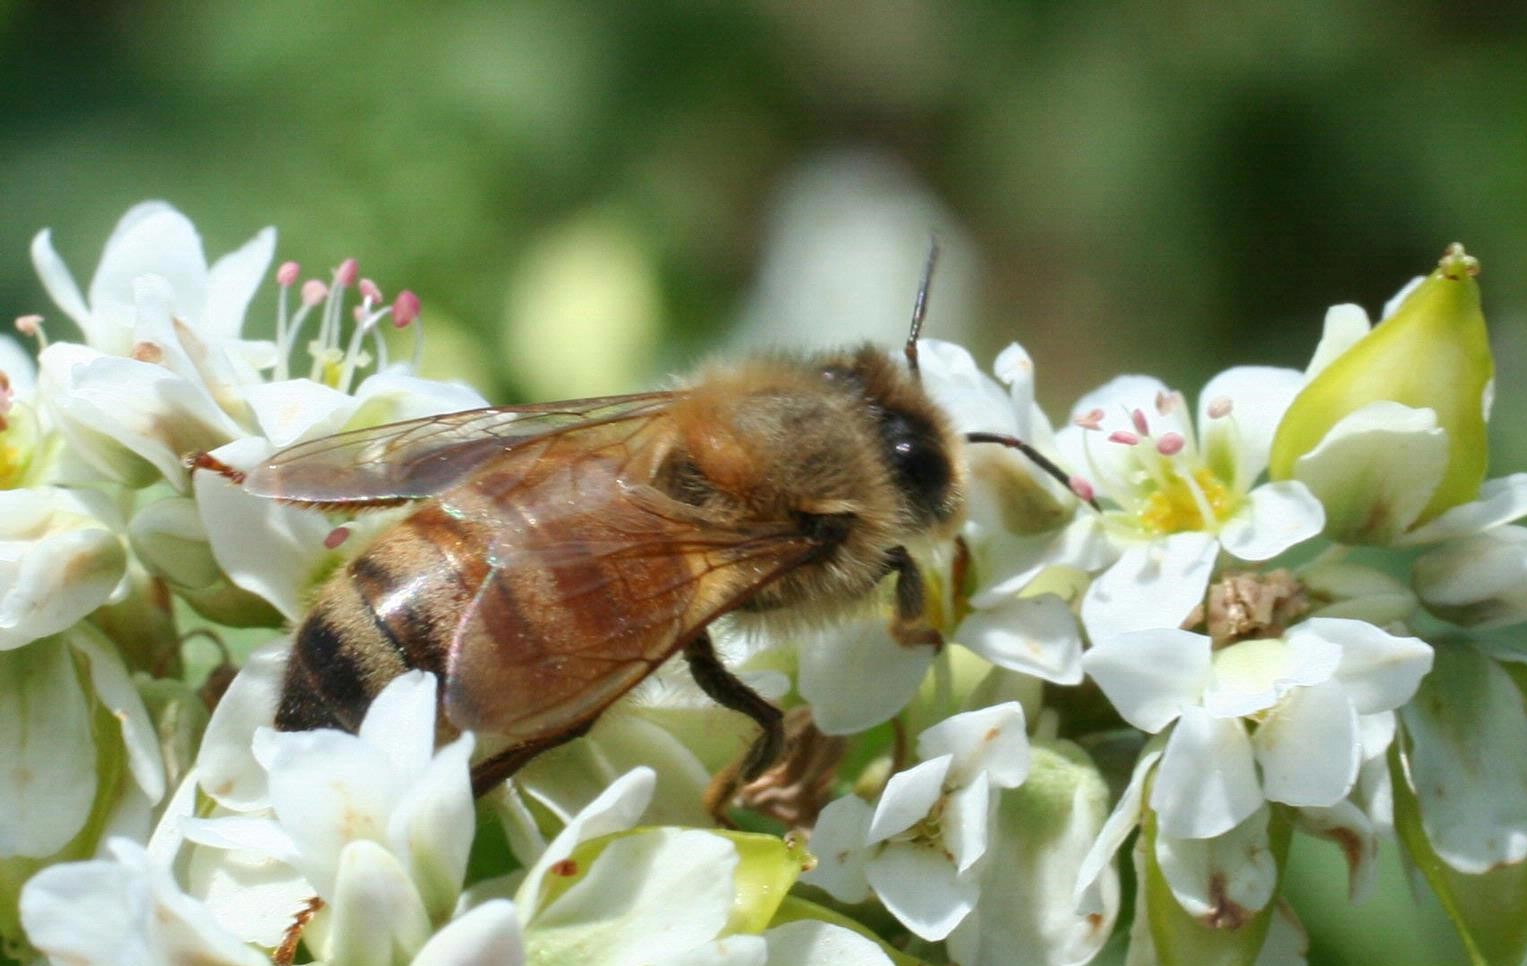
Buckwheat not only builds organic matter in soil but it also attracts pollinators. Photo by Russ Ottens, University of Georgia, Bugwood.org.
Buckwheat is an ideal summer cover crop for gardens with poor, sandy soil. It is a rapid grower and can produce a large amount of biomass in a short period of time, which can be used to increase soil organic matter content, improving soil structure. The cover crop’s dense, fibrous root system provides ample surface area for nutrient uptake and helps prevents erosion.
Another major benefit of planting buckwheat is its ability to attract beneficial insects, particularly pollinators like bees and butterflies, which can help increase the yield of crops that rely on pollination for fruit set. Additionally, buckwheat is known for attracting predatory wasps, which can help control insect pests. Buckwheat also has the ability to scavenge phosphorus from the soil, making it available for other crops.
To prevent buckwheat from becoming weedy, it is important to terminate it before it goes to seed. This can be achieved by chopping it down when it starts to flower and leaving it to decompose in place.
Suppress Nematodes with Marigolds
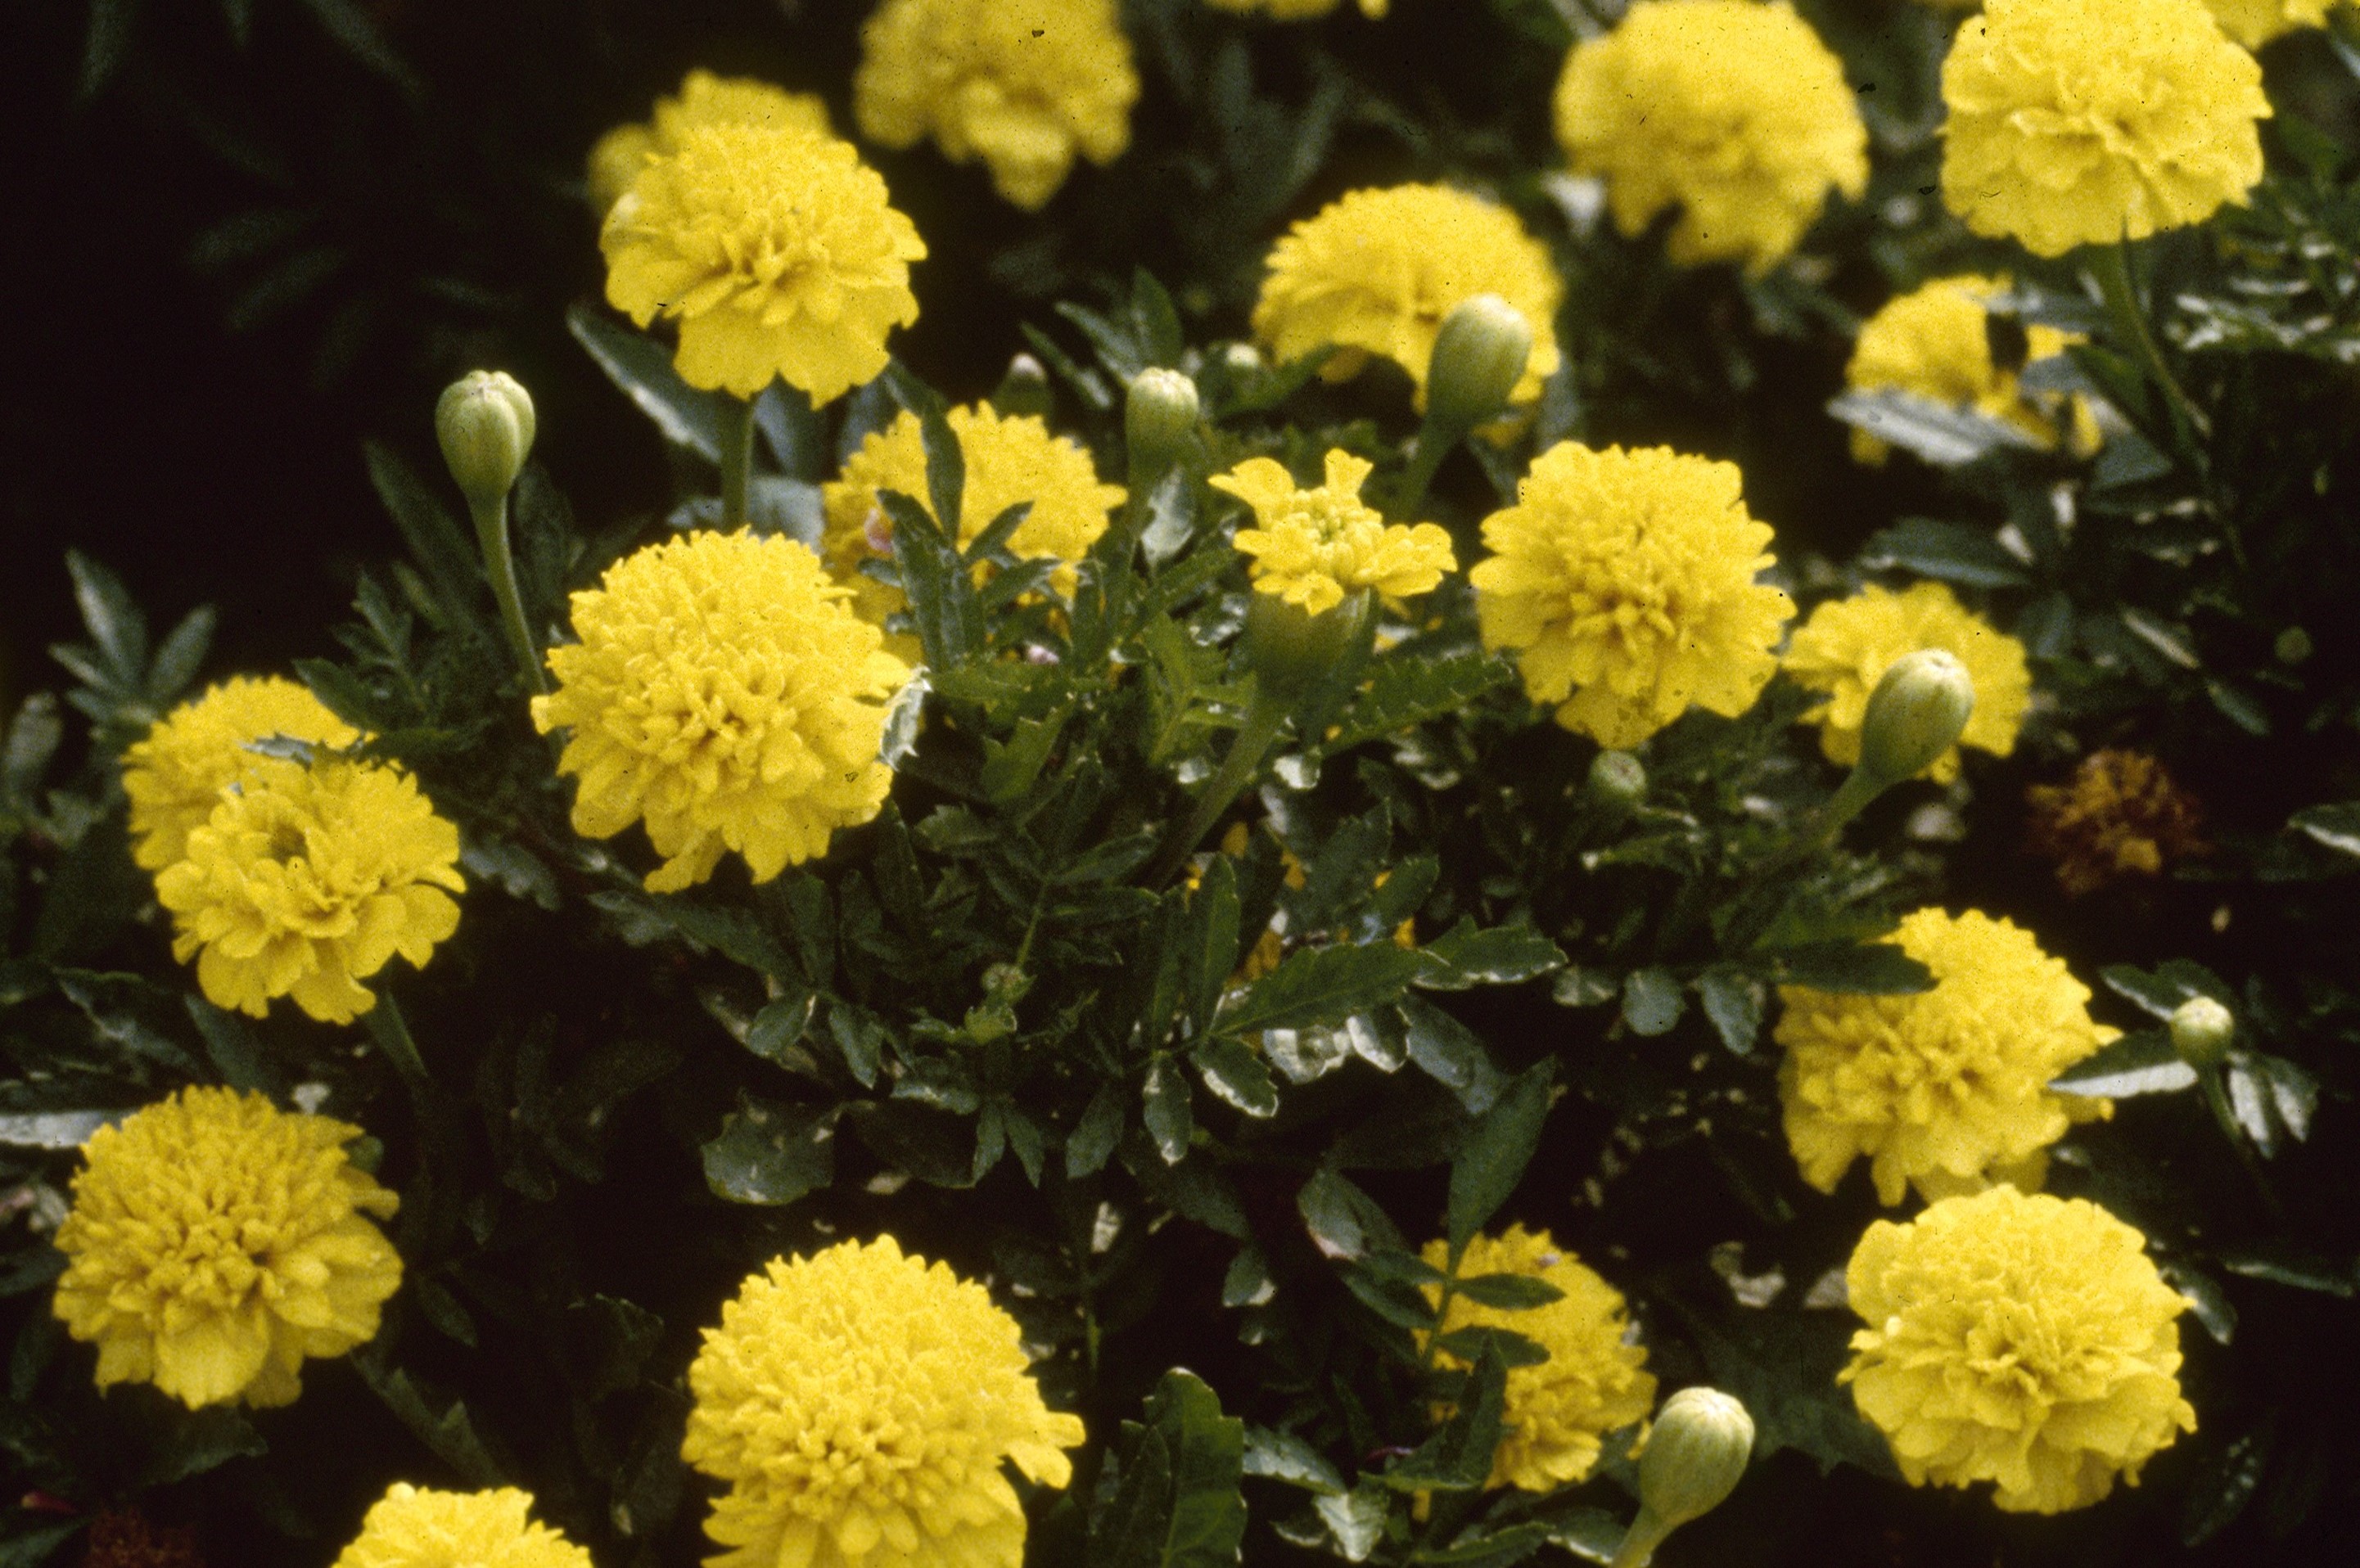
French marigolds can help suppress root-knot nematodes. Photo by North Carolina, USDA APHIS PPQ, Bugwood.org.
Nematodes are microscopic, unsegmented roundworms that can be either be free-living or plant parasites. Among them, the plant-parasitic species, such as the root-knot nematodes, can cause severe damage to crops and even lead to their demise. They are difficult to control as they reside underground or inside plants, and nematicides are not easily available to home gardeners.
However, planting cover crops like African or French marigolds before the main crop can significantly reduce nematode populations. These marigolds release alpha-terthienyl, which suppresses not only root-knot nematodes but also other disease-causing organisms.
Apart from marigolds, several other summer cover crops like sunn hemp and velvetbean can also suppress nematodes, especially for root-knot and sting nematode control.
Cover Crops for the Dinner Table
Growing cover crops that serve a dual purpose of providing ground cover during the hottest months and yielding edible produce in the fall is an excellent way to make the most of garden space. Some examples of such crops are sweet potatoes, field peas, and daikon radishes.
Sweet potatoes are ideal for filling the gap between summer and fall crops as they have a long growing season. They have a deep root system that helps break up compacted soil, and their vines provide ground cover, reducing soil erosion. In the fall, their tubers can be harvested after the leaves have died back to make a nutritious and delicious addition to any meal.
Field peas are a versatile crop that not only provide benefits to the soil as nitrogen fixers and ground covers but also offer delicious edible pods if allowed to develop. There are many types of field peas for which to choose, including black-eyed peas, crowder peas, and cream peas. Pods can be harvested in the fall and used to enhance the flavor of stews, salads, and soups.
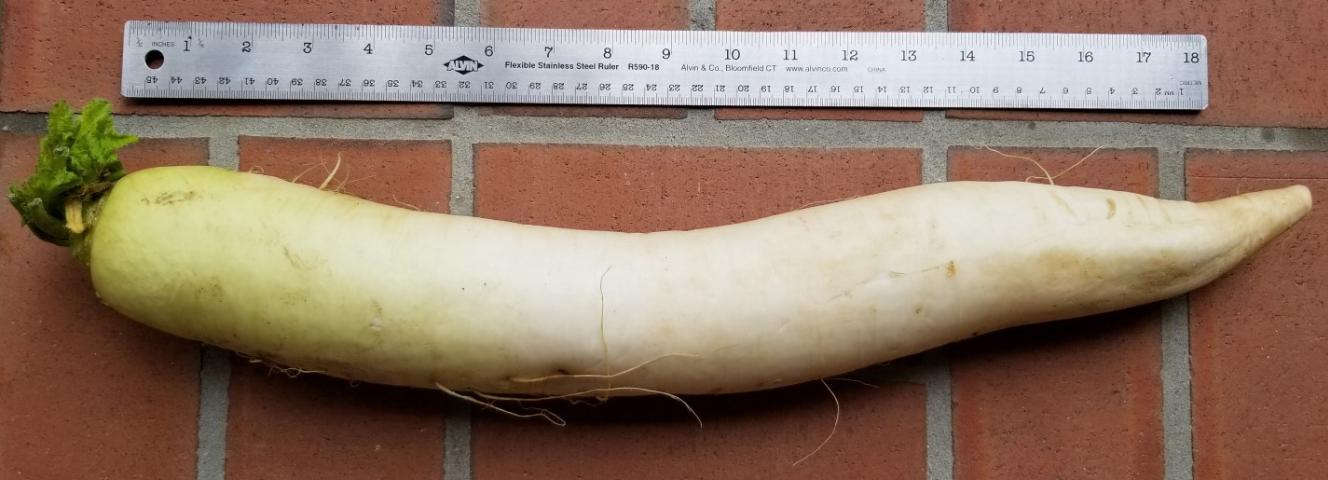
Daikon radishes are an excellent cover crop that grow deep to break up soil and they have plenty of flavor for the dinner table. Photo by Guodong Liu, UF/IFAS.
Daikon radishes have a deep taproot that can help break up compacted soil, and their foliage can help suppress weed growth. In addition, daikon radishes can be harvested in the fall and can be used in a variety of dishes such as soups, salads, and stir-fries.
Timing is Everything
To make the most of your summer gardening break, plant cover crops as soon as you conclude your spring harvest, typically from late May through early July. Scatter the seeds evenly over the bed and lightly rake them into the soil. It is important to keep the soil moist during the germination period, which typically lasts four to 10 days depending on the crop.
Regular monitoring of your cover crops as they grow is essential to ensure they are terminated at the appropriate time, preventing them from becoming weeds and competing with other crops. Once terminated, you can leave the cover crop residue on the soil surface as a mulch or incorporate it into the soil.
So, this summer, stay cool and let your cover crops take the heat as they improve soil fertility, increase organic matter, prevent erosion, suppress nematodes, reduce weeds, and even provide food for a fall harvest.