by Matt Lollar | Jan 29, 2026
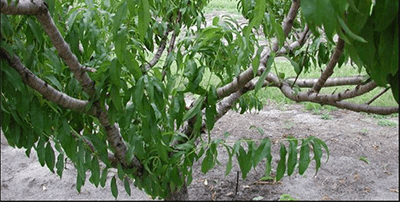
Peach and plum trees are prone to diseases and often produce inconsistent yields. The best way to remedy these issues is with proper pruning. Annual pruning reduces disease incidence, improves fruit quality, and increases tree longevity. So when should trees be pruned and how do we go about it?
Pruning Timing
Peach and plum trees should be pruned in late winter before blooming begins. Mid- to late-February is a good time for the Florida panhandle. If trees are pruned too early they may put on new growth too early and be exposed to late winter freeze events.
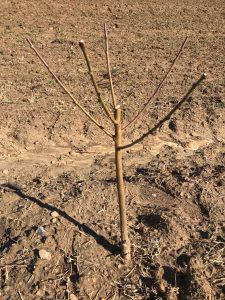
Heading cut made on a recently planted whip, selecting five scaffolds and stopping terminal growth. Photo Credit: David Lawrence, Auburn University
Pruning Cuts
Two types of pruning cuts are utilized for pruning peach and plum trees; thinning and heading cuts. Thinning cuts remove unwanted shoots from their point of origin. Heading cuts are made about a 1/4 inch above a bud. Thinning cuts are used to open up the tree canopy to increase air circulation and sun exposure. Heading cuts stimulate growth in a desired direction.
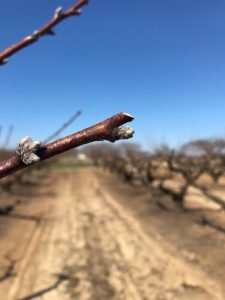
Heading cut made to an outward growing bud to promote growth and direction. Photo Credit: David Lawrence, Auburn University
Open Center Training
An open center tree consists of a main trunk and three to five scaffold branches. Scaffold branches are the primary branches originating from the main trunk. These scaffold branches will produce the fruiting wood. At planting, a heading cut should be made to the main trunk about 30 inches above the soil line. This cut will promote lateral growth (scaffolds). If the tree already has lateral growth at planting, three to five scaffold branches can be selected at this time and the heading cut should be made just above these branches. Scaffold branches will be selected during year two of growth if no scaffolds were on the tree at planting. Heading cuts, removing about a 1/4 of each branch, should be made on all selected scaffold branch about a 1/4 inch above an outward growing bud. From the third year of growth and beyond annual maintenance pruning will be performed to maintain the open center growth habit. All damaged or diseased wood, suckers, and water sprouts should be removed. Large branches growing from scaffold branches toward the center of the tree should be removed, along with any upright growth that will shade out fruiting shoots. Downward growth should also be removed. Heading cuts are to be made on remaining growth to encourage desired direction of growth based on bud direction. Excessive fruit wood should be thinned to promote larger fruit and less fruit thinning.
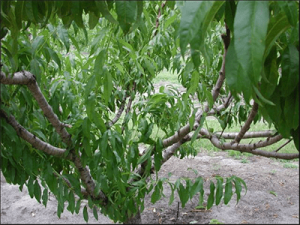
A peach tree pruned with an open center. Photo Credit, University of Florida/IFAS Extension
Pruning peach and plum trees sounds a bit labor intensive, but once it’s part of routine maintenance it will reduce labor during the season and promote the growth of larger and better quality fruit.

by Matt Lollar | Dec 26, 2025
The Christmas season is all about the gifts! This statement couldn’t be further from the truth, but most likely some gifts will be given. An old traditional gift is gift fruit. And a lot of the time that gift fruit is a mix of citrus from Florida. A unique citrus that I’ve been wanting to add to my grove is the limequat. A few weeks ago I had a close encounter with a limequat at a local nursery, but it was in disguise. The limequat in question had a tag that read ‘Key Lime’. I am a fan of Key lime pie, therefore I like Key limes, but I knew I don’t want the added maintenance of protecting a Key lime tree from the cold. I had a suspicion this plant was a limequat, but I decided to pass on it. This experience prompted me to do a little research, so I don’t pass up on this opportunity in the future.
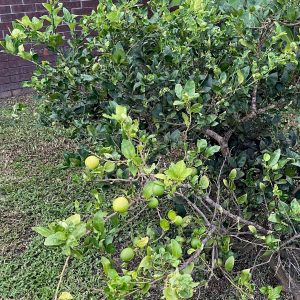
Key Lime fruit at various degrees of ripeness. Photo Credit: Ray Bodrey, University of Florida/IFAS Extension – Gulf County
Key Lime vs. Persian Lime
Before we talk more about limequats, I think it’s important we discuss the differences between Key limes and Persian limes. The Persian lime, Citrus latifolia, originated in southeast Asia. The first report of these trees in the United States was at a home in California in 1875. Like Persian limes, the Key lime, Citrus aurantifolia, originated in southeast Asia and was brought to the Americas by Spanish and later became naturalized in the Florida Keys and throughout Central and South America. Although these limes are two different species, they are both hybrids of crosses between the same three species (Citrus medica, Citrus grandis, and Citrus micrantha). Persian limes are more cold hardy than Key limes and neither are as cold hardy as limequats.
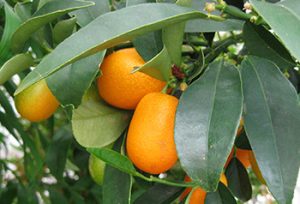
Kumquats growing on a tree. Photo Credit: University of Florida/IFAS
Limequat
Limequats resulted from cross pollination between a Key lime and a kumquat. However, limequats are less cold hardy than kumquats. Similar to kumquats, the skin of limequats is sweeter than their flesh. Three common cultivars of limequats are ‘Eustis’, ‘Lakeland’, and ‘Tavares’. ‘Tavares’ limequats produce larger fruit than ‘Eustis’ and ‘Lakeland’, but their mature fruit are more orange in color. A number of commercial and retail nurseries sell a limequat variety under the name ‘Key’ or ‘Key Lime’, which stemmed my confusion at the local nursery. All confusion could have been avoided if I would have known the scientific name at the time of my visit. (Limequats are listed as either Citrus x floridana or Citrofortunella x floridana.)
So now you know how limequats came about. For more information on limequats and other citrus species, please visit the UF/IFAS Gardening Solutions Citrus Page.
by Matt Lollar | May 28, 2025
Gardening just wouldn’t be any fun without the pests. In this episode of Gardening in the Panhandle LIVE!, the hosts answered some very important questions about different types of pests in Florida lawns and landscapes. Before we talk about some of the specific topics from this episode, it’s critical to know the definition of a pest when it pertains to our yards. A pest is any organism that is harmful and/or damaging to humans or the property of humans such as crops and livestock. Weeds are pests, some insects are pests, and diseases are pests.
Integrated Pest Management or IPM for short is the use of different pest management strategies to help control pests. The UF/IFAS Publication Landscape Integrated Pest Management provides more details on the steps involved in a good IPM program.
As stated above, pests can come in a lot of forms. Pesticides offer control for some pests. The article The Basics of Pesticides provides more information on using pesticides.
“Natural” can be a vague term. You’ll want to read the UF/IFAS publication Natural Products for Managing Landscape and Garden Pests in Florida to help clarify the definition of natural pesticides and offer some natural control options.
If you’re growing edible crops, then you’ll need to follow some extra precautions to make sure your crops are safe to eat. A Florida-Friendly Landscaping Approach to Pest Management in Your Edible Landscape provides IPM strategies specific to fruits, vegetables, and herbs utilized in the landscape.
Some annual weeds are easier to control as the germinate. Pre-emergent herbicides provide a barrier that kills most annual weeds shortly after they germinate. Apply pre-emergent herbicides in late winter before day temperatures reach 65°F–70°F for 4 or 5 consecutive days and in the fall when nighttime temperatures drop to 55°F–60°F for several consecutive days.
The first step of IPM is to scout for pests. More information on scouting can be found in the article Scouting: The tip of the IPM spear from Matt Smith with the UF/IFAS Extension in Lake County.
The larva of many beetle species like to eat turfgrass roots. More information on June beetles and their control can be found in the fact sheet June Beetles (White Grubs).
Ground pearls are very difficult to control. The UF/IFAS publication Ground Pearls, Margarodes spp. (Insecta: Hemiptera: Margarodidae offers detailed information of these underground relatives of armored scales.
Snakes usually help us control pests around our homes. If you’re interested in what snake species live in Florida, then you’ll want to read the UF/IFAS publication Managing Conflicts with Wildlife: Living with Snakes.
Chinch bugs are a major insect pest of Saint Augustinegrass. The UF/IFAS publication Southern Chinch Bug, Blissus insularis Barber (Insecta: Hemiptera: Blissidae) provides some valuable information on this insect pest and how to control it.
Fire ants are a direct pest of humans and the create some unsightly mounds in the yard. A number of baits are available on the market to help keep them out of the landscape. The article Sustainable Fire Ant Control offers more details on baits and other fire ant control strategies.
Mole crickets are another type of insect that feed on turfgrass roots. The Mole Cricket IPM Guide for Florida is a great place to start if you’re trying to understand this pest better.
If you’re sticking with an edible landscape theme, then you’ve certainly encountered leaf-footed bugs and stinkbugs on your fruit and vegetable crops. Larry Williams with the UF/IFAS Extension in Okaloosa County has written a very informative article on leaf-footed bugs titled Leaf-footed Bugs Are Common On Tomatoes.
The extension publication Weed Management Guide for Florida Lawns offers a variety of weed management strategies for your yard.
Weed control in plant beds can sometimes be tricky. The UF/IFAS publication Improving Weed Control in Landscape Planting Beds provides solutions for managing weeds around shrubs and ornamentals.
Products containing glyphosate are good for spot spray applications in the landscape, however some people may choose to avoid its use. The UF/IFAS publication Use of Glyphosate and Herbicide Alternatives for Weed Control in Florida Landscape Planting Beds discusses the advantages and disadvantages of using glyphosate and other herbicides.
Pests can wreak havoc on healthy lawns and landscapes. The resources and advice provided in this episode of Gardening in the Panhandle LIVE! will help you maintain a beautiful setting to enjoy. To view this episode of Gardening in the Panhandle LIVE! please visit our YouTube channel.
by Matt Lollar | Apr 30, 2025
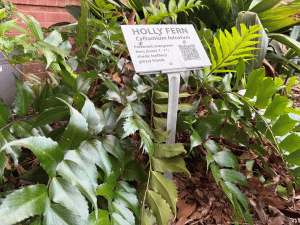
A holly fern in the landscape. Photo Credit: Matt Lollar, University of Florida/IFAS Extension – Santa Rosa County
On a recent episode of Celebrity Jeopardy, one of the categories featured answers all about ferns. The category got me thinking about all the confusing things about ferns.
First of all, are ferns even plants at all? Yes, but there are some unique characteristics that make them stand out. Ferns are vascular plants like most all of our other landscape and house plants, but they do not produce flowers, fruits, and seeds like other vascular plants. Instead, they produce spores in small, round structures called sporangia that are usually on the undersides of leaves. Sporangia are also found on fungi and algae.
A pretty noticeable feature about ferns is their leaves. Fern leaves are called fronds which consist of many small leaflets called pinnae. Fronds have a feather-like appearance that give most ferns a fine texture that softens the landscape. Sterile, non-spore producing fronds called fiddleheads develop from the center of the plants in early spring. They are called fiddleheads because they are curled like the top of a fiddle when they first emerge. The fiddleheads of some fern species are prized by chefs for their delicate flavor and crunchy texture. Fertile, spore producing fronds develop later in the season.
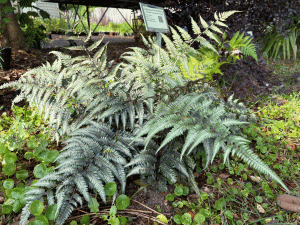
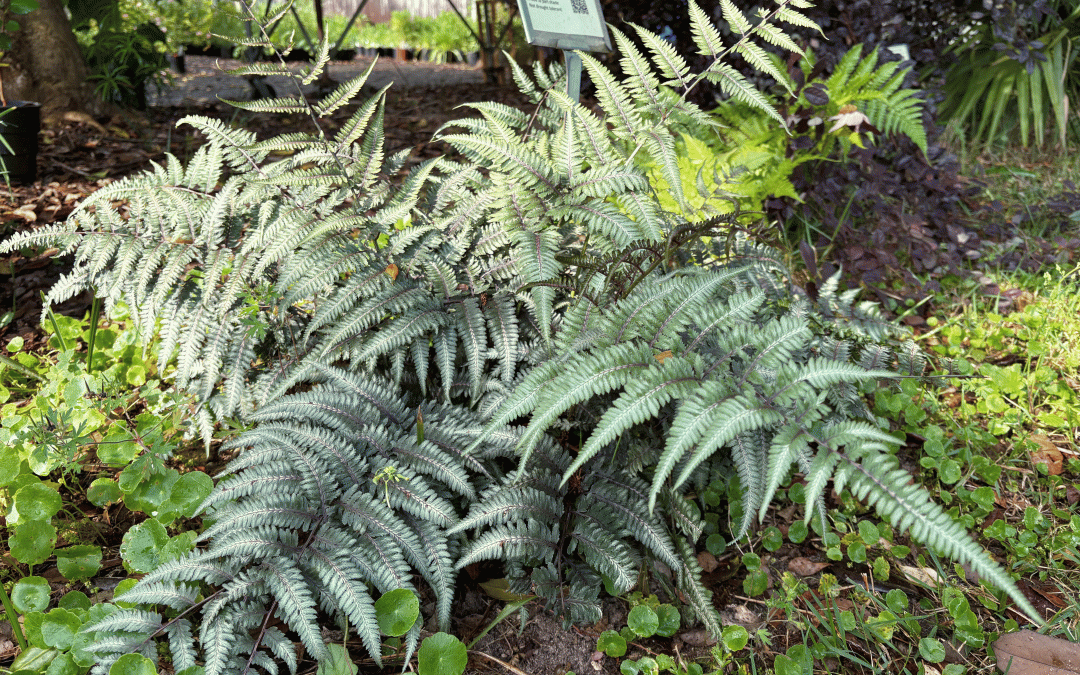
A Japanese painted fern in the landscape. Photo Credit: Matt Lollar, University of Florida/IFAS Extension – Santa Rosa County
When grown outdoors, most ferns do best in spots that receive filtered light or a bit more shade. However, some species of ferns that are grown indoors may need a little more light. Ferns like high humidity environments which is why we usually see them growing in floodplains and in wetlands in the wild. Indoor ferns should be watered thoroughly whenever the soil surface begins to feel dry. Choose potting soils with a high percentage of peat moss for its moisture retaining properties. And make sure you don’t over-fertilize.
by Matt Lollar | Apr 30, 2025
If you’re going for a tropical look, but don’t want to lose your landscape, then you’ll get some great ideas from this episode of “Gardening in the Panhandle LIVE!”.
Most of the Florida Panhandle falls within USDA Plant Hardiness Zone 9a. The USDA Plant Hardiness Zone Map displays the average annual extreme minimum winter temperature for locations throughout the United States. Based on NOAA weather data, the date of the last spring freeze can range from February 16 to March 15 depending on location in the Florida Panhandle. It’s important to note these figures are based on averages and will vary from year to year.
Some plants need protection from freeze events. More information on protecting plants from cold weather can be found in the article “Preparing the Landscape for Cold Weather”.
There are quite a few native plants that can give your landscape a tropical look. Plants that have a tropical look usually have bright flowers, variegated leaves, and/or coarse textured foliage. A native that comes to mind is Florida anise that grows well in shaded areas and is available in varieties with variegated foliage and light green foliage. The native firebush (Hamelia patens) will freeze back some years, but provides a tropical focal point with its showy flowers and unique foliage. Some oakleaf hydrangea selections with chartreuse colored blooms can also provide a tropical aspect.
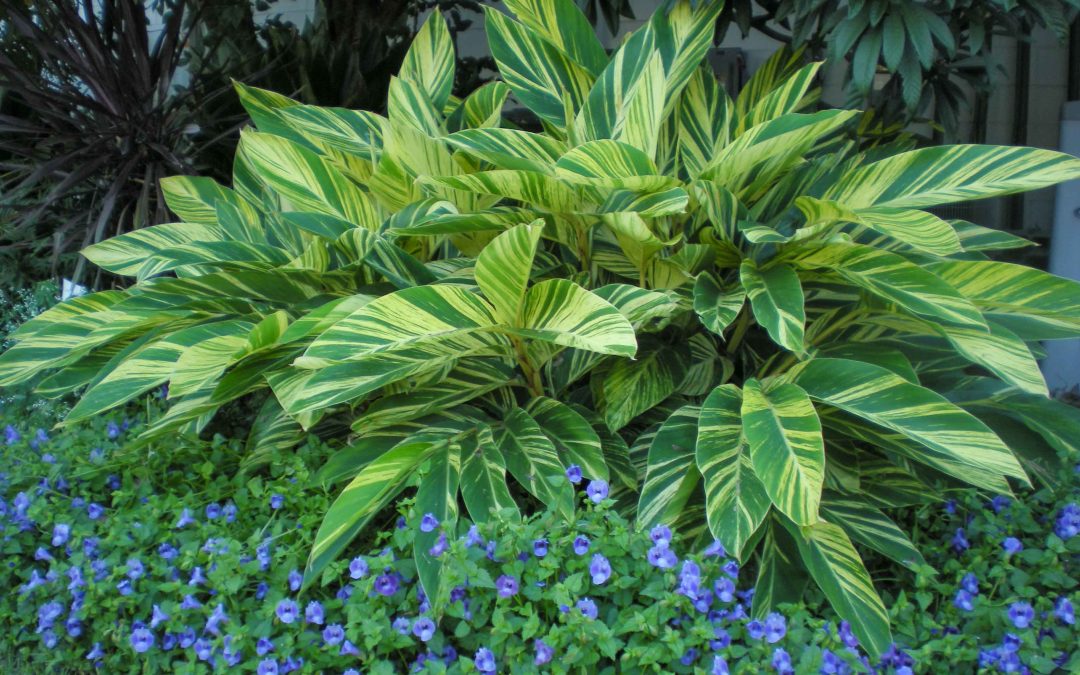
Other plants that give a tropical feel, but aren’t native to Florida include cast iron plant, canna lilies, red hot poker, fatsia, farfugium, holly fern, African false hosta, and loquat trees. Some tropicals that freeze back, but will come back in the spring include ornamental gingers and tumeric. To view other suitable plants for the Florida Panhandle check out the Florida-Friendly Landscaping Plant Guide.
Row covers and frost cloths can provide some insulation for sensitive plants. The thickness of the material used can vary significantly and offer different levels of freeze protection. It’s important the material covers the plants all the way to the ground, not just the foliage. More information on row covers in the article “Using Row Covers in the Garden” from the University of New Hampshire.
It’s important to wait to clean up and prune freeze damaged plants. Mid-to-late March is a good time to cut back plants that have been damaged from a freeze event. However, the longer you wait the better. More information for caring for these plants can be found in the article “Treating Cold-Damaged Plants”.
Coastal climates differ from mainland environments. In the winter, temperatures in these two places will be similar, but windchills may be exaggerated in coastal areas. Additional wind tends to dry plants out faster, but spots near water may allow for some experimentation with more tropical plant material.
For more ideas on plant selections for the Florida Panhandle, check out other Gardening in the Panhandle articles or contact your local Extension Office. The “Freeze Friendly Foliage Plants” episode of Gardening in the Panhandle LIVE! can be found at 2025 Gardening in the Panhandle LIVE! Freeze Friendly Foliage. Visit the NWD IFAS YouTube page to view additional episodes of Gardening in the Panhandle LIVE!


