by Matt Lollar | Jan 25, 2018
We’re having a cold winter this year and I’m sure the last thing on your mind is your spring garden, but it’s time to start ordering seeds! The spring gardening seed catalogs are now out on garden center magazine racks and it’s tempting to buy everything that looks good in pictures. However, there are a few things to think about when picking out what you want to grow.
Know Your Season
Vegetable crops are usually grown by season. We are lucky in Florida because we have both a warm season and a cool season. We are unlucky too because we have very hot summers! Usually our spring crops suffer from too much heat and humidity in July and August. Cool season crops are typically planted from September to March, while warm season crops are typically planted in February and March or August and September. Eggplant and okra are outliers because they can usually make it through the summer. It’s important that you follow tried and true planting dates for the crops you intend to grow. You can find a very helpful table embedded in the Florida Vegetable Gardening Guide that lists what to plant when.
Know Your State
As you may have noticed, North Florida has a very humid climate year-round. We not only have to give our crops extra care due to rain and humidity, but we also need to grow varieties adapted for our climate. Some recommended varieties are listed in Table 2 of the Florida Vegetable Gardening Guide. You can also find some recommended varieties in Seed Sources for Florida Homegrown Vegetables. (Please note that some of the seed sources listed in this publication are geared more toward commercial growers, so they may be unavailable unless you intend to plant quite a few acres in one crop.)
Know How Green Your Thumb Is
Probably the most important thing about gardening is your level of commitment and experience. Take a few minutes to assess your skills as a gardener and the amount of time you are willing to commit to your garden. Then use the following list to help you determine what to plant.
- Easy to Grow in Florida – Radish, Collard, Turnip, Kale, English Pea, Green Bean, Sweet Potatoes
- Somewhat Easy to Grow in Florida – Okra, Yellow Squash, Zucchini, Eggplant, Watermelon, Sweet Corn
- Hard to Grow in Florida – Tomato, Cantaloupe, Muskmelon, Pumpkin
This is only a short list, but I hope it gives you a starting point to help you determine your skill set.
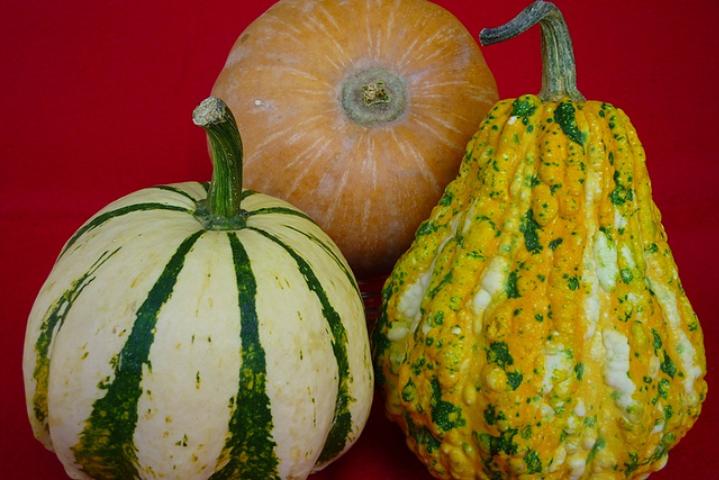
A variety of calabaza squash. Photo Credit: University of Florida/IFAS
Know the Difference Between Open Pollinated, Heirloom, and Hybrid Varieties
- Open-pollination of crops occurs when insects, birds, wind, or other natural mechanisms carry pollen from flower to flower. Seed can be saved from open-pollinated varieties which will produce crops with similar characteristics to their parents.
- Heirloom varieties have a history of being passed down within a family or community. As the name suggests, seed can be saved from heirloom varieties which will produce crops with similar characteristics to their parents.
- Hybridization is a controlled method of pollination in which the pollen of two different varieties or species is crossed by human or natural mechanisms. Seed saved from hybrids will most likely not produce as vigorously as their parents and may produce crops that are significantly different from their parents.
I would never want to discourage you from growing new crops, but I hope you now have a little better plan as to what to plant this year. If you want to try something new with minimal risk then I would recommend you try growing yard-long beans, calabaza squash, and malabar spinach. These vegetables serve as excellent substitutes for some of the more commonly grown varieties. You can read more about these crops and other minor vegetables by visiting the University of Florida/IFAS Minor Vegetable Webpage.
by Matt Lollar | Jan 25, 2018
The Jackson County Master Gardeners are hosting a hosting a Mushroom Growing Workshop on Saturday, February 10 at the Jackson County Extension Office, 2741 Penn Ave., Marianna, FL.

Shiitake mushrooms growing on a log. Photo Credit: University of Florida/IFAS
MUSHROOM GROWING WORKSHOP
SATURDAY, FEBRUARY 10
9:00 AM to 2:00 PM
• Learn to grow shiitake mushrooms on logs.
• Learn about mushroom nutrition.
• Take home an inoculated mushroom log!
• A home cooked lunch is included!
Registration Fee $20.00
Includes Lunch
Space is Limited
To register, contact the Extension Service at (850)482-9620 or s.farr@ufl.edu.
Pre-register by February 7th.
by Matt Lollar | Jan 10, 2018
The Jackson County Master Gardeners are hosting a hosting a Mushroom Growing Workshop on Saturday, February 10 at the Jackson County Extension Office, 2741 Penn Ave., Marianna, FL.
Shiitake mushrooms growing on a log. Photo Credit: University of Florida/IFAS
MUSHROOM GROWING WORKSHOP
SATURDAY, NOVEMBER 18
9:00 AM to 2:00 PM
• Learn to grow shiitake mushrooms on logs.
• Learn about mushroom nutrition.
• Take home an inoculated mushroom log!
• A home cooked lunch is included!
Registration Fee $20.00
Includes Lunch
Space is Limited
To register, contact the Extension Service at (850)482-9620 or s.farr@ufl.edu.
Pre-register by February 7th.
by Matt Lollar | Dec 14, 2017

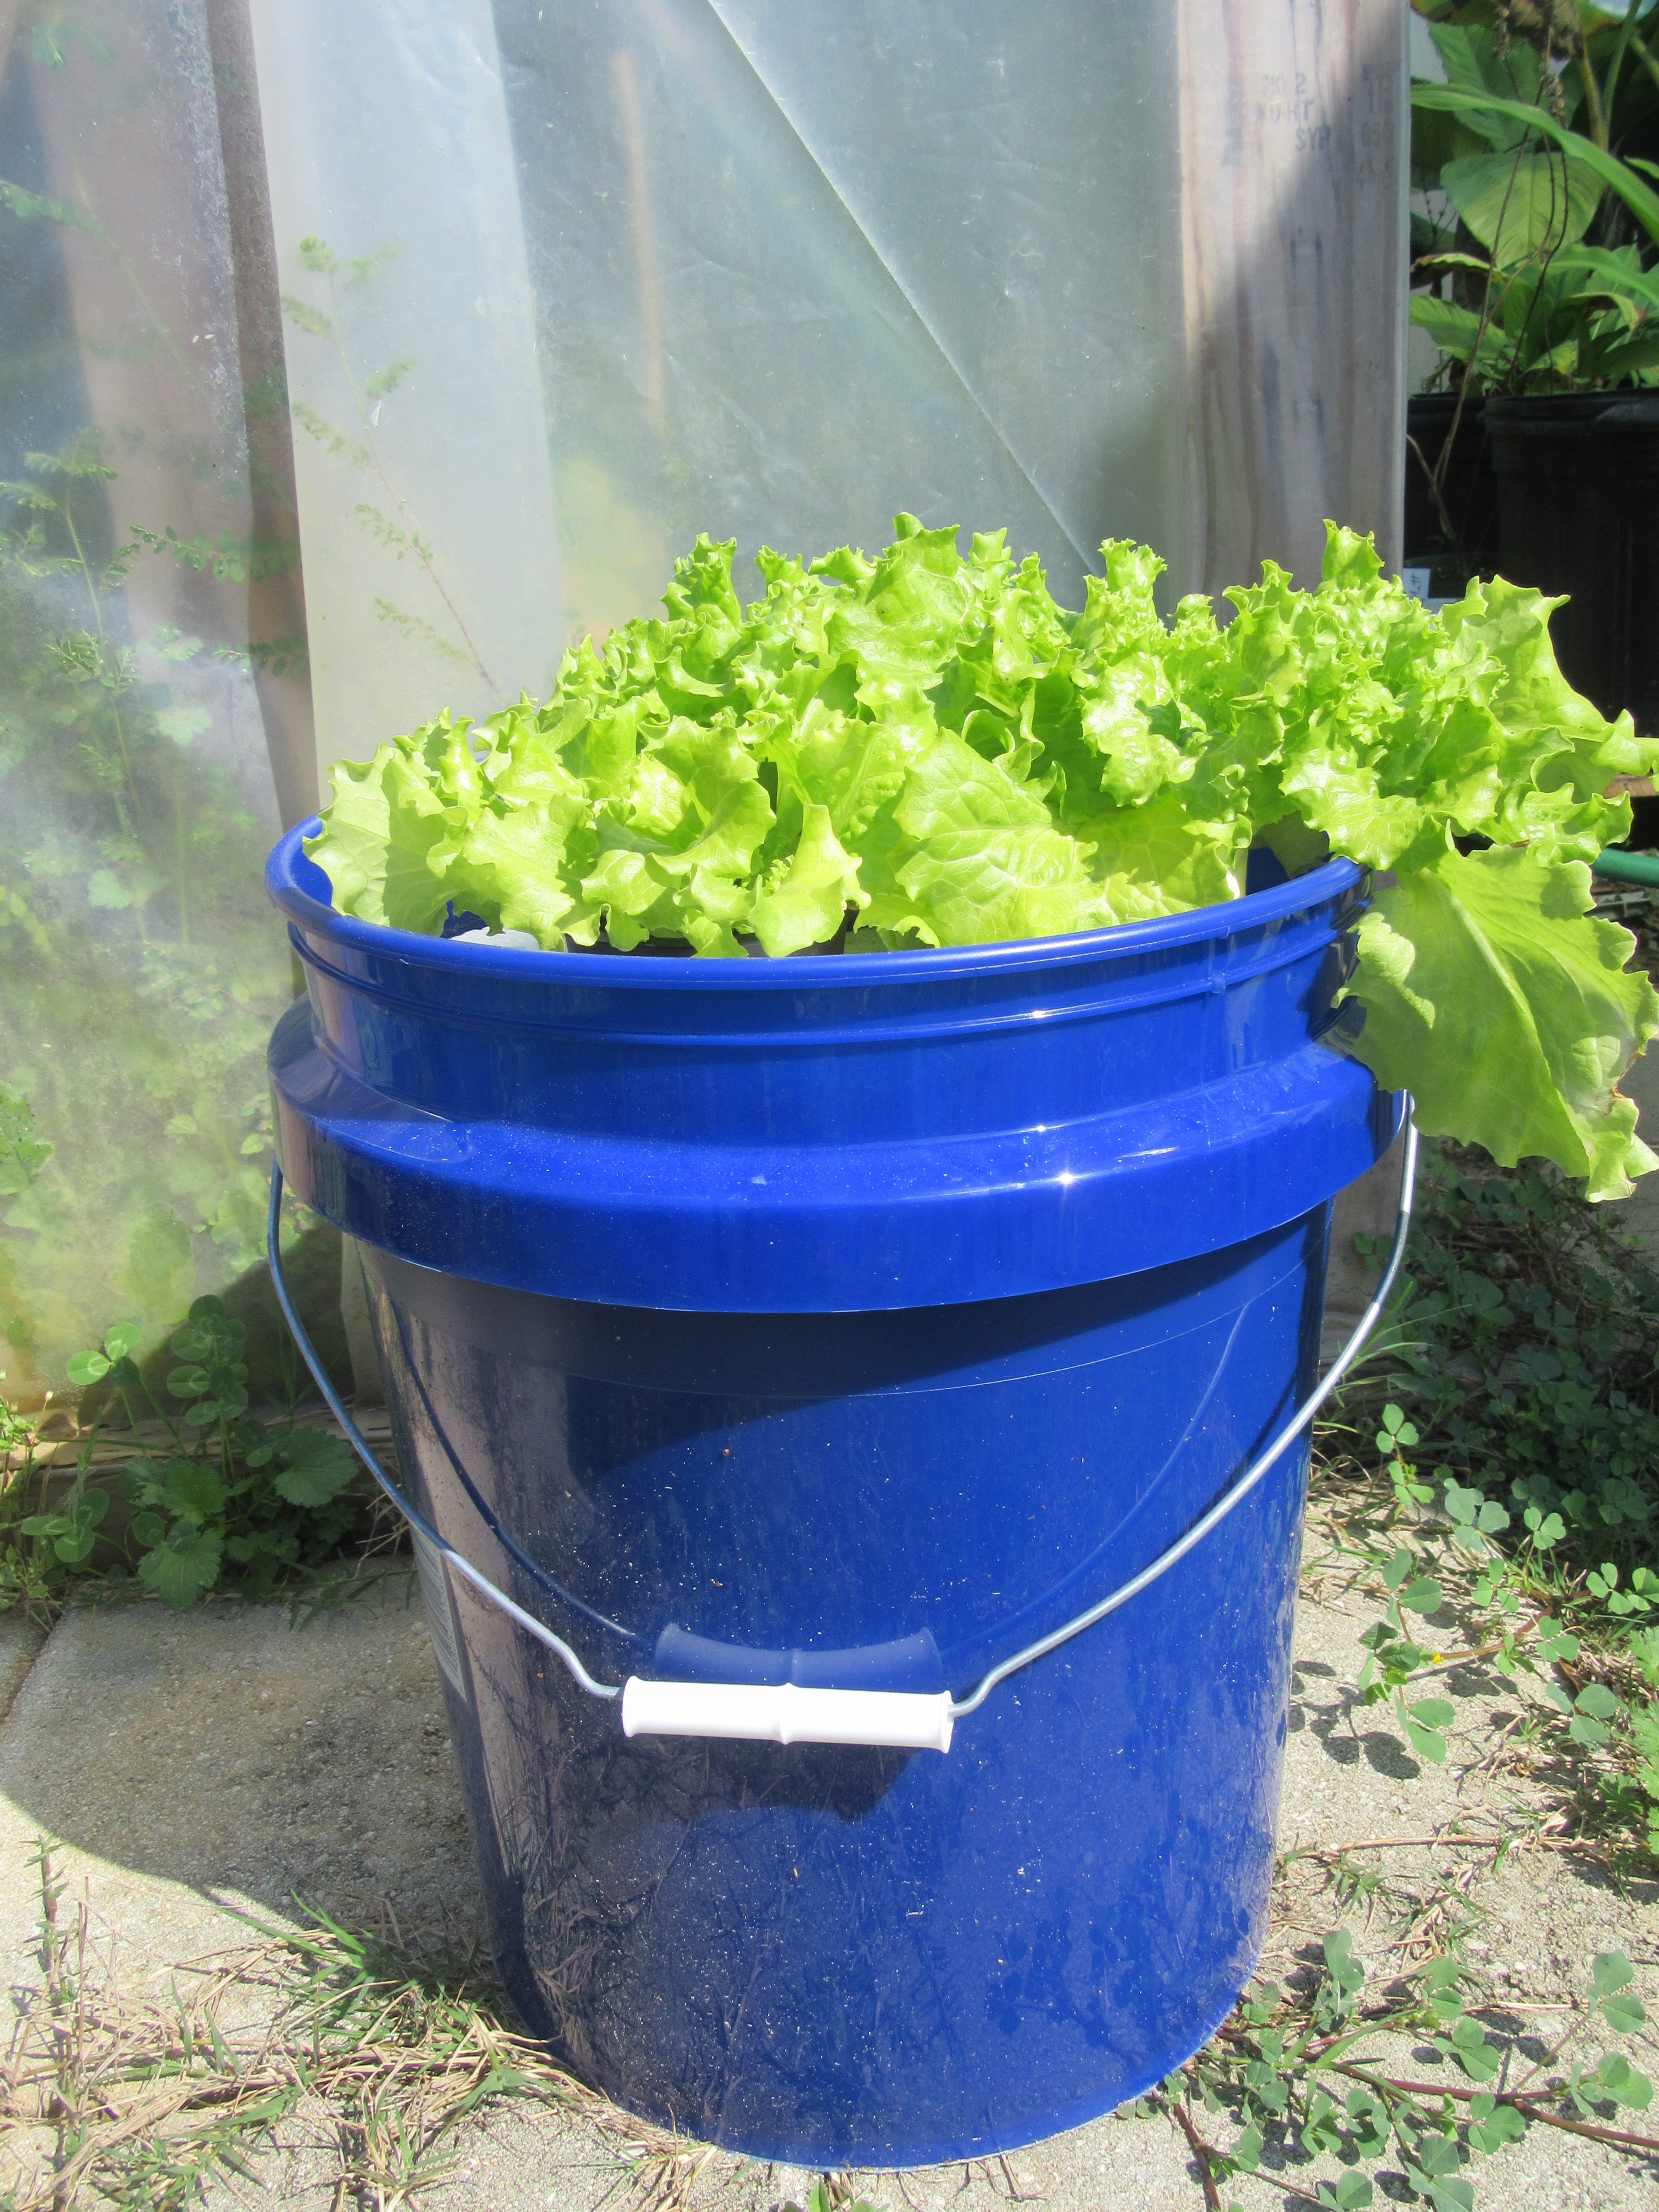
Leaf lettuce growing in a floating hydroponic system. Photo Credit: University of Florida/IFAS Extension.
Christmas is just around the corner and what better gift could you give other than the gift that keeps on giving…a hydroponic bucket garden! Floating hydroponic gardens are easy to build with supplies found at just about any home and garden center. A simple garden can be constructed with a 5-Gallon bucket, polystyrene foam board insulation, and “net pots” or other suitable containers to support the plants. Leaf lettuce and herbs are suitable plants for growing in a floating garden and will grow well indoors as long as there is plenty of natural light available.
SUPPLIES
- 5-Gallon Bucket
- Polystyrene Foam (1½ inch or thicker)
- Water
- Water-Soluble Fertilizer (10-10-10, 20-20-20, 24-8-16, or similar grade)
- Epson Salts (magnesium sulfate)
- Suitable Plants (leafy lettuce, greens, or most herbs – NOT rosemary)
- “Net Pots”, Polystyrene Cups with punctures, or other suitable containers
- Jigsaw, Drywall Saw, or Sharp Knife
- Hole Saw
CONSTRUCTION
- Cut, with a jigsaw, a 1½ inch board of polystyrene foam board insulation into 1-by-1-foot squares.
- Place the bottom of the bucket on a 1-by-1 foot square of foam and trace the shape of the bucket on the foam. Cut out the circle.
- Use a hole saw to cut evenly spaced holes out of the foam. (Typically 3 to 4 depending on “net pot”/plant container size.) The hole size should allow the bottom of the plant container to be level with the underside of the foam.
FERTILIZATION & PLANT CARE
Fill the bucket with approximately 2.5 gallons of water. Add 1 to 2 teaspoons of water-soluble fertilizer for each gallon of water to be used in the bucket (approximately 5 to 9 teaspoons for 4.5 gallons of water). Add ½ to 1 teaspoon of Epson Salts for each gallon of water to be used in the bucket (approximately 2.5 to 4.5 teaspoons for 4.5 gallons of water). Mix the fertilizer and Epsom Salts with the water in the bucket. Continue to fill the bucket with water to within 1½ inches of the rim of the bucket. Set “net pots” or plant containers in the hole cutouts in the foam circle. Lay the foam circle, with inserted containers, on the surface of the water/fertilizer mixture in the bucket. Place the young starter plants in the containers. Do not remove the potting mix from the plant roots. The most critical aspect is the depth of the transplant’s root ball in the solution. The bottom of the root ball should be flush with the surface of the water. As the water/fertilizer mixture is taken up by the plants and evaporated, the water level in the bucket will decline.
FURTHER INFORMATION
A bucket garden may just be the beginning of your hydroponic ventures. For additional publications on growing hydroponic vegetables please visit the University of Florida/IFAS EDIS website hydroponic production page. If you want to start your own hydroponic farm then you may also be interested in attending the “Starting a Successful Hydroponic Business” training at the Suwannee Valley Agricultural Extension Center in Live Oak in March.
by Matt Lollar | Nov 20, 2017
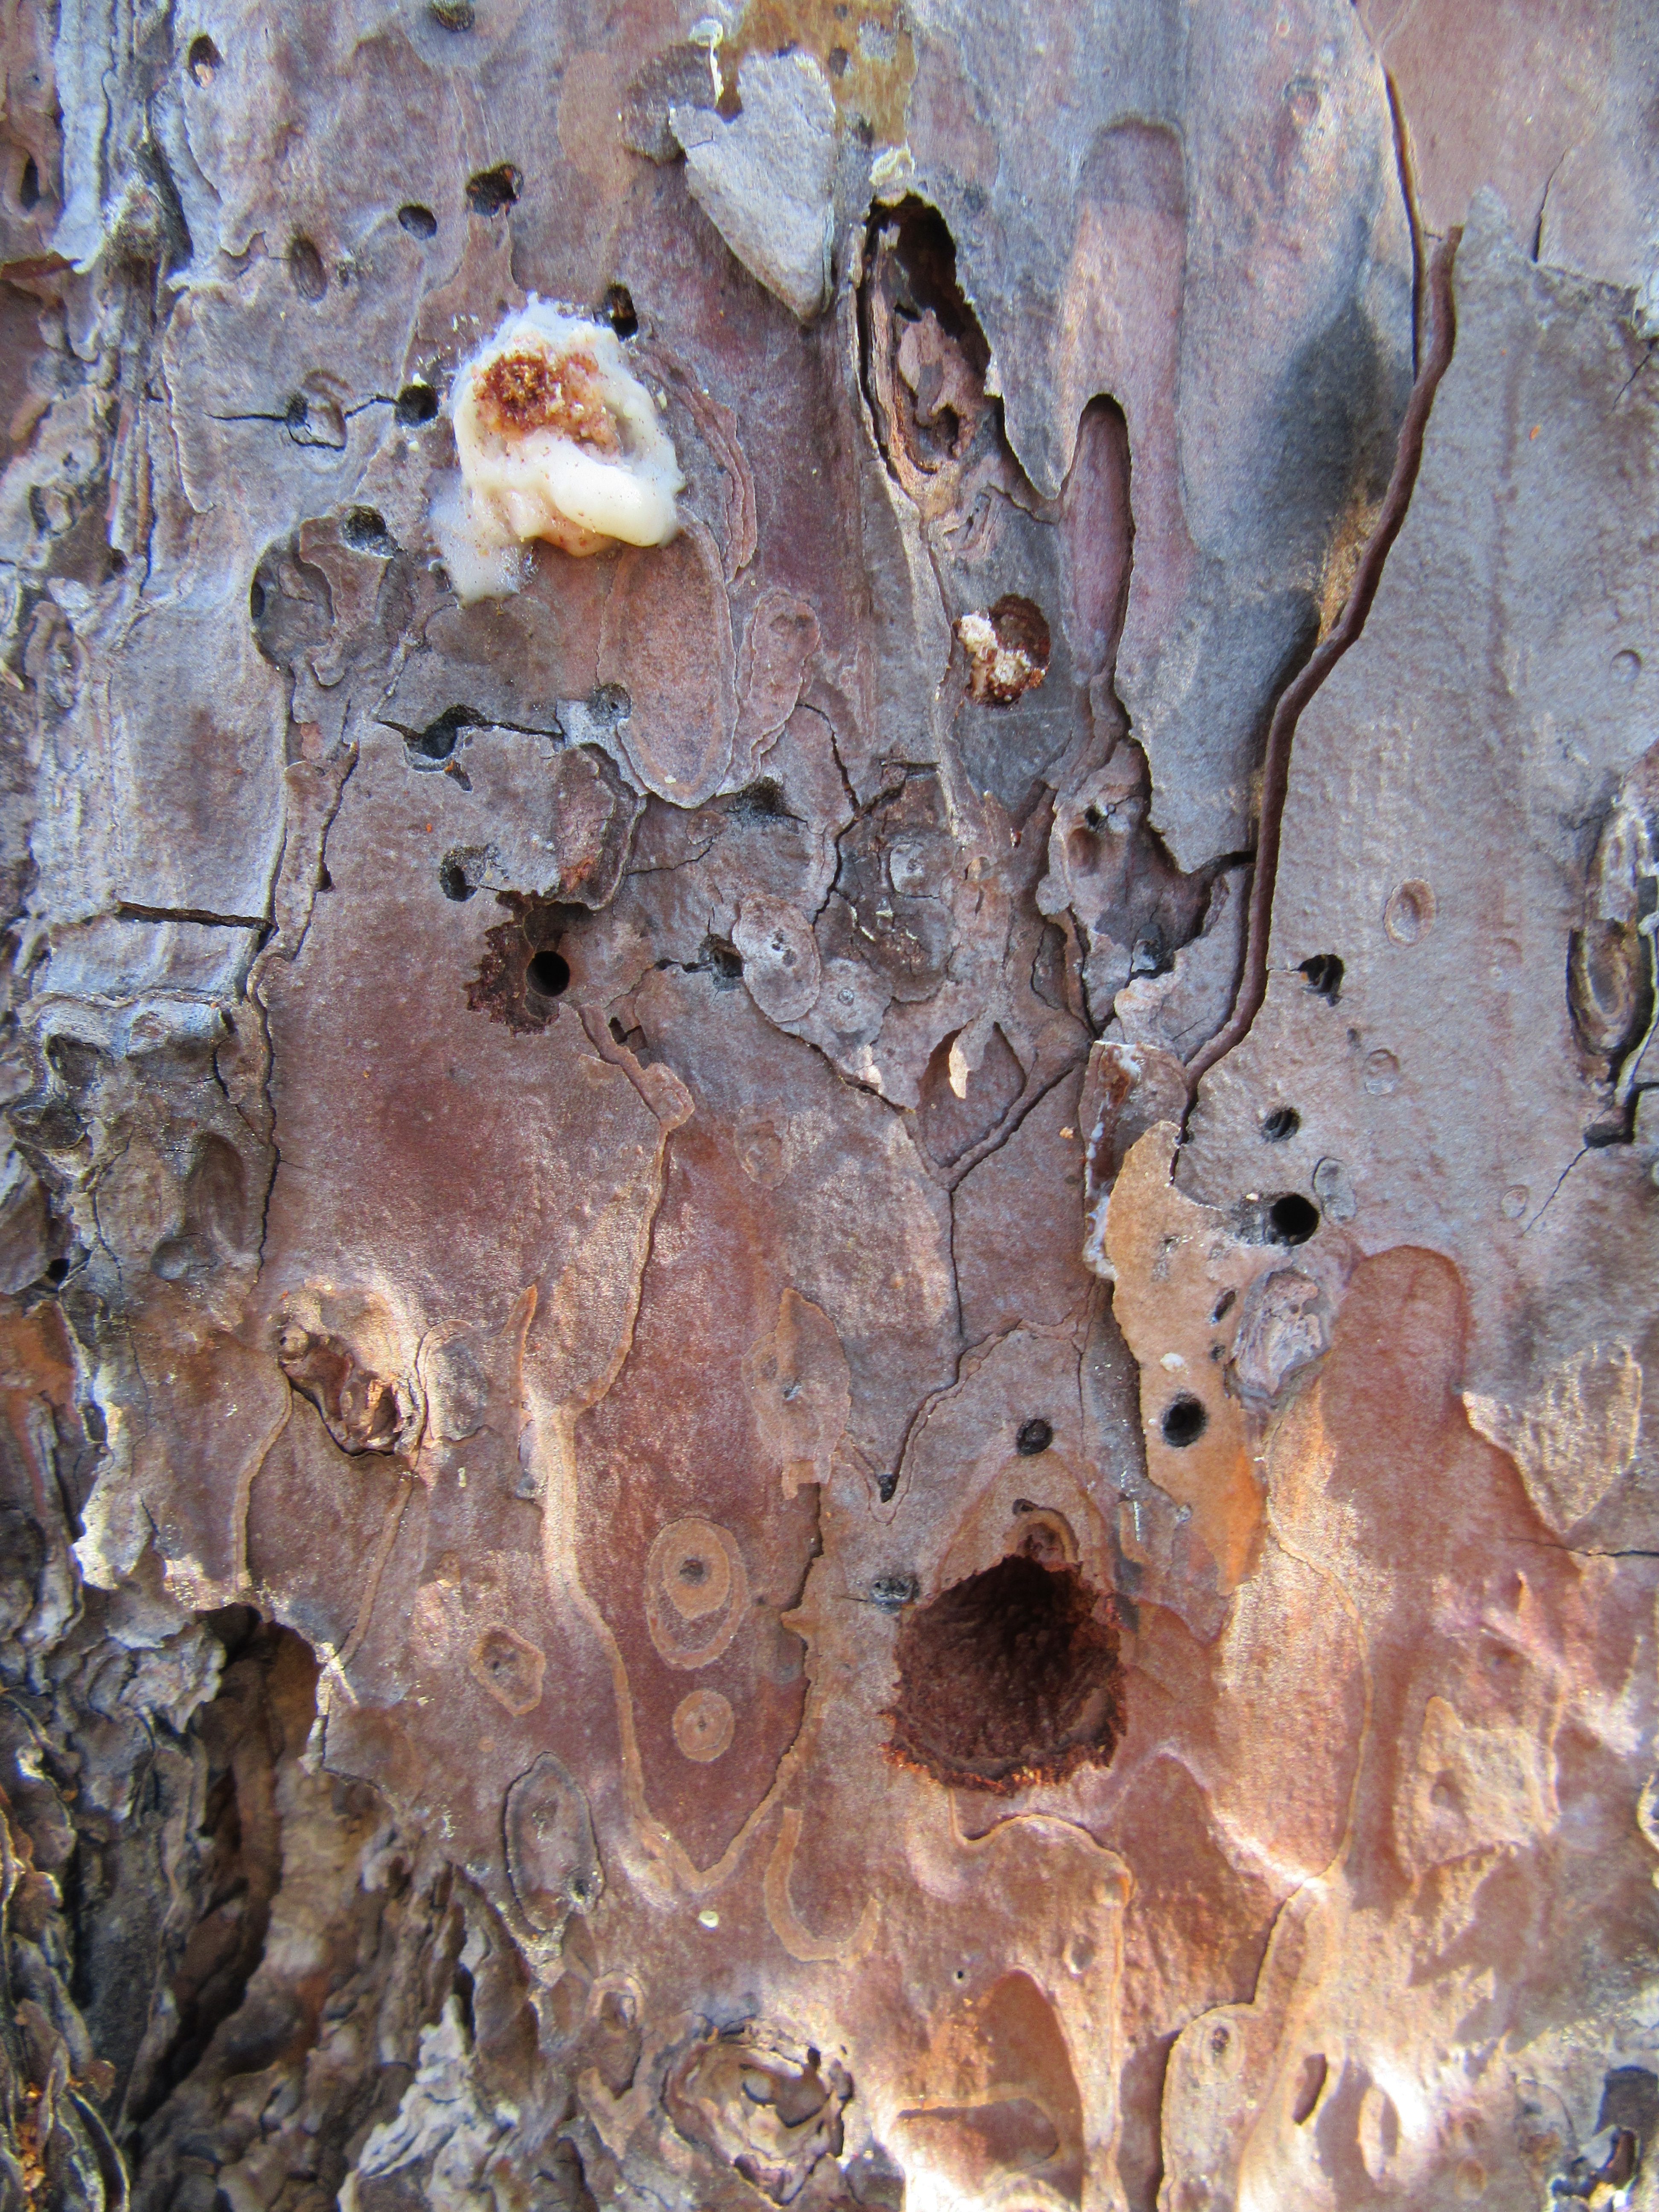
Sometimes you don’t realize a tree is dying until it is dead. A few weeks ago, we got a call from a client who said he had insects killing his trees. Before having someone drive out to the property, our Master Gardener volunteer recommended that the client bring in some of the insects for us to take a look. It turned out the insects invading his pine tree were a type of longhorned beetle, but more specimens were required for identification. A site visit soon ensued.
There were a number of pine trees on the property, however only one was infested with the insects in question. Upon closer investigation, we noticed a number of different sized holes in the tree. The larger holes are nearly the size of a dime.

Arrowhead borer damage on a pine tree. Photo Credit: University of Florida/IFAS Extension.
It turns out the insects making the larger holes are a type of longhorned beetle known as an arrowhead borer (Xylotrechus sagittatus). The borers are brown to black in color with a reddish hue. They are moderately hairy and some specimens contain arrowhead markings pointing toward their heads. Adults feed on the bark of damaged or fire-killed pines. The adults are attracted to lights and may be mistaken for crickets because they run very fast. Eggs are laid in bark and larvae feed on sapwood, then tunnel deeper, often tunneling within a single annual ring. The borers pupate inside the tree and the newly emerged adults chew their way out.
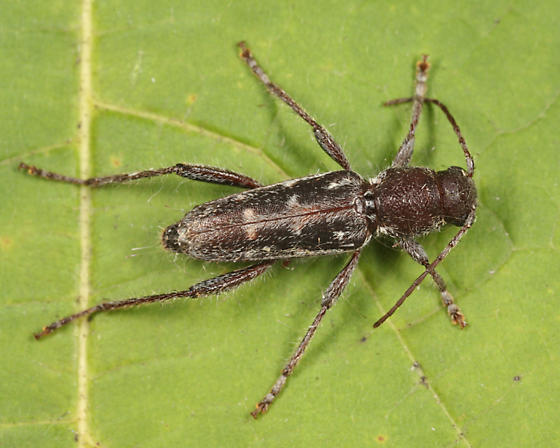
Arrowhead Borer. Photo Credit: Tom Murray bugguide.net.
Given the fact that arrowhead borers are attracted to dead or dying trees, the killer of this particular tree is still in question. The smaller holes in the bark picture above were created by a much smaller beetle, but we were unable to get a specimen. We did see a couple of these beetles running around when we dug deeper into the bark. The small beetles that we saw closely resembled a type of Ips engraver beetle. Beetles in this genus have been known to kill trees, but most likely they weren’t the culprits either. Based on the overall appearance of the tree and the fact that other trees in the area were not infested with beetles, it is believed the tree was killed by other means. The tree was likely struck by lightening or suffered from poor genetics because it did not have a good form for a pine tree.
If you have a questionable looking tree on your property or if you have insects you would like identified, please feel free to stop by your local Extension Office and ask a Master Gardener!