by Ray Bodrey | Apr 24, 2017
If you haven’t already, it’s time to prepare the garden space for the summer bounty of fresh vegetables. The following information will help you get started. Just remember, as the soil preparation goes, so goes the vegetable production.

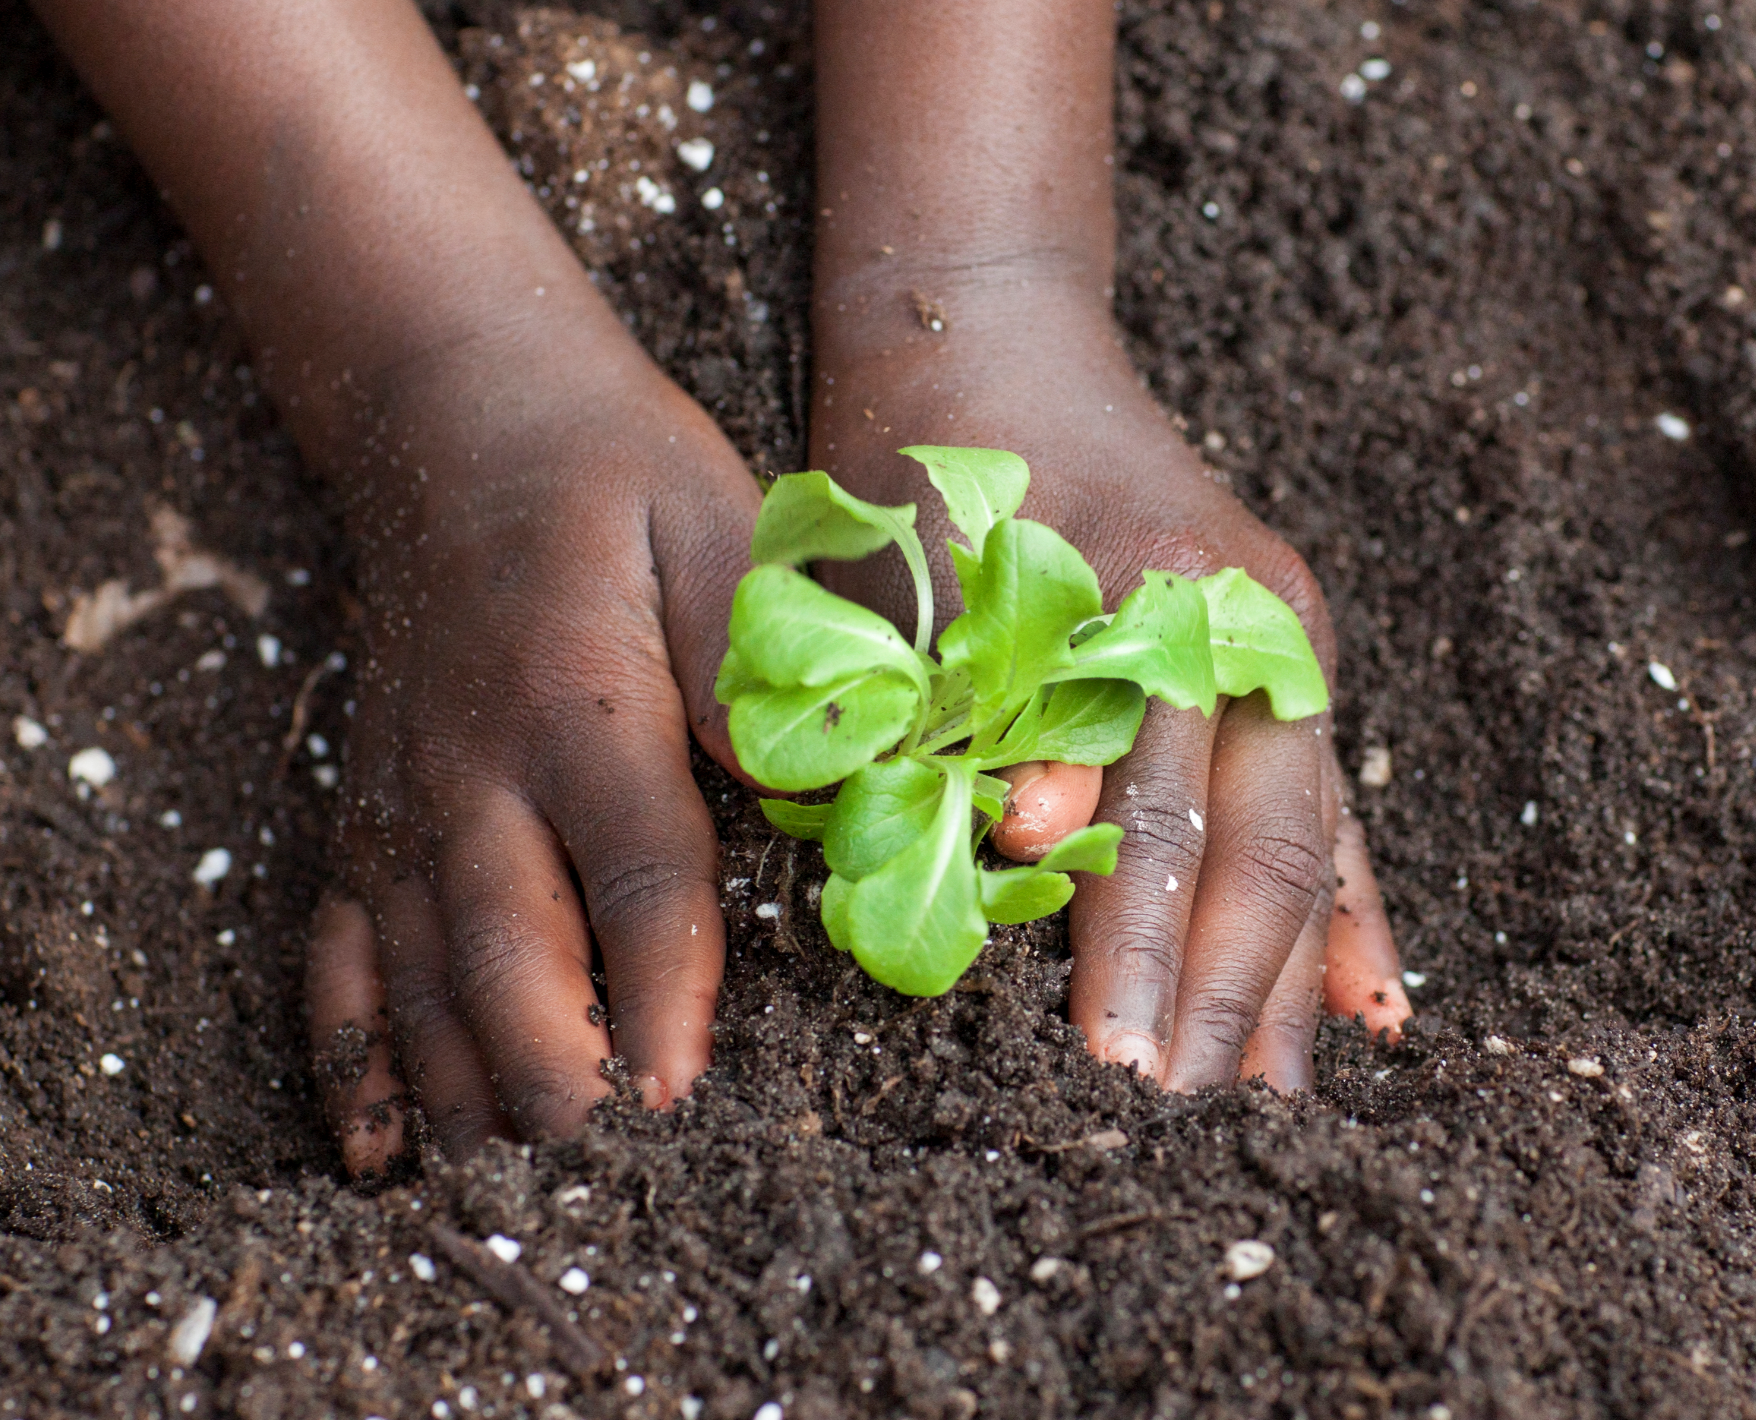
Figure 1: Planting Vegetables in Prepared Soil.
Credit: Tyler Jones, UF/IFAS.
By far the most physical part of vegetable gardening is soil preparation. This is the foundation that your garden is built on, so let’s not cut corners at this stage. Plain and simple, poor soil prep will result in poor garden performance. Before you begin prep, it is a good idea to have a soil sample analyzed. With a soil analysis complete, a more customized fertilizer and application may be recommended for your needs. However, a complete fertilizer like 8-8-8 or 10-10-10 can be used as general purpose. Also, pH can be determined through this test. If the soil is too acidic for vegetables, then a liming requirement may be needed. pH is key information, especially regarding planting time. If one needs lime, it is recommended to wait at least a month before planting to allow the lime to adjust soil pH. Generally, a small amount of lime can be added to a garden space regardless, as lime also contains the vital micronutrients calcium and magnesium. Contact your local extension office for more information on soil testing.
To begin the garden prep, one will first need to remove the weeds from the space. The next step is to turn the soil. This will help aerate the soil and accelerate soil decomposition which leads to higher organic matter. Turing the soil will also eliminate any soil compaction issues that would stifle seed germination. With sandy soils throughout the Panhandle, one will most likely need to amend by spreading a rich organic compost in the space. An application of fertilizer can be mixed in at this stage as well. Always follow the manufacturer’s label regarding application directions. Once complete, the soil should then be turned by digging down six to eight inches. A large garden will require a motorized tiller, but hand-held implements should be fine for smaller spaces.
After the soil is turned, be sure to break up any clods and rake so that the area is level. The soil should be of a fine texture by this point. Again, this makes seed germination much easier and will assist in further root development of transplants.
To have a vegetable garden that all will envy, it begins with soil prep. Remember, not only does a vegetable garden provide nutrition, but it also provides for exercise, a feeling of accomplishment and even could save you a few bucks. Please contact your local county extension office for more information.
Supporting information for this article can be found in the UF/IFAS EDIS publication: “Florida Vegetable Gardening Guide” by Sydney Park Brown, Danielle Treadwell, J. M. Stephens and Susan Webb: http://edis.ifas.ufl.edu/pdffiles/VH/VH02100.pdf
Information on garden plot preparation was also provided by Emeritus Vegetable Specialist Jim Stephens, of The University of Florida’s Institute of Food and Agricultural Science.
UF/IFAS Extension is an Equal Opportunity Institution.

by Ray Bodrey | Mar 20, 2017
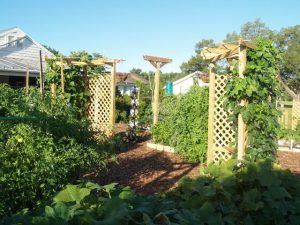
Figure 1: Edible Landscaping.
Credit: Dr. Gail Hansen, Environmental Horticulture-UF/IFAS
Edible landscaping has become a trend for many gardening enthusiasts. A combination of edible plants along with traditional ornamentals can create an artful presentation. There are some challenges when designing such a landscape, but in those challenges opportunities’ may be found. One of the most difficult challenges is making sure your garden or landscape is healthy and vibrant year-round since many edibles are short-lived annuals. These include plants such as eggplant, pepper, lettuce, artichoke and some annual herbs. There is a solution to this concern. First, know your edible plant’s propagation and maturity months. This way you can offset plantings to ensure color in your landscape. Another key measure is to mix some evergreen ornamentals in with short season edibles and long season edibles. Examples of long season edibles include berry shrubs, fruit trees and biennial or perennial herbs.

Table 1: North/Central Florida Front Yard Edibles.
Credit: Dr. Gail Hansen, Environmental Horticulture-UF/IFAS.
When designing your edible landscape, think about style and theme to help guide you through the process. A formal design has more straight edges and geometric shapes, whereas the more natural approach has meandering edges and irregular shapes. A color scheme in harmony is very important. Remember, an edible landscape should not just be a production food garden but a visual treat. The goal is not to grow a high yield garden, but only to produce supplemental edibles to make the endeavor worthwhile.
Dr. Gail Hansen, Associate Professor of Environmental Horticulture at the University of Florida, has developed twelve ideas when creating an edible landscape:
- Combine reliable, low-maintenance ornamental with edible plants. Use evergreen ornamentals to maintain enough green structure, so that potential cool season bare spots are not visual.
- Use support structures for an artistic effect and to assist in growth of some plants. Trellises, arbors and even tomato cages are some examples that can be used.
- Use containers in areas to keep the landscape more organized. Planters will also help in maintenance, as plants will be easier to reach and the soil will be easier to manage.
- Create some hard edges in your landscape. Raised beds, garden walls and borders will give defining lines to the landscape and promote a clean appearance.
- A pathway through the landscape will both provide an access to plants and give an inviting appeal. Brick pavers, gravel and mulch are good examples of pathway material.
- Remember color is key. Create a visually pleasing combination of plant color, form, texture and sizes.
- Always start by keeping it simple. So, start small and simple. Then, you can begin filling in the landscape.
- Look for one unique feature to create an added interest to you landscape and provide growth to plants. This could be a shade house for ferns and other hanging baskets or a hay bale, where lettuce, tomatoes or peppers could grow upon.
- Select appealing and easy to grow plants that you want to eat!
- Let plants reach maturity before taking them out of the landscape. For example, rainbow chard will grow larger, if allowed to continue to grow after seed has been produced.
- Use the Florida-Friendly Landscaping principle, “Right Plant, Right Place”, when adding edibles to your landscape. Match the growing needs with the most suitable location.
- Consider your location and layout for irrigation. All plants need some degree of water. An above ground drip irrigation system is usually the most flexible and adjustable irrigation method in regards to overall plant watering needs in a landscape.
Following Dr. Hansen’s ideas will help you create the edible landscape of your dreams. For more information on edible landscaping, please contact your local county extension office for more details.
Supporting information for this article can be found in the UF/IFAS EDIS Publications, “Landscape Design with Edibles” by Dr. Gail Hansen: http://edis.ifas.ufl.edu/pdffiles/EP/EP47500.pdf
UF/IFAS Extension is an Equal Opportunity Institution.
by Ray Bodrey | Feb 10, 2017
Yes, even with cool weather setting in, much can be done on the flower gardening front. Let’s kickoff 2017 by being the envy of the neighborhood with flower beds that are rich and vibrant in color.
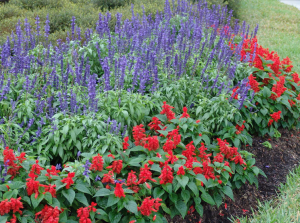
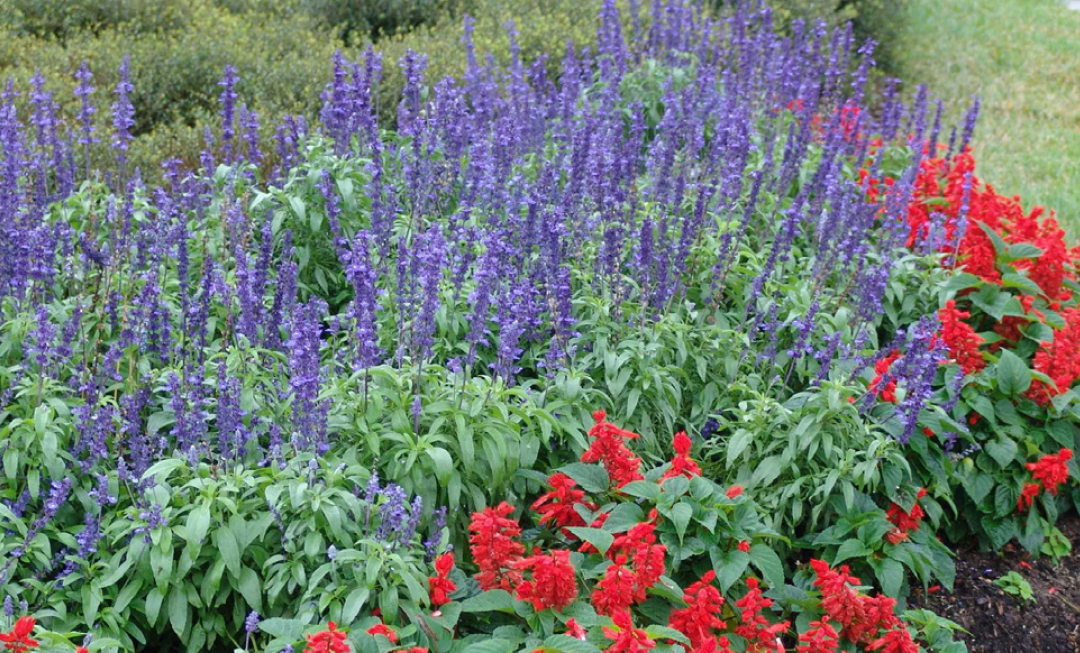
Figure 1: Bedding Annuals.
Credit: Sydney Park Brown, UF/IFAS.
Annual bedding plants are plentiful in variety and come in an array of colors and forms. These plants will highlight home landscapes, whether in beds or in containers on porches, decks and patios.
Annuals are divided into two categories, warm and cold season. Warm season are tender, and damaged by the first frost. Cool season on the other hand, cannot withstand heat or excessive rainfall. Therefore, to be successful with annuals, you must plant at the right time. For this region, late March for the earliest warm season annual planting and late fall for the earliest cool season annual planting is ideal. For the Panhandle, most annuals only live through the season, not the year. For this time of year, some examples of annuals that enjoy cooler temperatures are the pansy, viola, petunia and snapdragon.
When shopping for annuals, pay close attention to how much sunlight the variety will tolerate. This should be displayed on the container. Be sure to plant your annuals under a minimum of partial light. No annual can tolerate heavy shade. Remember when deciding on which variety to purchase, that annuals are an accent piece or supplement to the landscape, and not the focal point. Think of harmony and balance among other plants in your landscape before coming to a decision.
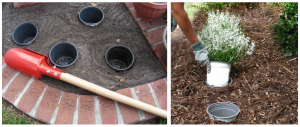
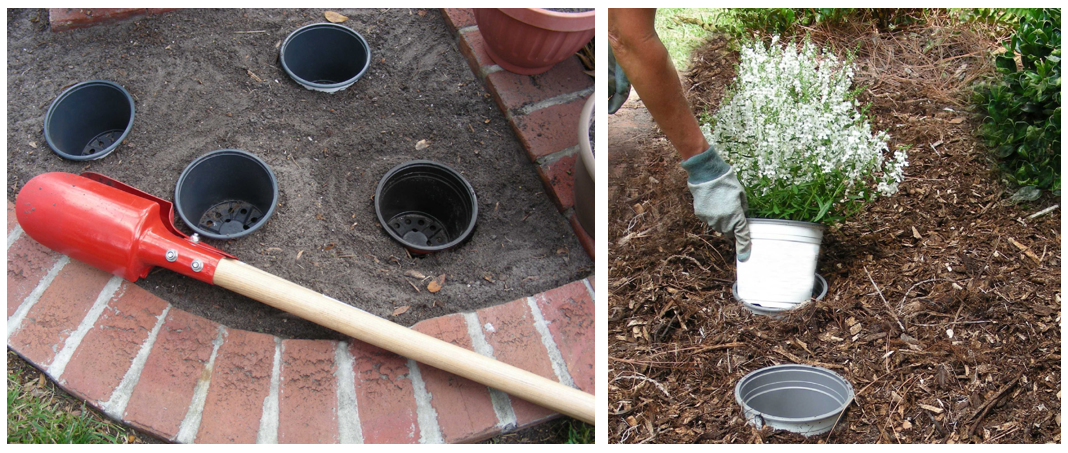
Figure 2: Pot-in-Pot Method.
Credit: Sydney Park Brown, UF/IFAS.
As for care, be sure to water annuals after planting. Provide water on a routine basis until the root system has established. The best way to achieve this is making sure the topsoil layer stays moist early on.
Some gardeners prefer the “pot-in-pot” method with annuals. This method consists of sinking empty pots into the soil and then dropping potted annuals of the same size pot, into the empty pots. This works well for our area for two reasons. Often, our native soils, especially if you live closer to the coast, are not conducive to annual flower bed gardening. By using the pot-in-pot method, rich potted soil encompasses the annual throughout its life span and with no soil bed amendments needed. Also, this can make an otherwise long, laborious gardening day become very short regarding the change out planting from cold to warm season annuals and vice versa.
When supplying water to annuals, be careful with high pressure overhead watering systems, as this can damage petals and can cause bloom rot. A drip irrigation system or handheld hose watering is the best method. Fertilize annuals with a controlled release nitrogen fertilizer, so that a steady supply of nutrients is provided throughout the season. For weed control, mulching with use of pre-emergent herbicides is the best course of action. Depending on the size of landscape, hand weeding maybe the best practice. For pest management use a spot treatment insecticide for the entire flower bed once an insect infestation or disease problems emerge.
The information provided in this article will help your annual bedding plant efforts and in turn reward you with a beautiful flower landscape throughout the year. For more information on annual flower bedding plants, please contact your local county extension office.
Supporting information for this article can be found at the UF/IFAS EDIS Publication, “Gardening with Annuals in Florida” by Dr. Sydney Park Brown: http://edis.ifas.ufl.edu/mg319
UF/IFAS Extension, An Equal Opportunity Institution.

by Ray Bodrey | Dec 22, 2016
Although there are many types of artificial Christmas trees these days, live or cut trees are still very popular. Given the proper care, your natural tree can maintain its festive look throughout the holidays, keeping your safety in mind as well.

Image credit: UF/IFAS Communications.
By now many of you have already bought and displayed your trees. However, it’s not a bad idea to discuss tree selection for next year. Tree selection is important to maintain tree health and for decorating as branch sturdiness differs among varieties. White pine and red cedar are great choices for the panhandle climate, but have weak branches for hanging ornaments. Firs and spruces are better choices for this, except for our native species that require closer management.
Of course, the most important management measure to keep in mind is moisture level. A hydrated tree will reduce needle drop and keep the tree vibrant green. Don’t forget about the fire hazard a dry tree can cause. Use water holding stands and replenish often, maintaining the water level above the base of the cut tree. Clean water is the best, no additives are needed. It will surprise you how quickly and how much a cut tree will absorb. A good rule of thumb is to have a water basin that will hold approximately 1 quart of water per inch of stem diameter. The proper size stand is important. Make sure it is proportional to your tree size. A potted tree will require approximately a gallon of water a couple of times a week, depending on size. Feel the needles and check the soil for dryness, and add water when needed.
Place your tree in the coolest area of the room. Keep the tree away from air ducts, fireplaces and direct sunlight. However, a tree left in a darkened room will also promote needle drop. A space with indirect sun is best. Any heat from these factors can deteriorate the moisture level needed for a healthy tree.
This is also a popular time of year to travel. Busy with holiday plans, it’s easy to forget about caring for your tree while you are gone. If you are going to travel more than a few days, ask a friend or neighbor to water your tree, but give specific instructions. Remember, moisture is the key. The last thing to do before embarking on your holiday travel is to give your tree water. Be sure the lights are unplugged too.
Safety is the number one priority and should always be on your mind. Start by keeping any open flames or candles far away from the tree. Be careful with strands of lights and inspect before placing on the tree. If the wiring is showing age with cracks in the rubber insulation or the plug is worn, please dispose of them. Be careful not to overload circuit breakers as well. Always turn lights off before you retire for bed.
Take time to properly care for your tree. Your efforts will reward you with a beautiful, festive tree throughout the holiday season. For more information, please contact your local county extension office. Happy Holidays!
Supporting information can be found at the UF/IFAS Family & Consumer Science website: http://solutionsforyourlife.ufl.edu/hot_topics/families_and_consumers/christmas_trees.shtml
by Ray Bodrey | Nov 14, 2016
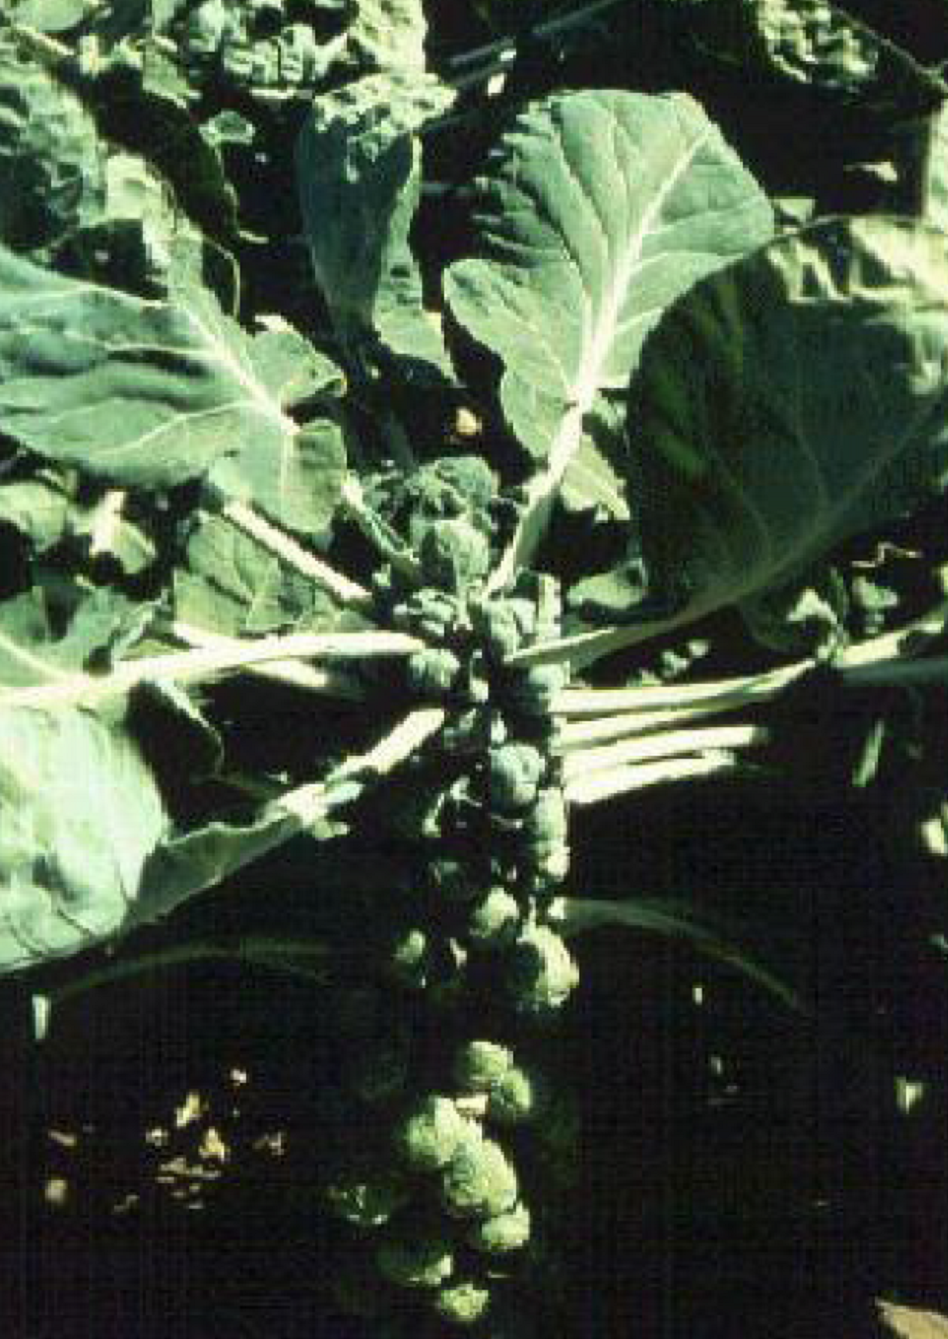
Want to try something different in your winter garden this year? Well, when it comes to Brussels sprouts, you either love them or hate them. They’re not commonly grown in the Panhandle, but if you’re looking for something different, try growing this tiny cabbage. Predicted weather conditions for this season should lend a great crop.
 Brussels sprouts are very popular in Europe, especially Great Britain, but not so much here in the U.S. However, they are grown commercially in California and New York. But, most states have a limited market and these crops are mostly seen in backyard vegetable gardens. The two varieties, Jade Cross and Long Island Improved, are the most commonly grown in the Panhandle.
Brussels sprouts are actually a type of cabbage. However, the plant does not form one large head in the center, but rather many small heads on lengthy branches. Each golf ball size sprout resembles a cabbage head. Brussels sprouts require extended cold, dry weather, just as many sources have predicted for this year in the Panhandle. Brussels Sprouts can also survive a heavy frost. They’ll need a temperature at least in the lower 60’s in order to maintain a solid sprout and not open up. If sprouts open, structural integrity is lost, and the sprout will turn to mush.
Finding Brussels sprout transplants for your garden may be a challenge. They’re just not that popular. The good news is, seed is readily available and germination is quick once planted in garden soil. Seeds should be planted between October-December in the Panhandle. When planting, space approximately 2 ½’ apart within the row at a seeding depth of a ½”. Rows should be 2’ apart. It’s a good idea to fertilize before you plant with a general all-purpose fertilizer like 10-10-10 or 8-8-8. A good rule of thumb is to disperse 4 pounds of fertilizer per 100’ row. Once plants have grown a few inches, broadcast another application and apply a water afterwards. After a month, another application should be done. Plants should reach maturity at three months. First sprouts will develop on lower branches. Once sprouts are golf ball size, they’re ready to pick.
As far as pest management, the most common issues with Brussels sprouts are the same with any cabbage. Aphids, nematodes and cabbage worms pose the greatest threats. If these pests appear, it’s usually later in the season when the plant is closer to maturity. At that point, you should apply a common vegetable garden pesticide, one that can be used with any variety of produce. As always, be sure to follow the manufacture’s label directions when using chemicals.
Brussels sprouts are high in nutritional value. According to the USDA, a sprout has approximately 10 calories, and is high in both dietary fiber and vitamin C. Here is a challenge for readers who are not fans of the tiny cabbage. Fair warning, this challenge is under the premise that additional calories are acceptable. Start by sauteing a dozen or so Brussels sprouts in equal parts olive oil & butter. Once the sprouts have become a bit tender, add a generous amount of Parmesan cheese and bacon bits. Plate and dig in. I’m confident that this will change some minds.
For more information, contact your local IFAS Extension office
Supporting information can be found in the UF/IFAS EDIS publications, “Brussels Sprouts-Brassica oleracea L. (Gemmifera group)” by James M. Stephens, & “Florida Vegetable Gardening Guide” by Sydney Park Brown, Danielle Treadwell, J.M. Stephens and Susan Webb.