by Ray Bodrey | Oct 12, 2016
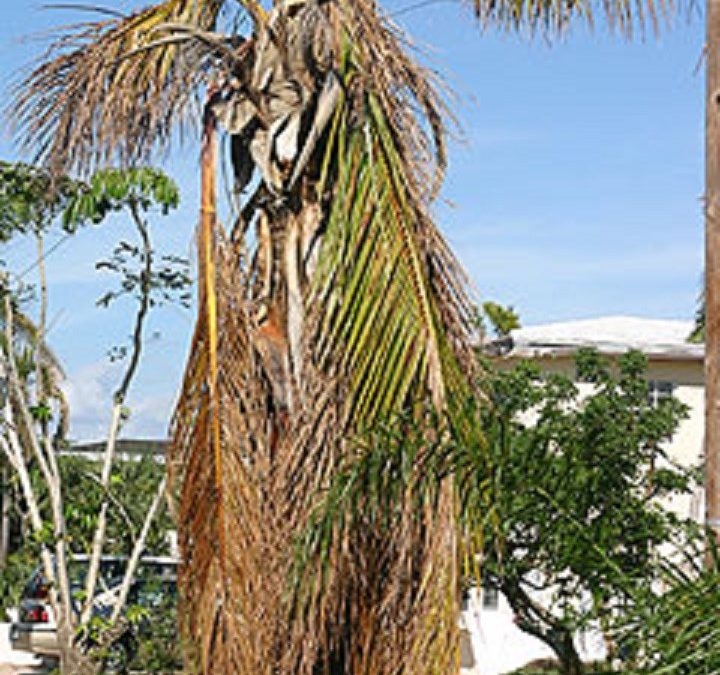
Figure 1: Palm damage after storm event.
Credit: Edward F. Gilman, UF/IFAS.
A common question after a tropical storm or hurricane event is will my palm tree recover? Palms grow different from other trees, so there’s definitely a different way to care for them post-storm.
The growing point of a palm tree is the bud, located in the top of the tree. This is where the palm fronds emerge. If this bud area becomes damaged, no new leaves will develop and unfortunately the tree will die. If by chance the palm tree has multiple-stemmed trunks, the undamaged trunk(s) should survive. Often times palm trees are so tall that it is very difficult to visibly determine if the bud has been damaged. Time will tell.
It’s important to wait at least 6 months to see if palms develop new growth. Palms usually rebound slowly after a storm. It may take a couple of years before the palm tree produces a full canopy of fronds. If a damaged palm tree is determined to be in peril and current rainfall is not sufficient, it’s important to irrigate three times a week for at least six weeks to assist in recovery.
After the storm strikes, it may be beneficial to perform pruning of the canopy. Start by removing any hanging broken or dead fronds that could be hazardous to people or property. It’s a good idea to remove any fronds that are covering the bud, as well. This will allow new fronds to form. Leave any bent green fronts attached. These fronds still have vital nutrients that the tree is utilizing. Once the frond turns brown, then it is safe for removal.
Storm damage cleanup is extremely dangerous, even for professionals. During cleanup after the storm, remember that safety comes first. Some general safety tips are essential, as in, do not work alone. It’s important to keep a well-stocked first aid kit too. Avoid overexertion at all costs. This is the most common cause leading to injury. Be sure to survey the area, identify the hazards and have a plan for the cleanup. Above all, create a safe area to work within.
Palm tree recovery from storms is a slow process, so please be patient and safe. Contact your local county extension office for more information.
Supporting information for this article can be found in the following the UF/IFAS publications:
“Assessing Damage and Restoring Trees After a Hurricane” by Edward F. Gilman, Mary L. Duryea, Eliana Kampf, Traci Jo Partin, Astrid Delgado & Carol J. Lehtola: http://monroe.ifas.ufl.edu/pdf/Hort/Assessing_Trees_After_Hurricane.pdf
An Equal Opportunity Institution.
by Ray Bodrey | Sep 8, 2016
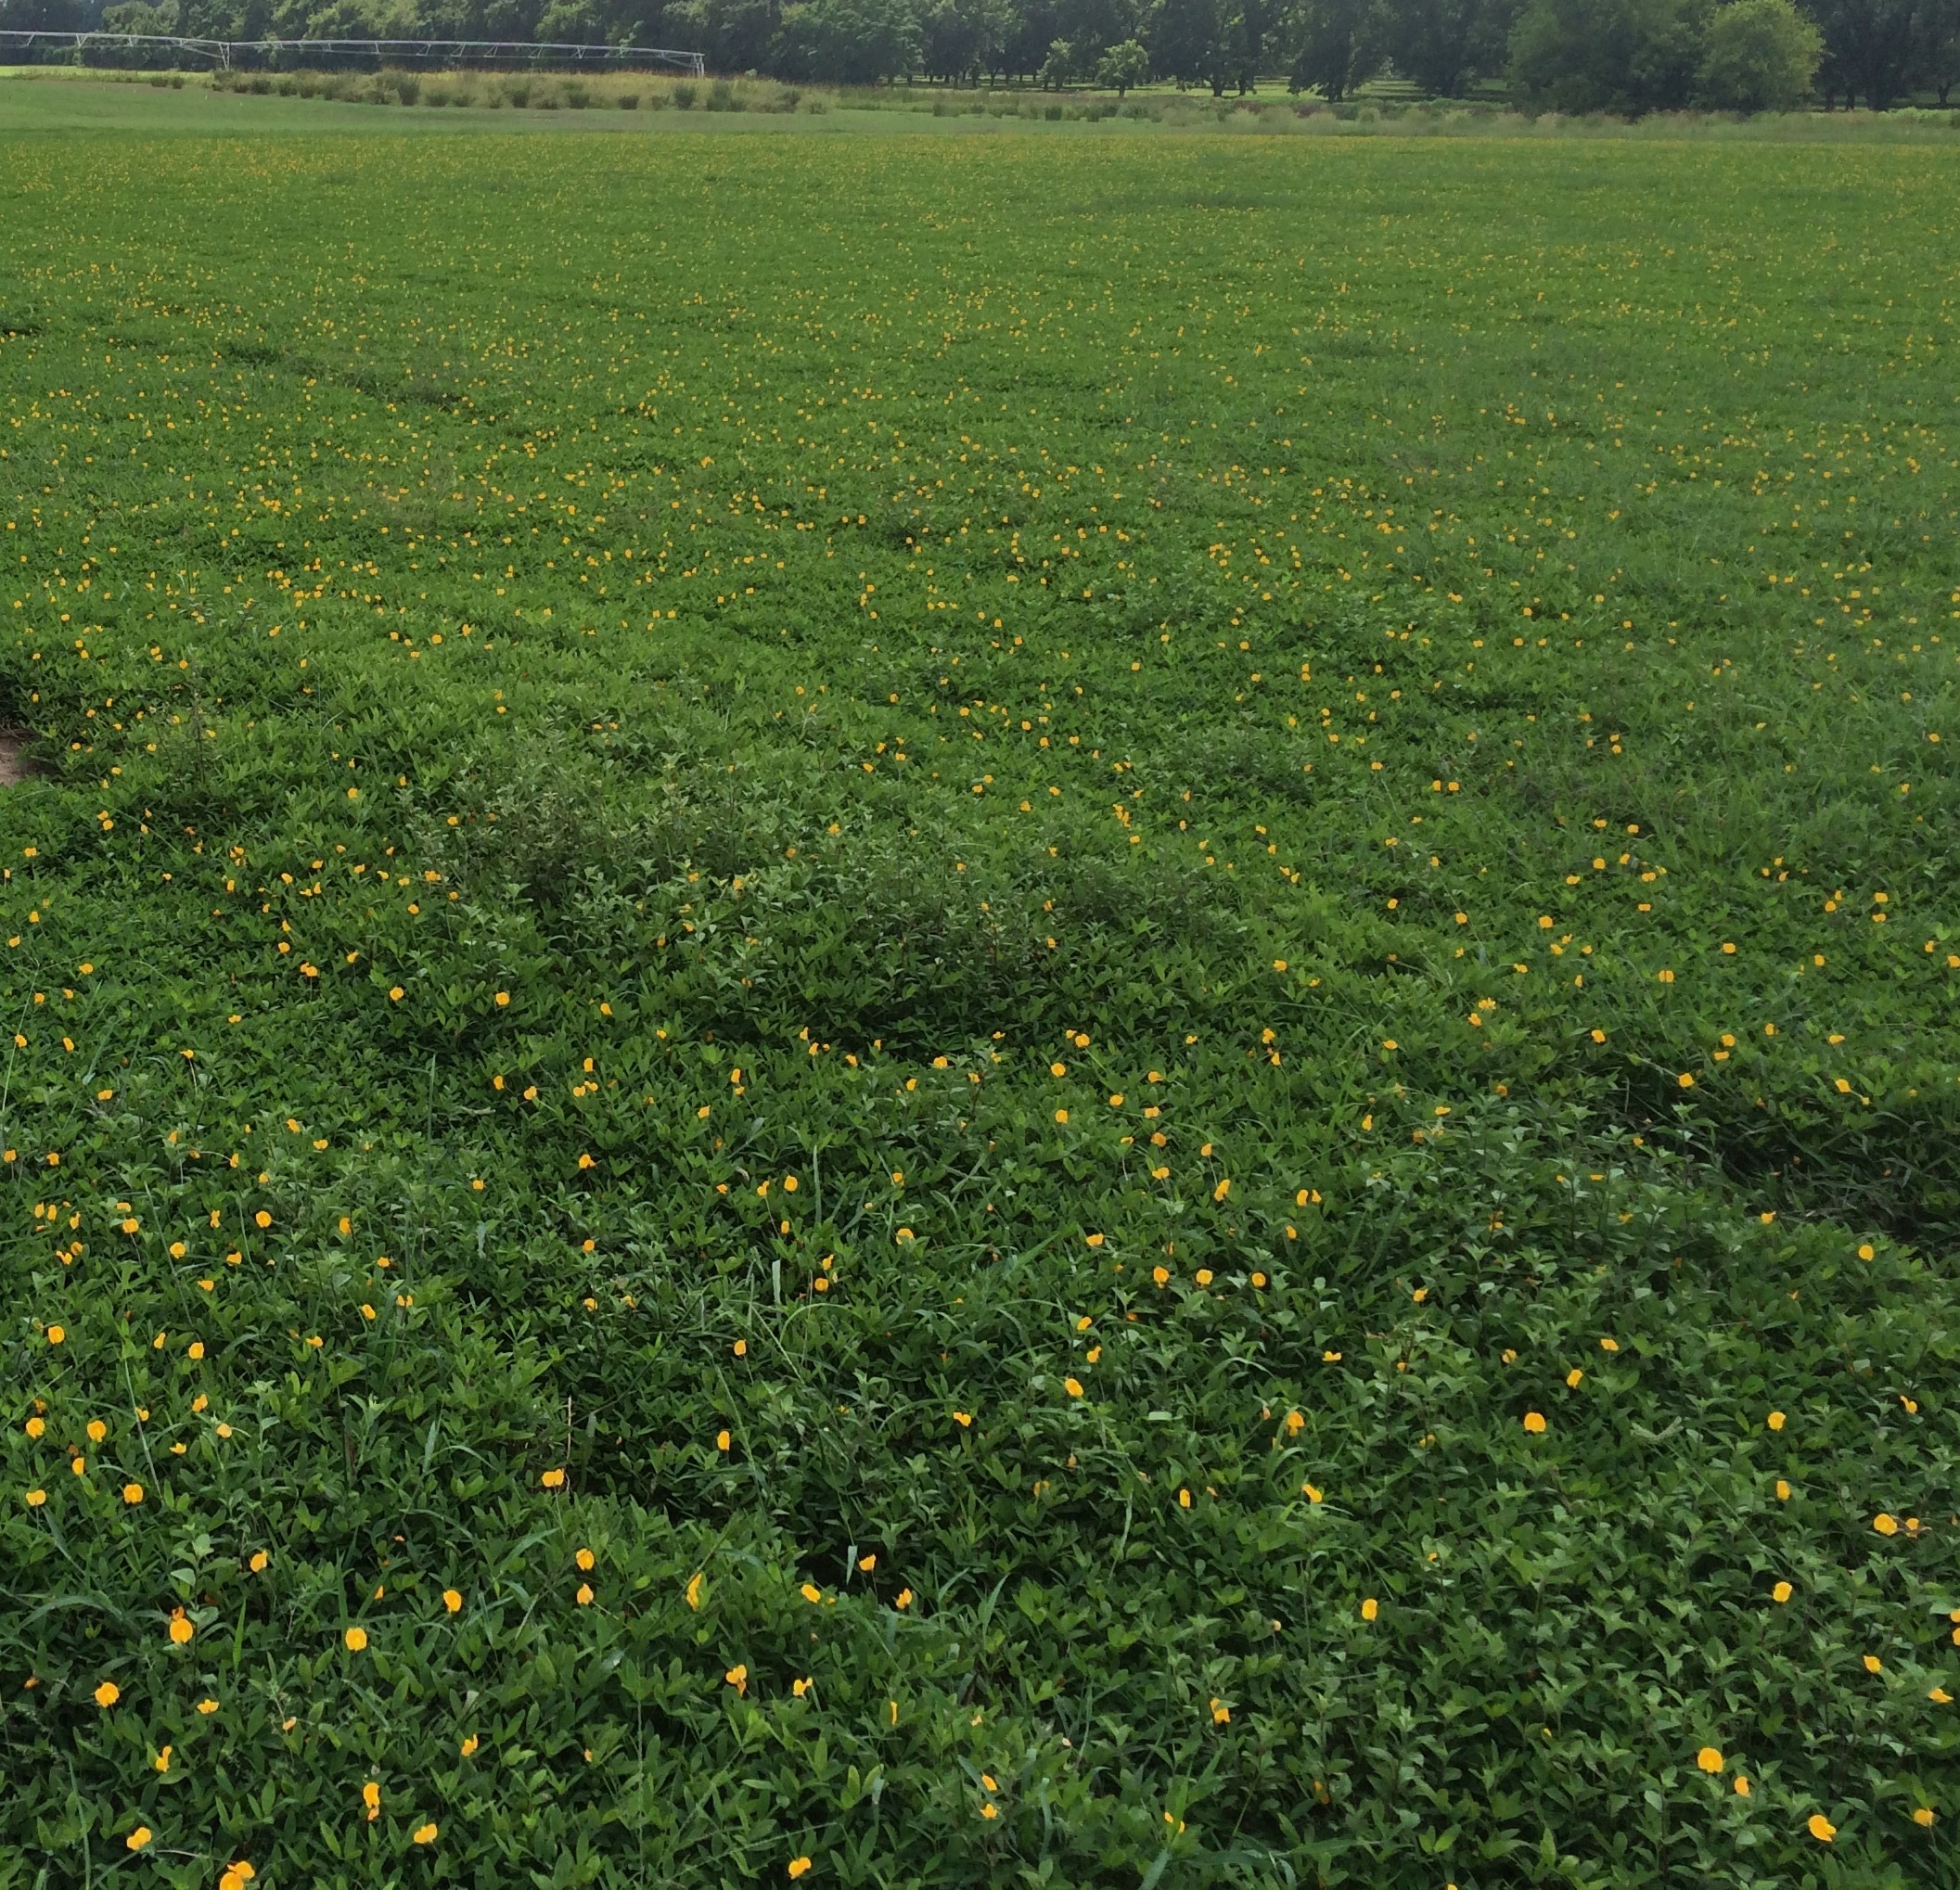
Driving through rural panhandle counties this time of year, one finds pastures with thick green canopies, exploding with yellow-gold flowers. Perennial peanut is in bloom. This is a highly nutritional forage option for livestock and also makes for a beautiful urban groundcover alternative to turfgrass.

Perennial Peanut Field. Photo credit: Ray Bodrey, UF/IFAS.
Perennial peanut was introduced from Brazil in the mid 1930’s. Though a non-native, the perennial peanut has not been shown to be a nuisance nor an invasive. The plant is in the same genus as the peanut that humans consume. However, this plant is a true perennial, living year to year. Perennial peanut does produce a small seed pod. But rhizoma perennial peanut, Arachis glabrata, does not reproduce by seed. Therefore, wildlife, specifically birds, are unable to disburse the plant into unintended areas.
As a side note, few perennial peanut cultivars, such as Arachis pintoi or “pinto peanut”, can be planted by seed. This species has stolons or “runners” and will produce adventitious roots at the nodes. The pinto peanut has become confused in nursery trade with the Florida-developed perennial peanut. Limited research to date has shown how well pinto peanuts perform as groundcover. The pinto peanut is more susceptible to winter kill, insect damage and nematodes than the cultivar Arachis glabrata.
The Florida developed perennial peanut is used mostly for hay or grazing by livestock such as horses, beef & dairy cattle, sheep and goats, as well as wildlife such as deer, rabbits and turkeys. The most common cultivars for pastures are “Florigrazed” and “Arbook”. These cultivars were released by UF IFAS and USDA in 1978 and in 1985. Since the release, these cultivars have also has been used in citrus groves as a cover crop as well as a ground cover in roadway medians. In Florida, it has been planted on approximately 30,000 acres.
Perennial peanut is high in nutritional value and is easily digestible by forage animals. It’s also a nitrogen fixer. Like all legumes, perennial peanut obtains its nitrogen from a bacteria associated with the plant’s root system. Therefore, it naturally adds nitrogen to the soil, reducing the amount of fertilizer needed if used with other crops or plants in a landscape.
Perennial peanut will reach ½ – 1 ½ feet in height. The plant is propagated using rhizomes and can be purchased as mats of sod or in containers. With its extensive root system, rhizoma perennial peanut spreads across the ground as a sod grass would perform. Perennial peanut grows best in sandy to sandy loam soils with a target soil pH of 6.0 although a soil range of 5.8 – 7.0 is adequate. It requires high moisture, with at least 30 inches of rain per year.
In home landscapes, several cultivars are available and have limited maintenance issues. “Ecoturf” and “Arblick” are the most popular cultivars used due to their lower height and profuse flowering. These cultivars thrive in coastal areas as they are considered salt tolerant. Salt spray, drift and short term salt water flooding have little effect. Mowing is not required but edging may be needed as the plant spreads. Weed control is the most concerning, especially during establishment. For pest management, peanut stunt virus cases have been reported. The symptoms are leaf mottling and yield depressions, but are rarely a problem unless the plant is under drought or nutrient stress.
All information considered, perennial peanut is a great option for panhandle livestock producers or the home landscape enthusiast.
Supporting information for this article can be found in the UF/IFAS EDIS publications:
“Guide to Using Rhizomal Perennial Peanut in the Urban Landscape”, by Robert E. Rouse, Elan M. Miavitz and Fritz M. Roka.
“Rhizoma Perennial Peanut”, by M.J. Williams, Y.C. Newman and Ann Blount.
“Perennial Peanut: A Quick Reference”, by Yoana C. Newman, Cheryl L. Mackowiak, Ann R. Blount and Jason Ferrell.
“Plant Materials Fact Sheet: Rhizoma Perennial Peanut (Arachis glabrata) – The Perennial Peanut for Urban Conservation in Florida”, by USDA NRCS.
by Ray Bodrey | Aug 19, 2016
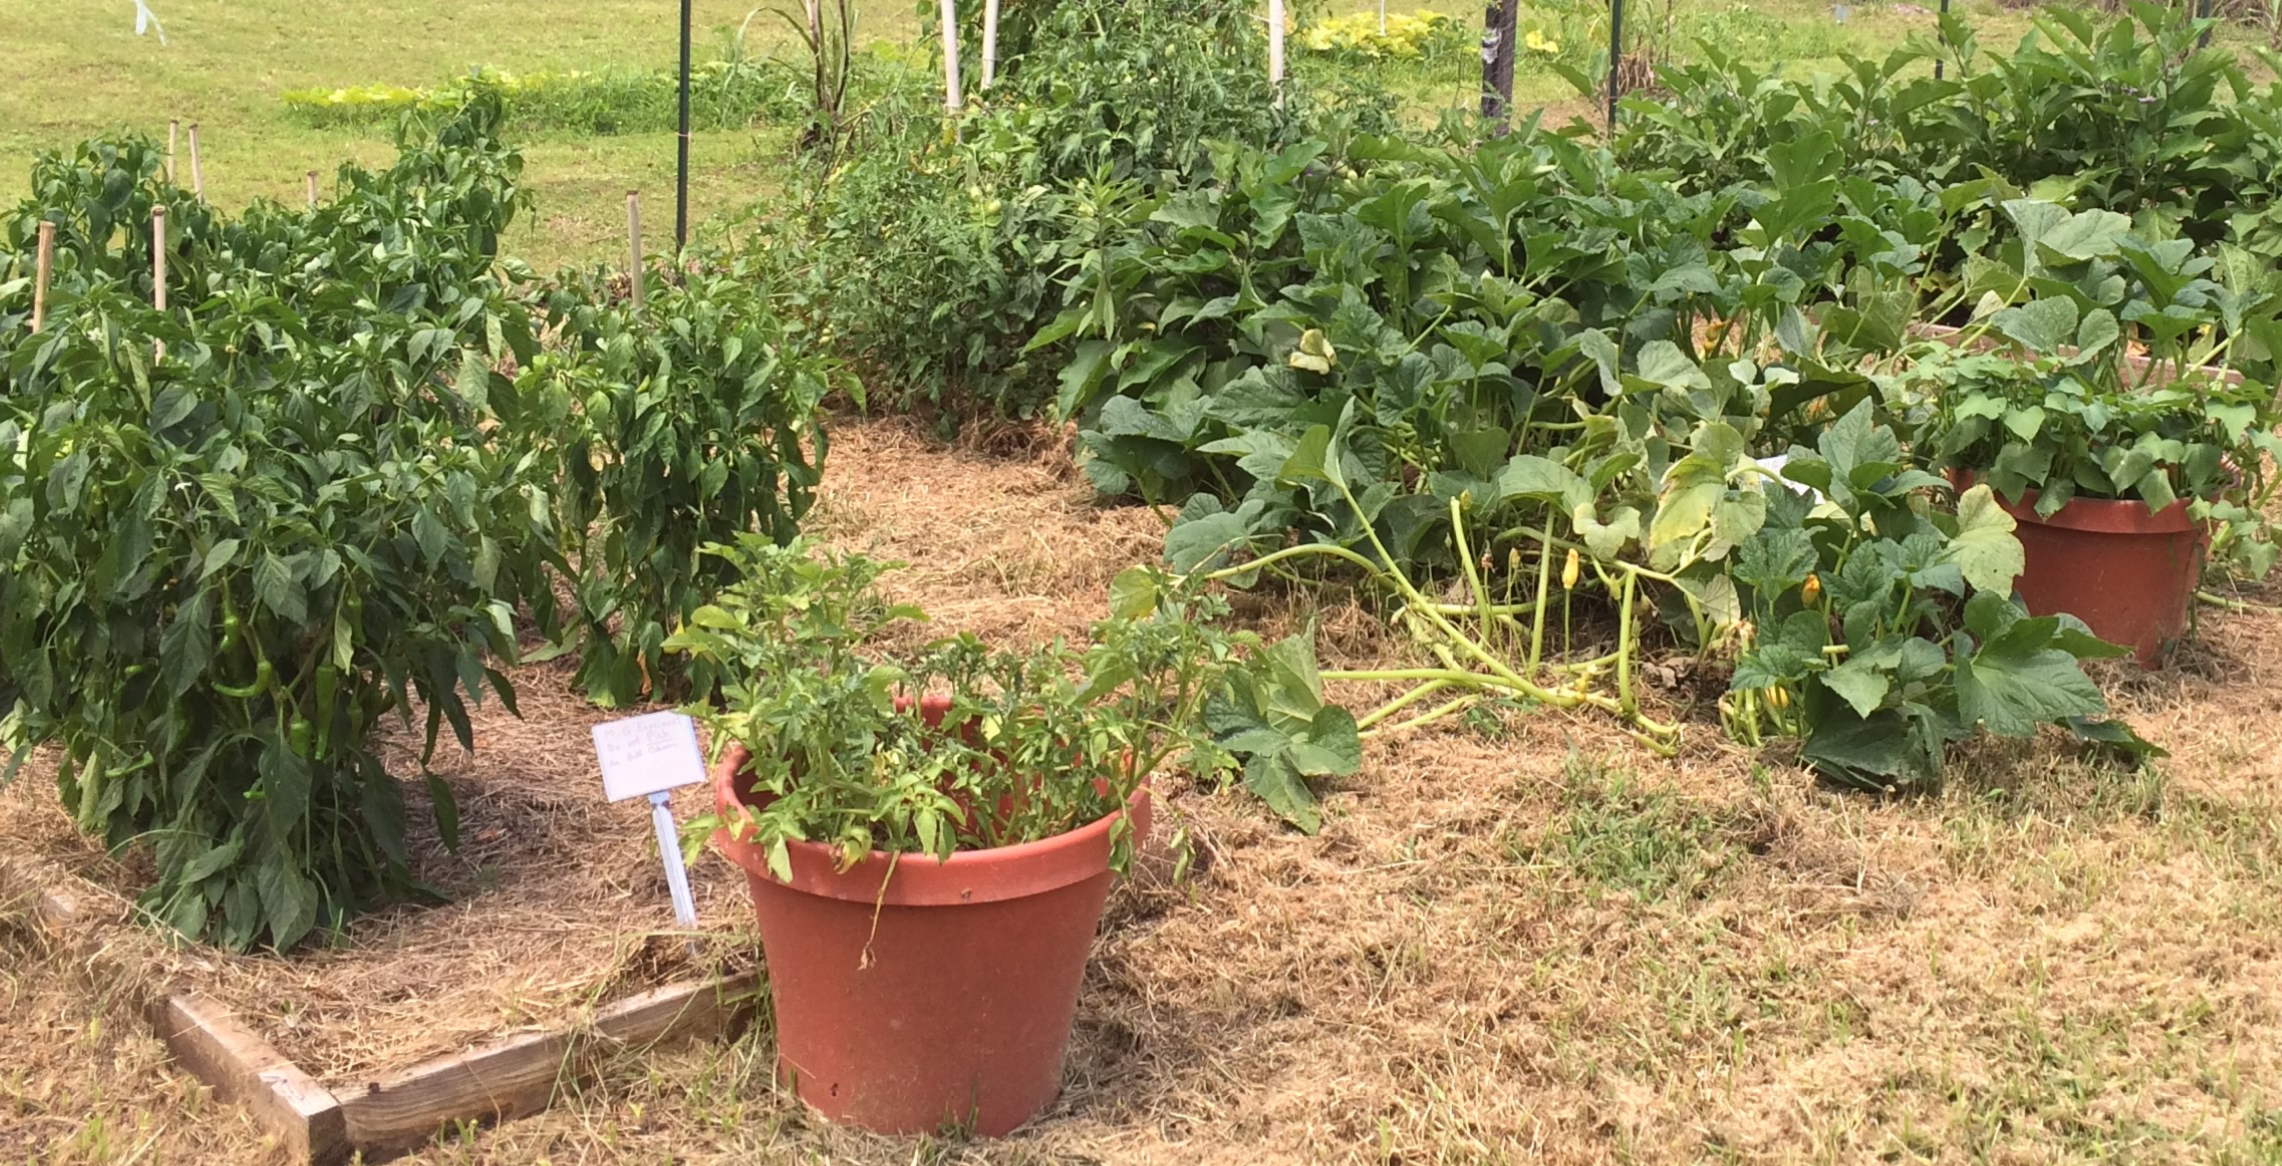
Being a gardener in the panhandle has its advantages. We’re able to grow a tremendous variety of vegetables on a year-round basis. However, in this climate, plant diseases, insects and weeds can often thrive. Usually, chemical measures are applied to thwart these pests. Some panhandle gardeners are now searching for techniques regarding a more natural form of gardening, known as organic. With fall garden planting just ahead, this may be an option for conventional vegetable gardeners looking for a challenge.

Vegetable Garden at UF/IFAS Extension Wakulla County. Photo credit: Ray Bodrey UF/IFAS.
So, what is organic gardening? Well, that really depends on who you ask. A broad definition is gardening without the use of synthesized fertilizers and industrial pesticides. Fair warning, “organic” does not translate into easier physical gardening methods. Laborious weeding and amending of soil are big parts of this gardening philosophy. This begs the question, why give up these proven industrial nutrient and pest control practices? Answer: organic gardening enthusiasts are extremely health conscious with the belief that vigorous outdoor activity coupled with food free of industrial chemicals will lead to better nutrition and health.
As stated earlier, the main difference between conventional and organic gardening is the methods used in fertilization and pest control. In either gardening style, be sure to select a garden plot with well-drained soil, as this is key for any vegetable crop. Soil preparation is the most important step in the process. To have a successful organic operation, the garden will require abundant quantities of organic material, usually in the form of animal manures and compost or mixed organic fertilizer. These materials will ensure water and nutrient holding capacity. Organic matter also supports microbiological activity in the soil. This contributes additional nutrients for plant uptake. Organic fertilizers and conditioners work very slowly. The vegetable garden soil will need to be mixed and prepped at least three weeks ahead of planting.
Effective organic pest management begins with observing the correct planting times, selection of the proper plant variety and water scheduling. Selecting vegetable varieties with pest resistant characteristics should be considered. Crop rotation is also a must. Members of the same crop family should not be planted repeatedly in the same organic garden soil. Over watering can be an issue. Avoid soils from becoming too wet and water only during daylight hours.
For weed management, using hand tools to physically removing weeds is the only control method. As for insect management, planting native plants in the immediate landscape of the organic garden will help draw in beneficial insects that will feast on garden insect pests. The use of horticultural oil or neem oil is useful. However, please read the product label. Some brands of oils are not necessarily “organic”. Nematodes, which are microscopic worms that attack plant roots, are less likely an issue in organic gardens. High levels of organic matter in soil causes an inhospitable environment for nematodes. Organic disease management unfortunately offers little to no controls. Sanitation, planting resistant varieties and crop rotation are the only defense mechanisms. Sanitation refers to avoiding the introduction of potential diseased transplants. Disinfecting gardens tools will also help. Hydrogen peroxide, chlorine and household bleach are disinfecting chemicals allowed in organic gardening settings as these chemicals are used in organic production systems for sanitation. Staking and mulching are also ways to keep plants from diseases by avoiding contact with each other and the soil.
Organic gardening can be a challenge to manage, but better health and nutrition could be the reward. Please take the article recommendations into consideration when deciding on whether to plant an organic garden. For more information, contact your local county extension office.
Supporting information for this article can be found in the UF/IFAS EDIS publication, Organic Vegetable Gardening in Florida, by Danielle D. Treadwell, Sydney Park Brown, James Stephens, and Susan Webb.

by Ray Bodrey | Jul 5, 2016
It’s safe to say that almost everyone equates citrus with the state of Florida. It just goes hand in hand. Most people first think of citrus as being oranges and grapefruit. Even by traveling south on I-75 or I-95, our welcome centers will gladly supply you with a complimentary cup of the juice of your choice, orange or grapefruit. However, the kumquat is a fruit that rarely comes to mind. The Panhandle is prime habitat for this forgotten fruit.
The kumquat is a native of southeast China, but it has found a home on the Gulf coast. It’s a cold hardy citrus, much like the Panhandle favorite satsuma orange. Due to the plants ability to be semi-dormant in the region, the kumquat has been known to withstand temperatures in the low teens. The kumquat fruit is an oddity in the citrus world. The peeling is sweet, the pulp is tart and it’s all edible, except for the seeds of course. The fruit reaches maturity around October, and will remain viable on the tree until March.
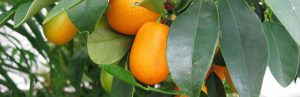
Figure 1: Kumquat fruit: Nagami variety.
Credit: UF/IFAS.
There are two varieties grown in Florida. The Nagami (Fortunella margarita) is by far the most popular in the state. This variety has oval shaped fruit and 2-5 seeds. The Meiwa (Fortunella crassifolia) has a more rounded shaped fruit with almost no seeds. This variety’s fruit is more sweet and juicy compared to the Nagami.
Kumquat is one of the easiest fruits to grow in the Panhandle. Most gardeners enjoy the ease of management as the kumquat tree is relatively small in size, and requires much less care compared to other citrus. Another advantage to kumquats is the ability to be grown in containers. Also, the dark green leaves and orange colored fruit is quite appealing on your back deck or patio.
When planting a kumquat, make sure the location has plenty of sunshine. Always apply mulch, but be sure to keep the mulch at least a foot from the trunk to combat any potential of disease. As for container growing, be sure to purchase a large container with adequate drainage holes. Place a screen in the bottom of the container, rather than rocks. This will ensure no soil is lost during drainage events. Newly planted kumquats will need significant water on a regular basis to become established, especially if planted in a container. Once established, watering can be limited.
Kumquats will need a fertilizer regimen too. A citrus formulated fertilizer works great. Although not required, pruning should be done after April or later in the summer before new flowers appear. A major plus, kumquat trees generally bear fruit just after a couple of years.
Kumquats are a delight to grow in the Panhandle and a fantastic evergreen for your landscape, back deck or patio.
Supporting information for this article can be found in the UF/IFAS EDIS publication, “Fortunella spp., Kumquat” by Michael G. Andreu, Melissa H. Friedman, and Robert J. Northrop & “Get Acquainted with Kumquat” by BJ Jarvis, CED & Horticultural Agent, UF/IFAS Pasco County Extension:
by Ray Bodrey | Jun 1, 2016
If you’ve been researching lawn grass options recently, you’ve probably come across a not so traditional variety known as zoysiagrass. There’s no mystery why zoysiagrass has become a hit with lawn enthusiasts in the Panhandle. This variety is a great choice for coastal, warm weather climates. However, there are always management practices that need to be carefully considered, before deciding on a lawn grass variety.
Zoysiagrass was introduced to the U.S. from Asia around the early 1900’s. The grass has mostly been used for turf applications, especially on golf courses and other athletic fields. However, in recent years, breeding advances have made this variety a viable option for homeowners. Some of these improvements involve insect resistance and fast establishment periods.
Except for one species, zoysiagrasses must be planted by sod, plugs, or sprigs. Zoysia japonica is the only species commercially available in seed form. Zoysiagrass is a not a cold hardy plant. It’s the first grass variety to turn brown under cold temperatures and is slow to turn green once warmer temperatures arrive. Probably the most attractive quality of zoysiagrass is the ability to grow in virtually any soil, ranging from sandy to clay, acidic or alkaline. Moderately shaded locations are also acceptable for zoysia. Zoysiagrass is extremely drought tolerant. The plant’s root system has a great adaptation to combat drought conditions. Since the root system is very deep, it is able to maximize soil moisture potential.

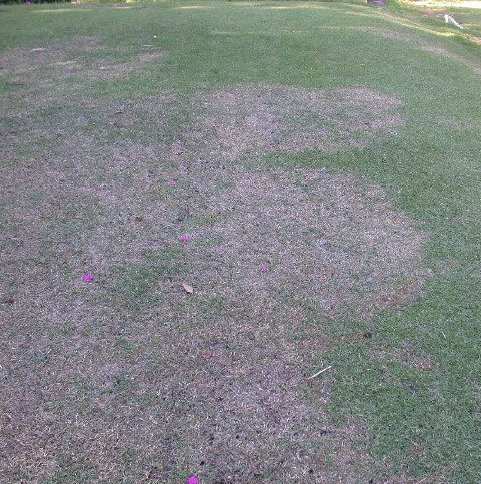
Figure 1. Large (brown) patch disease caused by Rhizoctonia solani.
Credit. J. Bryan Unruh, UF/IFAS.
Zoysiagrass is not a silver bullet for lawn problems. It encounters weed and insect problems as well. The most formidable disease of zoysiagrass is large brown patch. This disease is caused by the fungal pathogen, Rhizoctonia solani. The disease begins in small patches that turn from yellow to brown. It’s common to see these patches with healthier grass in the center. The pathogen is most active when soil temps fall between 65-75°F. This generally correlates with the fall season and then throughout the following spring in the Panhandle. Zoysiagrass is no more susceptible to the disease as any other grass, but the recovery time is lengthy. With this being said, a proactive fungicide regimen is recommended.
Zoysiagrass also responds better to smaller quantities of fertilizer applied more frequently rather than supplying larger quantities infrequently. UF/IFAS Extension recommendations state that zoysiagrass should receive three applications per year in the Panhandle region.
If you are looking to seed or sod your landscape, zoysiagrass may be an option to consider. Best management practices influence the overall health and quality of your lawn and reduces its susceptibility to disease. Take these practices into consideration when deciding on a lawn grass.
Please visit Florida Friendly Landscaping, http://fyn.ifas.ufl.edu/, for more information on maintaining your landscape.
Supporting information for this article can be found in the UF/IFAS EDIS publication “Zoysiagrass for Florida Lawns” by J. Bryan Unruh, L. E. Trenholm, and J. L. Cisar: http://edis.ifas.ufl.edu/pdffiles/LH/LH01100.pdf
An Equal Opportunity Institution. UF/IFAS Extension, University of Florida, Institute of Food and Agricultural Sciences, Nick T. Place, Dean for UF/IFAS Extension. Single copies of UF/IFAS Extension publications (excluding 4-H and youth publications) are available free to Florida residents from county UF/IFAS Extension offices.
