
by Ray Bodrey | May 12, 2022
The Annual Tupelo Honey Festival will be held Saturday, May 21st from 9 am – 4 pm central time at Lake Alice Park in Wewahitchka. This is an exciting event, with your chance to take part in a local treat. Area honey producers will be on hand, selling their honey in a variety of sizes. There will also be food, art & crafts, and live music.
For decades, tupelo honey has been synonymous with Gulf County. The nectar from the tupelo gum tree (Nyssa ogeche), produces some of the finest honey in the world. The common name “tupelo” is derived from language of the Muscogee Nation, also known as the Creek Indian Nation. The meaning of the word is “swamp tree”, as this tree flourishes in areas of wet soils and seasonal flooding. Gulf County is home to one of the largest tupelo forests on earth.
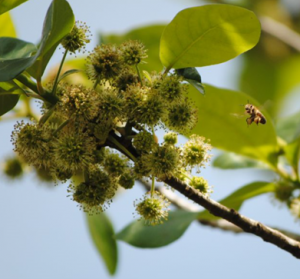
Honeybee visiting tupelo blossoms. Photo Credit: Gulf County Tourist Development Council
The tupelo bloom season lasts from approximately mid-April to the end of May. This is an anxious time for beekeepers. Tupelo blooms are very temperamental and delicate in nature. For this short period, beekeepers hope for little wind or rain and no cold temperatures, as any of these factors can make or break tupelo honey production. Regardless of seasonal impacts, the demand for Gulf County’s tupelo honey never subsides.
Please visit http://www.tupelohoneyfestival.com/ for more information on the festival. For more information on beekeeping, contact Gulf County Extension at 639-3200.
UF/IFAS Extension is an Equal Opportunity Institution.
by Ray Bodrey | Apr 28, 2022
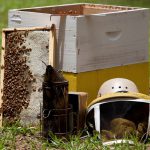 University of Florida IFAS Extension and the Beekeeping in the Panhandle Working Group have once again teamed up to offer the 9th Annual Beekeeping in the Panhandle Conference on Friday May 6th and Saturday May 7th 2022 at the Washington County Ag Center Auditorium.
This year’s event will feature: Hands-on open hive experiences, presentations on the latest in research-based beekeeping management practices, interaction with expert beekeepers, vendors with beekeeping equipment, and hive products. Door prizes will be available as well!
The registration fee for the event will be $35 for one day or $55 for both days and $15 per day for youth 12 and under.
The activities will take place from 8:00 am – 5:00 pm Central Standard Time each day and will include a catered lunch.
Location: 1424 Jackson Avenue, Chipley, FL
Ways to register:
Registration link: https://www.eventbrite.com/e/9th-annual-beekeeping-in-the-panhandle-conference-trade-show-tickets-269199873067
Or drop by the Washington County Office at 1424 Jackson Avenue in Chipley.
For more information contact Washington County Extension Office at (850) 638-6180.
by Ray Bodrey | Apr 7, 2022
The thistle has long been an enemy of ranchers, county roadside maintenance crews and homeowners. Often difficult to control, it causes both headaches for producers, in reduction of grazing for livestock as well as being an eyesore for gardening enthusiasts. There are nine different species of thistle in Florida. Most of these are closely related, therefore the control protocols are the same. Only one species is a perennial, and all others are biennial. A biennial plant grows from seed in one year and produces seed for the next.
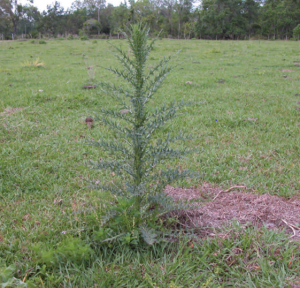
Thistle that has begun to bolt. Photo Credit: Dr. Jason Ferrell, University of Florida/IFAS Agronomy Department-Weed Science.
It’s important to understand the biology of the thistle in regards of seeking control of this fast spreading weed. This plant will grow a taproot and a cluster of leaves in the first year. This is known as the rosette stage. In the second year, a stalk will appear from the center of the rosette. This is called “bolting”. A seed head will form once the bolting stage is complete. Amazingly, one thistle plant can amass 4,000 seeds. The plant faces its demise after releasing the seeds. The rosette growth stage is mostly during the winter months with bolting occurring from January to July. This is important to note when battling this persistent weed.
As for control, preventing the thistle from producing seed is the most important management measure. Otherwise, little can be done to stop the outbreak of the weed. For homeowners, manually removing the rosette and tap root by hand is effective with small stands. Be careful and wear protective coverings on your hands and arms. Keep in mind, the plant will come back if the tap root is not fully removed.
Other physical control methods, like mowing, have mixed results. This can be effective if mowing occurs after the bolting stage has occurred, but before the seed head forms. However, this is tricky, as thistle plants often do not bloom at the same time.
Thistles in the rosette stage are very susceptible to herbicides. Although, applying a herbicide after the seed head has formed has little effect on control. Herbicides containing 2,4-D are very effective for landscapes. Timing of application is critical. The key to controlling this weed is by scouting and identifying stands as early as possible.
If you’re a beekeeper, there is an upside to this weed. Delicious honey can be made from the thistle bloom.
For more information on thistle, please contact your local county extension office.
Supporting information for this article can be found in the UF/IFAS EDIS Publication, “Thistle Control in Pastures” by Dr. Brent Sellers and Dr. Jason Ferrell.
UF/IFAS Extension is an Equal Opportunity Institution.

by Ray Bodrey | Feb 17, 2022
Are you “chomping at the bit” to get started gardening this year, but not sure what you can do at this point? Well, good news, there’s plenty of things that can be done whether landscaping or vegetable gardening is your passion.
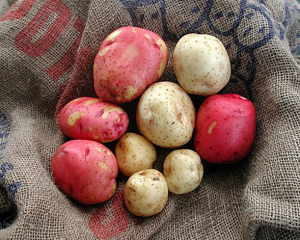
“New” potatoes grown in Florida. Photo Credit: C. Hutchinson, UF/IFAS
Temperatures can drop significantly in the Panhandle this month, and with short notice. If you want to enhance your flower beds, be sure to use annual bedding plants that can withstand the chill. Dianthus, pansy, viola and dusty miller are some good suggestions to plant. It’s a good time to plant bulbs too. Dahlias, crinum and agapanthus are good choices this time of year. Be sure to provide adequate mulch and water during this cold weather month. There are plenty of trees and shrubs that are beginning to bloom this time of year also. If you’re like me, your allergies will tell you this too. Red maple and star magnolia, just to name a couple, will soon be in bloom.
As for vegetable gardening, the potato is a good choice for Florida gardens. As Americans, we consume approximately 125 pounds per person a year. Potato farming is done commercially in Florida, but mostly with “new” potatoes. These are the small, rounded immature potatoes that have a thin skin and are perfect for low country boils.
It’s February, so it’s Irish potato planting season. The planting season for this cultivar for the Panhandle is from February 1st to mid-March. Sweet potatoes can be planted beginning in late March through June. A hundred pounds of seed potatoes should yield approximately ten bushels. Buy healthy certified seed potatoes from a garden center. Avoid using table stock potatoes. Often, table stock will not sprout successfully. Store bought potatoes are often treated with sprout inhibitors too. This treatment can cause development issues if used as seed potatoes.
Raised beds, at least 6”, are the best way to grow potatoes. Be sure to fertilize the bed soil mixture and fertilize again down furrows when planting. Irish potatoes require copious amounts of fertilizer. For fertilizer, use a general, complete formulation like 10-10-10. Before planting, be sure to dust the seed potatoes with a fungicide to reduce the chance of decay. Plant seed potatoes 3” in depth, at 12” apart and allow for 36” row spacing.
Please take these gardening tips into consideration this month and the next. Spring is just around the corner. Happy gardening! For more information please contact your local county extension office.
Supporting information for this article can be found in the UF/IFAS EDIS Publications, “ Florida Vegetable Gardening Guide” by Sydney Park Brown, Danielle Treadwell, J. M. Stephens, and Susan Webb : http://edis.ifas.ufl.edu/pdffiles/VH/VH02100.pdf and “Growing Potatoes in the Florida Home Garden”, by Christian T. Christensen, Joel Reyes-Cabrera, Libby R. Rens, Jeffrey E. Pack, Lincoln Zotarelli,Chad Hutchinson, Wendy J. Dahl, Doug Gergela, and James M. White: http://edis.ifas.ufl.edu/pdffiles/HS/HS18300.pdf
Supporting information can also be found on the UF/IFAS website under “Florida Gardening Calendar” by Sydney Park Brown: http://solutionsforyourlife.ufl.edu/lawn_and_garden/calendar/pdfs/February_North.pdf
by Ray Bodrey | Jan 13, 2022
January and February are typically the coldest months in Florida. Low temperatures can damage even the more cold-hardy plants. However, there are measures that can be done to help cold-damaged plants recover.
After a frost or freeze, see if your plants are dry. Even injured plants need water. Plants can be greatly damaged if the temperature drops suddenly, as they have no time to acclimate to the freezing temperatures. These freezing temps cause ice crystals to form in plants cells. These crystals expand, rupturing the cell walls and preventing the plant from maintaining shape. If severe, this can certainly kill tender plants. On more cold hardy plants, damaged foliage will appear wilted and curled down. In a few hours or days, it will darken and turn black. Flowers, buds, and new growth often dieback under freezing temps.
After freezing temperatures occur, it’s important to remove damaged leaves and flowers as soon as they turn brown or black. This will help prevent diseases from occurring. Pruning should be postponed until cold temperatures are no longer expected and new growth begins to appear on the plant. This practice ensures live wood, which appears dead from losing its leaves, is not mistakenly removed from the plant. Cold damaged wood can be detected by examining the cambium layer (under the bark) of the plant. If it has black or brown discoloration, it is damaged and should be pruned back behind these points. Plants should be fertilized in the spring, to encourage new growth.
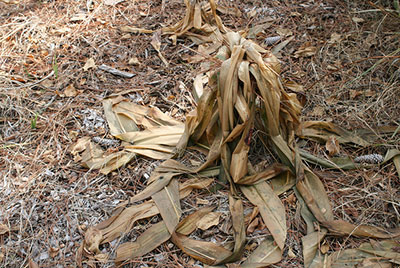
Cold damage. Photo Credit: University of Florida/IFAS
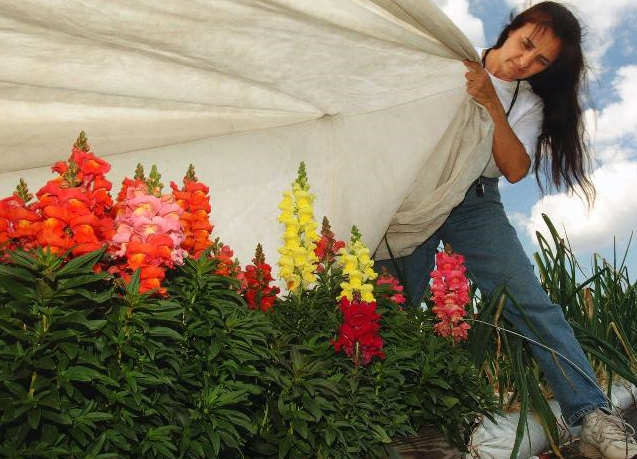
What about proactive care? You can accomplish this by moving potted plants indoors and covering tender landscape plants with a protective covering. Protective covering can include old bed sheet, pieces of material or fabric, and cardboard boxes. Be careful not to let the protective covering touch the plants. The surface of the covering will become as cold as the air temperatures and may damage any tender leaves it encounters. Also, don’t forget to remove the covering the next day when temperature raises this is important so the plants do not “bake” in the warmer temperatures. Plants placed near the house, lights, or other structures, which shelter them from wind, will be more protected than those fully exposed to the cold air.
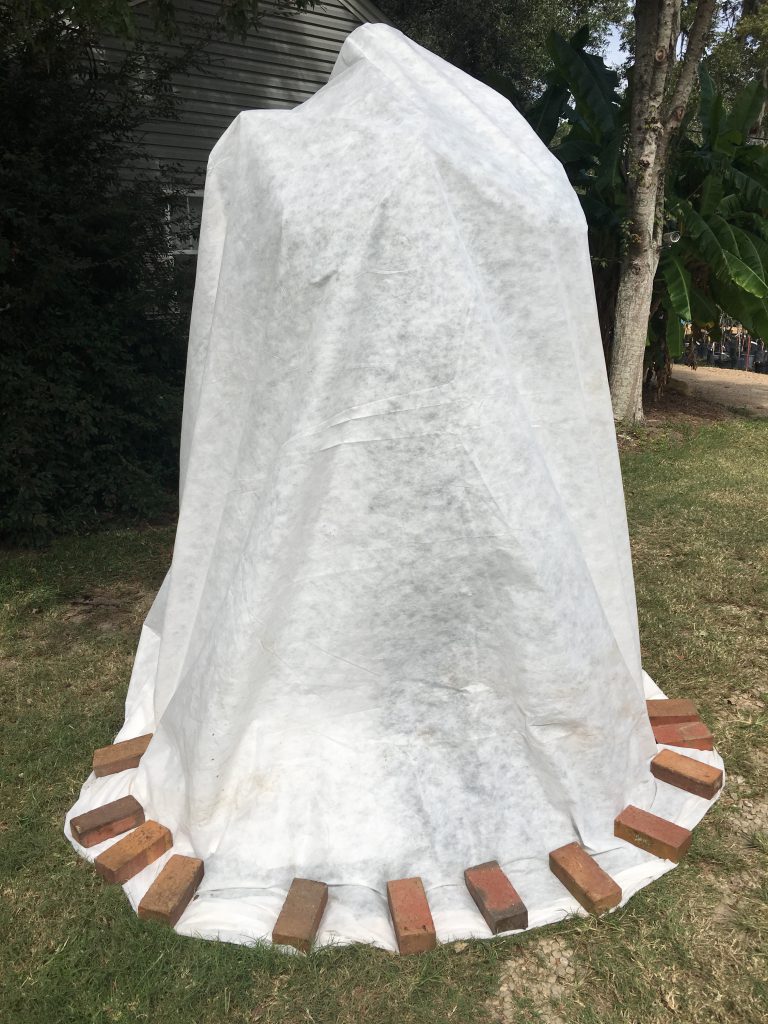
Use frost cloth to completely cover cold sensitive plants. Be sure to make complete contact with the ground and use heavy objects to keep the fabric secure. Photo by Jonathan Burns.
For more information on freeze damage plants contact your local county extension office.
Supporting information for this article can be found in the UF/IFAS Extension EDIS publication: “Cold Protection of Landscape Plants”, by Sydney Park Brown: https://edis.ifas.ufl.edu/publication/mg025


