by Ray Bodrey | Apr 8, 2020
Spring has arrived and so have the insects. Caterpillars are crawling around and one possesses a unique appetite.
Neodiprion spp. is the most common defoliating insect group affecting pine trees. In all, there are 35 species that are native to the U.S. and Canada. The redheaded pine sawfly, Neodiprion lecontei, is the primary species found in the Florida Panhandle.
Adult sawflies can be as large as 1/3 of an inch in length. The female can be two-thirds larger than the male and are mostly black with a reddish-brown head, with occasional white coloration on the sides of the abdomen.
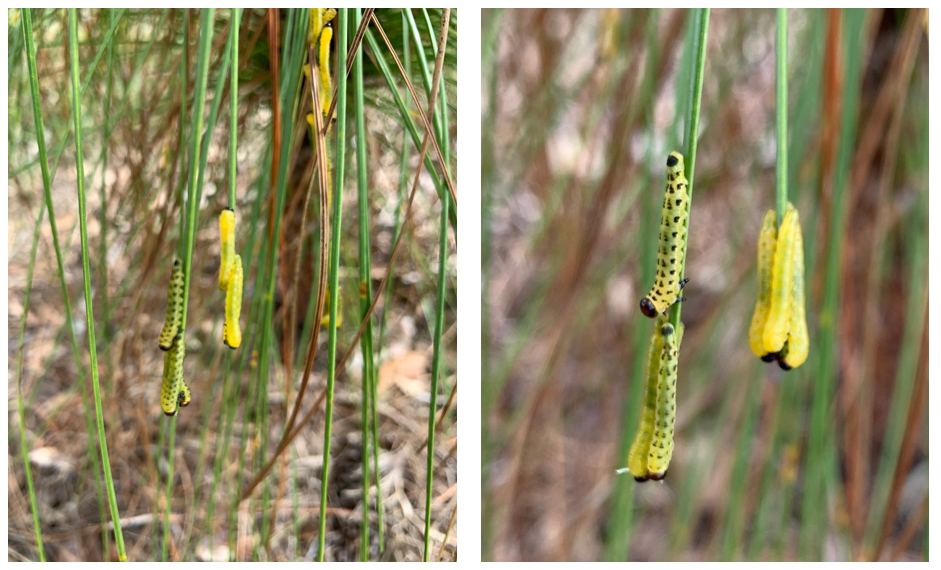
Mature larvae of the redheaded pine sawfly. Credit: Patty Dunlap, Gulf County Master Gardener.
The ovipositor, the tube-like organ used for laying eggs, is saw-like, hence the common name. During the fall, females make slits in pine needles and deposit individual eggs, up to 120 eggs at a time. The eggs are shiny, translucent and white-hued. Mature larvae (caterpillars), as seen in the accompanying photo, are yellow-green, emerge in the spring and feast on pine needles. After weeks of feeding on needles, the mature larvae drop to the ground. The cocoon, a reddish-brown, thin walled cylinder, is spun in the upper layer of the soil horizon or in the leaf litter; this is called the pupae stage. The pupae overwinter, and adults emerge from the cocoon in the spring of the following year.
Mature larvae are attracted to young, open growing pine stands. Pine is the preferred host, but cedar and fir, where native, are secondary food sources. Neodiprion lecontei is an important defoliator of commercially grown pine, as the preferred feeding conditions for sawfly larvae are enhanced in monocultures of shortleaf, loblolly, and slash pine, all of which are commonly cultivated in the southern United States. Defoliation can kill or slow the growth of pine trees as well as predispose trees to other insects or disease.
Are there control methods? Yes, biological control is a major factor, as natural enemies are numerous. Disease, viruses and predators help regulate population control. For small scale control, physically removing eggs or larvae is key. Again, most infestations occur on younger tree plantings, so they’ll be in reach. Be sure to scout young pines for signs of infestation. Horticultural soaps and oils are effective chemical controls, if needed.
For more information, contact your local county extension office.
Supporting information for this article can be found in the UF/IFAS Extension EDIS publication, “Redheaded Pine Sawfly Neodiprion lecontei” by Sara DeBerry: https://edis.ifas.ufl.edu/pdffiles/IN/IN88200.pdf
UF/IFAS Extension is an Equal Opportunity Institution.
by Ray Bodrey | Feb 18, 2020
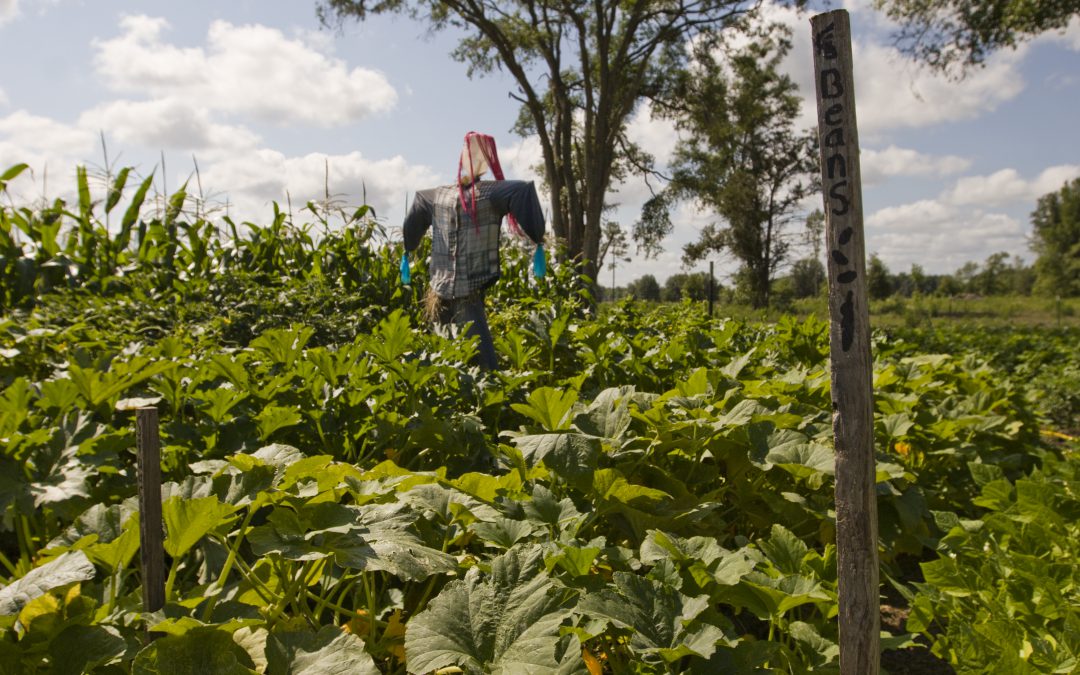
A scarecrow in a 4H youth vegetable garden in Gilchrist County, Florida. Beans, vegetables, gardening, sustainability, 4H, youth programs, education. UF/IFAS Photo: Tyler Jones.
Spring & summer are certainly not far away. The following information pertains to the first step in the vegetable garden planning process. Just remember, as the soil preparation goes, so goes the vegetable production.
By far the most physical part of vegetable gardening is soil preparation. This is the foundation that your garden is built on, so let’s not cut corners at this stage. Plain and simple, poor soil prep will result in poor garden performance. Before you begin prep, it is a good idea to have a soil sample analyzed. With a soil analysis complete, a more customized fertilizer and application may be recommended for your needs. However, a complete fertilizer like 8-8-8 or 10-10-10 can be used as general purpose.
Also, pH can be determined through this test. If the soil is too acidic for vegetables, then a liming requirement may be needed. pH is key information, especially regarding planting time. If one needs lime, it is recommended to wait at least a month before planting to allow the lime to begin to adjust soil pH. Generally, a small amount of lime can be added to a garden space regardless, as lime also contains the vital micronutrients calcium and magnesium. Contact your local county extension office for more information on soil testing.
To begin the garden prep, one will first need to remove the weeds from the space. The next step is to turn the soil. This will help aerate the soil and accelerate soil decomposition which leads to higher organic matter. Turing the soil will also eliminate any soil compaction issues that would stifle seed germination. With sandy soils throughout the Panhandle, one may need to amend by spreading a rich organic compost in the space.
An application of fertilizer can be mixed in at this stage as well. Always follow the manufacturers label regarding application directions. Once complete, the soil should then be turned by digging down six to eight inches. A large garden will require a motorized tiller, but hand held implements should be fine for smaller spaces.
After the soil is turned, be sure to break up any clods and rake so that the area is level. The soil should be of a fine texture by this point. Again, this makes seed germination much easier and will assist in further root development of transplants.
To have a vegetable garden that all will envy, it begins with soil prep. Remember, not only does a vegetable garden provide nutrition, but it also provides for exercise, a feeling of accomplishment and even could save you a few bucks. Please contact your local county extension office for more information.
Supporting information for this article can be found in the UF/IFAS EDIS publication: “Florida Vegetable Gardening Guide” by Sydney Park Brown, Danielle Treadwell, J. M. Stephens and Susan Webb: http://edis.ifas.ufl.edu/pdffiles/VH/VH02100.pdf
UF/IFAS Extension is an Equal Opportunity Institution.
by Ray Bodrey | Jan 22, 2020
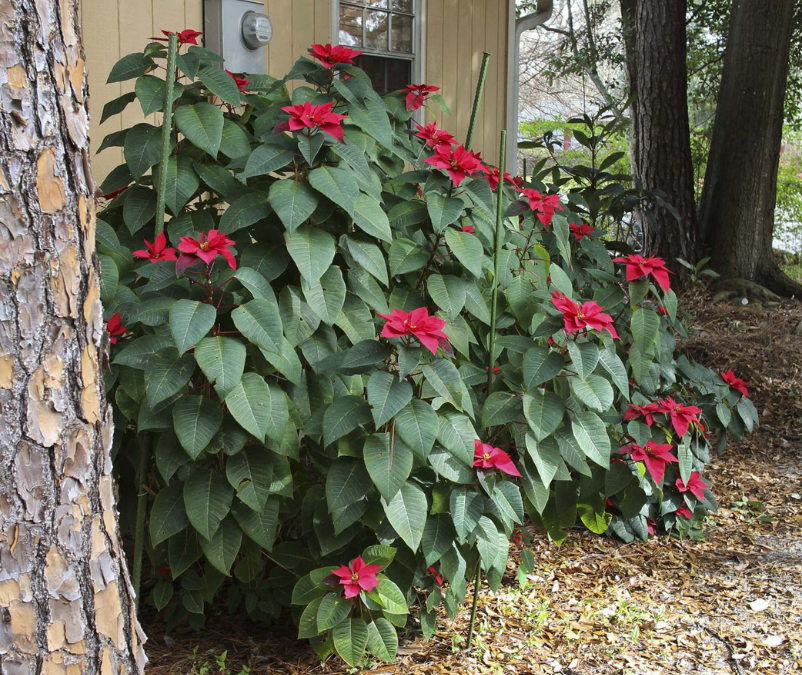
Many of us enjoy potted poinsettias during the holiday season. However, we often give up on the poinsettia, once the season is over and the festive color has been lost. With some care, a poinsettia can be around for seasons to come, if planted in your home landscape.
Photo: A mature poinsettia planted outside of a home.
Credit: UF/IFAS, Robert Annis.
Once your poinsettia starts to fade after the holiday, you can prepare it for transplanting. Since we live in the cooler, northern area of the state, you’ll have to hold your plant in a protected area until the danger of frost has pasted. During this period, the poinsettia should be allowed to become dormant. Water it occasionally, just enough to keep it from drying out. A thorough soaking about once a week should be sufficient. Poinsettias are especially sensitive to extremes of heat and cold, as well as sudden temperature changes. Because of this, keep your potted poinsettia away from hot air vents, cold windows and doorways, where temperature fluctuates rapidly. Keep your poinsettia in a brightly lighted area, but never in direct sun.
When you’re ready to plant the poinsettia in your landscape, you should carefully consider its placement relative to the amount of light it will receive. Poinsettias are “short day” plants. This means they will set buds in the fall only if the daily period of light they receive is relatively short. If you plant your poinsettia where it’s exposed to extra illumination from porch, window, or street lights, it may never bloom.
Poinsettias will grow in a wide range of soils, sand, muck, marl, and clay and they will need fertilizer. For the correct nutrients, apply a complete fertilizer, such as a 8-8-8 or 10-10-10, three times a year, beginning when growth starts in the spring, in June, and finally in the late fall, after the bracts (flowering leaves) have set. This last application promotes large bracts with showy color. Apply 1 ½ pounds of 8-8-8 or 10-10-10 per 100 square feet each application of fertilizer.
In late winter or early spring, after blooming is over and the danger of frost is no more, poinsettias should be pruned back to within 12 to 18 inches off the ground. If they’ve been frozen, you may have to cut even lower. To insure compact, showy plants at flowering time, poinsettias should be pruned several times during the growing season. Each time new growth reaches a length of 12 inches, it should be cut or pinched back, leaving four leaves on each shoot. This operation should be continued until about September 10th, but no later. Because poinsettias begin to set buds as days become shorter, pruning after September 10th may reduce flower production.
Following these tips should reward you with another beautiful burst of color next holiday season. For more information contact your local county extension office.
Information for this article was provided by UF/IFAS Extension Horticulturist Dr. Robert Black. More information on the poinsettia can be found at https://gardeningsolutions.ifas.ufl.edu/plants/ornamentals/poinsettia.html
UF/IFAS Extension is an Equal Opportunity Institution.
by Ray Bodrey | Oct 22, 2019

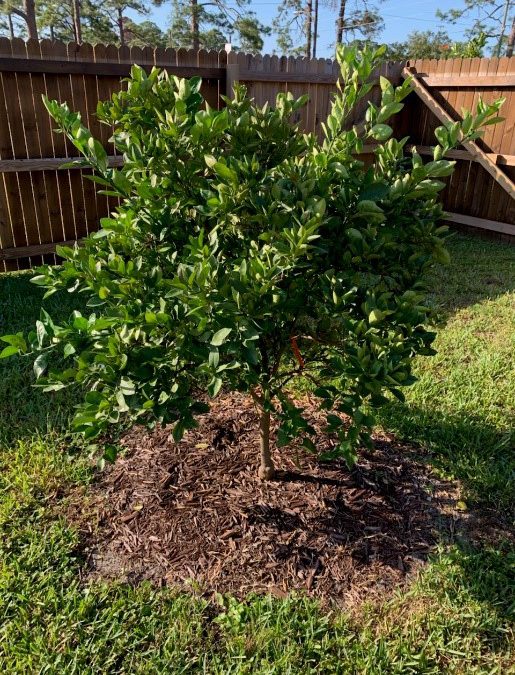
Root rot may develop if citrus trees are mulched closer than 12″ to the trunk
Thankfully, cooler temperatures have finally made it to the Florida Panhandle, but it took until the middle of October. The last two months surely taught us lessons about helping our gardens beat the heat. One strategy to help plants cope with extreme heat or drought is mulching.
Many of us either have or can easily find, piles of wood chip mulch from fallen trees, thanks to the hurricane. This material will come in handy now, as fall and winter mulching is a great gardening practice with many benefits.
Think of mulch as a blanket for plants. By acting as a cover to the root system, mulch can perform as both a cooling factor during warm months and can help warm the root system during cooler weather, as well as assist in retaining moisture. This is important, as regulated soil moisture will accept rain or irrigation water much easier than crusty, dry soil. Water will simply runoff and can cause erosion in dry soil conditions. Mulch is a great weed barrier and is also aesthetically pleasing in the landscape by helping define borders and gives depth. A 3-4” thick layer of mulch, in a 2-3’ diameter, is typically a sufficient amount of mulch for landscape plants and fruit trees.
There are two types of mulch material that you’ll find in our area, organic or inert. Components of organic mulch include compost, bark, leaves grass clippings, straw, wood chips and even saw dust. Straw, wood chips and saw dust contain very little nitrogen, however. If mulching with these materials, it’s a good idea to add some nitrogen fertilizer. One or two cups of a complete fertilizer like 10-10-10 should help you avoid nutrient issues. Organic mulch will need to be replenished yearly to some degree, as it breaks down into a soil amending compost. This breakdown into compost will improve soil water holding capacity and fertility.
Inert mulch can be made of shells, gravel, pebbles, plastic and rubber. However, inert options are not as easy to use in controlling moisture and temperature levels and of course provides no nutrient value. With Inert mulch, you should always fertilize the area first, especially vegetable gardening. Use approximately two pounds of 10-10-10 fertilizer for every 100 square feet of vegetable garden. This may not seem like much fertilizer, but since plastic mulch reduces the amount of fertilizer that leaches out of the root zone of your plants, you can apply less fertilizer to begin with. That’s a big reason why UF/IFAS researchers recommend plastic mulch to commercial vegetable and ornamental producers in Florida, but organic mulches are more appropriate for most home garden settings.
Mulching may be one of the most valuable and cost-effective garden practices. Mulch helps control weeds, conserves moisture, moderates soil temperatures, improves soil fertility and last, but not least, adds to the beauty of the landscape.
For more information contact your local county extension office.
Information for this article provided by Dr. Robert Black and Dr. Gary W. Knox of UF/IFAS Extension. More information can be found at this website: http://gardeningsolutions.ifas.ufl.edu/care/planting/mulch.html
UF/IFAS Extension is an Equal Opportunity Institution.
by Ray Bodrey | Aug 22, 2019
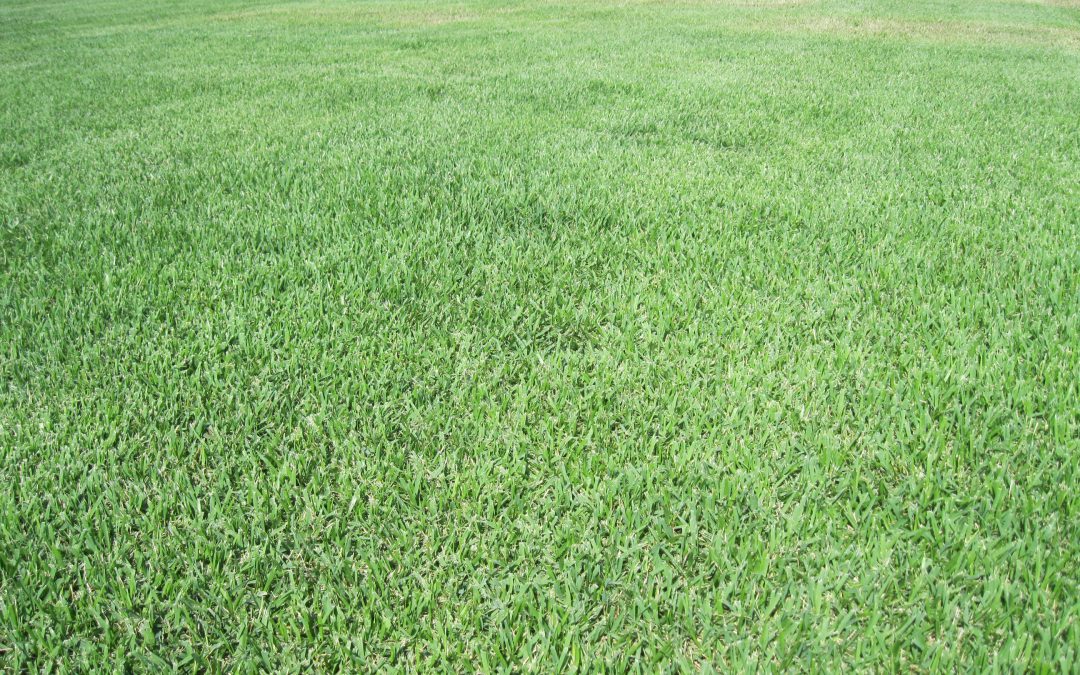
Seldom do we find the answer to a problem as being easy. More often, a difficult and complicated answer is what’s needed. However, the solution to a healthy lawn rebound may be found simply by adjusting your mower height and mowing schedule.
Mowing strategy is an important variable that keeps a lawn healthy and flourishing, no matter the species or cultivar of grass. Mowing too high can lead to an undesirable look and cause unwanted thatch buildup, which can create a favorable environment for pests and diseases. Mowing too low can weaken the root system causing thinning, which allows space for weeds to invade. Another problem with mowing too low is that it affects nutritional needs. Lawn grasses generate food for themselves through a process called photosynthesis. A healthy leaf surface area is needed to effectively accomplish this. If the lawn is mowed too low, then leaf surface area is lost. The grass can literally starve itself.
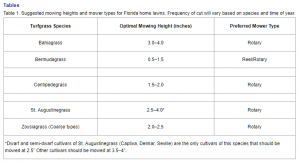
Table: Suggested mowing height for lawn grasses. Frequency of cut will vary based on species and time of year. Credit: L. E. Trenholm, J. B. Unruh & J. L. Cisar, UF/IFAS Extensio
Not all lawn grasses should be mowed at the same height, as show in the table above. Fine textured grasses like Bermuda and Zoysia matrella can be cut significantly lower than coarse textured grasses, such as Bahia or St. Augustine. Not sure of the type of lawn grass you have? Visit this site https://edis.ifas.ufl.edu/topic_book_florida_lawn_handbook_3rd_ed to review the Florida Lawn Handbook or contact your local county extension office for questions.
Mowing schedule is the other side of the coin. How often to mow ultimately depends on how fast your grass grows. By nature, Bermuda will grow quickly and Zoysia is somewhat slower growing. Regardless, summer months are when warm-season lawn grasses grow more rapidly. Historically, lawn grasses begin a dormant-slow growth stage in October and continues through March. Fertilizer schedule also plays a role in grass growth rate. So how often do you need to mow? This rate is best determined by the amount of growth since the last cutting, rather than the number of days which have elapsed. You should mow often enough so that no more than 1/4 to 1/3 of the total leaf surface is removed at any given mowing. In other words, leave twice as much leaf surface as you cut off. Remember, incremental adjustments should be made to your current practices. Never drastically change the height of the grass. If the lawn has been allowed to grow too long, you should gradually lower the mowing height on successive cuttings.
What are some other helpful tips? Always use a well-adjusted mower with a sharpened blade. You may find it easier replace your blade each year or every 2 years than periodic resharpening. Dull mower blades do a tremendous amount of damage with uneven cuts. This will cause gashes and splits in the leaf where fungal and bacterial pathogens can thrive. Never mow grass when it’s wet, either. Dry grass cuts are cleaner cuts and won’t clog the mower deck. If you have built up thatch, it’s a good idea to attach a bag to your mower that will catch clippings. These clippings will be great additions to your compost pile or to use as natural mulch. If no thatch problems exist, mowing without a bag will distribute clippings throughout the lawn, and the clippings will decompose into nutrients for the root system.
With proper mowing strategies, along with fertilizing & watering, your lawn grass can bounce back. For more information contact your local county extension office.
Information for this article provided by the UF/IFAS Extension EDIS Publication, “Mowing Your Florida Lawn”, by L. E. Trenholm, J. B. Unruh & J. L. Cisar: https://edis.ifas.ufl.edu/pdffiles/LH/LH02800.pdf
UF/IFAS Extension is an Equal Opportunity Institution.


