by Roy Carter | Aug 10, 2015
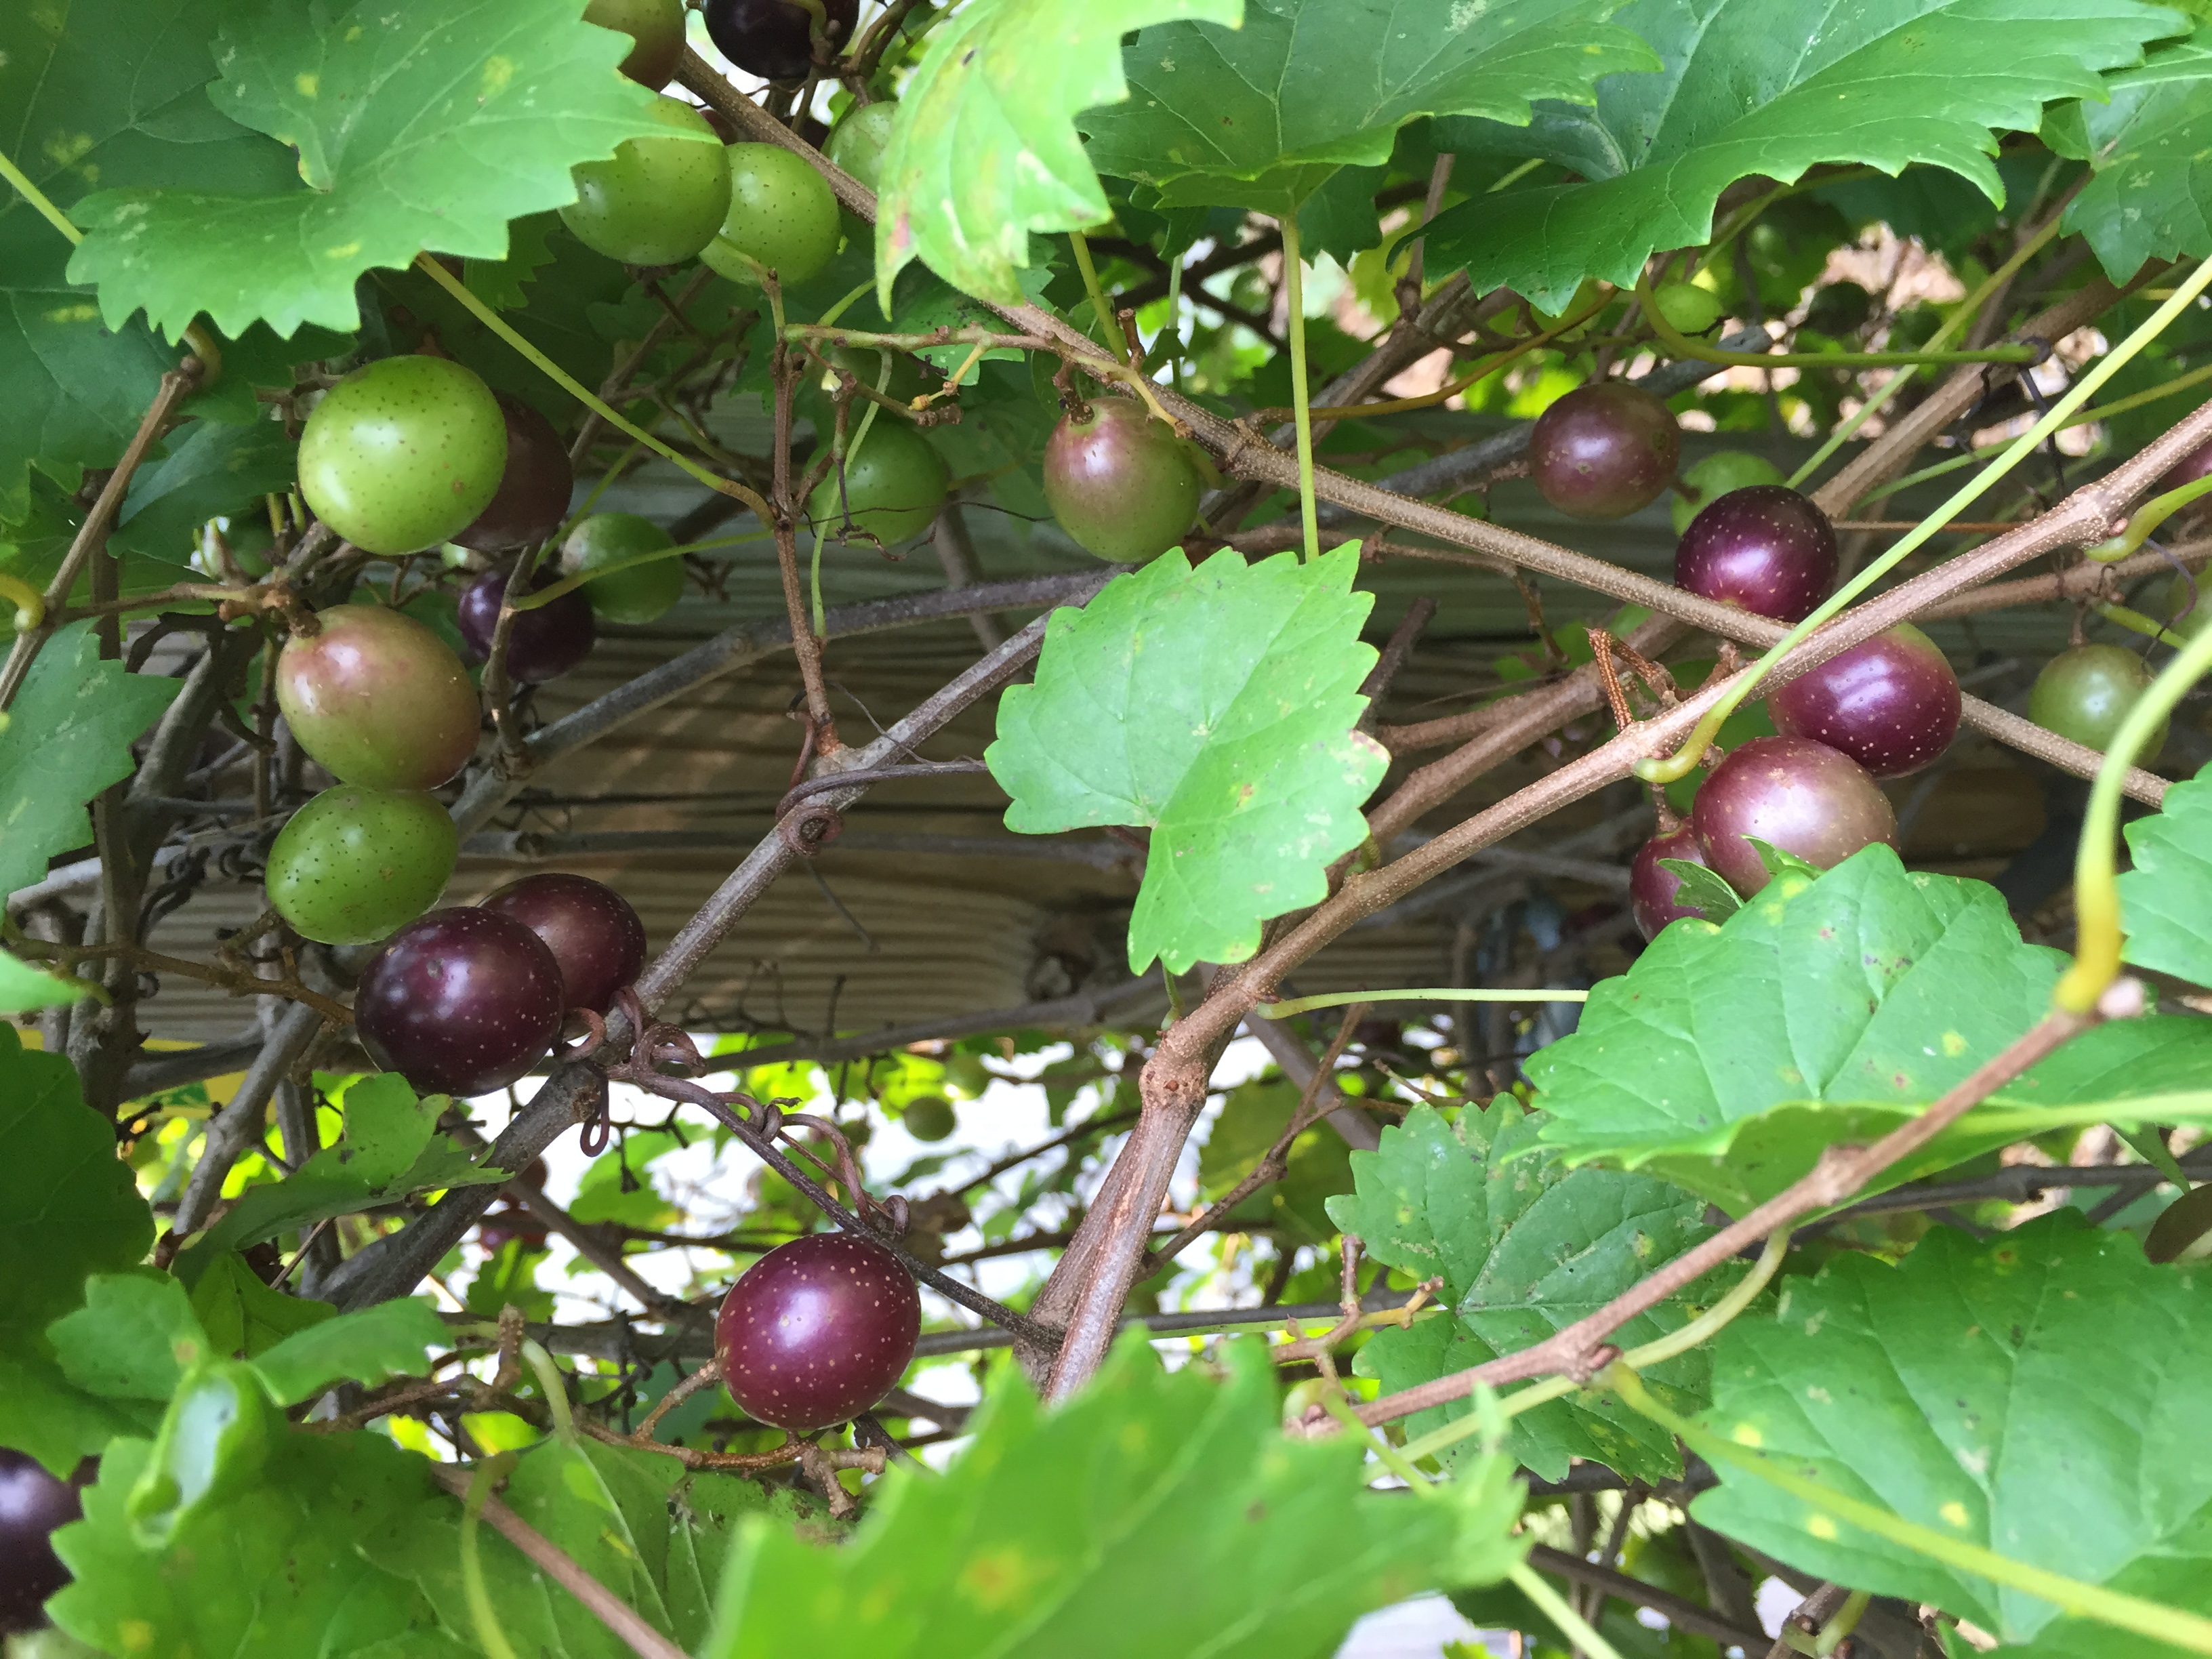
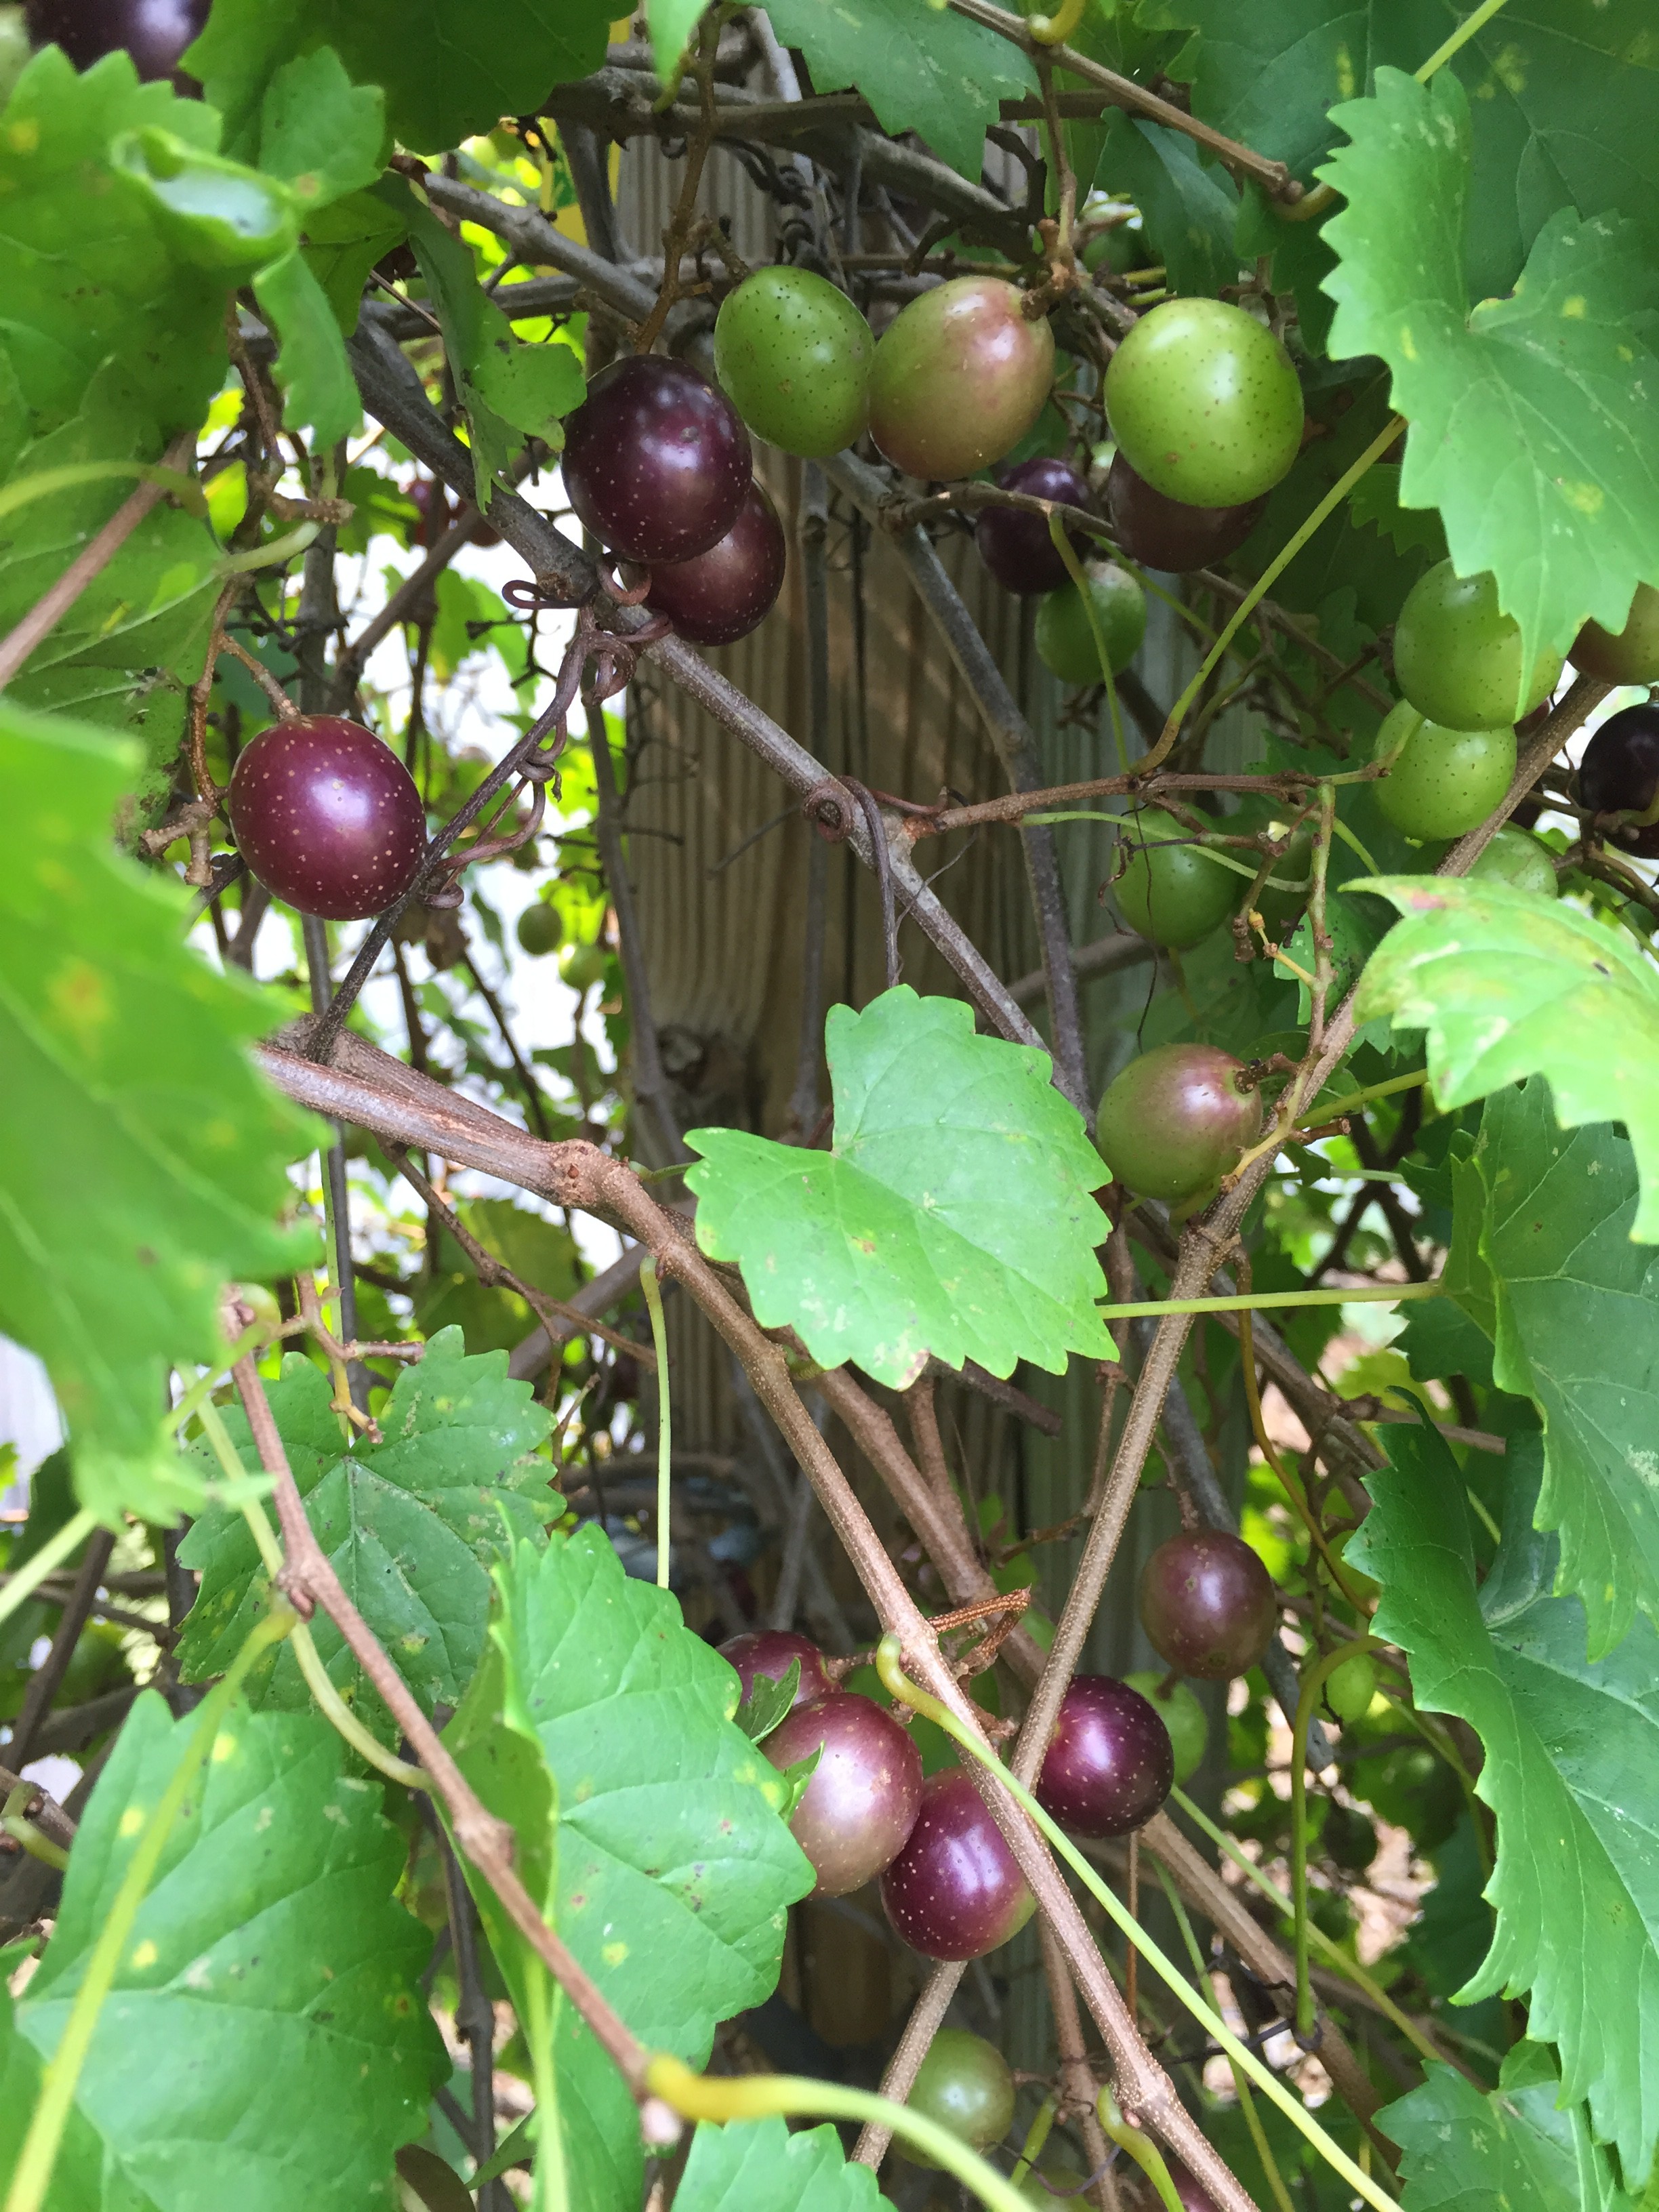
The muscadine grape is a popular fruit that grows very well here in North Florida. It has smaller leaves than bunch grapes and fruit are harvested singly, rather than in bunches. Theses grapes can be enjoyed fresh and also be used for home wine-making. One of the nice things about growing muscadine grapes in Florida is that they’re rarely bothered by insects or diseases. They can easily be grown in your backyard garden.

Muscadine grapes are ripening now! Photo credit: Mary Derrick, UF/IFAS Extension.
Grapes will grow well in a variety of soils here in North Florida. Upland soils with clay underlying at about three feet are ideal. You should avoid poorly drained soils. If the grapes are grown on soil with very good drainage, they should be set in the ground deeper than they were grown in the nursery on land with a high water table. Grapes should be planted on raised beds at the same depth they were at in the nursery.
During the first year, grapes should be fertilized with a quarter pound of 8-8-8 or 10-10-10 fertilizer, applied in bands about a foot away from the plant, soon after growth begins. Repeat applications in April, July and September. Fertilizer rates increase each year, but they should never exceed six pounds per vine per year.
Weeds can sometimes be a problem with muscadine grapes. To get rid of weeds, you can use a good herbicide, or you can cultivate around the plants. The muscadine grape has a very shallow root system, however, so be careful when you’re weeding around the plants. Mulches can be helpful in controlling weeds, but be sure to leave a circle of at least six inches around each vine uncovered.
Grapes need a generous supply of water to survive here in North Florida. In fact, more first-year grapes die from a lack of water than from any other cause. Make sure the plant receives about an inch of water weekly. Muscadine grapes are rarely bothered by insects or diseases. However, a spray program is advised to protect plants from possible damage by black rot or bitter rot. Spraying should begin when the vines are in bloom, and continue a regular two week intervals until about a week before the harvest. For specific information on the proper spray to use, you should contact your local County Agent.
Muscadine grapes mature in August and early September. If you don’t plan to use them immediately, they should be picked from the vine when ripe and stored at 40 degrees Fahrenheit.
For more information, please see:
The Muscadine Grape
Muscadines Benefit from Timely and Artful Pruning
by Roy Carter | Jul 14, 2015
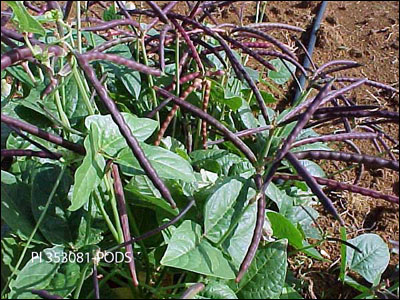
Southern Peas, Image Credit UF / IFAS gardening solutions
Cowpeas are one of the most important food legumes in the semiarid tropics covering Asia, Africa, Southern Europe, and Central and South America.
A drought-tolerant and warm-weather crop, cowpeas are well adapted to the drier regions of the tropics, where other food legumes do not perform well. It also has the useful ability to fix atmospheric nitrogen through it its root nodules, and it grows well in poor soils with more the 85 percent sand and with less than 0.2% organic matter and low levels phosphorus.
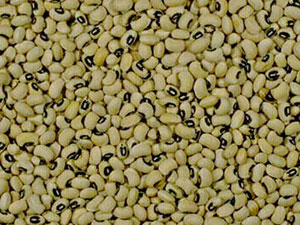
A farmer might call them cowpeas. A grocer might call them black-eyed peas. A restaurant waitress might call them field peas. But they are all talking about the same vegetable the southern pea. If you think you’re confused now, wait until you see some of the other names for this vegetable. My information was provided by Emeritus Extension Vegetable Specialist, Jim Stephens, of the University of Florida/Institute of Food and Agricultural Sciences and Okaloosa county director Larry Williams.
A good part of the confusion over southern pea variety names is due to the fact that gardeners can easily save their own southern pea seeds. Over the years, true varietal identity gets lost. So, gardeners think up new local names for the Southern pea varieties that grow. As the seeds are spread around, what started out as a single variety may become known by several names. Added to this fact that there are so many recognizable southern pea varieties and it’s easy to see how confusion can result.
Some years ago, more than fifty southern pea varieties and strains were identified through scientific testing. Since then, plant breeders have added many more varieties to that old list.
Southern Pea Plant, image Credit UF / IFAS gardening solutions
Today, eleven southern pea classifications are recognized. By looking for the characteristics associated with each grouping, gardeners usually can come fairly close to identifying unknown seed stock. With the exception of the purple hull group, southern pea classification is based mostly on the color of the seed and seed eyes and the spacing of the seed in the pods.
Varieties are called Crowder’s if the seeds are spaced so closely that the seed color varies. The color can be general over the entire seed coat or it may be concentrated around the seed eye. Colorless varieties are called creams. The purple hull group includes varieties with some purple coloring on their pods, even though they may fit into other groups due to seed characteristics.
As I said, there are III Classification Groups – The Black-Eyes, The Black-Eye Crowder’s, The Colored-Eyes, The Colored-Eye Crowder’s, The Purple Hull group, The Black Crowder’s, The Brown Crowder’s, The Speckled Crowder’s, The Creams, The Cream Crowder’s, and The Field Forage Group. To make matters even more confusing Southern peas also can be classified according to plant growth habit. Pea plants may be bush, top pick, vining, or semi-vining types.
Southern peas recommended for North Florida includes Black-eye No. 5, Cream 8, Cream 12, Knuckle Hull, Magnolia, Pink Eye, Purple Hull, Texas Cream 40, White Acres, Top Pick Eye Purple Hull, Top Pick Cream 40, Sadandy and Zipper Cream.
Southern peas can be planted in our area in the spring, summer, or fall. For more information on how to grow Southern Peas, contact your local county extension office and see Publication SP 103, Florida Vegetable Gardening Guide.

by Roy Carter | Jun 10, 2015
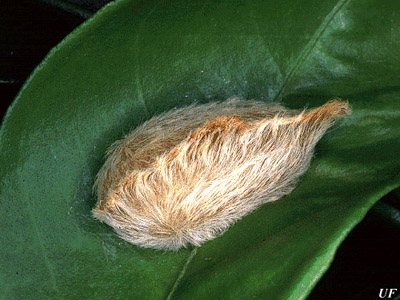
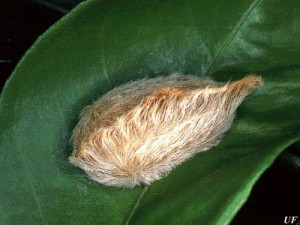
Saddleback Caterpiller, Image Credit Matthew Orwat UF/IFAS
The four major stinging caterpillars occurring in Florida are the Puss Caterpillar, Saddleback Caterpillar, IO Moth Caterpillar and Hag Caterpillar. Some less common ones also occur in the state. These caterpillars do not possess stingers, but have spines (nettling hairs) that are connected to poison glands. Some people experience severe reaction to the poison released by the spines and require medical attention. Others experience only an itching or burning sensation.
Stinging caterpillar’s feed on many pants, but they seldom are present in large enough numbers to cause serious damage. Their stings, rather than feeding, pose the primary threat. That’s why it’s important to learn to recognize and avoid these cantankerous crawlers. My information on stinging caterpillars was provided by Extension Entomologist Dr. Don Short and Dr. D. E. Short of the University of Florida’s Institute of Food and Agricultural Sciences
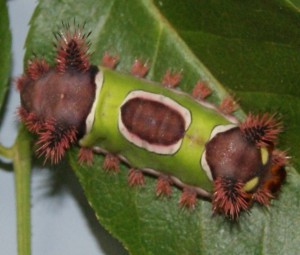
The puss caterpillar is stout bodied, almost an inch long, and completely covered with gray to brown hairs. Under the soft hairs are stiff, poisonous spines. When touched, the spines break off in the skin, causing serve pain. The saddleback caterpillar has a more striking appearance. It’s brown, with a wide green band around the middle of the body. There’s a large brown spot in the middle of the green band, giving the appearance of a brown saddle on a green blanket. The saddleback may exceed and inch in length, and is stout bodied. The main poison spines are born on pairs of projections near the front and rear of the body. There’s a row of smaller stinging organs along each side.
I O Moth Caterpillar, Image Credit UF Entomology
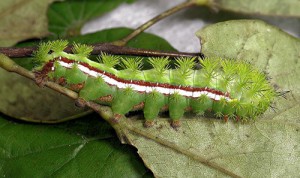
The IO moth caterpillar is pale green, with yellow and reddish to maroon stripes along the sides. It often exceeds two inches in length, and is fairly stout bodied. The poisonous spines, which form rows of bands across the body, are usually yellow with black tips.
The light brown hag moth caterpillar has nine pairs of variable length protrusions along its body, from which poisonous spines extend. The protrusions are curved and twisted, giving the appearance of disheveled hair of a hag.
Most contact with stinging caterpillars occurs in the spring and summer. As might be expected, children, campers, and gardeners are most frequent victims. When playing or working outdoors in infested areas, it pays to wear a long-sleeved shirt, long pants, and gloves.
Reactions to caterpillars poison vary with an individual’s sensitivity. Itching, burning, swelling, and nausea may be experienced. In severe cases, fever, shock, and convulsions may occur. If a person has a history of hay fever, asthma, or allergy or if allergic symptoms develop a physician should be contacted immediate. In cases of milder reactions, a strip of adhesive tape should be placed on and pulled off the affected area repeatedly to remove the spines. Then, apply ice packs, followed by a paste of baking soda and water.
Since so few stinging caterpillars are normally found on plants around the home mechanical methods usually offer the easiest means of control. Just carefully remove and crush the caterpillars, or knock them into a pan of kerosene. If a pesticide is needed, Bacillus thuringiensis (Bt), Seven or Malathion may be used in accordance with label directions for caterpillar control.
For more information on Caterpillars contact your UF/IFAS County Extension Service or visit www.http://edis.ifas.ufl.edu and see Publication 107 – Stinging and Venomous Caterpillars.
Puss Caterpillar, Image Credit University of Florida
by Roy Carter | May 26, 2015
The proverbial picnic scene aside, ants are pests all of us have to deal with from time to time. Both inside and outside our homes, they feed on and contaminate our food, they build ugly mounds on our lawns, and some ants can inflict painful bites or stings.
Several species of ants are found in Florida. The most common can be grouped into three categories: House-infesting ants, yard infesting ants, and carpenter ants. In this article we’ll talk about ant biology and behavior and how to control them.

Florida Carpenter Ants. Photo credit: UF/IFAS.
Ants have a life cycle similar to many other insects. They go from egg, to larva, to pupa, to adult. Eggs are almost microscopic in size and hatch into soft legless larvae. The pupa resembles the adult ant, except it is soft, uncolored and immobile. It can take from six weeks to two months from egg to adult.
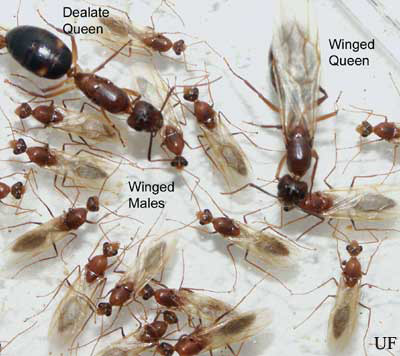
Ants are social insects. They live in colonies much like bees do. Most colonies have a queen ant, male ants, and worker or female ants. Colonies are started by queens, whose primary function is reproduction. The queen may live for many years and is usually replaced by a daughter queen. Males are produced in very old or large colonies, and their sole function is to mate with the unfertilized female, after which, they die. Worker ants construct, repair and defend the nest, provide food for the colony, and take care of the young ants.
Most ants are omnivorous, which means they will eat anything, through some do have specialized food habits. Ants locate food by random searching; when one ant finds food, she informs the other workers in the colony. The exact method of communication is unknown, but in some cases, ants can leave scent trails that other ants can follow to the food source.
Because ants are attracted to any type of food or food particles, your best bet to controlling ants inside your home is to keep it very clean. Store food in airtight containers. Never substitute insecticides for inadequate housekeeping.
The key to eliminating ants is locating and destroying the colony. Sometimes this can be a real problem, because ants are very adaptable. Outdoor nesting species can sometime nest indoors and vice versa, depending, on the food supply.
To find the ant colony, you have to watch the movement of the ants very closely. Outdoors, many ants are easy to locate, because they deposit earth on the soil surface, and form ant hills. But some outdoor ants build nests under house foundations, in decaying logs, and tree trunks. These can be difficult to locate indoors. Ants may nest in walls, behind baseboards, in cracks, and in decaying wood.
Spray, dusts, granules, and baits can be useful in controlling ants. When using these products, treat baseboards, door and window frames, and cracks and crevices between walls and flooring. Treat all areas where ants appear to have trails. If the nest is located, apply an insecticide to the nest according to the pesticide label.
For more information:
Ants
Fire Ants
Carpenter Ants
by Roy Carter | May 12, 2015
Herbs are plants that are grown for the special flavor and aroma of their various parts. They are used mainly to season, enrich, or otherwise improve the taste or smell of certain foods. Since they are not classified as vegetables. Since their growth habits and cultural requirements are similar, herbs are often included with vegetables in the garden.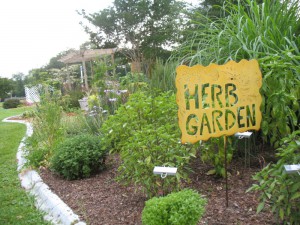
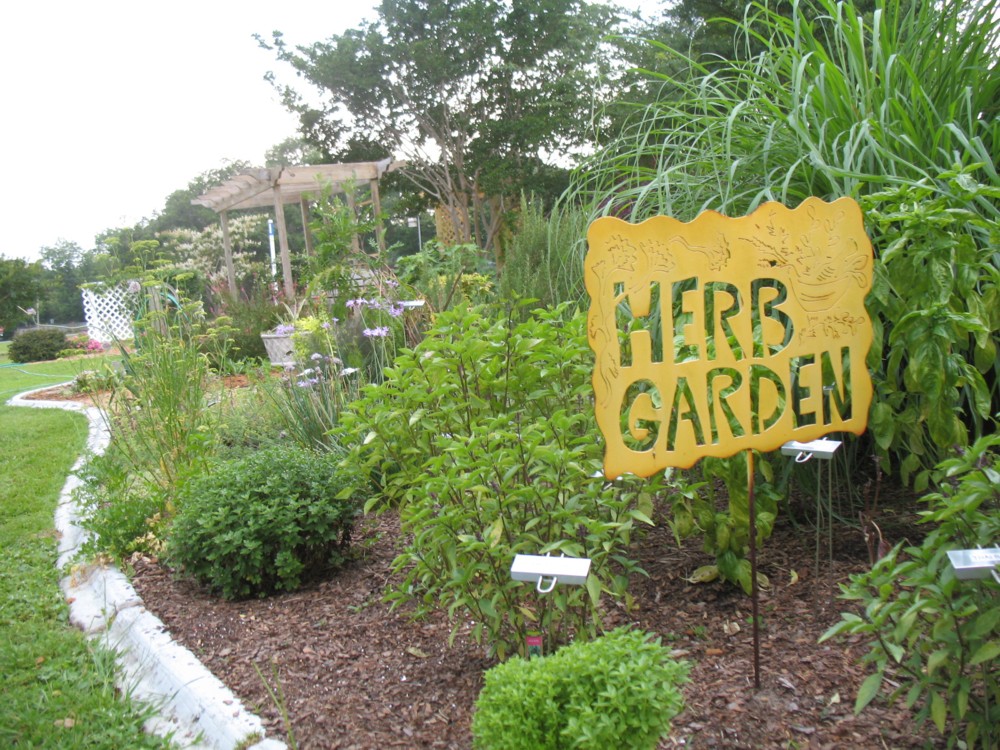
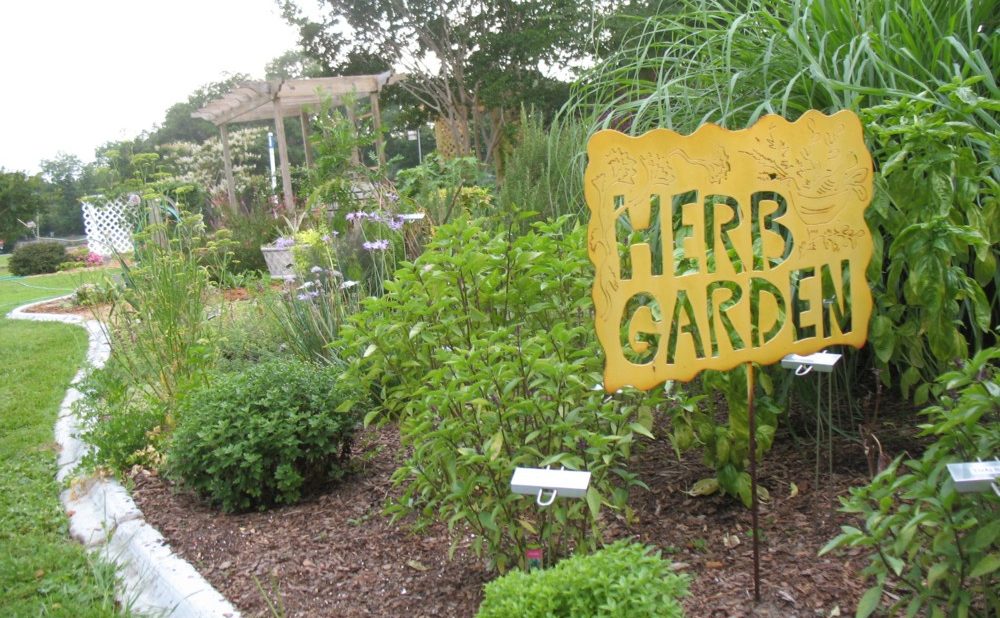
One of the best ways to enjoy year round gardening is to plant an herb garden. Herbs are easy to grow, they require very little care, and they don’t take up much room. Even if you don’t have a large backyard, you can still grow herbs successfully. A small garden bed, a window box, or even a few clay pots, can provide you with fresh, aromatic herbs year round. Herbs are rapid growers and they have a wide variety of uses in the home. They can be used either fresh or dried and when dried they’ll keep for long periods of time.
Herbs are fairly easy to grow. A good garden soil that’s free of weeds and close to a water supply will keep your herbs healthy and growing rapidly. If you can, plant herbs on a narrow strip of land, preferably at the border of your vegetable garden. This will keep your herbs easy to reach. If you scatter them across a wide garden plot, you’ll end up having to walk over the plants to reach and gather them unless you can provide some pathways within your garden. Of course, if you’re growing herbs in window boxes or clay pots, this won’t be a problem.
Dill is probably the easiest and the hardiest herb you can grow. It’s usually planted in late fall and early winter because of its ability to withstand cool temperatures. It may also be planted in the spring. Dill isn’t particularly fussy about its soil so any all-purpose soil that’s suitable for your regular garden vegetables is fine for dill. Another plus is that dill is rarely bothered by any diseases or insects. Fresh dill leaves add excellent flavor to salads and cream sauces, and as a dried herb, dill is well known for the distinct flavor it gives to pickles.
Another popular herb enjoyed by gardeners is sweet basil. This herb is an annual, and it can be replanted in the same area year after year. Basil is also used both fresh and dried. It is widely used as a flavoring for soups, meats and fish. One word of caution: don’t over plant this one. A few basil plants will usually provide more leaves and flowers than an entire family can use in a year.
A few plants, such as sage, balm, and rosemary can be propagated best by cutting. Stems from new growth or the upper parts of older stem make the best cutting for easiest rooting. Cut the stem into 3 to 4 inch pieces each containing a set of leaves or leaf buds near the upper end. To prevent wilting place the cutting in water as soon as they are removed from the plant. A shallow box filled with 4 to 5 inches of a mixture of clean sand, peat, and perlite makes a good root bed. Insert the cutting to a depth of one half-to two thirds their length in the moist mixture; then saturate the mix with water. Place the box in a protected place and keep moist (but not sopping wet) continuously until roots develop in about two weeks. Continue to water until the cuttings are ready to set out in pots or in the garden.
Such plants as thyme, winter savory and marjoram can be propagated by simple layering, which consist of covering the lower portion of the side branches with soil, leaving much of the top of the plant exposed. When the covered part of the stem have rooted, they can be cut from the parent plant and set as individual plants.
Older plants of chive, rosemary and tarragon can be multiplied by dividing the crown clumps into separate parts. These divisions can be set as individual plants.
Mint spreads rapidly by means of surface or underground runners that may grow several feet from the parent plant. The runners, with roots attached, can be removed and transplanted to other locations
Obviously, the list of herbs which grow very well in Florida is quite lengthy, so we won’t be able to go into all of them here. If you can keep in mind just a few points about herb gardens, maybe you can enjoy the virtues of some of these herbs yourself. Remember that herbs are generally very easy to grow and can be adapted to either outdoor garden or indoor container growing conditions. For just a small amount of effort, growing herbs can provide you with year-round gardening satisfaction.
For more information see UF/IFAS Gardening Solutions.